DODGE VIPER 2015 VX / 3.G Owner's Guide
Manufacturer: DODGE, Model Year: 2015, Model line: VIPER, Model: DODGE VIPER 2015 VX / 3.GPages: 148, PDF Size: 21.7 MB
Page 31 of 148
Rain Mode
•Rainmodeoffersincreasedtractioncontrolandstabilitycontrolforlowtraction
conditions such as wet roads, dry roads during cold temperatures, or when the driver
wants enhanced stability due to lack of familiarity or experience with the vehicle’s
response. To enter the “Rain Mode” mode, push the “ESC” switch three times. The
“ESC RAIN” light will illuminate, and the “ESC RAIN” message will display in the
vehicle cluster (left of the odometer).
NOTE:
Some models may not offer “Sport” or “Track” Mode.
WARNING!
The Electronic Stability Control System (ESC) cannot prevent the natural laws of physics
from acting on the vehicle, nor can it increase the traction afforded by prevailing road
conditions. ESC cannot prevent all accidents, including those resulting from excessive
speed in turns, driving on very slippery surfaces, or hydroplaning. ESC also cannot
prevent accidents resulting from loss of vehicle control due to inappropriate driver input
for the conditions. Only a safe, attentive, and skillful driver can prevent accidents. The
capabilities of an ESC equipped vehicle must never be exploited in a reckless or
dangerous manner which could jeopardize the user’s safety or the safety of others.
MANUAL TRANSMISSION 1 TO 4 SKIP SHIFT
•SkipShiftisenabledwhenvehiclespeedisgreaterthan16MPH
(26 km/h) but less than 18 MPH (29 km/h) and the accelerator is
at 20% or less.
•Foroptimalfueleconomy,underlowaccelerationconditions,your
vehicle will only allow you to shift from first gear to fourth gear.
Additionally, the skip shift message will appear in the tachometer.
•RefertoyourOwner'sManualontheDVDforfurtherinformation.
Skip
Shift
133
22
55RR
6
OPERATING YOUR VEHICLE
29
Page 32 of 148
ADDING FUEL
1. Press the fuel filler door release switch (located in the driver's door map pocket).
2. Open the fuel filler door.
3. There is no fuel filler cap. A flapper door inside the pipe seals the system.
4. Insert the fuel nozzle fully into the filler pipe – the nozzle opens and holds the flapper
door while refueling.
NOTE:
Only the correct size nozzle opens the latches allowing the flapper door to open.
5. Fill the vehicle with fuel – when the fuel nozzle “clicks” or shuts off the fuel tank is full.
6. Remove the fuel nozzle and close the fuel door.
NOTE:
Afunnelisprovided(locatedinthetrunkinthesparetirearea)toopentheflapper
door to allow for emergency refueling with a gas can.
CAUTION!
To a v o i d f u e l s p i l l a g e a n d o v e r f i l l i n g , d o n o t “ t o p o f f ” t h e f u e l t a n k a f t e r f i l l i n g .
WARNING!
•Neverhaveanysmokingmaterialslitinornearthevehiclewhenthefueldooris
open or the tank is being filled.
•Neveraddfuelwhentheengineisrunning.Thisisinviolationofmoststateand
federal fire regulations and may cause the “Malfunction Indicator Light” to turn on.
•Afiremayresultiffuelispumpedintoaportablecontainerthatisinsideofavehicle.
Yo u c o u l d b e b u r n e d . A l w a y s p l a c e f u e l c o n t a i n e r s o n t h e g r o u n d w h i l e f i l l i n g .
OPERATING YOUR VEHICLE
30
Page 33 of 148
EMERGENCY FUEL FILLER DOOR RELEASE
If you are unable to open the fuel filler door, use the fuel filler door emergency release
procedure by following the proceeding steps:
1. Open the liftgate.
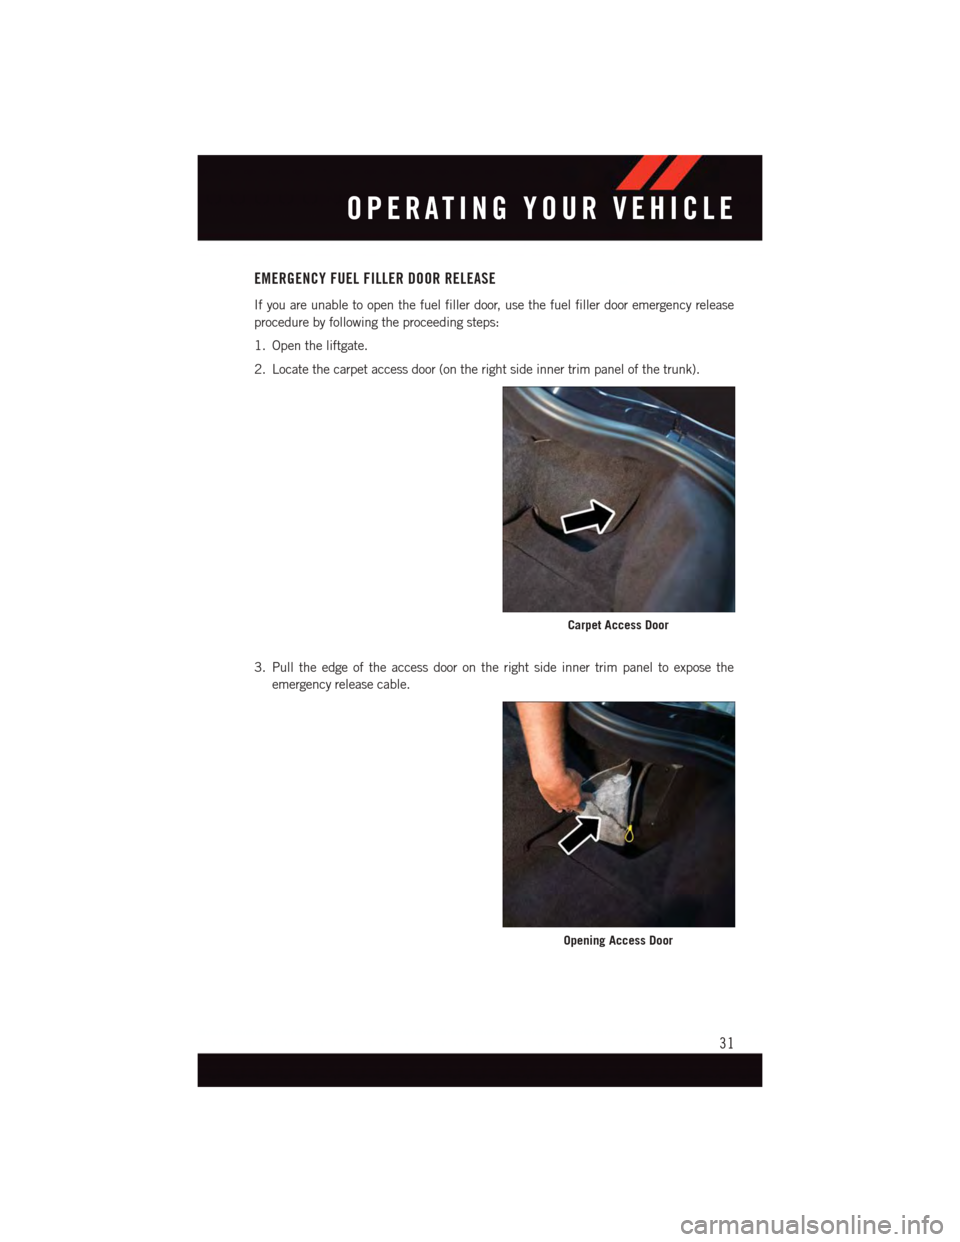
2. Locate the carpet access door (on the right side inner trim panel of the trunk).
3. Pull the edge of the access door on the right side inner trim panel to expose the
emergency release cable.
Carpet Access Door
Opening Access Door
OPERATING YOUR VEHICLE
31
Page 34 of 148
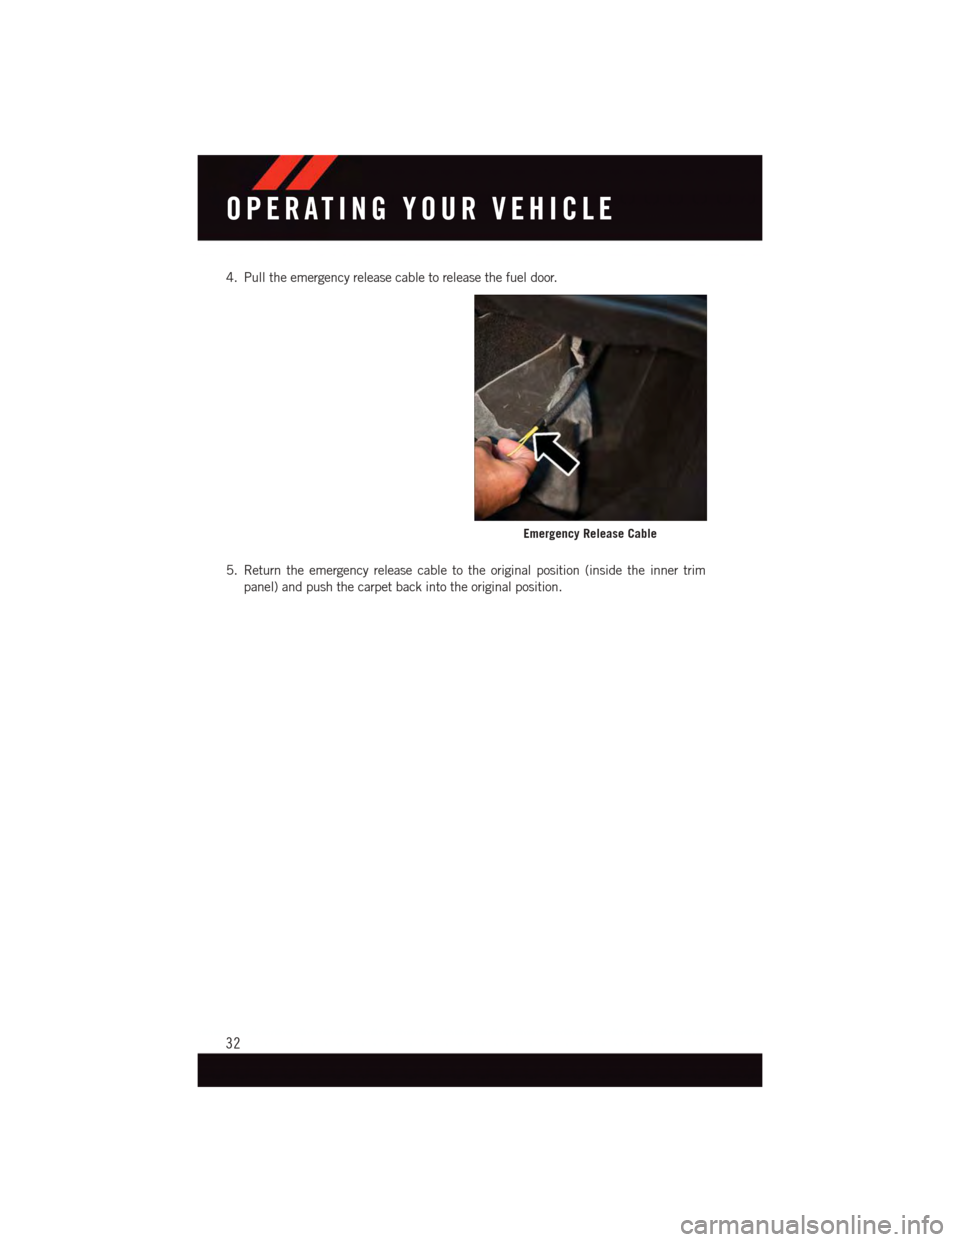
4. Pull the emergency release cable to release the fuel door.
5. Return the emergency release cable to the original position (inside the inner trim
panel) and push the carpet back into the original position.
Emergency Release Cable
OPERATING YOUR VEHICLE
32
Page 35 of 148
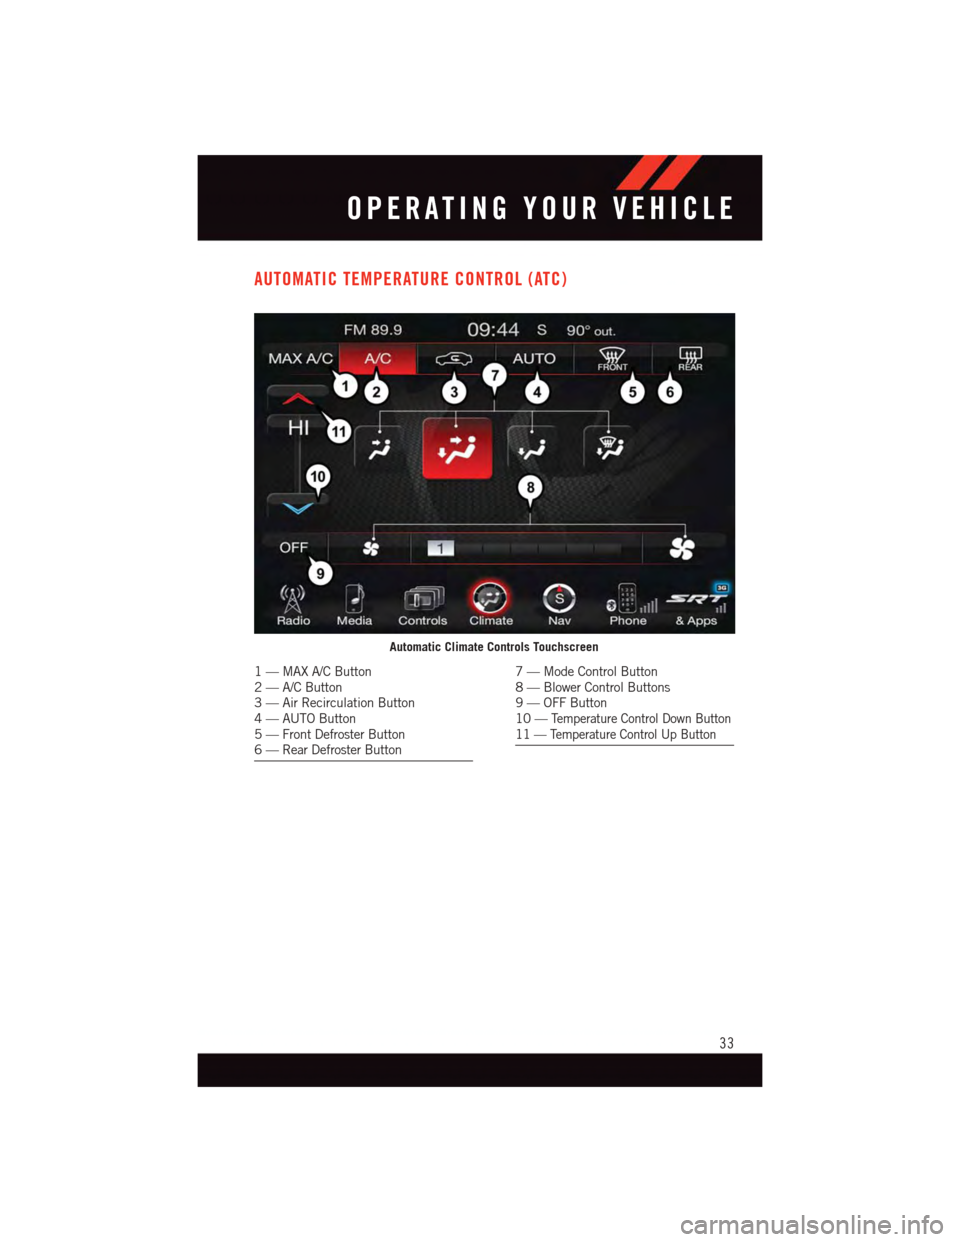
AUTOMATIC TEMPERATURE CONTROL (ATC)
Automatic Climate Controls Touchscreen
1—MAXA/CButton2—A/CButton3—AirRecirculationButton4—AUTOButton5—FrontDefrosterButton6—RearDefrosterButton
7—ModeControlButton8—BlowerControlButtons9—OFFButton10 —Te m p e r a t u r e C o n t r o l D o w n B u t t o n11 — Temperature Control Up Button
OPERATING YOUR VEHICLE
33
Page 36 of 148
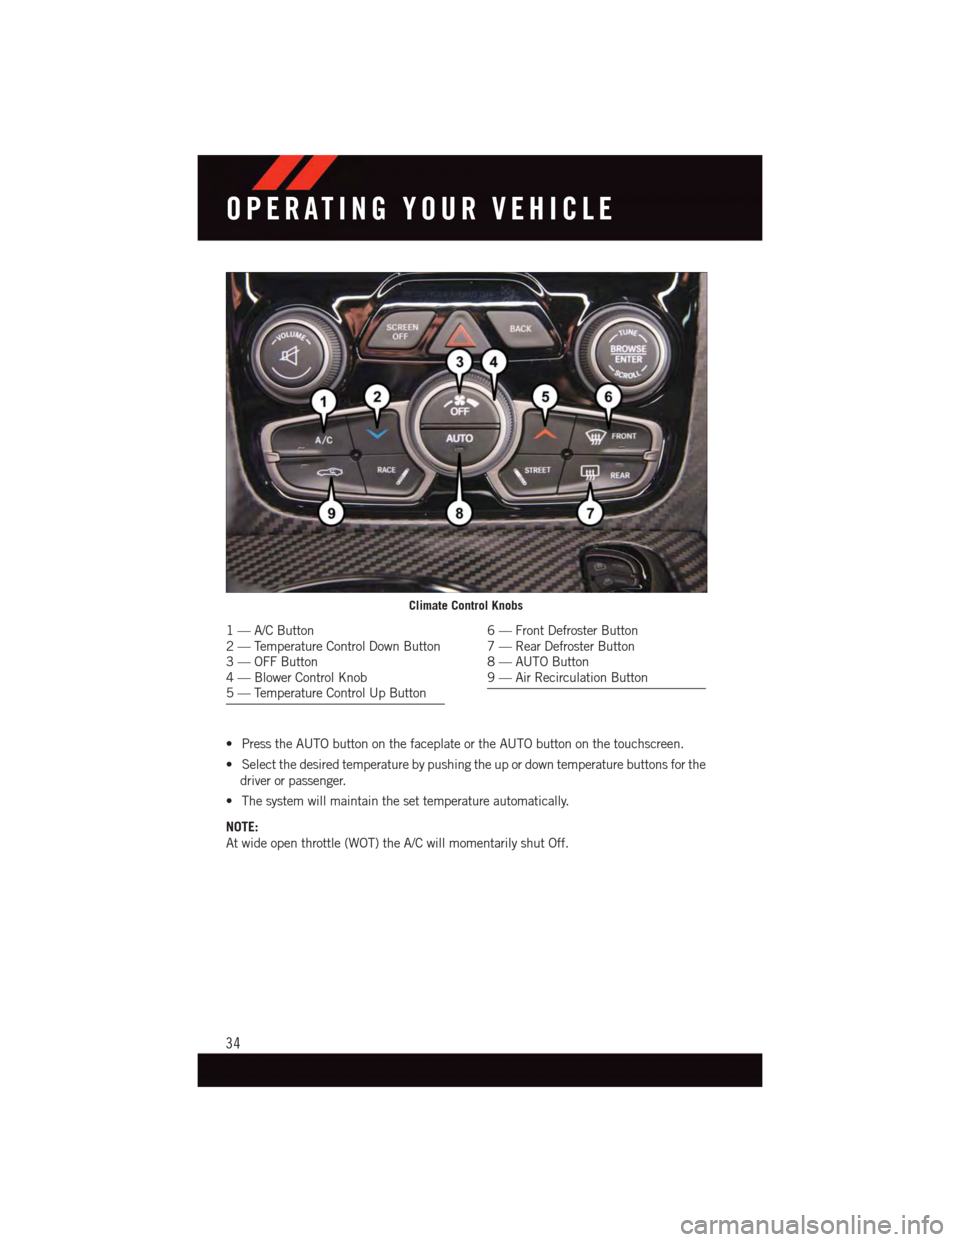
•PresstheAUTObuttononthefaceplateortheAUTObuttononthetouchscreen.
•Selectthedesiredtemperaturebypushingtheupordowntemperaturebuttonsforthe
driver or passenger.
•Thesystemwillmaintainthesettemperatureautomatically.
NOTE:
At wide open throttle (WOT) the A/C will momentarily shut Off.
Climate Control Knobs
1—A/CButton2—TemperatureControlDownButton3—OFFButton4—BlowerControlKnob5—TemperatureControlUpButton
6—FrontDefrosterButton7—RearDefrosterButton8—AUTOButton9—AirRecirculationButton
OPERATING YOUR VEHICLE
34
Page 37 of 148
Air Conditioning (A/C)
•IftheairconditioningbuttonispressedwhileinAUTOmode,thesystemwillexitAUTO
mode and stay in A/C. The mode and blower will be set at the closest mode and blower
position that the system was operating in AUTO.
Air Recirculation/MaxA/C
•RotatetheTemperatureControltotheMAXA/Cpositiontoautomaticallyturnonboth
Air Conditioning and Recirculation.
•Forwindowdefogging,turntherecirculationbuttonoff.
•Recirculationisnotallowedindefrost/floor(mix)modesforapproximatelyfive
minutes. Recirculation is allowed in floor mode.
PARKVIEW® REAR BACK-UP CAMERA
•Youcanseeanon-screenimageoftherearsurroundingsofyourvehiclewheneverthe
shift lever is put into REVERSE. The ParkView®Rear Back-Up Camera image will be
displayed in the touchscreen display along with a caution note to “check entire
surroundings” across the top of the screen. After five seconds this note will disappear.
•Iftherearviewmirrorortouchscreendisplayappearsfoggy,cleantheParkView®
camera located above the licence plate.
WARNING!
Drivers must be careful when backing up; even when using the ParkView®Rear
Back-Up Camera. Always check carefully behind your vehicle, and be sure to check for
pedestrians, animals, other vehicles, obstructions, or blind spots before backing up.
Yo u m u s t c o n t i n u e t o p a y a t t e n t i o n w h i l e b a c k i n g u p . F a i l u r e t o d o s o c a n r e s u l t i n
serious injury or death.
OPERATING YOUR VEHICLE
35
Page 38 of 148
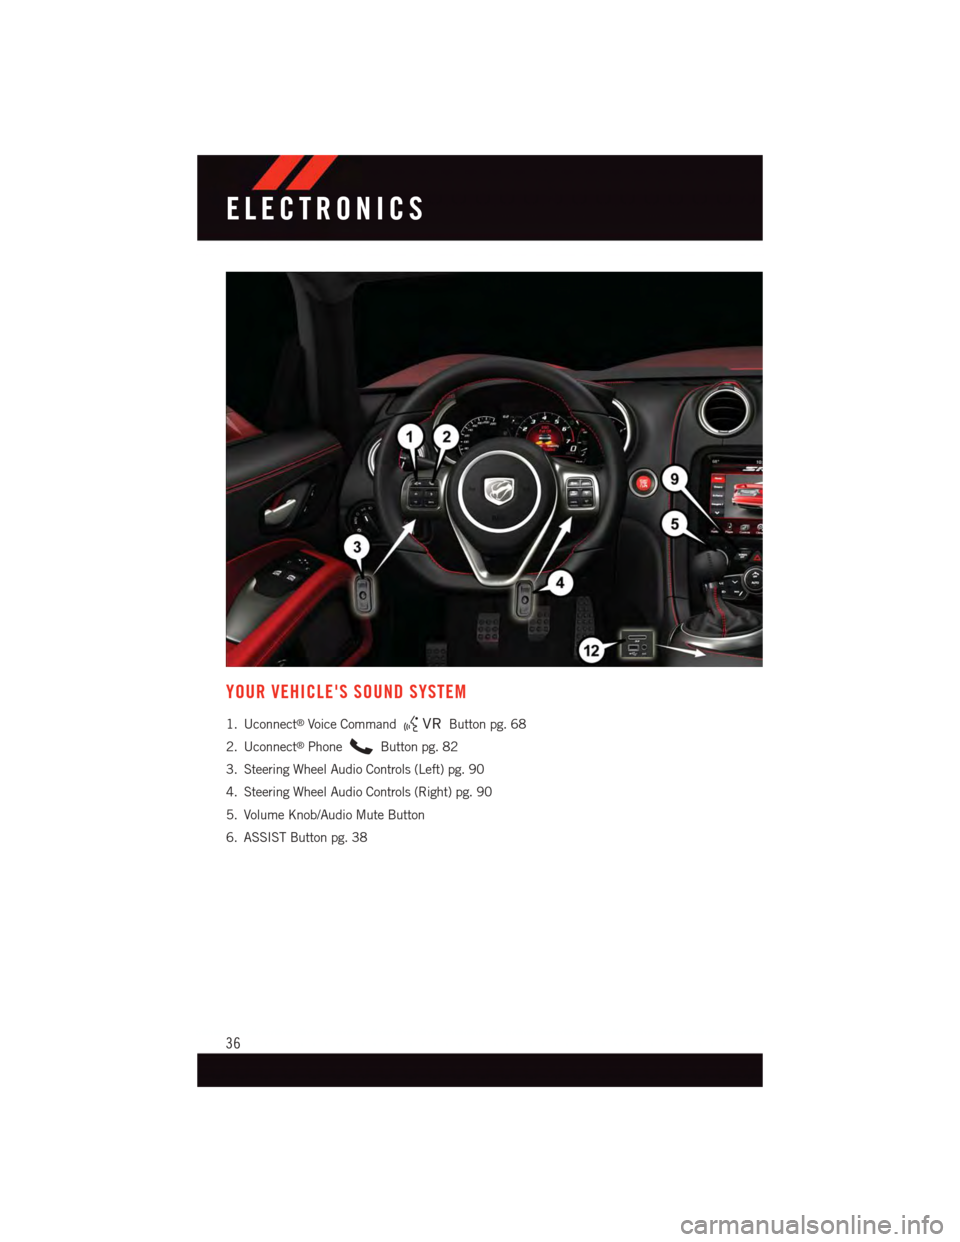
YOUR VEHICLE'S SOUND SYSTEM
1. Uconnect®Voice CommandButton pg. 68
2. Uconnect®PhoneButton pg. 82
3. Steering Wheel Audio Controls (Left) pg. 90
4. Steering Wheel Audio Controls (Right) pg. 90
5. Volume Knob/Audio Mute Button
6. ASSIST Button pg. 38
ELECTRONICS
36
Page 39 of 148
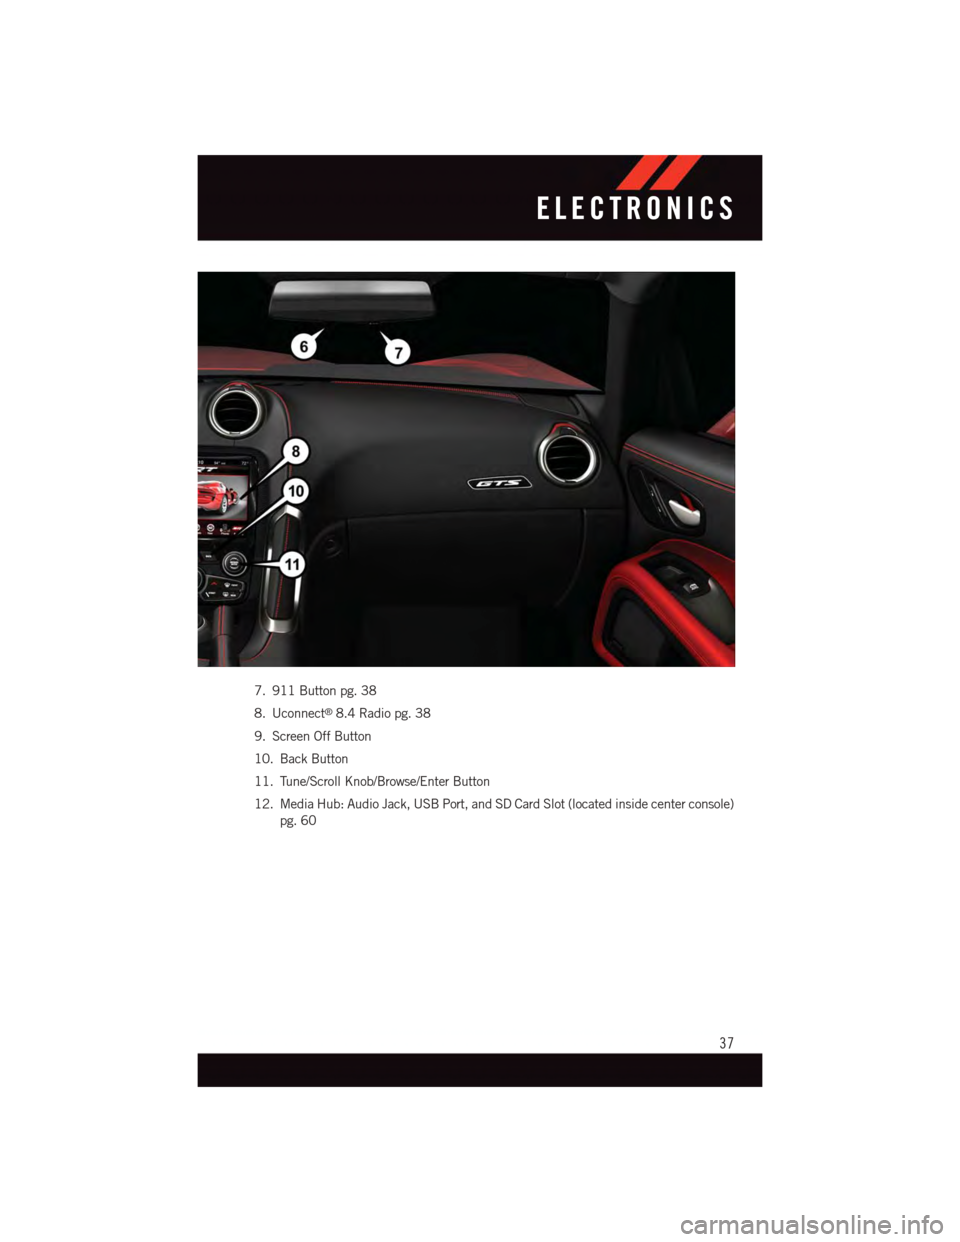
7. 911 Button pg. 38
8. Uconnect®8.4 Radio pg. 38
9. Screen Off Button
10. Back Button
11. Tune/Scroll Knob/Browse/Enter Button
12. Media Hub: Audio Jack, USB Port, and SD Card Slot (located inside center console)
pg. 60
ELECTRONICS
37
Page 40 of 148
YOUR RADIO
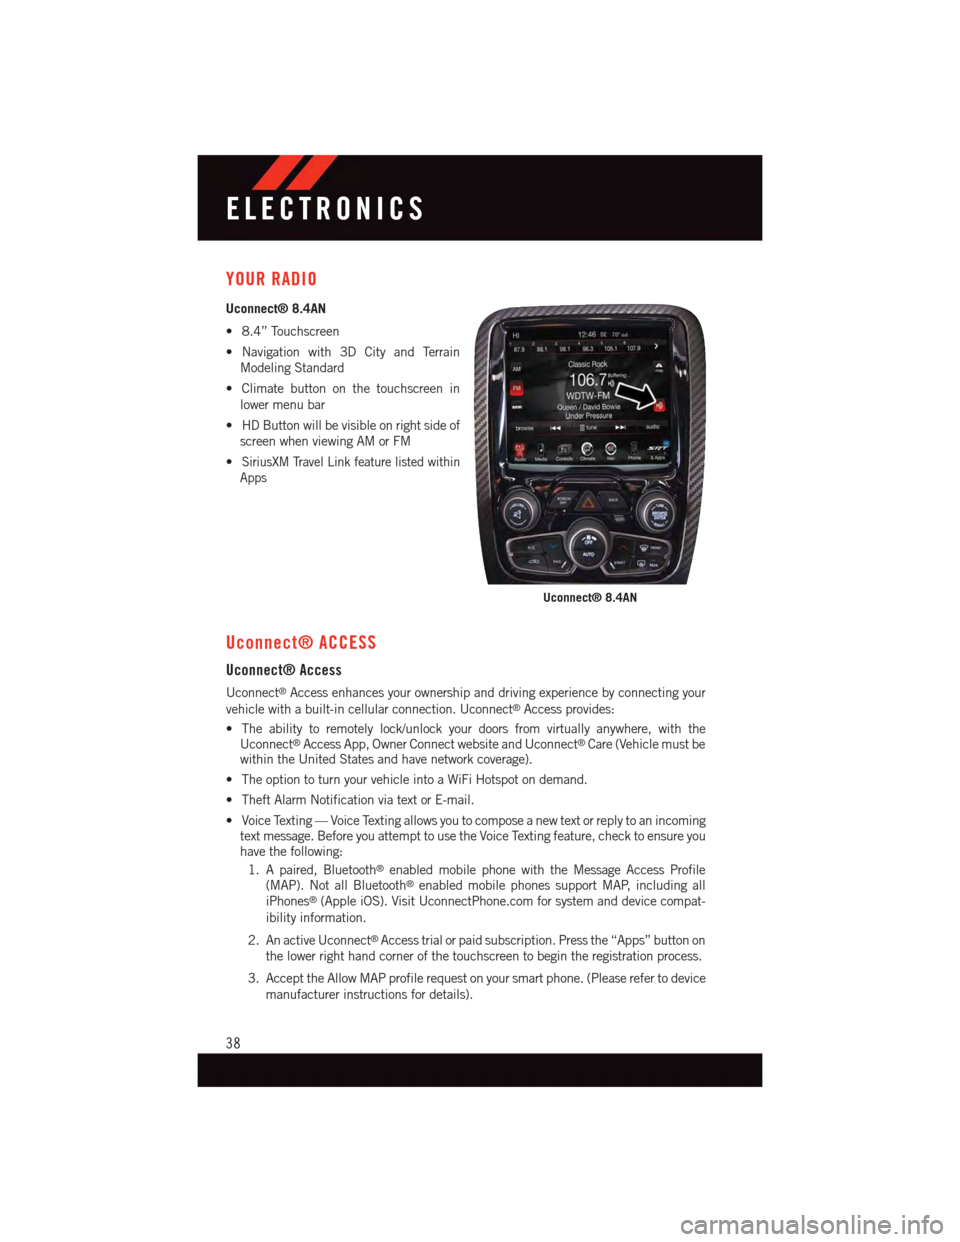
Uconnect® 8.4AN
•8.4”Touchscreen
•Navigationwith3DCityandTerrain
Modeling Standard
•Climatebuttononthetouchscreenin
lower menu bar
•HDButtonwillbevisibleonrightsideof
screen when viewing AM or FM
•SiriusXM Travel Link feature listed within
Apps
Uconnect® ACCESS
Uconnect® Access
Uconnect®Access enhances your ownership and driving experience by connecting your
vehicle with a built-in cellular connection. Uconnect®Access provides:
•Theabilitytoremotelylock/unlockyourdoorsfromvirtuallyanywhere,withtheUconnect®Access App, Owner Connect website and Uconnect®Care (Vehicle must bewithin the United States and have network coverage).
•TheoptiontoturnyourvehicleintoaWiFiHotspotondemand.
•TheftAlarmNotificationviatextorE-mail.
•VoiceTexting—VoiceTextingallowsyoutocomposeanewtextorreplytoanincomingtext message. Before you attempt to use the Voice Texting feature, check to ensure youhave the following:
1. A paired, Bluetooth®enabled mobile phone with the Message Access Profile(MAP). Not all Bluetooth®enabled mobile phones support MAP, including alliPhones®(Apple iOS). Visit UconnectPhone.com for system and device compat-
ibility information.
2. An active Uconnect®Access trial or paid subscription. Press the “Apps” button on
the lower right hand corner of the touchscreen to begin the registration process.
3. Accept the Allow MAP profile request on your smart phone. (Please refer to device
manufacturer instructions for details).
Uconnect® 8.4AN
ELECTRONICS
38