key FIAT 500 ABARTH 2014 2.G User Guide
[x] Cancel search | Manufacturer: FIAT, Model Year: 2014, Model line: 500 ABARTH, Model: FIAT 500 ABARTH 2014 2.GPages: 88, PDF Size: 5.56 MB
Page 3 of 88
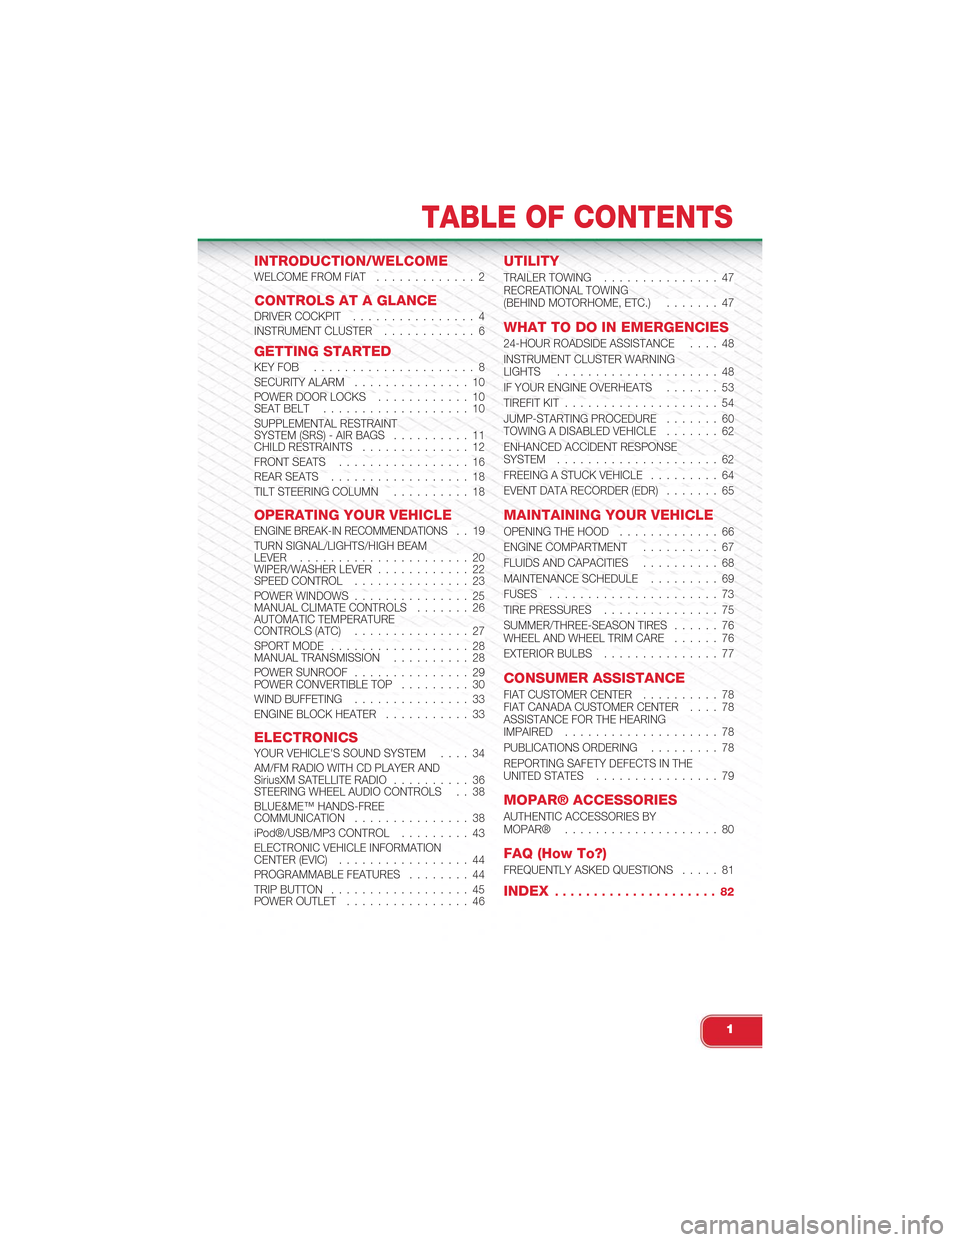
INTRODUCTION/WELCOMEWELCOME FROM FIAT............. 2
CONTROLS AT A GLANCEDRIVER COCKPIT................ 4INSTRUMENT CLUSTER............ 6
GETTING STARTEDKEY FOB . . . . . . . . . . . . . . . . . . . . . 8SECURITY ALARM. . . . . . . . . . . . . . . 10POWER DOOR LOCKS. . . . . . . . . . . . 10SEAT BELT. . . . . . . . . . . . . . . . . . . 10SUPPLEMENTAL RESTRAINTSYSTEM (SRS) - AIR BAGS. . . . . . . . . . 11CHILD RESTRAINTS. . . . . . . . . . . . . . 12FRONT SEATS. . . . . . . . . . . . . . . . . 16REAR SEATS. . . . . . . . . . . . . . . . . . 18TILT STEERING COLUMN. . . . . . . . . . 18
OPERATING YOUR VEHICLEENGINE BREAK-IN RECOMMENDATIONS. . 19TURN SIGNAL/LIGHTS/HIGH BEAMLEVER. . . . . . . . . . . . . . . . . . . . . . 20WIPER/WASHER LEVER. . . . . . . . . . . . 22SPEED CONTROL. . . . . . . . . . . . . . . 23POWER WINDOWS. . . . . . . . . . . . . . . 25MANUAL CLIMATE CONTROLS. . . . . . . 26AUTOMATIC TEMPERATURECONTROLS (ATC). . . . . . . . . . . . . . . 27SPORT MODE. . . . . . . . . . . . . . . . . . 28MANUAL TRANSMISSION. . . . . . . . . . 28POWER SUNROOF. . . . . . . . . . . . . . . 29POWER CONVERTIBLE TOP. . . . . . . . . 30WIND BUFFETING. . . . . . . . . . . . . . . 33ENGINE BLOCK HEATER. . . . . . . . . . . 33
ELECTRONICSYOUR VEHICLE'S SOUND SYSTEM. . . . 34AM/FM RADIO WITH CD PLAYER ANDSiriusXM SATELLITE RADIO. . . . . . . . . . 36STEERING WHEEL AUDIO CONTROLS . . 38BLUE&ME™ HANDS-FREECOMMUNICATION. . . . . . . . . . . . . . . 38iPod®/USB/MP3 CONTROL. . . . . . . . . 43ELECTRONIC VEHICLE INFORMATIONCENTER (EVIC). . . . . . . . . . . . . . . . . 44PROGRAMMABLE FEATURES. . . . . . . . 44TRIP BUTTON. . . . . . . . . . . . . . . . . . 45POWER OUTLET. . . . . . . . . . . . . . . . 46
UTILITY
TRAILER TOWING. . . . . . . . . . . . . . . 47RECREATIONAL TOWING(BEHIND MOTORHOME, ETC.). . . . . . . 47
WHAT TO DO IN EMERGENCIES
24-HOUR ROADSIDE ASSISTANCE. . . . 48INSTRUMENT CLUSTER WARNINGLIGHTS. . . . . . . . . . . . . . . . . . . . . 48IF YOUR ENGINE OVERHEATS. . . . . . . 53TIREFIT KIT. . . . . . . . . . . . . . . . . . . . 54JUMP-STARTING PROCEDURE. . . . . . . 60TOWING A DISABLED VEHICLE. . . . . . . 62ENHANCED ACCIDENT RESPONSESYSTEM. . . . . . . . . . . . . . . . . . . . . 62FREEING A STUCK VEHICLE. . . . . . . . . 64EVENT DATA RECORDER (EDR). . . . . . . 65
MAINTAINING YOUR VEHICLE
OPENING THE HOOD. . . . . . . . . . . . . 66ENGINE COMPARTMENT. . . . . . . . . . 67FLUIDS AND CAPACITIES. . . . . . . . . . 68MAINTENANCE SCHEDULE. . . . . . . . . 69FUSES. . . . . . . . . . . . . . . . . . . . . . 73TIRE PRESSURES. . . . . . . . . . . . . . . 75SUMMER/THREE-SEASON TIRES. . . . . . 76WHEEL AND WHEEL TRIM CARE. . . . . . 76EXTERIOR BULBS. . . . . . . . . . . . . . . 77
CONSUMER ASSISTANCE
FIAT CUSTOMER CENTER. . . . . . . . . . 78FIAT CANADA CUSTOMER CENTER. . . . 78ASSISTANCE FOR THE HEARINGIMPAIRED. . . . . . . . . . . . . . . . . . . . 78PUBLICATIONS ORDERING. . . . . . . . . 78REPORTING SAFETY DEFECTS IN THEUNITED STATES. . . . . . . . . . . . . . . . 79
MOPAR® ACCESSORIES
AUTHENTIC ACCESSORIES BYMOPAR®. . . . . . . . . . . . . . . . . . . . 80
FAQ (How To?)
FREQUENTLY ASKED QUESTIONS. . . . . 81
INDEX. . . . . . . . . . . . . . . . . . . . . 82
TABLE OF CONTENTS
1
Page 10 of 88
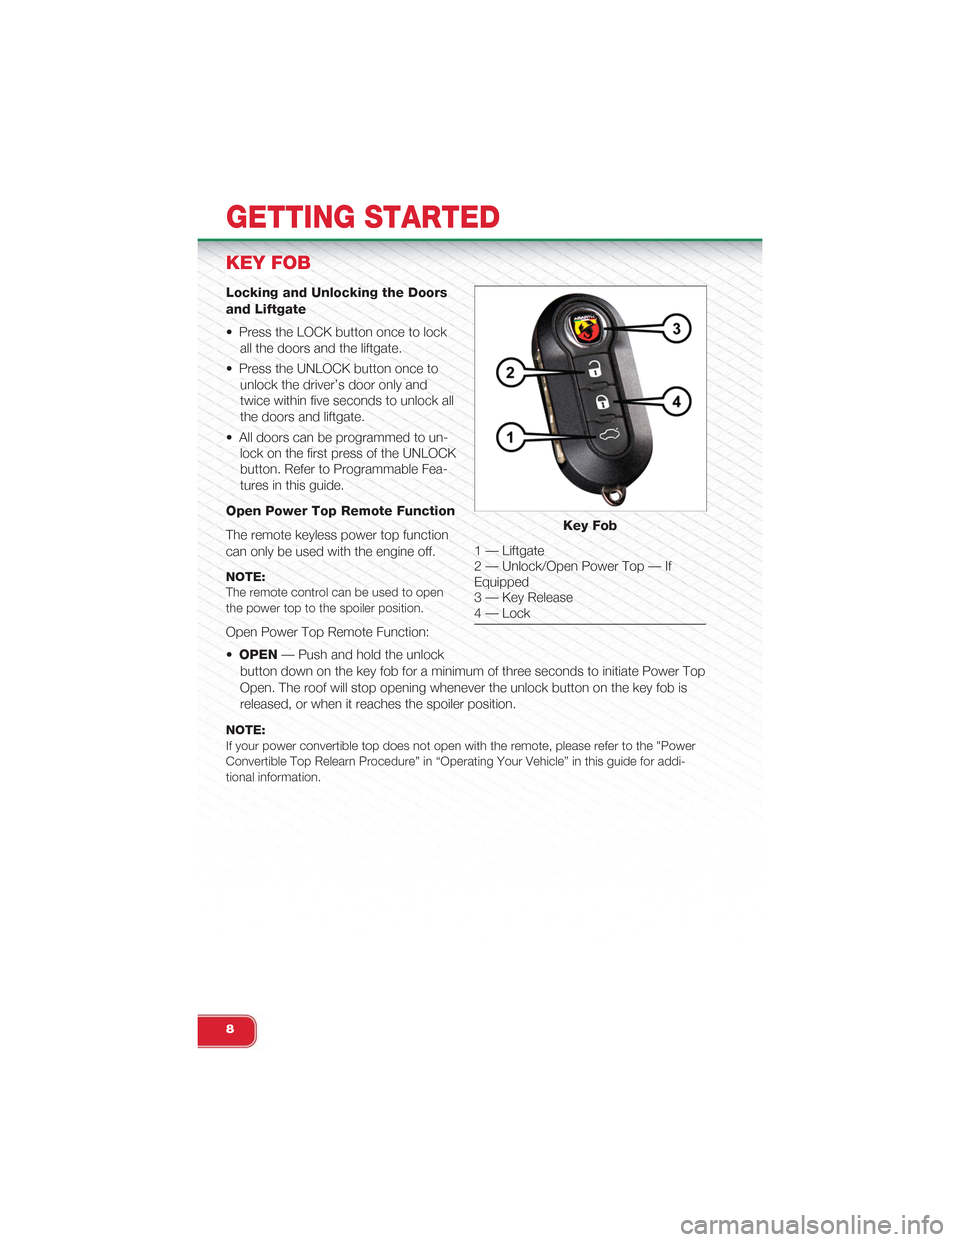
KEY FOB
Locking and Unlocking the Doors
and Liftgate
• Press the LOCK button once to lock
all the doors and the liftgate.
• Press the UNLOCK button once to
unlock the driver’s door only and
twice within five seconds to unlock all
the doors and liftgate.
• All doors can be programmed to un-
lock on the first press of the UNLOCK
button. Refer to Programmable Fea-
tures in this guide.
Open Power Top Remote Function
The remote keyless power top function
can only be used with the engine off.
NOTE:The remote control can be used to openthe power top to the spoiler position.
Open Power Top Remote Function:
•OPEN— Push and hold the unlock
button down on the key fob for a minimum of three seconds to initiate Power Top
Open. The roof will stop opening whenever the unlock button on the key fob is
released, or when it reaches the spoiler position.
NOTE:If your power convertible top does not open with the remote, please refer to the "PowerConvertible Top Relearn Procedure” in “Operating Your Vehicle” in this guide for addi-tional information.
Key Fob
1 — Liftgate2 — Unlock/Open Power Top — IfEquipped3 — Key Release4 — Lock
GETTING STARTED
8
Page 11 of 88
WARNING!
Failure to follow these warnings can result in injuries that are serious or fatal to
you, your passengers, and others around you:
• Before operating the power top, make sure that no moving parts of the con-
vertible top can injure a person or animal.
•Never place any extremities (hands, feet, etc.) near the convertible top compo-
nents, the upper windshield area, the shelf area behind the rear seats, or the
convertible top stowage area while raising or lowering the convertible top.
• When using the power top button on RKE transmitter, if potential danger
exists while lowering the top, release the button immediately to interrupt the
operation.
• Only drive the vehicle with the convertible top completely closed and latched
or fully lowered into its stowage compartment.
• Do not operate the power top when the vehicle is in motion.
Opening The Liftgate
• To open the liftgate, press the LIFTGATE release handle located on the underside
of the license plate bar and pull the liftgate open with one fluid motion.
• Press the LIFGATE button located on the key fob.
WARNING!
Never leave children alone in a vehicle, or with access to an unlocked vehicle.
Allowing children to be in a vehicle unattended is dangerous for a number of rea-
sons. A child or others could be severely injured or killed. Children should be
warned not to touch the parking brake, brake pedal, or the shift lever. Do not
leave the Key Fob in the vehicle, or in a location accessible to children. A child
could operate power windows, other controls, or move the vehicle.
GETTING STARTED
9
Page 12 of 88
SECURITY ALARM
To Arm:
• Press the Key Fob LOCK button.
To Disarm The System:
•Press the Key Fob UNLOCK button or cycle the ignition to the ON/START position.
• The Vehicle Security Alarm is designed to protect your vehicle; however, you can
create conditions where the Vehicle Security Alarm will give you a false alarm.
If one of the previously described arming sequences has occurred, the Vehicle
Security Alarm will arm regardless of whether you are in the vehicle or not. If you
remain in the vehicle and open a door, the alarm will sound. If this occurs, disarm
the Vehicle Security Alarm.
• If the Vehicle Security Alarm is armed and the battery becomes disconnected the
Vehicle Security Alarm will remain armed when the battery is reconnected. The
exterior lights will flash, and the horn will sound. If this occurs, disarm the Vehicle
Security Alarm.
POWER DOOR LOCKS
• The vehicles power door locks are activated by moving the inside door handles.
• Push or pull the driver’s door handle to lock or unlock the doors and liftgate when
the doors are closed.
SEAT BELT
• Be sure everyone in your vehicle is in a seat and using a seat belt properly.
• Position the lap belt across your thighs, below your abdomen. To remove slack in
the lap portion, pull up a bit on the shoulder belt. To loosen the lap belt if it is too
tight, tilt the latch plate and pull on the lap belt. A snug belt reduces the risk of
sliding under the belt in a collision.
• Position the shoulder belt on your chest so that it is comfortable and not resting
on your neck. The retractor will withdraw any slack in the belt.
• A shoulder belt placed behind you will not protect you from injury during a colli-
sion. You are more likely to hit your head in a collision if you do not wear your
shoulder belt. The lap and shoulder belt are meant to be used together.
• A belt that is too loose will not protect you properly. In a sudden stop you could
move too far forward, increasing the possibility of injury. Wear your seat belt
snugly.
• A frayed or torn belt could rip apart in a collision and leave you with no protection.
Inspect the belt system periodically, checking for cuts, frays, or loose parts. Dam-
aged parts must be replaced immediately. Do not disassemble or modify the sys-
tem. Seat belt assemblies must be replaced after a collision if they have been
damaged (bent retractor, torn webbing, etc.).
GETTING STARTED
10
Page 23 of 88
Headlight Delay (Follow Me Home)
• Within two minutes of the ignition switch being turned to the OFF/LOCK position
or the ignition key being removed from the ignition, pull the turn signal lever to-
ward the steering wheel.
• Each movement of the lever toward the steering wheel will increase the illumina-
tion period by 30 seconds, up to a maximum of 210 seconds.
• To deactivate, pull the multifunction lever toward the steering wheel and hold it for
more than two seconds.
NOTE:Activation of Follow Me Home is only enabled once per key cycle and the steps outlinedabove must be repeated each time you want to activate it.
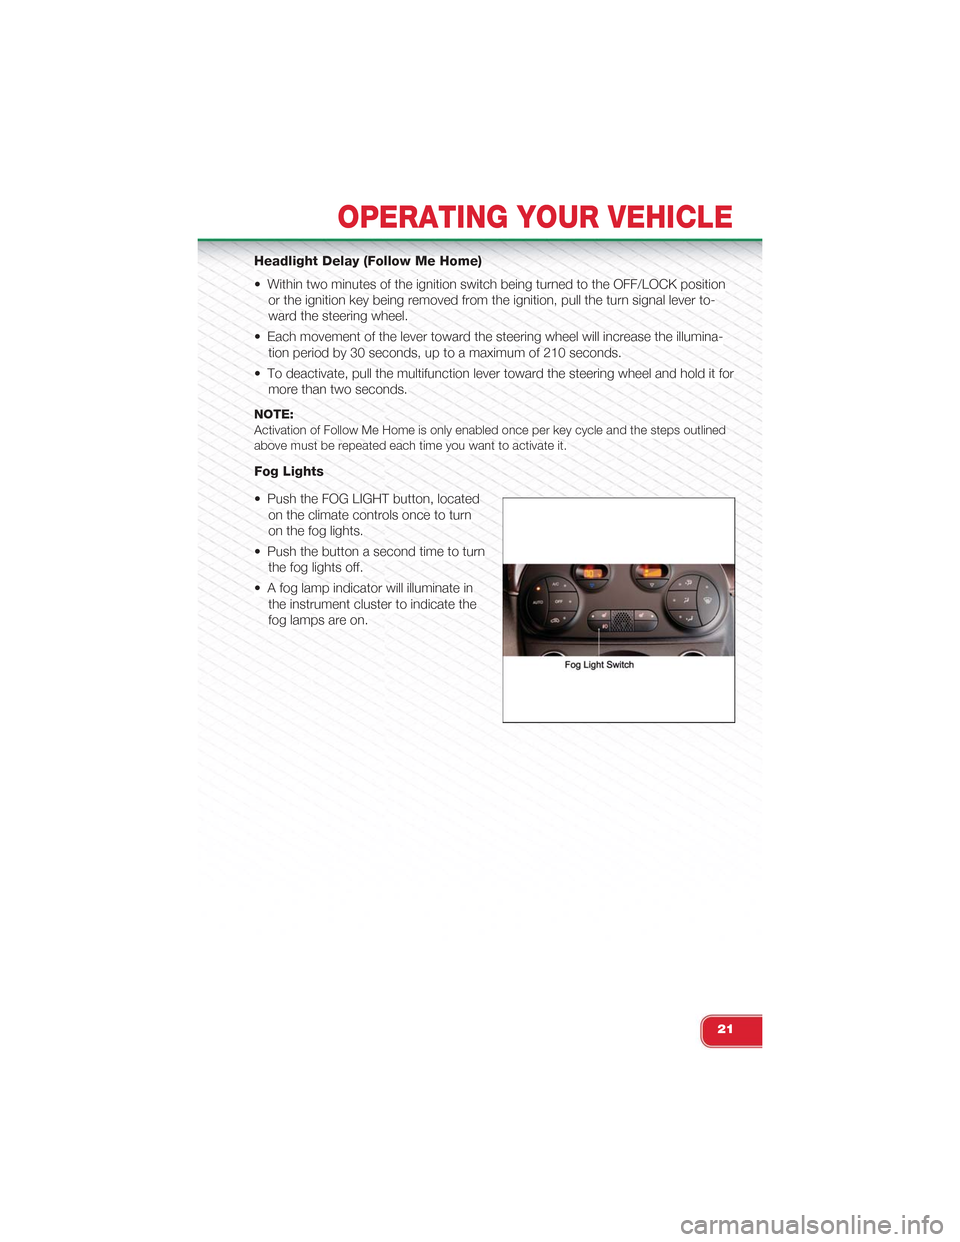
Fog Lights
• Push the FOG LIGHT button, located
on the climate controls once to turn
on the fog lights.
• Push the button a second time to turn
the fog lights off.
• A fog lamp indicator will illuminate in
the instrument cluster to indicate the
fog lamps are on.
OPERATING YOUR VEHICLE
21
Page 27 of 88
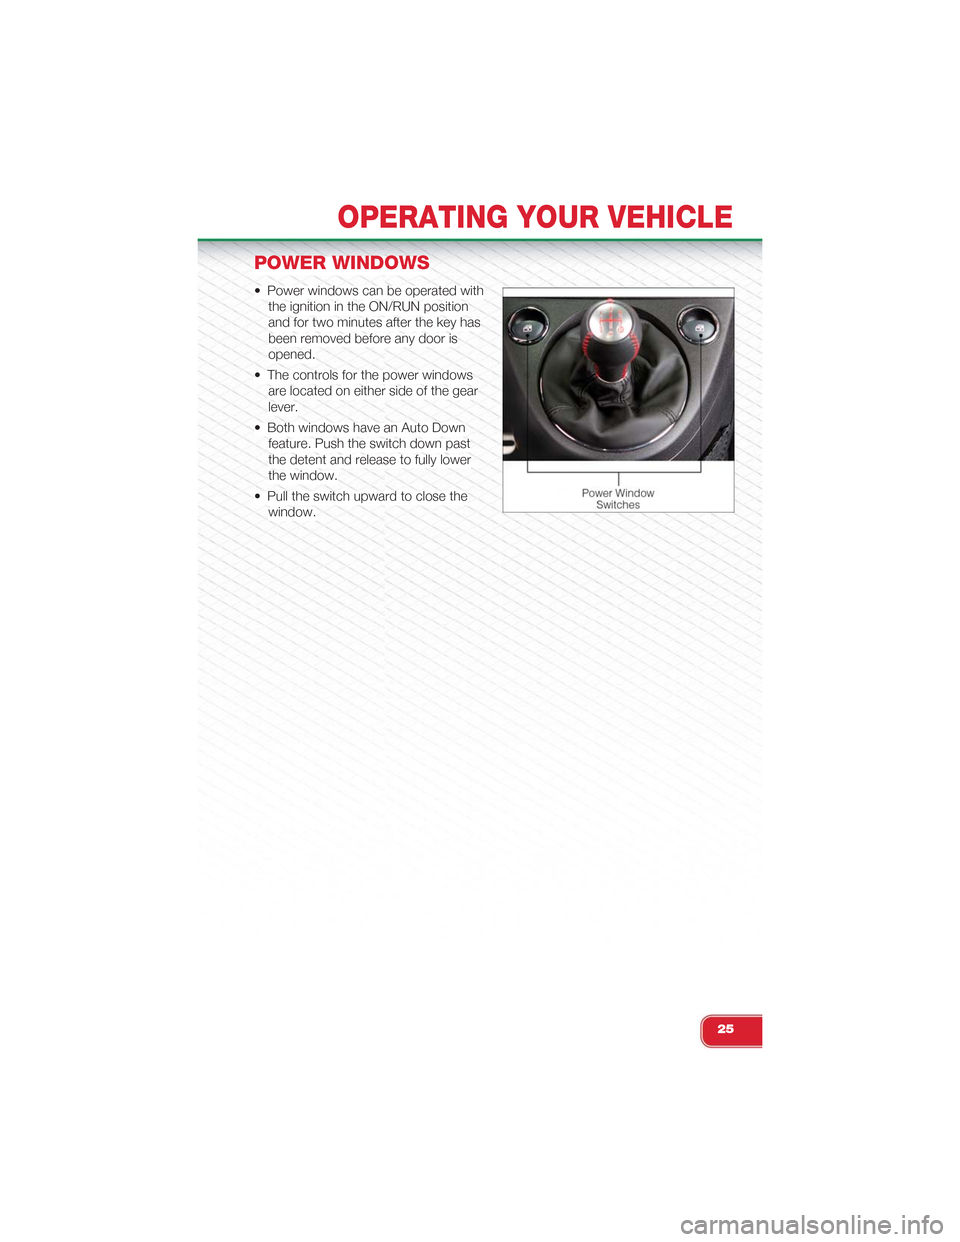
POWER WINDOWS
• Power windows can be operated with
the ignition in the ON/RUN position
and for two minutes after the key has
been removed before any door is
opened.
• The controls for the power windows
are located on either side of the gear
lever.
• Both windows have an Auto Down
feature. Push the switch down past
the detent and release to fully lower
the window.
• Pull the switch upward to close the
window.
OPERATING YOUR VEHICLE
25
Page 32 of 88
WARNING!
• Do not let children play with the sunroof, or leave children unattended in the
vehicle, and do not leave the key in or near the vehicle (or in a location ac-
cessible to children). Occupants, particularly unattended children, can be-
come entrapped by the power sunroof while operating the power sunroof
switch. Such entrapment may result in serious injury or death.
• In a collision, there is a greater risk of being thrown from a vehicle with an
open sunroof. You could also be seriously injured or killed. Always fasten
your seat belt properly and make sure all passengers are properly secured.
• Do not allow small children to operate the sunroof. Never allow your fingers,
other body parts, or any object to project through the sunroof opening. Injury
may result.
POWER CONVERTIBLE TOP
On vehicles equipped with a power convertible top, the power convertible top
switch is located on the overhead console. The switch contains two buttons.
The passenger side button, is used to open the power top, and the driver side but-
ton, is used to close the power top.
NOTE:
• The power top buttons will operate when the ignition switch is turned to the
ACC/ON/RUN position.
• The power top can be remotely operated with the key fob. Refer to “Opening
Power Top Remote Function” in “Things To Know Before Starting” in the Owner’s
Manual on the DVD for more information.
Lowering The Power Top
Auto Open
Push the top open button approximately one second for the three-quarter open/
spoiler position. Push the top open button for approximately one second a second
time to fully open the convertible top.
Manual Open
For manual open, push and hold the open button until desired roof position or until
spoiler position.
NOTE:
Vertical movement only operates in auto open/close mode.
OPERATING YOUR VEHICLE
30
Page 34 of 88
Power Convertible Top Relearn Procedure
If your power convertible top does not operate in the Auto Opening/Closing mode
(automatically opening/closing to the one-quarter open and three-quarter open
comfort stops), or if the remote keyless power top function is inoperable, or if the
trunk lid does not open - the following relearn procedure may be necessary.
1. Confirm that the door/trunk lid are closed.
2. Begin with the top in the fully closed position (using manual mode).
3. Hold the OPEN button to move the top to the fully open position.
4. CONTINUE to hold the OPEN button for an additional three seconds.
5. Release the OPEN button.
6. Hold the CLOSED button to move the top to the fully closed position.
7. CONTINUE to hold the CLOSED button until the top begins to cycle fully open,
then release the CLOSED button.
At the end of step 7 the top will automatically cycle to the fully open position, and
then close to the 1/4 open position.
This will confirm that the relearn procedure was successful.
Auto Open/Close will now be functional. Trunk lid operation will be functional. Re-
mote Keyless Power Top Function will be functional.
NOTE:
DO NOT interrupt this activity.
If the power convertible top does not relearn repeat the procedure a second time.
Wind Stop
The Wind Stop installs in the backseat area of the vehicle. The Wind Stop will not inter-
fere with power top operation. Therefore, it can remain installed when the top is up.
OPERATING YOUR VEHICLE
32
Page 43 of 88
• When prompted by the mobile phone, enter the PIN number shown on the instru-
ment panel display using your mobile phone keypad. If pairing is successful, the
system will say “Connecting” and at the end the display will show as confirmation
message, the ID of the paired mobile phone.
• It is essential to wait until you see this confirmation message on the display.
Pressing the PHONE/MENU button on the steering wheel or the MUTE/ESC but-
ton before the message is displayed may cancel the pairing process. If the pairing
process fails, an error message will be displayed: in this event repeat the pairing
procedure.
• At first pairing, BLUE&ME™ will say “Welcome” immediately after connecting.
This message will no longer be heard when your phone automatically connects to
the BLUE&ME™ system on future ignition cycles.
• BLUE&ME™ will ask if you would like to copy your paired phone phonebook to
BLUE&ME™. It is recommended to copy it. To start copying the phonebook say
“Yes”, otherwise say “No.”
• For certain mobile phones the phonebook is not copied automatically, in this case
you must transfer the phonebook contacts using your mobile phone keypad.
If BLUE&ME™ asks you to do this, then perform this procedure following the in-
structions specific to your mobile phone and press the PHONE/MENU button on
the steering wheel when you have finished. Certain mobile phones may require
you to indicate that you do not want to be asked every time to copy the phone-
book. If this is the case, this could be indicated by checking a box during on the
phone the pairing process. If applicable, this option will only be presented on the
phone during the pairing process.
Making A Phone Call
• Assume that “John Smith” is one of the contacts stored in your phonebook.
• To call John Smith, press the steering wheel button PHONE/MENU and pro-
nounce “Call John Smith.”
• If the name is recognized, the system will display the recognized contact’s infor-
mation on the display screen.
• If there is just one phone number for John Smith in your phonebook, the system
will ask if you would like to call John Smith. To start the call say “Yes,” otherwise
say “No.”
• If John Smith has several phone numbers, the system will ask which phone num-
ber you would like to call (e.g.: “Call John Smith (at) Work or (at) Home?”). An-
swer with the type of required phone number (e.g.: “(at) Home”).
ELECTRONICS
41
Page 44 of 88
• If John Smith has several phone numbers but the “location” (e.g.: the type of
phone number like work, home, etc.) is missing, the system will display the se-
lected contact and a list of related phone numbers on the instrument cluster dis-
play. The hands-free phone system will ask if you would like to call the phone
number displayed. To respond with yes, say “Yes,” otherwise say “No.” If this is
the correct contact but the wrong number, say “Forward” or “Backward” to navi-
gate to the phone number you’d like to call. To call the displayed phone number,
pronounce “Call.” You can also scroll through the phone number list manually by
pressing the buttons on the back of the steering wheel until you find the required
number. Then, press the PRESET UP/OK button on the rear of the steering
wheel to start the call.
• To end the phone call, press the PHONE HANG UP button on the steering wheel.
Media Player
• With the BLUE&ME™ media player you can play, via the car sound system, the
digital audio files stored on a USB device by simply connecting it to the USB port
located in the glove compartment of the car.
• The MEDIA PLAYER menu enables the following:
– Display tracks stored on your USB stick/iPod®.
– Play audio files stored on your USB stick/iPod® (BLUE&ME™ recognizes .wma,
.mp3 and .wav, .aac formats for audio files and .wpl and .m3u for playlists).
How To Connect The USB Stick/iPod® To BLUE&ME™
• To connect your USB stick/iPod® to BLUE&ME™, proceed as follows:
• USB devices without USB wire: just connect the USB stick/iPod® (directly or
by an extension lead) to the USB port on the car.
• USB stick/iPod® with USB wire: use the wire to connect the USB stick/iPod®
to the USB port on the car.
• Turn the ignition key to ON. BLUE&ME™ will start automatically to play your
digital tracks selecting them from the library built at the moment the USB
stick/iPod® is connected.
• If AUTOPLAY is set to “ON,” BLUE&ME™ will start playback automatically.
• Refer to the iPod®/USB/MP3 CONTROL section in this manual and the
BLUE&ME™ User's Manual on the DVD for more details.
WARNING!
Driving while distracted can result in loss of vehicle control, accident and injury. It
is strongly recommended that you use extreme caution when using any device or
feature that may take your focus off the road or your hands off the steering wheel.
Your primary responsibility is the safe operation of your vehicle.
ELECTRONICS
42