light FIAT 500X 2017 Owner handbook (in English)
[x] Cancel search | Manufacturer: FIAT, Model Year: 2017, Model line: 500X, Model: FIAT 500X 2017Pages: 284, PDF Size: 11.14 MB
Page 29 of 284
central position and pushed again
towards the dashboard in the stable
position, this is interpreted as a request
for fixed main beam headlights: the
warning light comes on in the
instrument panel and the main beam
headlights turn on until vehicle speed
exceeds 40 km/h again. When this
threshold is exceeded the function
activates again automatically and the
warning light comes on again in
the instrument panel.
To deactivate this function, rotate the
light switch ring nut to the
position.
DIRECTION INDICATORS
Bring left stalk A fig. 30 to the (stable)
position:
upwards: activates the right direction
indicator;
downwards: activates the left direction
indicator.
The
orwarning light respectively
will flash on the instrument panel.
The direction indicators switch off
automatically when the steering wheel
is straightened or when the daytime
running lights (DRL)/parking lights are
activated."Lane Change" function
If you wish to signal a lane change while
running, place the left stalk in the
unstable position for less than half a
second.
The direction indicator on the side
selected will flash five times and then
switch off automatically.
HEADLIGHT ALIGNMENT
ADJUSTMENT
Headlight alignment corrector
The headlight alignment corrector
operates with ignition device at MAR
and dipped headlights on.
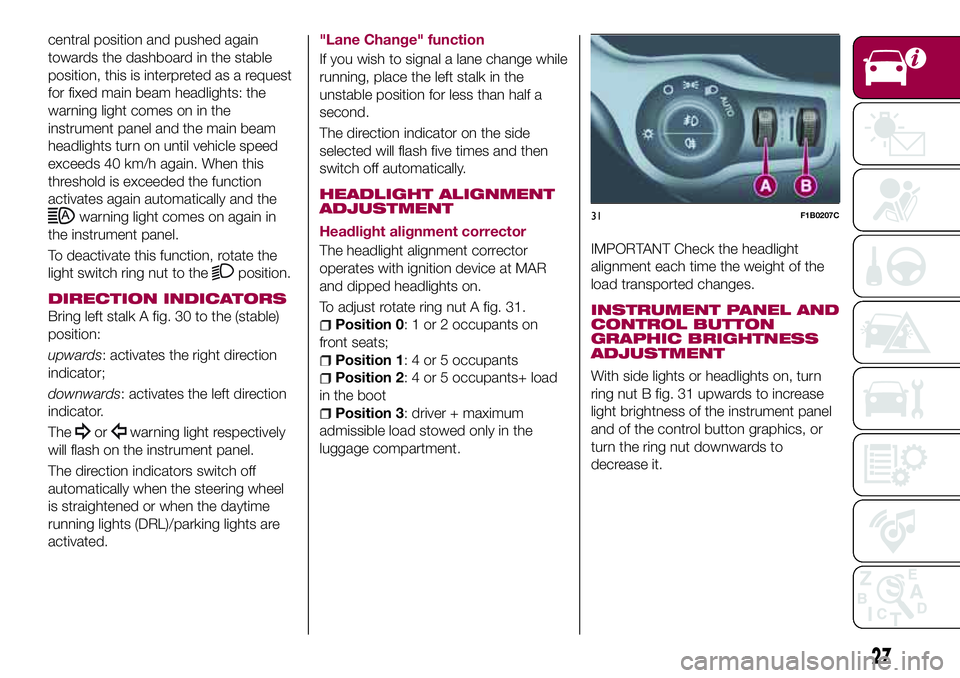
To adjust rotate ring nut A fig. 31.
Position 0: 1 or 2 occupants on
front seats;
Position 1: 4 or 5 occupants
Position 2: 4 or 5 occupants+ load
in the boot
Position 3: driver + maximum
admissible load stowed only in the
luggage compartment.
IMPORTANT Check the headlight
alignment each time the weight of the
load transported changes.
INSTRUMENT PANEL AND
CONTROL BUTTON
GRAPHIC BRIGHTNESS
ADJUSTMENT
With side lights or headlights on, turn
ring nut B fig. 31 upwards to increase
light brightness of the instrument panel
and of the control button graphics, or
turn the ring nut downwards to
decrease it.
31F1B0207C
27
Page 30 of 284
WARNING
18)The daytime running lights are an
alternative to the dipped headlights for
driving during the daytime in countries
where it is compulsory to have lights on
during the day; where it is not compulsory,
the use of daytime running lights is
permitted.
19)Daytime running lights cannot replace
dipped beam headlights when driving at
night or through tunnels. The use of
daytime running lights is governed by the
highway code of the country in which you
are driving. Comply with legal
requirements.
INTERIOR LIGHTS
FRONT ROOF LIGHT
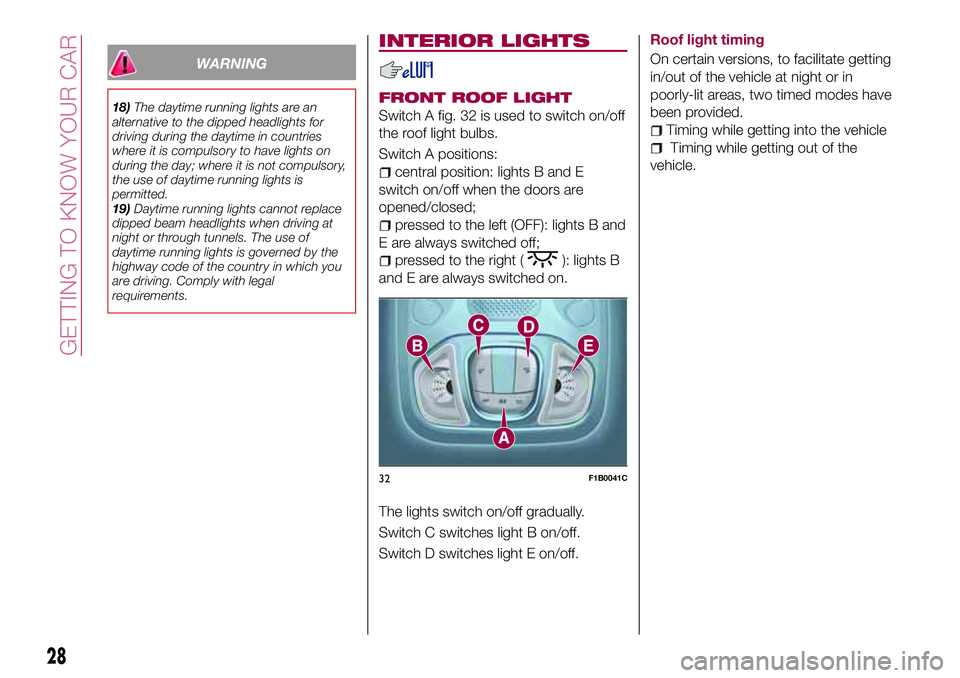
Switch A fig. 32 is used to switch on/off
the roof light bulbs.
Switch A positions:
central position: lights B and E
switch on/off when the doors are
opened/closed;
pressed to the left (OFF): lights B and
E are always switched off;
pressed to the right (): lights B
and E are always switched on.
The lights switch on/off gradually.
Switch C switches light B on/off.
Switch D switches light E on/off.Roof light timing
On certain versions, to facilitate getting
in/out of the vehicle at night or in
poorly-lit areas, two timed modes have
been provided.
Timing while getting into the vehicle
Timing while getting out of the
vehicle.
32F1B0041C
28
GETTING TO KNOW YOUR CAR
Page 36 of 284
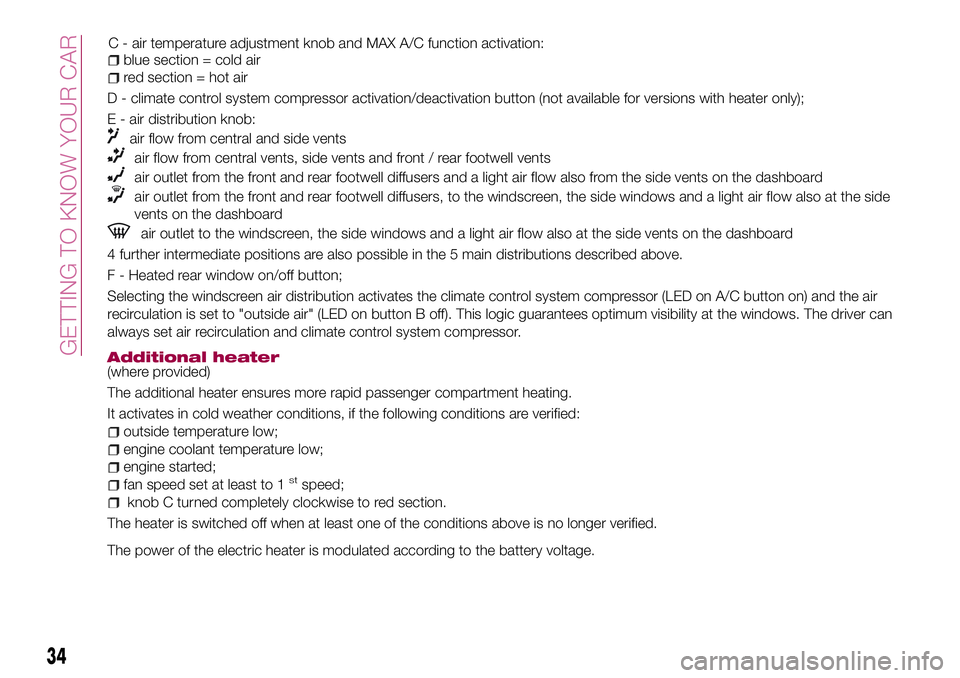
blue section = cold air
red section = hot air
D - climate control system compressor activation/deactivation button (not available for versions with heater only);
E - air distribution knob:
air flow from central and side vents
air flow from central vents, side vents and front / rear footwell vents
air outlet from the front and rear footwell diffusers and a light air flow also from the side vents on the dashboard
air outlet from the front and rear footwell diffusers, to the windscreen, the side windows and a light air flow also at the side
vents on the dashboard
air outlet to the windscreen, the side windows and a light air flow also at the side vents on the dashboard
4 further intermediate positions are also possible in the 5 main distributions described above.
F - Heated rear window on/off button;
Selecting the windscreen air distribution activates the climate control system compressor (LED on A/C button on) and the air
recirculation is set to "outside air" (LED on button B off). This logic guarantees optimum visibility at the windows. The driver can
always set air recirculation and climate control system compressor.
Additional heater(where provided)
The additional heater ensures more rapid passenger compartment heating.
It activates in cold weather conditions, if the following conditions are verified:
outside temperature low;
engine coolant temperature low;
engine started;
fan speed set at least to 1stspeed;
knob C turned completely clockwise to red section.
The heater is switched off when at least one of the conditions above is no longer verified.
The power of the electric heater is modulated according to the battery voltage.
34
GETTING TO KNOW YOUR CAR
C - air temperature adjustment knob and MAX A/C function activation:
Page 38 of 284
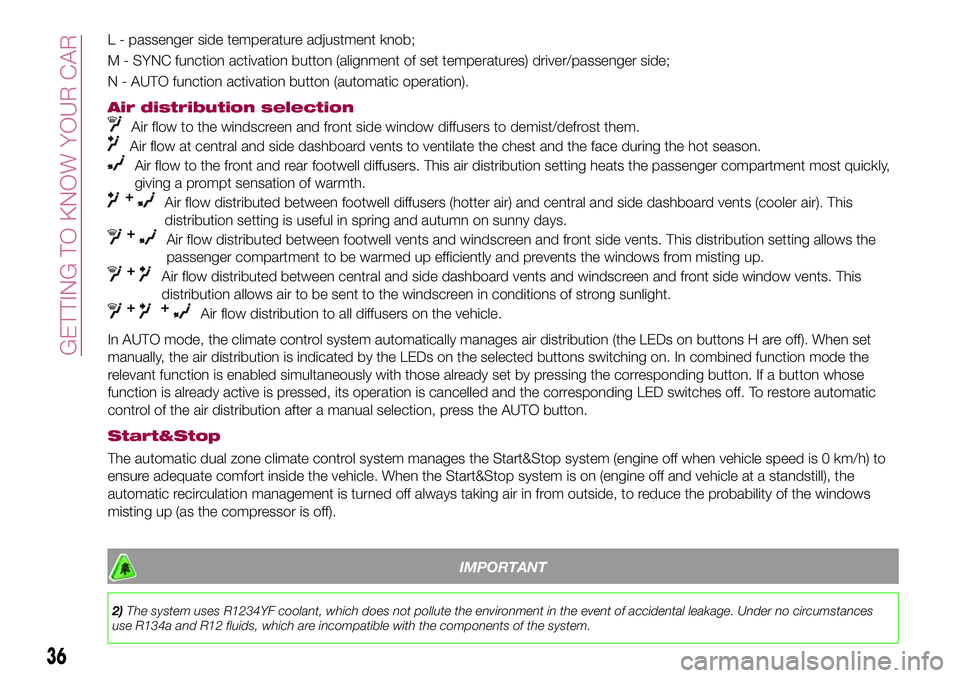
L - passenger side temperature adjustment knob;
M - SYNC function activation button (alignment of set temperatures) driver/passenger side;
N - AUTO function activation button (automatic operation).
Air distribution selection
Air flow to the windscreen and front side window diffusers to demist/defrost them.
Air flow at central and side dashboard vents to ventilate the chest and the face during the hot season.
Air flow to the front and rear footwell diffusers. This air distribution setting heats the passenger compartment most quickly,
giving a prompt sensation of warmth.
+Air flow distributed between footwell diffusers (hotter air) and central and side dashboard vents (cooler air). This
distribution setting is useful in spring and autumn on sunny days.
+Air flow distributed between footwell vents and windscreen and front side vents. This distribution setting allows the
passenger compartment to be warmed up efficiently and prevents the windows from misting up.
+Air flow distributed between central and side dashboard vents and windscreen and front side window vents. This
distribution allows air to be sent to the windscreen in conditions of strong sunlight.
++Air flow distribution to all diffusers on the vehicle.
In AUTO mode, the climate control system automatically manages air distribution (the LEDs on buttons H are off). When set
manually, the air distribution is indicated by the LEDs on the selected buttons switching on. In combined function mode the
relevant function is enabled simultaneously with those already set by pressing the corresponding button. If a button whose
function is already active is pressed, its operation is cancelled and the corresponding LED switches off. To restore automatic
control of the air distribution after a manual selection, press the AUTO button.
Start&Stop
The automatic dual zone climate control system manages the Start&Stop system (engine off when vehicle speed is 0 km/h) to
ensure adequate comfort inside the vehicle. When the Start&Stop system is on (engine off and vehicle at a standstill), the
automatic recirculation management is turned off always taking air in from outside, to reduce the probability of the windows
misting up (as the compressor is off).
IMPORTANT
2)The system uses R1234YF coolant, which does not pollute the environment in the event of accidental leakage. Under no circumstances
use R134a and R12 fluids, which are incompatible with the components of the system.
36
GETTING TO KNOW YOUR CAR
Page 43 of 284
BOOT
The boot unlocking is electrically
operated and is deactivated when the
vehicle is in motion.
OPENING
27)
Opening from the outside
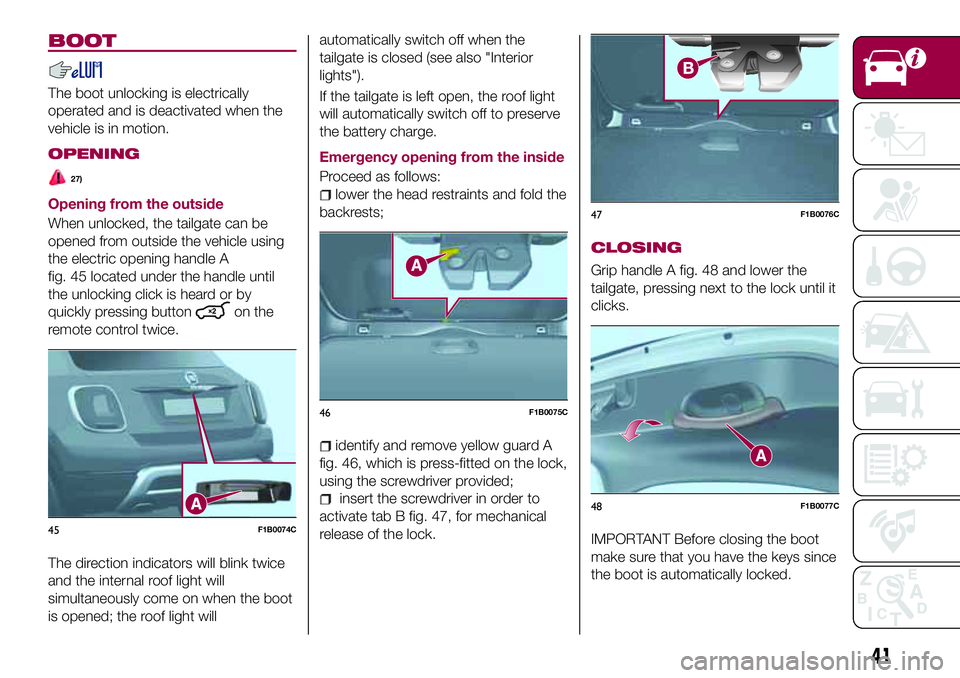
When unlocked, the tailgate can be
opened from outside the vehicle using
the electric opening handle A
fig. 45 located under the handle until
the unlocking click is heard or by
quickly pressing button
on the
remote control twice.
The direction indicators will blink twice
and the internal roof light will
simultaneously come on when the boot
is opened; the roof light willautomatically switch off when the
tailgate is closed (see also "Interior
lights").
If the tailgate is left open, the roof light
will automatically switch off to preserve
the battery charge.
Emergency opening from the inside
Proceed as follows:
lower the head restraints and fold the
backrests;
identify and remove yellow guard A
fig. 46, which is press-fitted on the lock,
using the screwdriver provided;
insert the screwdriver in order to
activate tab B fig. 47, for mechanical
release of the lock.
CLOSING
Grip handle A fig. 48 and lower the
tailgate, pressing next to the lock until it
clicks.
IMPORTANT Before closing the boot
make sure that you have the keys since
the boot is automatically locked.45F1B0074C
46F1B0075C
47F1B0076C
48F1B0077C
41
Page 45 of 284
KNOWING THE INSTRUMENT PANEL
This section of the booklet gives you all
the information you need to
understand, interpret and use the
instrument panel correctly.CONTROL PANEL AND ON-BOARD
INSTRUMENTS..............44
DISPLAY..................46
TRIP COMPUTER.............48
WARNING LIGHTS AND
MESSAGES................49
43
Page 46 of 284
CONTROL PANEL AND ON-BOARD INSTRUMENTS
VERSIONS WITH SINGLE COLOUR DISPLAY
52F1B0341C
44
KNOWING THE INSTRUMENT PANEL
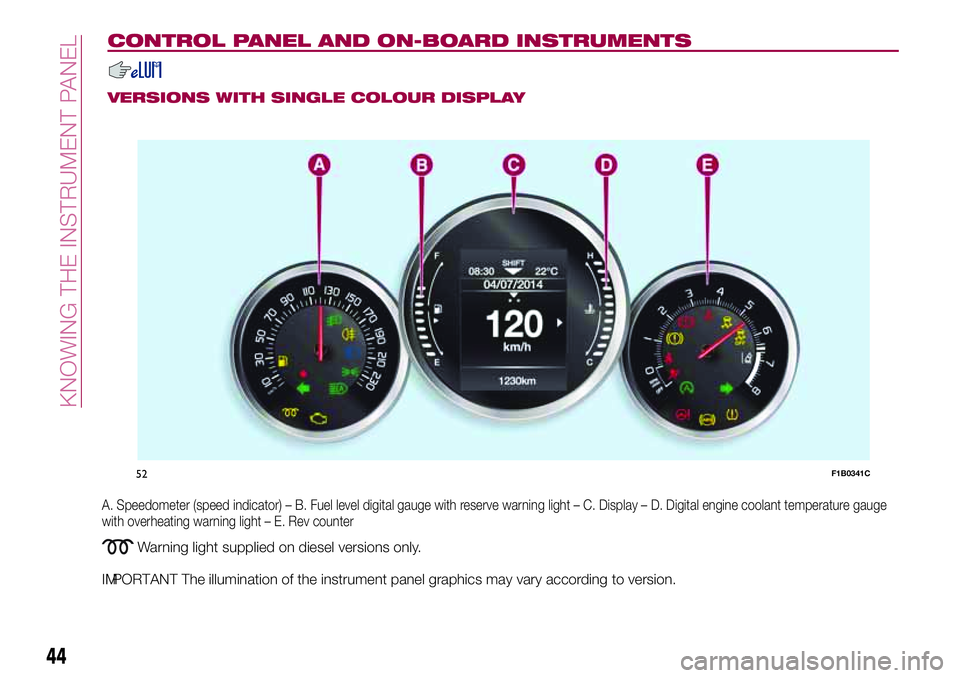
A. Speedometer (speed indicator) – B. Fuel level digital gauge with reserve warning light – C. Display – D. Digital engine coolant temperature gauge
with overheating warning light – E. Rev counter
Warning light supplied on diesel versions only.
IMPORTANT The illumination of the instrument panel graphics may vary according to version.
Page 47 of 284
VERSIONS WITH COLOUR DISPLAY
53F1B0342C
45
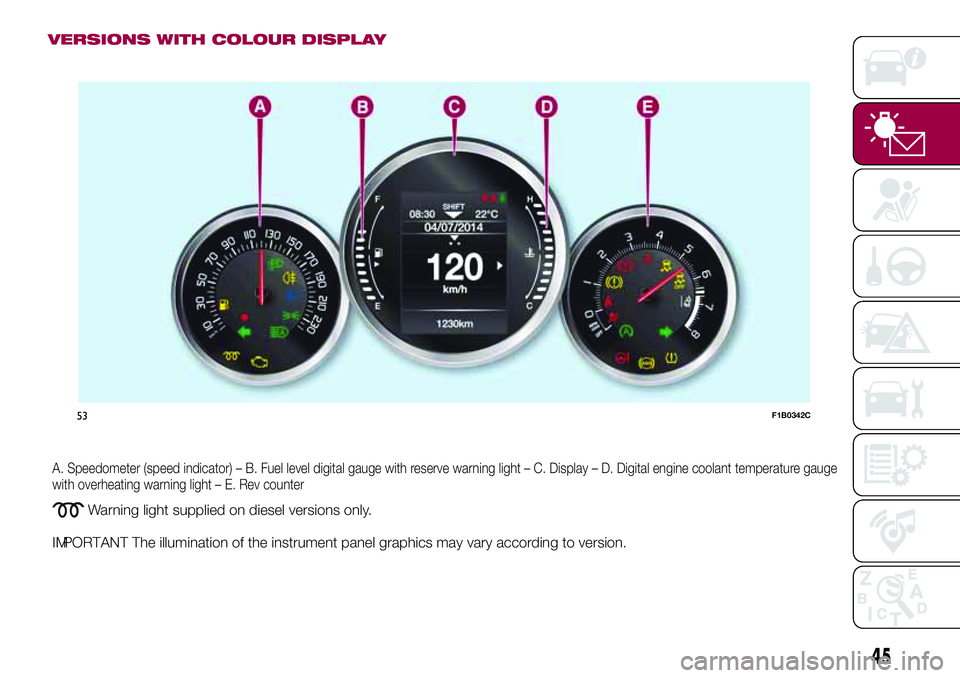
A. Speedometer (speed indicator) – B. Fuel level digital gauge with reserve warning light – C. Display – D. Digital engine coolant temperature gauge
with overheating warning light – E. Rev counter
Warning light supplied on diesel versions only.
IMPORTANT The illumination of the instrument panel graphics may vary according to version.
Page 49 of 284
MAIN MENU
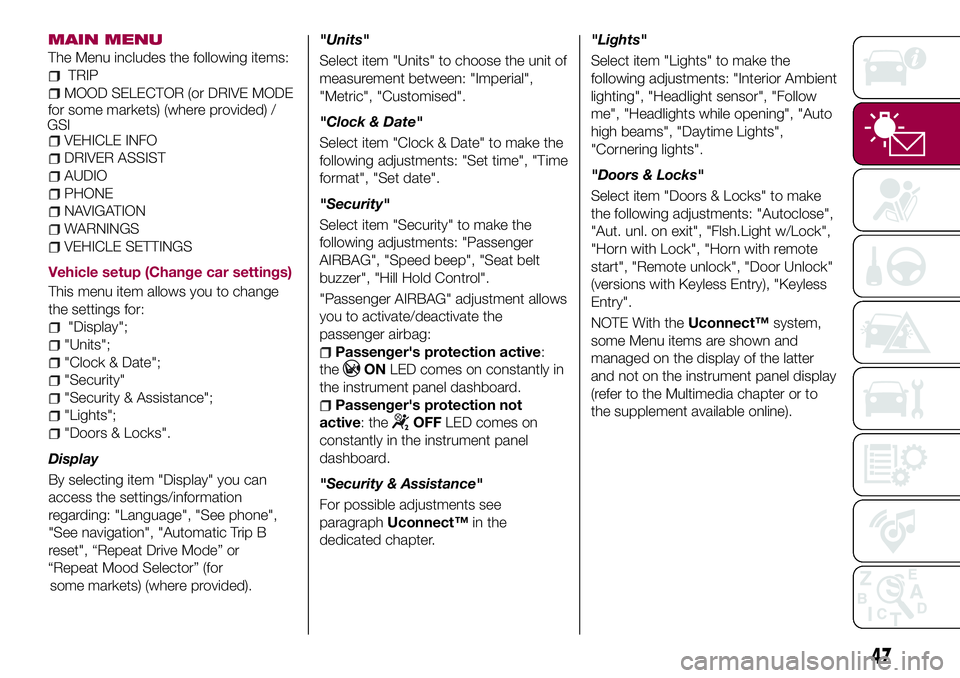
The Menu includes the following items:
TRIP
MOOD SELECTOR (or DRIVE MODE
VEHICLE INFO
DRIVER ASSIST
AUDIO
PHONE
NAVIGATION
WARNINGS
VEHICLE SETTINGS
Vehicle setup (Change car settings)
This menu item allows you to change
the settings for:
"Display";
"Units";
"Clock & Date";
"Security"
"Security & Assistance";
"Lights";
"Doors & Locks".
Display
By selecting item "Display" you can
access the settings/information
regarding: "Language", "See phone",
"See navigation", "Automatic Trip B
reset", “Repeat Drive Mode” or
(where provided)."Units"
Select item "Units" to choose the unit of
measurement between: "Imperial",
"Metric", "Customised".
"Clock & Date"
Select item "Clock & Date" to make the
following adjustments: "Set time", "Time
format", "Set date".
"Security"
Select item "Security" to make the
following adjustments: "Passenger
AIRBAG", "Speed beep", "Seat belt
buzzer", "Hill Hold Control".
"Passenger AIRBAG" adjustment allows
you to activate/deactivate the
passenger airbag:
Passenger's protection active:
the
ONLED comes on constantly in
the instrument panel dashboard.
Passenger's protection not
active: the
OFFLED comes on
constantly in the instrument panel
dashboard.
"Security & Assistance"
For possible adjustments see
paragraphUconnect™in the
dedicated chapter."Lights"
Select item "Lights" to make the
following adjustments: "Interior Ambient
lighting", "Headlight sensor", "Follow
me", "Headlights while opening", "Auto
high beams", "Daytime Lights",
"Cornering lights".
"Doors & Locks"
Select item "Doors & Locks" to make
the following adjustments: "Autoclose",
"Aut. unl. on exit", "Flsh.Light w/Lock",
"Horn with Lock", "Horn with remote
start", "Remote unlock", "Door Unlock"
(versions with Keyless Entry), "Keyless
Entry".
NOTE With theUconnect™system,
some Menu items are shown and
managed on the display of the latter
and not on the instrument panel display
(refer to the Multimedia chapter or to
the supplement available online).
47
GSIfor some markets) (where provided) /
“Repeat Mood Selector” (for
some markets)
Page 51 of 284
WARNING LIGHTS AND MESSAGES
IMPORTANT The warning light switches on in the instrument panel together with a dedicated message and/or acoustic signal
when applicable. These indications are indicative and precautionary and as such must not be considered as exhaustive and/or
alternative to the information contained in the Owner Handbook, which you are advised to read carefully in all cases. Always
refer to the information in this chapter in the event of a failure indication.
IMPORTANT Failure indications displayed are divided into two categories: serious and less serious failures. Serious failures are
indicated by a repeated and prolonged warning "cycle". Less serious failures are indicated by a warning "cycle" with a shorter
duration. The display cycle of both categories can be interrupted. The instrument panel warning light will stay on until the cause
of the failure is eliminated.
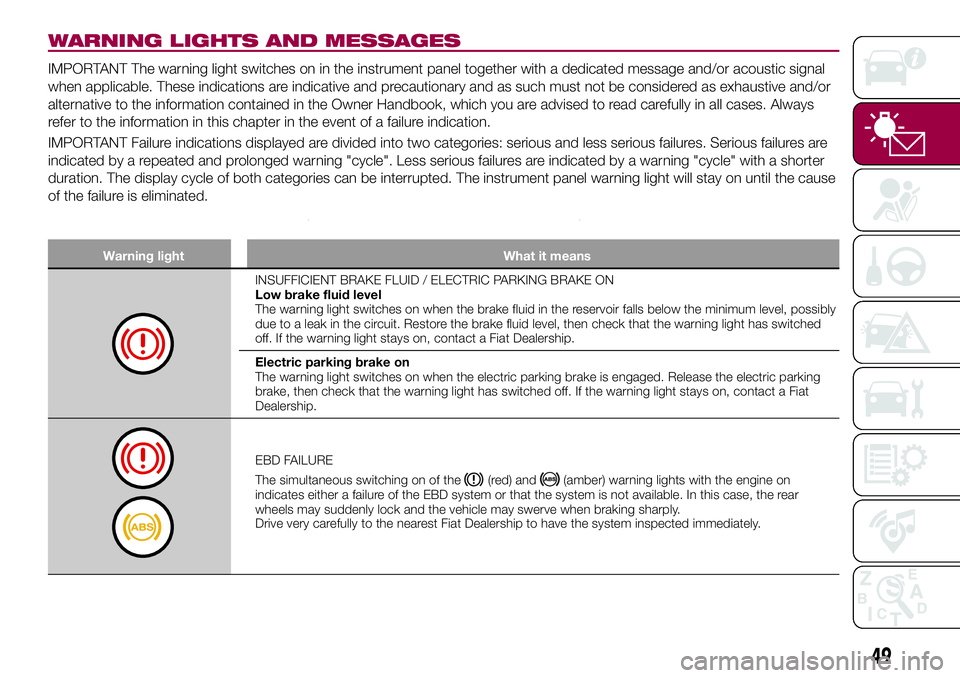
Warning light What it means
INSUFFICIENT BRAKE FLUID / ELECTRIC PARKING BRAKE ON
Low brake fluid level
The warning light switches on when the brake fluid in the reservoir falls below the minimum level, possibly
due to a leak in the circuit. Restore the brake fluid level, then check that the warning light has switched
off. If the warning light stays on, contact a Fiat Dealership.
Electric parking brake on
The warning light switches on when the electric parking brake is engaged. Release the electric parking
brake, then check that the warning light has switched off. If the warning light stays on, contact a Fiat
Dealership.
EBD FAILURE
The simultaneous switching on of the
(red) and(amber) warning lights with the engine on
indicates either a failure of the EBD system or that the system is not available. In this case, the rear
wheels may suddenly lock and the vehicle may swerve when braking sharply.
Drive very carefully to the nearest Fiat Dealership to have the system inspected immediately.
49