change time FIAT CROMA 2005 2.G Connect NavPlus Manual
[x] Cancel search | Manufacturer: FIAT, Model Year: 2005, Model line: CROMA, Model: FIAT CROMA 2005 2.GPages: 164, PDF Size: 5.39 MB
Page 149 of 164

149
CONNECT NAV+
IMPORTANTSetting (whatever)
language will start the updating pro-
cedure for both the written text and
for voice commands and instructions.
The written text (strings) will be up-
dated immediately upon selecting the
language. To update voice command
and message language the Setup CD
shall be inserted. if the Setup CD is not
inserted when requested, the required
voice command and message language
will not be updated.
To change parameters and operating
modes, press keypad keys 16-fig. 1
under LANGUAGE, DATE & TIME,
VEHICLE or CONNECT.
This operation will display the spe-
cific screen thus allowing the desired
operations.LANGUAGE
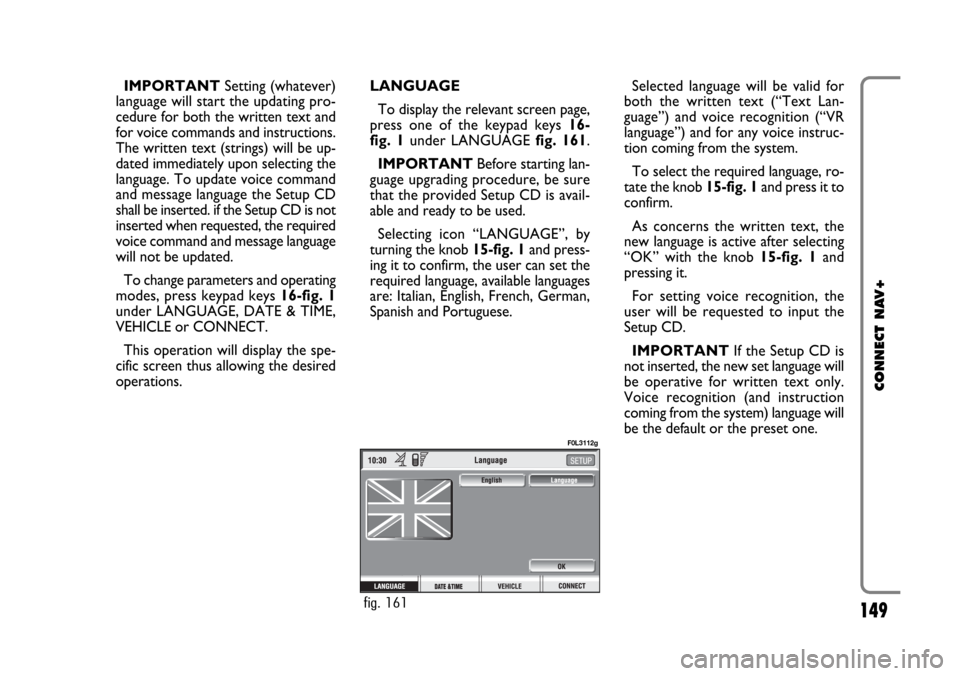
To display the relevant screen page,
press one of the keypad keys 16-
fig. 1under LANGUAGE fig. 161.
IMPORTANTBefore starting lan-
guage upgrading procedure, be sure
that the provided Setup CD is avail-
able and ready to be used.
Selecting icon “LANGUAGE”, by
turning the knob 15-fig. 1and press-
ing it to confirm, the user can set the
required language, available languages
are: Italian, English, French, German,
Spanish and Portuguese.Selected language will be valid for
both the written text (“Text Lan-
guage”) and voice recognition (“VR
language”) and for any voice instruc-
tion coming from the system.
To select the required language, ro-
tate the knob 15-fig. 1and press it to
confirm.
As concerns the written text, the
new language is active after selecting
“OK” with the knob 15-fig. 1and
pressing it.
For setting voice recognition, the
user will be requested to input the
Setup CD.
IMPORTANTIf the Setup CD is
not inserted, the new set language will
be operative for written text only.
Voice recognition (and instruction
coming from the system) language will
be the default or the preset one.
fig. 161
F0L3112g
Page 150 of 164

150
CONNECT NAV+
The display will show the following
string:
“Insert Setup CD to change language
of messages and voice commands.
Press ESC to cancel”.
If the Setup CD is inserted the fol-
lowing message will be permanently
displayed:
“System will be unavailable for a few
seconds and calls in progress will be
terminated. Press ENTER to continue
or ESC to cancel”.
If the knob 15-fig. 1has been
pressed, the following message will be
displayed permanently:
“Message and voice command lan-
guage change in progress. Do not turn
off system. Please wait”.
The end of the procedure is indicat-
ed by the following message:
“Message and voice command lan-
guage change concluded correctly”.If some errors occur during language
updating, the following message will be
displayed:
“Language change failed. Please re-
peat procedure”.
This message asks the user to repeat
the above procedure.
Whenever the system is switched on
turning the ignition key to ON, the
language module is checked and if the
system finds a fault the following mes-
sage is displayed:
“Voice commands and messages not
available. Please change the language”.
This message asks the user to repeat
language change procedure.
The user shall set again the desired
language in the SETUP menu and then
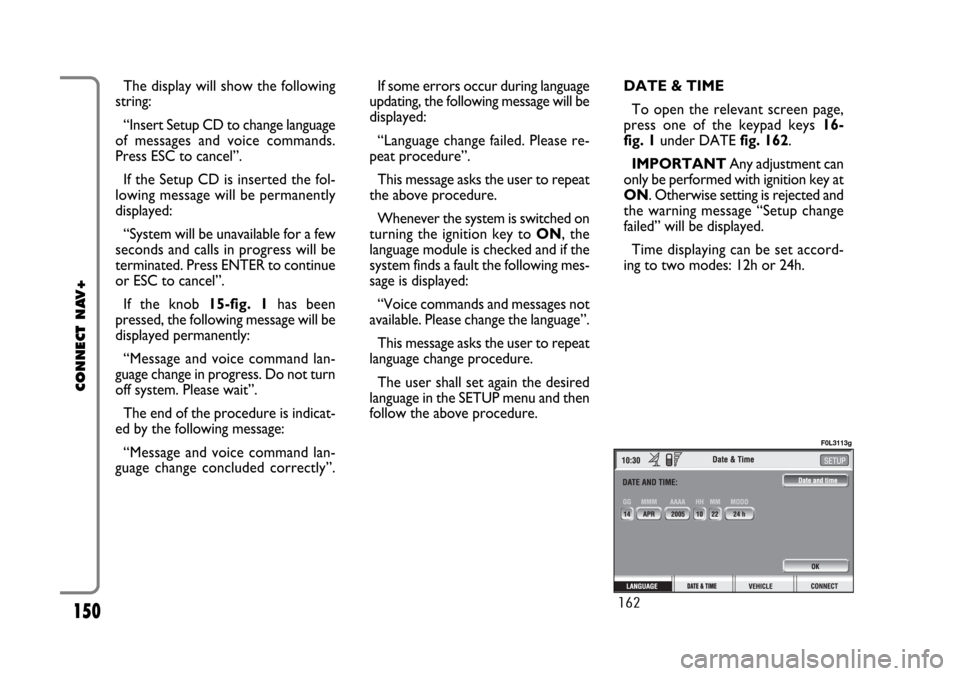
follow the above procedure.DATE & TIME
To open the relevant screen page,
press one of the keypad keys 16-
fig. 1under DATE fig. 162.
IMPORTANTAny adjustment can
only be performed with ignition key at
ON. Otherwise setting is rejected and
the warning message “Setup change
failed” will be displayed.
Time displaying can be set accord-
ing to two modes: 12h or 24h.
162
F0L3113g
Page 158 of 164

The following settings are possible:
– “Deactivation dependent on igni-
tion key”
– “Deactivation independent of igni-
tion key”.
Current activated setting will be high-
lighted.
Select the required setting by rotat-
ing the knob 15-fig. 1and then press
it to confirm.
Press “ESC” 14-fig. 1to go back to
previous screen.
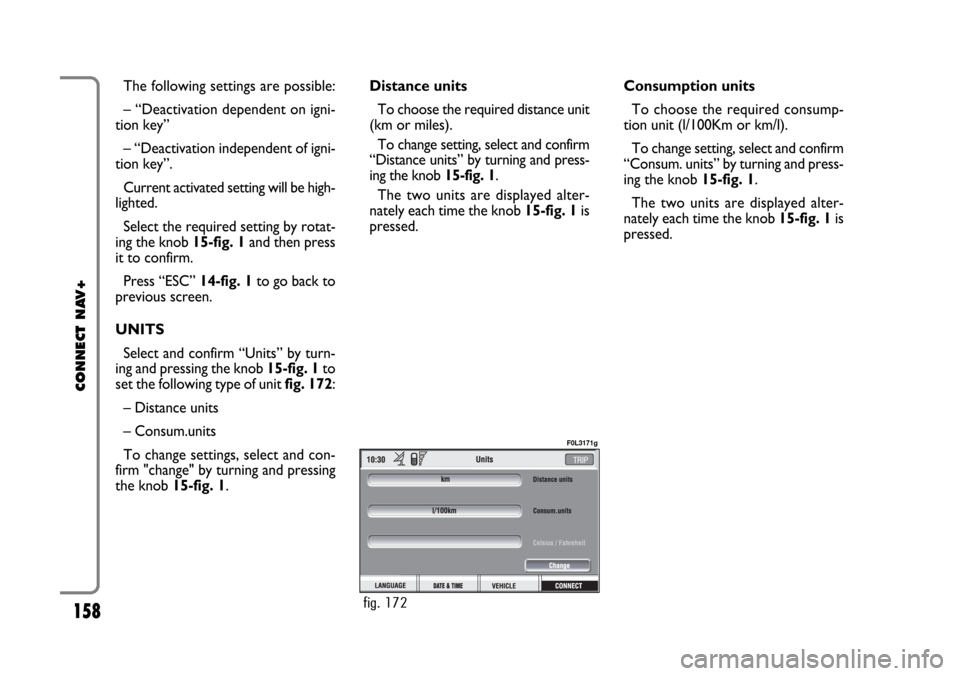
UNITS
Select and confirm “Units” by turn-
ing and pressing the knob 15-fig. 1to
set the following type of unit fig. 172:
– Distance units
– Consum.units
To change settings, select and con-
firm "change" by turning and pressing
the knob 15-fig. 1. Distance units
To choose the required distance unit
(km or miles).
To change setting, select and confirm
“Distance units” by turning and press-
ing the knob 15-fig. 1.
The two units are displayed alter-
nately each time the knob 15-fig. 1is
pressed.Consumption units
To choose the required consump-
tion unit (l/100Km or km/l).
To change setting, select and confirm
“Consum. units” by turning and press-
ing the knob 15-fig. 1.
The two units are displayed alter-
nately each time the knob 15-fig. 1is
pressed.
158
CONNECT NAV+
fig. 172
F0L3171g