navigation system FIAT CROMA 2005 2.G Connect NavPlus Manual
[x] Cancel search | Manufacturer: FIAT, Model Year: 2005, Model line: CROMA, Model: FIAT CROMA 2005 2.GPages: 164, PDF Size: 5.39 MB
Page 98 of 164

Pressing “NAV” 18-fig. 1for over
2 seconds will activate the NAV Mute
function for muting voice instructions.
To reactivate the function, press the
same key again for over 2 seconds.
Set route: defines route calculation
parameters (For further details see
section “Set route” on the following
pages). Right vertical bar icons are:
Other menus: shows a second
page of navigation menu.
Select address: lets the user select
a geographical point (through address,
directory...).
Activate RG: enables/disables route
guide. If RG is disabled, then voice
messages, cross icons and zooms are
no more available. If a route is active
when RG is disabled, it remains visible
on the map, while automatic route re-
calculation (if user leaves route) is not
active.
Volume: sets the voice instruction
volume level.
98
CONNECT NAV+
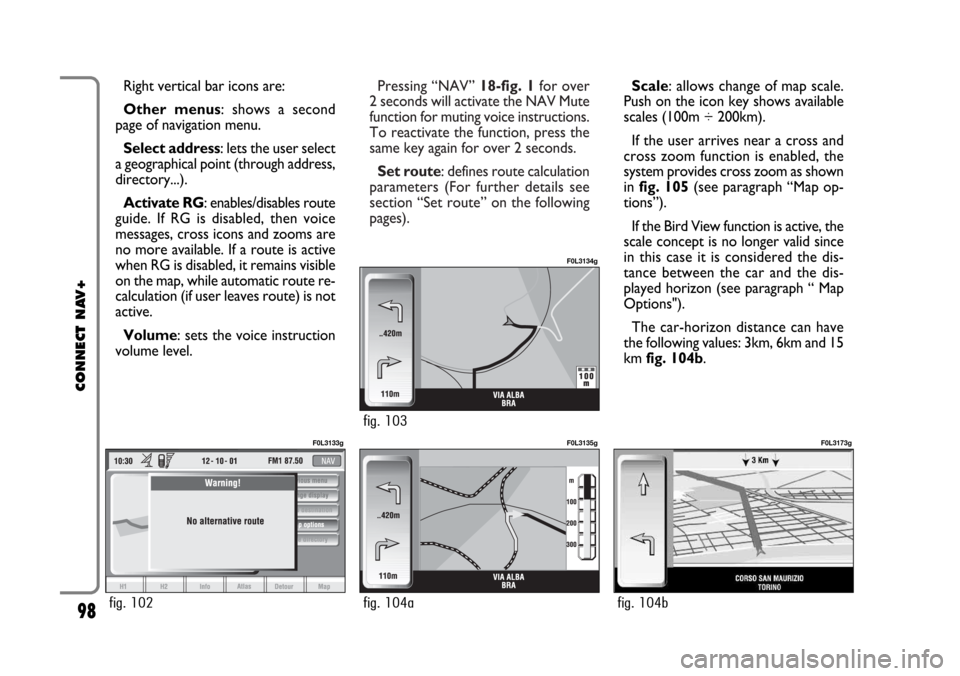
Scale: allows change of map scale.
Push on the icon key shows available
scales (100m ÷ 200km).
If the user arrives near a cross and
cross zoom function is enabled, the
system provides cross zoom as shown
in fig. 105(see paragraph “Map op-
tions”).
If the Bird View function is active, the
scale concept is no longer valid since
in this case it is considered the dis-
tance between the car and the dis-
played horizon (see paragraph “ Map
Options").
The car-horizon distance can have
the following values: 3km, 6km and 15
km fig. 104b.
fig. 102
F0L3133g
fig. 104a
F0L3135g
fig. 104b
F0L3173g
fig. 103
F0L3134g
Page 101 of 164

101
CONNECT NAV+
If in place of “Street” the user spec-
ifies “C”, it means “downtown” and
so neither “Street number” and “2nd
street” must be input.
The navigation system always guide
you downtown in case of small towns.
After selecting the “Street” name,
press the knob 15-fig. 1to go to next
page to enter the street number;
Pressing “ESC” 14-fig. 1gets to pre-
vious screen without setting the street
name.
“Street number”
Destination street number is ob-
tained after entering the street name.
Select “Street number” by rotating the
knob 15-fig. 1and press it to confirm.
To input digits select them on the key-
pad by rotating the knob 15-fig. 1and
then press it to confirm.
Then, select OK using the keypad and
press the knob 15-fig. 1to confirm.“2nd street”
This option is used to enter the name
of a second street that intersects the
first entered street, so that the se-
lected destination is the intersection
between the two streets.
The second street name can be en-
tered, after entering the place name
and the first street name. Select “2nd
street” by rotating the knob 15-
fig. 1and press it to confirm.
To input the 2nd street name char-
acters, select them on the keypad by
rotating the knob 15-fig. 1and then
press it to confirm.
After selecting the “2nd street” press
the knob 15-fig. 1.
“Calculate route”
This option will activate route calcu-
lation to the required destination.
If a destination is already set, the sys-
tem will ask for confirmation before
changing destination“Other options”
– Directory
This function is used to store the se-
lected address into the navigation sys-
tem directory and to associate it to a
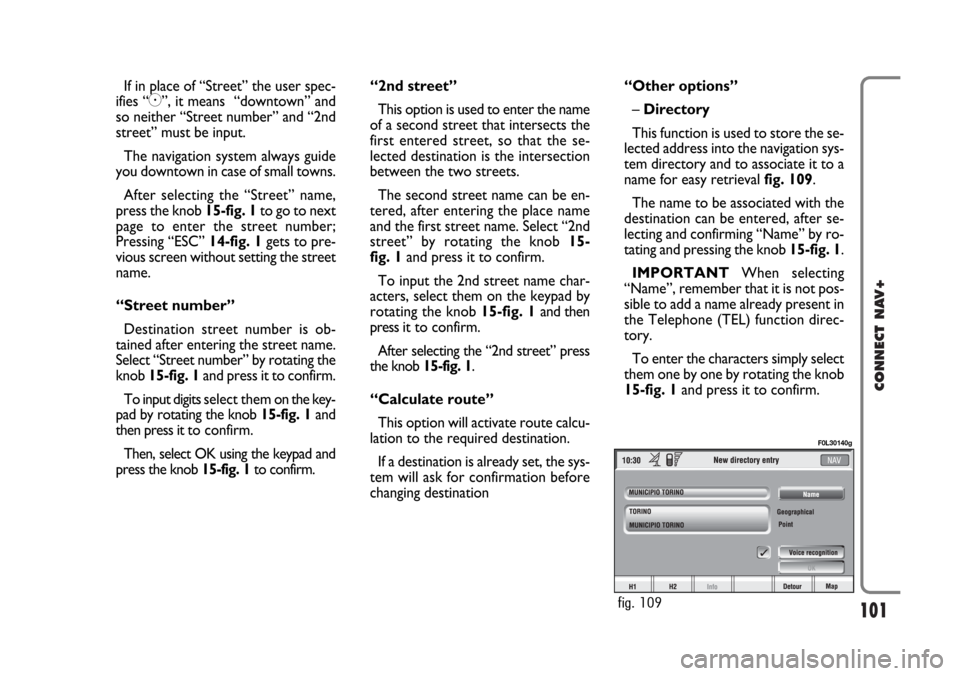
name for easy retrieval fig. 109.
The name to be associated with the
destination can be entered, after se-
lecting and confirming “Name” by ro-
tating and pressing the knob 15-fig. 1.
IMPORTANTWhen selecting
“Name”, remember that it is not pos-
sible to add a name already present in
the Telephone (TEL) function direc-
tory.
To enter the characters simply select
them one by one by rotating the knob
15-fig. 1and press it to confirm.
fig. 109
F0L30140g
Page 103 of 164

103
CONNECT NAV+
POINTS OF INTEREST
This function is used to obtain a file
containing the location and informa-
tion on points of general interest such
as, for example, restaurants, museums,
stations etc., divided by category.
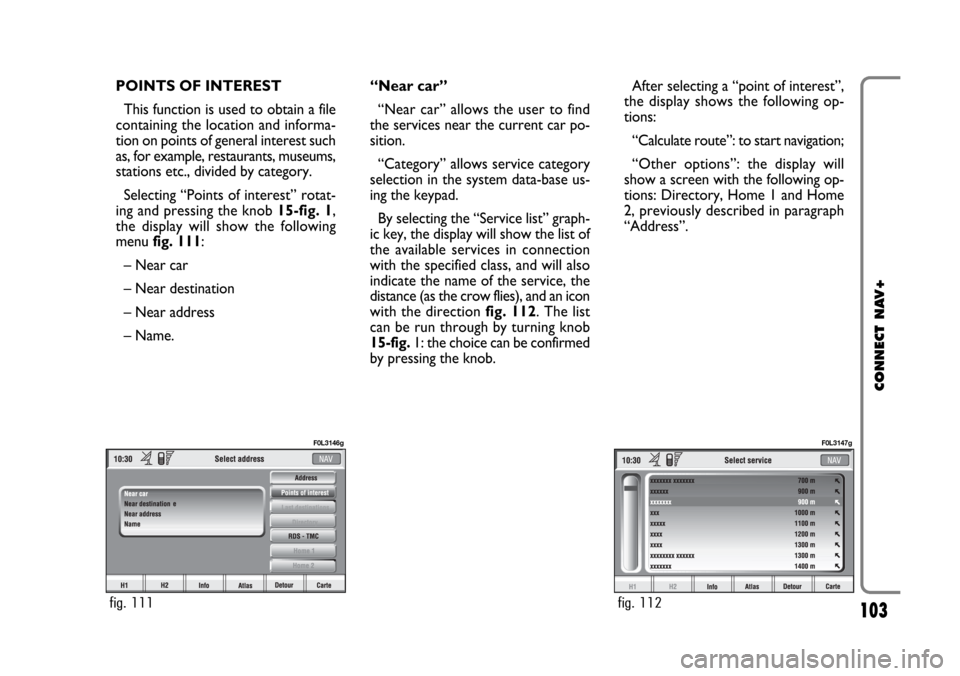
Selecting “Points of interest” rotat-
ing and pressing the knob 15-fig. 1,
the display will show the following
menu fig. 111:
– Near car
– Near destination
– Near address
– Name. “Near car”
“Near car” allows the user to find
the services near the current car po-
sition.
“Category” allows service category
selection in the system data-base us-
ing the keypad.
By selecting the “Service list” graph-
ic key, the display will show the list of
the available services in connection
with the specified class, and will also
indicate the name of the service, the
distance (as the crow flies), and an icon
with the direction fig. 112. The list
can be run through by turning knob
15-fig. 1: the choice can be confirmed
by pressing the knob.After selecting a “point of interest”,
the display shows the following op-
tions:
“Calculate route”: to start navigation;
“Other options”: the display will
show a screen with the following op-
tions: Directory, Home 1 and Home
2, previously described in paragraph
“Address”.
fig. 111
F0L3146g
fig. 112
F0L3147g
Page 114 of 164

114
CONNECT NAV+
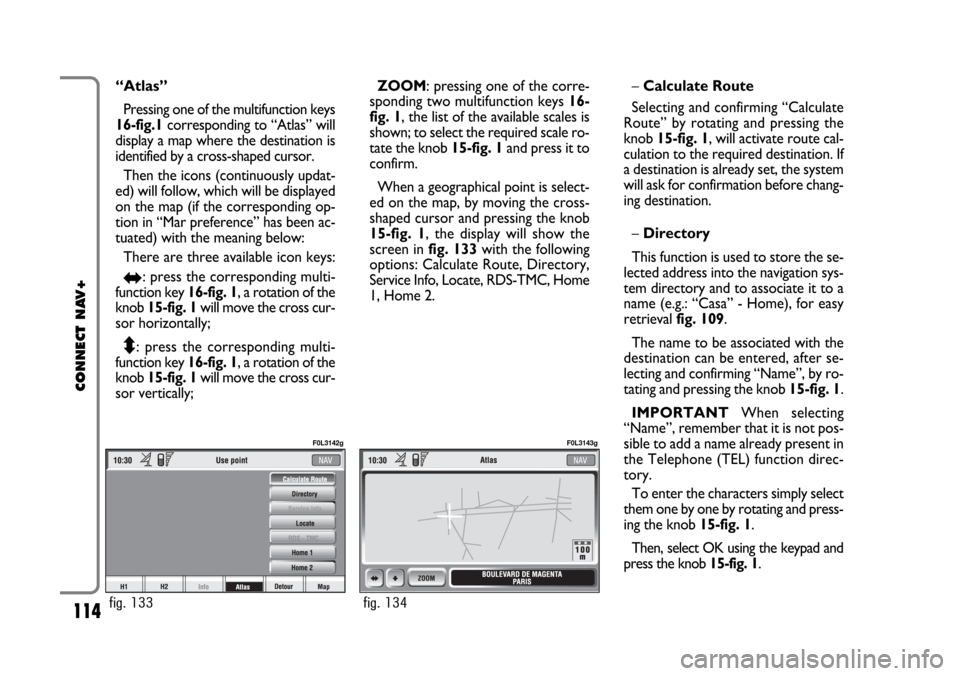
“Atlas”
Pressing one of the multifunction keys
16-fig.1corresponding to “Atlas” will
display a map where the destination is
identified by a cross-shaped cursor.
Then the icons (continuously updat-
ed) will follow, which will be displayed
on the map (if the corresponding op-
tion in “Mar preference” has been ac-
tuated) with the meaning below:
There are three available icon keys:
RE: press the corresponding multi-
function key 16-fig. 1, a rotation of the
knob 15-fig. 1will move the cross cur-
sor horizontally;
Q
Z: press the corresponding multi-
function key 16-fig. 1, a rotation of the
knob 15-fig. 1will move the cross cur-
sor vertically;ZOOM: pressing one of the corre-
sponding two multifunction keys 16-
fig. 1, the list of the available scales is
shown; to select the required scale ro-
tate the knob 15-fig. 1and press it to
confirm.
When a geographical point is select-
ed on the map, by moving the cross-
shaped cursor and pressing the knob
15-fig. 1, the display will show the
screen in fig. 133with the following
options: Calculate Route, Directory,
Service Info, Locate, RDS-TMC, Home
1, Home 2.–Calculate Route
Selecting and confirming “Calculate
Route” by rotating and pressing the
knob 15-fig. 1, will activate route cal-
culation to the required destination. If
a destination is already set, the system
will ask for confirmation before chang-
ing destination.
–Directory
This function is used to store the se-
lected address into the navigation sys-
tem directory and to associate it to a
name (e.g.: “Casa” - Home), for easy
retrieval fig. 109.
The name to be associated with the
destination can be entered, after se-
lecting and confirming “Name”, by ro-
tating and pressing the knob 15-fig. 1.
IMPORTANT When selecting
“Name”, remember that it is not pos-
sible to add a name already present in
the Telephone (TEL) function direc-
tory.
To enter the characters simply select
them one by one by rotating and press-
ing the knob 15-fig. 1.
Then, select OK using the keypad and
press the knob 15-fig. 1.
fig. 133
F0L3142g
fig. 134
F0L3143g
Page 124 of 164

124
CONNECT NAV+
GENERAL INFORMATION
With the “Voice recognition” func-
tion the user can control the CON-
NECT Nav+ by voice. By means of
“Voice recognition”, the user can
send commands to the system to the
system through a microphone: short
push on
}1-fig. 1set on front pan-
el enables voice command interpre-
tation; CONNECT Nav+ will then
provide voice help to guide the user
get the required function.
Press again
}1-fig. 1to stop pro-
cedure.Voice recognition is performed in
two ways:
– voice recognition without
voice identification;
– voice recognition with voice
identification.
Commands without voice identi-
ficationactivate the main system
functions (TEL, RADIO, CD etc.).
Commands with voice identifica-
tionmakes it possible to enter / recall
names in the phone directory and/or
navigation addresses.
In the first case (voice recognition
without voice identification), the sys-
tem is able to receive the voice com-
mands regardless of the user’s sex and
voice tone and inflexion.No preliminary training phase is re-
quired, just follow the instructions giv-
en by the system each time.
In the second case (voice recognition
with voice identification), the system
is able to recognise the required com-
mand comparing the voice command
pronounced to the corresponding
voice sample previously stored by the
user.
IMPORTANTThe voice recogni-
tion and message store operations are
immediately interrupted in the event
of incoming calls; in this case, at the
end of the call, the whole operation
must be repeated. Conversely, in-
coming SMS text messages do not in-
terrupt the operations.
V V
O O
I I
C C
E E
R R
E E
C C
O O
G G
N N
I I
T T
I I
O O
N N
Page 160 of 164

160
CONNECT NAV+
Hardware module
Audio
CD player
Telephone
CONNECT Nav+
Press “ESC” 14-fig. 1to exit the dialogue box; the involved module will feature limited functions as described in the fol-
lowing table:
Application
Audio (Radio, CD, CDC)
Telephone (voice)
Navigator (voice)
Voice recognition (voice)
Audio (CD only)
Navigation
Cell phone, SOS
All
Displayed message
Limited audio volume
CD player OFF
Telephone OFF (TEL OFF)
Whole system OFF
Page 161 of 164

161
CONNECT NAV+
“Audio” module overheating
In case of “Audio” module over-
heating, current audio volume is au-
tomatically limited regardless of the
current audio source (radio, CD, CD
Changer).
The display will show a proper warn-
ing message.“CD player” module
overheating
In case of “CD player” module over-
heating, no CD will be played: no au-
dio CD or MP3 CD will be played and
the navigation functions will not be
guaranteed (unless navigation without
CD has been previously activated).
The display will show a proper warn-
ing message.
“Telephone” module
overheating
In case of “Telephone” module over-
heating, the module is deactivated
(TEL OFF), thus inhibiting information
and assistance functions (SOS).
The display will show a proper warn-
ing message.CONNECT Nav+ auto-off
In case of excessive overtempera-
ture, a warning message will inform
the user that the auto-off procedure
has been activated. The system can be
switched on normally when regular
operating temperature values are re-
stored.