setup FIAT CROMA 2005 2.G Connect NavPlus Manual
[x] Cancel search | Manufacturer: FIAT, Model Year: 2005, Model line: CROMA, Model: FIAT CROMA 2005 2.GPages: 164, PDF Size: 5.39 MB
Page 47 of 164
OK
To confirm the chosen option, select
“OK” with the knob 15-fig. 1and
press it.
During the operations available in the
“CDC Prog” function, buttons 5, 6
and 9-fig. 1are disabled.
When removing the Compact Disc
from the multiple player or changing
the CD sequence, a new playback se-
quence shall be programmed.
CD name
This function can be selected only if
a Compact Disc is inserted in the mul-
tiple player.
If the CD already has a name, this will
be shown on the display.
“CD name” function allows to name
max. 10 CDs with 20 characters max.
For the description of the different
functions, refer to “CD Mode”.
47
CONNECT NAV+
“AUDIO SETUP” FUNCTION
(AUDIO ADJUSTMENTS)
To access the audio setup menu
while listening to a CD, select the “Au-
dio setup” icon rotating the knob 15-
fig. 1and press it to confirm.
For the description of the different
functions available in the menu, see the
corresponding paragraph of the “RA-
DIO MODE” chapter.MP3 MODE
CONNECT Nav+ can recognize the
type of Compact Disc inserted.Dur-
ing the reading procedure to recog-
nize the disk the display shows “Read-
ing CD...”. If the inserted CD is a MP3
one, a specific control is activated.
IMPORTANTNever use 8 cm au-
dio or MP3 CDs, even with the spe-
cial adapter, since this format damages
the system.
IMPORTANTCONNECT Nav+
builds MP3 CD folder-organized struc-
ture of files; folders are organized in
sequence with their own MP3 tracks
(up to max. four levels of folders/sub-
directories). Folder and file name
length shall not exceed 31 characters.
Characters: blank, ’(apostrophe), (
and )(open and closed brackets) are
not admitted in MP3 track names.
When creating MP3 CD you must not
use these characters to name files oth-
erwise CONNECT Nav+ will not be
able to play it.
Page 49 of 164
49
CONNECT NAV+
MAIN SCREEN OPTIONS
AND FUNCTIONS
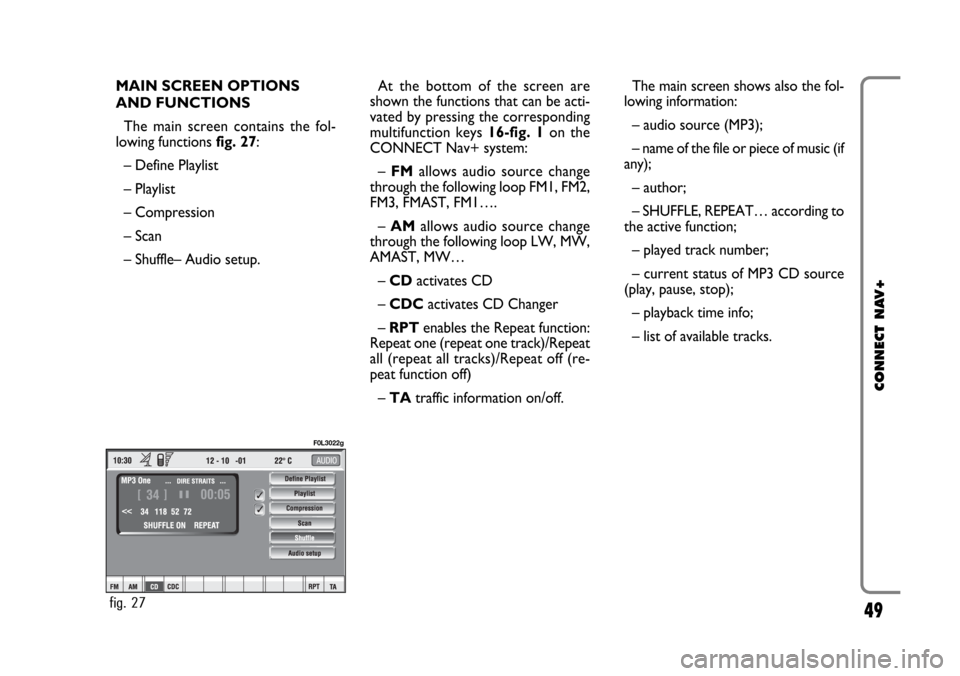
The main screen contains the fol-
lowing functions fig. 27:
– Define Playlist
– Playlist
– Compression
– Scan
– Shuffle– Audio setup.At the bottom of the screen are
shown the functions that can be acti-
vated by pressing the corresponding
multifunction keys 16-fig. 1 on the
CONNECT Nav+ system:
– FMallows audio source change
through the following loop FM1, FM2,
FM3, FMAST, FM1….
–AMallows audio source change
through the following loop LW, MW,
AMAST, MW…
– CDactivates CD
– CDC activates CD Changer
– RPT enables the Repeat function:
Repeat one (repeat one track)/Repeat
all (repeat all tracks)/Repeat off (re-
peat function off)
– TAtraffic information on/off.The main screen shows also the fol-
lowing information:
– audio source (MP3);
– name of the file or piece of music (if
any);
– author;
– SHUFFLE, REPEAT… according to
the active function;
– played track number;
– current status of MP3 CD source
(play, pause, stop);
– playback time info;
– list of available tracks.
fig. 27
F0L3022g
Page 51 of 164

51
CONNECT NAV+
“Compression” FUNCTION
This function optimizes MP3 CD
sound quality when playing it in the car.
To turn this function on/off, select
the “Compression” icon with the
knob 15-fig. 1and press it.
When the “Compression” function
is on, symbol “✓” is shown near the
corresponding icon.
“Scan” FUNCTION
(BRIEF PLAYBACK)
The “Scan” function is turned on/off
selecting the relevant icon key with
the knob 15-fig. 1and pressing it.
When this function is on, all the MP3
CD tracks are played for about 10 sec-
onds in the actual sequence on the
MP3 CD or the preset playlist is
played (depending on “Playlist” en-
able/disable).
To turn the function off, select the
“Scan” icon and press the knob 15-
fig. 1again. “Shuffle” FUNCTION
(RANDOM PLAYING)
To turn the “Shuffle” function on/off,
turn the knob 15-fig. 1 and press it af-
ter selecting the function.
When the Shuffle function is on, the
display shows “SHUFFLE”.
With this function on, the MP3 CD
tracks or the playlist are played in ran-
dom sequence (depending on
“Playlist” enable/disable).
To turn the function off, select the
“Shuffle” icon and press the knob 15-
fig. 1 again. “Audio setup” FUNCTION
(AUDIO ADJUSTMENTS)
To access the audio setup menu
while listening to a MP3 CD, select the
“Setup” icon rotating the knob 15-
fig. 1and press it to confirm.
For the description of the different
functions available in the menu, refer
to the corresponding paragraph in sec-
tion “RADIO MODE”.
Page 79 of 164
“In directory” icon key
This key fig. 63 - 64, selected and
confirmed by rotating and pressing the
knob 15-fig. 1, stores current dis-
played site address in the “Site direc-
tory” (with a maximum of 10 stored
addresses), proceed as follows:
– rotate the knob15-fig. 1to se-
lect the address and then press the
knob to confirm.Storing the tenth address, the display
shows a dialog box warning the user
that the directory is full and the icon
key (“In directory”) is greyed. Further
storing requests a preventive deletion.
A mnemonic string (max. length 30
characters) can be associated to each
stored address fig. 66; proceed as fol-
lows:
– rotate the knob 15-fig. 1to se-
lect “Name” fig. 66and type in the re-
quired name using the keypad.“WAP Options” icon key
This key fig. 63 - 64selected and
confirmed by rotating and pressing the
knob 15-fig. 1, allows to set up the
following WAP options: address of
“Home setup” site, “Site directory”,
“Settings”.
“Home set-up”
This keyfig. 67selected and con-
firmed by rotating and pressing the
knob 15-fig. 1, allows specification of
home site address; proceed as follows:
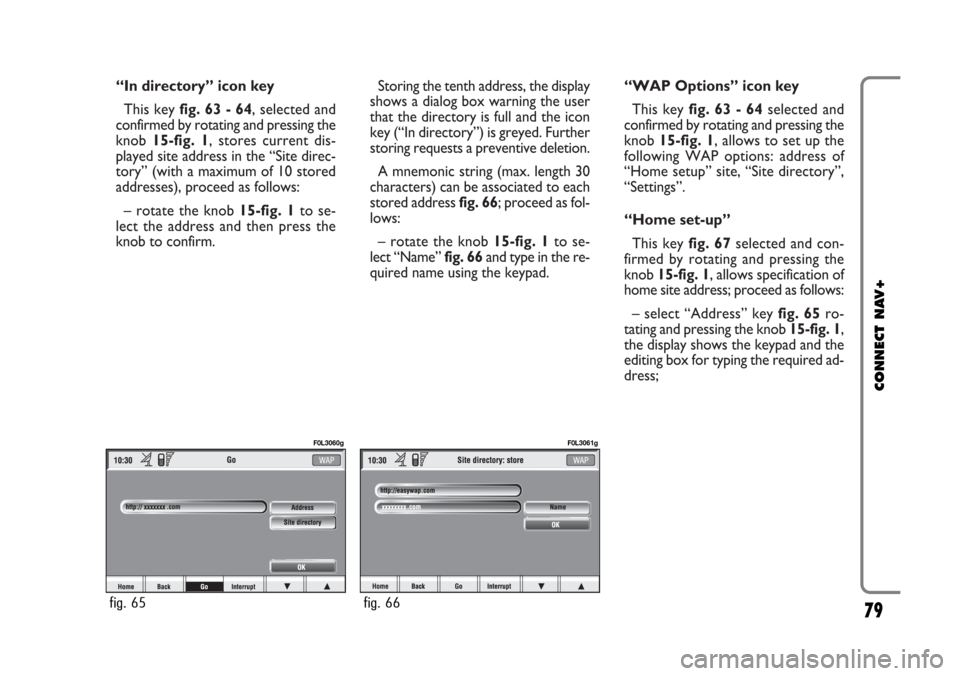
– select “Address” key fig. 65ro-
tating and pressing the knob 15-fig. 1,
the display shows the keypad and the
editing box for typing the required ad-
dress;
79
CONNECT NAV+
fig. 65
F0L3060g
fig. 66
F0L3061g
Page 84 of 164
“Other menus” FUNCTION
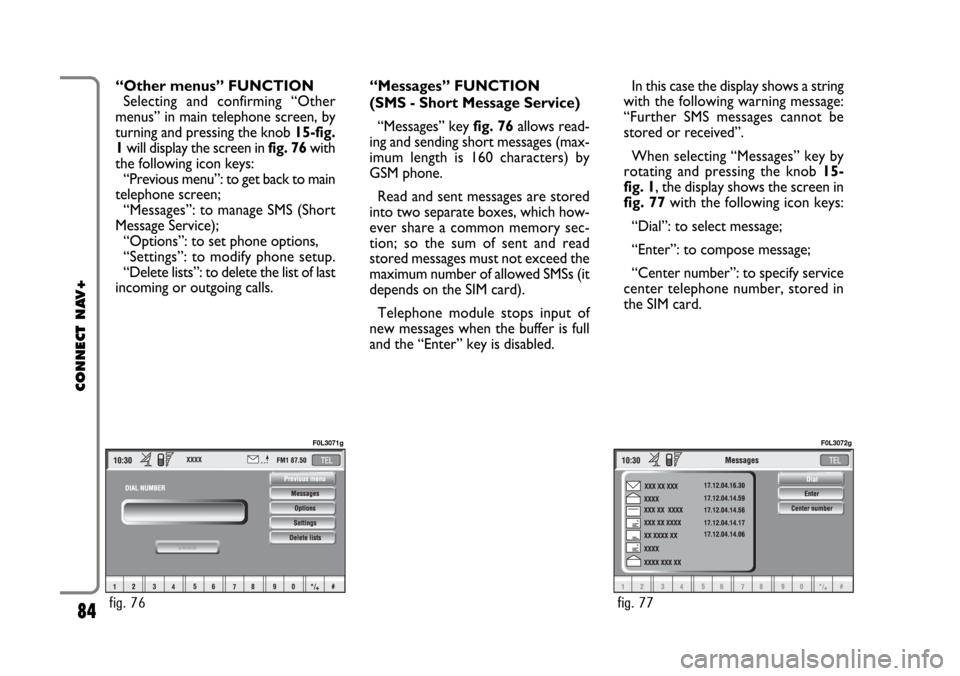
Selecting and confirming “Other
menus” in main telephone screen, by
turning and pressing the knob 15-fig.
1will display the screen in fig. 76with
the following icon keys:
“Previous menu”: to get back to main
telephone screen;
“Messages”: to manage SMS (Short
Message Service);
“Options”: to set phone options,
“Settings”: to modify phone setup.
“Delete lists”: to delete the list of last
incoming or outgoing calls.“Messages” FUNCTION
(SMS - Short Message Service)
“Messages” key fig. 76allows read-
ing and sending short messages (max-
imum length is 160 characters) by
GSM phone.
Read and sent messages are stored
into two separate boxes, which how-
ever share a common memory sec-
tion; so the sum of sent and read
stored messages must not exceed the
maximum number of allowed SMSs (it
depends on the SIM card).
Telephone module stops input of
new messages when the buffer is full
and the “Enter” key is disabled.In this case the display shows a string
with the following warning message:
“Further SMS messages cannot be
stored or received”.
When selecting “Messages” key by
rotating and pressing the knob 15-
fig. 1, the display shows the screen in
fig. 77with the following icon keys:
“Dial”: to select message;
“Enter”: to compose message;
“Center number”: to specify service
center telephone number, stored in
the SIM card.
84
CONNECT NAV+
fig. 76
F0L3071g
fig. 77
F0L3072g
Page 119 of 164
119
CONNECT NAV+
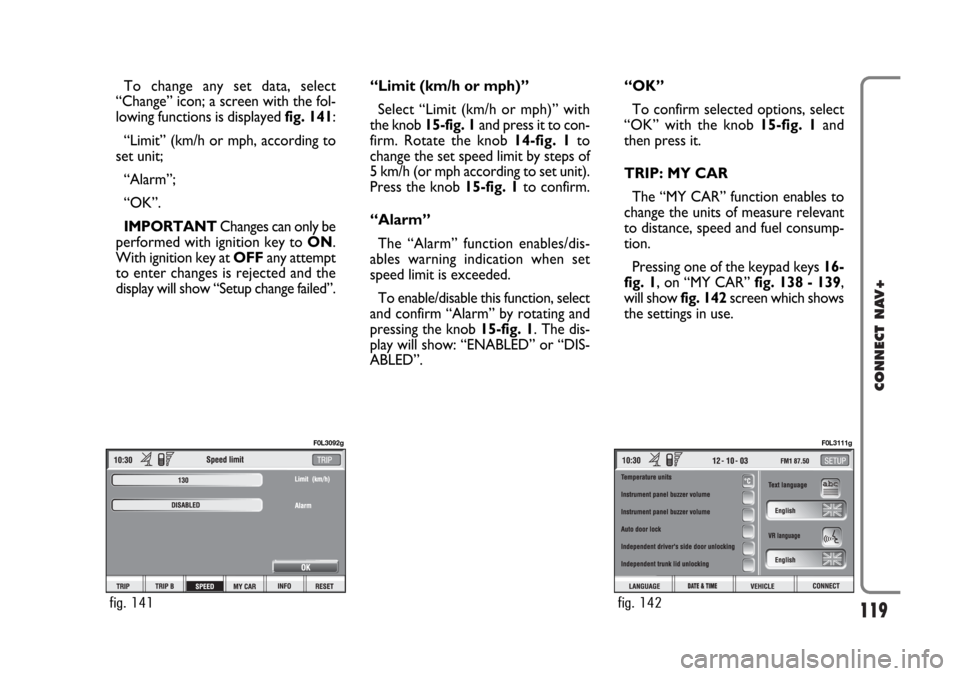
To change any set data, select
“Change” icon; a screen with the fol-
lowing functions is displayed fig. 141:
“Limit” (km/h or mph, according to
set unit;
“Alarm”;
“OK”.
IMPORTANTChanges can only be
performed with ignition key to ON.
With ignition key at OFFany attempt
to enter changes is rejected and the
display will show “Setup change failed”.“Limit (km/h or mph)”
Select “Limit (km/h or mph)” with
the knob 15-fig. 1and press it to con-
firm. Rotate the knob14-fig. 1to
change the set speed limit by steps of
5 km/h (or mph according to set unit).
Press the knob 15-fig. 1to confirm.
“Alarm”
The “Alarm” function enables/dis-
ables warning indication when set
speed limit is exceeded.
To enable/disable this function, select
and confirm “Alarm” by rotating and
pressing the knob 15-fig. 1. The dis-
play will show: “ENABLED” or “DIS-
ABLED”.“OK”
To confirm selected options, select
“OK” with the knob 15-fig. 1and
then press it.
TRIP: MY CAR
The “MY CAR” function enables to
change the units of measure relevant
to distance, speed and fuel consump-
tion.
Pressing one of the keypad keys 16-
fig. 1, on “MY CAR” fig. 138 - 139,
will show fig. 142screen which shows
the settings in use.
fig. 141
F0L3092g
fig. 142
F0L3111g
Page 120 of 164
120
CONNECT NAV+
– Select one of the three multifunc-
tion keys 16-fig. 1corresponding to
the CONNECT string to display the
screen for changing certain settings.
– Select “Units” icon key with the
knob 15 fig. 1and then press it to
confirm.
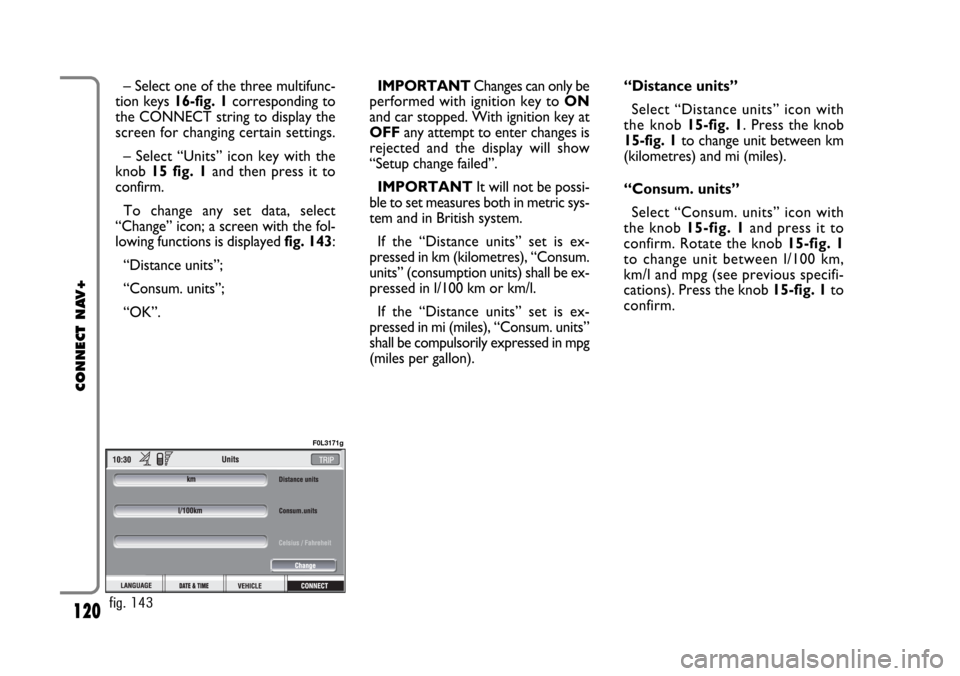
To change any set data, select
“Change” icon; a screen with the fol-
lowing functions is displayed fig. 143:
“Distance units”;
“Consum. units”;
“OK”.IMPORTANTChanges can only be
performed with ignition key to ON
and car stopped. With ignition key at
OFFany attempt to enter changes is
rejected and the display will show
“Setup change failed”.
IMPORTANTIt will not be possi-
ble to set measures both in metric sys-
tem and in British system.
If the “Distance units” set is ex-
pressed in km (kilometres), “Consum.
units” (consumption units) shall be ex-
pressed in l/100 km or km/l.
If the “Distance units” set is ex-
pressed in mi (miles), “Consum. units”
shall be compulsorily expressed in mpg
(miles per gallon).“Distance units”
Select “Distance units” icon with
the knob15-fig. 1. Press the knob
15-fig. 1to change unit between km
(kilometres) and mi (miles).
“Consum. units”
Select “Consum. units” icon with
the knob 15-fig. 1and press it to
confirm. Rotate the knob 15-fig. 1
to change unit between l/100 km,
km/l and mpg (see previous specifi-
cations). Press the knob 15-fig. 1to
confirm.
fig. 143
F0L3171g
Page 148 of 164
148
CONNECT NAV+
The MY CAR mode enables to set
different car and CONNECT Nav+
system operating modes and parame-
ters.
Parameters and operating modes
have been grouped in the following
four areas:
– LANGUAGE
– DATE & TIME
– VEHICLE
– CONNECT.
Every above area is then divided in
different sub-areas. Read carefully
through this chapter to learn any fea-
tures offered by CONNECT Nav+
system.
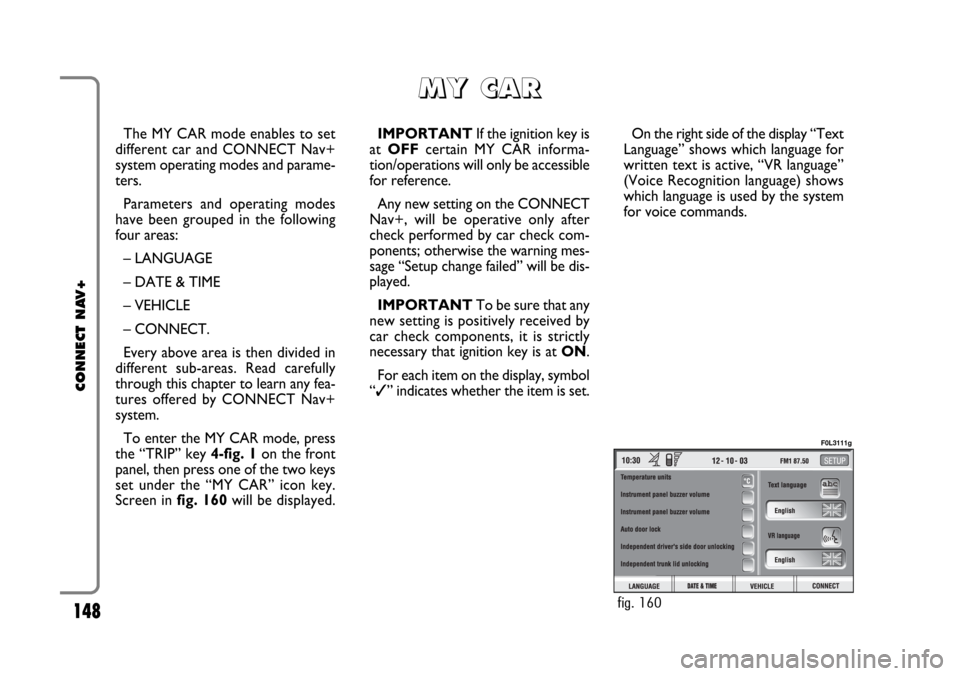
To enter the MY CAR mode, press
the “TRIP” key 4-fig. 1on the front
panel, then press one of the two keys
set under the “MY CAR” icon key.
Screen in fig. 160will be displayed.IMPORTANTIf the ignition key is
at OFFcertain MY CAR informa-
tion/operations will only be accessible
for reference.
Any new setting on the CONNECT
Nav+, will be operative only after
check performed by car check com-
ponents; otherwise the warning mes-
sage “Setup change failed” will be dis-
played.
IMPORTANTTo be sure that any
new setting is positively received by
car check components, it is strictly
necessary that ignition key is at ON.
For each item on the display, symbol
“✓” indicates whether the item is set.On the right side of the display “Text
Language” shows which language for
written text is active, “VR language”
(Voice Recognition language) shows
which language is used by the system
for voice commands.
M M
Y Y
C C
A A
R R
fig. 160
F0L3111g
Page 149 of 164
149
CONNECT NAV+
IMPORTANTSetting (whatever)
language will start the updating pro-
cedure for both the written text and
for voice commands and instructions.
The written text (strings) will be up-
dated immediately upon selecting the
language. To update voice command
and message language the Setup CD
shall be inserted. if the Setup CD is not
inserted when requested, the required
voice command and message language
will not be updated.
To change parameters and operating
modes, press keypad keys 16-fig. 1
under LANGUAGE, DATE & TIME,
VEHICLE or CONNECT.
This operation will display the spe-
cific screen thus allowing the desired
operations.LANGUAGE
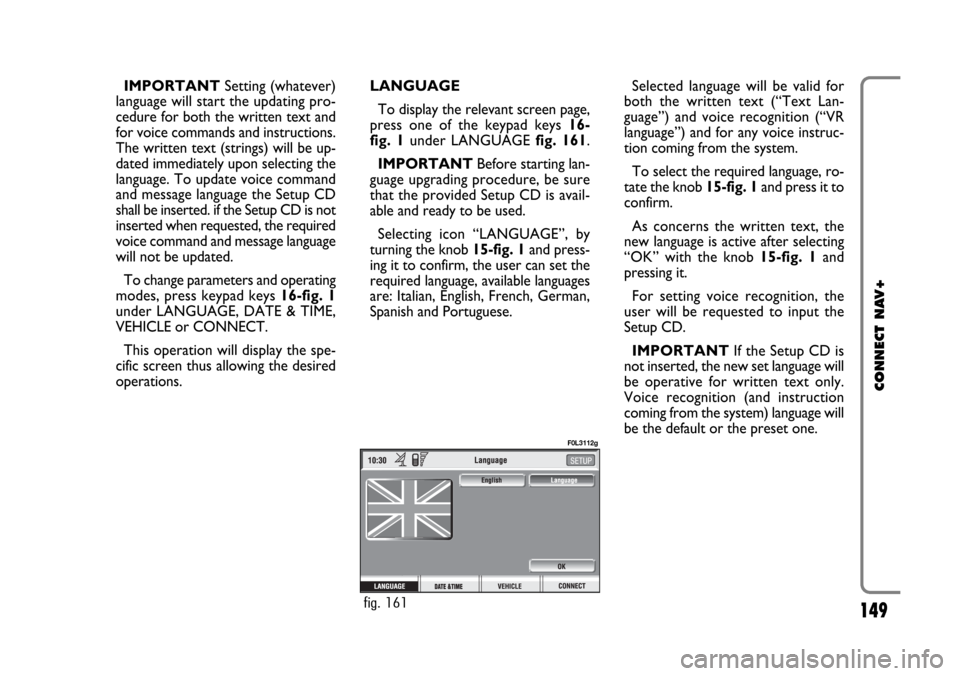
To display the relevant screen page,
press one of the keypad keys 16-
fig. 1under LANGUAGE fig. 161.
IMPORTANTBefore starting lan-
guage upgrading procedure, be sure
that the provided Setup CD is avail-
able and ready to be used.
Selecting icon “LANGUAGE”, by
turning the knob 15-fig. 1and press-
ing it to confirm, the user can set the
required language, available languages
are: Italian, English, French, German,
Spanish and Portuguese.Selected language will be valid for
both the written text (“Text Lan-
guage”) and voice recognition (“VR
language”) and for any voice instruc-
tion coming from the system.
To select the required language, ro-
tate the knob 15-fig. 1and press it to
confirm.
As concerns the written text, the
new language is active after selecting
“OK” with the knob 15-fig. 1and
pressing it.
For setting voice recognition, the
user will be requested to input the
Setup CD.
IMPORTANTIf the Setup CD is
not inserted, the new set language will
be operative for written text only.
Voice recognition (and instruction
coming from the system) language will
be the default or the preset one.
fig. 161
F0L3112g
Page 150 of 164
150
CONNECT NAV+
The display will show the following
string:
“Insert Setup CD to change language
of messages and voice commands.
Press ESC to cancel”.
If the Setup CD is inserted the fol-
lowing message will be permanently
displayed:
“System will be unavailable for a few
seconds and calls in progress will be
terminated. Press ENTER to continue
or ESC to cancel”.
If the knob 15-fig. 1has been
pressed, the following message will be
displayed permanently:
“Message and voice command lan-
guage change in progress. Do not turn
off system. Please wait”.
The end of the procedure is indicat-
ed by the following message:
“Message and voice command lan-
guage change concluded correctly”.If some errors occur during language
updating, the following message will be
displayed:
“Language change failed. Please re-
peat procedure”.
This message asks the user to repeat
the above procedure.
Whenever the system is switched on
turning the ignition key to ON, the
language module is checked and if the
system finds a fault the following mes-
sage is displayed:
“Voice commands and messages not
available. Please change the language”.
This message asks the user to repeat
language change procedure.
The user shall set again the desired
language in the SETUP menu and then
follow the above procedure.DATE & TIME
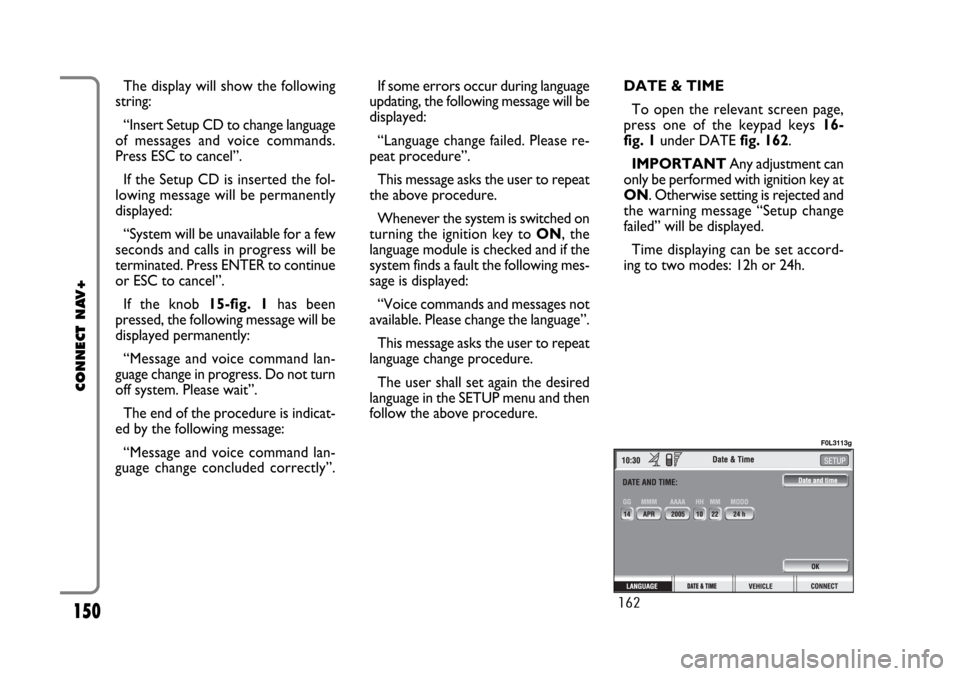
To open the relevant screen page,
press one of the keypad keys 16-
fig. 1under DATE fig. 162.
IMPORTANTAny adjustment can
only be performed with ignition key at
ON. Otherwise setting is rejected and
the warning message “Setup change
failed” will be displayed.
Time displaying can be set accord-
ing to two modes: 12h or 24h.
162
F0L3113g