setup FIAT CROMA 2005 2.G Connect NavPlus Manual
[x] Cancel search | Manufacturer: FIAT, Model Year: 2005, Model line: CROMA, Model: FIAT CROMA 2005 2.GPages: 164, PDF Size: 5.39 MB
Page 3 of 164

3
CONNECT Nav+
ADVICE, CONTROLS AND GENERAL INFORMATION... 5
ADVICE ............................................................................................................ 5
CONTROLS .................................................................................................... 10
Front panel controls ...................................................................................... 10
Steering wheel controls ................................................................................ 14
GENERAL INFORMATION ........................................................................ 15
System power on ............................................................................................ 16
System power off ............................................................................................ 17
Main mode ........................................................................................................ 18
Protection against theft ................................................................................. 19
AUDIO............................................................................................................ 21
SCREEN OPTIONS AND FUNCTIONS ................................................ 21
RADIO MODE ................................................................................................ 22
Traffic information .......................................................................................... 24
Seeking alternative frequencies ................................................................... 26
“Frequency” function ..................................................................................... 26
Autostore function ......................................................................................... 27
Band Scan function ......................................................................................... 28
Preset Scan function ...................................................................................... 28
Radio setup function ...................................................................................... 29
LOC/DX function ........................................................................................... 29
Mono/Stereo function ................................................................................... 29
PTY-Prog. Type function .............................................................................. 30
RDS function .................................................................................................... 31
Regional function ............................................................................................ 31
Audio setup function ..................................................................................... 32
Bass .................................................................................................................... 33
Treble ................................................................................................................ 33
Balance/Fader function .................................................................................. 33
Loudness ........................................................................................................... 33
Equalizer ............................................................................................................ 34
Auto Vol. Cont. function .............................................................................. 35
CD MODE ....................................................................................................... 37
Shuffle function ................................................................................................ 38
Scan function .................................................................................................... 39Compression function ................................................................................... 39
CD setup function .......................................................................................... 39
Audio setup function ..................................................................................... 42
CD-CHANGER MODE ................................................................................ 42
Shuffle function ................................................................................................ 44
Prog function ................................................................................................... 45
Scan function .................................................................................................... 45
Compression function ................................................................................... 45
CDC setup function ....................................................................................... 45
Audio setup function ..................................................................................... 47
MP3 MODE ...................................................................................................... 47
Main screen options and functions.............................................................. 49
Audio setup function ..................................................................................... 50
Define Playlist function .................................................................................. 50
Playlist function ............................................................................................... 50
Compression function ................................................................................... 51
Scan function .................................................................................................... 51
Shuffle function ................................................................................................ 51
Playing the Playlist ........................................................................................... 52
Playing MP3 CD .............................................................................................. 53
Define Playlist function .................................................................................. 54
CELLULAR TELEPHONE WITH VOICE COMMANDS...60
GENERAL INFORMATION ........................................................................ 60
PRELIMINARY OPERATIONS ................................................................... 61
Entering and exiting the telephone mode ................................................ 61
Inserting the telephone card ........................................................................ 63
Entering the PIN code ................................................................................... 64
INCOMING CALLS ...................................................................................... 65
OUTGOING CALLS ..................................................................................... 65
DIALLING A SERVICE NUMBER .............................................................. 66
Frequent Numbers function ........................................................................ 67
Last Numbers Received function ............................................................... 68
Last Numbers Called function .................................................................... 69
Directory function .......................................................................................... 70
WAP function .................................................................................................. 77
Page 16 of 164

16
CONNECT NAV+
SYSTEM POWER ON
The CONNECT Nav+ can be
switched on according to two differ-
ent methods:
automatic switching onwith ig-
nition key to ON;
manual switching on:
– by button 17-fig. 1;Automatic switching on
Turning the ignition key to ON, will
turn the CONNECT Nav+ system on
automatically, thus activating or mak-
ing available all the functions described
in this manual.
Manual switching on
With ignition key to OFF, press but-
ton 17-fig. 1, to switch on the CON-
NECT Nav+ system thus making avail-
able the following modules:
– MAIN
– AUDIO
– NAV
– TEL
– SOS
– SERV (Infomobility bCONNECT
•).IMPORTANTWith manual
switch-on, the TRIP and MY CAR
functional modules can be accessed
with a few restrictions. These limita-
tions are normal when switching the
system on manually by button 17-
fig. 1, since with engine off (key at
OFF), the car data transmission de-
vices are not operating.
Turning the ignition key to ONwill
make all system functions active (See
TRIP computer and SETUP sections).
Page 17 of 164

17
CONNECT NAV+
SYSTEM POWER OFF
The CONNECT Nav+ system can
be switched off according to two dif-
ferent modes:
– deactivation dependenton ig-
nition key
– deactivation independentof ig-
nition key
The power-off mode can be chosen
in the SETUP module (see section
SETUP/ Power OFF).Deactivation dependent
on ignition key
(Key-dependent auto-off)
With this mode active, CONNECT
Nav+ can be switched off by turning
the ignition key to OFFor by press-
ing button 17-fig. 1.
The display will show the message
“PLEASE WAIT WHILE SYSTEM
TURNS OFF”.
IMPORTANTDeactivation with
ignition key to OFFis delayed and will
take place after 20 minutes if the sys-
tem has a destination set or a phone
call is in progress.Deactivation independent
of ignition key
(Key-independ. auto-off)
With this mode active, the radio-nav-
igation system can be switched off by
pressing button 1-fig. 1or automati-
cally after 20 minutes.
Page 22 of 164
22
CONNECT NAV+
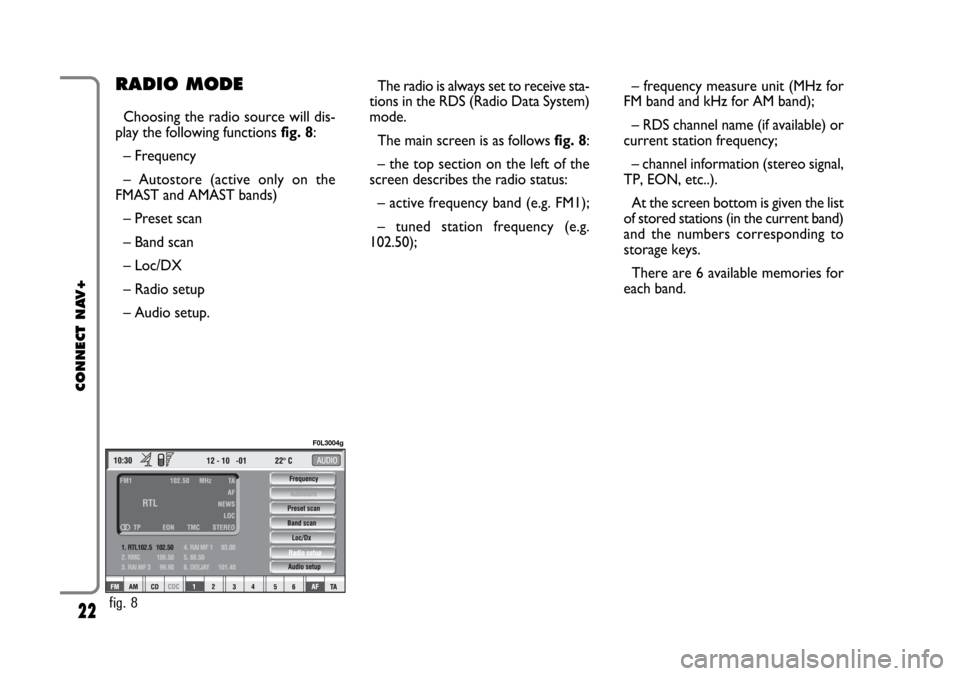
– frequency measure unit (MHz for
FM band and kHz for AM band);
– RDS channel name (if available) or
current station frequency;
– channel information (stereo signal,
TP, EON, etc..).
At the screen bottom is given the list
of stored stations (in the current band)
and the numbers corresponding to
storage keys.
There are 6 available memories for
each band.RADIO MODE
Choosing the radio source will dis-
play the following functions fig. 8:
– Frequency
– Autostore (active only on the
FMAST and AMAST bands)
– Preset scan
– Band scan
– Loc/DX
– Radio setup
– Audio setup.The radio is always set to receive sta-
tions in the RDS (Radio Data System)
mode.
The main screen is as follows fig. 8:
– the top section on the left of the
screen describes the radio status:
– active frequency band (e.g. FM1);
– tuned station frequency (e.g.
102.50);
fig. 8
F0L3004g
Page 29 of 164
29
CONNECT NAV+
LOC/DX function
(tuner sensitivity adjustment)
With this function it is possible to
change the sensitivity of automatic ra-
dio station searching. When low sen-
sitivity “LOC” is set, only stations with
excellent reception are sought; when
high sensitivity “DX” is set, all the sta-
tions are sought. If you are in an area
with a large number of broadcasters
and you want the ones with the
strongest signal, choose low sensitivi-
ty “LOC”.
To choose between low or high
tuner sensitivity, select the “LOC/DX”
function with the knob 15-fig. 1and
then press it repeatedly. The abbre-
viation of the sensitivity chosen will be
shown on the display:
– LOC = low sensitivity;
– DX = high sensitivity.Mono/Stereo function
To pass from “Mono” to “Stereo” or
vice versa, select “Mono/Stereo” by
turning the knob 15-fig. 1and press
it to confirm. This function is only
available on FM band.
When stereo reception is on the dis-
play shows “STEREO”, when it is off
the display shows “MONO”.
When the signal of the station tuned
is weak, to improve the sound quality,
it is advisable to switch to “MONO”. “Radio setup” FUNCTION
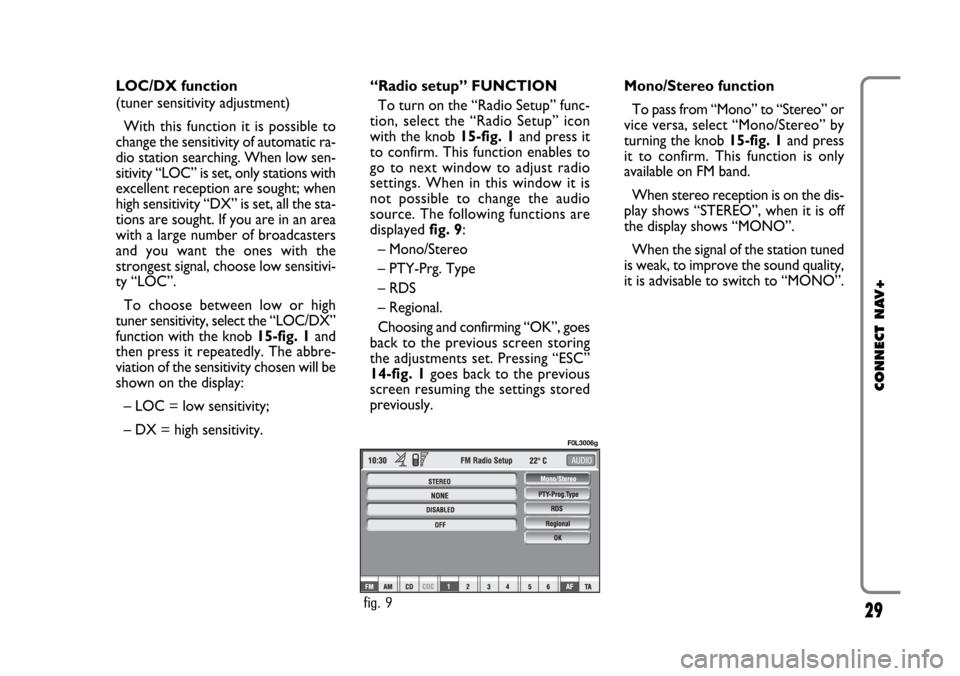
To turn on the “Radio Setup” func-
tion, select the “Radio Setup” icon
with the knob 15-fig. 1and press it
to confirm. This function enables to
go to next window to adjust radio
settings. When in this window it is
not possible to change the audio
source. The following functions are
displayed fig. 9:
– Mono/Stereo
– PTY-Prg. Type
– RDS
– Regional.
Choosing and confirming “OK”, goes
back to the previous screen storing
the adjustments set. Pressing “ESC”
14-fig. 1goes back to the previous
screen resuming the settings stored
previously.
fig. 9
F0L3006g
Page 32 of 164
32
CONNECT NAV+
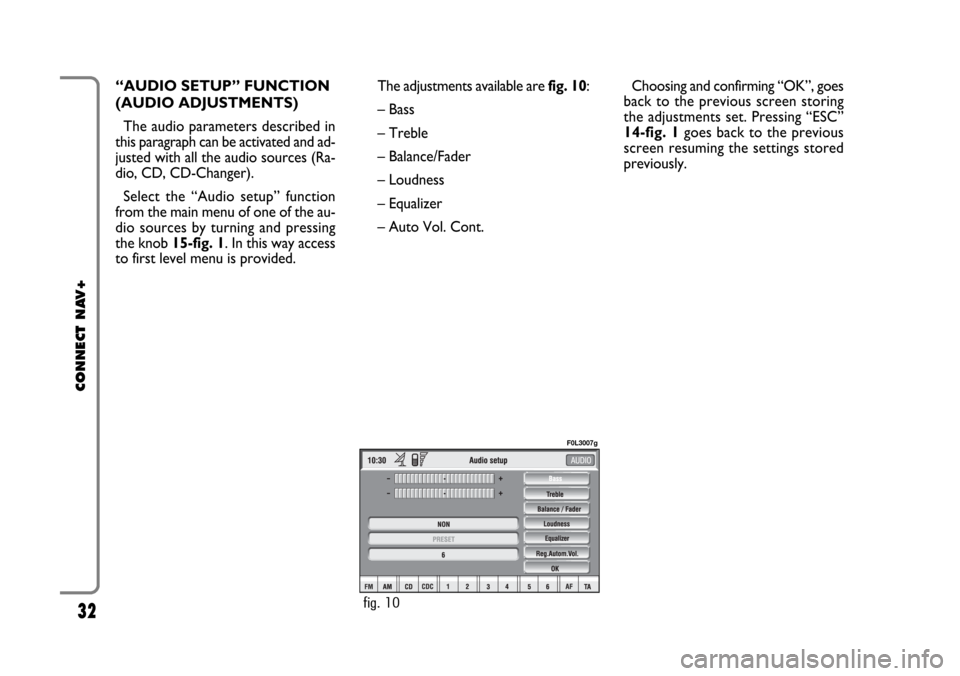
The adjustments available are fig. 10:
– Bass
– Treble
– Balance/Fader
– Loudness
– Equalizer
– Auto Vol. Cont.Choosing and confirming “OK”, goes
back to the previous screen storing
the adjustments set. Pressing “ESC”
14-fig. 1goes back to the previous
screen resuming the settings stored
previously. “AUDIO SETUP” FUNCTION
(AUDIO ADJUSTMENTS)
The audio parameters described in
this paragraph can be activated and ad-
justed with all the audio sources (Ra-
dio, CD, CD-Changer).
Select the “Audio setup” function
from the main menu of one of the au-
dio sources by turning and pressing
the knob 15-fig. 1. In this way access
to first level menu is provided.
fig. 10
F0L3007g
Page 37 of 164
CD MODE
IMPORTANTNever use 8 cm au-
dio or MP3 CDs, even with the spe-
cial adapter, since this format damages
the system.
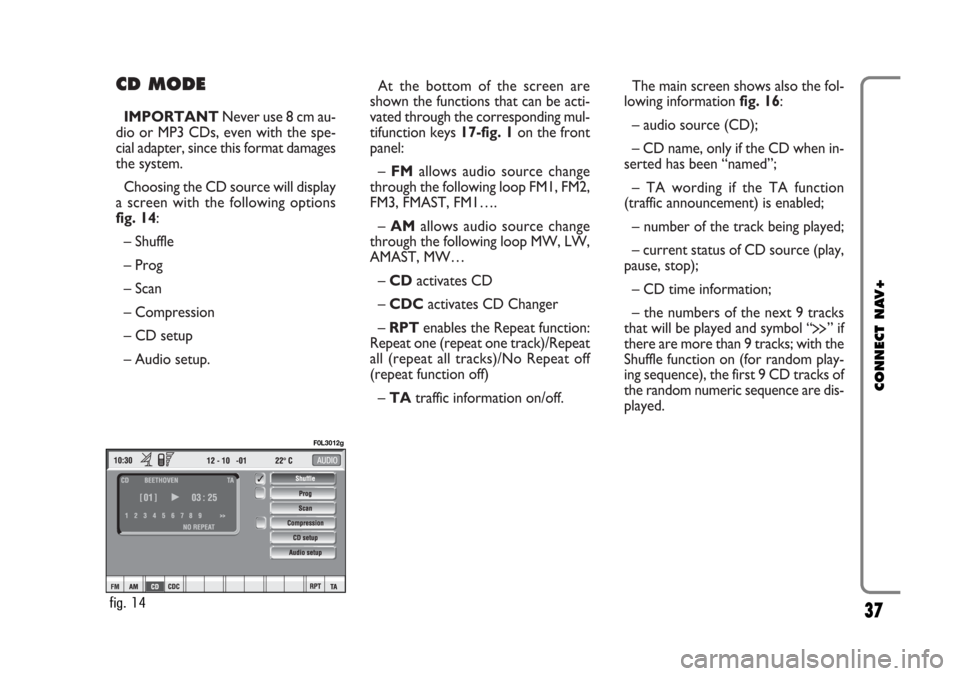
Choosing the CD source will display
a screen with the following options
fig. 14:
– Shuffle
– Prog
– Scan
– Compression
– CD setup
– Audio setup.At the bottom of the screen are
shown the functions that can be acti-
vated through the corresponding mul-
tifunction keys 17-fig. 1on the front
panel:
– FMallows audio source change
through the following loop FM1, FM2,
FM3, FMAST, FM1….
– AMallows audio source change
through the following loop MW, LW,
AMAST, MW…
– CDactivates CD
– CDCactivates CD Changer
– RPTenables the Repeat function:
Repeat one (repeat one track)/Repeat
all (repeat all tracks)/No Repeat off
(repeat function off)
– TAtraffic information on/off.The main screen shows also the fol-
lowing information fig. 16:
– audio source (CD);
– CD name, only if the CD when in-
serted has been “named”;
– TA wording if the TA function
(traffic announcement) is enabled;
– number of the track being played;
– current status of CD source (play,
pause, stop);
– CD time information;
– the numbers of the next 9 tracks
that will be played and symbol “
§” if
there are more than 9 tracks; with the
Shuffle function on (for random play-
ing sequence), the first 9 CD tracks of
the random numeric sequence are dis-
played.
37
CONNECT NAV+
fig. 14
F0L3012g
Page 39 of 164
39
CONNECT NAV+
This function enables or disables
playback of the previously user pro-
grammed track list (see “CD setup”
functions).
“Prog” icon key is disabled if no pro-
grammed list has been entered.
When list has been programmed and
programmed list playing has been cho-
sen, symbol “✓” is shown near the
corresponding icon.
“Scan” FUNCTION
(BRIEF PLAYBACK)
The “Scan” function is turned on/off
selecting the relevant icon key with
the knob 15-fig. 1and pressing it.
When this function is on, all the CD
tracks are played for about 10 seconds
in the actual sequence on the CD.
Press the knob 15-fig. 1again to
turn the function off. “Compression” FUNCTION
This function activates dynamic
sound compression when playing a
CD in the car.
To turn this function on/off, select
the “Compression” icon with the
knob 15-fig. 1and press it.
When the “Compression” function
is on, symbol “✓” is shown near the
corresponding icon.
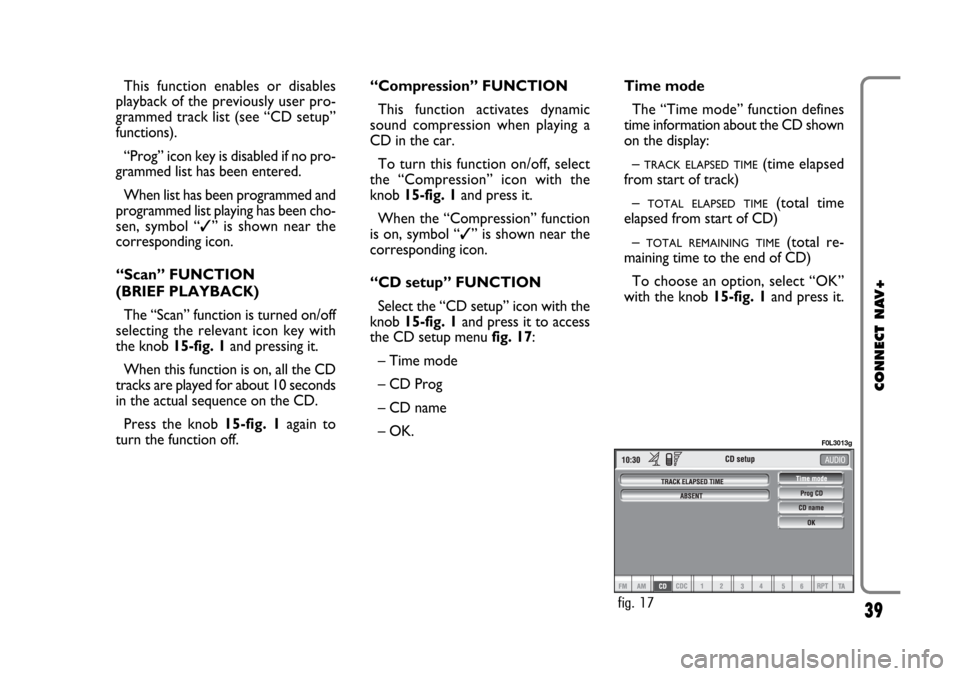
“CD setup” FUNCTION
Select the “CD setup” icon with the
knob 15-fig. 1and press it to access
the CD setup menu fig. 17:
– Time mode
– CD Prog
– CD name
– OK.Time mode
The “Time mode” function defines
time information about the CD shown
on the display:
–
TRACK ELAPSED TIME(time elapsed
from start of track)
–
TOTAL ELAPSED TIME(total time
elapsed from start of CD)
–
TOTAL REMAINING TIME(total re-
maining time to the end of CD)
To choose an option, select “OK”
with the knob 15-fig. 1and press it.
fig. 17
F0L3013g
Page 42 of 164
42
CONNECT NAV+
Delete
“Delete” icon enables to clear the
CD name.
To turn the function on, select
“Delete” icon rotating the knob 15-
fig. 1and pressing it.
Delete name
“Delete name” icon enables to delete
a previously stored sequence name.
To turn the function on, select
“Delete name” icon rotating the knob
15-fig. 1and pressing it.
OK
To confirm your choices, select the
“OK” icon with the knob 15-fig. 1
and press it; the name and the asso-
ciated sequence are stored.IMPORTANTIn case of buffer full,
a warning message “WARNING, CD
DIRECTORY FULL” will be displayed
to point out the problem. The user
shall have to delete some previously
stored CD names.
“AUDIO SETUP” FUNCTION
(AUDIO ADJUSTMENTS)
To access the audio setup menu
while listening to a CD, select the “Au-
dio setup” icon with the knob 15-
fig. 1and press it to confirm.
For the description of the different
functions available in the menu, see the
corresponding paragraph of the “RA-
DIO MODE” chapter.CD-CHANGER
MODE (if installed)
IMPORTANTNever use 8 cm au-
dio or MP3 CDs, even with the spe-
cial adapter, since this format damages
the system.
The CD-changer cannot play CDs in
the MP3 format.
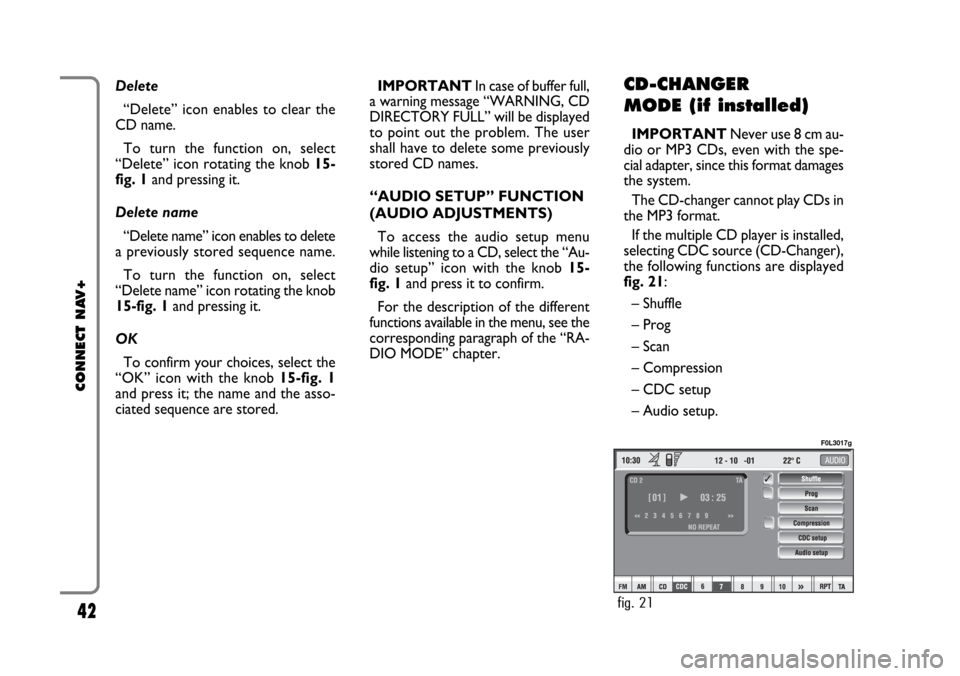
If the multiple CD player is installed,
selecting CDC source (CD-Changer),
the following functions are displayed
fig. 21:
– Shuffle
– Prog
– Scan
– Compression
– CDC setup
– Audio setup.
fig. 21
F0L3017g
Page 45 of 164
45
CONNECT NAV+
“Prog” FUNCTION
To turn the “Prog” function on/off, ro-
tate the knob 15-fig. 1 and then press
it after selecting the function.
This function enables or disables
playback of user’s previously pro-
grammed track list (see “CDC setup”
functions).
“Prog” icon key is disabled if no pro-
grammed list has been entered (see
“CDC SETUP" functions).
When list has been programmed and
programmed list playing has been cho-
sen, symbol “✓” is shown near the
corresponding icon.“Scan” FUNCTION
(BRIEF PLAYBACK)
The “Scan” function is turned on/off
selecting the relevant icon key with
the knob 15-fig. 1and pressing it.
When this function is on, all the CD
tracks are played for about 10 seconds
in the actual sequence on the CD.
To turn the function off, select the
“Scan” icon key and press the knob
15-fig. 1again
“Compression” FUNCTION
This function activates dynamic
sound compression when playing a
CD in the car.
To turn this function on/off, select
the “Compression” icon key with the
knob 15-fig. 1and press it.
When the “Compression” function
is on, symbol “✓” is shown near the
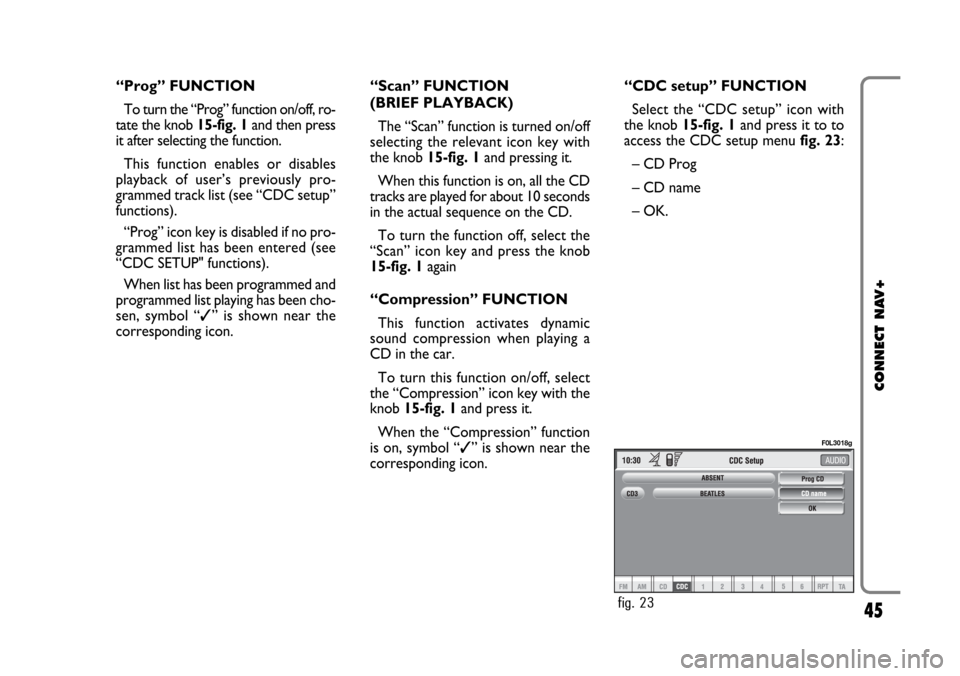
corresponding icon.“CDC setup” FUNCTION
Select the “CDC setup” icon with
the knob 15-fig. 1and press it to to
access the CDC setup menufig. 23:
– CD Prog
– CD name
– OK.
fig. 23
F0L3018g