key FIAT DOBLO 2007 1.G Owner's Manual
[x] Cancel search | Manufacturer: FIAT, Model Year: 2007, Model line: DOBLO, Model: FIAT DOBLO 2007 1.GPages: 218, PDF Size: 3.19 MB
Page 46 of 218
HEATED REAR
WINDOW (amber)
The warning light turns
on when switching the heated rear
window on.
45GETTING TO KNOW YOUR VEHICLE
The presence of water in
the fuel circuit may cause
serious damage to the en-
tire injection system and cause ir-
regular engine operation. If the
warning light
cor èturns on
(on certain versions together
with the message on the display)
contact Fiat Dealership as soon
as possible to have the system re-
lieved. If the above indications
come on immediately after refu-
elling, water has probably been
poured into the tank: turn the en-
gine off immediately and contact
Fiat Dealership.
¢Y(
EXTERNAL LIGHT
FAILURE (amber)
The warning light turns on
when one of the following
lights is failing:
– sidelights
– brake lights (third brake light ex-
cluded)
– rear fog guards
– direction indicators
– number plate lights.
W
VEHICLE
PROTECTION
SYSTEM
FAILURE -
FIAT CODE
(amber)
Turning the key to MARthe warn-
ing light shall flash only once and then
go off.
If with the ignition key at MAR, the
warning light stays on, this indicates a
possible failure (see “Fiat Code sys-
tem” in section “Dashboard and con-
trols”).
IMPORTANTThe turning on at
the same time of the warning lights
U
and Yindicates a failure of the Fiat
CODE system.
If with the engine running the warn-
ing light
Uflashes, this means that
the vehicle is not protected by the en-
gine inhibitor device (see “Fiat Code
system” in section “Dashboard and
controls”).
Contact Fiat Dealership to have all
the key memorised.
Page 57 of 218
56GETTING TO KNOW YOUR VEHICLE
A
B
fig. 67
F0A0178b
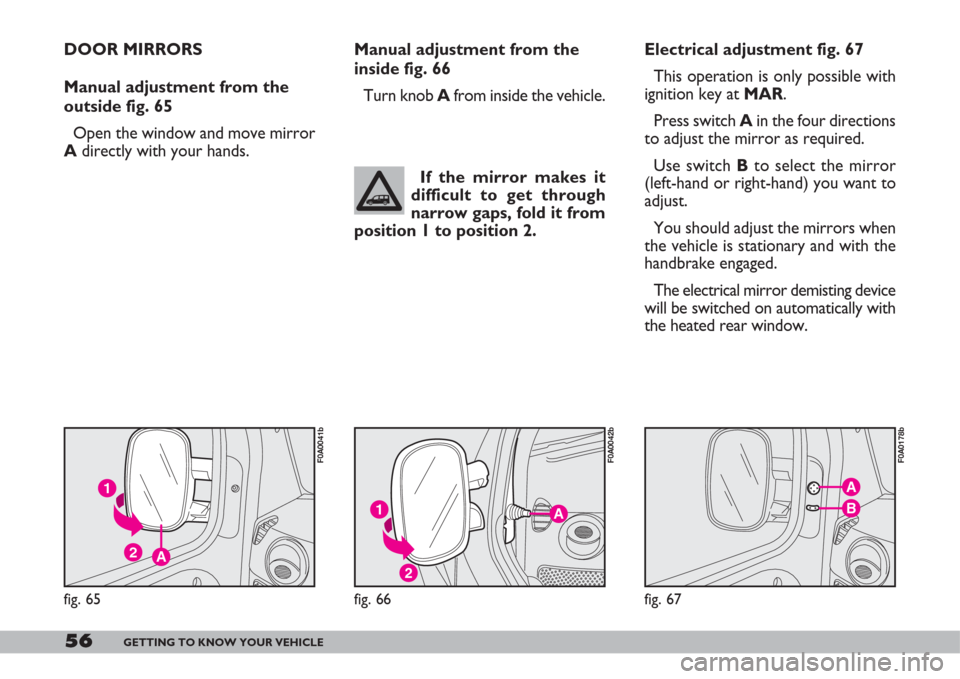
Manual adjustment from the
inside fig. 66
Turn knob Afrom inside the vehicle.
A
2
1
fig. 66
F0A0042b
If the mirror makes it
difficult to get through
narrow gaps, fold it from
position 1 to position 2.
Electrical adjustment fig. 67
This operation is only possible with
ignition key at MAR.
Press switch Ain the four directions
to adjust the mirror as required.
Use switch Bto select the mirror
(left-hand or right-hand) you want to
adjust.
You should adjust the mirrors when
the vehicle is stationary and with the
handbrake engaged.
The electrical mirror demisting device
will be switched on automatically with
the heated rear window. DOOR MIRRORS
Manual adjustment from the
outside fig. 65
Open the window and move mirror
A directly with your hands.
A
1
2
fig. 65
F0A0041b
Page 64 of 218
63GETTING TO KNOW YOUR VEHICLE
LOOKING AFTER
THE SYSTEM
During the winter, the climate con-
trol system must be turned on at least
once a month for about ten minutes.
Have the system efficiency checked
before the summer at a Fiat Deal-
ership.STEERING COLUMN
STALKS
LEFT-HAND STALK
The left-hand stalk operates most of
the external lights.
The external lights can only be
switched on when the ignition key is
at MAR. The instrument panel and
the heating/ventilation (or climate con-
trol system) controls and the cigar
lighter ring will come on with the ex-
ternal lights.
The system is filled with
R134a refrigerant which
will not pollute the envi-
ronment in the event of leakage.
Under no circumstances should
R12 fluid be used as it is incom-
patible with the system compo-
nents and contains CFC.
fig. 79
F0A0048b
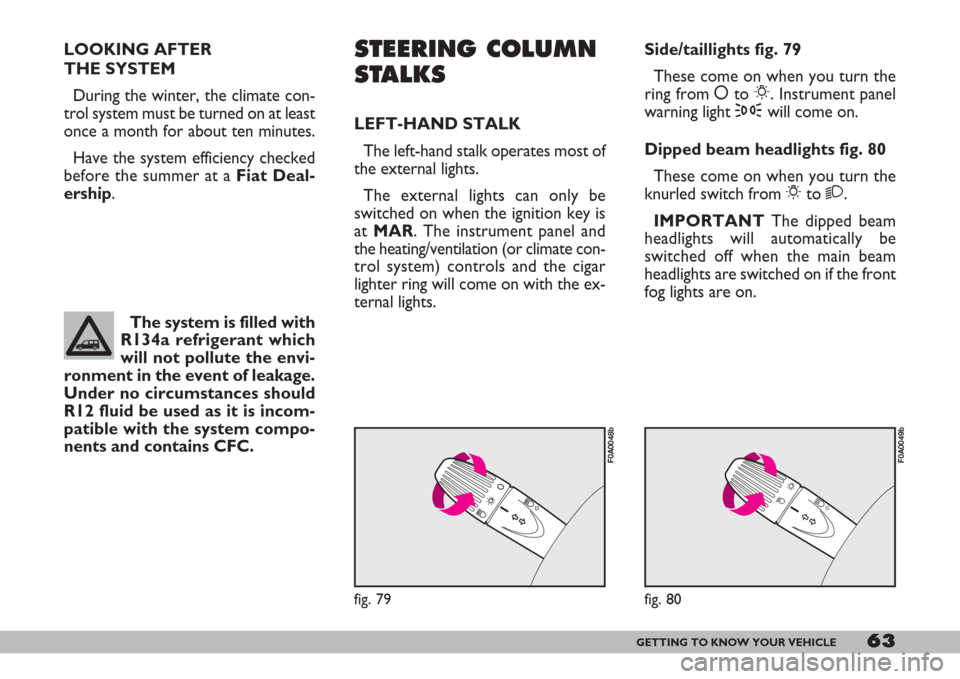
Side/taillights fig. 79
These come on when you turn the
ring from åto 6. Instrument panel
warning light 3will come on.
Dipped beam headlights fig. 80
These come on when you turn the
knurled switch from 6to 2.
IMPORTANTThe dipped beam
headlights will automatically be
switched off when the main beam
headlights are switched on if the front
fog lights are on.
62
y1Δ
fig. 80
F0A0049b
Page 65 of 218
64GETTING TO KNOW YOUR VEHICLE
The direction indicators will auto-
matically be switched off when the ve-
hicle is straightened out.
If you wish to signal a lane change
where only a slight movement of the
steering wheel is required, move the
stalk up or down without pushing it far
enough to make it click. The stalk will
return to the neutral position as soon
as it is released.
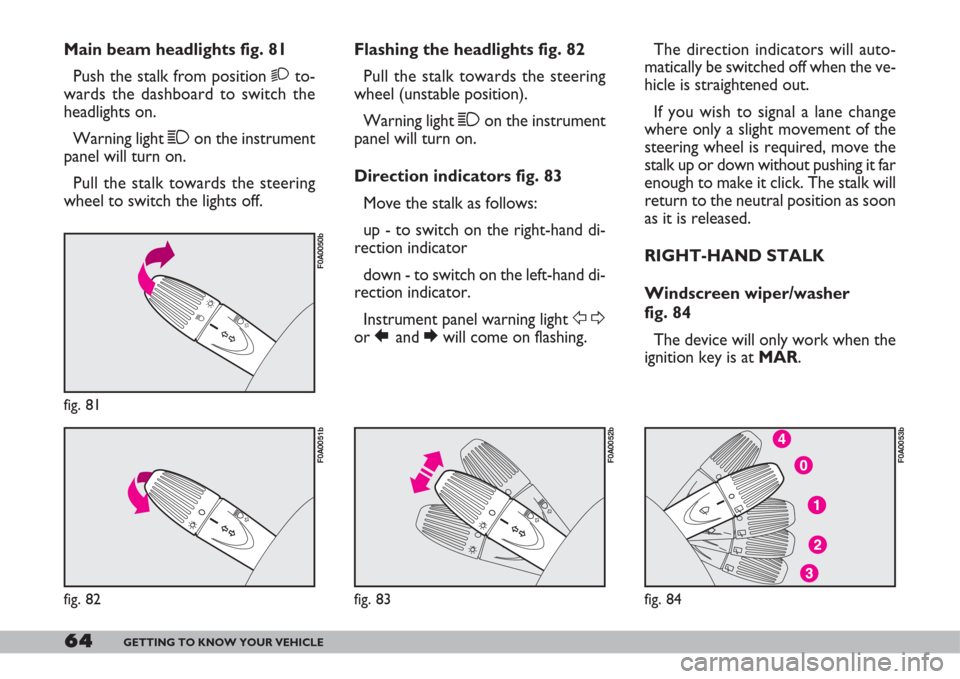
RIGHT-HAND STALK
Windscreen wiper/washer
fig. 84
The device will only work when the
ignition key is at MAR.
fig. 84
F0A0053b
Main beam headlights fig. 81
Push the stalk from position 2to-
wards the dashboard to switch the
headlights on.
Warning light 1on the instrument
panel will turn on.
Pull the stalk towards the steering
wheel to switch the lights off.Flashing the headlights fig. 82
Pull the stalk towards the steering
wheel (unstable position).
Warning light 1on the instrument
panel will turn on.
Direction indicators fig. 83
Move the stalk as follows:
up - to switch on the right-hand di-
rection indicator
down - to switch on the left-hand di-
rection indicator.
Instrument panel warning light FD
or Rand Ewill come on flashing.
62
y1Δ
fig. 81
F0A0050b
fig. 82
F0A0051b
fig. 83
F0A0052b
Page 66 of 218
65GETTING TO KNOW YOUR VEHICLE
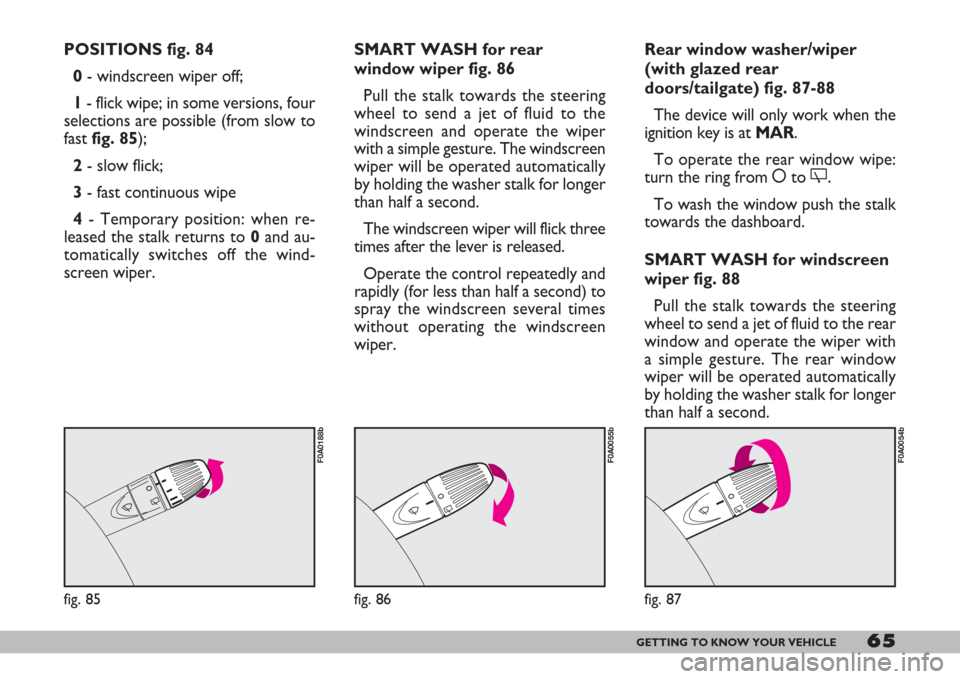
POSITIONS fig. 84
0- windscreen wiper off;
1- flick wipe; in some versions, four
selections are possible (from slow to
fast fig. 85);
2- slow flick;
3- fast continuous wipe
4- Temporary position: when re-
leased the stalk returns to 0and au-
tomatically switches off the wind-
screen wiper.SMART WASH for rear
window wiper fig. 86
Pull the stalk towards the steering
wheel to send a jet of fluid to the
windscreen and operate the wiper
with a simple gesture. The windscreen
wiper will be operated automatically
by holding the washer stalk for longer
than half a second.
The windscreen wiper will flick three
times after the lever is released.
Operate the control repeatedly and
rapidly (for less than half a second) to
spray the windscreen several times
without operating the windscreen
wiper.
fig. 85
F0A0188b
fig. 86
F0A0055b
Rear window washer/wiper
(with glazed rear
doors/tailgate) fig. 87-88
The device will only work when the
ignition key is at MAR.
To operate the rear window wipe:
turn the ring from åto '.
To wash the window push the stalk
towards the dashboard.
SMART WASH for windscreen
wiper fig. 88
Pull the stalk towards the steering
wheel to send a jet of fluid to the rear
window and operate the wiper with
a simple gesture. The rear window
wiper will be operated automatically
by holding the washer stalk for longer
than half a second.
fig. 87
F0A0054b
Page 67 of 218
66GETTING TO KNOW YOUR VEHICLE
The rear window wiper will flick
three times after the lever is released.
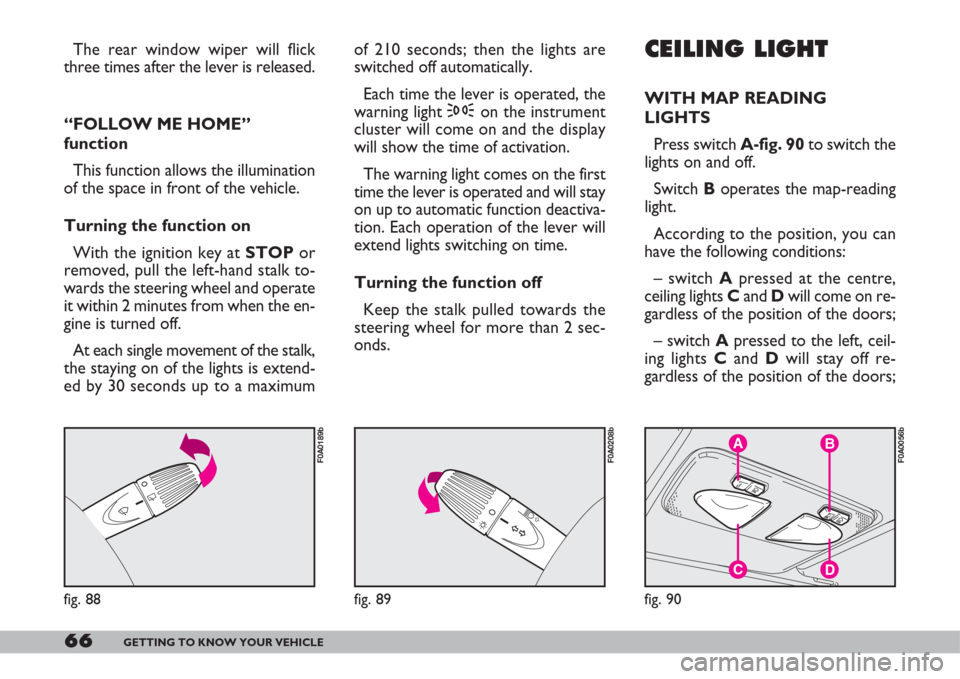
“FOLLOW ME HOME”
function
This function allows the illumination
of the space in front of the vehicle.
Turning the function on
With the ignition key at STOP or
removed, pull the left-hand stalk to-
wards the steering wheel and operate
it within 2 minutes from when the en-
gine is turned off.
At each single movement of the stalk,
the staying on of the lights is extend-
ed by 30 seconds up to a maximumCEILING LIGHT
WITH MAP READING
LIGHTS
Press switch A-fig. 90to switch the
lights on and off.
Switch Boperates the map-reading
light.
According to the position, you can
have the following conditions:
– switch Apressed at the centre,
ceiling lights Cand Dwill come on re-
gardless of the position of the doors;
– switch Apressed to the left, ceil-
ing lights Cand Dwill stay off re-
gardless of the position of the doors;
',
fig. 88
F0A0189b
C
B
D
A
fig. 90
F0A0056b
6y1Δ
fig. 89
F0A0208b
of 210 seconds; then the lights are
switched off automatically.
Each time the lever is operated, the
warning light 3on the instrument
cluster will come on and the display
will show the time of activation.
The warning light comes on the first
time the lever is operated and will stay
on up to automatic function deactiva-
tion. Each operation of the lever will
extend lights switching on time.
Turning the function off
Keep the stalk pulled towards the
steering wheel for more than 2 sec-
onds.
Page 68 of 218
67GETTING TO KNOW YOUR VEHICLE
– switch Apressed to the right, ceil-
ing lights Cand Dwill stay on in what-
ever condition.
When the ceiling light is off, switch
Bturns on the following lights:
– map-reading light Cif pressed to
the left;
– map-reading light Dif pressed to
the right.
IMPORTANTMake sure that both
switches are in central position before
getting out of the vehicle. This is en-
sure that the ceiling lights go out when
the doors are closed preventing the
battery from running down.
Timing for getting into the
vehicle
The ceiling lights will come on as fol-
lows:
– for 15 seconds when the front
doors are unlocked;– for 7 seconds when a door is
closed (within the three minutes).
Timing will be stopped when the ig-
nition key is turned to MAR.
Timing for getting out of the
vehicle
The ceiling lights will come on as fol-
lows when the key is removed from
the ignition switch:
– for 3 minutes within two minutes
after stopping the engine;
– for 7 seconds when a door is
closed (within the three minutes).
Timing will be stopped when the
doors are locked.WITH TOGGLE LENS
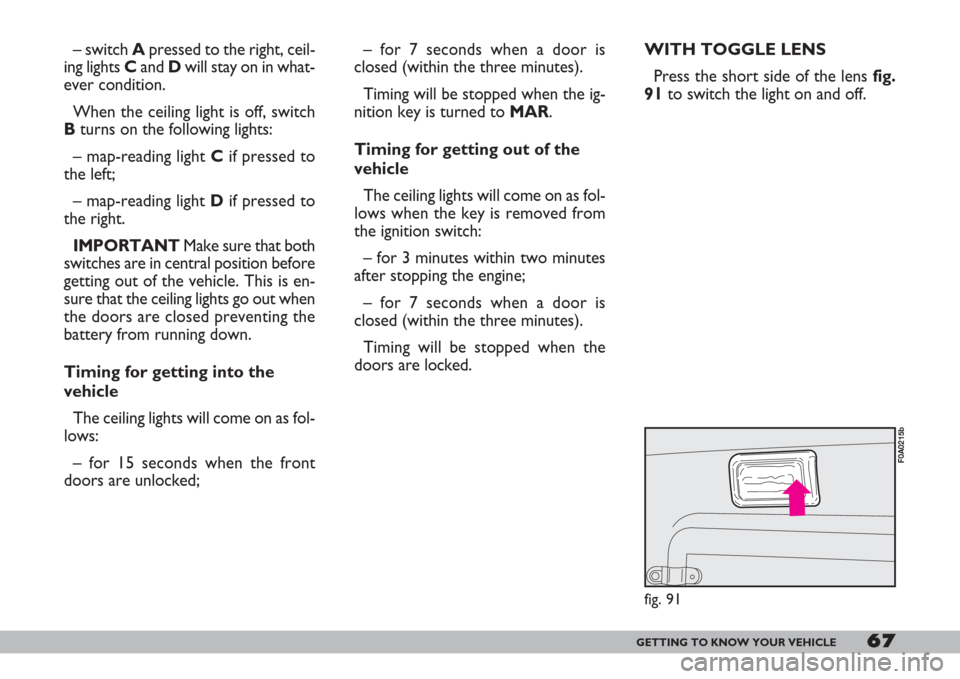
Press the short side of the lens fig.
91to switch the light on and off.
fig. 91
F0A0215b
Page 69 of 218
68GETTING TO KNOW YOUR VEHICLE
CONTROLS
HAZARD LIGHTS fig. 92
They turn on by pressing switch A,
regardless of the position of the igni-
tion key.
When the lights are on, the switch
and the instrument panel warning light
FDor Rand Ewill flash.
Press the switch again to turn the
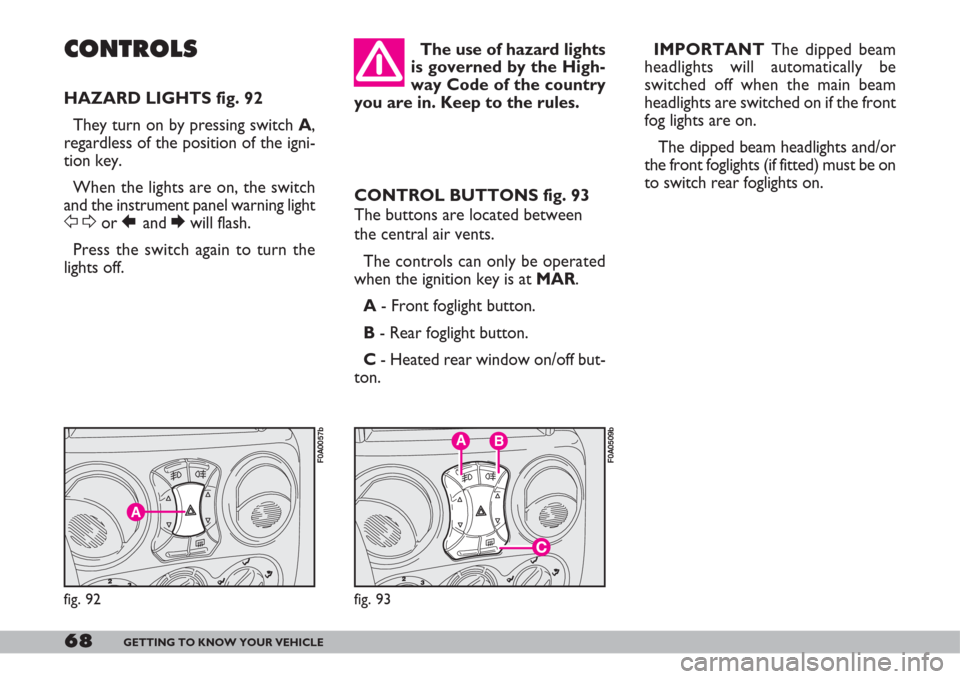
lights off.CONTROL BUTTONS fig. 93
The buttons are located between
the central air vents.
The controls can only be operated
when the ignition key is at MAR.
A- Front foglight button.
B- Rear foglight button.
C- Heated rear window on/off but-
ton. IMPORTANTThe dipped beam
headlights will automatically be
switched off when the main beam
headlights are switched on if the front
fog lights are on.
The dipped beam headlights and/or
the front foglights (if fitted) must be on
to switch rear foglights on.
A
fig. 92
F0A0057b
The use of hazard lights
is governed by the High-
way Code of the country
you are in. Keep to the rules.
BA
fig. 93
F0A0509b
Page 70 of 218
69GETTING TO KNOW YOUR VEHICLE
The rear fog lights are switched off
either by pressing C or switching on
the main beam headlights or turning
the ignition key to STOP. You will
need to switch the rear foglights back
on, if required, when the dipped beam
headlights and/or front foglights are
switched on or when the engine is
started again.
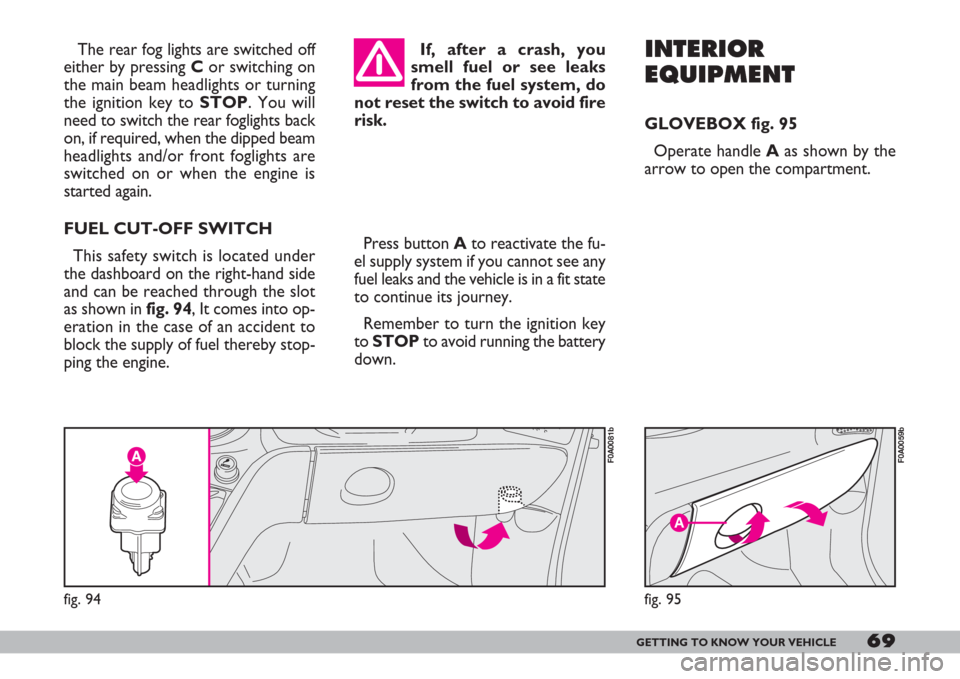
FUEL CUT-OFF SWITCH
This safety switch is located under
the dashboard on the right-hand side
and can be reached through the slot
as shown in fig. 94, It comes into op-
eration in the case of an accident to
block the supply of fuel thereby stop-
ping the engine.Press button Ato reactivate the fu-
el supply system if you cannot see any
fuel leaks and the vehicle is in a fit state
to continue its journey.
Remember to turn the ignition key
to STOPto avoid running the battery
down.INTERIOR
EQUIPMENT
GLOVEBOX fig. 95
Operate handle Aas shown by the
arrow to open the compartment.
fig. 94
F0A0081b
If, after a crash, you
smell fuel or see leaks
from the fuel system, do
not reset the switch to avoid fire
risk.
A
fig. 95
F0A0059b
Page 71 of 218
70GETTING TO KNOW YOUR VEHICLE
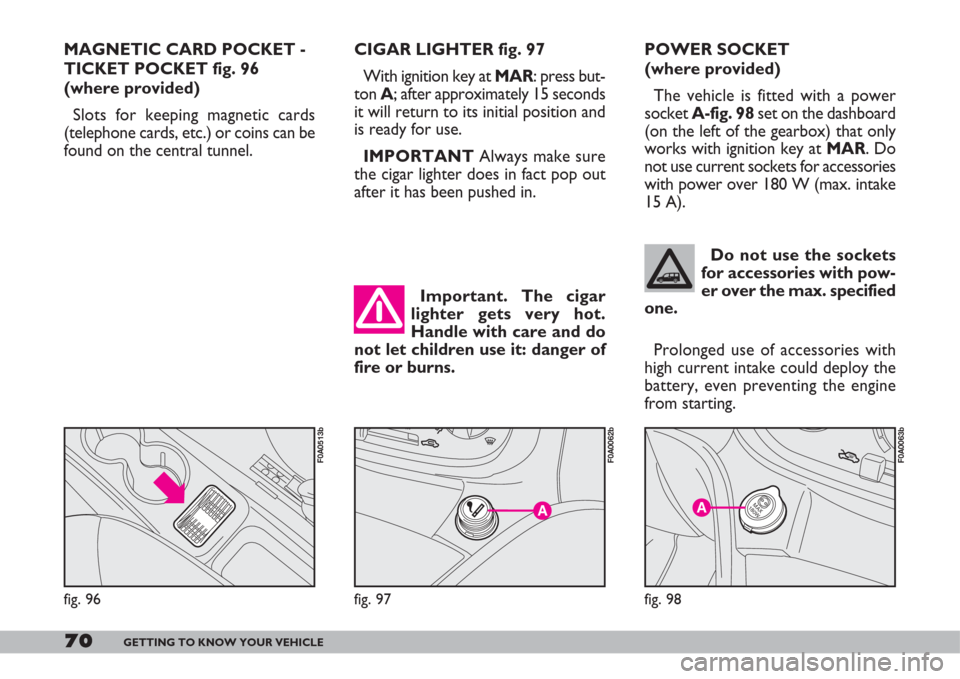
MAGNETIC CARD POCKET -
TICKET POCKET fig. 96
(where provided)
Slots for keeping magnetic cards
(telephone cards, etc.) or coins can be
found on the central tunnel.CIGAR LIGHTER fig. 97
With ignition key at MAR: press but-
ton A; after approximately 15 seconds
it will return to its initial position and
is ready for use.
IMPORTANTAlways make sure
the cigar lighter does in fact pop out
after it has been pushed in. POWER SOCKET
(where provided)
The vehicle is fitted with a power
socket A-fig. 98set on the dashboard
(on the left of the gearbox) that only
works with ignition key at MAR. Do
not use current sockets for accessories
with power over 180 W (max. intake
15 A).
fig. 96
F0A0513b
A
fig. 97
F0A0062b
Important. The cigar
lighter gets very hot.
Handle with care and do
not let children use it: danger of
fire or burns.
Do not use the sockets
for accessories with pow-
er over the max. specified
one.
U-
MAX
180WA
fig. 98
F0A0063b
Prolonged use of accessories with
high current intake could deploy the
battery, even preventing the engine
from starting.