fuse FIAT DUCATO 2006 Owner handbook (in English)
[x] Cancel search | Manufacturer: FIAT, Model Year: 2006, Model line: DUCATO, Model: FIAT DUCATO 2006Pages: 238, PDF Size: 3.29 MB
Page 65 of 238
64
SAFETY
DEVICES
CORRECT USE
OF THE
VEHICLE
WARNING
LIGHTS AND
MESSAGES
IN AN
EMERGENCY
VEHICLE
MAINTENANCE
TECHNICAL
SPECIFICATIONS
INDEX
DASHBOARD
AND CONTROLS
TO INCREASE THE MEMORISED
SPEED
The speed memorised can be increased in
two ways:
❒pressing the accelerator and then
memorising the new speed reached;
or
❒moving the stalk upwards (+).
Each operation of the stalk will corre-
spond to a slight increase in speed (about
1 km/h), while keeping the stalk upwards
will correspond to a continuous speed in-
crease.
TO REDUCE MEMORISED
SPEED
The speed memorised can be increased in
two ways:
❒disengaging the device and then mem-
orising the new speed;
or
❒moving the stalk downwards (–) until
reaching the new speed which will be
memorised automatically.
Each operation of the stalk will corre-
spond to a slight reduction in speed (about
1 km/h), while keeping the stalk down-
wards will correspond to a continuous
speed reduction.DEVICE DISENGAGEMENT
The device can be disengaged in the fol-
lowing ways:
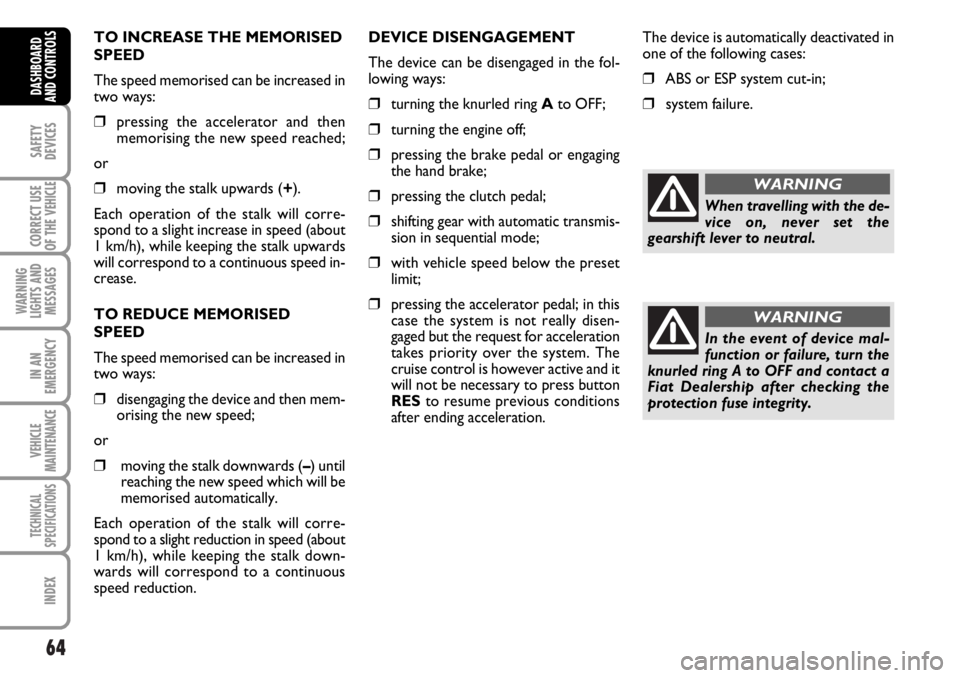
❒turning the knurled ring Ato OFF;
❒turning the engine off;
❒pressing the brake pedal or engaging
the hand brake;
❒pressing the clutch pedal;
❒shifting gear with automatic transmis-
sion in sequential mode;
❒with vehicle speed below the preset
limit;
❒pressing the accelerator pedal; in this
case the system is not really disen-
gaged but the request for acceleration
takes priority over the system. The
cruise control is however active and it
will not be necessary to press button
RES to resume previous conditions
after ending acceleration.The device is automatically deactivated in
one of the following cases:
❒ABS or ESP system cut-in;
❒system failure.
When travelling with the de-
vice on, never set the
gearshift lever to neutral.
In the event of device mal-
function or failure, turn the
knurled ring A to OFF and contact a
Fiat Dealership after checking the
protection fuse integrity.
WARNING
WARNING
Page 70 of 238
69
SAFETY
DEVICES
CORRECT USE
OF THE
VEHICLE
WARNING
LIGHTS AND
MESSAGES
IN AN
EMERGENCY
VEHICLE
MAINTENANCE
TECHNICAL
SPECIFICATIONS
INDEX
DASHBOARD
AND CONTROLS
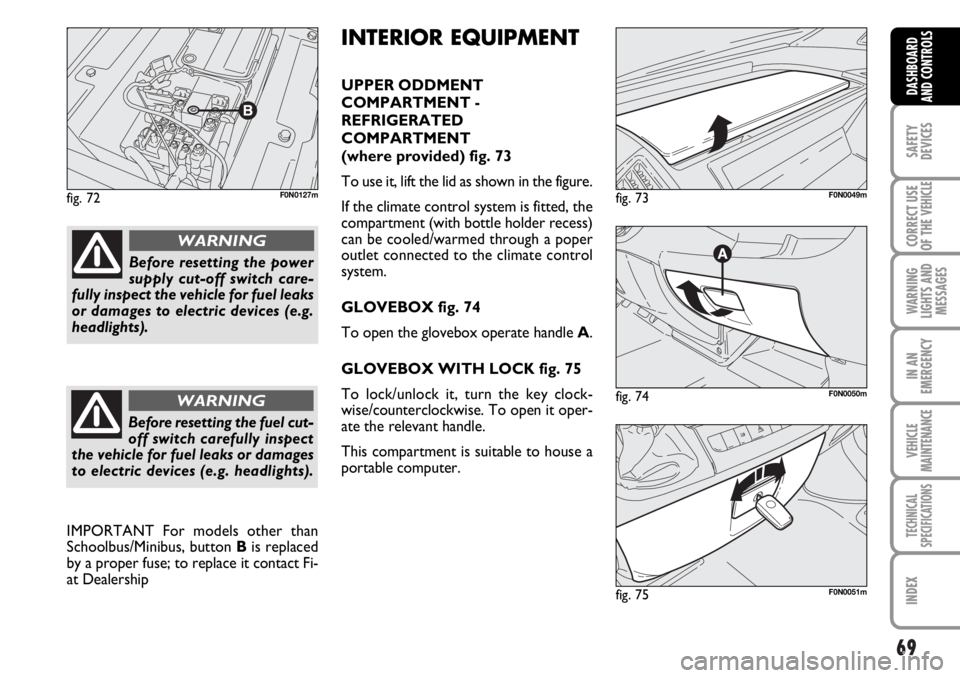
fig. 72F0N0127m
fig. 74F0N0050m
fig. 73F0N0049m
fig. 75F0N0051m
INTERIOR EQUIPMENT
UPPER ODDMENT
COMPARTMENT -
REFRIGERATED
COMPARTMENT
(where provided) fig. 73
To use it, lift the lid as shown in the figure.
If the climate control system is fitted, the
compartment (with bottle holder recess)
can be cooled/warmed through a poper
outlet connected to the climate control
system.
GLOVEBOX fig. 74
To open the glovebox operate handle A.
GLOVEBOX WITH LOCK fig. 75
To lock/unlock it, turn the key clock-
wise/counterclockwise. To open it oper-
ate the relevant handle.
This compartment is suitable to house a
portable computer.
Before resetting the power
supply cut-off switch care-
fully inspect the vehicle for fuel leaks
or damages to electric devices (e.g.
headlights).
WARNING
Before resetting the fuel cut-
off switch carefully inspect
the vehicle for fuel leaks or damages
to electric devices (e.g. headlights).
WARNING
IMPORTANT For models other than
Schoolbus/Minibus, button Bis replaced
by a proper fuse; to replace it contact Fi-
at Dealership
Page 74 of 238
73
SAFETY
DEVICES
CORRECT USE
OF THE
VEHICLE
WARNING
LIGHTS AND
MESSAGES
IN AN
EMERGENCY
VEHICLE
MAINTENANCE
TECHNICAL
SPECIFICATIONS
INDEX
DASHBOARD
AND CONTROLS
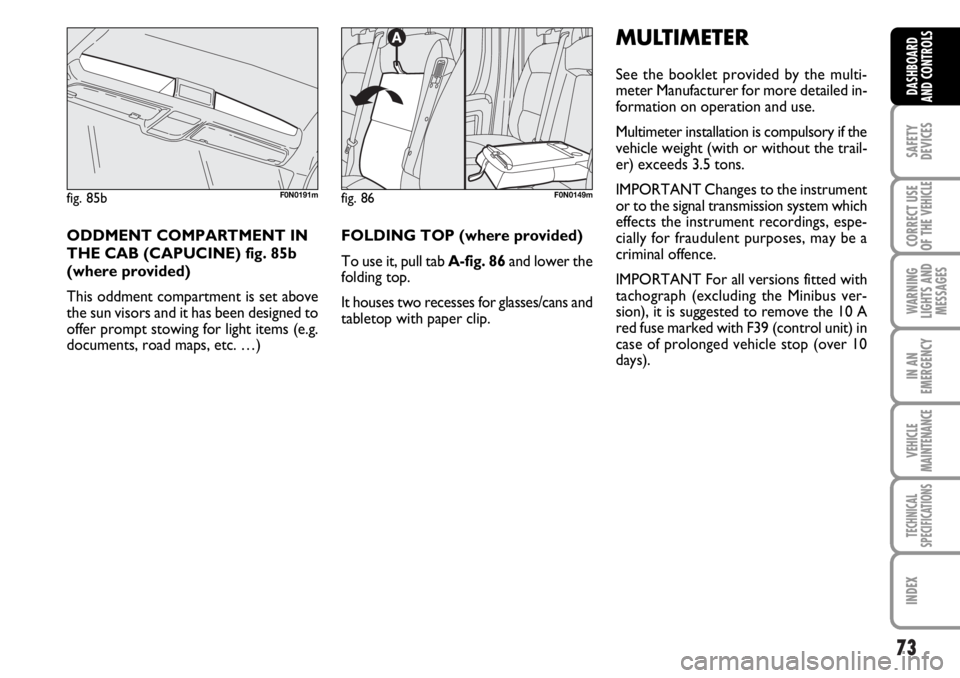
fig. 86F0N0149m
FOLDING TOP (where provided)
To use it, pull tab A-fig. 86and lower the
folding top.
It houses two recesses for glasses/cans and
tabletop with paper clip.
MULTIMETER
See the booklet provided by the multi-
meter Manufacturer for more detailed in-
formation on operation and use.
Multimeter installation is compulsory if the
vehicle weight (with or without the trail-
er) exceeds 3.5 tons.
IMPORTANT Changes to the instrument
or to the signal transmission system which
effects the instrument recordings, espe-
cially for fraudulent purposes, may be a
criminal offence.
IMPORTANT For all versions fitted with
tachograph (excluding the Minibus ver-
sion), it is suggested to remove the 10 A
red fuse marked with F39 (control unit) in
case of prolonged vehicle stop (over 10
days).
fig. 85bF0N0191m
ODDMENT COMPARTMENT IN
THE CAB (CAPUCINE) fig. 85b
(where provided)
This oddment compartment is set above
the sun visors and it has been designed to
offer prompt stowing for light items (e.g.
documents, road maps, etc. …)
Page 76 of 238
75
SAFETY
DEVICES
CORRECT USE
OF THE
VEHICLE
WARNING
LIGHTS AND
MESSAGES
IN AN
EMERGENCY
VEHICLE
MAINTENANCE
TECHNICAL
SPECIFICATIONS
INDEX
DASHBOARD
AND CONTROLS
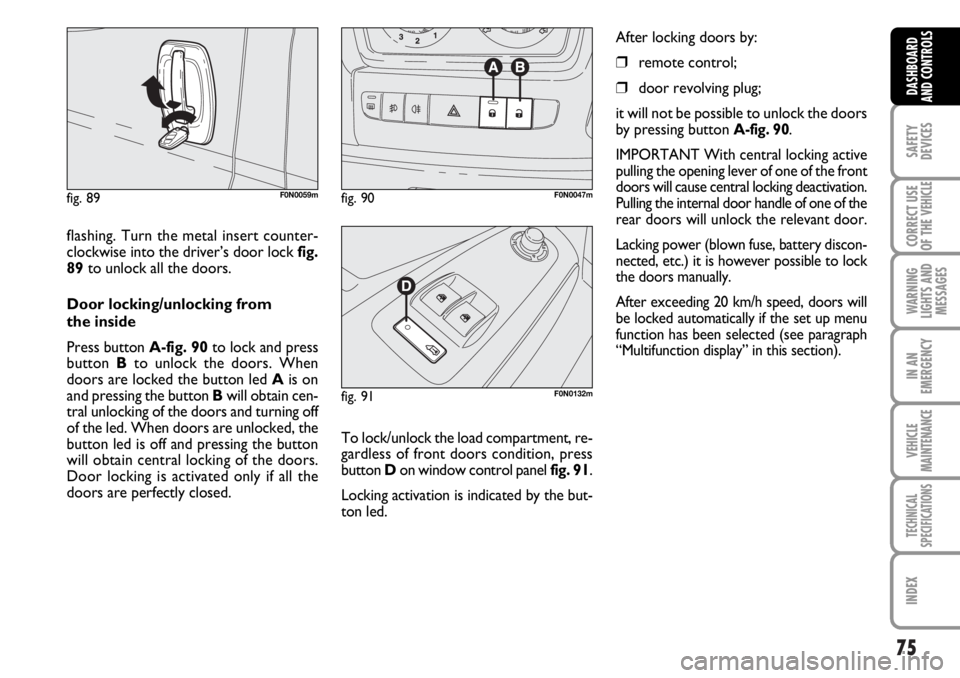
flashing. Turn the metal insert counter-
clockwise into the driver’s door lock fig.
89to unlock all the doors.
Door locking/unlocking from
the inside
Press button A-fig. 90to lock and press
button Bto unlock the doors. When
doors are locked the button led Ais on
and pressing the button Bwill obtain cen-
tral unlocking of the doors and turning off
of the led. When doors are unlocked, the
button led is off and pressing the button
will obtain central locking of the doors.
Door locking is activated only if all the
doors are perfectly closed.
fig. 89F0N0059mfig. 90F0N0047m
fig. 91F0N0132m
After locking doors by:
❒remote control;
❒door revolving plug;
it will not be possible to unlock the doors
by pressing button
A-fig. 90.
IMPORTANT With central locking active
pulling the opening lever of one of the front
doors will cause central locking deactivation.
Pulling the internal door handle of one of the
rear doors will unlock the relevant door.
Lacking power (blown fuse, battery discon-
nected, etc.) it is however possible to lock
the doors manually.
After exceeding 20 km/h speed, doors will
be locked automatically if the set up menu
function has been selected (see paragraph
“Multifunction display” in this section).
To lock/unlock the load compartment, re-
gardless of front doors condition, press
button Don window control panel fig. 91.
Locking activation is indicated by the but-
ton led.
Page 135 of 238

134
IN AN
EMERGENCY
VEHICLE
MAINTENANCE
TECHNICAL
SPECIFICATIONS
INDEX
DASHBOARD
AND CONTROLS
SAFETY
DEVICES
CORRECT USE
OF THE
VEHICLE
WARNING
LIGHTS AND
MESSAGES
GENERIC FAILURE
INDICATION
(amber)
The warning light turns on in the follow-
ing circumstances.
Engine oil pressure
sensor failure
The warning light comes on when the en-
gine oil pressure sensor is faulty. Contact
Fiat Dealership as soon as possible.
Inertial fuel cut-off switch
intervened
The warning light comes on when the in-
ertial fuel cut-off switch is triggered.
The display will show the dedicated mes-
sage.
è
EXTERNAL LIGHT
FAILURE (amber)
The warning light turns on
when one of the following lights
is failing:
– sidelights
– brake lights
– rear fog guards
– direction indicators.
The failure referring to these lights could
be: one or more blown bulbs, a blown
protection fuse or an electric connection
cut-off.
On certain versions the dedicated message
is displayed.
W
REAR FOG LIGHTS
(amber)
The warning light turns on
when the rear fog lights are turned on.
4
Rain sensor failure
(versions with multifunction
display)
The warning light on the dial turns on
when the rain sensor is faulty. Contact Fi-
at Dealership.
The display will show the dedicated mes-
sage.
Parking sensor failure
(versions with multifunction
display)
See what described for warning light
t.
Page 140 of 238
139
WARNING
LIGHTS AND
MESSAGES
VEHICLE
MAINTENANCE
TECHNICAL
SPECIFICATIONS
INDEX
DASHBOARD
AND CONTROLS
SAFETY
DEVICES
CORRECT USE
OF THE
VEHICLE
IN AN
EMERGENCY
ENGINE STARTING ............................................................ 140
IF A TYRE IS PUNCTURED ................................................ 141
QUICK TYRE REPAIR KIT
FIX & GO automatic ............................................................. 145
WHEN NEEDING TO CHANGE A BULB .................... 150
IF AN EXTERIOR LIGHT BURNS OUT .......................... 152
IF AN INTERIOR LIGHT BURNS OUT ........................... 156
IF A FUSE BLOWS ................................................................. 157
IF THE BATTERY IS FLAT ................................................... 167
JACKING THE VEHICLE ..................................................... 168
TOWING THE VEHICLE .................................................... 168
I I
N N
A A
N N
E E
M M
E E
R R
G G
E E
N N
C C
Y Y
Page 151 of 238
150
WARNING
LIGHTS AND
MESSAGES
VEHICLE
MAINTENANCE
TECHNICAL
SPECIFICATIONS
IINDEX
DASHBOARD
AND CONTROLS
SAFETY
DEVICES
CORRECT USE
OF THE
VEHICLE
IN AN
EMERGENCY
WHEN NEEDING TO
CHANGE A BULB
GENERAL INSTRUCTIONS
❒When a light is not working, check
that the corresponding fuse is intact
before changing a bulb. For the loca-
tion of fuses, refer to the paragraph “If
a fuse blows” in this section;
❒Before changing a bulb check the con-
tacts for oxidation;
❒Burnt bulbs must be replaced by oth-
ers of the same type and power;
❒Always check the height of the head-
light beam after changing a bulb.
IMPORTANT The headlight inner surface
may be lightly misted over: this is not a
fault but a natural fact due to low tem-
perature and the level of air humidity. It
will disappear as soon the headlights are
turned on. The presence of drops inside
the headlights means water infiltration,
therefore contact Fiat Dealership.
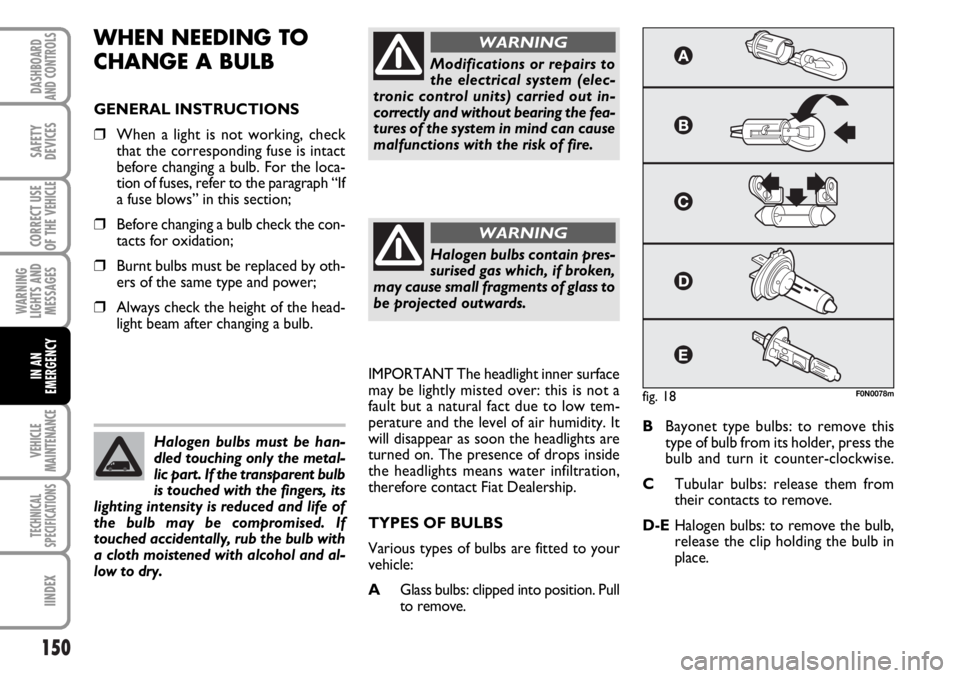
TYPES OF BULBS
Various types of bulbs are fitted to your
vehicle:
AGlass bulbs: clipped into position. Pull
to remove.BBayonet type bulbs: to remove this
type of bulb from its holder, press the
bulb and turn it counter-clockwise.
CTubular bulbs: release them from
their contacts to remove.
D-EHalogen bulbs: to remove the bulb,
release the clip holding the bulb in
place. Halogen bulbs must be han-
dled touching only the metal-
lic part. If the transparent bulb
is touched with the fingers, its
lighting intensity is reduced and life of
the bulb may be compromised. If
touched accidentally, rub the bulb with
a cloth moistened with alcohol and al-
low to dry.
Modifications or repairs to
the electrical system (elec-
tronic control units) carried out in-
correctly and without bearing the fea-
tures of the system in mind can cause
malfunctions with the risk of fire.
WARNING
Halogen bulbs contain pres-
surised gas which, if broken,
may cause small fragments of glass to
be projected outwards.
WARNING
fig. 18F0N0078m
Page 158 of 238
157
WARNING
LIGHTS AND
MESSAGES
VEHICLE
MAINTENANCE
TECHNICAL
SPECIFICATIONS
INDEX
DASHBOARD
AND CONTROLS
SAFETY
DEVICES
CORRECT USE
OF THE
VEHICLE
IN AN
EMERGENCY
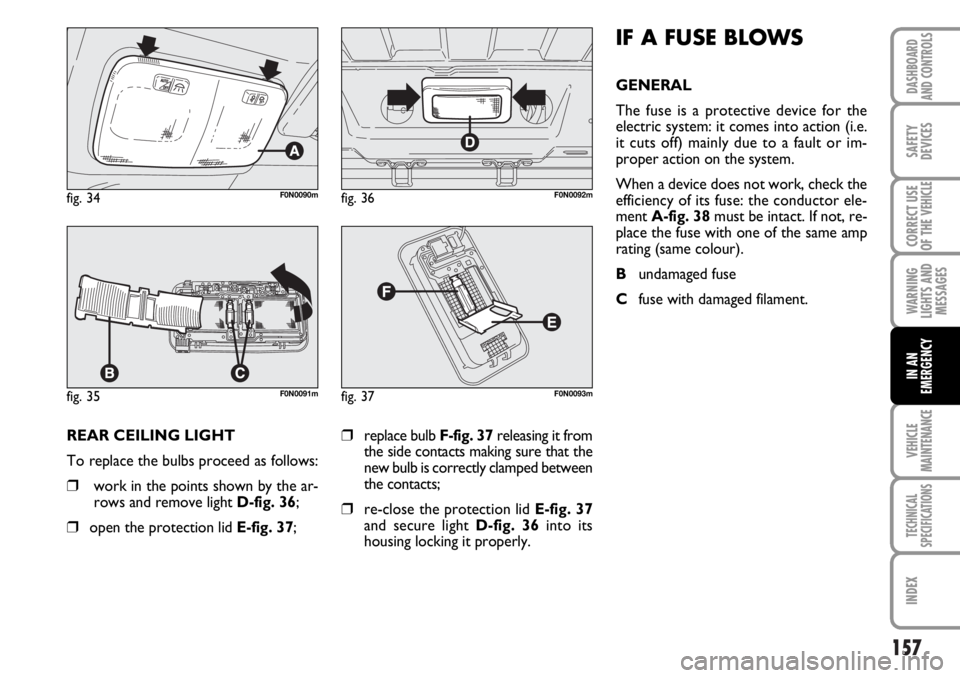
REAR CEILING LIGHT
To replace the bulbs proceed as follows:
❒work in the points shown by the ar-
rows and remove light D-fig. 36;
❒open the protection lid E-fig. 37;
❒replace bulb F-fig. 37releasing it from
the side contacts making sure that the
new bulb is correctly clamped between
the contacts;
❒re-close the protection lid E-fig. 37
and secure light D-fig. 36into its
housing locking it properly.
fig. 34F0N0090m
fig. 35F0N0091m
fig. 36F0N0092m
fig. 37F0N0093m
IF A FUSE BLOWS
GENERAL
The fuse is a protective device for the
electric system: it comes into action (i.e.
it cuts off) mainly due to a fault or im-
proper action on the system.
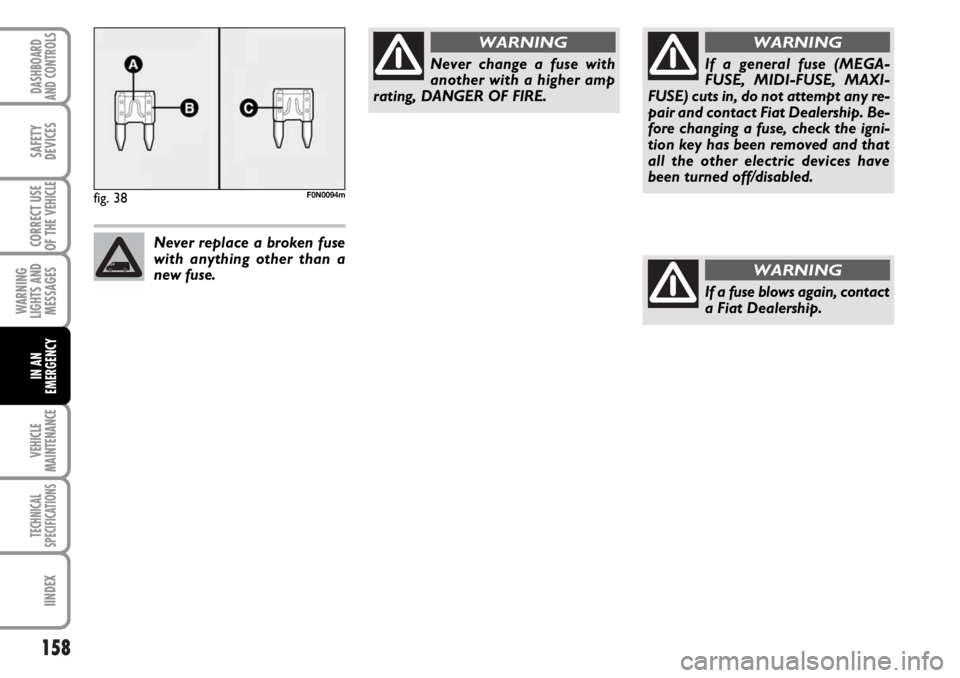
When a device does not work, check the
efficiency of its fuse: the conductor ele-
ment A-fig. 38must be intact. If not, re-
place the fuse with one of the same amp
rating (same colour).
Bundamaged fuse
Cfuse with damaged filament.
Page 159 of 238
158
WARNING
LIGHTS AND
MESSAGES
VEHICLE
MAINTENANCE
TECHNICAL
SPECIFICATIONS
IINDEX
DASHBOARD
AND CONTROLS
SAFETY
DEVICES
CORRECT USE
OF THE
VEHICLE
IN AN
EMERGENCY
fig. 38F0N0094m
Never change a fuse with
another with a higher amp
rating, DANGER OF FIRE.
WARNING
Never replace a broken fuse
with anything other than a
new fuse.
If a general fuse (MEGA-
FUSE, MIDI-FUSE, MAXI-
FUSE) cuts in, do not attempt any re-
pair and contact Fiat Dealership. Be-
fore changing a fuse, check the igni-
tion key has been removed and that
all the other electric devices have
been turned off/disabled.
WARNING
If a fuse blows again, contact
a Fiat Dealership.
WARNING
Page 160 of 238
159
WARNING
LIGHTS AND
MESSAGES
VEHICLE
MAINTENANCE
TECHNICAL
SPECIFICATIONS
INDEX
DASHBOARD
AND CONTROLS
SAFETY
DEVICES
CORRECT USE
OF THE
VEHICLE
IN AN
EMERGENCY
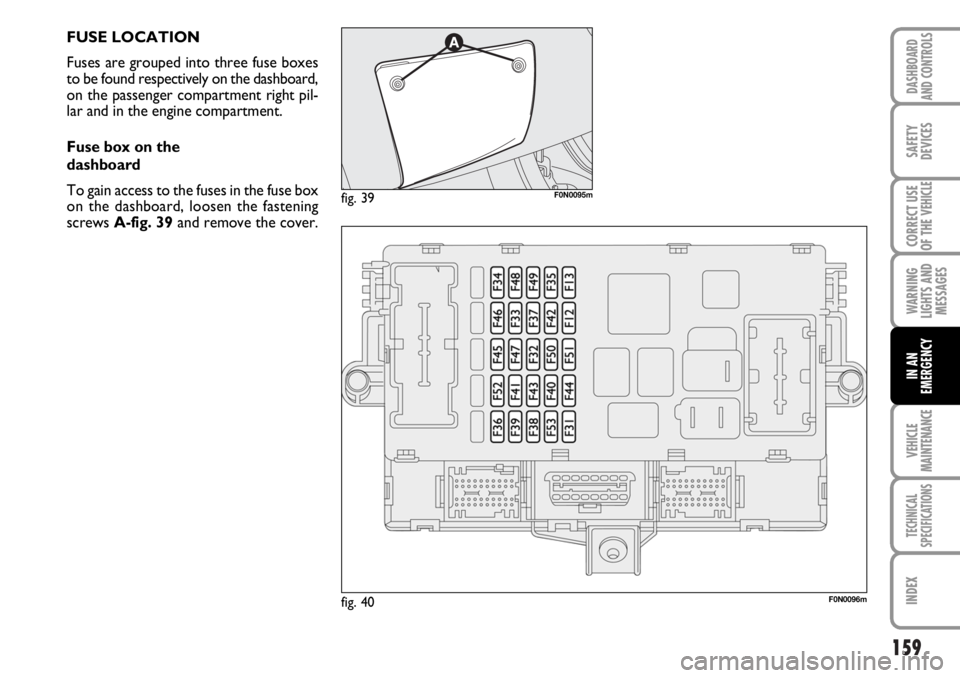
FUSE LOCATION
Fuses are grouped into three fuse boxes
to be found respectively on the dashboard,
on the passenger compartment right pil-
lar and in the engine compartment.
Fuse box on the
dashboard
To gain access to the fuses in the fuse box
on the dashboard, loosen the fastening
screws A-fig. 39and remove the cover.
fig. 40F0N0096m
fig. 39F0N0095m