switches FIAT DUCATO 2011 Owner handbook (in English)
[x] Cancel search | Manufacturer: FIAT, Model Year: 2011, Model line: DUCATO, Model: FIAT DUCATO 2011Pages: 287, PDF Size: 4.42 MB
Page 11 of 287
7
KNOWING
YOUR CAR
SAFETY
STARTING
AND
DRIVING
WARNING
LIGHTS AND
MESSAGES
IN AN
EMERGENCY
MAINTENANCE
AND CARE
TECHNICAL
SPECIFICATIONS
INDEX
F0N0801mfig. 5F0N0114mfig. 6
Request for additional remote controls
The system can recognise up to 8 keys with
incorporated remote control. Should a new remote
control be necessary, contact a Fiat Dealership and be
ready to present the CODE card, a personal identity
document and the vehicle ownership documents. Some versions are equipped with a key with a remote
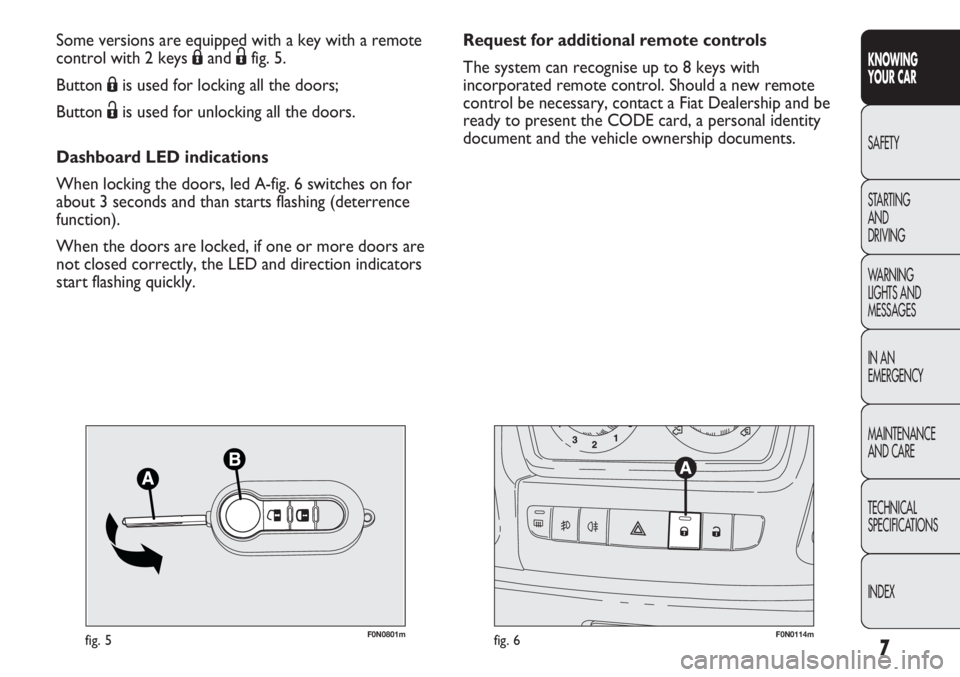
control with 2 keys Áand Ëfig. 5.
Button Áis used for locking all the doors;
Button Ëis used for unlocking all the doors.
Dashboard LED indications
When locking the doors, led A-fig. 6 switches on for
about 3 seconds and than starts flashing (deterrence
function).
When the doors are locked, if one or more doors are
not closed correctly, the LED and direction indicators
start flashing quickly.
Page 58 of 287
54
KNOWING
YOUR CAR
SAFETY
STARTING
AND
DRIVING
WARNING
LIGHTS AND
MESSAGES
IN AN
EMERGENCY
MAINTENANCE
AND CARE
TECHNICAL
SPECIFICATIONS
INDEX
The intake air temperature is always automatically
controlled according to the temperature set on the display
(except for when the system is off or in certain conditions
when the compressor is not running).
The system allows the following parameters and
functions to be set or altered manually: air temperature,
fan speed (continuous variation); air distribution in
seven positions; compressor enablement, fast
defrosting/demisting function; air recirculation; switching
off of the system;
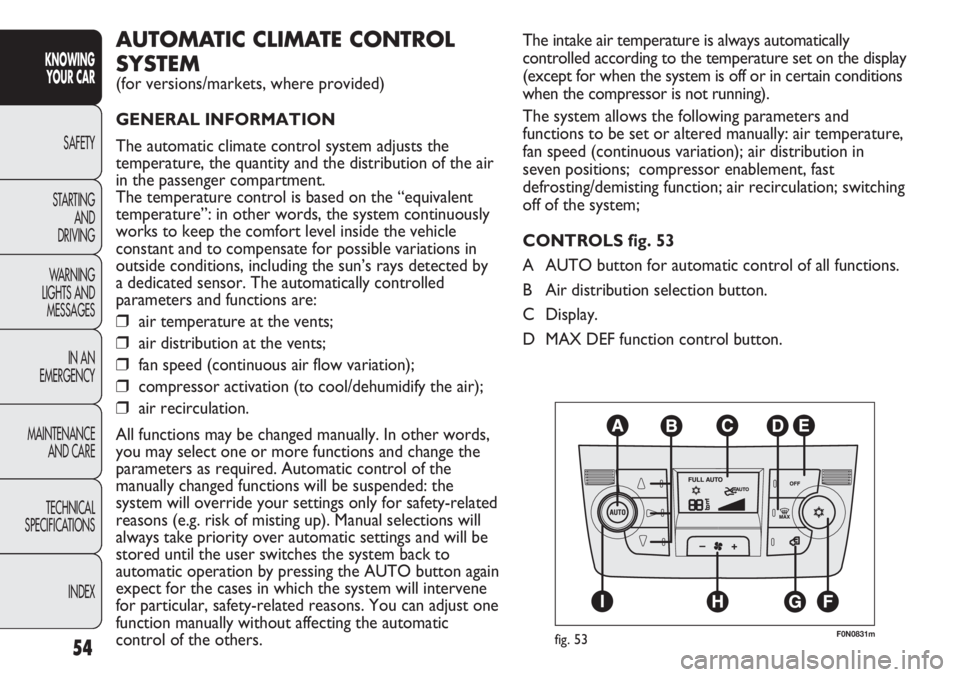
CONTROLS fig. 53
A AUTO button for automatic control of all functions.
B Air distribution selection button.
C Display.
D MAX DEF function control button.AUTOMATIC CLIMATE CONTROL
SYSTEM
(for versions/markets, where provided)
GENERAL INFORMATION
The automatic climate control system adjusts the
temperature, the quantity and the distribution of the air
in the passenger compartment.
The temperature control is based on the “equivalent
temperature”: in other words, the system continuously
works to keep the comfort level inside the vehicle
constant and to compensate for possible variations in
outside conditions, including the sun’s rays detected by
a dedicated sensor. The automatically controlled
parameters and functions are:
❒air temperature at the vents;
❒air distribution at the vents;
❒fan speed (continuous air flow variation);
❒compressor activation (to cool/dehumidify the air);
❒air recirculation.
All functions may be changed manually. In other words,
you may select one or more functions and change the
parameters as required. Automatic control of the
manually changed functions will be suspended: the
system will override your settings only for safety-related
reasons (e.g. risk of misting up). Manual selections will
always take priority over automatic settings and will be
stored until the user switches the system back to
automatic operation by pressing the AUTO button again
expect for the cases in which the system will intervene
for particular, safety-related reasons. You can adjust one
function manually without affecting the automatic
control of the others.
F0N0831mfig. 53
Page 62 of 287

58
KNOWING
YOUR CAR
SAFETY
STARTING
AND
DRIVING
WARNING
LIGHTS AND
MESSAGES
IN AN
EMERGENCY
MAINTENANCE
AND CARE
TECHNICAL
SPECIFICATIONS
INDEX
It is however not advised to use it on rainy/cold days as
it would considerably increase the possibility of the
windows steaming up, especially if the climate control
compressor is off.
To prevent steaming up, the recirculation is forced off
(i.e. air is introduced from the outside) when the the
outside temperature is cold.
It is advisable not to use the air recirculation function
when the outside temperature is low to prevent the
windows from rapidly misting up.
Climate control compressor on/off
button (F)
Pressing the √button switches the
climate control compressor off, it if was
on previously and the logo in the display
goes out.
Press the button when the LED is off to restore
automatic system control of compressor activation.
The icon will light up on the display.
The system will switch recirculation off when the
compressor is switched off to prevent misting up.
Although the system is capable of maintaining the
required temperature, the word FULL will disappear
from the display. If the system is no longer able to
maintain the temperature, the figures will flash and the
word AUTO will go out. IMPORTANT Should the system (after manual
intervention) no longer be able to guarantee the target
temperature for the passenger compartment, the set
temperature value will start flashing to indicate the
difficulties the system is experiencing and then the word
AUTO will go out.
To restore system automatic control at any time, after
one or more manual adjustments, press the AUTO
button.
Air recirculation on/off button (G)
The Air recirculation works according to
the following operating logics:
❒override on (air recirculation always on), indicated
by the LED on the button
Gcoming on and the
symbol íon the display;
❒override off (air recirculation always off and
introduction of outside air), indicated by the LED
on the button going off and the symbol êappearing
on the display.
These operating conditions are obtained by pressing air
recirculation button G in sequence.
IMPORTANT The engagement of the air recirculation
system makes it possible to reach the required heating
or cooling conditions faster.
Page 63 of 287
59
KNOWING
YOUR CAR
SAFETY
STARTING
AND
DRIVING
WARNING
LIGHTS AND
MESSAGES
IN AN
EMERGENCY
MAINTENANCE
AND CARE
TECHNICAL
SPECIFICATIONS
INDEX
IMPORTANT With the compressor off, it is not
possible to introduce air into the passenger
compartment at a temperature lower than that of the
outside air. In certain weather conditions, the windows
could mist up rapidly due to the non-dehumidified air.
The system remembers that the compressor has been
switched off, even after the engine has stopped.
To restore automatic compressor activation control,
press the √button again (in this case, the system will
work only as a heater) or press the AUTO button.
With the compressor switched off, if the outside
temperature is higher than the one set, the system is
not capable of satisfying this request. This is signalled by
the target temperature flashing, after which the word
AUTO goes out.
With the climate control compressor off, the fan speed
can be set to zero manually (no bar shown).
With the compressor enabled and the engine started,
the fan speed may be reduced to the minimum setting
(only one bar shown).
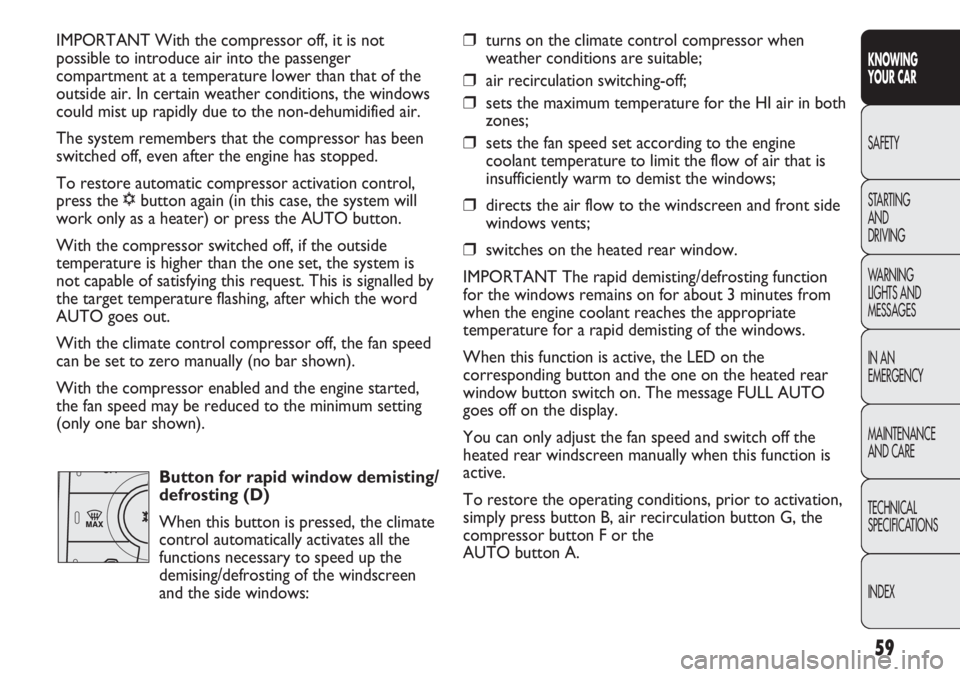
Button for rapid window demisting/
defrosting (D)
When this button is pressed, the climate
control automatically activates all the
functions necessary to speed up the
demising/defrosting of the windscreen
and the side windows:❒turns on the climate control compressor when
weather conditions are suitable;
❒air recirculation switching-off;
❒sets the maximum temperature for the HI air in both
zones;
❒sets the fan speed set according to the engine
coolant temperature to limit the flow of air that is
insufficiently warm to demist the windows;
❒directs the air flow to the windscreen and front side
windows vents;
❒switches on the heated rear window.
IMPORTANT The rapid demisting/defrosting function
for the windows remains on for about 3 minutes from
when the engine coolant reaches the appropriate
temperature for a rapid demisting of the windows.
When this function is active, the LED on the
corresponding button and the one on the heated rear
window button switch on. The message FULL AUTO
goes off on the display.
You can only adjust the fan speed and switch off the
heated rear windscreen manually when this function is
active.
To restore the operating conditions, prior to activation,
simply press button B, air recirculation button G, the
compressor button F or the
AUTO button A.
Page 64 of 287
60
KNOWING
YOUR CAR
SAFETY
STARTING
AND
DRIVING
WARNING
LIGHTS AND
MESSAGES
IN AN
EMERGENCY
MAINTENANCE
AND CARE
TECHNICAL
SPECIFICATIONS
INDEX
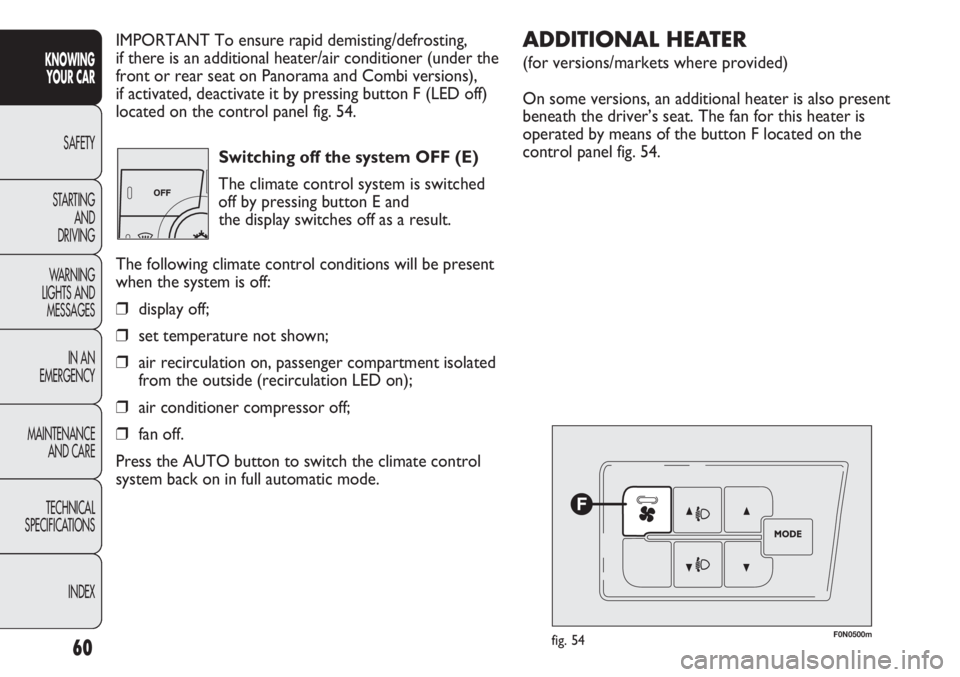
IMPORTANT To ensure rapid demisting/defrosting,
if there is an additional heater/air conditioner (under the
front or rear seat on Panorama and Combi versions),
if activated, deactivate it by pressing button F (LED off)
located on the control panel fig. 54.
Switching off the system OFF (E)
The climate control system is switched
off by pressing button E and
the display switches off as a result.
The following climate control conditions will be present
when the system is off:
❒display off;
❒set temperature not shown;
❒air recirculation on, passenger compartment isolated
from the outside (recirculation LED on);
❒air conditioner compressor off;
❒fan off.
Press the AUTO button to switch the climate control
system back on in full automatic mode.
F0N0500mfig. 54
ADDITIONAL HEATER
(for versions/markets where provided)
On some versions, an additional heater is also present
beneath the driver’s seat. The fan for this heater is
operated by means of the button F located on the
control panel fig. 54.
Page 69 of 287
65
KNOWING
YOUR CAR
SAFETY
STARTING
AND
DRIVING
WARNING
LIGHTS AND
MESSAGES
IN AN
EMERGENCY
MAINTENANCE
AND CARE
TECHNICAL
SPECIFICATIONS
INDEX
Deactivation of the programmed activation time
fig. 59
To delete the programmed activation time, press button
6 briefly: the display lighting will go off and the number 3
relating to the preselected time will disappear.
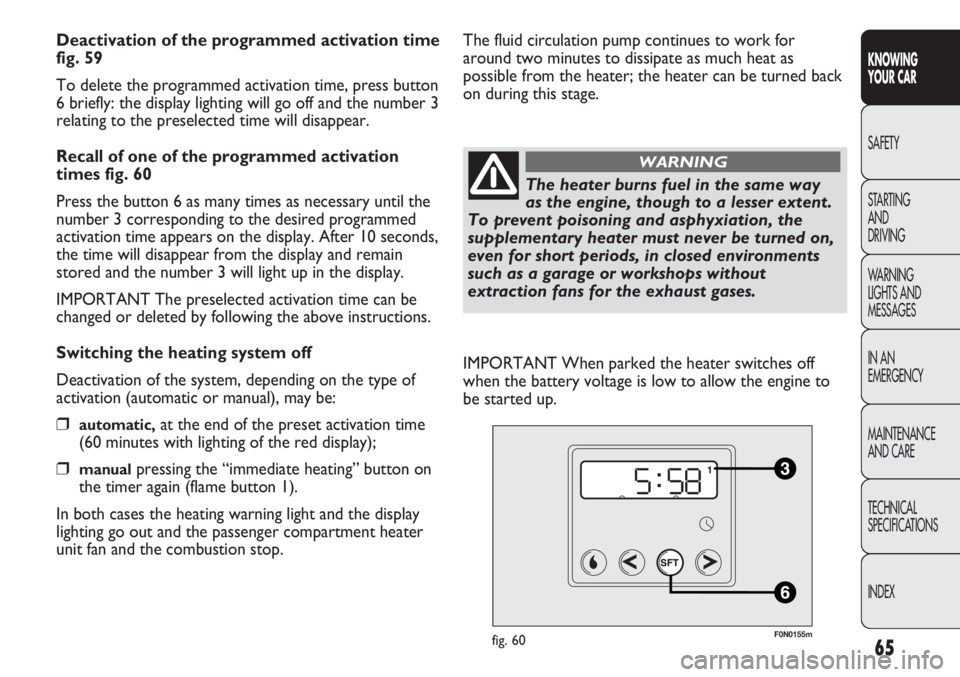
Recall of one of the programmed activation
times fig. 60
Press the button 6 as many times as necessary until the
number 3 corresponding to the desired programmed
activation time appears on the display. After 10 seconds,
the time will disappear from the display and remain
stored and the number 3 will light up in the display.
IMPORTANT The preselected activation time can be
changed or deleted by following the above instructions.
Switching the heating system off
Deactivation of the system, depending on the type of
activation (automatic or manual), may be:
❒automatic,at the end of the preset activation time
(60 minutes with lighting of the red display);
❒manualpressing the “immediate heating” button on
the timer again (flame button 1).
In both cases the heating warning light and the display
lighting go out and the passenger compartment heater
unit fan and the combustion stop.
F0N0155mfig. 60
The fluid circulation pump continues to work for
around two minutes to dissipate as much heat as
possible from the heater; the heater can be turned back
on during this stage.
The heater burns fuel in the same way
as the engine, though to a lesser extent.
To prevent poisoning and asphyxiation, the
supplementary heater must never be turned on,
even for short periods, in closed environments
such as a garage or workshops without
extraction fans for the exhaust gases.
WARNING
IMPORTANT When parked the heater switches off
when the battery voltage is low to allow the engine to
be started up.
Page 80 of 287
76
KNOWING
YOUR CAR
SAFETY
STARTING
AND
DRIVING
WARNING
LIGHTS AND
MESSAGES
IN AN
EMERGENCY
MAINTENANCE
AND CARE
TECHNICAL
SPECIFICATIONS
INDEX
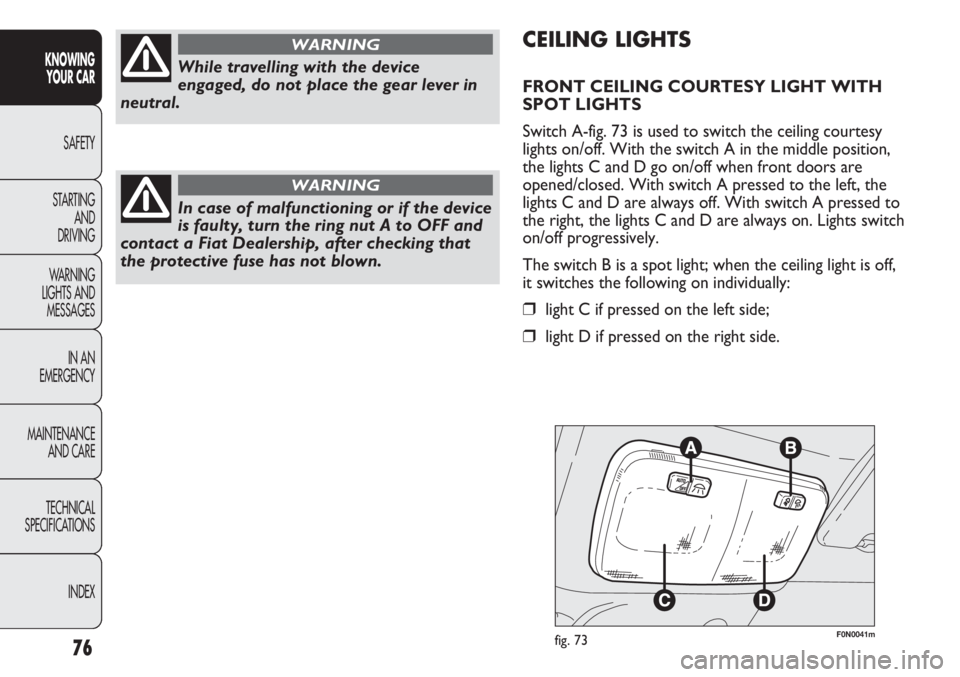
F0N0041mfig. 73
CEILING LIGHTS
FRONT CEILING COURTESY LIGHT WITH
SPOT LIGHTS
Switch A-fig. 73 is used to switch the ceiling courtesy
lights on/off. With the switch A in the middle position,
the lights C and D go on/off when front doors are
opened/closed. With switch A pressed to the left, the
lights C and D are always off. With switch A pressed to
the right, the lights C and D are always on. Lights switch
on/off progressively.
The switch B is a spot light; when the ceiling light is off,
it switches the following on individually:
❒light C if pressed on the left side;
❒light D if pressed on the right side.
While travelling with the device
engaged, do not place the gear lever in
neutral.
WARNING
In case of malfunctioning or if the device
is faulty, turn the ring nut A to OFF and
contact a Fiat Dealership, after checking that
the protective fuse has not blown.
WARNING
Page 81 of 287
77
KNOWING
YOUR CAR
SAFETY
STARTING
AND
DRIVING
WARNING
LIGHTS AND
MESSAGES
IN AN
EMERGENCY
MAINTENANCE
AND CARE
TECHNICAL
SPECIFICATIONS
INDEX
❒when opening one of the side doors for about
3 minutes;
❒when one of the doors is closed for a period of
about 10 seconds.
The timed delay period ends automatically when the
doors are locked.
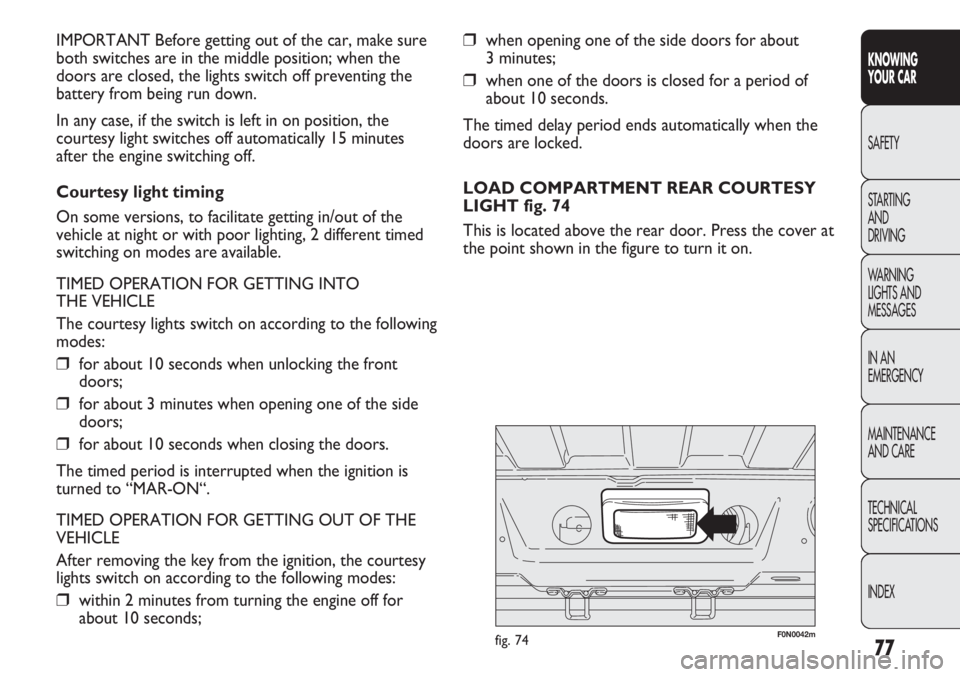
LOAD COMPARTMENT REAR COURTESY
LIGHT fig. 74
This is located above the rear door. Press the cover at
the point shown in the figure to turn it on. IMPORTANT Before getting out of the car, make sure
both switches are in the middle position; when the
doors are closed, the lights switch off preventing the
battery from being run down.
In any case, if the switch is left in on position, the
courtesy light switches off automatically 15 minutes
after the engine switching off.
Courtesy light timing
On some versions, to facilitate getting in/out of the
vehicle at night or with poor lighting, 2 different timed
switching on modes are available.
TIMED OPERATION FOR GETTING INTO
THE VEHICLE
The courtesy lights switch on according to the following
modes:
❒for about 10 seconds when unlocking the front
doors;
❒for about 3 minutes when opening one of the side
doors;
❒for about 10 seconds when closing the doors.
The timed period is interrupted when the ignition is
turned to “MAR-ON“.
TIMED OPERATION FOR GETTING OUT OF THE
VEHICLE
After removing the key from the ignition, the courtesy
lights switch on according to the following modes:
❒within 2 minutes from turning the engine off for
about 10 seconds;
F0N0042mfig. 74
Page 83 of 287
79
KNOWING
YOUR CAR
SAFETY
STARTING
AND
DRIVING
WARNING
LIGHTS AND
MESSAGES
IN AN
EMERGENCY
MAINTENANCE
AND CARE
TECHNICAL
SPECIFICATIONS
INDEX
F0N0044mfig. 77F0N0045mfig. 78
The function switches off automatically when emergency
braking ceases.
This function complies with the relevant legislations
currently in force.
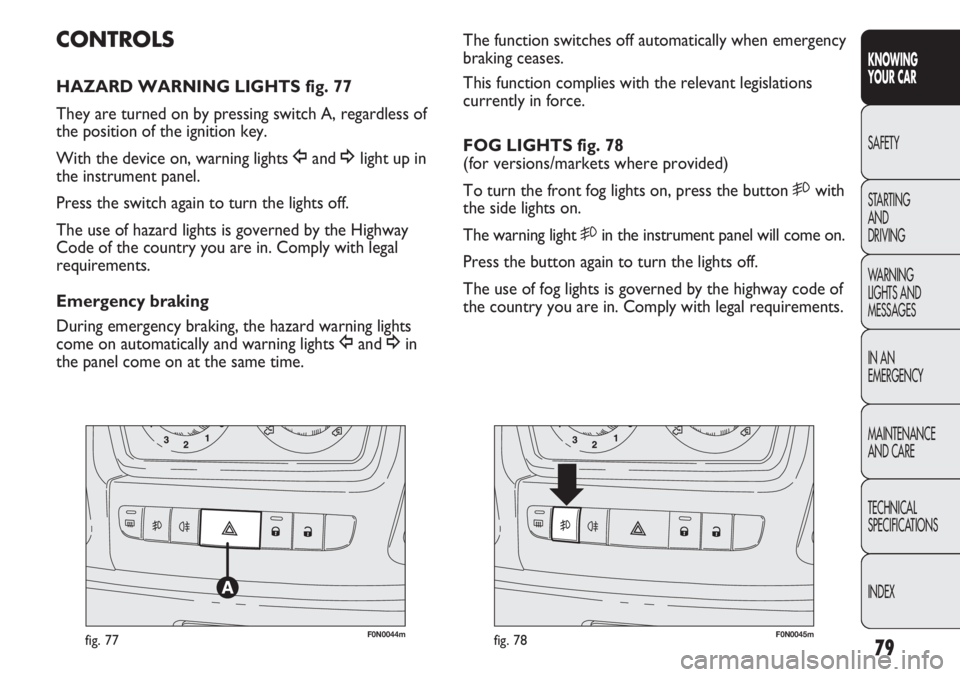
FOG LIGHTS fig. 78
(for versions/markets where provided)
To turn the front fog lights on, press the button
5with
the side lights on.
The warning light 5in the instrument panel will come on.
Press the button again to turn the lights off.
The use of fog lights is governed by the highway code of
the country you are in. Comply with legal requirements.
CONTROLS
HAZARD WARNING LIGHTS fig. 77
They are turned on by pressing switch A, regardless of
the position of the ignition key.
With the device on, warning lights
Îand ¥light up in
the instrument panel.
Press the switch again to turn the lights off.
The use of hazard lights is governed by the Highway
Code of the country you are in. Comply with legal
requirements.
Emergency braking
During emergency braking, the hazard warning lights
come on automatically and warning lights
Îand ¥in
the panel come on at the same time.
Page 86 of 287
82
KNOWING
YOUR CAR
SAFETY
STARTING
AND
DRIVING
WARNING
LIGHTS AND
MESSAGES
IN AN
EMERGENCY
MAINTENANCE
AND CARE
TECHNICAL
SPECIFICATIONS
INDEX
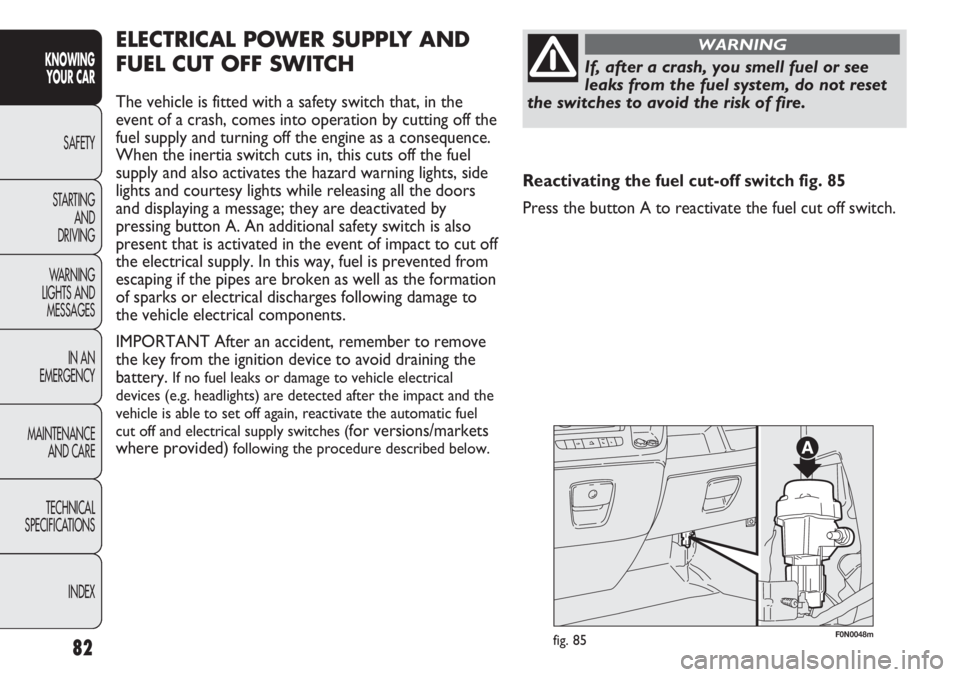
F0N0048mfig. 85
ELECTRICAL POWER SUPPLY AND
FUEL CUT OFF SWITCH
The vehicle is fitted with a safety switch that, in the
event of a crash, comes into operation by cutting off the
fuel supply and turning off the engine as a consequence.
When the inertia switch cuts in, this cuts off the fuel
supply and also activates the hazard warning lights, side
lights and courtesy lights while releasing all the doors
and displaying a message; they are deactivated by
pressing button A. An additional safety switch is also
present that is activated in the event of impact to cut off
the electrical supply. In this way, fuel is prevented from
escaping if the pipes are broken as well as the formation
of sparks or electrical discharges following damage to
the vehicle electrical components.
IMPORTANT After an accident, remember to remove
the key from the ignition device to avoid draining the
battery.
If no fuel leaks or damage to vehicle electrical
devices (e.g. headlights) are detected after the impact and the
vehicle is able to set off again, reactivate the automatic fuel
cut off and electrical supply switches (
for versions/markets
where provided)
following the procedure described below.
If, after a crash, you smell fuel or see
leaks from the fuel system, do not reset
the switches to avoid the risk of fire.
WARNING
Reactivating the fuel cut-off switch fig. 85
Press the button A to reactivate the fuel cut off switch.