ECO mode FIAT DUCATO 244 2002 3.G Connect NavPlus Manual
[x] Cancel search | Manufacturer: FIAT, Model Year: 2002, Model line: DUCATO 244, Model: FIAT DUCATO 244 2002 3.GPages: 246, PDF Size: 3.39 MB
Page 12 of 246
CONNECT Nav
11
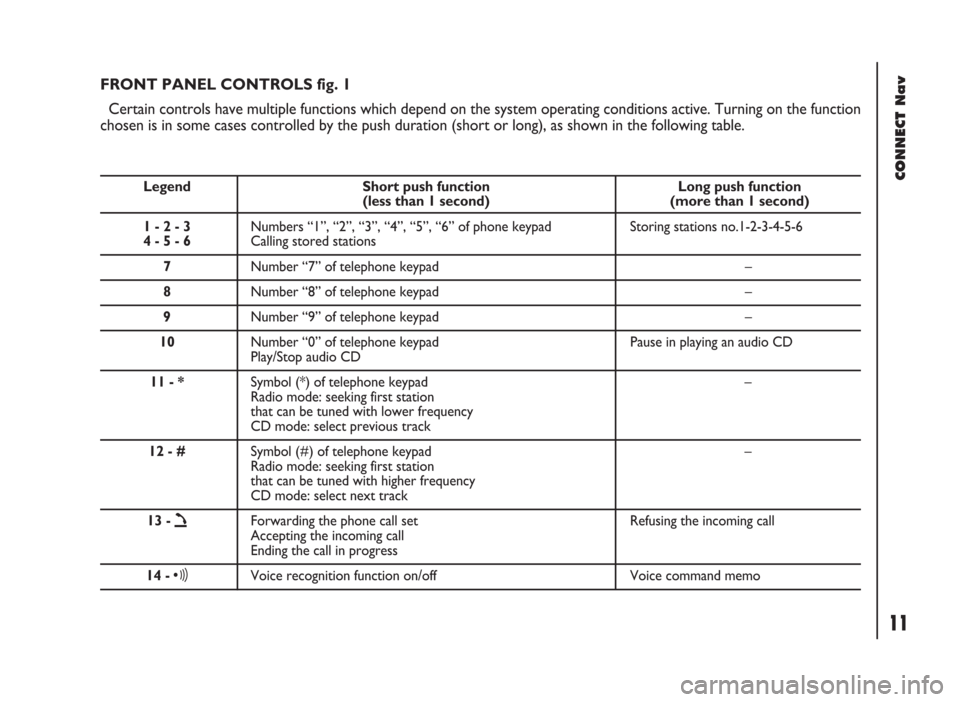
FRONT PANEL CONTROLS fig. 1
Certain controls have multiple functions which depend on the system operating conditions active. Turning on the function
chosen is in some cases controlled by the push duration (short or long), as shown in the following table.
Legend Short push function Long push function (less than 1 second) (more than 1 second)
1 - 2 - 3 Numbers “1”, “2”, “3”, “4”, “5”, “6” of phone keypad Storing stations no.1-2-3-4-5-6
4 - 5 - 6Calling stored stations
7Number “7” of telephone keypad –
8Number “8” of telephone keypad –
9Number “9” of telephone keypad –
10Number “0” of telephone keypad Pause in playing an audio CD
Play/Stop audio CD
11 - *Symbol (*) of telephone keypad –
Radio mode: seeking first station
that can be tuned with lower frequency
CD mode: select previous track
12 - #Symbol (#) of telephone keypad –
Radio mode: seeking first station
that can be tuned with higher frequency
CD mode: select next track
13 -
òForwarding the phone call set Refusing the incoming call
Accepting the incoming call
Ending the call in progress
14 -ôVoice recognition function on/off Voice command memo
Page 13 of 246
CONNECT Nav
12
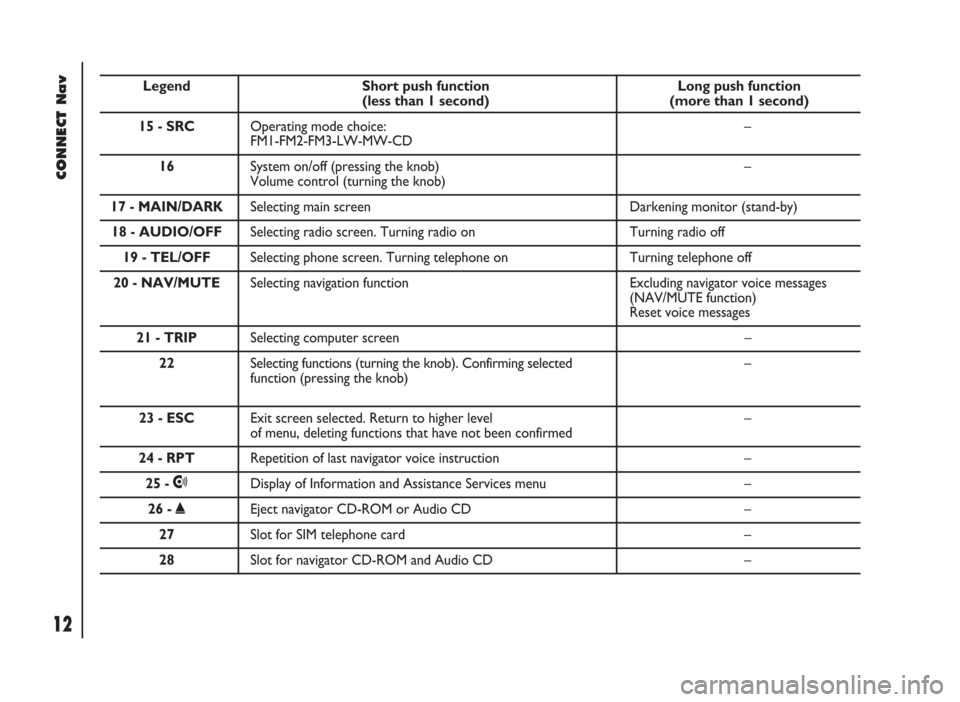
Legend Short push function Long push function (less than 1 second) (more than 1 second)
15 - SRCOperating mode choice: –
FM1-FM2-FM3-LW-MW-CD
16 System on/off (pressing the knob) –
Volume control (turning the knob)
17 - MAIN/DARKSelecting main screen Darkening monitor (stand-by)
18 - AUDIO/OFFSelecting radio screen. Turning radio on Turning radio off
19 - TEL/OFFSelecting phone screen. Turning telephone on Turning telephone off
20 - NAV/MUTESelecting navigation function Excluding navigator voice messages
(NAV/MUTE function)
Reset voice messages
21 - TRIPSelecting computer screen –
22 Selecting functions (turning the knob). Confirming selected –
function (pressing the knob)
23 - ESCExit screen selected. Return to higher level –of menu, deleting functions that have not been confirmed
24 - RPTRepetition of last navigator voice instruction –
25 -•Display of Information and Assistance Services menu –
26 -˚Eject navigator CD-ROM or Audio CD –
27Slot for SIM telephone card –
28Slot for navigator CD-ROM and Audio CD –
Page 24 of 246
CONNECT Nav
23
IMPORTANTStarting the engine
when the modem function is on, will
cause the connection drop with data
loss as a consequence. Stooping the
engine has no effect on data transmis-
sion since the CONNECT Nav will
stay on for other 20 minutes. If a GSM
communication is in progress the sys-
tem will automatically activate a new
window for other 20 minutes. Long
GSM communications (with data
transmission) can run down the vehi-
cle battery.
Operation requirements
The modem function is operational
if the following conditions are present:
– CONNECT Nav system on;
– SIM card inserted;
– sufficient credit;
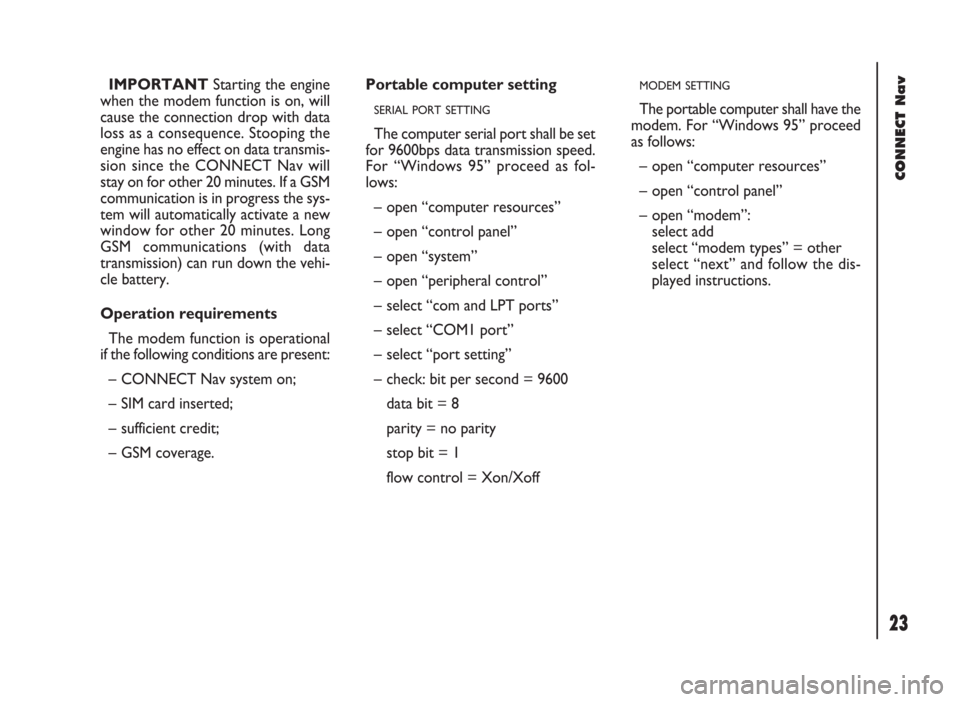
– GSM coverage.Portable computer setting
SERIAL PORT SETTING
The computer serial port shall be set
for 9600bps data transmission speed.
For “Windows 95” proceed as fol-
lows:
– open “computer resources”
– open “control panel”
– open “system”
– open “peripheral control”
– select “com and LPT ports”
– select “COM1 port”
– select “port setting”
– check: bit per second = 9600
data bit = 8
parity = no parity
stop bit = 1
flow control = Xon/Xoff
MODEM SETTING
The portable computer shall have the
modem. For “Windows 95” proceed
as follows:
– open “computer resources”
– open “control panel”
– open “modem”:
select add
select “modem types” = other
select “next” and follow the dis-
played instructions.
Page 30 of 246
29
CONNECT Nav
The audio system is turned on by
pressing briefly the “AUDIO” but-
ton18-fig. 1which displays the main
functions of the radio.
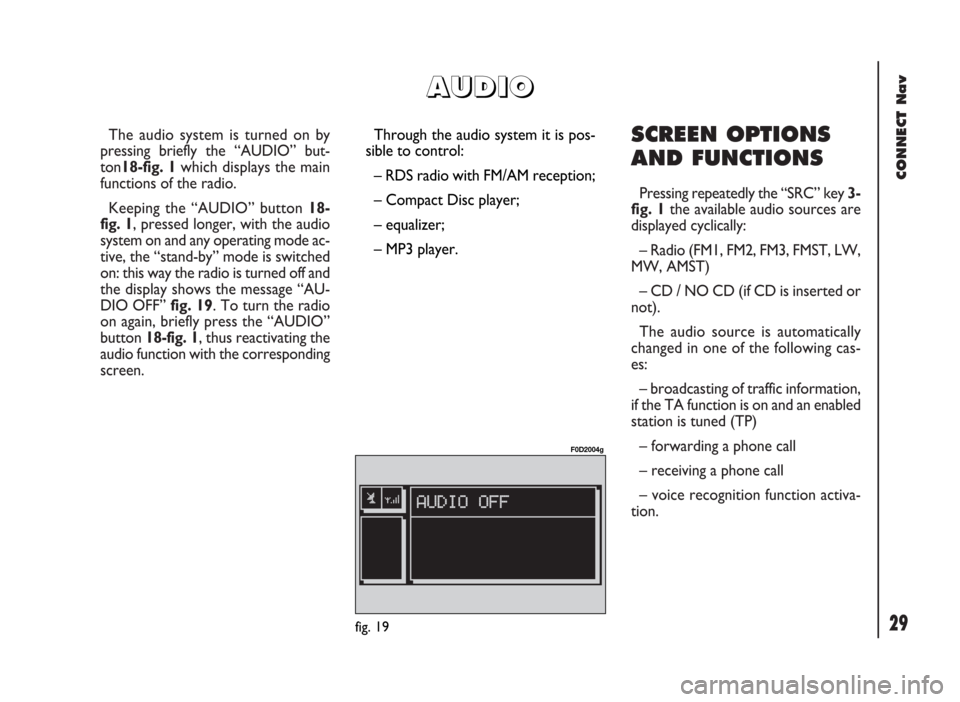
Keeping the “AUDIO” button 18-
fig. 1, pressed longer, with the audio
system on and any operating mode ac-
tive, the “stand-by” mode is switched
on: this way the radio is turned off and
the display shows the message “AU-
DIO OFF” fig. 19. To turn the radio
on again, briefly press the “AUDIO”
button 18-fig. 1, thus reactivating the
audio function with the corresponding
screen. SCREEN OPTIONS
AND FUNCTIONS
Pressing repeatedly the “SRC” key 3-
fig. 1the available audio sources are
displayed cyclically:
– Radio (FM1, FM2, FM3, FMST, LW,
MW, AMST)
– CD / NO CD (if CD is inserted or
not).
The audio source is automatically
changed in one of the following cas-
es:
– broadcasting of traffic information,
if the TA function is on and an enabled
station is tuned (TP)
– forwarding a phone call
– receiving a phone call
– voice recognition function activa-
tion.
A A
U U
D D
I I
O O
Through the audio system it is pos-
sible to control:
– RDS radio with FM/AM reception;
– Compact Disc player;
– equalizer;
– MP3 player.
fig. 19
F0D2004g
Page 53 of 246
CONNECT Nav
52
MP3 MODE
To guarantee optimum playing, use
top quality CDs duplicated at as low
as possible speed.
The system can recognize the type
of Compact Disc inserted.
During the reading procedure to rec-
ognize the disk the display shows
“WARNING - Reading CD. Please
wait” and then “Exploring MP3..”.
IMPORTANTNever use 8 cm au-
dio or MP3 CDs, even with the spe-
cific adapter, since this format will
damage the system.
IMPORTANTThe system builds
MP3 CD folder-organized structure of
files; folders are organized in sequence
with their own mp3 tracks (up to max.
four levels of folders/subdirectories).
Folder and file name length shall not ex-
ceed 20 characters.
Characters: blank, ‘(apostrophe), (
and )(open and closed brackets) are
not admitted in track names.When creating MP3 CD you must not
use these characters to name files oth-
erwise the system will not be able to
play it.
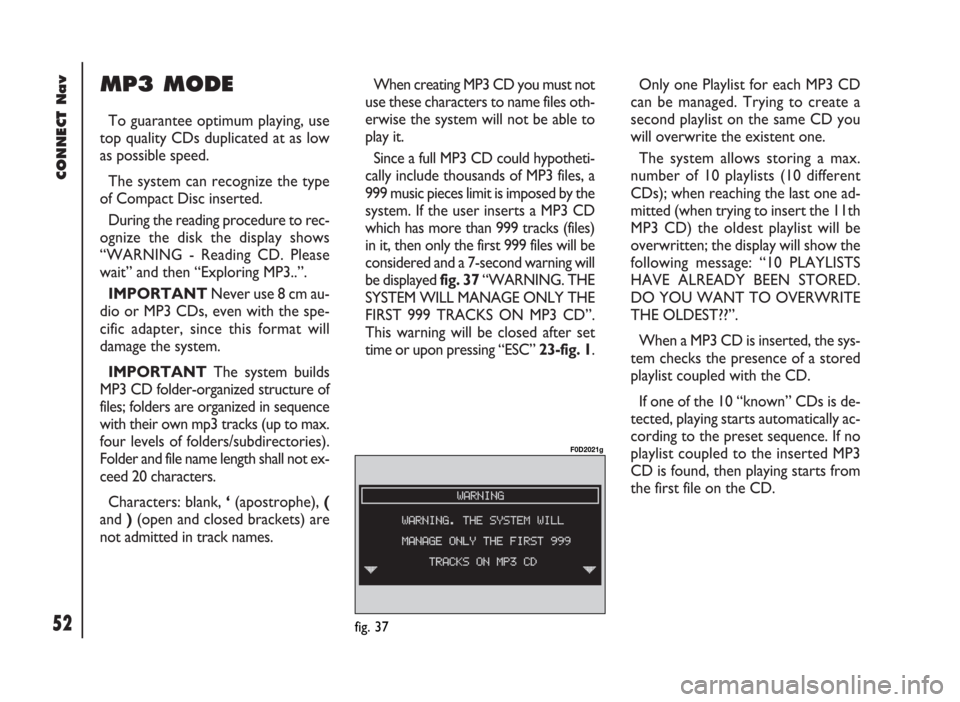
Since a full MP3 CD could hypotheti-
cally include thousands of MP3 files, a
999 music pieces limit is imposed by the
system. If the user inserts a MP3 CD
which has more than 999 tracks (files)
in it, then only the first 999 files will be
considered and a 7-second warning will
be displayed fig. 37 “WARNING. THE
SYSTEM WILL MANAGE ONLY THE
FIRST 999 TRACKS ON MP3 CD”.
This warning will be closed after set
time or upon pressing “ESC” 23-fig. 1.Only one Playlist for each MP3 CD
can be managed. Trying to create a
second playlist on the same CD you
will overwrite the existent one.
The system allows storing a max.
number of 10 playlists (10 different
CDs); when reaching the last one ad-
mitted (when trying to insert the 11th
MP3 CD) the oldest playlist will be
overwritten; the display will show the
following message: “10 PLAYLISTS
HAVE ALREADY BEEN STORED.
DO YOU WANT TO OVERWRITE
THE OLDEST??”.
When a MP3 CD is inserted, the sys-
tem checks the presence of a stored
playlist coupled with the CD.
If one of the 10 “known” CDs is de-
tected, playing starts automatically ac-
cording to the preset sequence. If no
playlist coupled to the inserted MP3
CD is found, then playing starts from
the first file on the CD.
fig. 37
F0D2021g
Page 58 of 246
57
CONNECT Nav
– current status of MP3 CD source
(play, pause, stop);
– CD time information;
– TA, SFL, RPT… according to the
active function.
“DEFINE PLAYLIST” and
“PLAYLIST” can be activated after
stopping MP3 CD playing (“Stop”).
When playing MP3 CD, buttons
÷
11-fig. 1and ˜12-fig. 1perform
the following functions:
– with short push skips to previ-
ous/next track in playlist (if any), any
change from one folder to another dis-
plays the name of the new folder for
5 seconds;
– with long push skips to previ-
ous/next not-empty folder (directory).
During this operation the name of the
new folder is displayed for five sec-
onds.DEFINE PLAYLIST
The “DEFINE PLAYLIST” function
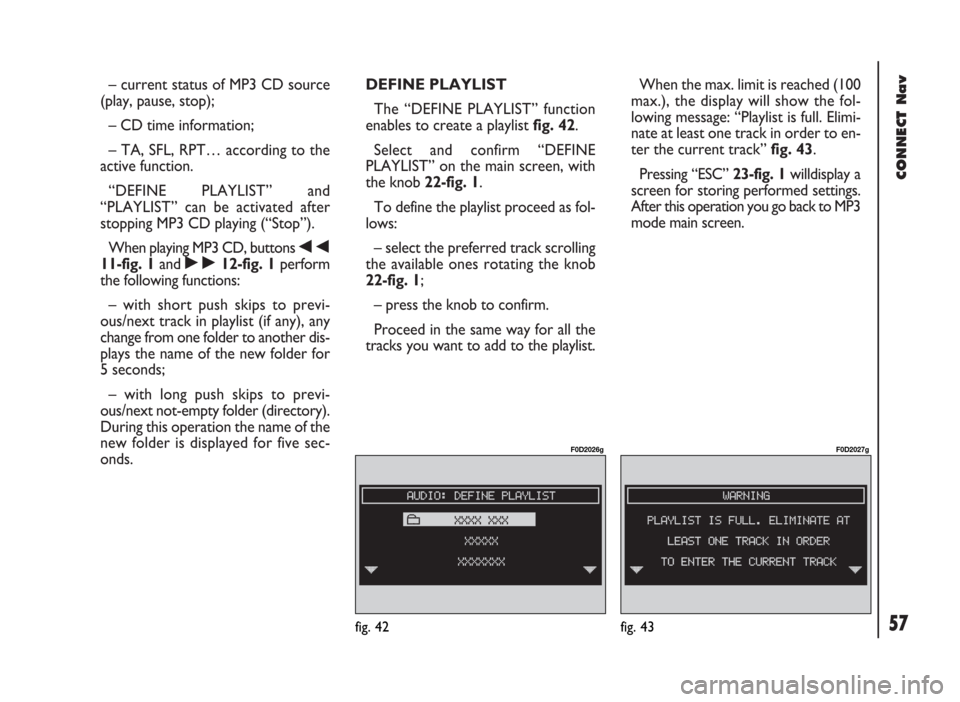
enables to create a playlist fig. 42.
Select and confirm “DEFINE
PLAYLIST” on the main screen, with
the knob 22-fig. 1.
To define the playlist proceed as fol-
lows:
– select the preferred track scrolling
the available ones rotating the knob
22-fig. 1;
– press the knob to confirm.
Proceed in the same way for all the
tracks you want to add to the playlist.When the max. limit is reached (100
max.), the display will show the fol-
lowing message: “Playlist is full. Elimi-
nate at least one track in order to en-
ter the current track” fig. 43.
Pressing “ESC” 23-fig. 1willdisplay a
screen for storing performed settings.
After this operation you go back to MP3
mode main screen.
fig. 42
F0D2026g
fig. 43
F0D2027g
Page 62 of 246
CONNECT Nav
61
In main telephone mode screen,
press the knob 22-fig. 1, to display the
following menu:
FREQUENT NUMBERS
LAST CALLS RECEIVED
LAST NUMBERS CALLED
DIRECTORY
WAP
VOICE MEMO
MESSAGES
PHONE OPTIONS
PHONE SETTINGSPress “ESC” 23-fig. 1to return to
main telephone screen.
There is another “ESC” mode, if
CONNECT is already on (e.g.: audio
mode), to enter the telephone mode:
– press shortly button ò13-fig. 1,
the display will show for few seconds
the last dialled number;
– press again button ò13-fig. 1to
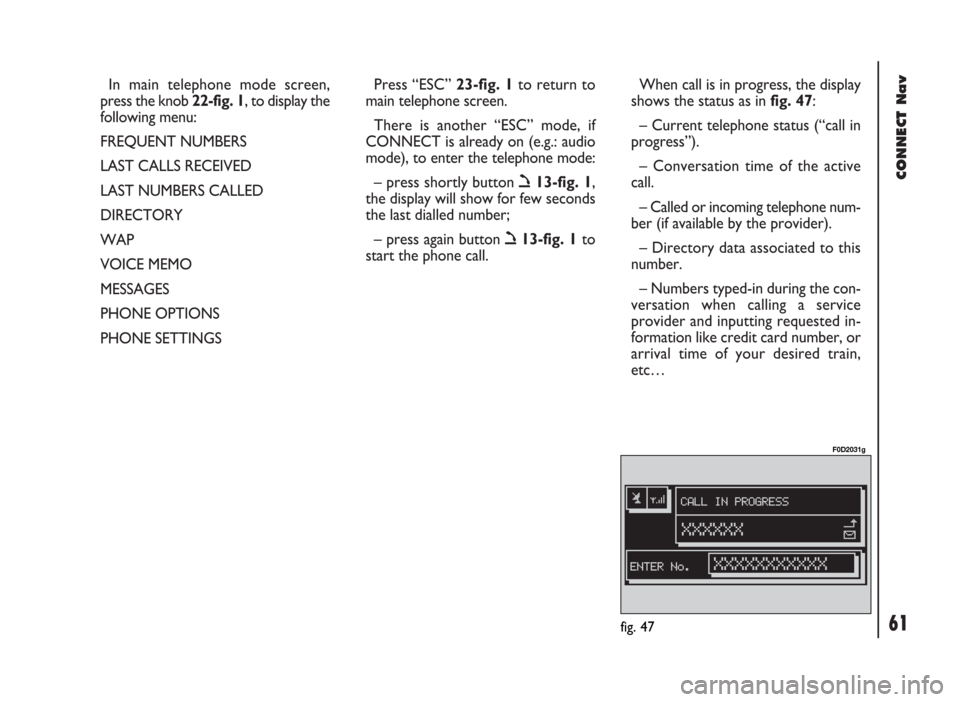
start the phone call.When call is in progress, the display
shows the status as in fig. 47:
– Current telephone status (“call in
progress”).
– Conversation time of the active
call.
– Called or incoming telephone num-
ber (if available by the provider).
– Directory data associated to this
number.
– Numbers typed-in during the con-
versation when calling a service
provider and inputting requested in-
formation like credit card number, or
arrival time of your desired train,
etc…
fig. 47
F0D2031g
Page 65 of 246
CONNECT Nav
64
To accept the call, proceed as
follows:
– short push on button ò13-fig. 1;
dialog box disappears and ring stops,
the display shows the string “call in
progress”.
To close the conversation,
proceed as follows:
– press button ò13-fig. 1; the sys-
tem returns automatically to the pre-
vious mode and the display shows the
relevant status.
To refuse the call, proceed as
follows:
– long push on button ò13-fig. 1;
dialog box disappears and ring stops.
In this case the screen will remain the
one shown before the incoming call.
IMPORTANT: dialog box disap-
pears and ring stops also if the line is
unwillingly lost.OUTGOING CALLS
To start a call, proceed as
follows:
– enter the telephone mode as pre-
viously described;
– dial the required number using the
multifunction keys 1 ÷ 12-fig. 1;
– to enter the international prefix
(“+” char), push button “*/+” at
length;
dialled number is shown in the input
box on the display; max. 20 digits can
be input and in case there is no enough
space to keep the whole string, the in-
terface will provide a left string scroll;
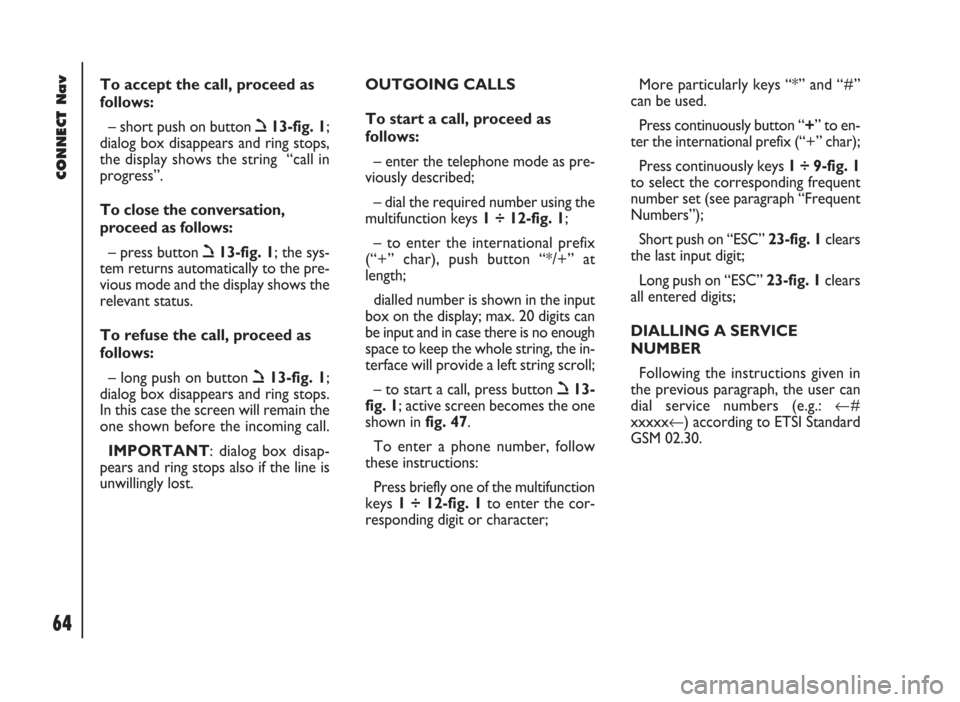
– to start a call, press button ò13-
fig. 1; active screen becomes the one
shown in fig. 47.
To enter a phone number, follow
these instructions:
Press briefly one of the multifunction
keys 1 ÷ 12-fig. 1to enter the cor-
responding digit or character;More particularly keys “*” and “#”
can be used.
Press continuously button “+” to en-
ter the international prefix (“+” char);
Press continuously keys 1 ÷ 9-fig. 1
to select the corresponding frequent
number set (see paragraph “Frequent
Numbers”);
Short push on “ESC” 23-fig. 1clears
the last input digit;
Long push on “ESC” 23-fig. 1clears
all entered digits;
DIALLING A SERVICE
NUMBER
Following the instructions given in
the previous paragraph, the user can
dial service numbers (e.g.: ←#
xxxxx←) according to ETSI Standard
GSM 02.30.
Page 73 of 246
CONNECT Nav
72
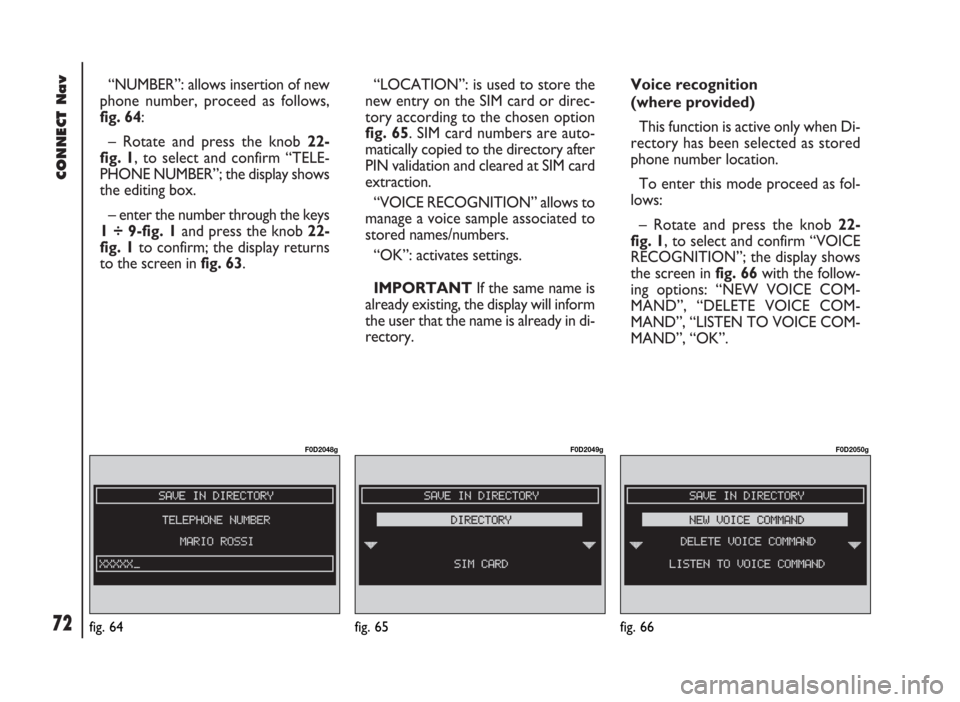
“NUMBER”: allows insertion of new
phone number, proceed as follows,
fig. 64:
– Rotate and press the knob 22-
fig. 1, to select and confirm “TELE-
PHONE NUMBER”; the display shows
the editing box.
– enter the number through the keys
1 ÷ 9-fig. 1and press the knob 22-
fig. 1to confirm; the display returns
to the screen in fig. 63.“LOCATION”: is used to store the
new entry on the SIM card or direc-
tory according to the chosen option
fig. 65. SIM card numbers are auto-
matically copied to the directory after
PIN validation and cleared at SIM card
extraction.
“VOICE RECOGNITION” allows to
manage a voice sample associated to
stored names/numbers.
“OK”: activates settings.
IMPORTANTIf the same name is
already existing, the display will inform
the user that the name is already in di-
rectory.Voice recognition
(where provided)
This function is active only when Di-
rectory has been selected as stored
phone number location.
To enter this mode proceed as fol-
lows:
– Rotate and press the knob 22-
fig. 1, to select and confirm “VOICE
RECOGNITION”; the display shows
the screen in fig. 66with the follow-
ing options: “NEW VOICE COM-
MAND”, “DELETE VOICE COM-
MAND”, “LISTEN TO VOICE COM-
MAND”, “OK”.
fig. 65
F0D2049g
fig. 66
F0D2050g
fig. 64
F0D2048g
Page 120 of 246
CONNECT Nav
119
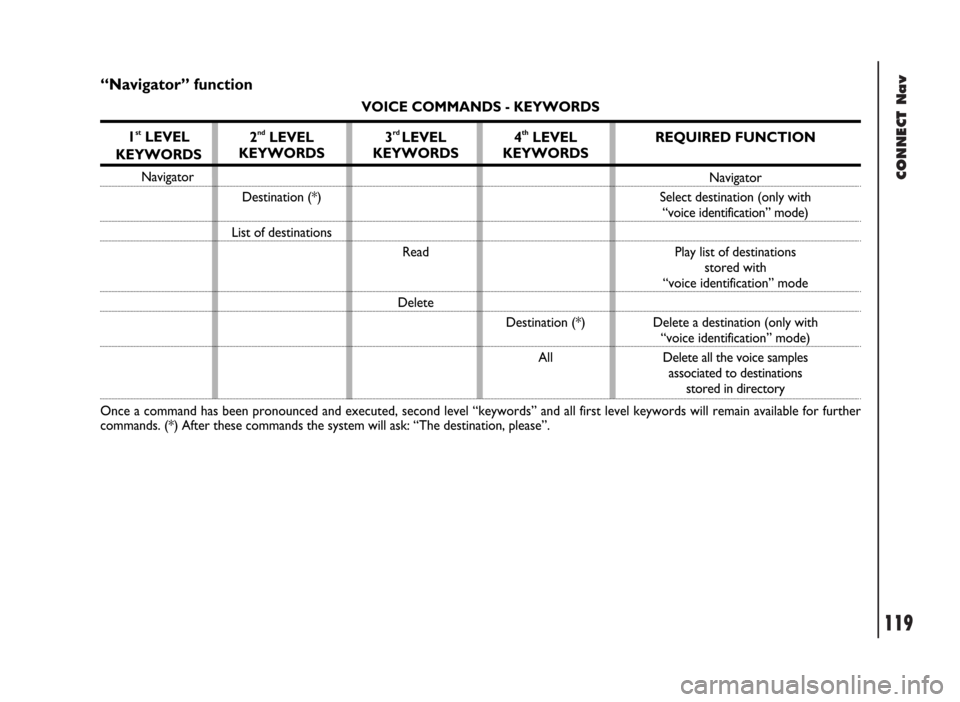
“Navigator” function
VOICE COMMANDS - KEYWORDS
1
stLEVEL
KEYWORDS
Navigator
Once a command has been pronounced and executed, second level “keywords” and all first level keywords will remain available for further
commands. (*) After these commands the system will ask: “The destination, please”.
2ndLEVEL
KEYWORDS
Destination (*)
List of destinations
3rd LEVEL
KEYWORDS
Read
Delete
4thLEVEL
KEYWORDS
Destination (*)
All
REQUIRED FUNCTION
Navigator
Select destination (only with
“voice identification” mode)
Play list of destinations
stored with
“voice identification” mode
Delete a destination (only with
“voice identification” mode)
Delete all the voice samples
associated to destinations
stored in directory