handbrake FIAT DUCATO BASE CAMPER 2014 Owner handbook (in English)
[x] Cancel search | Manufacturer: FIAT, Model Year: 2014, Model line: DUCATO BASE CAMPER, Model: FIAT DUCATO BASE CAMPER 2014Pages: 367, PDF Size: 20.39 MB
Page 6 of 367
READ THIS CAREFULLYREFUELLING
Only refuel with automotive diesel conforming to the European specification EN590. The use of other products or mixtures may damage the
engine beyond repair and consequently invalidate the warranty, due to the damage caused.
STARTING THE ENGINE
Make sure that the handbrake is engaged; set the gear lever to neutral; fully depress the clutch pedal without pressing the accelerator, then
turn the ignition key to MAR-ON and wait for the warning lights
and
to switch off; turn the ignition key to AVV and release it as
soon as the engine has started.
PARKING ON FLAMMABLE MATERIAL
The catalytic converter develops high temperatures during operation. Do not park on grass, dry leaves, pine needles or other flammable
material: fire hazard.
RESPECTING THE ENVIRONMENT
The vehicle is fitted with a system that allows continuous diagnosis of the emission-related components in order to help protect the
environment.
ELECTRICAL ACCESSORIES
If, after buying the vehicle, you decide to add electrical accessories (with the risk of gradually draining the battery), visit a Fiat Dealership. They
can calculate the overall electrical requirement and check that the vehicle's electrical system can support the required load.
SCHEDULED SERVICING
Correct maintenance enables the vehicle to perfectly maintain performance and safety characteristics, its environmental friendliness and low
running costs over time.
THE OWNER HANDBOOK CONTAINS
... important information, advice and warnings for correct use, driving safety and maintenance of your vehicle over time. Special attention
must be paid to the symbols
(safety of persons)
(environmental protection)
(vehicle integrity).
Page 12 of 367
.
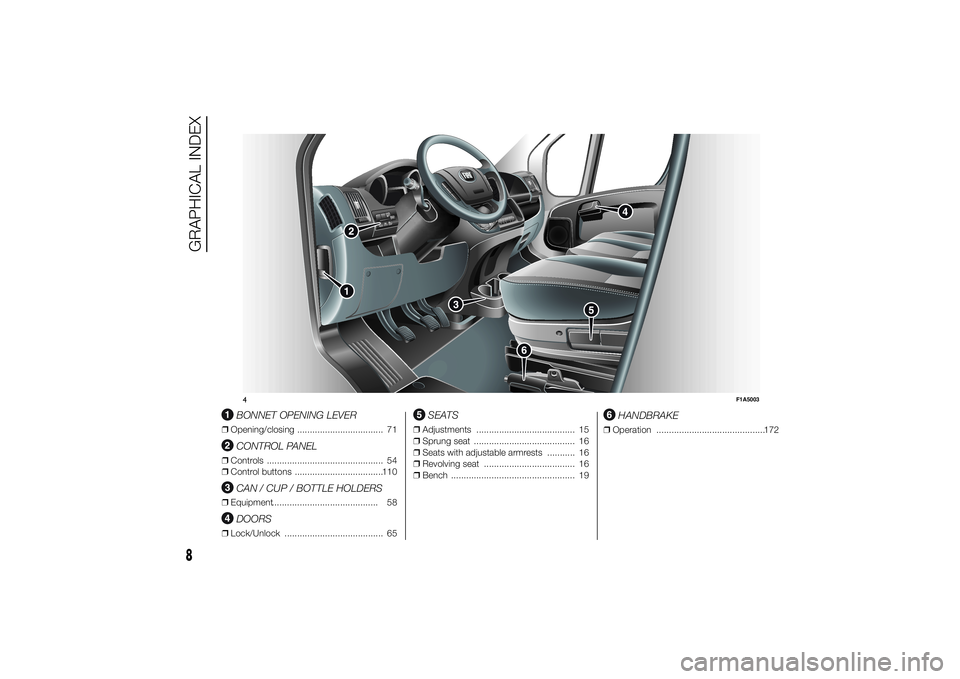
BONNET OPENING LEVER
❒Opening/closing .................................. 71
CONTROL PANEL
❒Controls .............................................. 54
❒Control buttons ...................................110
CAN / CUP / BOTTLE HOLDERS
❒Equipment.......................................... 58
DOORS
❒Lock/Unlock ....................................... 65
SEATS
❒Adjustments ....................................... 15
❒Sprung seat ........................................ 16
❒Seats with adjustable armrests ........... 16
❒Revolving seat .................................... 16
❒Bench ................................................. 19
HANDBRAKE
❒Operation ...........................................172
M
ODE
4
F1A5003
8
GRAPHICAL INDEX
Page 19 of 367
STEERING LOCK
Activation
When the key is at STOP, remove the
key and turn the steering wheel until
it locks.
Disengagement
Move the steering wheel slightly as you
turn the ignition key to MAR-ON
WARNING
2) If the ignition device has been
tampered with (e.g. an attempted
theft), have it checked over by a
Fiat Dealership before driving
again.
3) Always remove the key when you
leave your vehicle to prevent
someone from accidentally
operating the controls. Remember
to engage the handbrake.
Engage first gear if the vehicle is
parked uphill or reverse gear if the
vehicle is parked downhill. Never
leave children unattended in the
vehicle.4) Never extract the key while the
vehicle is moving. The steering
wheel will lock as soon as it is
turned. This also applies to cases
in which the vehicle is towed.
5) Under no circumstances should
aftermarket operations be carried
out involving steering system or
steering column modifications
(e.g. installation of anti-theft
device). This could negatively
affect performance and safety,
invalidate the warranty, cause
serious safety problems and also
result in vehicle non-compliance
with type-approval requirements.
SEATS
6)2)
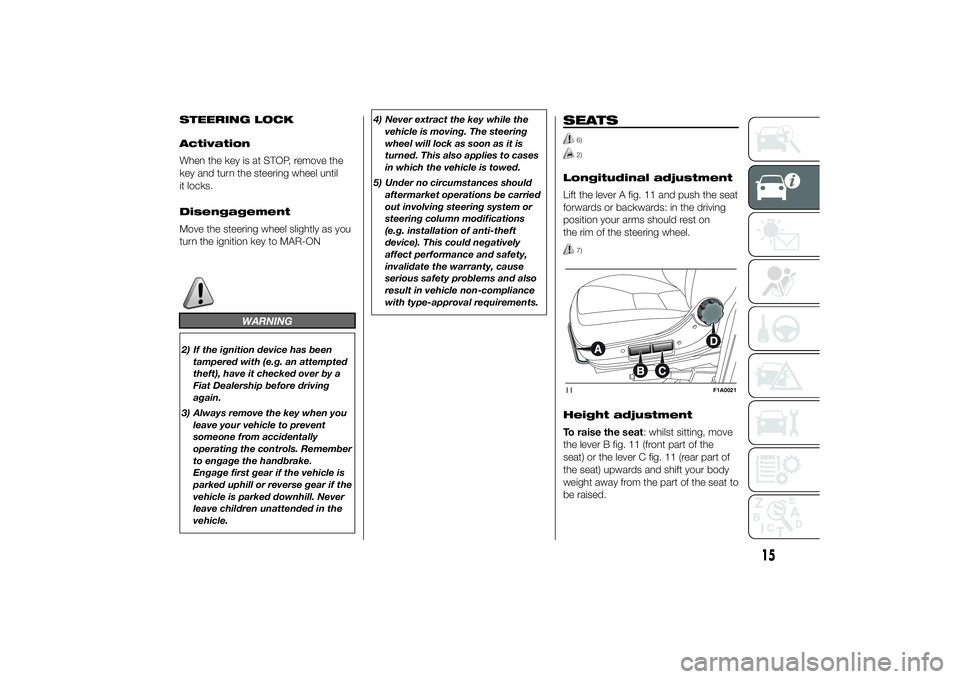
Longitudinal adjustment
Lift the lever A fig. 11 and push the seat
forwards or backwards: in the driving
position your arms should rest on
the rim of the steering wheel.
7)
Height adjustment
To raise the seat: whilst sitting, move
the lever B fig. 11 (front part of the
seat) or the lever C fig. 11 (rear part of
the seat) upwards and shift your body
weight away from the part of the seat to
be raised.11
F1A0021
15
Page 26 of 367
4-SEATER BENCH SEAT
(Crew Cab Van versions)
(for versions/markets, where provided)
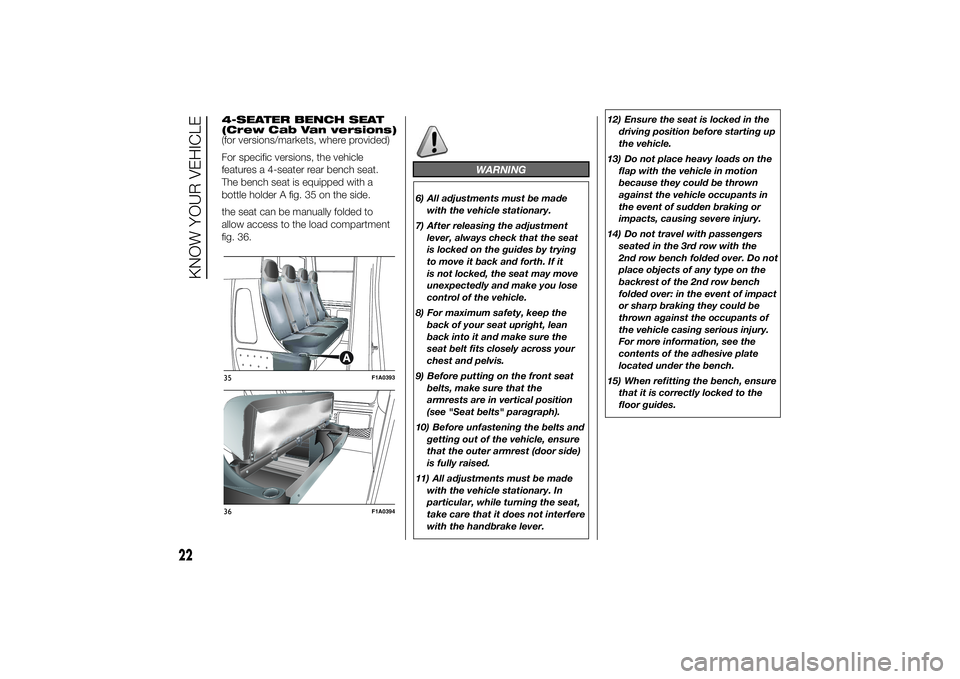
For specific versions, the vehicle
features a 4-seater rear bench seat.
The bench seat is equipped with a
bottle holder A fig. 35 on the side.
the seat can be manually folded to
allow access to the load compartment
fig. 36.
WARNING
6) All adjustments must be made
with the vehicle stationary.
7) After releasing the adjustment
lever, always check that the seat
is locked on the guides by trying
to move it back and forth. If it
is not locked, the seat may move
unexpectedly and make you lose
control of the vehicle.
8) For maximum safety, keep the
back of your seat upright, lean
back into it and make sure the
seat belt fits closely across your
chest and pelvis.
9) Before putting on the front seat
belts, make sure that the
armrests are in vertical position
(see "Seat belts" paragraph).
10) Before unfastening the belts and
getting out of the vehicle, ensure
that the outer armrest (door side)
is fully raised.
11) All adjustments must be made
with the vehicle stationary. In
particular, while turning the seat,
take care that it does not interfere
with the handbrake lever.12) Ensure the seat is locked in the
driving position before starting up
the vehicle.
13) Do not place heavy loads on the
flap with the vehicle in motion
because they could be thrown
against the vehicle occupants in
the event of sudden braking or
impacts, causing severe injury.
14) Do not travel with passengers
seated in the 3rd row with the
2nd row bench folded over. Do not
place objects of any type on the
backrest of the 2nd row bench
folded over: in the event of impact
or sharp braking they could be
thrown against the occupants of
the vehicle casing serious injury.
For more information, see the
contents of the adhesive plate
located under the bench.
15) When refitting the bench, ensure
that it is correctly locked to the
floor guides.
35
F1A0393
36
F1A0394
22
KNOW YOUR VEHICLE
Page 55 of 367
Each activation of the lever
corresponds to an increase in speed of
about 1 km/h, whilst keeping the lever
upwards varies the speed continuously.
Reducing the stored
speed
This can be done in two ways:
❒by switching off the device and then
storing the new speed;
or
❒by moving the stalk downwards (-)
until the new speed, which will be
stored automatically, is reached.
Each movement of the lever will
correspond to a slight reduction in
speed of about 1 km/h, while keeping
the lever held downwards will decrease
the speed continuously.
Deactivating the device
The device can be switched off by
the driver in the following ways:
❒turning ring nut A to OFF orO
(according to the version);
❒by stopping the engine;Deactivating the
function
The device can be switched off by the
driver in the following ways:
❒turning ring nut A to OFF orO
(according to the version);
❒pressing the button B, both with
symbolIIand symbol CANC/RES,
the system pauses;
❒by stopping the engine;
❒by pressing the brake pedal or
operating the handbrake;
❒by pressing the clutch pedal;
❒requesting a gear shift with an
automatic transmission in sequential
mode;
❒with the vehicle speed below the set
limit
❒by pressing the accelerator pedal; in
this case the system is not actually
turned off but the acceleration
request takes priority; the Cruise
Control remains activated, without
the need to press the CANC/RES
button to restore the previous
conditions once the acceleration is
over.
The device is automatically switched off
in the following cases:
❒if the ABS or ESP systems cut in;❒in the event of system failure.
27) 28)
SPEED LIMITER
This device allows the speed of the car
to be limited to values which can be
set by the driver.
The maximum speed can be set both
with vehicle stationary and in motion.
The minimum speed that can be set is
30 km/h.
When the device is active, the car
speed depends on the pressure at the
accelerator pedal, until the
programmed speed limit is reached
(see "Speed limit programming"
paragraph).
If necessary (in the event of overtaking
for example), the set speed limit can
be exceeded by fully depressing the
accelerator pedal.
By gradually reducing the pressure on
the accelerator pedal, the function
will be reactivated as soon as the car
speed drops below the set speed.
51
Page 80 of 367
❒ASR
❒HBA
❒DST
❒ERM
54) 55) 56)
SYSTEM INTERVENTION
This is signalled by the flashing of
warning light
in the instrument panel,
to inform the driver that the vehicle is
in critical stability and grip conditions.
SYSTEM ACTIVATION
The ESC system switches on
automatically when the engine is
started and cannot be switched off.
HILL HOLDER SYSTEM
This system is an integral part of the
ESC system and facilitates starting on
slopes.
It is automatically activated in the
following conditions:
❒uphill: vehicle stationary on a road
with a gradient higher than 5%,
engine running, brake pressed and
gearbox in neutral or gear (other than
reverse) engaged;❒downhill: vehicle stationary on a road
with a gradient higher than 5%,
engine running, brake pressed and
reverse gear engaged.
When setting off, the ESC system
control unit maintains the braking
pressure on the wheels until the torque
necessary for starting is reached, or
in any case for a maximum of 2
seconds, allowing your right foot to be
moved easily from the brake pedal to
the accelerator.
When two seconds have elapsed,
without starting, the system is
automatically deactivated, gradually
releasing the braking pressure. During
this release stage, the typical brake
disengagement noise indicating that the
vehicle is going to move imminently
will be heard.
IMPORTANT The Hill Holder system is
not a parking brake; therefore, never
leave the vehicle without having
engaged the handbrake, turned the
engine off and engaged first gear,
so that it is parked in safe conditions
(for further information read the
"Parking" paragraph in the "Starting
and driving" chapter).ASR (AntiSlip
Regulation) SYSTEM
It is an integral part of the ESC system.
It automatically operates in the event
of one or both drive wheels slipping,
loss of grip on wet roads (aquaplaning)
and acceleration on slippery, snowy
or icy roads, etc.
Depending on the slipping conditions,
two different control systems are
activated:
❒if the slipping involves both drive
wheels, the ASR intervenes reducing
the power transmitted by the engine;
❒if the slipping only involves one of the
drive wheels, it intervenes
automatically braking the wheel that
is slipping.
58)
Engagement/ disengagement of the
ASR system
The ASR system switches on
automatically each time the engine is
started.
Whilst driving, the ASR can be switched
off and subsequently switched on
again by pressing the ASR OFF button
fig. 124.
57)
76
KNOW YOUR VEHICLE
Page 107 of 367
KNOWING THE INSTRUMENT PANEL
This section of the booklet gives you all
the information you need to
understand, interpret and use the
instrument panel correctly.CONTROL PANEL AND
INSTRUMENTS ...............................104
DISPLAY ........................................109
TRIP COMPUTER ...........................118
WARNING LIGHTS AND
MESSAGES ....................................121
- LOW BRAKE FLUID/HANDBRAKE
ENGAGED .......................................... 121
- EBD FAILURE .................................. 122
- AIRBAG FAILURE ............................. 122
- SEAT BELTS NOT FASTENED .......... 123
- ENGINE COOLANT TEMPERATURE
TOO HIGH .......................................... 124
- LOW BATTERY CHARGE ................. 124
- LOW ENGINE OIL PRESSURE ......... 125
-ENGINE OIL DETERIORATED ........... 125
-INCOMPLETE DOOR/LOAD
COMPARTMENT CLOSURE ............... 126
- POWER STEERING FAILURE ........... 126
-SELF-LEVELLING SUSPENSION
FAILURE ............................................. 126
- INJECTION/EOBD SYSTEM
FAILURE ............................................. 128
- ABS FAILURE ................................... 129
-FUEL RESERVE ................................ 129
- GLOW PLUG HEATING/GLOW
PLUG HEATING FAILURE ................... 130
- WATER IN DIESEL FILTER ................ 130
-VEHICLE PROTECTION SYSTEM
FAILURE - FIAT CODE ........................ 131
- REAR FOG LIGHTS .......................... 131
-GENERIC FAILURE INDICATION ....... 131
-DPF (PARTICULATE FILTER)
CLEANING UNDERWAY ..................... 133
-WORN BRAKE PADS ........................ 134
-DRIVING ADVISOR ........................... 135
- TPMS ............................................... 136
- DIPPED HEADLIGHTS ..................... 137- FOLLOW ME HOME ........................ 137
- LEFT-HAND DIRECTION INDICATOR
............................................................ 137
- RIGHT-HAND DIRECTION
INDICATOR ........................................ 138
-FOG LIGHTS ..................................... 138
- CRUISE CONTROL .......................... 138
-SPEED LIMITER ................................ 138
- AUTOMATIC MAIN BEAM
HEADLIGHTS ..................................... 139
- MAIN BEAM HEADLIGHTS .............. 139
-EXTERIOR LIGHTS FAULT ................ 140
-BRAKE LIGHT FAILURE .................... 140
-MAIN BEAM AUTOMATISM FAULT ... 141
-POSSIBLE ICE ON ROAD ................. 141
-SPEED LIMIT EXCEEDED ................. 141
-SCHEDULED SERVICING ................. 141
-DRIVING ADVISOR SYSTEM
FAILURE ............................................. 142
-TRAFFIC SIGN RECOGNITION
FAILURE ............................................. 142
-LIMITED RANGE ............................... 142
-START&STOP SYSTEM
ACTIVATION/DEACTIVATION .............. 143
-START&STOP FAILURE .................... 143
103
Page 125 of 367
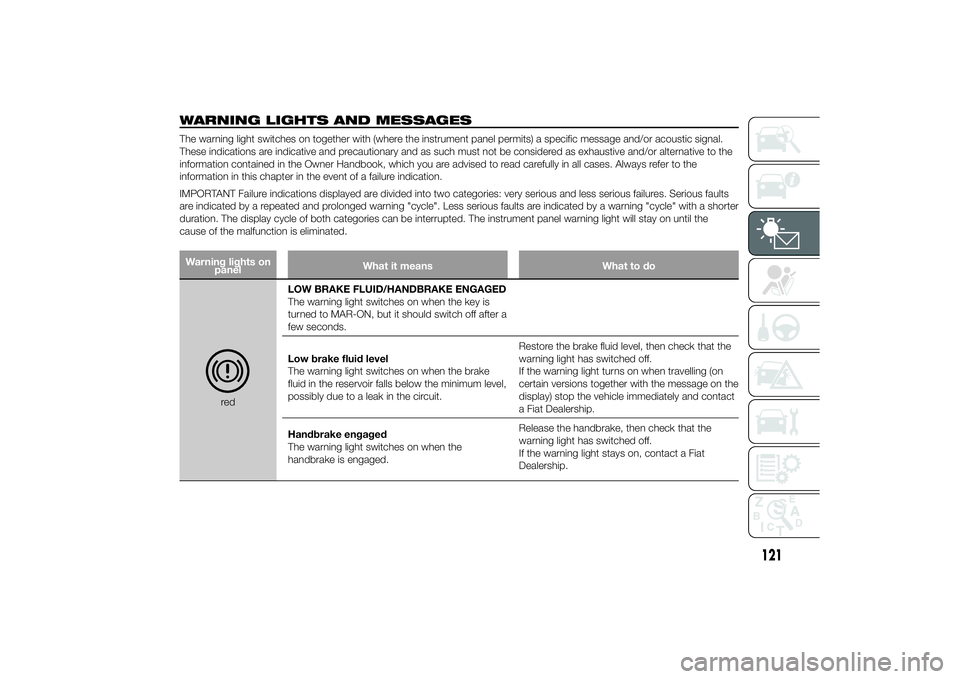
WARNING LIGHTS AND MESSAGESThe warning light switches on together with (where the instrument panel permits) a specific message and/or acoustic signal.
These indications are indicative and precautionary and as such must not be considered as exhaustive and/or alternative to the
information contained in the Owner Handbook, which you are advised to read carefully in all cases. Always refer to the
information in this chapter in the event of a failure indication.
IMPORTANT Failure indications displayed are divided into two categories: very serious and less serious failures. Serious faults
are indicated by a repeated and prolonged warning "cycle". Less serious faults are indicated by a warning "cycle" with a shorter
duration. The display cycle of both categories can be interrupted. The instrument panel warning light will stay on until the
cause of the malfunction is eliminated.Warning lights on
panelWhat it means What to do
redLOW BRAKE FLUID/HANDBRAKE ENGAGED
The warning light switches on when the key is
turned to MAR-ON, but it should switch off after a
few seconds.
Low brake fluid level
The warning light switches on when the brake
fluid in the reservoir falls below the minimum level,
possibly due to a leak in the circuit.Restore the brake fluid level, then check that the
warning light has switched off.
If the warning light turns on when travelling (on
certain versions together with the message on the
display) stop the vehicle immediately and contact
a Fiat Dealership.
Handbrake engaged
The warning light switches on when the
handbrake is engaged.Release the handbrake, then check that the
warning light has switched off.
If the warning light stays on, contact a Fiat
Dealership.
121
Page 174 of 367
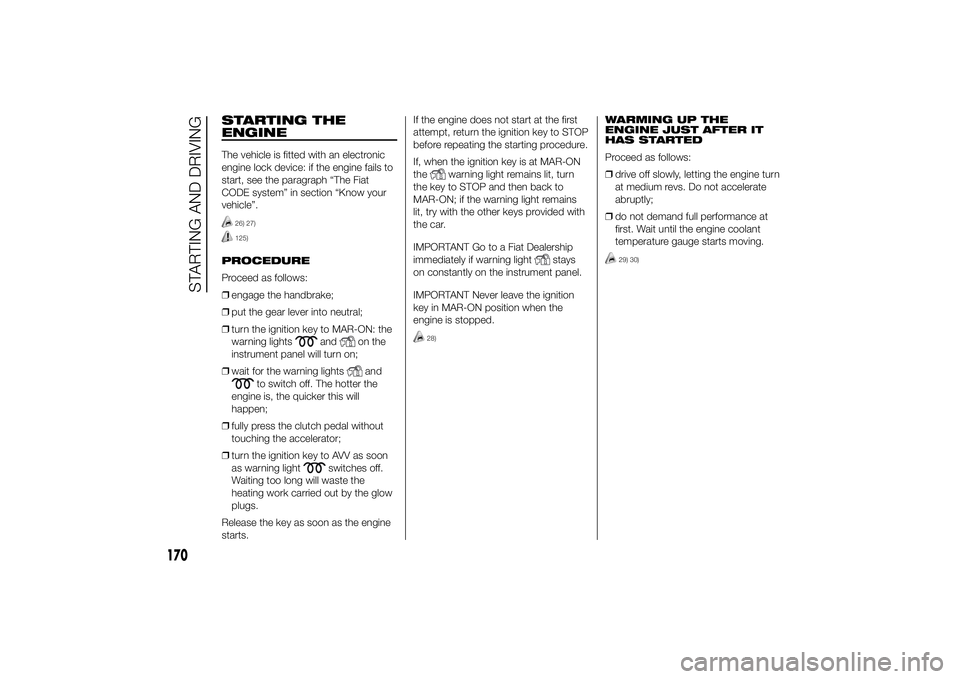
STARTING THE
ENGINEThe vehicle is fitted with an electronic
engine lock device: if the engine fails to
start, see the paragraph “The Fiat
CODE system” in section “Know your
vehicle”.
26) 27)125)
PROCEDURE
Proceed as follows:
❒engage the handbrake;
❒put the gear lever into neutral;
❒turn the ignition key to MAR-ON: the
warning lights
and
on the
instrument panel will turn on;
❒wait for the warning lightsand
to switch off. The hotter the
engine is, the quicker this will
happen;
❒fully press the clutch pedal without
touching the accelerator;
❒turn the ignition key to AVV as soon
as warning light
switches off.
Waiting too long will waste the
heating work carried out by the glow
plugs.
Release the key as soon as the engine
starts.If the engine does not start at the first
attempt, return the ignition key to STOP
before repeating the starting procedure.
If, when the ignition key is at MAR-ON
the
warning light remains lit, turn
the key to STOP and then back to
MAR-ON; if the warning light remains
lit, try with the other keys provided with
the car.
IMPORTANT Go to a Fiat Dealership
immediately if warning light
stays
on constantly on the instrument panel.
IMPORTANT Never leave the ignition
key in MAR-ON position when the
engine is stopped.
28)
WARMING UP THE
ENGINE JUST AFTER IT
HAS STARTED
Proceed as follows:
❒drive off slowly, letting the engine turn
at medium revs. Do not accelerate
abruptly;
❒do not demand full performance at
first. Wait until the engine coolant
temperature gauge starts moving.
29) 30)
170
STARTING AND DRIVING
Page 176 of 367
PARKINGProceed as follows:
❒stop the engine and engage the
handbrake;
❒engage a gear (on a slope, engage
first gear if the car is facing uphill or
reverse if it is facing downhill) and
leave the wheels steered.
If the vehicle is parked on a steep
slope, it is advisable to block the
wheels with a wedge or stone.
Do not leave the key in the ignition as
this drains the battery. Always remove
the key when you leave the car.
126)
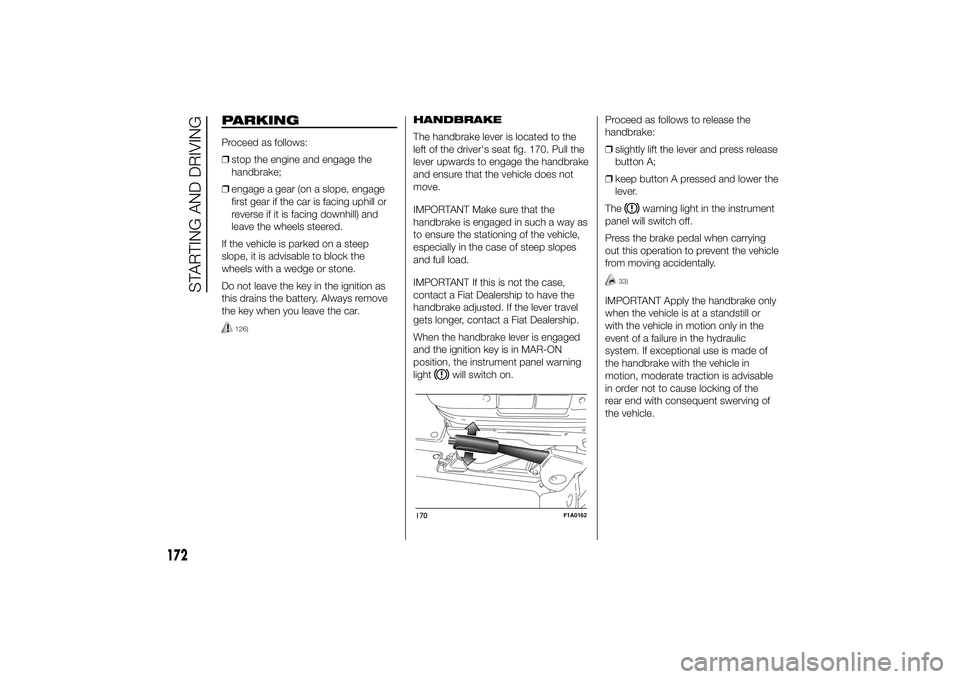
HANDBRAKE
The handbrake lever is located to the
left of the driver's seat fig. 170. Pull the
lever upwards to engage the handbrake
and ensure that the vehicle does not
move.
IMPORTANT Make sure that the
handbrake is engaged in such a way as
to ensure the stationing of the vehicle,
especially in the case of steep slopes
and full load.
IMPORTANT If this is not the case,
contact a Fiat Dealership to have the
handbrake adjusted. If the lever travel
gets longer, contact a Fiat Dealership.
When the handbrake lever is engaged
and the ignition key is in MAR-ON
position, the instrument panel warning
light
will switch on.Proceed as follows to release the
handbrake:
❒slightly lift the lever and press release
button A;
❒keep button A pressed and lower the
lever.
The
warning light in the instrument
panel will switch off.
Press the brake pedal when carrying
out this operation to prevent the vehicle
from moving accidentally.
33)
IMPORTANT Apply the handbrake only
when the vehicle is at a standstill or
with the vehicle in motion only in the
event of a failure in the hydraulic
system. If exceptional use is made of
the handbrake with the vehicle in
motion, moderate traction is advisable
in order not to cause locking of the
rear end with consequent swerving of
the vehicle.
170
F1A0162
172
STARTING AND DRIVING