ESC FIAT DUCATO BASE CAMPER 2016 Owner handbook (in English)
[x] Cancel search | Manufacturer: FIAT, Model Year: 2016, Model line: DUCATO BASE CAMPER, Model: FIAT DUCATO BASE CAMPER 2016Pages: 387, PDF Size: 20.76 MB
Page 112 of 387
Fiat Auto S.p.A. shall not be liable for
damage caused by the installation
of accessories either not supplied or
recommended by Fiat Auto S.p.A.
and/or not installed in compliance with
the instructions provided.
RADIO TRANSMITTERS
AND MOBILE PHONES
Radio transmitter equipment (vehicle
mobile phones, CB radios, amateur
radio etc.) cannot be used inside the
car unless a separate aerial is mounted
externally.
IMPORTANT The use of these devices
inside the passenger compartment
(without an external aerial) may cause
the electrical systems to malfunction.
This could compromise the safety
of the car in addition to constituting a
potential hazard for passengers' health.
In addition, transmission and reception
of these devices may be affected by the
shielding effect of the car body.
As far as the use of EC-approved
mobile phones is concerned (GSM,
GPRS, UMTS), follow the usage
instructions provided by the mobile
phone manufacturer.PROVISION FOR FITTING
TELEPASS ON
REFLECTIVE
WINDSCREEN
(for versions/markets, where provided)
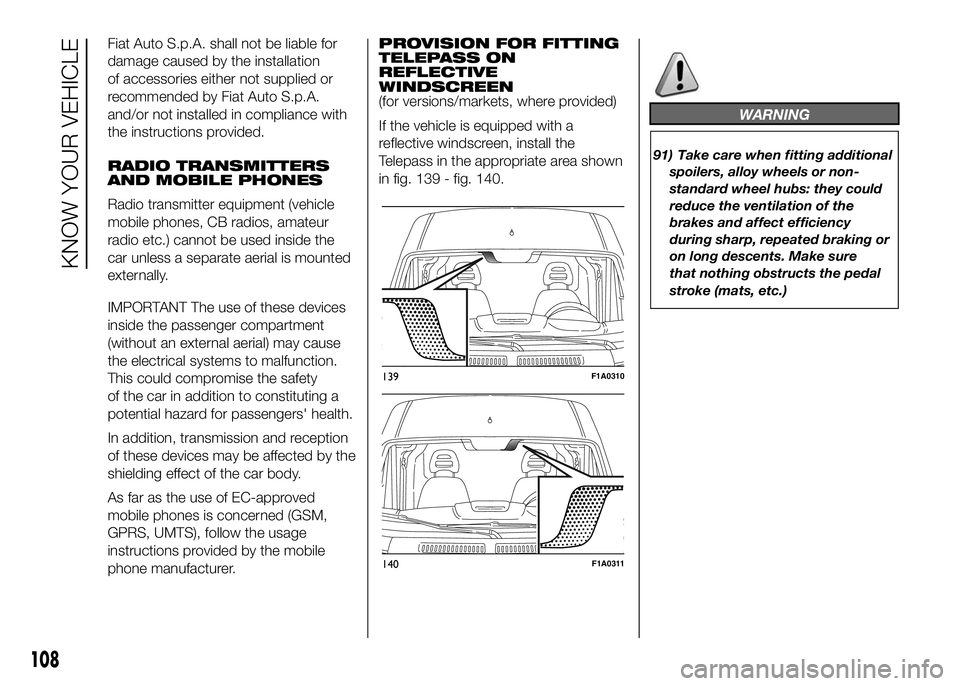
If the vehicle is equipped with a
reflective windscreen, install the
Telepass in the appropriate area shown
in fig. 139 - fig. 140.
WARNING
91) Take care when fitting additional
spoilers, alloy wheels or non-
standard wheel hubs: they could
reduce the ventilation of the
brakes and affect efficiency
during sharp, repeated braking or
on long descents. Make sure
that nothing obstructs the pedal
stroke (mats, etc.)
139F1A0310
140F1A0311
108
KNOW YOUR VEHICLE
Page 124 of 387
SPEEDOMETER (speed
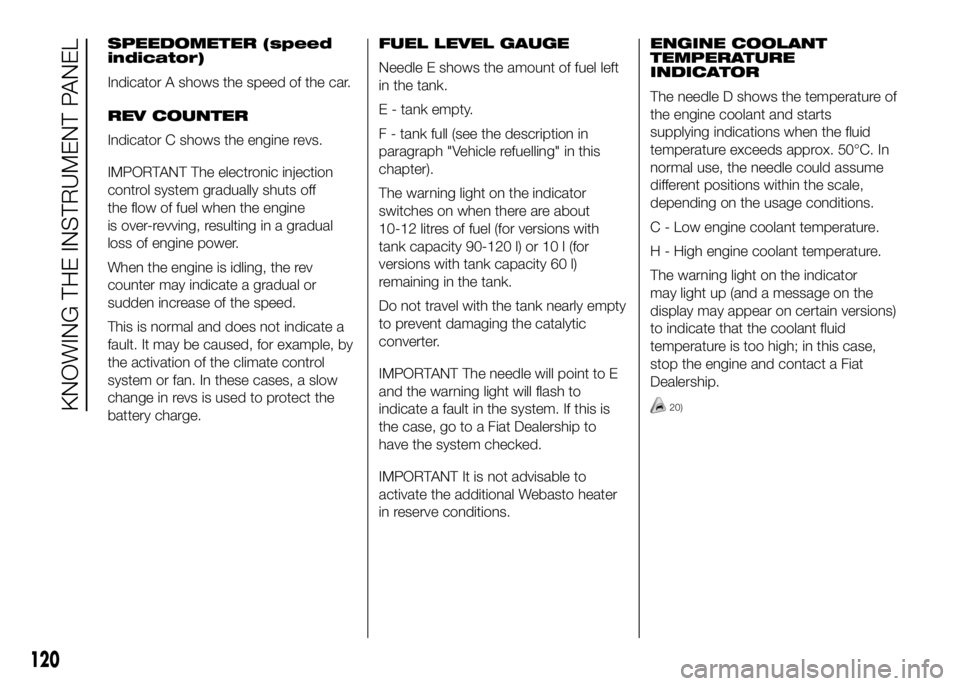
indicator)
Indicator A shows the speed of the car.
REV COUNTER
Indicator C shows the engine revs.
IMPORTANT The electronic injection
control system gradually shuts off
the flow of fuel when the engine
is over-revving, resulting in a gradual
loss of engine power.
When the engine is idling, the rev
counter may indicate a gradual or
sudden increase of the speed.
This is normal and does not indicate a
fault. It may be caused, for example, by
the activation of the climate control
system or fan. In these cases, a slow
change in revs is used to protect the
battery charge.FUEL LEVEL GAUGE
Needle E shows the amount of fuel left
in the tank.
E - tank empty.
F - tank full (see the description in
paragraph "Vehicle refuelling" in this
chapter).
The warning light on the indicator
switches on when there are about
10-12 litres of fuel (for versions with
tank capacity 90-120 l) or 10 l (for
versions with tank capacity 60 l)
remaining in the tank.
Do not travel with the tank nearly empty
to prevent damaging the catalytic
converter.
IMPORTANT The needle will point to E
and the warning light will flash to
indicate a fault in the system. If this is
the case, go to a Fiat Dealership to
have the system checked.
IMPORTANT It is not advisable to
activate the additional Webasto heater
in reserve conditions.ENGINE COOLANT
TEMPERATURE
INDICATOR
The needle D shows the temperature of
the engine coolant and starts
supplying indications when the fluid
temperature exceeds approx. 50°C. In
normal use, the needle could assume
different positions within the scale,
depending on the usage conditions.
C - Low engine coolant temperature.
H - High engine coolant temperature.
The warning light on the indicator
may light up (and a message on the
display may appear on certain versions)
to indicate that the coolant fluid
temperature is too high; in this case,
stop the engine and contact a Fiat
Dealership.
20)
120
KNOWING THE INSTRUMENT PANEL
Page 129 of 387
NoteOn versions with reconfigurable
multifunction display adjustment can be
made both with lights off ("daytime"
mode brightness level) and with lights
on ("nighttime" mode brightness level).
Headlight alignment
(Headlight alignment
corrector position
adjustment)
(for versions/markets, where provided)
This function permits the adjustment (to
4 levels) of the headlight alignment
corrector position.
To carry out the adjustment, proceed as
follows:
❒briefly press the MODE button. The
level set previously flashes on the
display;
❒press button
orto adjust
the position;
❒briefly press the MODE button to
return to the menu screen or hold the
button down to return to the
standard screen without storing.Speed limit (Speed
Beep)
This function makes it possible to set
the vehicle speed limit (km/h or mph).
When this limit is exceeded the driver is
immediately alerted (see “Warning
lights and messages” section).
To set the desired speed limit, proceed
as follows:
- briefly press the MODE button: the
display will show the wording (Speed
Beep);
press button
orto select
speed limit activation (On) or
deactivation (Off);
- if the function has been activated (On),
press the
orbutton to
select the desired speed limit and then
press MODE to confirm.NoteSetting is possible between 30
and 200 km/h, or 20 and 125 mph,
according to the previously set unit.
See the "Setting the unit of
measurement (Measurement unit)"
paragraph described below. The setting
will increase/decrease by 5 units each
time button
/is pressed.
Hold down the
/button to
automatically increase/decrease the
setting rapidly. Complete the
adjustment with single presses of the
button when you approach the desired
value.
- press the MODE button briefly to
return to the menu screen or hold the
button down to return to the standard
screen without storing.
To cancel the setting, proceed as
follows:
- briefly press button MODE, (On) will
flash on the display;
- press button
, (Off) will flash on
the display;
- press the MODE button briefly to
return to the menu screen or hold the
button down to return to the standard
screen without storing.
125
Page 130 of 387
Headlight sensor
sensitivity adjustment
(for versions/markets, where provided)
With this function it is possible to adjust
the rain headlight sensitivity according
to 3 levels.
To set the required sensitivity level,
proceed as follows:
– briefly press the MODE button: the
previously set sensitivity “level” starts to
flash on the display;
– press the
orbutton to
make the adjustment;
– press the MODE button briefly to
return to the menu screen or hold the
button down to return to the standard
screen without storing.
Cornering lights
(Activation/deactivation of
“Cornering lights”)
(for versions/markets, where provided)
This function activates/deactivates
("On"/"Off") the cornering lights (see the
description in the “Exterior lights”
paragraph).
Proceed as follows to activate/
deactivate the lights:
❒briefly press the MODE button. "On"
or "Off" flash on the display,
according to what has been
previously set;❒press
orto make your
choice;
❒briefly press the MODE button to
return to the menu screen or hold the
button down to return to the
standard screen without storing.
Rain sensor
(Rain sensor setting adjustment)
(for versions/markets, where provided)
This function allows you to adjust the
rain sensor sensitivity to 4 levels.
To set the required sensitivity level,
proceed as follows:
❒briefly press the MODE button. The
sensitivity “level” set previously
flashes on the display;
❒press the
orbutton to
make the adjustment;
❒briefly press the MODE button to
return to the menu screen or hold the
button down to return to the
standard screen without storing.Trip B On/Off (Trip B
data)
This function can be used to activate
(On) or deactivate (Off) the Trip B
display (partial trip).
For more information see the "Trip
computer" paragraph.
For activation/deactivation, proceed as
follows:
- briefly press the MODE button: ON or
OFF flashes on the display (depending
the previous setting);
- press the
orbutton to
select;
- press the MODE button briefly to
return to the menu screen or hold the
button down to return to the standard
screen without storing.
Traffic sign
This function allows you to activate (On)
or deactivate (Off) the Traffic Sign
function to recognise the traffic signs
(no overtaking or speed limits).
For activation/deactivation, proceed as
follows:
- briefly press the MODE button: ON or
OFF flashes on the display (depending
the previous setting);
126
KNOWING THE INSTRUMENT PANEL
Page 136 of 387
IMPORTANT The range can be affected
by several factors: driving style (see
paragraph “Driving style” in the
“Starting and driving” section), type of
route (motorway, towns and cities,
mountain roads, etc…), usage
conditions (load, tyre pressures, etc…).
Trip planning must therefore take the
above into account.
Distance travelled
This value shows the distance covered
from the start of the new journey.
Average consumption (for versions/
markets, where provided)
This value shows the approximate
average fuel consumption from the start
of the new journey.
Instant consumption (for versions/
markets where provided)
This value shows the fuel consumption.
The value is constantly updated. The
display will show “----”ifthecar
is parked with the engine running.Average speed
This value shows the car's average
speed based on the overall time
elapsed since the start of the new
journey.
Trip time
Time elapsed since the start of the new
journey.
IMPORTANT If there is no information,
the Trip computer displays "----" in
place of the value. When normal
operating conditions are restored, the
counting of the various values is
resumed, without either zeroing the
values displayed prior to the problem,
or starting a new mission.
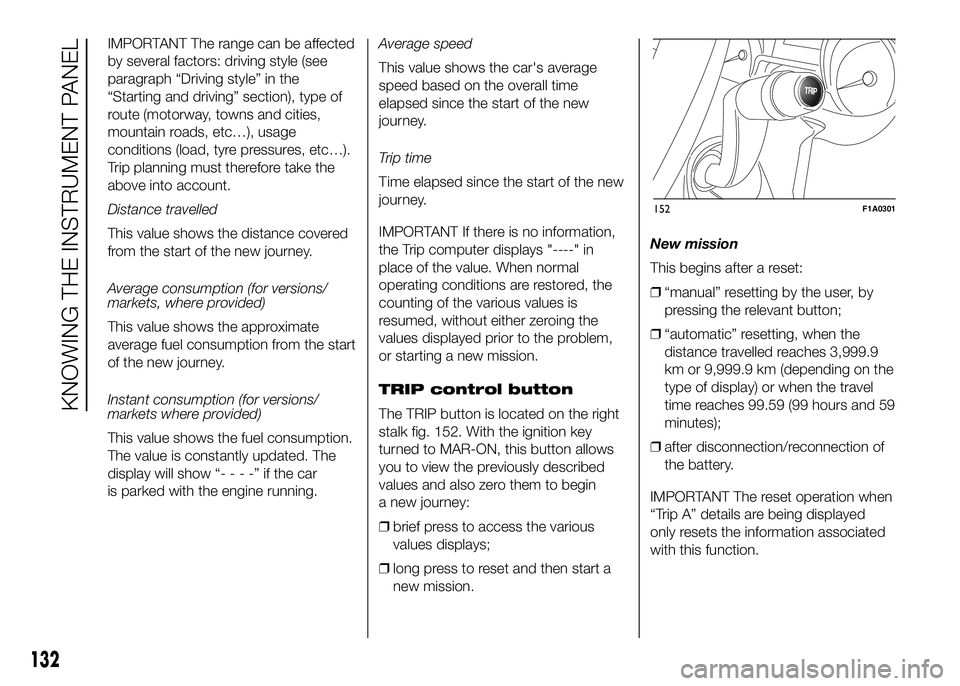
TRIP control button
The TRIP button is located on the right
stalk fig. 152. With the ignition key
turned to MAR-ON, this button allows
you to view the previously described
values and also zero them to begin
a new journey:
❒brief press to access the various
values displays;
❒long press to reset and then start a
new mission.New mission
This begins after a reset:
❒“manual” resetting by the user, by
pressing the relevant button;
❒“automatic” resetting, when the
distance travelled reaches 3,999.9
km or 9,999.9 km (depending on the
type of display) or when the travel
time reaches 99.59 (99 hours and 59
minutes);
❒after disconnection/reconnection of
the battery.
IMPORTANT The reset operation when
“Trip A” details are being displayed
only resets the information associated
with this function.
TRIP
152F1A0301
132
KNOWING THE INSTRUMENT PANEL
Page 141 of 387
Warning lights on
displayWhat it means What to do
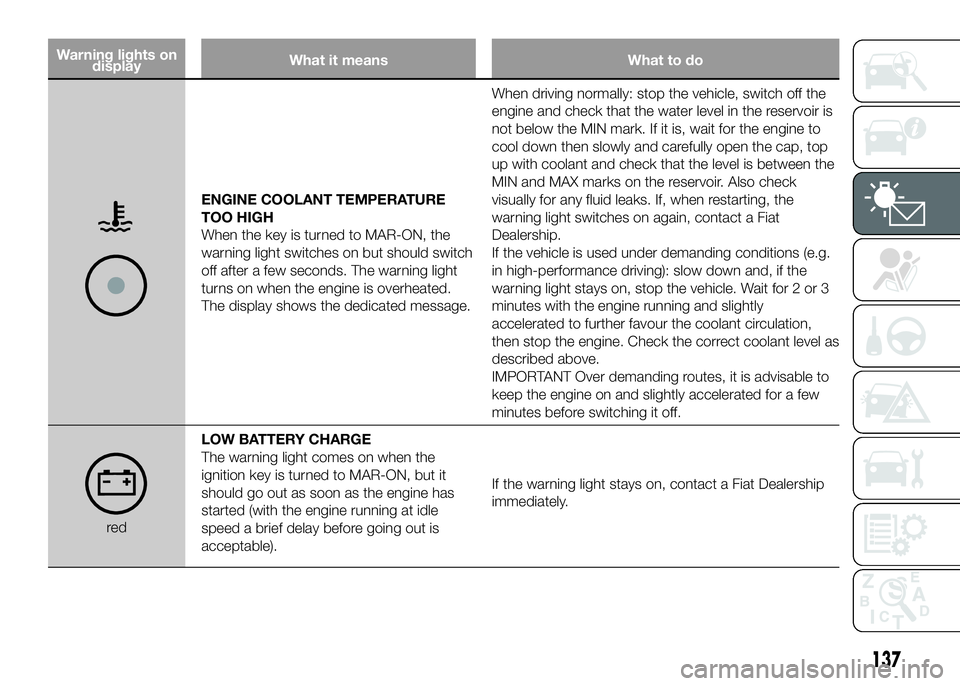
ENGINE COOLANT TEMPERATURE
TOO HIGH
When the key is turned to MAR-ON, the
warning light switches on but should switch
off after a few seconds. The warning light
turns on when the engine is overheated.
The display shows the dedicated message.When driving normally: stop the vehicle, switch off the
engine and check that the water level in the reservoir is
not below the MIN mark. If it is, wait for the engine to
cool down then slowly and carefully open the cap, top
up with coolant and check that the level is between the
MIN and MAX marks on the reservoir. Also check
visually for any fluid leaks. If, when restarting, the
warning light switches on again, contact a Fiat
Dealership.
If the vehicle is used under demanding conditions (e.g.
in high-performance driving): slow down and, if the
warning light stays on, stop the vehicle. Wait for 2 or 3
minutes with the engine running and slightly
accelerated to further favour the coolant circulation,
then stop the engine. Check the correct coolant level as
described above.
IMPORTANT Over demanding routes, it is advisable to
keep the engine on and slightly accelerated for a few
minutes before switching it off.
redLOW BATTERY CHARGE
The warning light comes on when the
ignition key is turned to MAR-ON, but it
should go out as soon as the engine has
started (with the engine running at idle
speed a brief delay before going out is
acceptable).If the warning light stays on, contact a Fiat Dealership
immediately.
137
Page 150 of 387
Warning lights on
panelWhat it means What to do
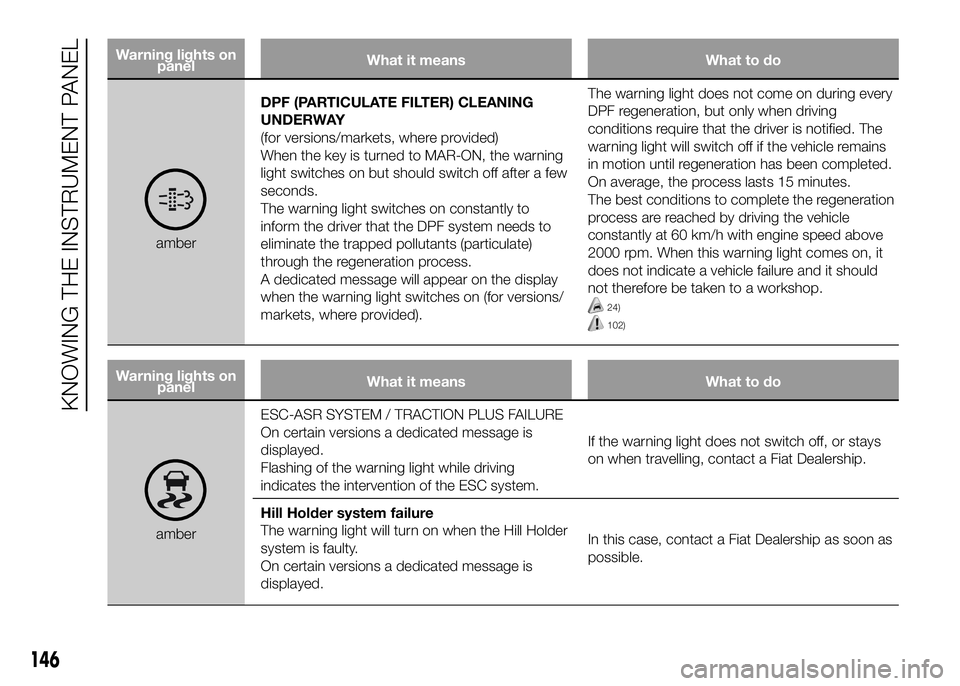
amberDPF (PARTICULATE FILTER) CLEANING
UNDERWAY
(for versions/markets, where provided)
When the key is turned to MAR-ON, the warning
light switches on but should switch off after a few
seconds.
The warning light switches on constantly to
inform the driver that the DPF system needs to
eliminate the trapped pollutants (particulate)
through the regeneration process.
A dedicated message will appear on the display
when the warning light switches on (for versions/
markets, where provided).The warning light does not come on during every
DPF regeneration, but only when driving
conditions require that the driver is notified. The
warning light will switch off if the vehicle remains
in motion until regeneration has been completed.
On average, the process lasts 15 minutes.
The best conditions to complete the regeneration
process are reached by driving the vehicle
constantly at 60 km/h with engine speed above
2000 rpm. When this warning light comes on, it
does not indicate a vehicle failure and it should
not therefore be taken to a workshop.
24)
102)
Warning lights on
panelWhat it means What to do
amberESC-ASR SYSTEM / TRACTION PLUS FAILURE
On certain versions a dedicated message is
displayed.
Flashing of the warning light while driving
indicates the intervention of the ESC system.If the warning light does not switch off, or stays
on when travelling, contact a Fiat Dealership.
Hill Holder system failure
The warning light will turn on when the Hill Holder
system is faulty.
On certain versions a dedicated message is
displayed.In this case, contact a Fiat Dealership as soon as
possible.
146
KNOWING THE INSTRUMENT PANEL
Page 153 of 387

WARNING
102) Always drive at a speed appropriate to the traffic conditions, the weather and traffic regulations. The engine may
be stopped if the DPF light is on; however, repeated interruption of the regeneration process may result in premature
deterioration of the engine oil. For this reason, always wait until the warning light switches off before stopping the
engine as described above. It is not advisable to complete DPF regeneration with the vehicle stationary.
Warning lights on
panelWhat it means What to do
greenDIPPED HEADLIGHTS
The warning light switches on when the dipped
beam headlights are turned on.
FOLLOW ME HOME
The warning light switches on (together with a
message shown on the display) when this device
is in use (see "Follow me home device" paragraph
in "Exterior lights" in the "Knowing your vehicle"
chapter).
greenLEFT-HAND DIRECTION INDICATOR
The warning light switches on when the direction
indicator control stalk is moved downwards or,
together with the right indicator, when the hazard
warning light button is pressed.
149
Page 163 of 387
SAFETY
The chapter that you are about to read
is very important: it describes the
safety systems with which the car is
equipped and provides instructions on
how to use them correctly.SEAT BELTS ...................................160
SBR SYSTEM .................................161
PRETENSIONERS...........................161
CARRYING CHILDREN SAFELY ......164
SETUP FOR “UNIVERSAL ISOFIX”
CHILD RESTRAINT SYSTEM ..........168
FRONT AIRBAGS............................174
SIDE BAGS .....................................179
159
Page 168 of 387
CARRYING
CHILDREN SAFELY
For optimal protection in the event of an
impact, all passengers must be seated
and wearing adequate restraint
systems.
This is even more important for
children.
This prescription is compulsory in all EC
countries according to EC Directive
2003/20/EC.
Compared with adults, a child's head is
proportionally larger and heavier than
the rest of the body, while muscles and
bone structure are not fully developed.
Therefore, correct restraint systems
are necessary which are different from
adult seat belts.The results of research on the best
child restraint systems are contained in
the European Standard ECE-R44,
which enforces the use of restraint
systems classified into five groups:
Group Weight range
Group0 upto10kg
Group 0+ up to 13 kg
Group 1 9-18 kg
Group 2 15-25 kg
Group 3 22-36 kg
As you can see, the groups overlap
partly and, in fact, there are devices on
sale that cover more than one weight
group.
All restraint devices must bear the
certification data, together with the
control mark, on a label solidly fixed to
the child restraint system which must
never be removed.
Over 1.50 m in height, from the point of
view of restraint systems, children are
considered as adults and wear the seat
belts normally.Lineaccessori Fiat offers child restraint
systems for each weight group. These
devices are recommended, having
been specifically designed for Fiat
vehicles.
113)
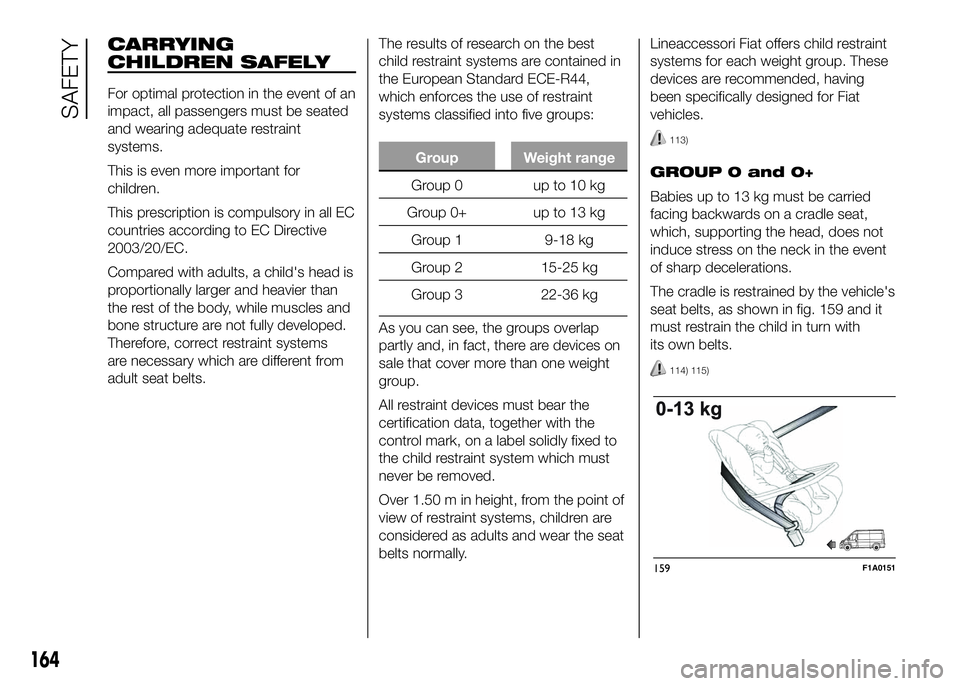
GROUP 0 and 0+
Babies up to 13 kg must be carried
facing backwards on a cradle seat,
which, supporting the head, does not
induce stress on the neck in the event
of sharp decelerations.
The cradle is restrained by the vehicle's
seat belts, as shown in fig. 159 and it
must restrain the child in turn with
its own belts.
114) 115)
159F1A0151
164
SAFETY