bulb FIAT FREEMONT 2011 Owner handbook (in English)
[x] Cancel search | Manufacturer: FIAT, Model Year: 2011, Model line: FREEMONT, Model: FIAT FREEMONT 2011Pages: 267, PDF Size: 5.16 MB
Page 17 of 267
WARNING!
Before exiting a vehicle, always apply
the parking brake, shift the transmission
into PARK, and remove the key fob from the
ignition. When leaving the vehicle, always lock
your vehicle.
Never leave children alone in a vehicle, or with
access to an unlocked vehicle.
Allowing children to be in a vehicle unattended
is dangerous for a number of reasons. A child or
others could be seriously or fatally injured. Chil-
dren should be warned not to touch the parking
brake, brake pedal or the shift lever.
Do not leave the key fob in or near the vehicle,
and do not leave Keyless Enter-N-Go in the ACC
or ON/RUN mode. A child could operate power
windows, other controls, or move the vehicle.
Do not leave children or animals inside parked
vehicles in hot weather. Interior heat build-up
may cause serious injury or death.An unlocked car is an invitation to
thieves. Always remove the Key Fob from
vehicle, cycle the ignition OFF and lock
all doors when leaving the vehicle unattended. SENTRY KEY®
The Sentry Key
®Immobilizer system prevents unau-
thorized vehicle operation by disabling the engine. The
system does not need to be armed or activated. Op-
eration is automatic, regardless of whether the vehicle
is locked or unlocked.
The system uses a Key Fob with Remote Keyless Entry
(RKE) transmitter, a Keyless Ignition Node (KIN) and a
RF receiver to prevent unauthorized vehicle operation.
Therefore, only Key Fobs that are programmed to the
vehicle can be used to start and operate the vehicle.
After cycling the ignition to the ON/RUN position, the
Vehicle Security Light will turn on for three seconds for
a bulb check. If the light remains on after the bulb
check, it indicates that there is a problem with the
electronics. In addition, if the light begins to flash after
the bulb check, it indicates that someone used an
invalid Key Fob to start the engine. Either of these
conditions will result in the engine being shut off after
two seconds.
If the Vehicle Security Light turns on during normal
vehicle operation (vehicle running for longer than
10 seconds), it indicates that there is a fault in the
electronics. Should this occur, have the vehicle serviced
as soon as possible by an authorized dealer.
10
KNOWING YOUR
VEHICLE
SAFETY
STARTING AND
DRIVING
WARNING
LIGHTS AND
MESSAGES
IN AN
EMERGENCY
SERVICING AND
CARETECHNICAL
SPECIFICATIONSCONTENTS
Page 27 of 267
information on Autostick™, refer to “Starting And
Driving.”
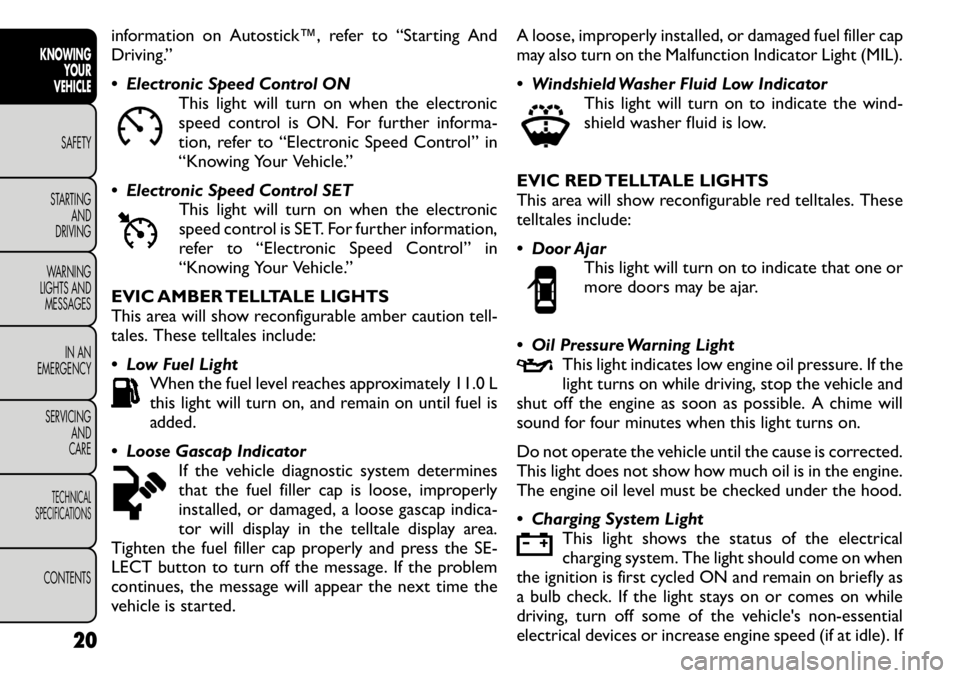
Electronic Speed Control ONThis light will turn on when the electronic
speed control is ON. For further informa-
tion, refer to “Electronic Speed Control” in
“Knowing Your Vehicle.”
Electronic Speed Control SET This light will turn on when the electronic
speed control is SET. For further information,
refer to “Electronic Speed Control” in
“Knowing Your Vehicle.”
EVIC AMBER TELLTALE LIGHTS
This area will show reconfigurable amber caution tell-
tales. These telltales include:
Low Fuel Light When the fuel level reaches approximately 11.0 L
this light will turn on, and remain on until fuel is
added.
Loose Gascap Indicator If the vehicle diagnostic system determines
that the fuel filler cap is loose, improperly
installed, or damaged, a loose gascap indica-
tor will display in the telltale display area.
Tighten the fuel filler cap properly and press the SE-
LECT button to turn off the message. If the problem
continues, the message will appear the next time the
vehicle is started. A loose, improperly installed, or damaged fuel filler cap
may also turn on the Malfunction Indicator Light (MIL).
Windshield Washer Fluid Low Indicator
This light will turn on to indicate the wind-
shield washer fluid is low.
EVIC RED TELLTALE LIGHTS
This area will show reconfigurable red telltales. These
telltales include:
Door Ajar This light will turn on to indicate that one or
more doors may be ajar.
Oil Pressure Warning Light This light indicates low engine oil pressure. If the
light turns on while driving, stop the vehicle and
shut off the engine as soon as possible. A chime will
sound for four minutes when this light turns on.
Do not operate the vehicle until the cause is corrected.
This light does not show how much oil is in the engine.
The engine oil level must be checked under the hood.
Charging System Light
This light shows the status of the electrical
charging system. The light should come on when
the ignition is first cycled ON and remain on briefly as
a bulb check. If the light stays on or comes on while
driving, turn off some of the vehicle's non-essential
electrical devices or increase engine speed (if at idle). If
20
KNOWING YOUR
VEHICLE
SAFETY
STARTING AND
DRIVING
WARNING
LIGHTS AND
MESSAGES
IN AN
EMERGENCY
SERVICING AND
CARETECHNICAL
SPECIFICATIONSCONTENTS
Page 28 of 267
the charging system light remains on, it means that the
vehicle is experiencing a problem with the charging
system. Obtain SERVICE IMMEDIATELY. See an autho-
rized dealer.
If jump starting is required, refer to “Jump Starting
Procedures” in “In An Emergency”.
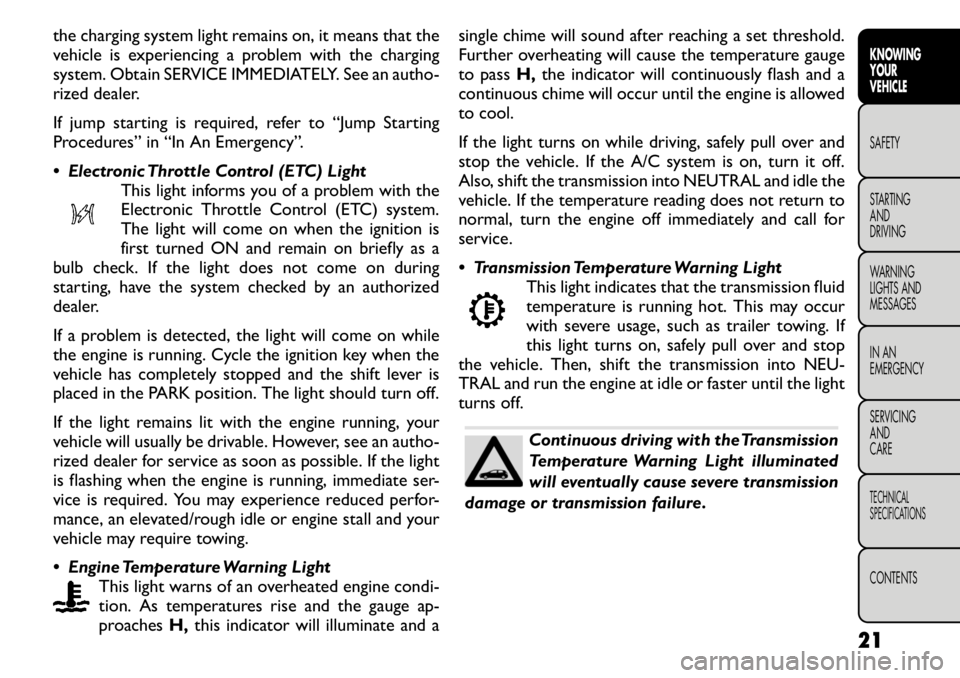
Electronic Throttle Control (ETC) LightThis light informs you of a problem with the
Electronic Throttle Control (ETC) system.
The light will come on when the ignition is
first turned ON and remain on briefly as a
bulb check. If the light does not come on during
starting, have the system checked by an authorized
dealer.
If a problem is detected, the light will come on while
the engine is running. Cycle the ignition key when the
vehicle has completely stopped and the shift lever is
placed in the PARK position. The light should turn off.
If the light remains lit with the engine running, your
vehicle will usually be drivable. However, see an autho-
rized dealer for service as soon as possible. If the light
is flashing when the engine is running, immediate ser-
vice is required. You may experience reduced perfor-
mance, an elevated/rough idle or engine stall and your
vehicle may require towing.
Engine Temperature Warning Light This light warns of an overheated engine condi-
tion. As temperatures rise and the gauge ap-
proaches H,this indicator will illuminate and a single chime will sound after reaching a set threshold.
Further overheating will cause the temperature gauge
to pass
H,the indicator will continuously flash and a
continuous chime will occur until the engine is allowed
to cool.
If the light turns on while driving, safely pull over and
stop the vehicle. If the A/C system is on, turn it off.
Also, shift the transmission into NEUTRAL and idle the
vehicle. If the temperature reading does not return to
normal, turn the engine off immediately and call for
service.
Transmission Temperature Warning Light This light indicates that the transmission fluid
temperature is running hot. This may occur
with severe usage, such as trailer towing. If
this light turns on, safely pull over and stop
the vehicle. Then, shift the transmission into NEU-
TRAL and run the engine at idle or faster until the light
turns off.
Continuous driving with the Transmission
Temperature Warning Light illuminated
will eventually cause severe transmission
damage or transmission failure.
21KNOWING
YOURVEHICLESAFETY
STARTING ANDDRIVING
WARNING
LIGHTS AND
MESSAGES
IN AN
EMERGENCY
SERVICING AND
CARETECHNICAL
SPECIFICATIONSCONTENTS
Page 75 of 267
NOTE:The fog lights will operate with the low beam
headlights or parking lights on. However, selecting the
high beam headlights will turn off the fog lights.
MULTIFUNCTION LEVER
The multifunction lever controls the operation of the
turn signals, headlight beam selection and passing lights.
The multifunction lever is located on the left side of the
steering column.
TURN SIGNALS
Move the multifunction lever up or down and the
arrows on each side of the instrument cluster flash to
show proper operation of the front and rear turn signallights.
NOTE:
• If either light remains on and does not flash, or there
is a very fast flash rate, check for a defective outside
light bulb. If an indicator fails to light when the lever is
moved, it would suggest that the indicator bulb is
defective.
• A “Turn Signal On” message will appear in the EVIC
(if equipped) and a continuous chime will sound if the
vehicle is driven more than 1.6 km with either turn
signal on.
LANE CHANGE ASSIST
Tap the lever up or down once, without moving beyond
the detent, and the turn signal (right or left) will flash
three times then automatically turn off. HIGH/LOW BEAM SWITCH
Push the multifunction lever away from you to switch
the headlights to high beam. Pull the multifunction lever
toward you to switch the headlights back to low beam.
FLASH-TO-PASS
You can signal another vehicle with your headlights by
lightly pulling the multifunction lever toward you. This
will turn on the high beams headlights until the lever is
released.
INTERIOR LIGHTS
The interior lights come on when a door is opened.
To protect the battery, the interior lights will turn off
automatically 10 minutes after the ignition switch is
moved to the LOCK position. This will occur if the
interior lights were switched on manually or are on
because a door is open. This includes the glove box
light, but not the trunk light. To restore interior light
operation, either turn the ignition switch ON or cycle
the light switch.
DIMMER CONTROLS
The dimmer control is part of the headlight switch and
is located on the left side of the instrument panel.
(fig. 52)
Rotating the left dimmer control upward with the
parking lights or headlights on will increase the bright-
ness of the instrument panel lights.
68
KNOWING YOUR
VEHICLE
SAFETY
STARTING AND
DRIVING
WARNING
LIGHTS AND
MESSAGES
IN AN
EMERGENCY
SERVICING AND
CARETECHNICAL
SPECIFICATIONSCONTENTS
Page 165 of 267

The ORC monitors the readiness of the electronic
parts of the air bag system whenever the ignition is in
the ON/RUN position. If the ignition is in the OFF
position, or in the ACC position, the air bag system is
not on and the air bags will not inflate.
The ORC contains a backup power supply system that
may deploy the air bags even if the battery loses power
or it becomes disconnected prior to deployment.Also, the ORC turns on the Air Bag Warning
Light in the instrument panel for approxi-
mately four to eight seconds for a self-check
when the ignition is first turned on. After the
self-check, the Air Bag Warning Light will turn off. If the
ORC detects a malfunction in any part of the system, it
turns on the Air Bag Warning Light, either momentarily
or continuously. A single chime will sound if the light
comes on again after initial startup.
It also includes diagnostics that will illuminate the
instrument cluster Air Bag Warning Light if a malfunc-
tion is noted that could affect the air bag system. The
diagnostics also record the nature of the malfunction.
WARNING!
Ignoring the Air Bag Warning Light in
your instrument panel could mean you
won't have the air bags to protect you in a
collision. If the light does not come on as a bulb
check when the ignition is first turned on, stays
on after you start the vehicle, or if it comes on as
you drive, have an authorized dealer service the
air bag system immediately.
Driver And Passenger Advanced Front Air Bag
Inflator Units
The Driver and Passenger Advanced Front Air Bag
Inflator Units are located in the center of the steering
wheel and on the right side of the instrument panel.
When the ORC detects a collision requiring the Ad-
vanced Front Air Bags, it signals the inflator units. A
large quantity of non-toxic gas is generated to inflate
the Advanced Front Air Bags. Different air bag inflation
rates are possible, based on the collision type and
severity. The steering wheel hub trim cover and the
upper right side of the instrument panel separate and
fold out of the way as the air bags inflate to their full
size. The air bags fully inflate in about 50 to 70 millisec-
onds. This is about half of the time it takes to blink your
eyes. The air bags then quickly deflate while helping to
restrain the driver and front passenger.
The Advanced Front Air Bag gas is vented through the
vent holes in the sides of the air bag. In this way, the air
bags do not interfere with your control of the vehicle.
158
KNOWING YOUR
VEHICLESAFETYSTARTING AND
DRIVING
WARNING
LIGHTS AND
MESSAGES
IN AN
EMERGENCY
SERVICING AND
CARETECHNICAL
SPECIFICATIONSCONTENTS
Page 171 of 267
Air Bag Warning Light
The light should turn on and remain on for four to six
seconds as a bulb check when the ignition switch is first
turned ON. If the light is not lit during starting, or if the
light stays on, flickers, or turns on while driving, have
the system checked by an authorized dealer.
Defroster
Check operation by selecting the defrost mode and
place the blower control on high speed. You should be
able to feel the air directed against the windshield. See
your authorized dealer for service if your defroster is
inoperable.
Floor Mat Safety Information
Always use floor mats designed to fit the footwell of
your vehicle. Use only floor mats that leave the pedal
area unobstructed and that are firmly secured so that
they cannot slip out of position and interfere with the
pedals or impair safe operation of your vehicle in other
ways.
WARNING!
Pedals that cannot move freely can
cause loss of vehicle control and increase
the risk of serious personal injury.
Always make sure that floor mats are properly
attached to the floor mat fasteners.
(Continued)(Continued)
Never place or install floor mats or other floor
coverings in the vehicle that cannot be properly
secured to prevent them from moving and inter-
fering with the pedals or the ability to control the
vehicle.
Never put floor mats or other floor coverings
on top of already installed floor mats. Additional
floor mats and other coverings will reduce the
size of the pedal area and interfere with the
pedals.
Check mounting of mats on a regular basis.
Always properly reinstall and secure floor mats
that have been removed for cleaning.
Always make sure that objects cannot fall into
the driver footwell while the vehicle is moving.
Objects can become trapped under the brake
pedal and accelerator pedal causing a loss of
vehicle control.
If required, mounting posts must be properly
installed, if not equipped from the factory.
Failure to properly follow floor mat installation
or mounting can cause interference with the
brake pedal and accelerator pedal operation
causing loss of control of the vehicle.
164
KNOWING YOUR
VEHICLESAFETYSTARTING AND
DRIVING
WARNING
LIGHTS AND
MESSAGES
IN AN
EMERGENCY
SERVICING AND
CARETECHNICAL
SPECIFICATIONSCONTENTS
Page 192 of 267
INSTRUMENT CLUSTER DESCRIPTIONS1. Air Bag Warning LightThis light will turn on for four to eight sec-
onds as a bulb check when the ignition switch
is first turned to ON/RUN. If the light is
either not on during starting, stays on, or
turns on while driving, have the system inspected at an
authorized dealer as soon as possible. Refer to “Occu-
pant Restraints” in “Safety” for further information.
2. Malfunction Indicator Light (MIL) The Malfunction Indicator Light (MIL) is part of
an onboard diagnostic system, called OBD, that
monitors engine and transmission control sys-
tems. The light will illuminate when the key is in the
ON/RUN position, before engine start. If the bulb does
not come on when turning the key from OFF to
ON/RUN, have the condition checked promptly.
Certain conditions, such as a loose or missing gas cap,
poor fuel quality, etc., may illuminate the MIL after
engine start. The vehicle should be serviced if the MIL
stays on through several of your typical driving cycles.
In most situations, the vehicle will drive normally and
will not require towing.
Prolonged driving with the MIL on could
cause damage to the engine control sys-
tem. It also could affect fuel economy
and drivability. If the MIL is flashing, severe cata-
lytic converter damage and power loss will soon
occur. Immediate service is required.
WARNING!
A malfunctioning catalytic converter, as
referenced above, can reach higher tem-
peratures than in normal operating conditions.
This can cause a fire if you drive slowly or park
over flammable substances such as dry plants,
wood, cardboard, etc .This could result in death or
serious injury to the driver, occupants or others.
3. Electronic Stability Control (ESC)
Activation/Malfunction Indicator Light — IfEquipped The “ESC Activation/Malfunction Indicator
Light” in the instrument cluster will come on
when the ignition switch is turned to the
ON/RUN position. It should go out with the
engine running. If the “ESC Activation/Malfunction In-
dicator Light” comes on continuously with the engine
running, a malfunction has been detected in the ESC
system. If this light remains on after several ignition
cycles, and the vehicle has been driven several miles
(kilometers) at speeds greater than 30 mph (48 km/h),
see your authorized dealer as soon as possible to have
the problem diagnosed and corrected.
185KNOWING
YOURVEHICLE SAFETY
STARTING ANDDRIVINGWARNING
LIGHTS AND
MESSAGESIN AN
EMERGENCY
SERVICING AND
CARETECHNICAL
SPECIFICATIONSCONTENTS
Page 193 of 267
NOTE:
• The “ESC Off Indicator Light” and the “ESC
Activation/Malfunction Indicator Light” come on mo-
mentarily each time the ignition switch is turned to
ON/RUN.
• Each time the ignition is turned to ON/RUN, the
ESC system will be ON, even if it was turned off
previously.
• The ESC system will make buzzing or clicking sounds
when it is active. This is normal; the sounds will stop
when ESC becomes inactive following the maneuver
that caused the ESC activation.
4. Turn Signal Indicator LightThe left or right arrow will flash in unison with the
corresponding front and rear turn signal lights
when the turn signal switch is operated. (Refer to
“Lights” in “Knowing Your Vehicle” for further infor-mation).
NOTE:
• A chime will sound if the vehicle is driven more than
1 mile (1.6 km) with either turn signal on.
• Check for an inoperative outside light bulb if either
indicator flashes at a rapid rate.
5. High Beam Indicator
This light shows that the high beam headlights
are on. Pull the multifunction lever on the left
side of the steering column toward you to switch to
low beam. (Refer to “Lights” in “Knowing Your Vehicle”
for further information). 6. Front Fog Light Indicator — If Equipped
This indicator will illuminate when the front fog
lights are on. (Refer to “Lights” in “Knowing
Your Vehicle” for further information).
7. Odometer Display / Electronic Vehicle
Information Center (EVIC) Display
Odometer
The odometer display shows the total distance the
vehicle has been driven.
Electronic Vehicle Information Center (EVIC)
Display
The Electronic Vehicle Information Center (EVIC) fea-
tures a driver-interactive display that is located in the
instrument cluster. For further information, refer to
“Electronic Vehicle Information Center (EVIC)” in
“Knowing Your Vehicle”.
8. Park/Headlight ON Indicator — If Equipped This indicator will illuminate when the park
lights or headlights are turned on. (Refer to
“Lights” in “Knowing Your Vehicle” for fur-
ther information).
9. Tire Pressure Monitoring Telltale Light — IfEquipped Each tire, including the spare (if provided),
should be checked monthly when cold and
inflated to the inflation pressure recom-
mended by the vehicle manufacturer on the
vehicle placard or tire inflation pressure label. (If your
186
KNOWING YOUR
VEHICLE
SAFETY
STARTING AND
DRIVINGWARNING
LIGHTS AND
MESSAGES
IN AN
EMERGENCY
SERVICING AND
CARETECHNICAL
SPECIFICATIONSCONTENTS
Page 194 of 267
vehicle has tires of a different size than the size indi-
cated on the vehicle placard or tire inflation pressure
label, you should determine the proper tire inflation
pressure for those tires.)
As an added safety feature, your vehicle has been
equipped with a tire pressure monitoring system
(TPMS) that illuminates a low tire pressure telltale
when one or more of your tires is significantly under-
inflated. Accordingly, when the low tire pressure tell-
tale light illuminates, you should stop and check your
tires as soon as possible, and inflate them to the proper
pressure. Driving on a significantly under-inflated tire
causes the tire to overheat and can lead to tire failure.
Under-inflation also reduces fuel efficiency and tire
tread life, and may affect the vehicle’s handling and
stopping ability.
Please note that the TPMS is not a substitute for
proper tire maintenance, and it is the driver’s respon-
sibility to maintain correct tire pressure, even if under-
inflation has not reached the level to trigger illumina-
tion of the TPMS low tire pressure telltale.
Your vehicle has also been equipped with a TPMS
malfunction indicator to indicate when the system is
not operating properly. The TPMS malfunction indica-
tor is combined with the low tire pressure telltale.
When the system detects a malfunction, the telltale
will flash for approximately one minute and then re-
main continuously illuminated. This sequence will con-
tinue upon subsequent vehicle start-ups as long as the
malfunction exists. When the malfunction indicator isilluminated, the system may not be able to detect or
signal low tire pressure as intended. TPMS malfunctions
may occur for a variety of reasons, including the instal-
lation of replacement or alternate tires or wheels on
the vehicle that prevent the TPMS from functioning
properly. Always check the TPMS malfunction telltale
light after replacing one or more tires or wheels on
your vehicle to ensure that the replacement or alter-
nate tires and wheels allow the TPMS to continue to
function properly.
The TPMS has been optimized for the
original equipment tires and wheels.
TPMS pressures and warning have been
established for the tire size equipped on your
vehicle. Undesirable system operation or sensor
damage may result when using replacement
equipment that is not of the same size, type,
and/or style.Aftermarket wheels can cause sensor
damage. Do not use aftermarket tire sealants or
balance beads if your vehicle is equipped with a
TPMS, as damage to the sensors may result . (Re-
fer to “Tire Inflation Pressures” under “Tires —
General Information” and to “Tire Pressure Moni-
tor System (TPMS)” in “Technical Specifications”
for further information).
10. Seat Belt Reminder Light When the ignition switch is first turned to ON/
RUN, this light will turn on for four to eight
seconds as a bulb check. During the bulb check,
187KNOWING
YOURVEHICLE SAFETY
STARTING ANDDRIVINGWARNING
LIGHTS AND
MESSAGESIN AN
EMERGENCY
SERVICING AND
CARETECHNICAL
SPECIFICATIONSCONTENTS
Page 195 of 267
if the driver's seat belt is unbuckled, a chime will sound.
After the bulb check or when driving, if the driver seat
belt remains unbuckled, the Seat Belt Warning Light
will flash or remain on continuously. Refer to “Occu-
pant Restraints” in “Safety” for further information.
11. Brake Warning LightThis light monitors various brake functions,
including brake fluid level and parking brake
application. If the brake light turns on it may
indicate that the parking brake is applied, that
the brake fluid level is low, or that there is a problem
with the anti-lock brake system reservoir.
If the light remains on when the parking brake has been
disengaged, and the fluid level is at the full mark on the
master cylinder reservoir, it indicates a possible brake
hydraulic system malfunction or that a problem with
the Brake Booster has been detected by the Anti-Lock
Brake System (ABS) / Electronic Stability Program
(ESP) system. In this case, the light will remain on until
the condition has been corrected. If the problem is
related to the brake booster, the ABS pump will run
when applying the brake and a brake pedal pulsation
may be felt during each stop.
The dual brake system provides a reserve braking
capacity in the event of a failure to a portion of the
hydraulic system. A leak in either half of the dual brake
system is indicated by the Brake Warning Light, which
will turn on when the brake fluid level in the master
cylinder has dropped below a specified level.
The light will remain on until the cause is corrected. NOTE:
The light may flash momentarily during sharp
cornering maneuvers, which change fluid level condi-
tions. The vehicle should have service performed, and
the brake fluid level checked.
If brake failure is indicated, immediate repair is neces-
sary.
WARNING!
Driving a vehicle with the red brake light
on is dangerous. Part of the brake sys-
tem may have failed. It will take longer to stop
the vehicle. You could have a collision. Have the
vehicle checked immediately.
Vehicles equipped with the Anti-Lock Brake System
(ABS), are also equipped with Electronic Brake Force
Distribution (EBD). In the event of an EBD failure, the
Brake Warning Light will turn on along with the ABS
Light. Immediate repair to the ABS system is required.
Operation of the Brake Warning Light can be checked
by turning the ignition switch from the OFF position to
the ON/RUN position. The light should illuminate for
approximately two seconds. The light should then turn
off unless the parking brake is applied or a brake fault is
detected. If the light does not illuminate, have the light
inspected by an authorized dealer.
The light also will turn on when the parking brake is
applied with the ignition switch in the ON/RUN posi-tion.
188
KNOWING YOUR
VEHICLE
SAFETY
STARTING AND
DRIVINGWARNING
LIGHTS AND
MESSAGES
IN AN
EMERGENCY
SERVICING AND
CARETECHNICAL
SPECIFICATIONSCONTENTS