tow FIAT FREEMONT 2013 Owner handbook (in English)
[x] Cancel search | Manufacturer: FIAT, Model Year: 2013, Model line: FREEMONT, Model: FIAT FREEMONT 2013Pages: 352, PDF Size: 5.22 MB
Page 286 of 352
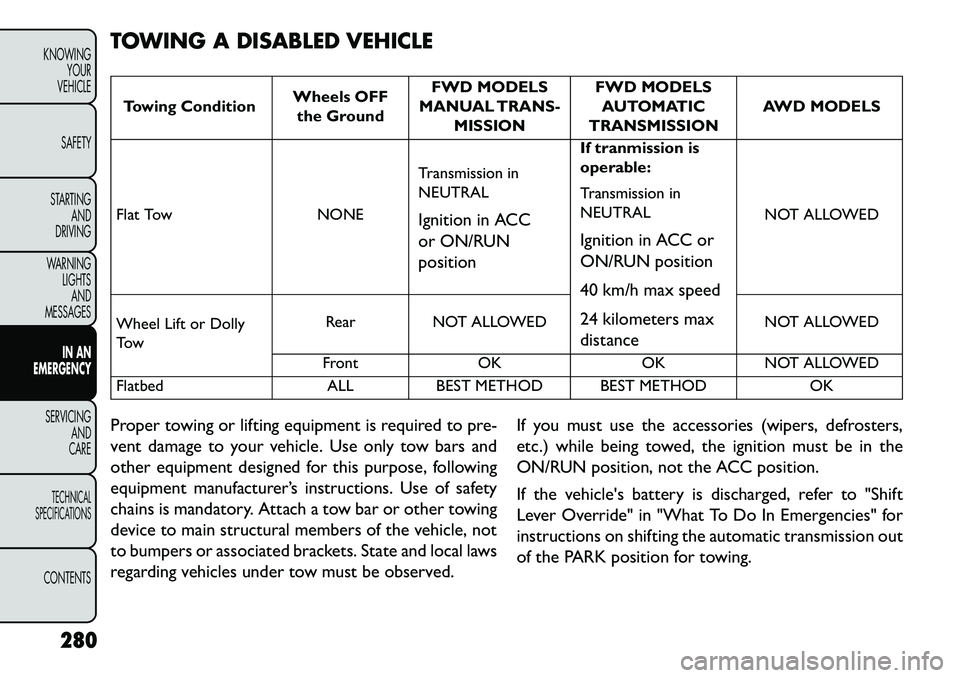
TOWING A DISABLED VEHICLETowing ConditionWheels OFF
the Ground FWD MODELS
MANUAL TRANS-
MISSION FWD MODELS
AUTOMATIC
TRANSMISSION AWD MODELS
Flat Tow NONETransmission in
NEUTRAL
Ignition in ACC
or ON/RUN
position If tranmission is
operable:
Transmission in
NEUTRAL
Ignition in ACC or
ON/RUN position
40 km/h max speed
24 kilometers max
distance NOT ALLOWED
Wheel Lift or Dolly
Tow Rear NOT ALLOWED
NOT ALLOWED
Front OK OKNOT ALLOWED
Flatbed ALLBEST METHOD BEST METHOD OK
Proper towing or lifting equipment is required to pre-
vent damage to your vehicle. Use only tow bars and
other equipment designed for this purpose, following
equipment manufacturer’s instructions. Use of safety
chains is mandatory. Attach a tow bar or other towing
device to main structural members of the vehicle, not
to bumpers or associated brackets. State and local laws
regarding vehicles under tow must be observed. If you must use the accessories (wipers, defrosters,
etc.) while being towed, the ignition must be in the
ON/RUN position, not the ACC position.
If the vehicle's battery is discharged, refer to "Shift
Lever Override" in "What To Do In Emergencies" for
instructions on shifting the automatic transmission out
of the PARK position for towing.
280
KNOWING YOUR
VEHICLE
SAFETY
STARTING AND
DRIVING
WARNING LIGHTSAND
MESSAGES
IN AN
EMERGENC
Y
SERVICING AND
C
ARETECHNICAL
SPECIFICATIONSCONTENTS
Page 287 of 352
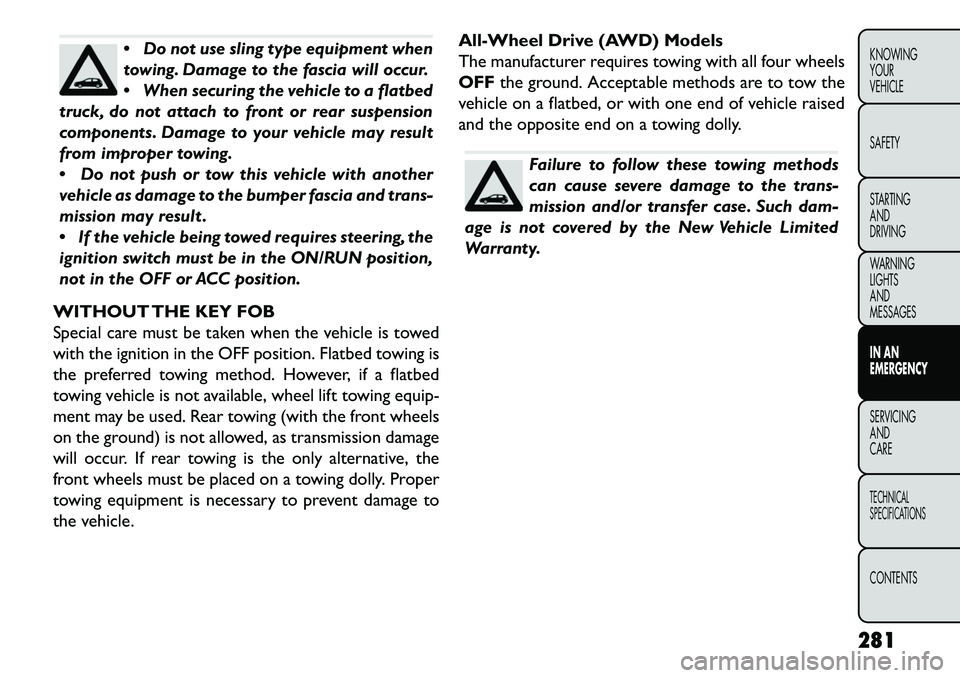
Do not use sling type equipment when
towing. Damage to the fascia will occur.
When securing the vehicle to a flatbed
truck, do not attach to front or rear suspension
components. Damage to your vehicle may result
from improper towing.
Do not push or tow this vehicle with another
vehicle as damage to the bumper fascia and trans-
mission may result .
If the vehicle being towed requires steering, the
ignition switch must be in the ON/RUN position,
not in the OFF or ACC position.
WITHOUT THE KEY FOB
Special care must be taken when the vehicle is towed
with the ignition in the OFF position. Flatbed towing is
the preferred towing method. However, if a flatbed
towing vehicle is not available, wheel lift towing equip-
ment may be used. Rear towing (with the front wheels
on the ground) is not allowed, as transmission damage
will occur. If rear towing is the only alternative, the
front wheels must be placed on a towing dolly. Proper
towing equipment is necessary to prevent damage to
the vehicle. All-Wheel Drive (AWD) Models
The manufacturer requires towing with all four wheels
OFF
the ground. Acceptable methods are to tow the
vehicle on a flatbed, or with one end of vehicle raised
and the opposite end on a towing dolly.
Failure to follow these towing methods
can cause severe damage to the trans-
mission and/or transfer case. Such dam-
age is not covered by the New Vehicle Limited
Warranty.
281
KNOWING
YOUR
VEHICLE
SAFETY
STARTING
AND
DRIVING
WARNING
LIGHTS
AND
MESSAGES
IN AN
EMERGENCY
SERVICING
AND
C ARETECHNICAL
SPECIFICATIONSCONTENTS
Page 288 of 352
FRONT-WHEEL DRIVE (FWD) MODELS -
MANUAL TRANSMISSION
The manufacturer recommends towing your vehicle
with all four wheels OFF the ground using a flatbed.
Your vehicle may also be towed in the forward direc-
tion, with all four wheels on the ground, the transmis-
sion in NEUTRAL position, and the ignition in the ACC
ON/RUN position. If the transmission is not operative,
the vehicle must be towed with the front wheels OFF
the ground (using a flatbed truck, towing dolly, or
wheel lift equipment with the front wheels raised).
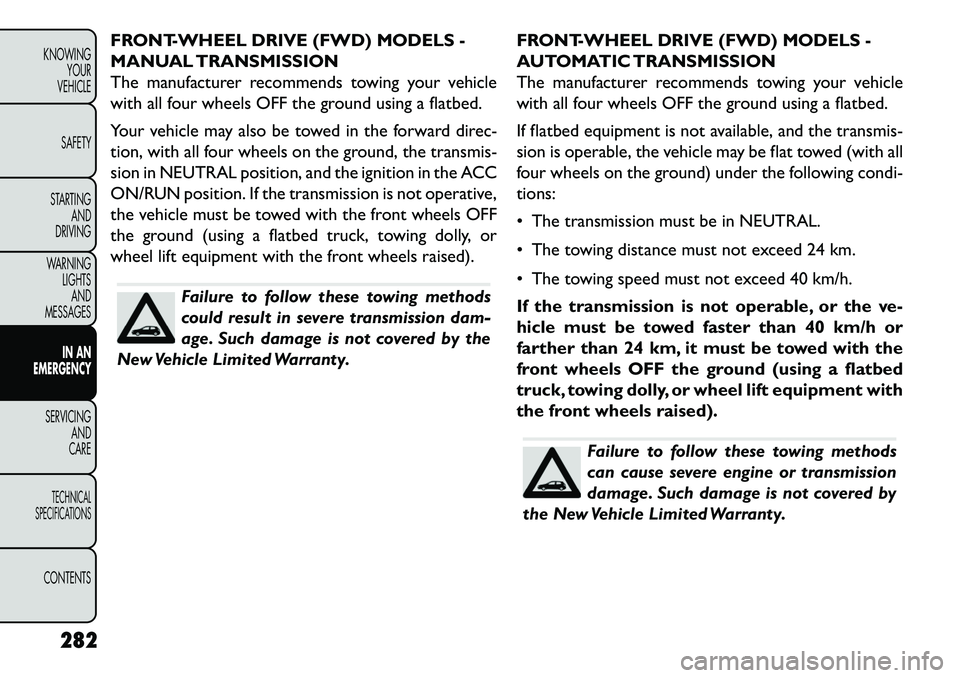
Failure to follow these towing methods
could result in severe transmission dam-
age. Such damage is not covered by the
New Vehicle Limited Warranty. FRONT-WHEEL DRIVE (FWD) MODELS -
AUTOMATIC TRANSMISSION
The manufacturer recommends towing your vehicle
with all four wheels OFF the ground using a flatbed.
If flatbed equipment is not available, and the transmis-
sion is operable, the vehicle may be flat towed (with all
four wheels on the ground) under the following condi-
tions:
The transmission must be in NEUTRAL.
The towing distance must not exceed 24 km.
The towing speed must not exceed 40 km/h.
If the transmission is not operable, or the ve-
hicle must be towed faster than 40 km/h or
farther than 24 km, it must be towed with the
front wheels OFF the ground (using a flatbed
truck, towing dolly, or wheel lift equipment with
the front wheels raised).
Failure to follow these towing methods
can cause severe engine or transmission
damage. Such damage is not covered by
the New Vehicle Limited Warranty.
282
KNOWING YOUR
VEHICLE
SAFETY
STARTING AND
DRIVING
WARNING LIGHTSAND
MESSAGES
IN AN
EMERGENC
Y
SERVICING AND
C
ARETECHNICAL
SPECIFICATIONSCONTENTS
Page 292 of 352
Periodic Checks
Every1,000 km or before long journeys, check and, if
necessary, restore:
engine coolant;
brake fluid;
windshield washer fluid level;
power steering fluid;
tire inflation pressure and condition;
operation of lighting system (headlights, direction indicators, hazard warning lights, etc.);
operation of windshield washer/wiper system and positioning/wear of windshield/rear window wiper
blades.
Every 3,000 km, check and top up, if required, the
engine oil level.
Heavy-Duty Use Of The Car
If the car is used mainly under one of the following
conditions:
towing a trailer or caravan;
dusty roads;
short, repeated journeys (less than 7-8 km) at sub- zero outside temperatures; engine often idling or driving long distances at low
speeds or long periods of idleness.
You should perform the following inspections more
frequently than shown on the Scheduled Servicing Plan:
check front disc brake pad conditions and wear;
check cleanliness of hood and trunk locks, cleanli- ness and lubrication of linkage;
visually inspect conditions of: engine, transmission, pipes and hoses (exhaust - fuel system - brakes) and
rubber elements (boots - sleeves - bushes - etc.);
check battery charge and battery fluid level (electro- lyte);
visually inspect condition of the accessory drive belts;
check and, if necessary, change engine oil and replace oil filter;
check and, if necessary, replace pollen filter;
check and, if necessary, replace air cleaner.
MAINTENANCE SCHEDULE — DIESEL
ENGINE
Required Maintenance Intervals
Refer to the Maintenance Schedules on the following
pages for the required maintenance intervals.
286
KNOWING YOUR
VEHICLE
SAFETY
STARTING AND
DRIVING
WARNING LIGHTSAND
MESSAGES
IN AN
EMERGENCY
SERVICING AND
C
ARETECHNICAL
SPECIFICATIONSCONTENTS
Page 294 of 352
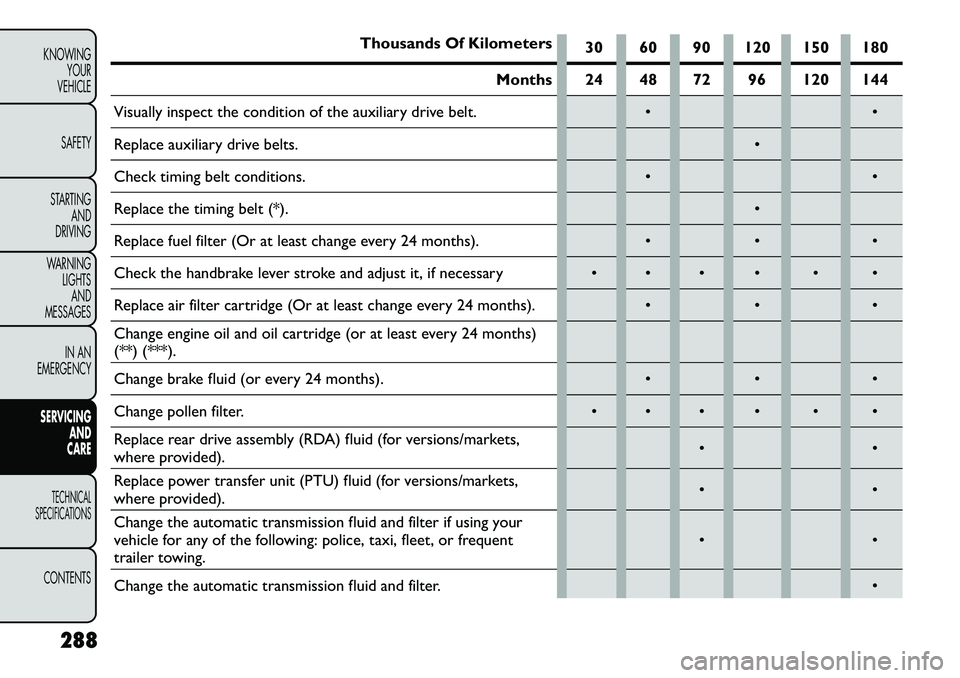
Thousands Of Kilometers30 60 90 120 150 180
Months 24 48 72 96 120 144
Visually inspect the condition of the auxiliary drive belt.
Replace auxiliary drive belts.
Check timing belt conditions.
Replace the timing belt (*).
Replace fuel filter (Or at least change every 24 months).
Check the handbrake lever stroke and adjust it, if necessary
Replace air filter cartridge (Or at least change every 24 months).
Change engine oil and oil cartridge (or at least every 24 months)
(**) (***).
Change brake fluid (or every 24 months).
Change pollen filter.
Replace rear drive assembly (RDA) fluid (for versions/markets,
where provided).
Replace power transfer unit (PTU) fluid (for versions/markets,
where provided).
Change the automatic transmission fluid and filter if using your
vehicle for any of the following: police, taxi, fleet, or frequent
trailer towing.
Change the automatic transmission fluid and filter.
288
KNOWING YOUR
VEHICLE
SAFETY
STARTING AND
DRIVING
WARNING LIGHTSAND
MESSAGES
IN AN
EMERGENCY
SERVICING AND
C
ARETECHNICAL
SPECIFICATIONSCONTENTS
Page 296 of 352
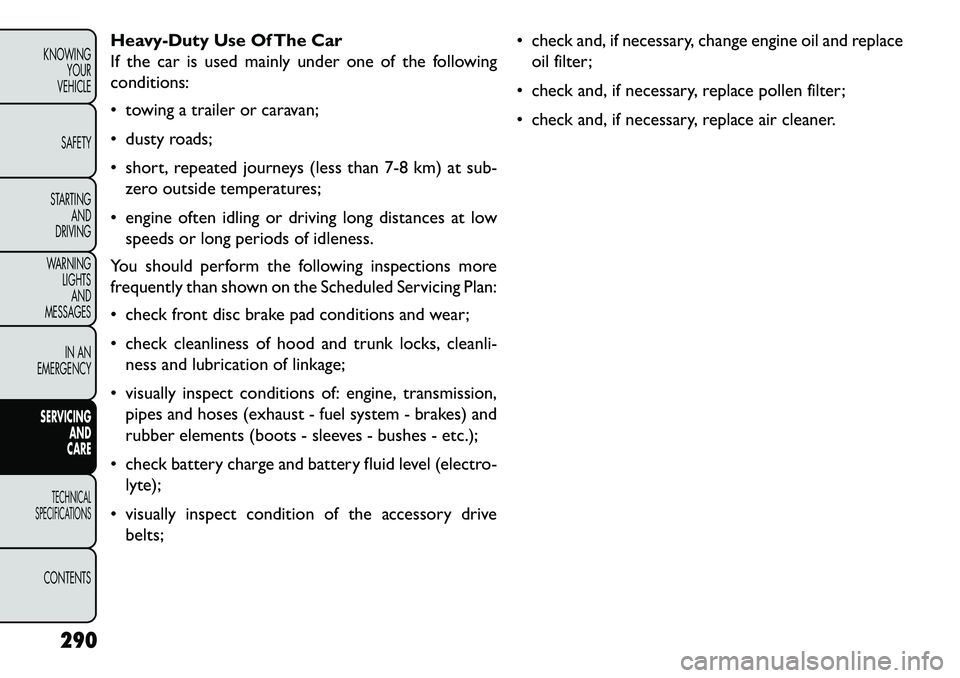
Heavy-Duty Use Of The Car
If the car is used mainly under one of the following
conditions:
towing a trailer or caravan;
dusty roads;
short, repeated journeys (less than 7-8 km) at sub-zero outside temperatures;
engine often idling or driving long distances at low speeds or long periods of idleness.
You should perform the following inspections more
frequently than shown on the Scheduled Servicing Plan:
check front disc brake pad conditions and wear;
check cleanliness of hood and trunk locks, cleanli- ness and lubrication of linkage;
visually inspect conditions of: engine, transmission, pipes and hoses (exhaust - fuel system - brakes) and
rubber elements (boots - sleeves - bushes - etc.);
check battery charge and battery fluid level (electro- lyte);
visually inspect condition of the accessory drive belts; check and, if necessary, change engine oil and replace
oil filter;
check and, if necessary, replace pollen filter;
check and, if necessary, replace air cleaner.
290
KNOWING YOUR
VEHICLE
SAFETY
STARTING AND
DRIVING
WARNING LIGHTSAND
MESSAGES
IN AN
EMERGENCY
SERVICING AND
C
ARETECHNICAL
SPECIFICATIONSCONTENTS
Page 305 of 352
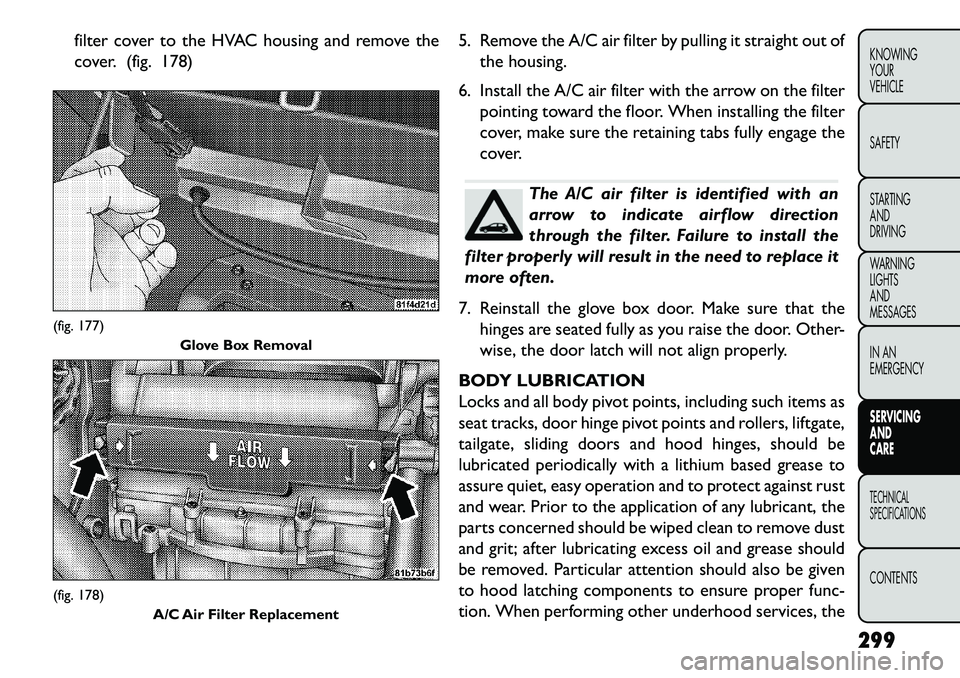
filter cover to the HVAC housing and remove the
cover. (fig. 178)5. Remove the A/C air filter by pulling it straight out of
the housing.
6. Install the A/C air filter with the arrow on the filter pointing toward the floor. When installing the filter
cover, make sure the retaining tabs fully engage the
cover.
The A/C air filter is identified with an
arrow to indicate airflow direction
through the filter. Failure to install the
filter properly will result in the need to replace it
more often.
7. Reinstall the glove box door. Make sure that the hinges are seated fully as you raise the door. Other-
wise, the door latch will not align properly.
BODY LUBRICATION
Locks and all body pivot points, including such items as
seat tracks, door hinge pivot points and rollers, liftgate,
tailgate, sliding doors and hood hinges, should be
lubricated periodically with a lithium based grease to
assure quiet, easy operation and to protect against rust
and wear. Prior to the application of any lubricant, the
parts concerned should be wiped clean to remove dust
and grit; after lubricating excess oil and grease should
be removed. Particular attention should also be given
to hood latching components to ensure proper func-
tion. When performing other underhood services, the
(fig. 177) Glove Box Removal(fig. 178)
A/C Air Filter Replacement
299
KNOWING
YOUR
VEHICLE
SAFETY
STARTING
AND
DRIVING
WARNING
LIGHTS
AND
MESSAGES
IN AN
EMERGENCY
SERVICING
AND
C
ARETECHNICAL
SPECIFICATIONSCONTENTS
Page 307 of 352

5. Lower the wiper blade and snap the pivot cap intoplace.
ADDING WASHER FLUID
The windshield washer and the rear window washer
share the same fluid reservoir. The fluid reservoir is
located in the engine compartment. Be sure to check
the fluid level in the reservoir at regular intervals. Fill
the reservoir with windshield washer solvent (not
radiator antifreeze) and operate the system for a few
seconds to flush out the residual water. When refilling the washer fluid reservoir, apply some
washer fluid to a cloth or towel and wipe the wiper
blades clean. This will help blade performance.
To prevent freeze-up of your windshield washer system
in cold weather, select a solution or mixture that meets
or exceeds the temperature range of your climate. This
rating information can be found on most washer fluid
containers.(fig. 179)1 — Wiper Arm
2 — Pivot Cap
(fig. 180)1 — Wiper Blade
2 — Blade Pivot Pin
3 — Wiper Arm
4 — Wiper Blade Holder
301
KNOWING
YOUR
VEHICLE
SAFETY
STARTING
AND
DRIVING
WARNING
LIGHTS
AND
MESSAGES
IN AN
EMERGENCY
SERVICING
AND
CARETECHNICAL
SPECIFICATIONSCONTENTS
Page 309 of 352
WARNING!
Exhaust gases can injure or kill. They
c
ontain carbon monoxide (CO), which is
colorless and odorless. Breathing it can make you
unconscious and can eventually poison you. To
avoid breathing CO, refer to “Safety Tips/Exhaust
Gas” in “Safety” for further information.
NOTE: Intentional tampering with emissions control
systems can result in civil penalties being assessed
against you.
WARNING!
A hot exhaust system can start a fire if
y
ou park over materials that can burn.
Such materials might be grass or leaves coming
into contact with your exhaust system. Do not
park or operate your vehicle in areas where your
exhaust system can contact anything that can
burn.
In unusual situations involving grossly malfunctioning
engine operation, a scorching odor may indicate severe
and abnormal catalyst overheating. If this occurs, safely
bring the vehicle to a complete stop, shut the engine
OFF, and allow the vehicle to cool. Thereafter, obtain
service, including a tune-up to manufacturer’s specifi-
cations immediately. To minimize the possibility of catalyst damage:
Do not shut OFF the engine or interrupt the ignition
when the transmission is in gear and the vehicle is in
motion.
Do not try to start the engine by pushing or towing the vehicle.
Do not idle the engine with any ignition coil connec- tors disconnected for prolonged periods.
COOLING SYSTEM
WARNING!
Wh
en working near the radiator cool-
ing fan, disconnect the fan motor lead or
turn the ignition switch to the LOCK position.The
fan is temperature controlled and can start at
any time the ignition switch is in the ON position.
You or others can be badly burned by hot
engine coolant (antifreeze) or steam from your
radiator. If you see or hear steam coming from
under the hood, do not open the hood until the
radiator has had time to cool. Never try to open a
cooling system pressure cap when the radiator is
hot .
303
KNOWING
YOUR
VEHICLE
SAFETY
STARTING
AND
DRIVING
WARNING
LIGHTS
AND
MESSAGES
IN AN
EMERGENCY
SERVICING
AND
CARETECHNICAL
SPECIFICATIONSCONTENTS
Page 318 of 352
If your vehicle is damaged due to an accident orsimilar cause, which destroys the paint and protec-
tive coating, have your vehicle repaired as soon as
possible. The cost of such repairs is considered the
responsibility of the owner.
If you carry special cargo such as chemicals, fertiliz- ers, de-icer salt, etc., be sure that such materials are
well packaged and sealed.
If a lot of driving is done on gravel roads, consider mud or stone shields behind each wheel.
Use Touch Up Paint or equivalent on scratches as soon as possible. Your authorized dealer has touch
up paint to match the color of your vehicle.
Wheel And Wheel Trim Care
All wheels and wheel trim, especially aluminum and
chrome-plated wheels should be cleaned regularly with
a mild soap and water to prevent corrosion. To remove
heavy soil and/or excessive brake dust, use a nonabra-
sive, non-acidic cleaner. Do not use scouring pads, steel
wool, a bristle brush, or metal polishes. Do not use
oven cleaner. Avoid automatic car washes that use
acidic solutions or harsh brushes that may damage the
wheels’ protective finish. Stain Repel Fabric Cleaning Procedure (for
versions/markets, where provided)
Stain Repel seats may be cleaned in the following
manner:
Remove as much of the stain as possible by blotting
with a clean, dry towel.
Blot any remaining stain with a clean, damp towel.
For tough stains, apply a mild soap solution to a clean, damp cloth and remove the stain. Use a fresh,
damp towel to remove soap residue.
For grease stains, apply a Multi-Purpose Cleaner or equivalent to a clean, damp cloth and remove the
stain. Use a fresh, damp towel to remove soap
residue.
Do not use any harsh solvents or any other form of protectants on Stain Repel products.
Interior Care
Instrument Panel Cover
The instrument panel cover has a low glare surface,
which minimizes reflections in the windshield. Do not
use protectants or other products, which may cause
undesirable reflections. Use soap and warm water to
restore the low glare surface.
312
KNOWING YOUR
VEHICLE
SAFETY
STARTING AND
DRIVING
WARNING LIGHTSAND
MESSAGES
IN AN
EMERGENCY
SERVICING AND
C
ARETECHNICAL
SPECIFICATIONSCONTENTS