warning FIAT FULLBACK 2017 Owner handbook (in English)
[x] Cancel search | Manufacturer: FIAT, Model Year: 2017, Model line: FULLBACK, Model: FIAT FULLBACK 2017Pages: 312, PDF Size: 12.31 MB
Page 34 of 312
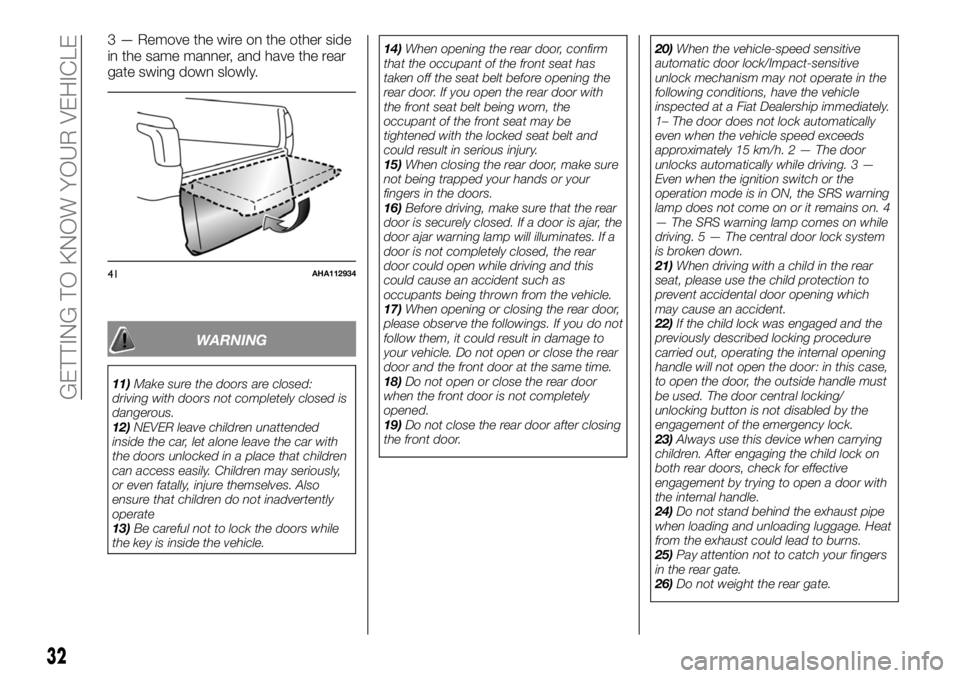
3 — Remove the wire on the other side
in the same manner, and have the rear
gate swing down slowly.
WARNING
11)Make sure the doors are closed:
driving with doors not completely closed is
dangerous.
12)NEVER leave children unattended
inside the car, let alone leave the car with
the doors unlocked in a place that children
can access easily. Children may seriously,
or even fatally, injure themselves. Also
ensure that children do not inadvertently
operate
13)Be careful not to lock the doors while
the key is inside the vehicle.14)When opening the rear door, confirm
that the occupant of the front seat has
taken off the seat belt before opening the
rear door. If you open the rear door with
the front seat belt being worn, the
occupant of the front seat may be
tightened with the locked seat belt and
could result in serious injury.
15)When closing the rear door, make sure
not being trapped your hands or your
fingers in the doors.
16)Before driving, make sure that the rear
door is securely closed. If a door is ajar, the
door ajar warning lamp will illuminates. If a
door is not completely closed, the rear
door could open while driving and this
could cause an accident such as
occupants being thrown from the vehicle.
17)When opening or closing the rear door,
please observe the followings. If you do not
follow them, it could result in damage to
your vehicle. Do not open or close the rear
door and the front door at the same time.
18)Do not open or close the rear door
when the front door is not completely
opened.
19)Do not close the rear door after closing
the front door.20)When the vehicle-speed sensitive
automatic door lock/Impact-sensitive
unlock mechanism may not operate in the
following conditions, have the vehicle
inspected at a Fiat Dealership immediately.
1– The door does not lock automatically
even when the vehicle speed exceeds
approximately 15 km/h. 2 — The door
unlocks automatically while driving. 3 —
Even when the ignition switch or the
operation mode is in ON, the SRS warning
lamp does not come on or it remains on. 4
— The SRS warning lamp comes on while
driving. 5 — The central door lock system
is broken down.
21)When driving with a child in the rear
seat, please use the child protection to
prevent accidental door opening which
may cause an accident.
22)If the child lock was engaged and the
previously described locking procedure
carried out, operating the internal opening
handle will not open the door: in this case,
to open the door, the outside handle must
be used. The door central locking/
unlocking button is not disabled by the
engagement of the emergency lock.
23)Always use this device when carrying
children. After engaging the child lock on
both rear doors, check for effective
engagement by trying to open a door with
the internal handle.
24)Do not stand behind the exhaust pipe
when loading and unloading luggage. Heat
from the exhaust could lead to burns.
25)Pay attention not to catch your fingers
in the rear gate.
26)Do not weight the rear gate.
41AHA112934
32
GETTING TO KNOW YOUR VEHICLE
Page 37 of 312
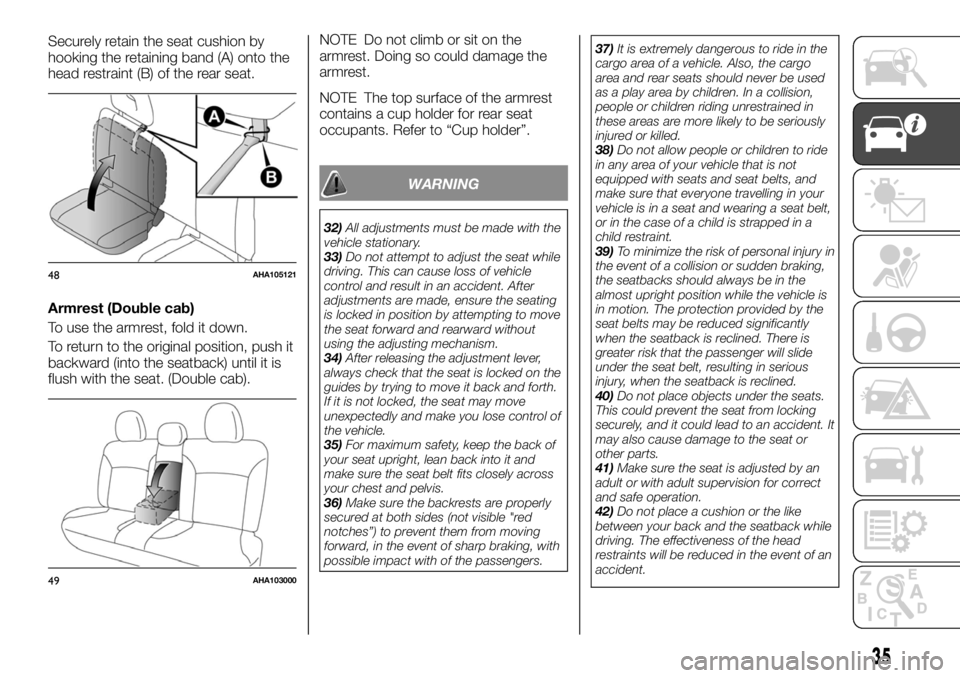
Securely retain the seat cushion by
hooking the retaining band (A) onto the
head restraint (B) of the rear seat.
Armrest (Double cab)
To use the armrest, fold it down.
To return to the original position, push it
backward (into the seatback) until it is
flush with the seat. (Double cab).NOTE Do not climb or sit on the
armrest. Doing so could damage the
armrest.
NOTE The top surface of the armrest
contains a cup holder for rear seat
occupants. Refer to “Cup holder”.
WARNING
32)All adjustments must be made with the
vehicle stationary.
33)Do not attempt to adjust the seat while
driving. This can cause loss of vehicle
control and result in an accident. After
adjustments are made, ensure the seating
is locked in position by attempting to move
the seat forward and rearward without
using the adjusting mechanism.
34)After releasing the adjustment lever,
always check that the seat is locked on the
guides by trying to move it back and forth.
If it is not locked, the seat may move
unexpectedly and make you lose control of
the vehicle.
35)For maximum safety, keep the back of
your seat upright, lean back into it and
make sure the seat belt fits closely across
your chest and pelvis.
36)Make sure the backrests are properly
secured at both sides (not visible "red
notches”) to prevent them from moving
forward, in the event of sharp braking, with
possible impact with of the passengers.37)It is extremely dangerous to ride in the
cargo area of a vehicle. Also, the cargo
area and rear seats should never be used
as a play area by children. In a collision,
people or children riding unrestrained in
these areas are more likely to be seriously
injured or killed.
38)Do not allow people or children to ride
in any area of your vehicle that is not
equipped with seats and seat belts, and
make sure that everyone travelling in your
vehicle is in a seat and wearing a seat belt,
or in the case of a child is strapped in a
child restraint.
39)To minimize the risk of personal injury in
the event of a collision or sudden braking,
the seatbacks should always be in the
almost upright position while the vehicle is
in motion. The protection provided by the
seat belts may be reduced significantly
when the seatback is reclined. There is
greater risk that the passenger will slide
under the seat belt, resulting in serious
injury, when the seatback is reclined.
40)Do not place objects under the seats.
This could prevent the seat from locking
securely, and it could lead to an accident. It
may also cause damage to the seat or
other parts.
41)Make sure the seat is adjusted by an
adult or with adult supervision for correct
and safe operation.
42)Do not place a cushion or the like
between your back and the seatback while
driving. The effectiveness of the head
restraints will be reduced in the event of an
accident.
48AHA105121
49AHA103000
35
Page 40 of 312

WARNING
47)All adjustments must only be carried
out with the vehicle stationary and the
engine off. Head restraints must be
adjusted so that the head, rather than the
neck, rests on them. Only in this case can
they protect your head correctly. To take
best advantage of the protection provided
by the head restraint, adjust the seat back
so that you are sitting up straight and your
head is as close to the head restraint as
possible.
48)Driving without the head restraints in
place can cause you and your passengers
serious injury or death in an accident. To
reduce the risk of injury in an accident,
always make sure the head restraints are
installed and properly positioned when the
seat is occupied.
49)Never place a cushion or similar device
on the seatback. This can adversely affect
head restraint performance by increasing
the distance between your head and the
restraint.
50)When a person sits in the middle
seating position of the rear seat, pull up the
head restraint to a height at which it locks
in position. Be sure to make this
adjustment before starting to drive. Serious
injuries could otherwise be suffered in the
result of an impact (Double cab).
51)Make sure that the height adjusting
knob (A) is correctly adjusted as shown in
the illustration, and also lift the head
restraints to ensure that they do not come
out of the seatback.52)The shape and size of the head
restraint differs according to the seat.
Always use the correct head restraint
provided for the seat and do not install the
head restraint in the wrong direction.
STEERING WHEEL
STEERING WHEEL
HEIGHT AND REACH
ADJUSTMENT
(Vehicles equipped with the reach
adjustment)
1. Release the lever while holding the
steering wheel up.
2. Adjust the steering wheel to the
desired position.
3. Securely lock the steering wheel by
pulling the lever fully upward.
A. Locked
B. Release
53) 54) 55)
56AA0110800
38
GETTING TO KNOW YOUR VEHICLE
Page 41 of 312
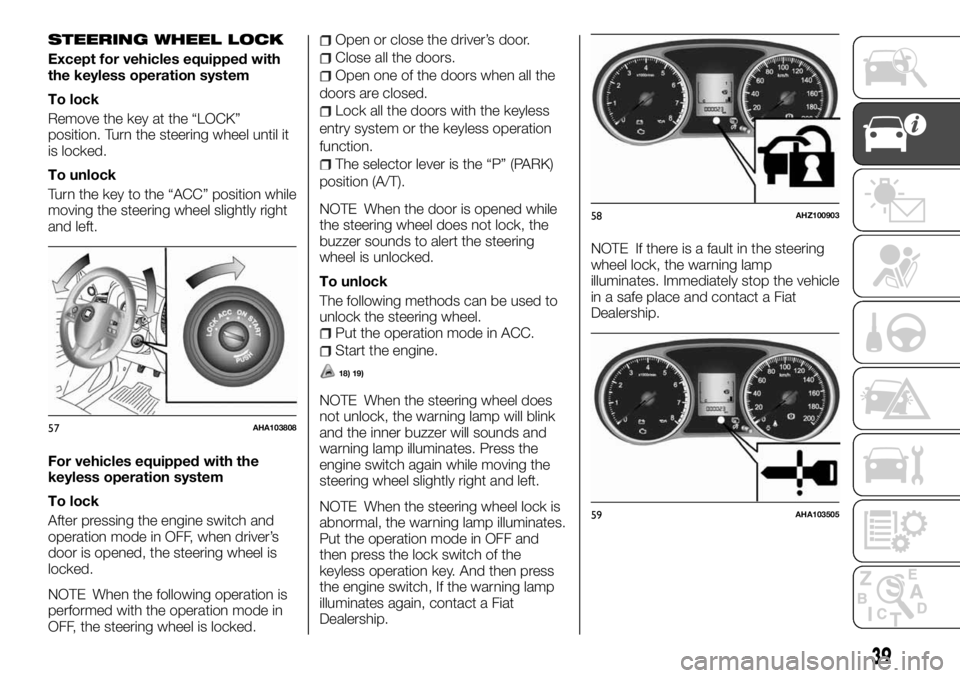
STEERING WHEEL LOCK
Except for vehicles equipped with
the keyless operation system
To lock
Remove the key at the “LOCK”
position. Turn the steering wheel until it
is locked.
To unlock
Turn the key to the “ACC” position while
moving the steering wheel slightly right
and left.
For vehicles equipped with the
keyless operation system
To lock
After pressing the engine switch and
operation mode in OFF, when driver’s
door is opened, the steering wheel is
locked.
NOTE When the following operation is
performed with the operation mode in
OFF, the steering wheel is locked.
Open or close the driver’s door.
Close all the doors.
Open one of the doors when all the
doors are closed.
Lock all the doors with the keyless
entry system or the keyless operation
function.
The selector lever is the “P” (PARK)
position (A/T).
NOTE When the door is opened while
the steering wheel does not lock, the
buzzer sounds to alert the steering
wheel is unlocked.
To unlock
The following methods can be used to
unlock the steering wheel.
Put the operation mode in ACC.
Start the engine.
18) 19)
NOTE When the steering wheel does
not unlock, the warning lamp will blink
and the inner buzzer will sounds and
warning lamp illuminates. Press the
engine switch again while moving the
steering wheel slightly right and left.
NOTE When the steering wheel lock is
abnormal, the warning lamp illuminates.
Put the operation mode in OFF and
then press the lock switch of the
keyless operation key. And then press
the engine switch, If the warning lamp
illuminates again, contact a Fiat
Dealership.NOTE If there is a fault in the steering
wheel lock, the warning lamp
illuminates. Immediately stop the vehicle
in a safe place and contact a Fiat
Dealership.
57AHA103808
58AHZ100903
59AHA103505
39
Page 42 of 312
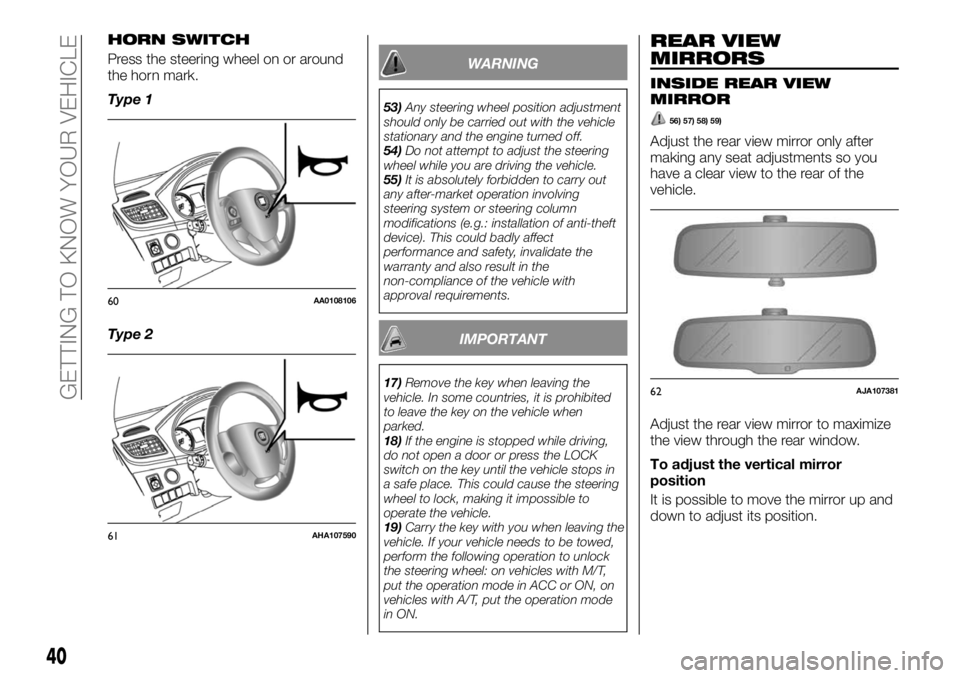
HORN SWITCH
Press the steering wheel on or around
the horn mark.
Type 1
Type 2WARNING
53)Any steering wheel position adjustment
should only be carried out with the vehicle
stationary and the engine turned off.
54)Do not attempt to adjust the steering
wheel while you are driving the vehicle.
55)It is absolutely forbidden to carry out
any after-market operation involving
steering system or steering column
modifications (e.g.: installation of anti-theft
device). This could badly affect
performance and safety, invalidate the
warranty and also result in the
non-compliance of the vehicle with
approval requirements.
IMPORTANT
17)Remove the key when leaving the
vehicle. In some countries, it is prohibited
to leave the key on the vehicle when
parked.
18)If the engine is stopped while driving,
do not open a door or press the LOCK
switch on the key until the vehicle stops in
a safe place. This could cause the steering
wheel to lock, making it impossible to
operate the vehicle.
19)Carry the key with you when leaving the
vehicle. If your vehicle needs to be towed,
perform the following operation to unlock
the steering wheel: on vehicles with M/T,
put the operation mode in ACC or ON, on
vehicles with A/T, put the operation mode
in ON.
REAR VIEW
MIRRORS
INSIDE REAR VIEW
MIRROR
56) 57) 58) 59)
Adjust the rear view mirror only after
making any seat adjustments so you
have a clear view to the rear of the
vehicle.
Adjust the rear view mirror to maximize
the view through the rear window.
To adjust the vertical mirror
position
It is possible to move the mirror up and
down to adjust its position.
60AA0108106
61AHA107590
62AJA107381
40
GETTING TO KNOW YOUR VEHICLE
Page 46 of 312
WARNING
56)As the driver's exterior mirror is curved,
it may slightly alter the perception of
distance of the reflected image. Further, the
reflective surface of the lower part of the
exterior mirrors is parabolic to increase the
field of view. The reflected image size is
thus reduced and gives the impression that
the reflected item is further away than it
actually is.
57)Do not attempt to adjust the rear view
mirrors while driving. This can be
dangerous. Always adjust the mirrors
before driving.
58)Your vehicle is equipped with convex
type mirrors. Remind that objects that you
see in the mirror will look smaller and
farther away compared to a normal flat
mirror. Do not use this mirror to estimate
distance of following vehicles when
changing lanes.
59)Do not drive the vehicle with the mirror
folded in. The lack of rearward visibility
normally provided by the mirror could lead
to an accident.
IMPORTANT
20)It is possible to retract and extend the
mirrors by hand. After retracting a mirror
using the mirror retractor switch, however,
you should extend it by using the switch
again, not by hand. If you extended the
mirror by hand after retracting it using the
switch, it would not properly lock in
position. As a result, it could move because
of the wind or vibration while you are
driving, taking away your rearward visibility.
EXTERNAL LIGHTS
COMBINATION
HEADLAMPS AND
DIPPER SWITCH
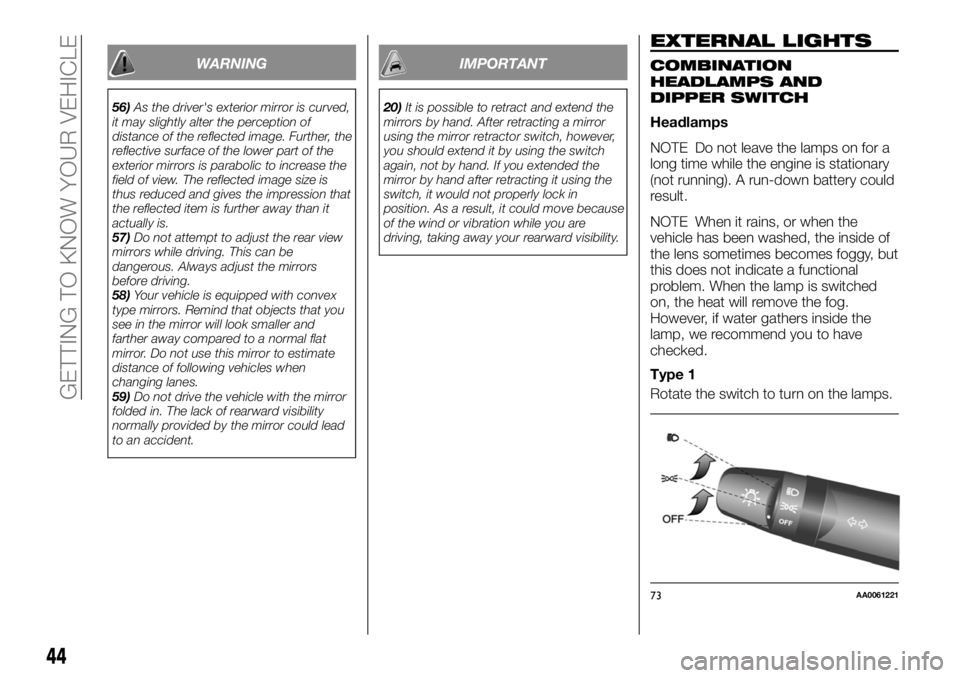
Headlamps
NOTE Do not leave the lamps on for a
long time while the engine is stationary
(not running). A run-down battery could
result.
NOTE When it rains, or when the
vehicle has been washed, the inside of
the lens sometimes becomes foggy, but
this does not indicate a functional
problem. When the lamp is switched
on, the heat will remove the fog.
However, if water gathers inside the
lamp, we recommend you to have
checked.
Type 1
Rotate the switch to turn on the lamps.
73AA0061221
44
GETTING TO KNOW YOUR VEHICLE
Page 49 of 312
Vehicle condition — Club Cab and
Double Cab
Switch position 0 — Driver only.
Switch position 3 — Driver and full
luggage loading (except for vehicles
with high intensity discharge headlamps
and 16 inch tyre).
Switch position 4 — Driver and full
luggage loading (vehicles with high
intensity discharge headlamps and
16 inch tyre).
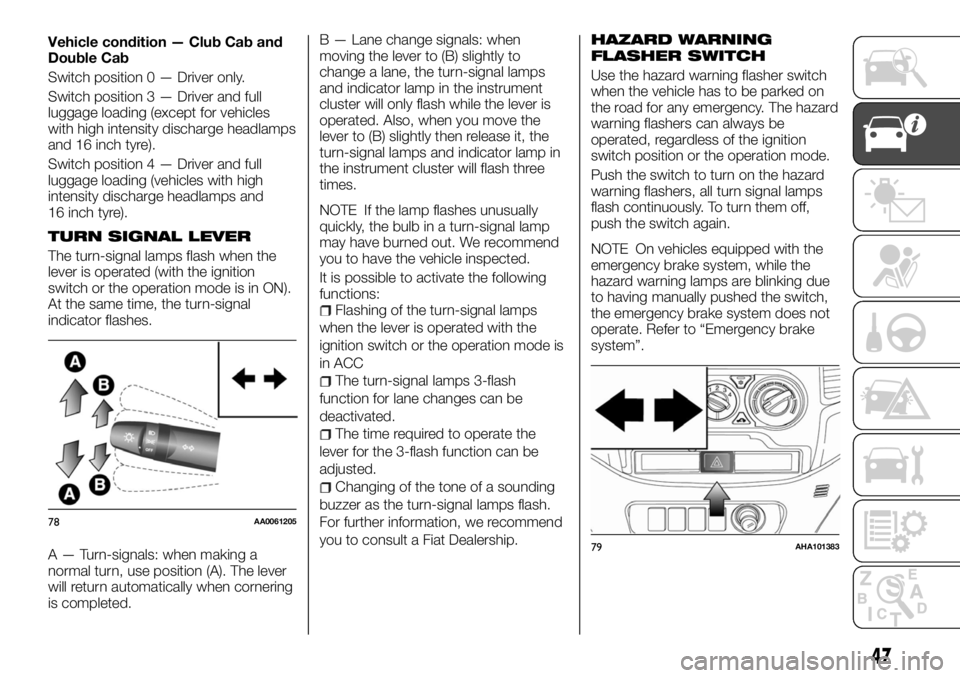
TURN SIGNAL LEVER
The turn-signal lamps flash when the
lever is operated (with the ignition
switch or the operation mode is in ON).
At the same time, the turn-signal
indicator flashes.
A — Turn-signals: when making a
normal turn, use position (A). The lever
will return automatically when cornering
is completed.B — Lane change signals: when
moving the lever to (B) slightly to
change a lane, the turn-signal lamps
and indicator lamp in the instrument
cluster will only flash while the lever is
operated. Also, when you move the
lever to (B) slightly then release it, the
turn-signal lamps and indicator lamp in
the instrument cluster will flash three
times.
NOTE If the lamp flashes unusually
quickly, the bulb in a turn-signal lamp
may have burned out. We recommend
you to have the vehicle inspected.
It is possible to activate the following
functions:
Flashing of the turn-signal lamps
when the lever is operated with the
ignition switch or the operation mode is
in ACC
The turn-signal lamps 3-flash
function for lane changes can be
deactivated.
The time required to operate the
lever for the 3-flash function can be
adjusted.
Changing of the tone of a sounding
buzzer as the turn-signal lamps flash.
For further information, we recommend
you to consult a Fiat Dealership.
HAZARD WARNING
FLASHER SWITCH
Use the hazard warning flasher switch
when the vehicle has to be parked on
the road for any emergency. The hazard
warning flashers can always be
operated, regardless of the ignition
switch position or the operation mode.
Push the switch to turn on the hazard
warning flashers, all turn signal lamps
flash continuously. To turn them off,
push the switch again.
NOTE On vehicles equipped with the
emergency brake system, while the
hazard warning lamps are blinking due
to having manually pushed the switch,
the emergency brake system does not
operate. Refer to “Emergency brake
system”.
78AA0061205
79AHA101383
47
Page 51 of 312
High intensity discharge headlamp
type
Do not need any adjustment.
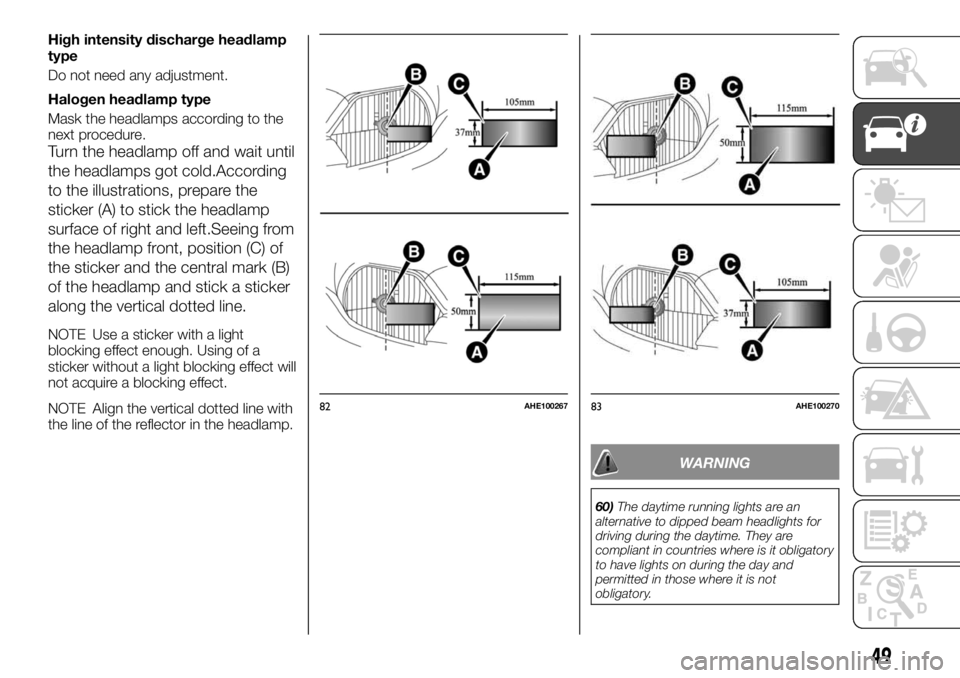
Halogen headlamp type
Mask the headlamps according to the
next procedure.
Turn the headlamp off and wait until
the headlamps got cold.According
to the illustrations, prepare the
sticker (A) to stick the headlamp
surface of right and left.Seeing from
the headlamp front, position (C) of
the sticker and the central mark (B)
of the headlamp and stick a sticker
along the vertical dotted line.
NOTE Use a sticker with a light
blocking effect enough. Using of a
sticker without a light blocking effect will
not acquire a blocking effect.
NOTE Align the vertical dotted line with
the line of the reflector in the headlamp.
WARNING
60)The daytime running lights are an
alternative to dipped beam headlights for
driving during the daytime. They are
compliant in countries where is it obligatory
to have lights on during the day and
permitted in those where it is not
obligatory.
82AHE10026783AHE100270
49
Page 57 of 312
Precautions to observe when using
wipers and washers
If the moving wipers become
blocked partway through a sweep by
ice or other deposits on the glass, the
wipers may temporarily stop operating
to prevent the motor from overheating.
In this case, park the vehicle in a safe
place, turn the ignition switch to the
“OFF” position or put the operation
mode in OFF, and then remove the ice
or other deposits. Because the wipers
will start operating again after the wiper
motor cools down, check that the
wipers operate before using them.
Do not use the wipers when the
glass is dry. They may scratch the glass
surface and the blades wear out
prematurely.
Before using the wipers in cold
weather, check that the wiper blades
are not frozen onto the glass. The
motor may burn out if the wipers are
used with the blades frozen onto the
glass.
Avoid using the washer continuously
for more than 20 seconds. Do not
operate the washer when the fluid
reservoir is empty. Otherwise, the motor
may burn out.
Periodically check the level of washer
fluid in the reservoir and refill if required.During cold weather, add a
recommended washer solution that will
not freeze in the washer reservoir.
Failure to do so could result in loss of
washer function and frost damage to
the system components.
WARNING
63)Do not use the screen wiper to remove
layers of snow or ice from the windscreen.
In such conditions, the windscreen wiper
may be subjected to excessive stress and
the motor cut-out switch, which prevents
operation for a few seconds, may
intervene. If operation is not restored,
contact a Fiat Dealership.
64)Streaks of water may cause
unnecessary blade movements.
65)If the washer is used in cold weather,
the washer fluid sprayed against the glass
may freeze, which may hinder visibility.
Warm the glass with the defroster or rear
window demister before using the washer.66)With the ignition switch or the
operation mode in ON and the lever in the
“AUTO” position, the wipers may
automatically operate in the situations
described below. If your hands get
trapped, you could suffer injuries or the
wipers could malfunction. Be sure to turn
the ignition switch to the “LOCK” position
or put the operation mode in OFF, or move
lever to the “OFF” position to deactivate
the rain sensor: when cleaning the outside
surface of the windscreen, if you touch or
wipe with a cloth on top of the rain sensor;
when using an automatic car wash; when a
physical shock is applied to the windscreen
or to the rain sensor.
IMPORTANT
21)Do not activate the rain sensor when
washing the car in an automatic car wash.
55
Page 71 of 312
NOTE The demister switch is not to
melt snow but to clear mist. Remove
snow before use of the demister switch.
NOTE To avoid unnecessary discharge
of the battery, do not use the rear
window demister during starting of the
engine or when the engine is not
running. Turn the demister off
immediately after the window is clear.
NOTE When cleaning the inside of the
rear window, use a soft cloth and wipe
gently along the heater wires, being
careful not to damage the wires.
NOTE Do not allow objects to touch
the inside of the rear window glass,
damaged or broken wires may result.
Customizing the automatic rear
window demister (for vehicles
equipped with the rear window
demister switch - Automatic type)
Function can be changed as desired,
as stated below.
Enable automatic rear window
demister — If the outside air
temperature drops below approx. 3 °C
(37 °F), the rear window demister
operates once automatically after the
engine starts. The heated mirrors will
also operate once automatically at the
same time.
Disable automatic rear window
demister — The rear window demister
does not operate automatically. The
heated mirrors will not operate
automatically as well.
Setting change method — Hold
down the rear window demister switch
for about 10 seconds or more. When
the setting is changed from enable to
disable 3 sounds are emitted and the
indicator lamp flashes 3 times. When
the setting is changed from disable to
enable 2 sounds are emitted and the
indicator lamp flashes 3 times.
NOTE The factory setting is “Disable
automatic rear window demister”.
WARNING
67)For safety, make sure you have a clear
view through all windows.
68)Use of the recirculation position for an
extended time may cause the windows to
fog up.
IMPORTANT
22)The engine speed may increase when
the air conditioning is operating. With an
increased engine speed, an A/T vehicle will
creep to a greater degree than with a lower
engine speed. Fully depress the brake
pedal to prevent the vehicle from creeping.
23)When using the air conditioning, the
idling speed may slightly increase as the air
conditioning compressor is switched on/off
automatically. While the vehicle with an
automatic transmission is stationary, fully
depress the brake pedal to prevent the
vehicle from creeping.24)When using the mode selection dial
between the
andpositions, prevent
fogging by moving the air selection lever to
select outside air (refer to “Air selection
lever”).
25)Use of the
(recirculation) position
for extended time may cause the windows
to fog up.
26)If the outside air is dusty or otherwise
contaminated, or if high cooling
performance is desired, set air selection
lever to the
(recirculation) position
and the temperature control dial all the way
to the right. Switch to the
(outside)
position periodically to increase ventilation
so that the windows do not become
fogged up.
IMPORTANT
2)The system uses a coolant that is
compatible with the laws in force in the
countries where the vehicle is sold, R134a
(indicated on a specific plate in the engine
compartment). The use of other coolants
affects the efficiency and condition of the
system. Also the compressor coolants
used must be compatible with the
indicated coolant.
69