check engine FIAT FULLBACK 2017 Owner handbook (in English)
[x] Cancel search | Manufacturer: FIAT, Model Year: 2017, Model line: FULLBACK, Model: FIAT FULLBACK 2017Pages: 312, PDF Size: 12.31 MB
Page 4 of 312
READ THIS CAREFULLY
REFUELLING
Only refuel with automotive diesel conforming to the European specification EN590. The use of other products or mixtures may damage the
engine beyond repair and consequently invalidate the warranty, due to the damage caused.
STARTING THE ENGINE
Make sure that the handbrake is engaged; set the gear lever to neutral; fully depress the clutch pedal without pressing the accelerator, then
turn the ignition key to MAR-ON and wait for the warning lightsandto switch off; turn the ignition key to AVV and release it as soon as
the engine has started.
PARKING ON FLAMMABLE MATERIAL
The catalytic converter develops high temperatures during operation. Do not park on grass, dry leaves, pine needles or other flammable
material: fire hazard.
RESPECTING THE ENVIRONMENT
The vehicle is fitted with a system that allows continuous diagnosis of the emission-related components in order to help protect the
environment.
ELECTRICAL ACCESSORIES
If, after buying the vehicle, you decide to add electrical accessories (with the risk of gradually draining the battery), visit a Fiat Dealership. They
can calculate the overall electrical requirement and check that the vehicle's electrical system can support the required load.
SCHEDULED SERVICING
Correct maintenance enables the vehicle to perfectly maintain performance and safety characteristics, its environmental friendliness and low
running costs over time.
Page 11 of 312
GRAPHICAL INDEX
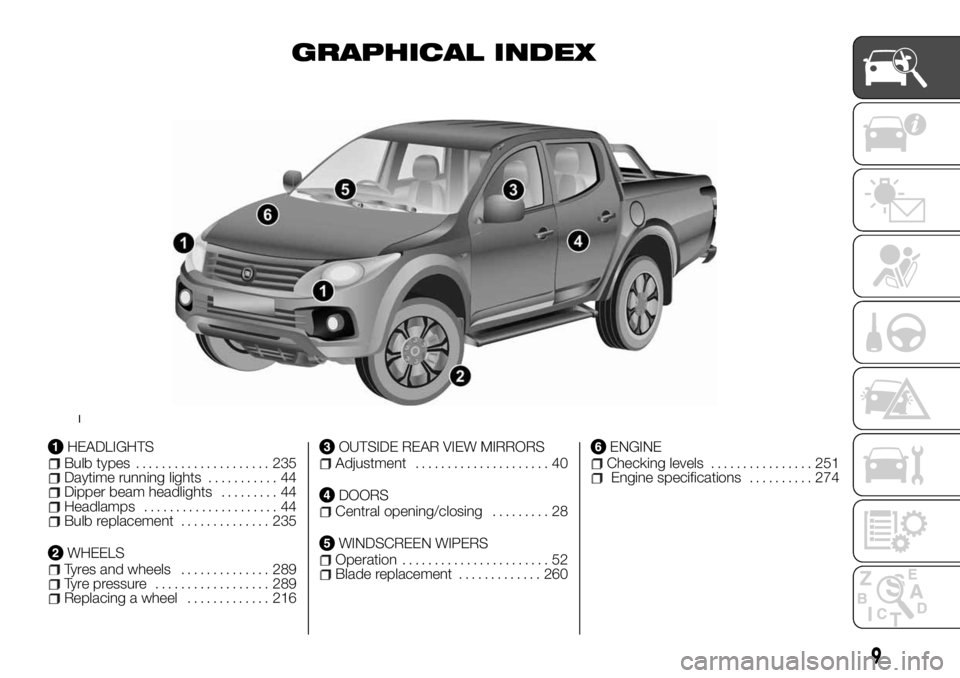
HEADLIGHTSBulb types..................... 235Daytime running lights........... 44Dipper beam headlights......... 44Headlamps..................... 44Bulb replacement.............. 235
WHEELSTyres and wheels.............. 289Tyre pressure.................. 289Replacing a wheel............. 216
OUTSIDE REAR VIEW MIRRORSAdjustment..................... 40
DOORSCentral opening/closing......... 28
WINDSCREEN WIPERSOperation....................... 52Blade replacement............. 260
ENGINEChecking levels................ 251Engine specifications.......... 274
1
9
Page 19 of 312
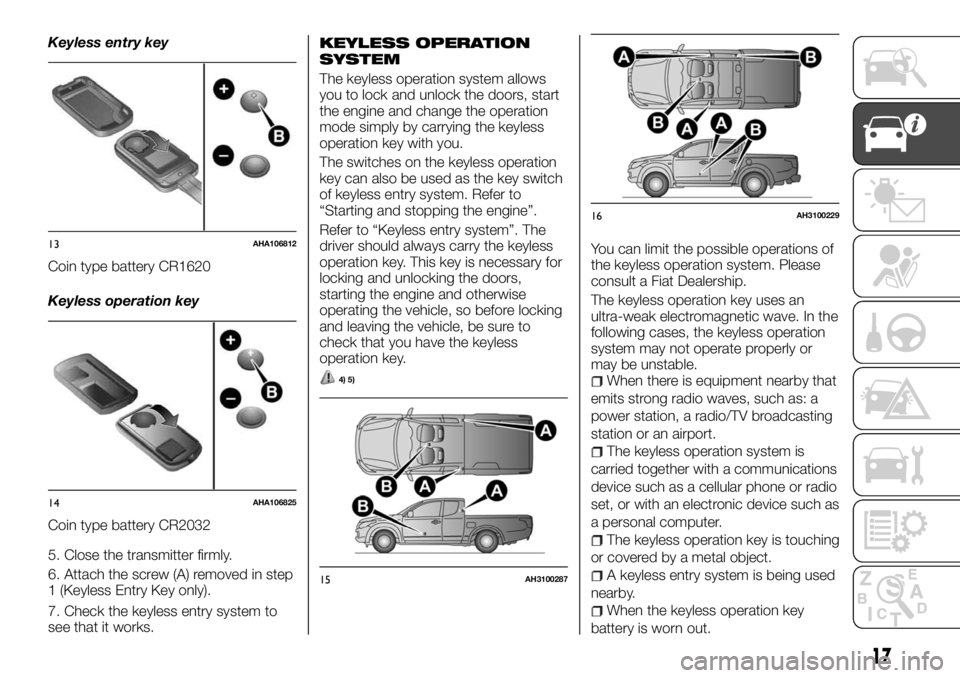
Keyless entry key
Coin type battery CR1620
Keyless operation key
Coin type battery CR2032
5. Close the transmitter firmly.
6. Attach the screw (A) removed in step
1 (Keyless Entry Key only).
7. Check the keyless entry system to
see that it works.KEYLESS OPERATION
SYSTEM
The keyless operation system allows
you to lock and unlock the doors, start
the engine and change the operation
mode simply by carrying the keyless
operation key with you.
The switches on the keyless operation
key can also be used as the key switch
of keyless entry system. Refer to
“Starting and stopping the engine”.
Refer to “Keyless entry system”. The
driver should always carry the keyless
operation key. This key is necessary for
locking and unlocking the doors,
starting the engine and otherwise
operating the vehicle, so before locking
and leaving the vehicle, be sure to
check that you have the keyless
operation key.
4) 5)
You can limit the possible operations of
the keyless operation system. Please
consult a Fiat Dealership.
The keyless operation key uses an
ultra-weak electromagnetic wave. In the
following cases, the keyless operation
system may not operate properly or
may be unstable.
When there is equipment nearby that
emits strong radio waves, such as: a
power station, a radio/TV broadcasting
station or an airport.
The keyless operation system is
carried together with a communications
device such as a cellular phone or radio
set, or with an electronic device such as
a personal computer.
The keyless operation key is touching
or covered by a metal object.
A keyless entry system is being used
nearby.
When the keyless operation key
battery is worn out.
13AHA106812
14AHA106825
15AH3100287
16AH3100229
17
Page 28 of 312
When you open driver’s door or the
engine switch operate again, the power
is supplied again.
NOTE When ACC power supply
automatic stop, the steering wheel
can’t lock and you can’t lock and
unlock the doors by the keyless entry
key and keyless operation key.
NOTE It is possible to modify functions
as follows:
The time until the power cuts out can
be changed to about 60 minutes.
The ACC power auto-cutout function
can be deactivated. For details, we
recommend you to consult a Fiat
Dealership.
Operation mode OFF reminder
systemWhen the operation mode is in any
mode other than OFF, if you close all
the doors then try to lock the doors by
pressing the driver’s or front
passenger’s door lock/unlock switch, a
warning lamp will blink and the outer
buzzer will sounds and you cannot lock
the doors.
Operation mode ON reminder
system
If the driver’s door is opened with the
engine stopped and the operation
mode in any mode other than OFF, the
operation mode ON reminder inner
buzzer sounds intermittently to remind
you to put the operation mode in OFF.WARNING
6)Do not remove the ignition key from the
ignition switch while driving. The steering
wheel will be locked, causing loss of
control.
7)If the ignition device has been tampered
with (e.g. an attempted theft), have it
checked over by a Fiat Dealership before
driving again.
8)Always remove the key when you leave
your vehicle to prevent someone from
accidentally operating the controls.
Remember to engage the handbrake.
Engage first gear if the vehicle is parked
uphill or reverse gear if the vehicle is
parked downhill. Never leave children
unattended in the vehicle.9)Never extract the key while the vehicle is
moving. The steering wheel will lock as
soon as it is turned. This also applies to
cases in which the vehicle is towed.
10)Under no circumstances should
aftermarket operations be carried out
involving steering system or steering
column modifications (e.g. installation of
anti-theft device). This could negatively
affect performance and safety, invalidate
the warranty, cause serious safety
problems and also result in vehicle
non-compliance with type-approval
requirements.
IMPORTANT
1)If the engine is stopped while driving, the
brake servomechanism will cease to
function and braking efficiency will
deteriorate. Also, the power steering
system will not function and it will require
greater manual effort to operate the
steering.
2)Do not leave the key in the “ON” position
for a long time when the engine is not
running, doing so will cause the battery to
be discharged.
3)Do not turn the key to the “START”
position while the engine is running. Doing
so could damage the starter motor.
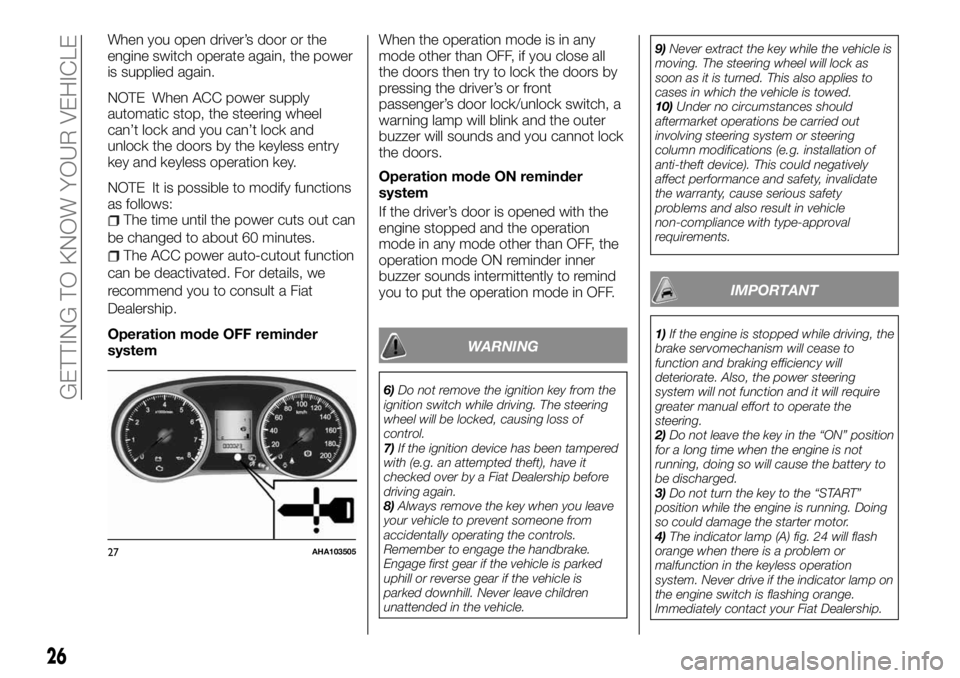
4)The indicator lamp (A) fig. 24 will flash
orange when there is a problem or
malfunction in the keyless operation
system. Never drive if the indicator lamp on
the engine switch is flashing orange.
Immediately contact your Fiat Dealership.
27AHA103505
26
GETTING TO KNOW YOUR VEHICLE
Page 35 of 312
27)Before driving, make sure that the rear
gate is securely closed. If the rear gate
opens while driving the vehicle, objects
stored in the cargo area could fall out onto
the road.
28)Once the dead lock system is engaged
it is impossible to open the doors from
inside the vehicle. Therefore, before
engaging the system check that there is no
one left inside. If the remote control battery
is flat, the system can be disengaged only
by inserting the key metal insert in either of
the door locks as described previously: in
this case the device remains active only for
the rear doors.
29)This spring loaded system has
activation forces that were designed for
optimum comfort. Accidental knocks or a
strong gust of wind may release the
springs and close the doors
spontaneously.
30)On vehicles with the rear bumper,
never swing down the rear gate because
the rear gate could be damaged.
31)Never close the rear gate with the link
or wire left unhooked.SEATS
SEAT ADJUSTMENT
Adjust the driver’s seat so that you are
comfortable and that you can reach the
pedals, steering wheel, switches etc.
while retaining a clear field of vision.
32) 33) 34) 35) 36) 37) 38) 39) 40) 41) 42) 43) 44) 45)
10)
FRONT SEATS
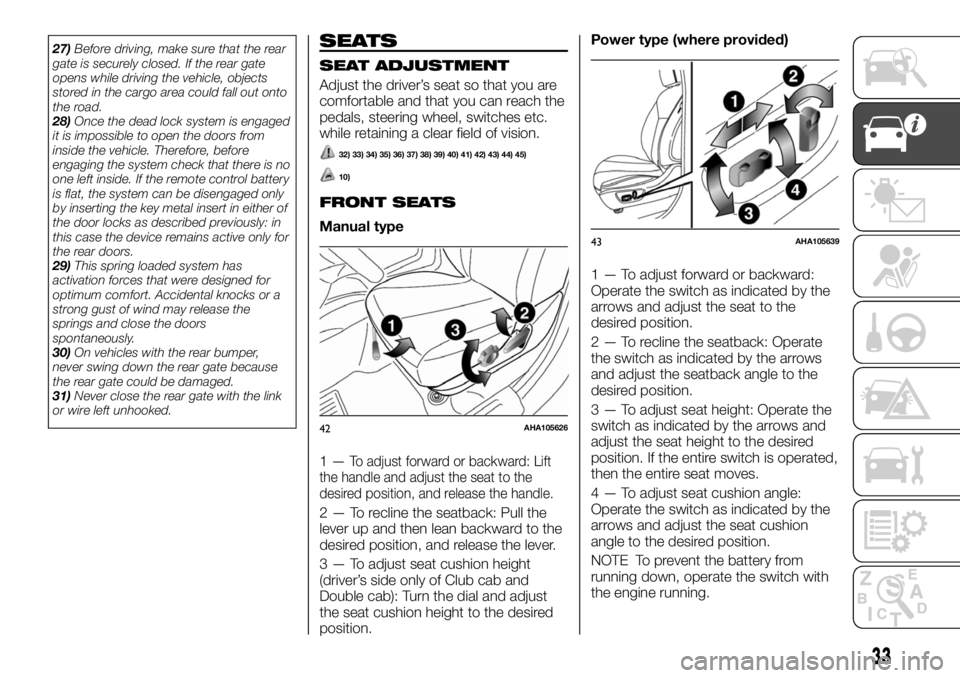
Manual type
1—
To adjust forward or backward: Lift
the handle and adjust the seat to the
desired position, and release the handle.
2 — To recline the seatback: Pull the
lever up and then lean backward to the
desired position, and release the lever.
3 — To adjust seat cushion height
(driver’s side only of Club cab and
Double cab): Turn the dial and adjust
the seat cushion height to the desired
position.Power type (where provided)
1 — To adjust forward or backward:
Operate the switch as indicated by the
arrows and adjust the seat to the
desired position.
2 — To recline the seatback: Operate
the switch as indicated by the arrows
and adjust the seatback angle to the
desired position.
3 — To adjust seat height: Operate the
switch as indicated by the arrows and
adjust the seat height to the desired
position. If the entire switch is operated,
then the entire seat moves.
4 — To adjust seat cushion angle:
Operate the switch as indicated by the
arrows and adjust the seat cushion
angle to the desired position.
NOTE To prevent the battery from
running down, operate the switch with
the engine running.
42AHA105626
43AHA105639
33
Page 46 of 312
WARNING
56)As the driver's exterior mirror is curved,
it may slightly alter the perception of
distance of the reflected image. Further, the
reflective surface of the lower part of the
exterior mirrors is parabolic to increase the
field of view. The reflected image size is
thus reduced and gives the impression that
the reflected item is further away than it
actually is.
57)Do not attempt to adjust the rear view
mirrors while driving. This can be
dangerous. Always adjust the mirrors
before driving.
58)Your vehicle is equipped with convex
type mirrors. Remind that objects that you
see in the mirror will look smaller and
farther away compared to a normal flat
mirror. Do not use this mirror to estimate
distance of following vehicles when
changing lanes.
59)Do not drive the vehicle with the mirror
folded in. The lack of rearward visibility
normally provided by the mirror could lead
to an accident.
IMPORTANT
20)It is possible to retract and extend the
mirrors by hand. After retracting a mirror
using the mirror retractor switch, however,
you should extend it by using the switch
again, not by hand. If you extended the
mirror by hand after retracting it using the
switch, it would not properly lock in
position. As a result, it could move because
of the wind or vibration while you are
driving, taking away your rearward visibility.
EXTERNAL LIGHTS
COMBINATION
HEADLAMPS AND
DIPPER SWITCH
Headlamps
NOTE Do not leave the lamps on for a
long time while the engine is stationary
(not running). A run-down battery could
result.
NOTE When it rains, or when the
vehicle has been washed, the inside of
the lens sometimes becomes foggy, but
this does not indicate a functional
problem. When the lamp is switched
on, the heat will remove the fog.
However, if water gathers inside the
lamp, we recommend you to have
checked.
Type 1
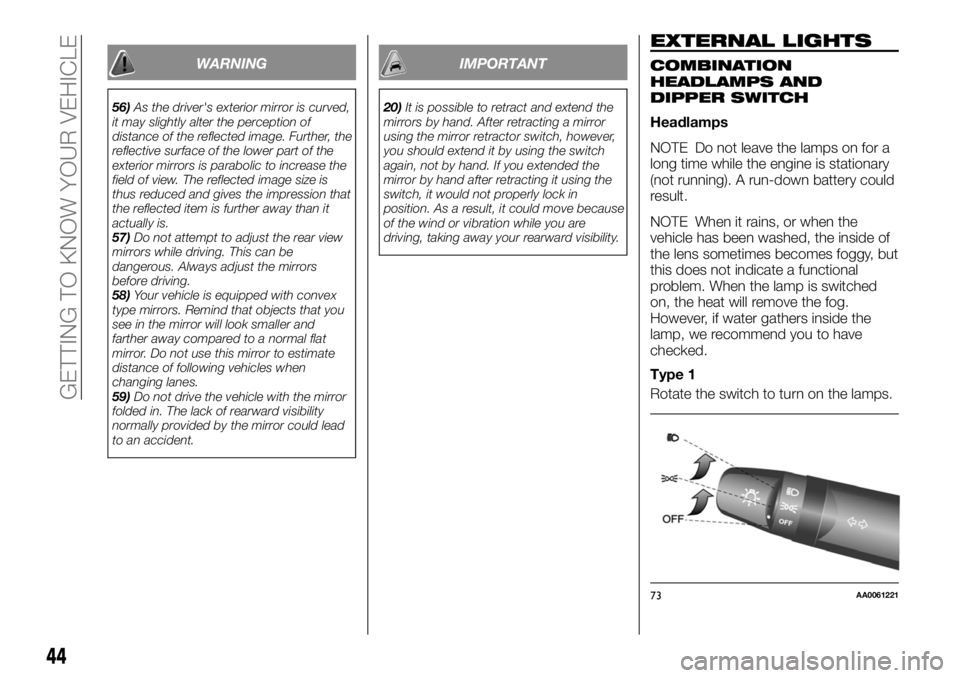
Rotate the switch to turn on the lamps.
73AA0061221
44
GETTING TO KNOW YOUR VEHICLE
Page 70 of 312
Too much cooling is not good for the
health. The inside air temperature
should only be 5 to 6 °C below the
outside air temperature.
When operating the system, make
sure the air intake, which is located in
front of the windscreen, is free of
obstructions such as leaves and snow.
Leaves collected in the air-intake
plenum may reduce air flow and plug
the plenum water drains.
Air conditioning system refrigerant
recommendations
If the air conditioning seems less
effective than usual, the cause might be
a refrigerant leak. We recommend you
to have the system inspected.
The air conditioning system in your
vehicle must be charged with the
refrigerant HFC-134a (R134a).
Use of any other refrigerant or lubricant
will cause severe damage which will
result in the need to replace your
vehicle’s entire air conditioning system.
The release of refrigerant into the
atmosphere should be prevented.
It is recommended that the refrigerant
be recovered and recycled for further
use.
During a long period of disuse
The air conditioning should be operated
for at least five minutes each week,
even in cold weather. This is to preventpoor lubrication of the compressor
internal parts and to maintain the air
conditioning in the best operating
condition.PASSENGER
COMPARTMENT AIR
CLEANER / POLLEN
FILTER
An air filter has been incorporated into
this air conditioner so that dirt and dust
are cleaned from the air.
Replace the air filter periodically as its
ability to clean the air will be reduced as
it collects pollen and dirt.
NOTE Operation in certain conditions
such as driving on a dusty road and
frequent use of the air conditioner can
lead to reduction of service life of the
filter. When you feel that the airflow is
lower than normal or when the
windscreen or windows start to fog up
easily, replace the air filter. We
recommend you to have it checked.
REAR WINDOW
DEMISTER SWITCH
(where provided)
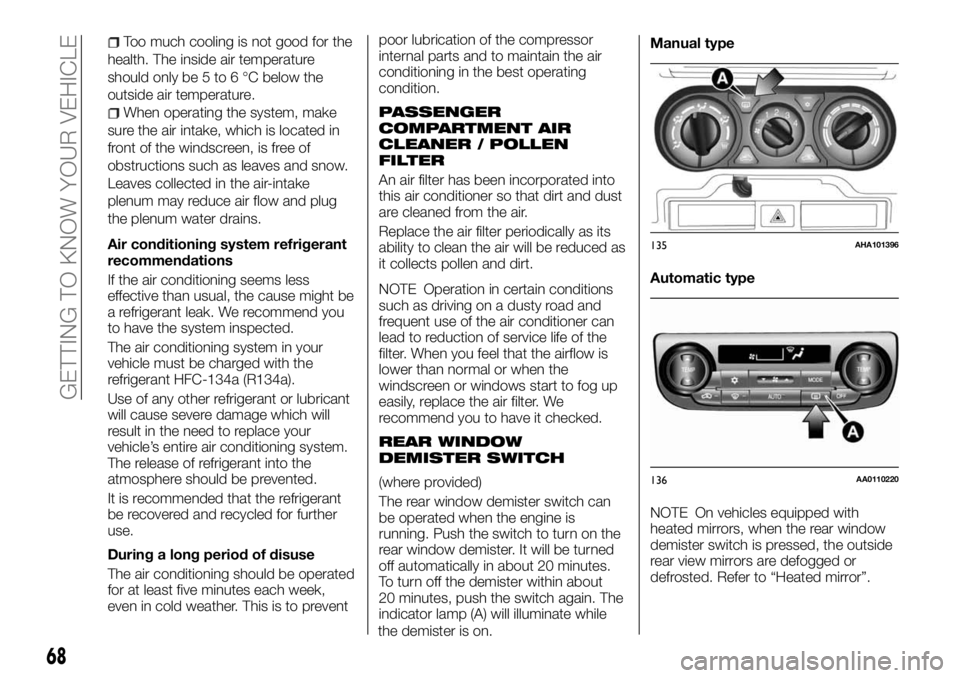
The rear window demister switch can
be operated when the engine is
running. Push the switch to turn on the
rear window demister. It will be turned
off automatically in about 20 minutes.
To turn off the demister within about
20 minutes, push the switch again. The
indicator lamp (A) will illuminate while
the demister is on.Manual type
Automatic type
NOTE On vehicles equipped with
heated mirrors, when the rear window
demister switch is pressed, the outside
rear view mirrors are defogged or
defrosted. Refer to “Heated mirror”.
135AHA101396
136AA0110220
68
GETTING TO KNOW YOUR VEHICLE
Page 73 of 312
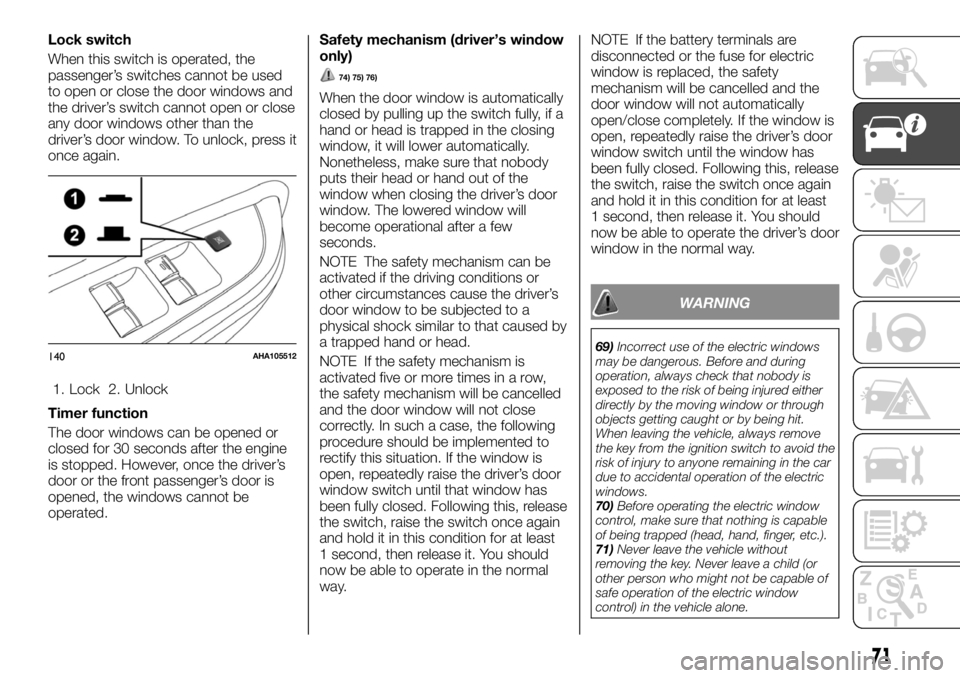
Lock switch
When this switch is operated, the
passenger’s switches cannot be used
to open or close the door windows and
the driver’s switch cannot open or close
any door windows other than the
driver’s door window. To unlock, press it
once again.
1. Lock 2. Unlock
Timer function
The door windows can be opened or
closed for 30 seconds after the engine
is stopped. However, once the driver’s
door or the front passenger’s door is
opened, the windows cannot be
operated.Safety mechanism (driver’s window
only)
74) 75) 76)
When the door window is automatically
closed by pulling up the switch fully, if a
hand or head is trapped in the closing
window, it will lower automatically.
Nonetheless, make sure that nobody
puts their head or hand out of the
window when closing the driver’s door
window. The lowered window will
become operational after a few
seconds.
NOTE The safety mechanism can be
activated if the driving conditions or
other circumstances cause the driver’s
door window to be subjected to a
physical shock similar to that caused by
a trapped hand or head.
NOTE If the safety mechanism is
activated five or more times in a row,
the safety mechanism will be cancelled
and the door window will not close
correctly. In such a case, the following
procedure should be implemented to
rectify this situation. If the window is
open, repeatedly raise the driver’s door
window switch until that window has
been fully closed. Following this, release
the switch, raise the switch once again
and hold it in this condition for at least
1 second, then release it. You should
now be able to operate in the normal
way.NOTE If the battery terminals are
disconnected or the fuse for electric
window is replaced, the safety
mechanism will be cancelled and the
door window will not automatically
open/close completely. If the window is
open, repeatedly raise the driver’s door
window switch until the window has
been fully closed. Following this, release
the switch, raise the switch once again
and hold it in this condition for at least
1 second, then release it. You should
now be able to operate the driver’s door
window in the normal way.
WARNING
69)Incorrect use of the electric windows
may be dangerous. Before and during
operation, always check that nobody is
exposed to the risk of being injured either
directly by the moving window or through
objects getting caught or by being hit.
When leaving the vehicle, always remove
the key from the ignition switch to avoid the
risk of injury to anyone remaining in the car
due to accidental operation of the electric
windows.
70)Before operating the electric window
control, make sure that nothing is capable
of being trapped (head, hand, finger, etc.).
71)Never leave the vehicle without
removing the key. Never leave a child (or
other person who might not be capable of
safe operation of the electric window
control) in the vehicle alone.140AHA105512
71
Page 76 of 312
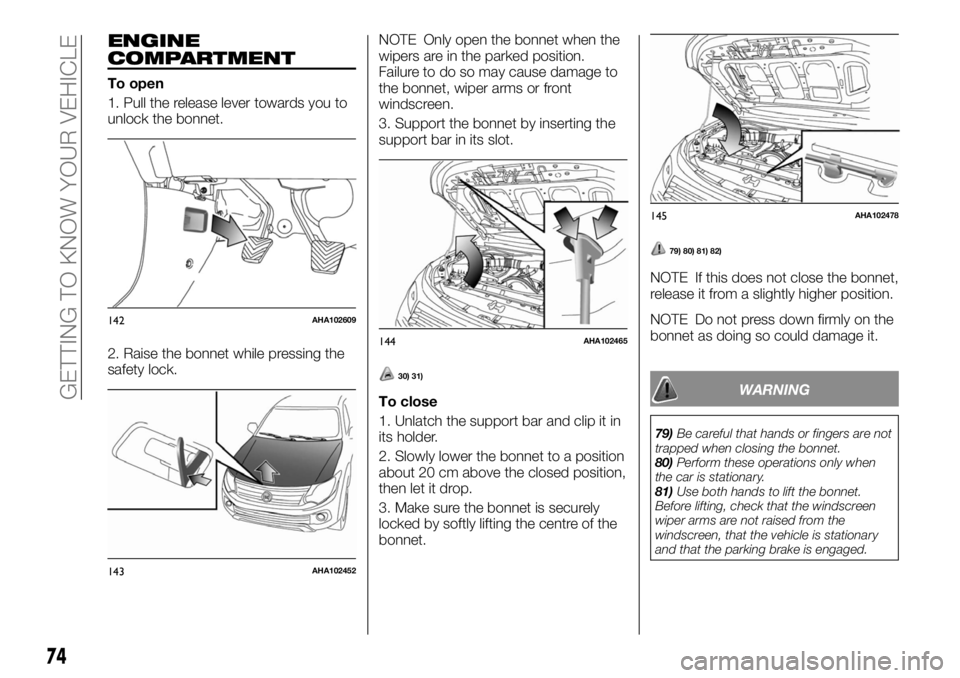
ENGINE
COMPARTMENT
To open
1. Pull the release lever towards you to
unlock the bonnet.
2. Raise the bonnet while pressing the
safety lock.NOTE Only open the bonnet when the
wipers are in the parked position.
Failure to do so may cause damage to
the bonnet, wiper arms or front
windscreen.
3. Support the bonnet by inserting the
support bar in its slot.
30) 31)
To close
1. Unlatch the support bar and clip it in
its holder.
2. Slowly lower the bonnet to a position
about 20 cm above the closed position,
then let it drop.
3. Make sure the bonnet is securely
locked by softly lifting the centre of the
bonnet.
79) 80) 81) 82)
NOTE If this does not close the bonnet,
release it from a slightly higher position.
NOTE Do not press down firmly on the
bonnet as doing so could damage it.
WARNING
79)Be careful that hands or fingers are not
trapped when closing the bonnet.
80)Perform these operations only when
the car is stationary.
81)Use both hands to lift the bonnet.
Before lifting, check that the windscreen
wiper arms are not raised from the
windscreen, that the vehicle is stationary
and that the parking brake is engaged.
142AHA102609
143AHA102452
144AHA102465
145AHA102478
74
GETTING TO KNOW YOUR VEHICLE
Page 78 of 312
86)Do not carry unnecessary objects on
the flatbed. Particularly if the vehicle is
driven in cities, where frequent stopping
and starting is necessary, supplementary
loads on the vehicle may have major
repercussions on fuel consumption.
Furthermore, do not travel with
unnecessary luggage, loads etc. on the
roof: the increased air resistance will
increase fuel consumption.
87)Using a lower gear when travelling with
heavy loads will improve vehicle
performance and extend the life of the
gearbox, limiting gear shifts and
overheating. This action ensures better
exhaust braking.
88)All precautions must be adopted to
prevent danger to other road users if the
load protrudes beyond the contour of the
vehicle. The rear and side protrusion must
be indicated according to the laws in force
in the country. The load must not
compromise stability of the vehicle or cover
lights, visual indicators or identifying plates.
Poles, bars and similar loads which are
difficult to see arranged horizontally must
not protrude beyond the contour of the
vehicle.TRAILER TOWING
In order to tow a trailer with your
vehicle, when having a trailer towing
device mounted that meets all relevant
regulations in your area, consult a Fiat
Dealership.
Check that your towbar coupling ball
does not obscure your vehicle’s licence
plate when the trailer or caravan is
disconnected. If it obscures the licence
plate, please remove the towbar
coupling ball. And if the towbar
coupling ball is lockable by using a key
or any kind of tools, please remove the
coupling ball and use a towbar coupling
ball which can be removed or
repositioned without the use of a key or
any kind of tools instead.
The regulations concerning the towing
of a trailer may differ from country to
country. You are advised to obey the
regulations in each area.
NOTE If you are going to tow a trailer,
pay careful attention to the following
points.
89)
Maximum towable weight with
brake and maximum trailernose
weight
Never exceed the maximum towable
weight with brake and the maximum
trailer-nose weight as listed in the
specifications. (Refer to “Vehicle
weight”.
If you tow a trailer at an altitude of more
than 1,000 m above sea-level, reduce
your weight by 10 % of the gross
combination weight for every increase
of 1,000 m above sea-level, as the
engine output is lowered owing to
decrease in atmospheric pressure.
76
GETTING TO KNOW YOUR VEHICLE