height adjustment FIAT FULLBACK 2017 Owner handbook (in English)
[x] Cancel search | Manufacturer: FIAT, Model Year: 2017, Model line: FULLBACK, Model: FIAT FULLBACK 2017Pages: 312, PDF Size: 12.31 MB
Page 35 of 312
27)Before driving, make sure that the rear
gate is securely closed. If the rear gate
opens while driving the vehicle, objects
stored in the cargo area could fall out onto
the road.
28)Once the dead lock system is engaged
it is impossible to open the doors from
inside the vehicle. Therefore, before
engaging the system check that there is no
one left inside. If the remote control battery
is flat, the system can be disengaged only
by inserting the key metal insert in either of
the door locks as described previously: in
this case the device remains active only for
the rear doors.
29)This spring loaded system has
activation forces that were designed for
optimum comfort. Accidental knocks or a
strong gust of wind may release the
springs and close the doors
spontaneously.
30)On vehicles with the rear bumper,
never swing down the rear gate because
the rear gate could be damaged.
31)Never close the rear gate with the link
or wire left unhooked.SEATS
SEAT ADJUSTMENT
Adjust the driver’s seat so that you are
comfortable and that you can reach the
pedals, steering wheel, switches etc.
while retaining a clear field of vision.
32) 33) 34) 35) 36) 37) 38) 39) 40) 41) 42) 43) 44) 45)
10)
FRONT SEATS
Manual type
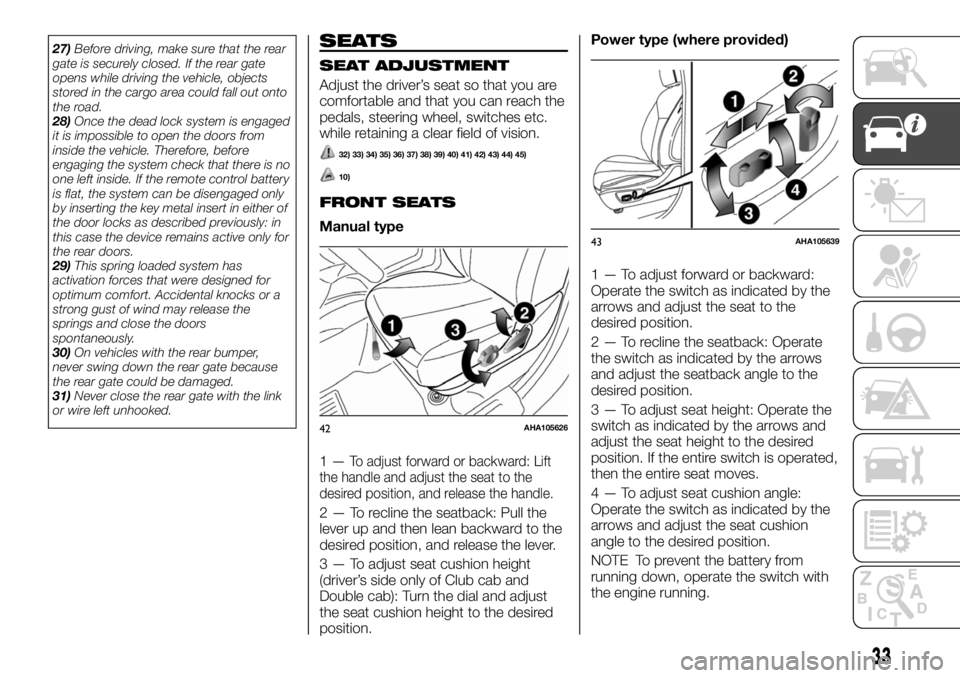
1—
To adjust forward or backward: Lift
the handle and adjust the seat to the
desired position, and release the handle.
2 — To recline the seatback: Pull the
lever up and then lean backward to the
desired position, and release the lever.
3 — To adjust seat cushion height
(driver’s side only of Club cab and
Double cab): Turn the dial and adjust
the seat cushion height to the desired
position.Power type (where provided)
1 — To adjust forward or backward:
Operate the switch as indicated by the
arrows and adjust the seat to the
desired position.
2 — To recline the seatback: Operate
the switch as indicated by the arrows
and adjust the seatback angle to the
desired position.
3 — To adjust seat height: Operate the
switch as indicated by the arrows and
adjust the seat height to the desired
position. If the entire switch is operated,
then the entire seat moves.
4 — To adjust seat cushion angle:
Operate the switch as indicated by the
arrows and adjust the seat cushion
angle to the desired position.
NOTE To prevent the battery from
running down, operate the switch with
the engine running.
42AHA105626
43AHA105639
33
Page 38 of 312
43)The reclining mechanism of the front
manual seat's seatback is spring loaded,
causing it to fold the seatback forward
when the lock lever is operated. When
using the lever, sit close to the seatback or
hold it with your hand to control its return
motion.
44)When sliding the seats, be careful not
to catch your hand or foot.
45)If your vehicle is equipped with the rear
seat, when sliding or reclining the seat
rearward, pay careful attention to the rear
seat passengers.
46)If the following types of persons use
the heated seats, they might become too
hot or receive minor burns (red skin, heat
blisters, etc.): children, elderly or ill people,
people with sensitive skin, excessively tired
people, people under the influence of
alcohol or sleep inducing medication (cold
medicine, etc.).
IMPORTANT
10)The fabric upholstery of the seats has
been designed to withstand long-term wear
deriving from normal use of the car. Some
precautions are however required. Avoid
prolonged and/or excessive rubbing
against clothing accessories such as metal
buckles and Velcro strips which, by
applying a high pressure on the fabric in a
small area, could cause it to break, thereby
damaging the upholstery.11)Operate in the “HI” position for quick
heating. Once the seat is warm, set the
heater switch to the “LO” position to keep it
warm. Slight variations in seat temperature
may be felt while using the heated seats.
This is caused by the operation of the
heater’s internal thermostat and does not
indicate a malfunction.
12)Do not place heavy objects on the seat
or stick pins, needles, or other pointed
objects into it.
13)Do not use a blanket, cushion, or other
material with high heat insulation properties
on the seat while using the heater; this
might cause the heater element to
overheat.
14)Do not use benzine, kerosene, petrol,
alcohol or other organic solvents when
cleaning the seats. Doing so could damage
not only the seat cover, but also the heater
element.
15)If water or any other liquid is spilled on
the seat, allow it to dry thoroughly before
attempting to use the heater.
16)Turn the heater off immediately if it
appears to be malfunctioning during use.
HEAD RESTRAINTS
47) 48) 49) 50) 51) 52)
NOTE The head restraint height of the
outer seat in the rear seat cannot be
adjusted.
Front seats
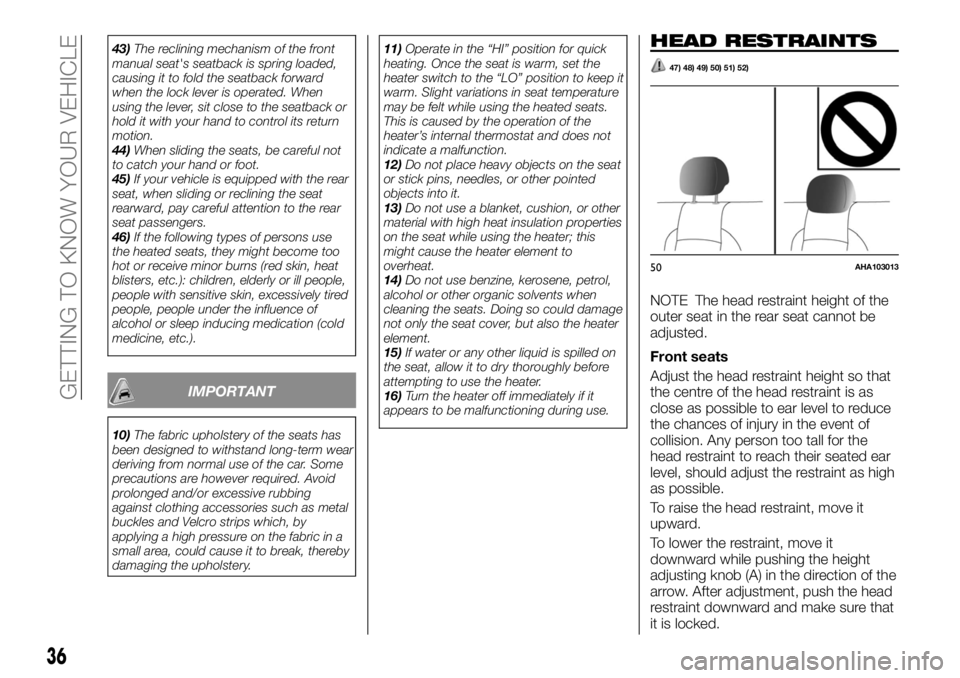
Adjust the head restraint height so that
the centre of the head restraint is as
close as possible to ear level to reduce
the chances of injury in the event of
collision. Any person too tall for the
head restraint to reach their seated ear
level, should adjust the restraint as high
as possible.
To raise the head restraint, move it
upward.
To lower the restraint, move it
downward while pushing the height
adjusting knob (A) in the direction of the
arrow. After adjustment, push the head
restraint downward and make sure that
it is locked.
50AHA103013
36
GETTING TO KNOW YOUR VEHICLE
Page 39 of 312
Rear centre seat
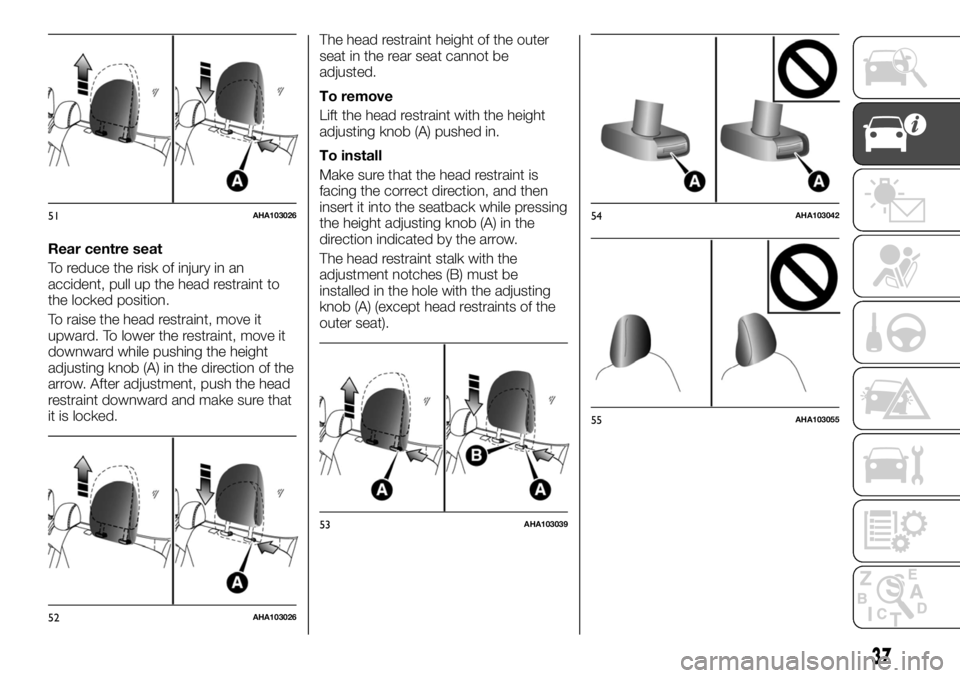
To reduce the risk of injury in an
accident, pull up the head restraint to
the locked position.
To raise the head restraint, move it
upward. To lower the restraint, move it
downward while pushing the height
adjusting knob (A) in the direction of the
arrow. After adjustment, push the head
restraint downward and make sure that
it is locked.The head restraint height of the outer
seat in the rear seat cannot be
adjusted.
To remove
Lift the head restraint with the height
adjusting knob (A) pushed in.
To install
Make sure that the head restraint is
facing the correct direction, and then
insert it into the seatback while pressing
the height adjusting knob (A) in the
direction indicated by the arrow.
The head restraint stalk with the
adjustment notches (B) must be
installed in the hole with the adjusting
knob (A) (except head restraints of the
outer seat).
51AHA103026
52AHA103026
53AHA103039
54AHA103042
55AHA103055
37
Page 40 of 312

WARNING
47)All adjustments must only be carried
out with the vehicle stationary and the
engine off. Head restraints must be
adjusted so that the head, rather than the
neck, rests on them. Only in this case can
they protect your head correctly. To take
best advantage of the protection provided
by the head restraint, adjust the seat back
so that you are sitting up straight and your
head is as close to the head restraint as
possible.
48)Driving without the head restraints in
place can cause you and your passengers
serious injury or death in an accident. To
reduce the risk of injury in an accident,
always make sure the head restraints are
installed and properly positioned when the
seat is occupied.
49)Never place a cushion or similar device
on the seatback. This can adversely affect
head restraint performance by increasing
the distance between your head and the
restraint.
50)When a person sits in the middle
seating position of the rear seat, pull up the
head restraint to a height at which it locks
in position. Be sure to make this
adjustment before starting to drive. Serious
injuries could otherwise be suffered in the
result of an impact (Double cab).
51)Make sure that the height adjusting
knob (A) is correctly adjusted as shown in
the illustration, and also lift the head
restraints to ensure that they do not come
out of the seatback.52)The shape and size of the head
restraint differs according to the seat.
Always use the correct head restraint
provided for the seat and do not install the
head restraint in the wrong direction.
STEERING WHEEL
STEERING WHEEL
HEIGHT AND REACH
ADJUSTMENT
(Vehicles equipped with the reach
adjustment)
1. Release the lever while holding the
steering wheel up.
2. Adjust the steering wheel to the
desired position.
3. Securely lock the steering wheel by
pulling the lever fully upward.
A. Locked
B. Release
53) 54) 55)
56AA0110800
38
GETTING TO KNOW YOUR VEHICLE
Page 111 of 312
SEAT BELT INSPECTION
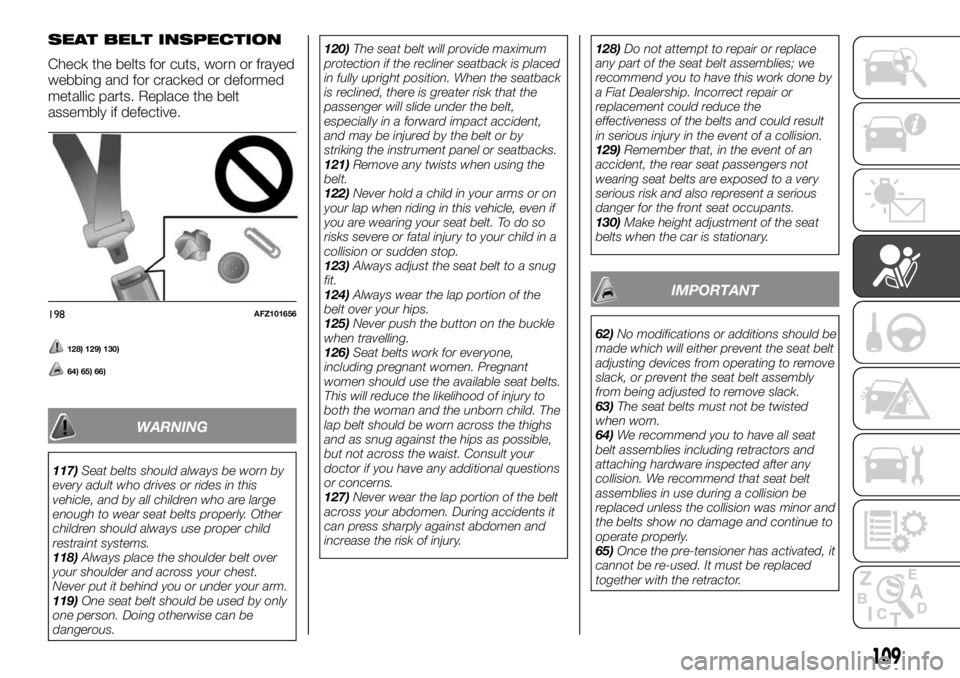
Check the belts for cuts, worn or frayed
webbing and for cracked or deformed
metallic parts. Replace the belt
assembly if defective.
128) 129) 130)
64) 65) 66)
WARNING
117)Seat belts should always be worn by
every adult who drives or rides in this
vehicle, and by all children who are large
enough to wear seat belts properly. Other
children should always use proper child
restraint systems.
118)Always place the shoulder belt over
your shoulder and across your chest.
Never put it behind you or under your arm.
119)One seat belt should be used by only
one person. Doing otherwise can be
dangerous.120)The seat belt will provide maximum
protection if the recliner seatback is placed
in fully upright position. When the seatback
is reclined, there is greater risk that the
passenger will slide under the belt,
especially in a forward impact accident,
and may be injured by the belt or by
striking the instrument panel or seatbacks.
121)Remove any twists when using the
belt.
122)Never hold a child in your arms or on
your lap when riding in this vehicle, even if
you are wearing your seat belt. To do so
risks severe or fatal injury to your child in a
collision or sudden stop.
123)Always adjust the seat belt to a snug
fit.
124)Always wear the lap portion of the
belt over your hips.
125)Never push the button on the buckle
when travelling.
126)Seat belts work for everyone,
including pregnant women. Pregnant
women should use the available seat belts.
This will reduce the likelihood of injury to
both the woman and the unborn child. The
lap belt should be worn across the thighs
and as snug against the hips as possible,
but not across the waist. Consult your
doctor if you have any additional questions
or concerns.
127)Never wear the lap portion of the belt
across your abdomen. During accidents it
can press sharply against abdomen and
increase the risk of injury.128)Do not attempt to repair or replace
any part of the seat belt assemblies; we
recommend you to have this work done by
a Fiat Dealership. Incorrect repair or
replacement could reduce the
effectiveness of the belts and could result
in serious injury in the event of a collision.
129)Remember that, in the event of an
accident, the rear seat passengers not
wearing seat belts are exposed to a very
serious risk and also represent a serious
danger for the front seat occupants.
130)Make height adjustment of the seat
belts when the car is stationary.
IMPORTANT
62)No modifications or additions should be
made which will either prevent the seat belt
adjusting devices from operating to remove
slack, or prevent the seat belt assembly
from being adjusted to remove slack.
63)The seat belts must not be twisted
when worn.
64)We recommend you to have all seat
belt assemblies including retractors and
attaching hardware inspected after any
collision. We recommend that seat belt
assemblies in use during a collision be
replaced unless the collision was minor and
the belts show no damage and continue to
operate properly.
65)Once the pre-tensioner has activated, it
cannot be re-used. It must be replaced
together with the retractor.
198AFZ101656
109
Page 310 of 312
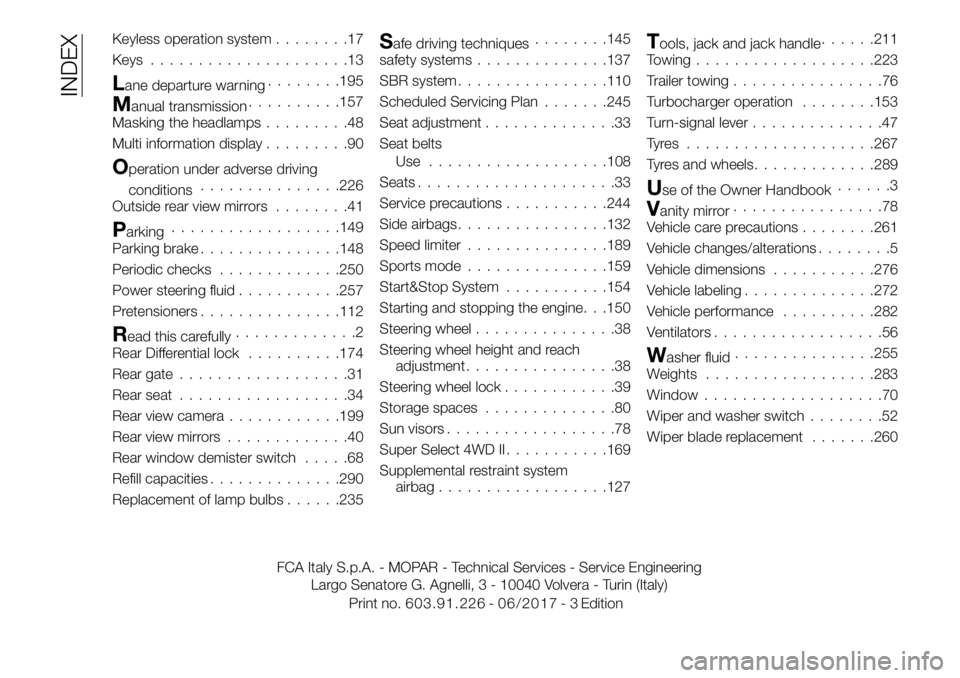
Keyless operation system........17
Keys.....................13
Lane departure warning........195
Manual transmission..........157
Masking the headlamps.........48
Multi information display.........90
Operation under adverse driving
conditions...............226
Outside rear view mirrors........41
Parking..................149
Parking brake...............148
Periodic checks.............250
Power steering fluid...........257
Pretensioners...............112
Read this carefully.............2
Rear Differential lock..........174
Rear gate..................31
Rear seat..................34
Rear view camera............199
Rear view mirrors.............40
Rear window demister switch.....68
Refill capacities..............290
Replacement of lamp bulbs......235
Safe driving techniques........145
safety systems..............137
SBR system................110
Scheduled Servicing Plan.......245
Seat adjustment..............33
Seat belts
Use ...................108
Seats.....................33
Service precautions...........244
Side airbags................132
Speed limiter...............189
Sports mode...............159
Start&Stop System...........154
Starting and stopping the engine. . .150
Steering wheel...............38
Steering wheel height and reach
adjustment................38
Steering wheel lock............39
Storage spaces..............80
Sun visors..................78
Super Select 4WD II...........169
Supplemental restraint system
airbag..................127Tools, jack and jack handle......211
Towing...................223
Trailer towing................76
Turbocharger operation........153
Turn-signal lever..............47
Tyres ....................267
Tyres and wheels.............289
Use of the Owner Handbook......3
Vanity mirror................78
Vehicle care precautions........261
Vehicle changes/alterations........5
Vehicle dimensions...........276
Vehicle labeling..............272
Vehicle performance..........282
Ventilators..................56
Washer fluid...............255
Weights..................283
Window...................70
Wiper and washer switch........52
Wiper blade replacement.......260
FCA Italy S.p.A. - MOPAR - Technical Services - Service Engineering
Largo Senatore G. Agnelli, 3 - 10040 Volvera - Turin (Italy)
INDEX
Print no.603.91.226 - -Edition 0 2017 /3 6