stop start FIAT MULTIPLA 2004 1.G Connect NavPlus Manual
[x] Cancel search | Manufacturer: FIAT, Model Year: 2004, Model line: MULTIPLA, Model: FIAT MULTIPLA 2004 1.GPages: 202, PDF Size: 2.22 MB
Page 5 of 202
4
CONNECT NAV
NAVIGATOR
IMPORTANT WARNINGS
FOR USE AND FOR DRIVING
SAFETY
The Satellite Navigator is an inte-
grated system which allows to easily
operate the major functions of your
car.
To avoid hazardous situations for
yourself and other road users when
using the Satellite Navigator you
should take the following advice:
– the navigation system must be used
keeping full control of the car. If in
doubt, stop the car to carry out the
various operations;
– serious accidents can be caused by
distractions or by not following the
flow of traffic;
– get to know the sound/navigation
system and its controls before
starting off;– enter the destination only when
the car is stationary;
– close the front panel when travel-
ling.
The navigation system will guide you
to your destination and indicate vari-
ations to the route stored on the nav-
igation CD. This is because the system
takes traffic information into account
when calculating to recommend the
best route possible. The system, how-
ever, cannot consider traffic condi-
tions, sudden interruptions or other
problems.
The navigation system assists the dri-
ver during the trip and recommends
the best route to be followed to reach
the preset destination by means of
voice and graphic instructions.IMPORTANTThe suggestions
provided by the navigation system do
not lessen the driver’s responsibility
when driving the car to observe the
highway code and the traffic signs.
Road safety is always and only the sole
responsibility of the driver.
All manoeuvres must be made re-
specting the highway code regardless
of the advice provided by the naviga-
tion system. The navigation system will
compute a new route and provide in-
structions should you detour from the
recommended route.
U U
S S
E E
F F
U U
L L
A A
D D
V V
I I
C C
E E
Page 13 of 202
12
CONNECT NAV
NAVIGATOR
O O
P P
E E
R R
A A
T T
I I
O O
N N
SWITCHING THE
NAVIGATOR SYSTEM
ON AND OFF
Press the knob/button (16) for ap-
proximately one second to switch the
sound/navigation system on. The
sound system will automatically switch
to the last active sound source at the
previously selected volume.
IMPORTANTThe sound source is
usually played at the last selected vol-
ume when the system is switched off
and back on. However, if the volume
was higher than the preset volume, the
sound source will be played at the pre-
set volume.
To set the power-on volume, see
“Adjusting power-on, TA announce-
ment, message” in the “Basic set-
tings”chapter.Switching on and off when
the engine is not running
The sound/navigation system can al-
so be operated when the engine is not
running (ignition key at STOP).
Press the knob/button (16) for ap-
proximately one second.
IMPORTANTThe device will au-
tomatically be switched off when the
ignition key is at STOPafter approx-
imately one hour to safeguard the car
battery. Start the engine to reset the
timeout.SELECTING THE FUNCTION
Proceed as follows to select the re-
quired function:
– press TU (17) for Radio;
– press CD-C (15) for CD or CD
CHANGER(where fitted);
– press NAV (12) to switch on the
navigation function.
The specific main menu/screen will
appear for each selected source.
Page 24 of 202
23
CONNECT NAV
NAVIGATOR
The “TMC” message will appear in
the lower row of the display when a
TMC station is selected.
Up to six TMC stations can be
stored in the FMC storage waveband
(see paragraph “Automatic storage of
TMC stations (TMC-Store)” on next
pages):
through this function it is therefore
possible to store the six strongest sta-
tions broadcasting in the area that you
are travelling in.
SCAN TMC function
This function is used to scan all the
stations that can be received in the
FMC waveband.
Proceed as follow to start the SCAN
TMC search:
1) in Radio mode, press the TU but-
ton (17). The Radio function menu
fig. 15will appear on the display
2) press button (13) next to PAGI-
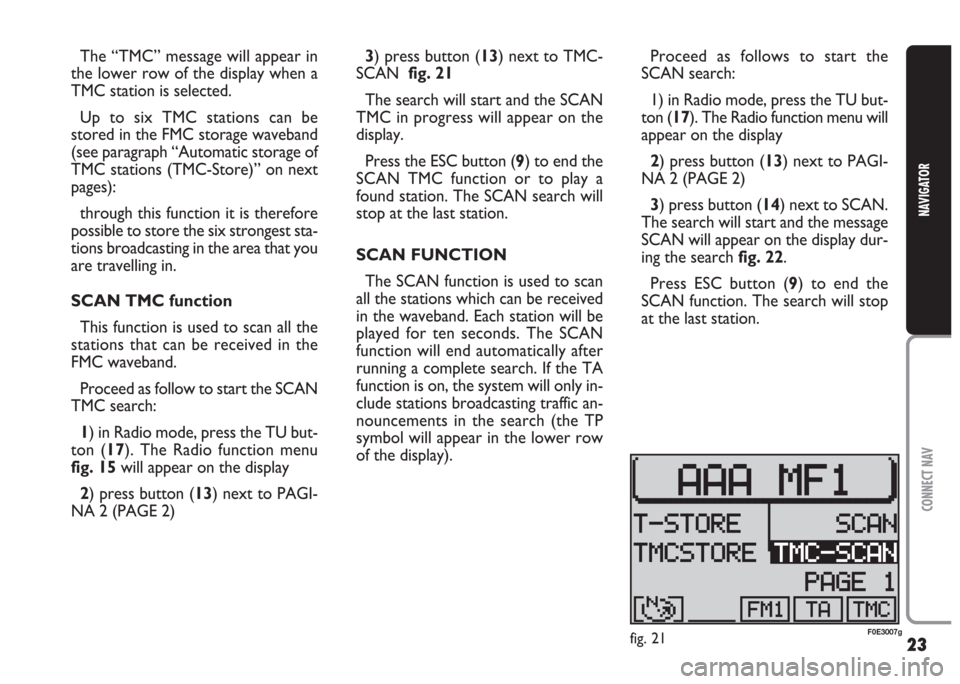
NA 2 (PAGE 2) 3) press button (13) next to TMC-
SCAN fig. 21
The search will start and the SCAN
TMC in progress will appear on the
display.
Press the ESC button (9) to end the
SCAN TMC function or to play a
found station. The SCAN search will
stop at the last station.
SCAN FUNCTION
The SCAN function is used to scan
all the stations which can be received
in the waveband. Each station will be
played for ten seconds. The SCAN
function will end automatically after
running a complete search. If the TA
function is on, the system will only in-
clude stations broadcasting traffic an-
nouncements in the search (the TP
symbol will appear in the lower row
of the display).Proceed as follows to start the
SCAN search:
1) in Radio mode, press the TU but-
ton (17). The Radio function menu will
appear on the display
2) press button (13) next to PAGI-
NA 2 (PAGE 2)
3) press button (14) next to SCAN.
The search will start and the message
SCAN will appear on the display dur-
ing the search fig. 22.
Press ESC button (9) to end the
SCAN function. The search will stop
at the last station.
fig. 21F0E3007g
Page 26 of 202
25
CONNECT NAV
NAVIGATOR
TIM FUNCTION
(TRAFFIC INFORMATION
MEMORY)
The device is provided with vocal
digital memory. Up to 14 traffic mes-
sages having max. overall length equal
to or lower than 4 minutes can be
stored automatically.
According to the length of the new
traffic messages, the oldest ones are
cleared.
IMPORTANT Traffic messages
longerthan four minutes are record-
ed partly only. In this case the message
OVERFLOW will appear on the dis-
play.When a new traffic message arrives
while you are listening to a TIM mes-
sage, the latter one is stopped and the
new arrived message is transmitted.
Storing traffic messages
Traffic messages are stored auto-
matically when listening to TA stations
or when the TIM function is on with
the device off.
Messages can be stored for 1 hour
or 12 hours (see next paragraph
“Choosing how long to store traffic
messages“).
If listening to a station not broad-
casting traffic info, switching the device
off with the TIM function on will start
automatically the search for a TA sta-
tion.Choosing how long to store
traffic messages
With the device on, proceed as fol-
lows to choose how long to store traf-
fic messages:
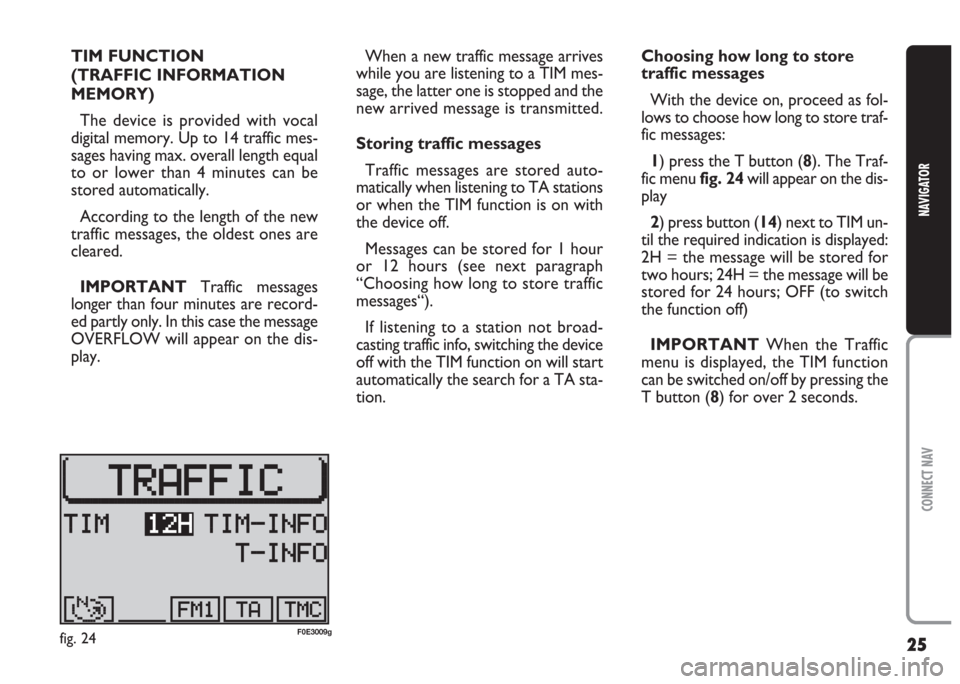
1) press the T button (8). The Traf-
fic menu fig. 24will appear on the dis-
play
2) press button (14) next to TIM un-
til the required indication is displayed:
2H = the message will be stored for
two hours; 24H = the message will be
stored for 24 hours; OFF (to switch
the function off)
IMPORTANT When the Traffic
menu is displayed, the TIM function
can be switched on/off by pressing the
T button (8) for over 2 seconds.
fig. 24F0E3009g
Page 33 of 202
32
CONNECT NAV
NAVIGATOR
Running/stopping the track
sequence
After entering the required track se-
quence, press button (13) next to
RUNfig. 32.
The sequence will start from the last
selected track and the message TPM
will appear on the display.
To stop a sequence without deleting
it, press button (13) next to RUN.Deleting a single track
sequence
Proceed as follows to delete a pro-
grammed track sequence:
1) in CD mode, go to the CD func-
tions menu by pressing the CD-C but-
ton (15). The CD functions menu
fig. 31will appear on the display
2) press button (13) next to PRO-
GRAM to open the CD programming
menu fig. 32
3) press button (14) next to CLR
PRG.Clearing all stored sequence
Proceed as follows to delete all the
stored sequences:
1) in CD mode, go the CD functions
menu by pressing the CD-C button
(15). The CD functions menu fig. 31
will appear on the display
2) press button (13) next to PRO-
GRAM to open the CD programming
menu fig. 32
3) press button (14) next to CLR
ALL
4) select SI (YES) with the knob/but-
ton (11) at the confirmation message
5) press the knob/button (11) to
confirm.
Page 85 of 202
84
CONNECT NAV
NAVIGATOR
O O
P P
E E
R R
A A
T T
I I
O O
N N
Switching on and off
with engine off
The Connect Nav can also be oper-
ated when the engine is not running
(ignition key at STOP).
Press the knob/button (16) for ap-
proximately one second.
IMPORTANT The device will au-
tomatically be switched off when the
ignition key is at STOPafter approx-
imately one hour to safeguard the car
battery. Start the engine to reset the
timeout.SELECTING FUNCTIONS
To select the required audio source,
proceed as follows:
– press SRC (17);
– turn the knob/button (16) to select
the required operating mode (Radio
or CD-Changer).
To start navigation, press NAV (12).
The specific main menu/screen will
appear for each selected source.
To access the phone mode, press
£
(15) button.
To access the Targa Infomobility
services, press
•(7) button. SWITCHING
THE CONNECT Nav ON/OFF
To turn the Connect Nav on, keep
the knob/button (16) pressed for
about 1 second. The sound system will
automatically switch to the last active
sound source at the previously se-
lected volume.
IMPORTANT The sound source is
usually played at the last selected vol-
ume when the system is switched off
and back on. However, if the volume
was higher than the preset volume, the
sound source will be played at the pre-
set volume.
To set the power-on volume, see
“Adjusting power-on, ta, announce-
ments, message and volume” in “Basic
settings ” section.
Page 92 of 202
91
CONNECT NAV
NAVIGATOR
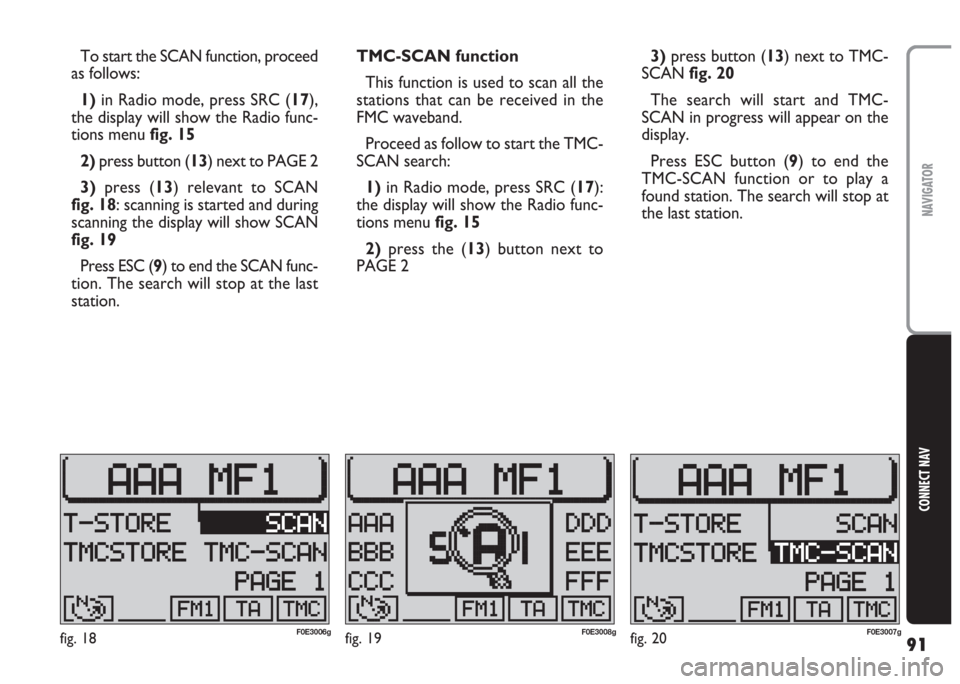
To start the SCAN function, proceed
as follows:
1) in Radio mode, press SRC (17),
the display will show the Radio func-
tions menu fig. 15
2)press button (13) next to PAGE 2
3)press (13) relevant to SCAN
fig. 18: scanning is started and during
scanning the display will show SCAN
fig. 19
Press ESC (9) to end the SCAN func-
tion. The search will stop at the last
station.TMC-SCAN function
This function is used to scan all the
stations that can be received in the
FMC waveband.
Proceed as follow to start the TMC-
SCAN search:
1)in Radio mode, press SRC (17):
the display will show the Radio func-
tions menu fig. 15
2)press the (13) button next to
PAGE 23)press button (13) next to TMC-
SCAN fig. 20
The search will start and TMC-
SCAN in progress will appear on the
display.
Press ESC button (9) to end the
TMC-SCAN function or to play a
found station. The search will stop at
the last station.
fig. 18F0E3006gfig. 19F0E3008gfig. 20F0E3007g
Page 95 of 202
94
CONNECT NAV
NAVIGATOR
TA FUNCTION
(Traffic Announcement)
This function can be switched on on-
ly in Radio mode in the FM waveband.
When listening to the CD source,
the CD changer (where fitted) or
when the navigation system is on and
the TA button (4) is pressed, the ra-
dio will switch to the FM waveband in
background and activate the TA func-
tion. This will not change the sound
source and the message “TA” will ap-
pear on the display.
When the TA function is on, you can
listen to traffic announcements even
when the CD player or CD changer
(where fitted) is on or in navigation
mode. The system will automatically
switch to the station broadcasting the
traffic announcement. At the end of
the announcement, the system will au-
tomatically return to the previous
source.
Press the TA button (4) to switch
the TA function off.IMPORTANT In Radio mode, with
the TA function on, a beep will be
heard if you leave the area where the
station broadcasting traffic announce-
ments can be received. In this case, an
automatic TP (Traffic Program) search
will be started.
Interrupting traffic
announcements
When the TA function is on, press
either TA (4) or MEN (10) or change
station to interrupt the traffic an-
nouncement. Alarm messages
When the PTY function is on, the
system can receive alarm messages
(example: weather conditions). In this
case, the warning message will appear
on the display and the announcement
will be made at the volume set for traf-
fic announcements.
To stop the alarm message, press ei-
ther MEN (10) or ESC (9).
Page 98 of 202
97
CONNECT NAV
NAVIGATOR
TIM FUNCTION
The device is provided with vocal
digital memory. Up to 14 traffic mes-
sages having max. overall length equal
to or lower than 4 minutes can be
stored automatically.
According to the length of the new
traffic messages, the oldest ones are
cleared.
IMPORTANT Traffic messages
longer than four minutes are record-
ed partly. In this case the message
OVERFLOW will appear on the dis-
play.
When a new traffic message arrives
while you are listening to a TIM mes-
sage, the latter one is stopped and the
new arrived message is transmitted.Storing traffic messages
Traffic messages are stored auto-
matically when listening to TA stations
or when the TIM function is on with
the device off.
Messages can be stored for 2 hours
or 24 hours (see next paragraph
“Choosing how long to store traffic
messages“).
If listening to a station not broad-
casting traffic info, switching the device
off with the TIM function on will start
automatically the search for a TA sta-
tion.Choosing how long to store
traffic messages
With the device on, proceed as fol-
lows to choose how long to store traf-
fic messages:
1) press T (8) to display the Traffic
menufig. 25
2) use the knob/button (11) to se-
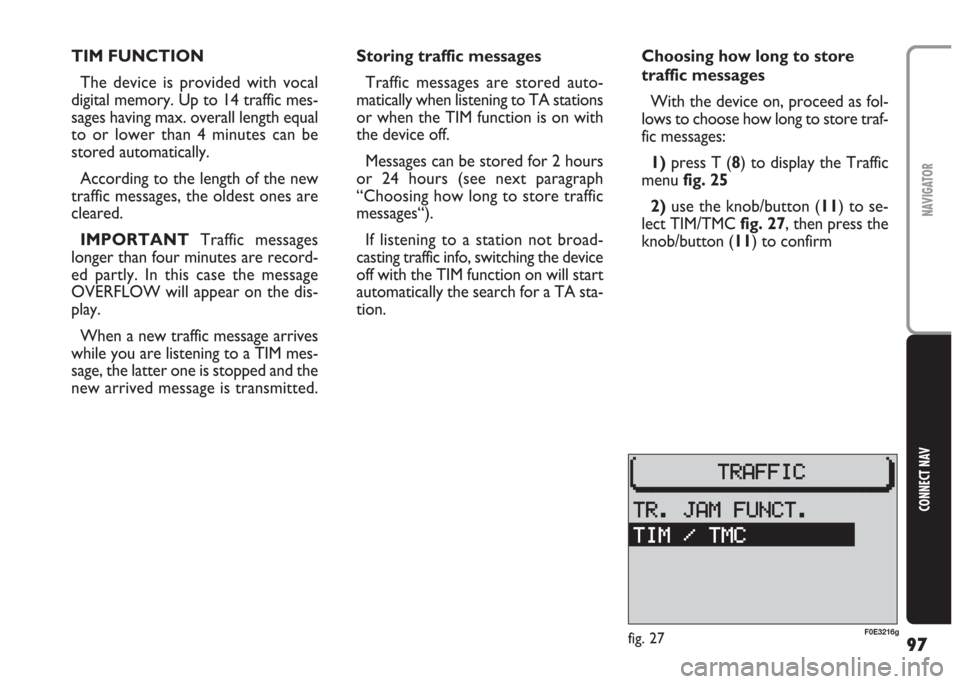
lect TIM/TMCfig. 27, then press the
knob/button (11) to confirm
fig. 27F0E3216g
Page 100 of 202
99
CONNECT NAV
NAVIGATOR
C C
O O
M M
P P
A A
C C
T T
D D
I I
S S
C C
P P
L L
A A
Y Y
E E
R R
( (
C C
D D
) )
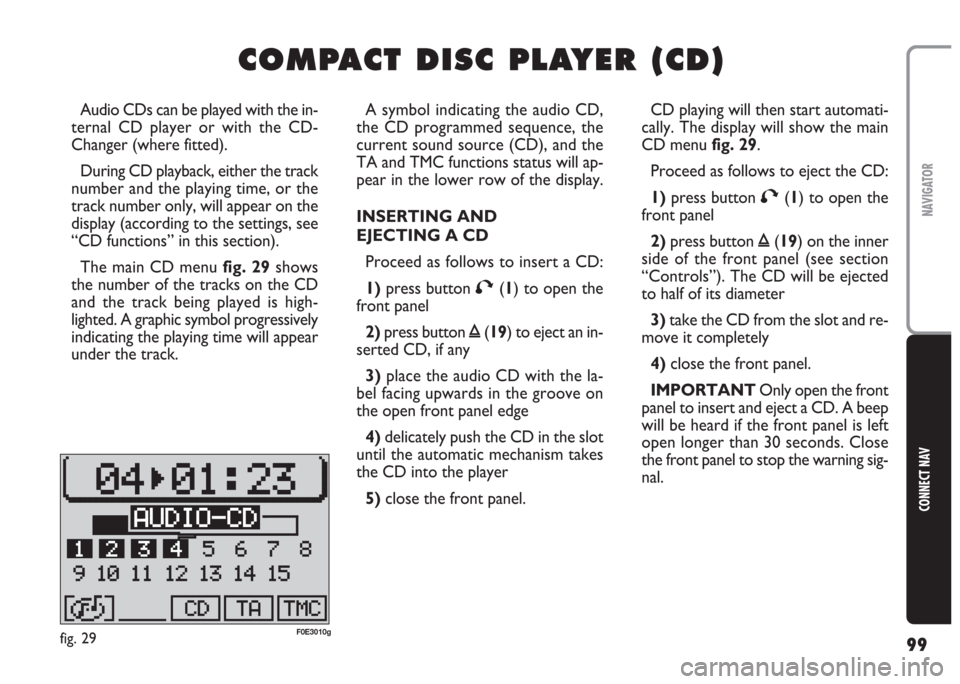
A symbol indicating the audio CD,
the CD programmed sequence, the
current sound source (CD), and the
TA and TMC functions status will ap-
pear in the lower row of the display.
INSERTING AND
EJECTING A CD
Proceed as follows to insert a CD:
1)press button T(1) to open the
front panel
2)press button ı(19) to eject an in-
serted CD, if any
3) place the audio CD with the la-
bel facing upwards in the groove on
the open front panel edge
4) delicately push the CD in the slot
until the automatic mechanism takes
the CD into the player
5) close the front panel. Audio CDs can be played with the in-
ternal CD player or with the CD-
Changer (where fitted).
During CD playback, either the track
number and the playing time, or the
track number only, will appear on the
display (according to the settings, see
“CD functions” in this section).
The main CD menu fig. 29shows
the number of the tracks on the CD
and the track being played is high-
lighted. A graphic symbol progressively
indicating the playing time will appear
under the track.CD playing will then start automati-
cally. The display will show the main
CD menu fig. 29.
Proceed as follows to eject the CD:
1)press button T(1) to open the
front panel
2)press button ı(19) on the inner
side of the front panel (see section
“Controls”). The CD will be ejected
to half of its diameter
3)take the CD from the slot and re-
move it completely
4)close the front panel.
IMPORTANT Only open the front
panel to insert and eject a CD. A beep
will be heard if the front panel is left
open longer than 30 seconds. Close
the front panel to stop the warning sig-
nal.
fig. 29F0E3010g