rims FIAT MULTIPLA 2006 1.G Owners Manual
[x] Cancel search | Manufacturer: FIAT, Model Year: 2006, Model line: MULTIPLA, Model: FIAT MULTIPLA 2006 1.GPages: 266, PDF Size: 4.61 MB
Page 135 of 266
134
CORRECT USE
OF THE CAR
WARNING
LIGHTS AND
MESSAGES
IN AN
EMERGENCY
CAR
MAINTENANCE
TECHNICAL
SPECIFICATIONS
INDEX
DASHBOARD
AND CONTROLS
SAFETY
DEVICES
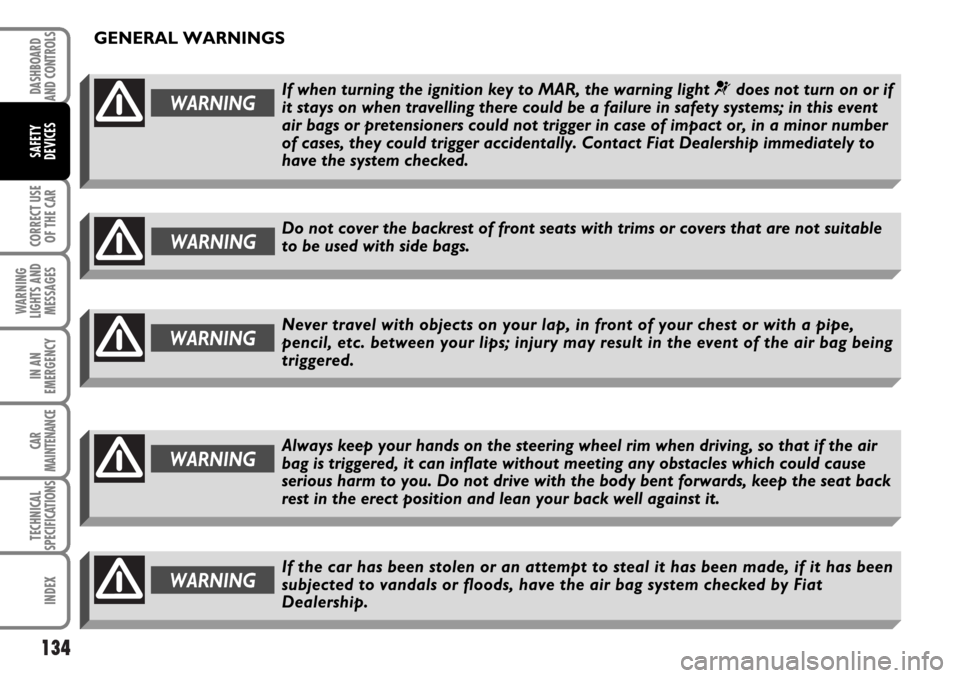
GENERAL WARNINGS
WARNING
Never travel with objects on your lap, in front of your chest or with a pipe,
pencil, etc. between your lips; injury may result in the event of the air bag being
triggered.WARNING
Do not cover the backrest of front seats with trims or covers that are not suitable
to be used with side bags.
If the car has been stolen or an attempt to steal it has been made, if it has been
subjected to vandals or floods, have the air bag system checked by Fiat
Dealership.WARNING
WARNINGAlways keep your hands on the steering wheel rim when driving, so that if the air
bag is triggered, it can inflate without meeting any obstacles which could cause
serious harm to you. Do not drive with the body bent forwards, keep the seat back
rest in the erect position and lean your back well against it.
WARNINGIf when turning the ignition key to MAR, the warning light ¬does not turn on or if
it stays on when travelling there could be a failure in safety systems; in this event
air bags or pretensioners could not trigger in case of impact or, in a minor number
of cases, they could trigger accidentally. Contact Fiat Dealership immediately to
have the system checked.
Page 169 of 266
168
SAFETY
DEVICES
CORRECT USE
OF THE CAR
WARNING
LIGHTS AND
MESSAGES
CAR
MAINTENANCE
TECHNICAL
SPECIFICATIONS
INDEX
DASHBOARD
AND CONTROLS
IN AN
EMERGENCY
WARNINGThe space-saver spare wheel (where provided) is specific to your car, do not use it
on other models, or use the spare wheel of other models on your vehicle. The
space-saver spare wheel shall only be used in an emergency. It shall only be used
for the distance necessary to reach a service point and the car speed shall not
exceed 80 km/h. The spare wheel has an orange sticker that summarises the main
cautions for use and limitations. The sticker should never be removed or covered.
Never fit a wheel cap on a space-saver spare wheel. The sticker gives the following
information in four languages: caution! For temporary use only! 80 km/h max!
Replace by normal wheel as soon as possible. Do not cover this label in use.
If changing standard wheels (e.g.: wheels with alloy rims in place of steel rims)
change also all wheel bolts.
WARNINGWhen driving with a space-saver spare wheel fitted, the driving performance of the
car changes. Avoid accelerating or braking sharply, abrupt turns or fast cornerings.
The life of the spare wheel is approx. 3000 km, after this distance it should be
replaced with another of the same type. Never attempt to fit a conventional tyre
on a rim designed for use as a space-saver spare wheel. Have the punctured wheel
repaired and refitted as soon as possible. Two or more space-saver spare wheels
should never be used together. Do not grease the threads of bolts before installing
them: they might slip out.
Page 172 of 266
171
SAFETY
DEVICES
CORRECT USE
OF THE CAR
WARNING
LIGHTS AND
MESSAGES
CAR
MAINTENANCE
TECHNICAL
SPECIFICATIONS
INDEX
DASHBOARD
AND CONTROLS
IN AN
EMERGENCY
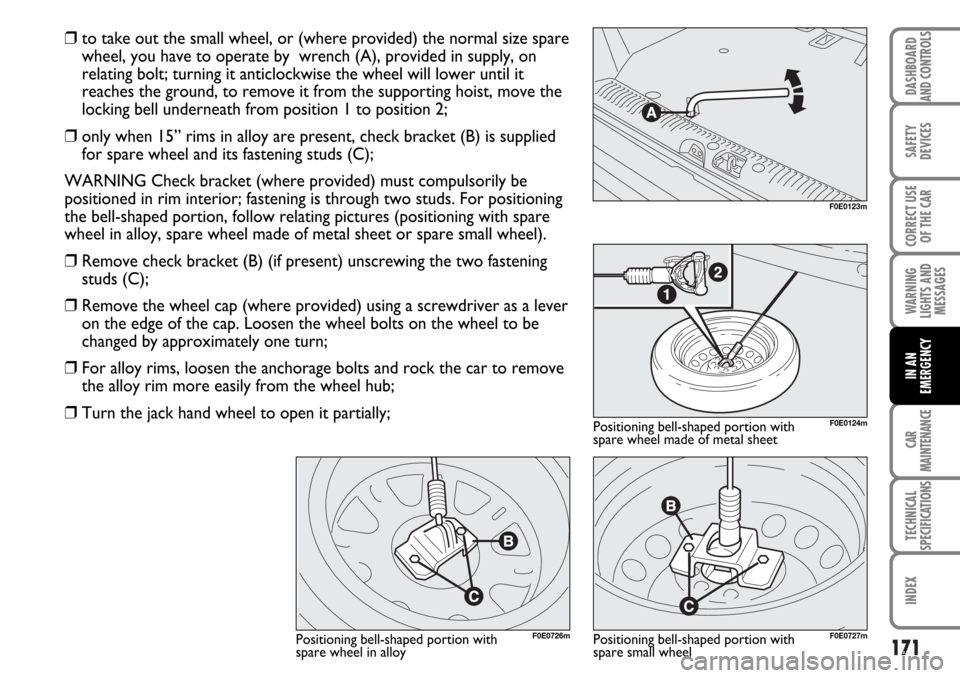
❒to take out the small wheel, or (where provided) the normal size spare
wheel, you have to operate by wrench (A), provided in supply, on
relating bolt; turning it anticlockwise the wheel will lower until it
reaches the ground, to remove it from the supporting hoist, move the
locking bell underneath from position 1 to position 2;
❒only when 15” rims in alloy are present, check bracket (B) is supplied
for spare wheel and its fastening studs (C);
WARNING Check bracket (where provided) must compulsorily be
positioned in rim interior; fastening is through two studs. For positioning
the bell-shaped portion, follow relating pictures (positioning with spare
wheel in alloy, spare wheel made of metal sheet or spare small wheel).
❒Remove check bracket (B) (if present) unscrewing the two fastening
studs (C);
❒Remove the wheel cap (where provided) using a screwdriver as a lever
on the edge of the cap. Loosen the wheel bolts on the wheel to be
changed by approximately one turn;
❒For alloy rims, loosen the anchorage bolts and rock the car to remove
the alloy rim more easily from the wheel hub;
❒Turn the jack hand wheel to open it partially;
F0E0123m
F0E0124m
F0E0727mF0E0726m
Positioning bell-shaped portion with
spare wheel made of metal sheet
Positioning bell-shaped portion with
spare small wheel Positioning bell-shaped portion with
spare wheel in alloy
Page 226 of 266
225
SAFETY
DEVICES
CORRECT USE
OF THE CAR
WARNING
LIGHTS AND
MESSAGES
TECHNICAL
SPECIFICATIONS
INDEX
DASHBOARD
AND CONTROLS
IN AN
EMERGENCY
CAR
MAINTENANCE
❒if a tyre is punctured, stop immediately and change
it to avoid damage to the tyre, the rim, suspensions
and steering system.
❒tyres age even if they are not used much. Cracks in
the tread rubber are a sign of ageing. In any case, if
the tyres have been on the car for over 6 years,
they should be checked by specialised personnel, to
see if they can still be used. Also remember to
check the space-saver spare wheel.
❒in the case of replacement, always fit new tyres,
avoiding those of dubious origin.
WARNINGRemember that road holding depends also on the correct tyre inflating pressure.
WARNINGIf the pressure is too low the tyre overheats and this can cause it serious damage.❒if a tyre is changed, also change the inflation valve.
❒to allow even wear between the front and rear
tyres, it is advisable to change them over every 10-
15 thousand kilometres, keeping them on the same
side of the car so as to not reverse the direction of
rotation.
WARNINGDo not cross switch the tyres, moving them from the right of the car to the left and
vice versa.
Never submit alloy rims to repainting treatments requiring to use temperatures
exceeding 150°C since the mechanical properties of the wheels could be
impaired.WARNING
Page 241 of 266
240
SAFETY
DEVICES
CORRECT USE
OF THE CAR
WARNING
LIGHTS AND
MESSAGES
CAR
MAINTENANCE
INDEX
DASHBOARD
AND CONTROLS
IN AN
EMERGENCY
TECHNICAL
SPECIFICATIONS
WHEELS
RIMS AND TYRES
Pressed steel or alloy rims (where provided). Tubeless
tyres with radial carcass.
All homologated tyres are listed in the log book.
IMPORTANT In the event of discrepancies between
the information provided on this OWNER
HANDBOOK and the LOG BOOK, consider the
specifications shown in the log book only.
Attaining to the prescribed size, to ensure safety of
the car in movement, it must be fitted with tyres of
the same make and type on all wheels.
IMPORTANT Do not use inner tubes with Tubeless
tyres.
WHEEL GEOMETRY
Front wheel toe-in measured from rim to rim: –3 ±1
mm.
SPACE-SAVER SPARE WHEEL
Pressed steel rim. Tubeless tyre.SNOW TYRES
Use the snow tyres specified in section “Driving your
car” in paragraph “Snow tyres”.
SNOW CHAINS
Only use low profile chains, see section “Driving your
car” in paragraph “Snow chains”.
UNDERSTANDING TYRE MARKING
Example: 185/65 R15 88H
185 = Nominal width (distance between sidewalls
in mm).
65 = Height/width ratio (as a percentage).
R = Radial tyre.
15 = Rim diameter in inches.
88 = Load rating.
H = Maximum speed rating.
Page 260 of 266
TECHNICAL
SPECIFICATIONS
259
SAFETY
DEVICES
CORRECT USE
OF THE CAR
WARNING
LIGHTS AND
MESSAGES
CAR
MAINTENANCE
INDEX
DASHBOARD
AND CONTROLS
IN AN
EMERGENCY
Pretensioners ................................... 117
Protecting the environment.......... 109
Radio-frequency remote control 9
– description ................................. 9
– ministerial homologation......... 255
Rear fog lights
– bulb replacement ..................... 190
– control ......................................... 65
Rear window shelf removal .......... 83
Rear window washer
– control ......................................... 62
– fluid level ..................................... 217
Rear window wiper
– blades ........................................... 227
– control ......................................... 62
– nozzle ........................................... 228
Rearview mirrors
– door mirrors .............................. 46
– driving mirror ............................ 46
Reconfigurable multifunction
display ............................................. 22
Remote control
(door locking/unlocking) ............. 9
Reversing light (replacement)....... 190
Rims and tyres ................................. 240– accessories.................................. 106
– aerial............................................. 103
– hands-free kit ............................. 104
– radio transmitters and
cellular telephones .................... 15
– speakers ...................................... 102
– standard equipment .................. 102
Spark plugs ........................................ 237
Speedometer .................................... 21
Starting the engine .......................... 137
– bump starting ............................. 167
– emergency starting ................... 165
– how to warm up the engine
after it has just started ............. 139
– ignition switch ............................ 15
– jump starting .............................. 166
– starting procedure
for diesel versions ..................... 138
– starting procedure
for petrol versions .................... 137
– stopping the engine................... 140
Steering .............................................. 239
Steering column lock ...................... 16
Steering column stalks
– left stalk ....................................... 61
– right stalk .................................... 59 Roof rack/ski rack ........................... 87
Rubber tubing................................... 226Seat belts.......................................... 112
– general instructions .................. 118
– how to keep the seat belts
always in efficient conditions ... 120
– load limiters .............................. 118
– pretensioners ............................. 117
– rear seat belts ........................... 114
– transporting children in safety.. 120
– type Isofix child restraint
system .......................................... 126
Seats ................................................... 41
– cleaning ........................................ 231
– front ............................................. 41
– moving ......................................... 81
– rear ............................................... 42
– removing ..................................... 84
Service Schedule .............................. 207
Side/taillights
– control ......................................... 59
– front bulb replacement ............ 189
– rear bulb replacement ............ 190
Snow chains ...................................... 150
Snow tyres ........................................ 149
Sound system ................................... 102
Page 261 of 266
TECHNICAL
SPECIFICATIONS
260
SAFETY
DEVICES
CORRECT USE
OF THE CAR
WARNING
LIGHTS AND
MESSAGES
CAR
MAINTENANCE
INDEXDASHBOARD
AND CONTROLS
IN AN
EMERGENCY
Steering wheel (adjustment) ......... 45
Storing the car ................................ 151
Sun visors .......................................... 70
Suspensions....................................... 239
Symbols.............................................. 6
Tachometer..................................... 18
Tank cap ............................................ 108
Third brake light .............................. 191
Top speeds ....................................... 246
Towing trailers
– important notes......................... 145
– installing the tow hook ............ 146
– assembly diagram ...................... 147
Towing the car ................................. 203
Tyre pressure................................... 243
Tyres
– changing a wheel ....................... 167
– geometry ..................................... 241
– important notes......................... 224
– inflation pressure....................... 243
– quick tyre repair kit
(FIX & GO automatic) ............. 177
– space-saver spare wheel.......... 242
– size and specification ................ 240
– understanding rim marking ..... 242
– understanding tyre marking .... 240
VAN (setup).................................... 99
Ventilation ......................................... 51
Weights ........................................... 247
Wheel geometry (toe-in) .............. 240
Wheel rims ...................................... 240
Wheels............................................... 240
Window cleaning
– windscreen washer (control) .. 61
– rear window washer (control) 62
– windscreen wiper (control).... 61
– rear window wiper (control) ... 62
Windows (cleaning) ........................ 231
Windscreen washer
– control ......................................... 61
– fluid level ..................................... 217
Windscreen wiper
– blades ........................................... 227
– control ......................................... 61
– nozzles ......................................... 228
Windscreen/rear window
wiper blades ................................... 226