sensor FIAT ULYSSE 2007 2.G Owners Manual
[x] Cancel search | Manufacturer: FIAT, Model Year: 2007, Model line: ULYSSE, Model: FIAT ULYSSE 2007 2.GPages: 254, PDF Size: 3.42 MB
Page 40 of 254
GETTING TO KNOW YOUR CAR
39
USE OF THE SEAT BELT
IN THE CENTRE POSITION
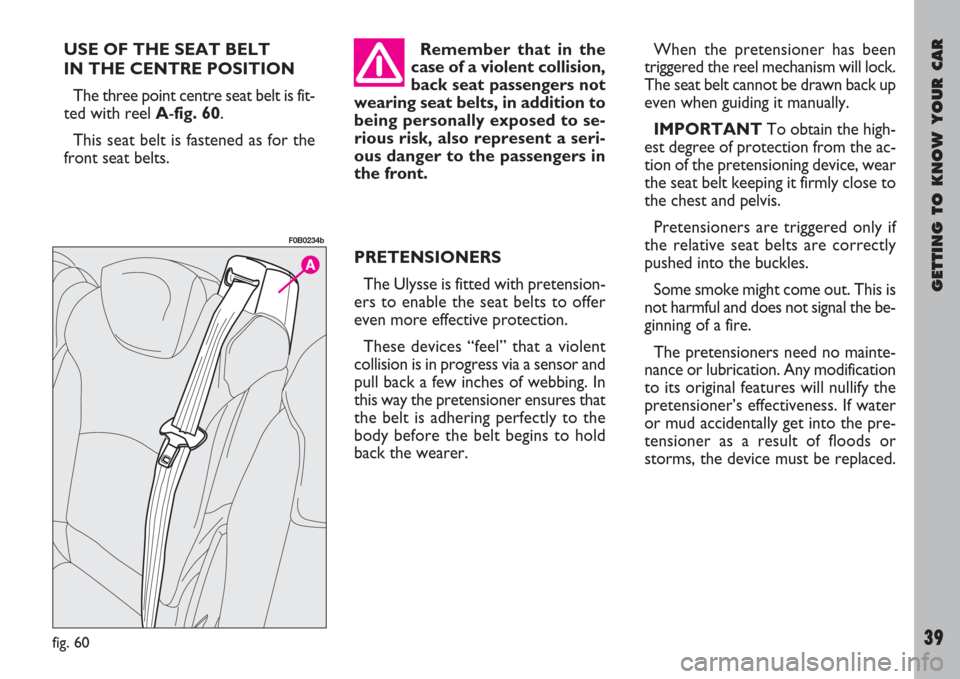
The three point centre seat belt is fit-
ted with reel A-fig. 60.
This seat belt is fastened as for the
front seat belts.Remember that in the
case of a violent collision,
back seat passengers not
wearing seat belts, in addition to
being personally exposed to se-
rious risk, also represent a seri-
ous danger to the passengers in
the front.
PRETENSIONERS
The Ulysse is fitted with pretension-
ers to enable the seat belts to offer
even more effective protection.
These devices “feel” that a violent
collision is in progress via a sensor and
pull back a few inches of webbing. In
this way the pretensioner ensures that
the belt is adhering perfectly to the
body before the belt begins to hold
back the wearer.When the pretensioner has been
triggered the reel mechanism will lock.
The seat belt cannot be drawn back up
even when guiding it manually.
IMPORTANTTo obtain the high-
est degree of protection from the ac-
tion of the pretensioning device, wear
the seat belt keeping it firmly close to
the chest and pelvis.
Pretensioners are triggered only if
the relative seat belts are correctly
pushed into the buckles.
Some smoke might come out. This is
not harmful and does not signal the be-
ginning of a fire.
The pretensioners need no mainte-
nance or lubrication. Any modification
to its original features will nullify the
pretensioner’s effectiveness. If water
or mud accidentally get into the pre-
tensioner as a result of floods or
storms, the device must be replaced.
fig. 60
F0B0234b
Page 54 of 254
GETTING TO KNOW YOUR CAR
53
cerning: automatic light turning on,
ESP, rain sensor.
To reset the trip computer data,
keep pressed the button set at the end
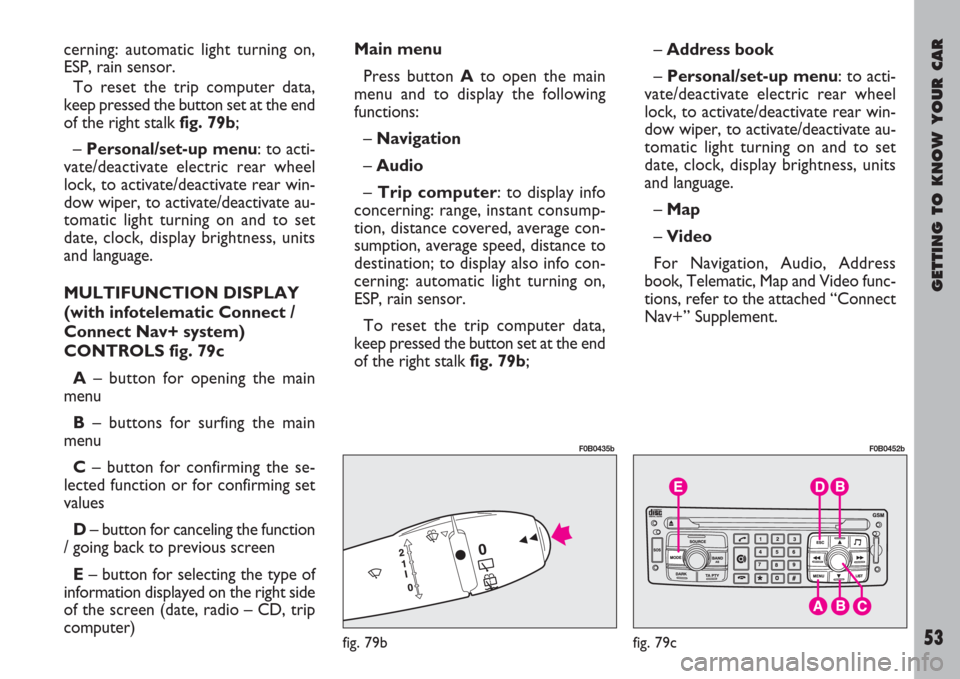
of the right stalk fig. 79b;
– Personal/set-up menu: to acti-
vate/deactivate electric rear wheel
lock, to activate/deactivate rear win-
dow wiper, to activate/deactivate au-
tomatic light turning on and to set
date, clock, display brightness, units
and language.
MULTIFUNCTION DISPLAY
(with infotelematic Connect /
Connect Nav+ system)
CONTROLS fig. 79c
A– button for opening the main
menu
B– buttons for surfing the main
menu
C– button for confirming the se-
lected function or for confirming set
values
D– button for canceling the function
/ going back to previous screen
E– button for selecting the type of
information displayed on the right side
of the screen (date, radio – CD, trip
computer)Main menu
Press button Ato open the main
menu and to display the following
functions:
– Navigation
– Audio
– Trip computer: to display info
concerning: range, instant consump-
tion, distance covered, average con-
sumption, average speed, distance to
destination; to display also info con-
cerning: automatic light turning on,
ESP, rain sensor.
To reset the trip computer data,
keep pressed the button set at the end
of the right stalk fig. 79b;– Address book
– Personal/set-up menu: to acti-
vate/deactivate electric rear wheel
lock, to activate/deactivate rear win-
dow wiper, to activate/deactivate au-
tomatic light turning on and to set
date, clock, display brightness, units
and language.
– Map
– Video
For Navigation, Audio, Address
book, Telematic, Map and Video func-
tions, refer to the attached “Connect
Nav+” Supplement.
fig. 79b
F0B0435b
fig. 79c
F0B0452b
Page 55 of 254
GETTING TO KNOW YOUR CAR
54
ODOMETER DISPLAY
This instrument displays the follow-
ing values:
on the upper line:partial kilome-
tres and engine oil level gauge (where
fitted)
on the lower line:total kilometres
and programmed maintenance indica-
tor; versions with automatic gear are
also fitted with engaged gear indicator
(for further details see the chapter
“Automatic gear”).
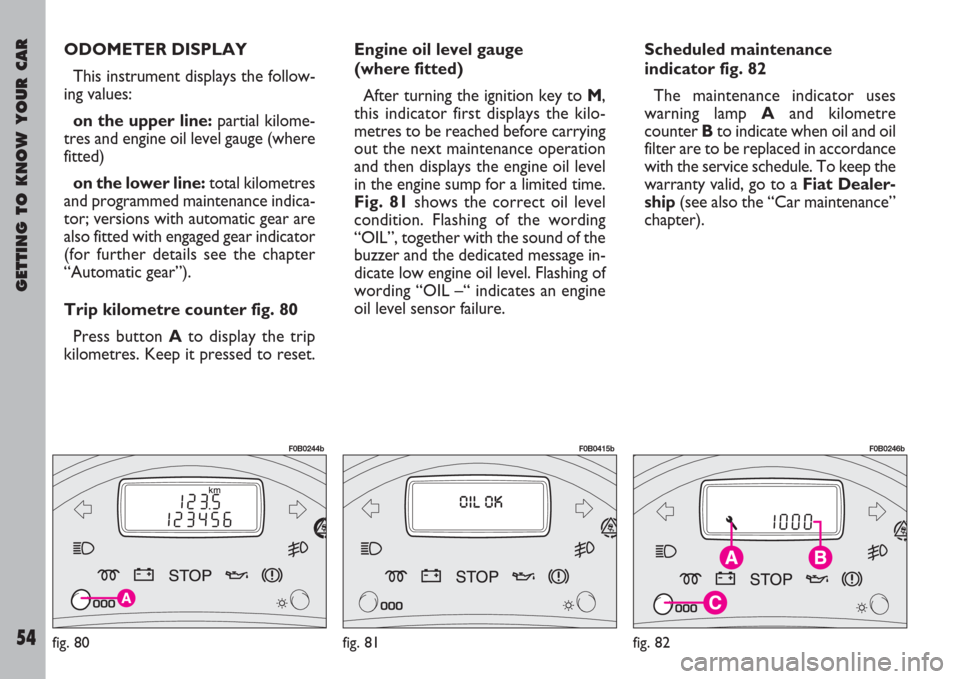
Trip kilometre counter fig. 80
Press button Ato display the trip
kilometres. Keep it pressed to reset.Engine oil level gauge
(where fitted)
After turning the ignition key to M,
this indicator first displays the kilo-
metres to be reached before carrying
out the next maintenance operation
and then displays the engine oil level
in the engine sump for a limited time.
Fig. 81shows the correct oil level
condition. Flashing of the wording
“OIL”, together with the sound of the
buzzer and the dedicated message in-
dicate low engine oil level. Flashing of
wording “OIL –“ indicates an engine
oil level sensor failure.
fig. 80
F0B0244b
fig. 81
F0B0415b
fig. 82
F0B0246b
Scheduled maintenance
indicator fig. 82
The maintenance indicator uses
warning lamp Aand kilometre
counter Bto indicate when oil and oil
filter are to be replaced in accordance
with the service schedule. To keep the
warranty valid, go to a Fiat Dealer-
ship(see also the “Car maintenance”
chapter).
Page 62 of 254
GETTING TO KNOW YOUR CAR
61
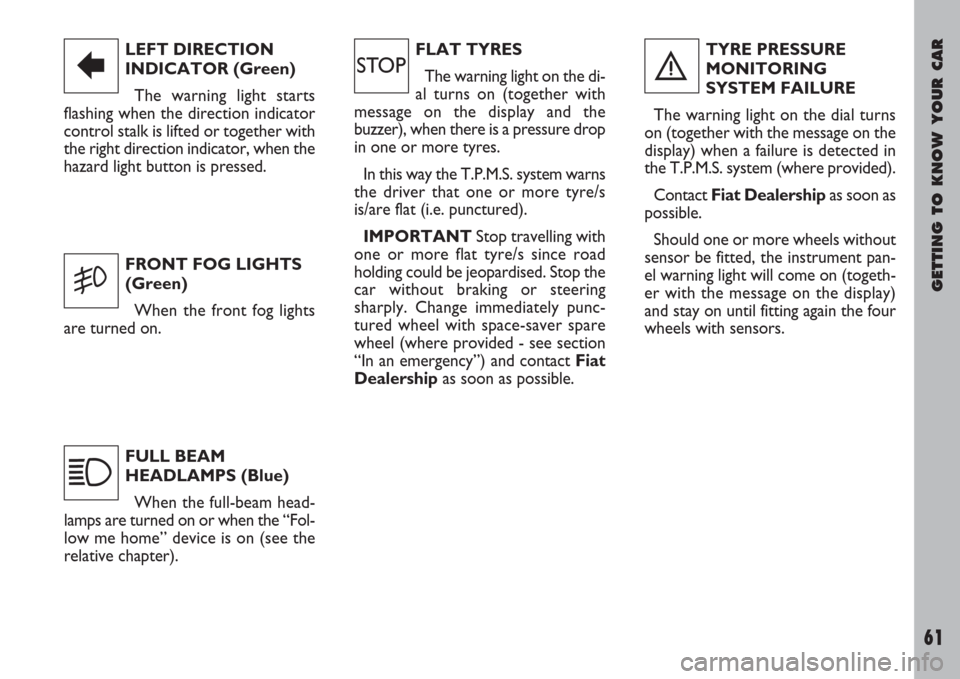
LEFT DIRECTION
INDICATOR (Green)
The warning light starts
flashing when the direction indicator
control stalk is lifted or together with
the right direction indicator, when the
hazard light button is pressed.
FRONT FOG LIGHTS
(Green)
When the front fog lights
are turned on.
FULL BEAM
HEADLAMPS (Blue)
When the full-beam head-
lamps are turned on or when the “Fol-
low me home” device is on (see the
relative chapter).
R
5
1
FLAT TYRES
The warning light on the di-
al turns on (together with
message on the display and the
buzzer), when there is a pressure drop
in one or more tyres.
In this way the T.P.M.S. system warns
the driver that one or more tyre/s
is/are flat (i.e. punctured).
IMPORTANTStop travelling with
one or more flat tyre/s since road
holding could be jeopardised. Stop the
car without braking or steering
sharply. Change immediately punc-
tured wheel with space-saver spare
wheel (where provided - see section
“In an emergency”) and contact Fiat
Dealershipas soon as possible.TYRE PRESSURE
MONITORING
SYSTEM FAILURE
The warning light on the dial turns
on (together with the message on the
display) when a failure is detected in
the T.P.M.S. system (where provided).
Contact Fiat Dealershipas soon as
possible.
Should one or more wheels without
sensor be fitted, the instrument pan-
el warning light will come on (togeth-
er with the message on the display)
and stay on until fitting again the four
wheels with sensors.
ìè
Page 72 of 254
GETTING TO KNOW YOUR CAR
71
SENSORS
The system is fitted not only with
outside and inside temperature sen-
sors, but also with a sunlight sensor
which transmits the sunlight value to
the control unit, thus making the tem-
perature control by the system more
accurate.
The sunlight sensor is placed in the
middle of the dashboard, while the
outside temperature sensor is on the
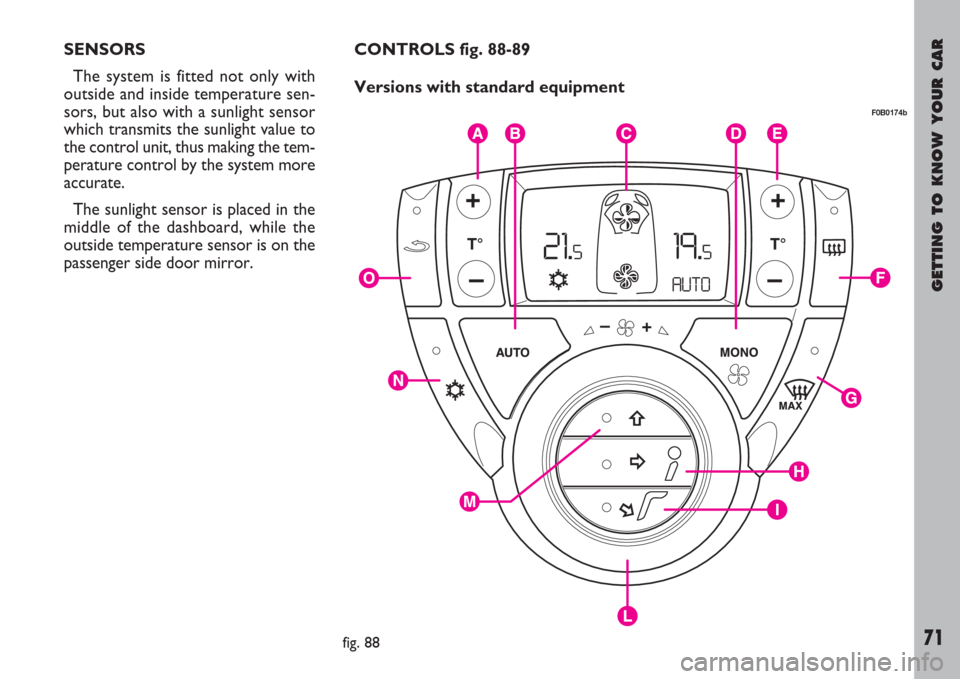
passenger side door mirror. CONTROLS fig. 88-89
Versions with standard equipment
fig. 88
F0B0174b
Page 79 of 254
GETTING TO KNOW YOUR CAR
78
TURNING THE SYSTEM OFF
The system can be switched off by
turning knurled knob Lanticlockwise
until the car shape is displayed with-
out the fan symbol.
When the system is turned off it
makes the following operations:
– storing of conditions prior to
switching off;
– the graphics on display Cgo off ex-
cept for the car shape;
– the air recirculation is taken to
open position (outside air intake);
– the compressor is excluded;
– the fan is excluded;
– the air is distributed to the wind-
screen;
– the air mixing is in “completely
cold” position.FAILURE INDICATION
If any failures are detected (locked
switches, sensor malfunction, electri-
cal failures, etc.) the system automat-
ically sets the “recovery” mode, which
is displayed by the flashing points sep-
arating the temperature decimals on
the display C. In this case contact a Fi-
at Dealership as soon as possible.
Recovery mode
The system will work in the follow-
ing way:
– driver’s and passenger’s tem-
peratures: aligned and evolving in the
same way;
if buttons Aor Eare locked tem-
perature is set at 21°C by the system;
– main fan, distribution, com-
pressor, recirculation: they work in
automatic mode (AUTO);
– AUTO function:main fan, air dis-
tribution, compressor and air recircu-
lation are automatically controlled by
the system and the impulses on the
relative switches have no effect;– MAX-DEF function: the system
directs air to the windscreen and the
air distribution, compressor, AUTO
and air recirculation switches are not
active, while the main fan and tem-
perature functions are still active;
– REAR function: additional fans
cannot be switched on;
– rear window: cannot be switched
on.
INDEPENDENT ADDITIONAL
HEATER
To improve your comfort, cars with
JTD engines, can be fitted with an in-
dependent additional heater.
After switching the engine off or with
engine idling, the additional heater
could stay on hissing and exhaling
smoke and smell.
Page 81 of 254
GETTING TO KNOW YOUR CAR
80
Side light and dipped-beam
headlight automatic
switching on (where fitted)
This device is fitted with an infrared
sensor installed on the windscreen and
is able to detect the outside light
brightness variations.
To activate /deactivate automatic
light turning on, use the display set-
up menu (see paragraph “Info display”
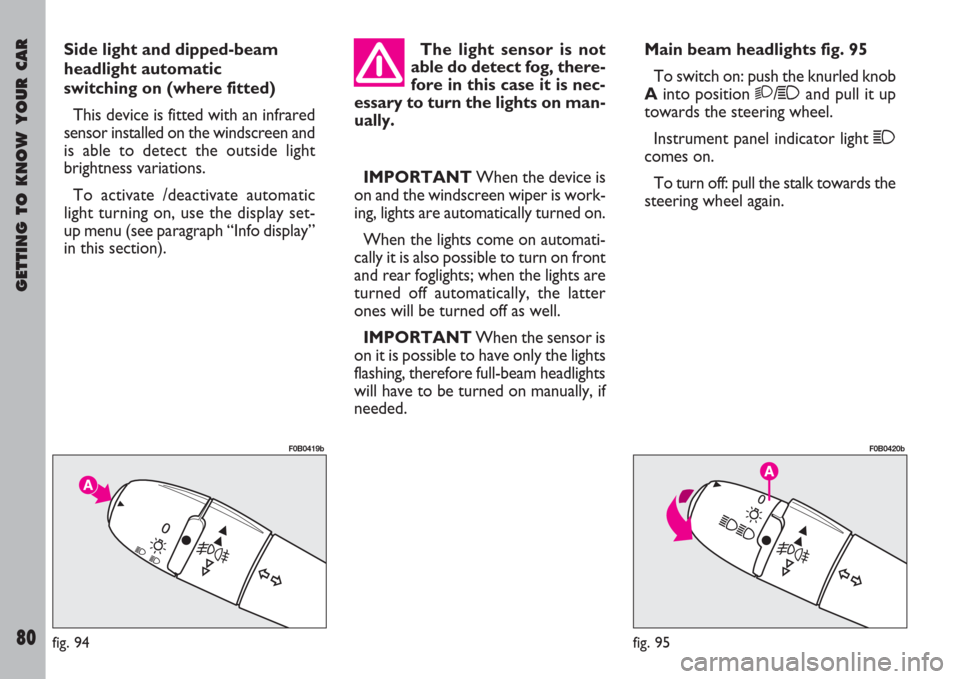
in this section).Main beam headlights fig. 95
To switch on: push the knurled knob
Ainto position 2/1and pull it up
towards the steering wheel.
Instrument panel indicator light 1
comes on.
To turn off: pull the stalk towards the
steering wheel again.
fig. 94
F0B0419b
fig. 95
F0B0420b
The light sensor is not
able do detect fog, there-
fore in this case it is nec-
essary to turn the lights on man-
ually.
IMPORTANTWhen the device is
on and the windscreen wiper is work-
ing, lights are automatically turned on.
When the lights come on automati-
cally it is also possible to turn on front
and rear foglights; when the lights are
turned off automatically, the latter
ones will be turned off as well.
IMPORTANTWhen the sensor is
on it is possible to have only the lights
flashing, therefore full-beam headlights
will have to be turned on manually, if
needed.
Page 84 of 254
GETTING TO KNOW YOUR CAR
83
Windscreen wiper with rain
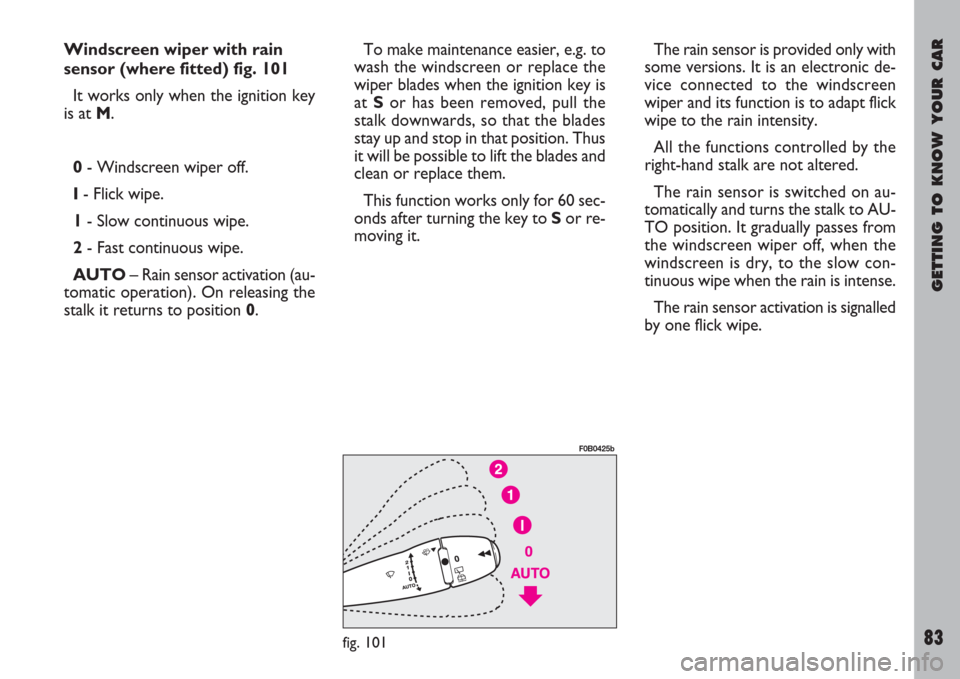
sensor (where fitted) fig. 101
It works only when the ignition key
is at M.
0- Windscreen wiper off.
I- Flick wipe.
1- Slow continuous wipe.
2- Fast continuous wipe.
AUTO– Rain sensor activation (au-
tomatic operation). On releasing the
stalk it returns to position 0.To make maintenance easier, e.g. to
wash the windscreen or replace the
wiper blades when the ignition key is
at Sor has been removed, pull the
stalk downwards, so that the blades
stay up and stop in that position. Thus
it will be possible to lift the blades and
clean or replace them.
This function works only for 60 sec-
onds after turning the key to Sor re-
moving it.The rain sensor is provided only with
some versions. It is an electronic de-
vice connected to the windscreen
wiper and its function is to adapt flick
wipe to the rain intensity.
All the functions controlled by the
right-hand stalk are not altered.
The rain sensor is switched on au-
tomatically and turns the stalk to AU-
TO position. It gradually passes from
the windscreen wiper off, when the
windscreen is dry, to the slow con-
tinuous wipe when the rain is intense.
The rain sensor activation is signalled
by one flick wipe.
fig. 101
F0B0425b
Page 85 of 254
GETTING TO KNOW YOUR CAR
84
When the windscreen wiper is
turned on with the rain sensor already
working, the windscreen wiper wash-
es the windscreen regularly and, at the
end of its operation, the rain sensor
keeps on working automatically.
To switch off the rain sensor turn the
key to Sand when the engine is start-
ed again, the rain sensor will not be
turned on even if the stalk remained
in AUTO position.
To switch on the rain sensor, move
the stalk to another position and then
back to AUTO.The rain sensor can recognize and
automatically adapt to particular
weather conditions which require dif-
ferent operations:
– surface impurities (salt, dirt,…);
– water lines due to worn out wind-
screen wiper blades;
– difference between night and day
(the human eye is particularly annoyed
by the windscreen wet surface at night
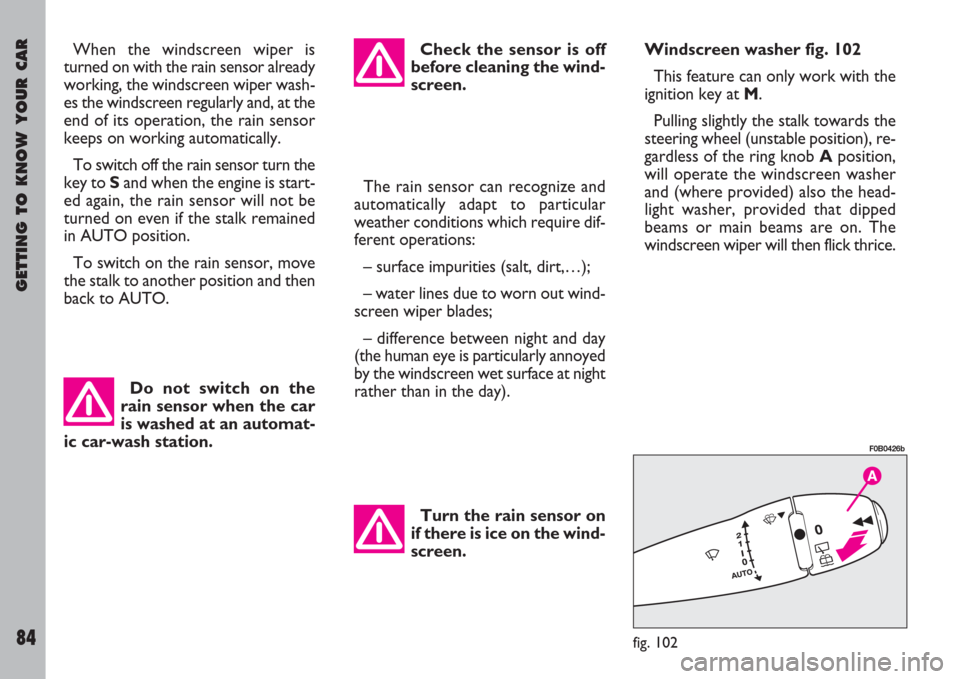
rather than in the day).Windscreen washer fig. 102
This feature can only work with the
ignition key at M.
Pulling slightly the stalk towards the
steering wheel (unstable position), re-
gardless of the ring knob Aposition,
will operate the windscreen washer
and (where provided) also the head-
light washer, provided that dipped
beams or main beams are on. The
windscreen wiper will then flick thrice.
Do not switch on the
rain sensor when the car
is washed at an automat-
ic car-wash station.Check the sensor is off
before cleaning the wind-
screen.
Turn the rain sensor on
if there is ice on the wind-
screen.
fig. 102
F0B0426b
Page 119 of 254
GETTING TO KNOW YOUR CAR
118
MBA AND HBA
SYSTEMS
(where fitted)
The MBA (Mechanic Brake Assis-
tance) and HBA (Hydraulic Brake As-
sistance) systems increase braking
pressure in emergency braking. When
the driver is forced by the critical dri-
ving conditions to press violently the
brake pedal, the system increases the
braking pressure to assure the quick-
est vehicle stop.
These two systems behave in the
same way, the only difference is that
one increases braking pressure
through the ESP control unit and the
other with a mechanic action. By following these indications you
will be able to brake in the best con-
ditions in all events.
IMPORTANTVehicles fitted with
ABS may only be fitted with wheel
rims, tyres and brake pads of the make
and model approved by the vehicle
manufacturer.
The system is completed with an
Electronic Brake Distributor EBD
which increases the brake system per-
formance and employs the ABS con-
trol unit and sensors.
If the xbrake fluid low
warning light comes on,
stop the vehicle immedi-
ately and contact the nearest Fi-
at Dealership. Fluid leaks from
the hydraulic system, in fact, can
compromise brake system oper-
ation, both traditional systems
and systems with ABS. The car is fitted with an
electronic braking device
(EBD). The xand >
warning lights will come on at the
same time when the engine is
running to indicate that there is
an EBD system failure. In this
case violent braking may be ac-
companied by early rear wheel
locking with the possibility of
skidding. Drive the car extreme-
ly carefully to the nearest Fiat
Dealership to have the system
checked.Warning light >alone,
with the engine running,
normally indicates a fault
in the ABS system. In this case,
the braking system is still effi-
cient, though without the an-
tilocking device. Under these
conditions, performance of the
EBD system may be reduced. Al-
so in this case, you are advised to
go immediately to the nearest Fi-
at Dealership, driving in such a
way to avoid sharp braking to
have the system checked.