check engine FIAT UNO 1983 Service Workshop Manual
[x] Cancel search | Manufacturer: FIAT, Model Year: 1983, Model line: UNO, Model: FIAT UNO 1983Pages: 303, PDF Size: 10.36 MB
Page 127 of 303
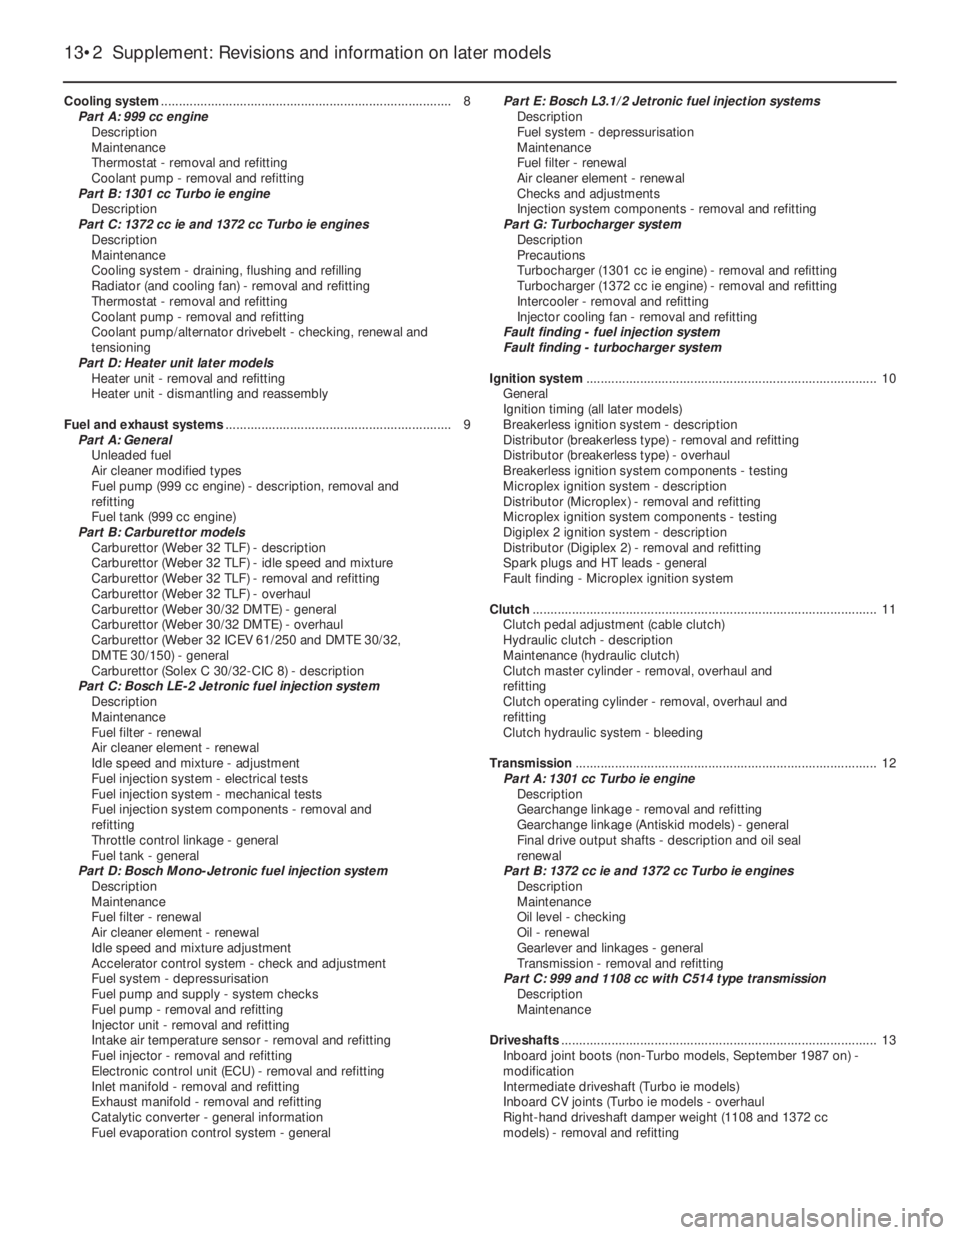
Cooling system................................................................................. 8
Part A: 999 cc engine
Description
Maintenance
Thermostat - removal and refitting
Coolant pump - removal and refitting
Part B: 1301 cc Turbo ie engine
Description
Part C: 1372 cc ie and 1372 cc Turbo ie engines
Description
Maintenance
Cooling system - draining, flushing and refilling
Radiator (and cooling fan) - removal and refitting
Thermostat - removal and refitting
Coolant pump - removal and refitting
Coolant pump/alternator drivebelt - checking, renewal and
tensioning
Part D: Heater unit later models
Heater unit - removal and refitting
Heater unit - dismantling and reassembly
Fuel and exhaust systems............................................................... 9
Part A: General
Unleaded fuel
Air cleaner modified types
Fuel pump (999 cc engine) - description, removal and
refitting
Fuel tank (999 cc engine)
Part B: Carburettor models
Carburettor (Weber 32 TLF) - description
Carburettor (Weber 32 TLF) - idle speed and mixture
Carburettor (Weber 32 TLF) - removal and refitting
Carburettor (Weber 32 TLF) - overhaul
Carburettor (Weber 30/32 DMTE) - general
Carburettor (Weber 30/32 DMTE) - overhaul
Carburettor (Weber 32 ICEV 61/250 and DMTE 30/32,
DMTE 30/150) - general
Carburettor (Solex C 30/32-CIC 8) - description
Part C: Bosch LE-2 Jetronic fuel injection system
Description
Maintenance
Fuel filter - renewal
Air cleaner element - renewal
Idle speed and mixture - adjustment
Fuel injection system - electrical tests
Fuel injection system - mechanical tests
Fuel injection system components - removal and
refitting
Throttle control linkage - general
Fuel tank - general
Part D: Bosch Mono-Jetronic fuel injection system
Description
Maintenance
Fuel filter - renewal
Air cleaner element - renewal
Idle speed and mixture adjustment
Accelerator control system - check and adjustment
Fuel system - depressurisation
Fuel pump and supply - system checks
Fuel pump - removal and refitting
Injector unit - removal and refitting
Intake air temperature sensor - removal and refitting
Fuel injector - removal and refitting
Electronic control unit (ECU) - removal and refitting
Inlet manifold - removal and refitting
Exhaust manifold - removal and refitting
Catalytic converter - general information
Fuel evaporation control system - generalPart E: Bosch L3.1/2 Jetronic fuel injection systems
Description
Fuel system - depressurisation
Maintenance
Fuel filter - renewal
Air cleaner element - renewal
Checks and adjustments
Injection system components - removal and refitting
Part G: Turbocharger system
Description
Precautions
Turbocharger (1301 cc ie engine) - removal and refitting
Turbocharger (1372 cc ie engine) - removal and refitting
Intercooler - removal and refitting
Injector cooling fan - removal and refitting
Fault finding - fuel injection system
Fault finding - turbocharger system
Ignition system................................................................................. 10
General
Ignition timing (all later models)
Breakerless ignition system - description
Distributor (breakerless type) - removal and refitting
Distributor (breakerless type) - overhaul
Breakerless ignition system components - testing
Microplex ignition system - description
Distributor (Microplex) - removal and refitting
Microplex ignition system components - testing
Digiplex 2 ignition system - description
Distributor (Digiplex 2) - removal and refitting
Spark plugs and HT leads - general
Fault finding - Microplex ignition system
Clutch................................................................................................ 11
Clutch pedal adjustment (cable clutch)
Hydraulic clutch - description
Maintenance (hydraulic clutch)
Clutch master cylinder - removal, overhaul and
refitting
Clutch operating cylinder - removal, overhaul and
refitting
Clutch hydraulic system - bleeding
Transmission.................................................................................... 12
Part A: 1301 cc Turbo ie engine
Description
Gearchange linkage - removal and refitting
Gearchange linkage (Antiskid models) - general
Final drive output shafts - description and oil seal
renewal
Part B: 1372 cc ie and 1372 cc Turbo ie engines
Description
Maintenance
Oil level - checking
Oil - renewal
Gearlever and linkages - general
Transmission - removal and refitting
Part C: 999 and 1108 cc with C514 type transmission
Description
Maintenance
Driveshafts........................................................................................ 13
Inboard joint boots (non-Turbo models, September 1987 on) -
modification
Intermediate driveshaft (Turbo ie models)
Inboard CV joints (Turbo ie models - overhaul
Right-hand driveshaft damper weight (1108 and 1372 cc
models) - removal and refitting
13•2 Supplement: Revisions and information on later models
Page 128 of 303
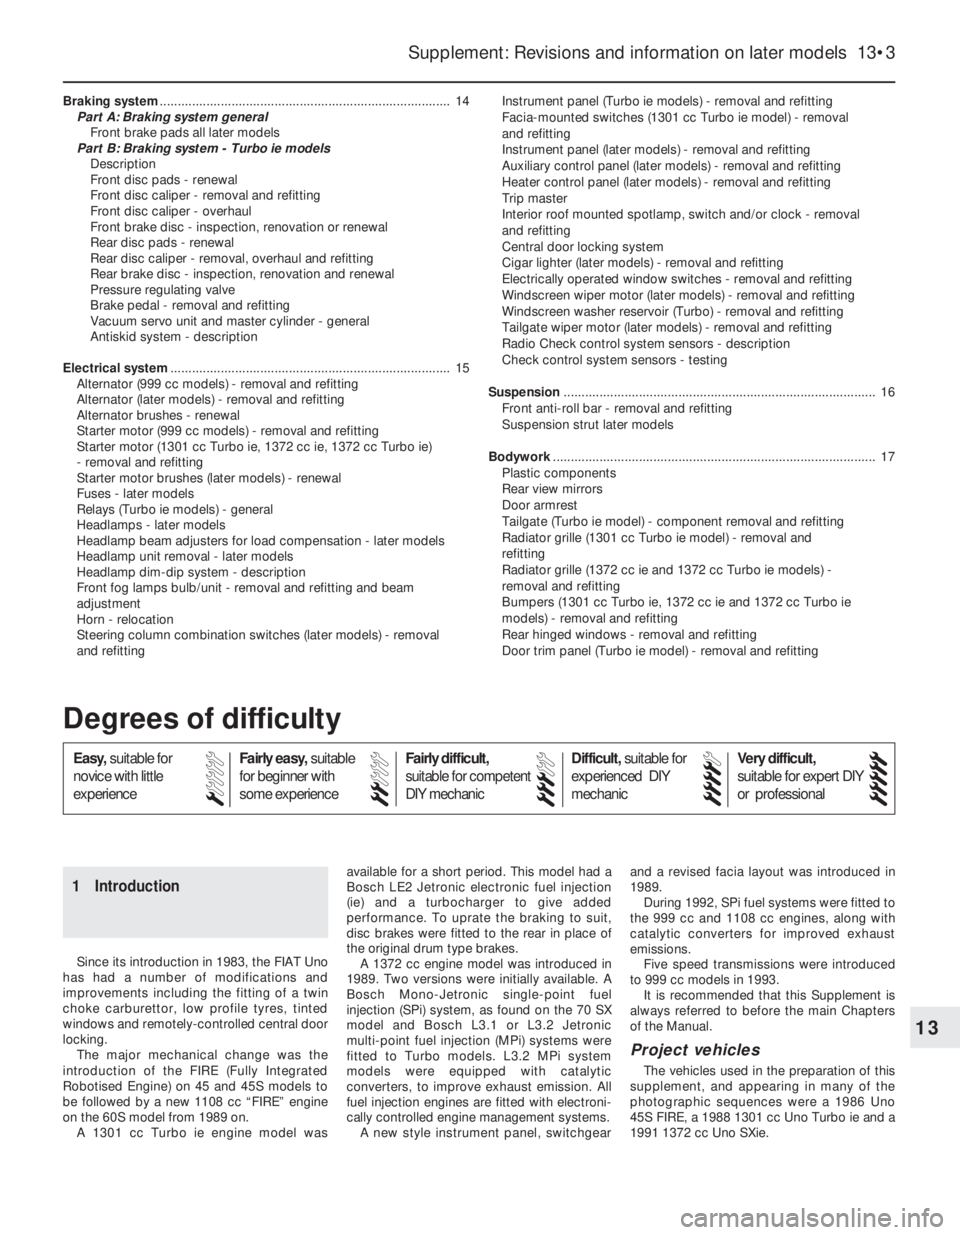
Braking system................................................................................. 14
Part A: Braking system general
Front brake pads all later models
Part B: Braking system - Turbo ie models
Description
Front disc pads - renewal
Front disc caliper - removal and refitting
Front disc caliper - overhaul
Front brake disc - inspection, renovation or renewal
Rear disc pads - renewal
Rear disc caliper - removal, overhaul and refitting
Rear brake disc - inspection, renovation and renewal
Pressure regulating valve
Brake pedal - removal and refitting
Vacuum servo unit and master cylinder - general
Antiskid system - description
Electrical system.............................................................................. 15
Alternator (999 cc models) - removal and refitting
Alternator (later models) - removal and refitting
Alternator brushes - renewal
Starter motor (999 cc models) - removal and refitting
Starter motor (1301 cc Turbo ie, 1372 cc ie, 1372 cc Turbo ie)
- removal and refitting
Starter motor brushes (later models) - renewal
Fuses - later models
Relays (Turbo ie models) - general
Headlamps - later models
Headlamp beam adjusters for load compensation - later models
Headlamp unit removal - later models
Headlamp dim-dip system - description
Front fog lamps bulb/unit - removal and refitting and beam
adjustment
Horn - relocation
Steering column combination switches (later models) - removal
and refittingInstrument panel (Turbo ie models) - removal and refitting
Facia-mounted switches (1301 cc Turbo ie model) - removal
and refitting
Instrument panel (later models) - removal and refitting
Auxiliary control panel (later models) - removal and refitting
Heater control panel (later models) - removal and refitting
Trip master
Interior roof mounted spotlamp, switch and/or clock - removal
and refitting
Central door locking system
Cigar lighter (later models) - removal and refitting
Electrically operated window switches - removal and refitting
Windscreen wiper motor (later models) - removal and refitting
Windscreen washer reservoir (Turbo) - removal and refitting
Tailgate wiper motor (later models) - removal and refitting
Radio Check control system sensors - description
Check control system sensors - testing
Suspension....................................................................................... 16
Front anti-roll bar - removal and refitting
Suspension strut later models
Bodywork.......................................................................................... 17
Plastic components
Rear view mirrors
Door armrest
Tailgate (Turbo ie model) - component removal and refitting
Radiator grille (1301 cc Turbo ie model) - removal and
refitting
Radiator grille (1372 cc ie and 1372 cc Turbo ie models) -
removal and refitting
Bumpers (1301 cc Turbo ie, 1372 cc ie and 1372 cc Turbo ie
models) - removal and refitting
Rear hinged windows - removal and refitting
Door trim panel (Turbo ie model) - removal and refitting
Supplement: Revisions and information on later models 13•3
13
1 Introduction
Since its introduction in 1983, the FIAT Uno
has had a number of modifications and
improvements including the fitting of a twin
choke carburettor, low profile tyres, tinted
windows and remotely-controlled central door
locking.
The major mechanical change was the
introduction of the FIRE (Fully Integrated
Robotised Engine) on 45 and 45S models to
be followed by a new 1108 cc “FIRE” engine
on the 60S model from 1989 on.
A 1301 cc Turbo ie engine model wasavailable for a short period. This model had a
Bosch LE2 Jetronic electronic fuel injection
(ie) and a turbocharger to give added
performance. To uprate the braking to suit,
disc brakes were fitted to the rear in place of
the original drum type brakes.
A 1372 cc engine model was introduced in
1989. Two versions were initially available. A
Bosch Mono-Jetronic single-point fuel
injection (SPi) system, as found on the 70 SX
model and Bosch L3.1 or L3.2 Jetronic
multi-point fuel injection (MPi) systems were
fitted to Turbo models. L3.2 MPi system
models were equipped with catalytic
converters, to improve exhaust emission. All
fuel injection engines are fitted with electroni-
cally controlled engine management systems.
A new style instrument panel, switchgearand a revised facia layout was introduced in
1989.
During 1992, SPi fuel systems were fitted to
the 999 cc and 1108 cc engines, along with
catalytic converters for improved exhaust
emissions.
Five speed transmissions were introduced
to 999 cc models in 1993.
It is recommended that this Supplement is
always referred to before the main Chapters
of the Manual.
Project vehicles
The vehicles used in the preparation of this
supplement, and appearing in many of the
photographic sequences were a 1986 Uno
45S FIRE, a 1988 1301 cc Uno Turbo ie and a
1991 1372 cc Uno SXie.
Easy,suitable for
novice with little
experienceFairly easy,suitable
for beginner with
some experienceFairly difficult,
suitable for competent
DIY mechanic
Difficult,suitable for
experienced DIY
mechanicVery difficult,
suitable for expert DIY
or professional
Degrees of difficulty
54321
Page 140 of 303
Torque wrench settingsNm lbf ft
Driveshaft flange connecting bolts (Turbo ie) . . . . . . . . . . . . . . . . . . . . . 43 32
Final drive output shaft bearing cover bolts (Turbo ie) . . . . . . . . . . . . . . 24 18
Intermediate shaft support to crankcase (Turbo ie) . . . . . . . . . . . . . . . . 48 35
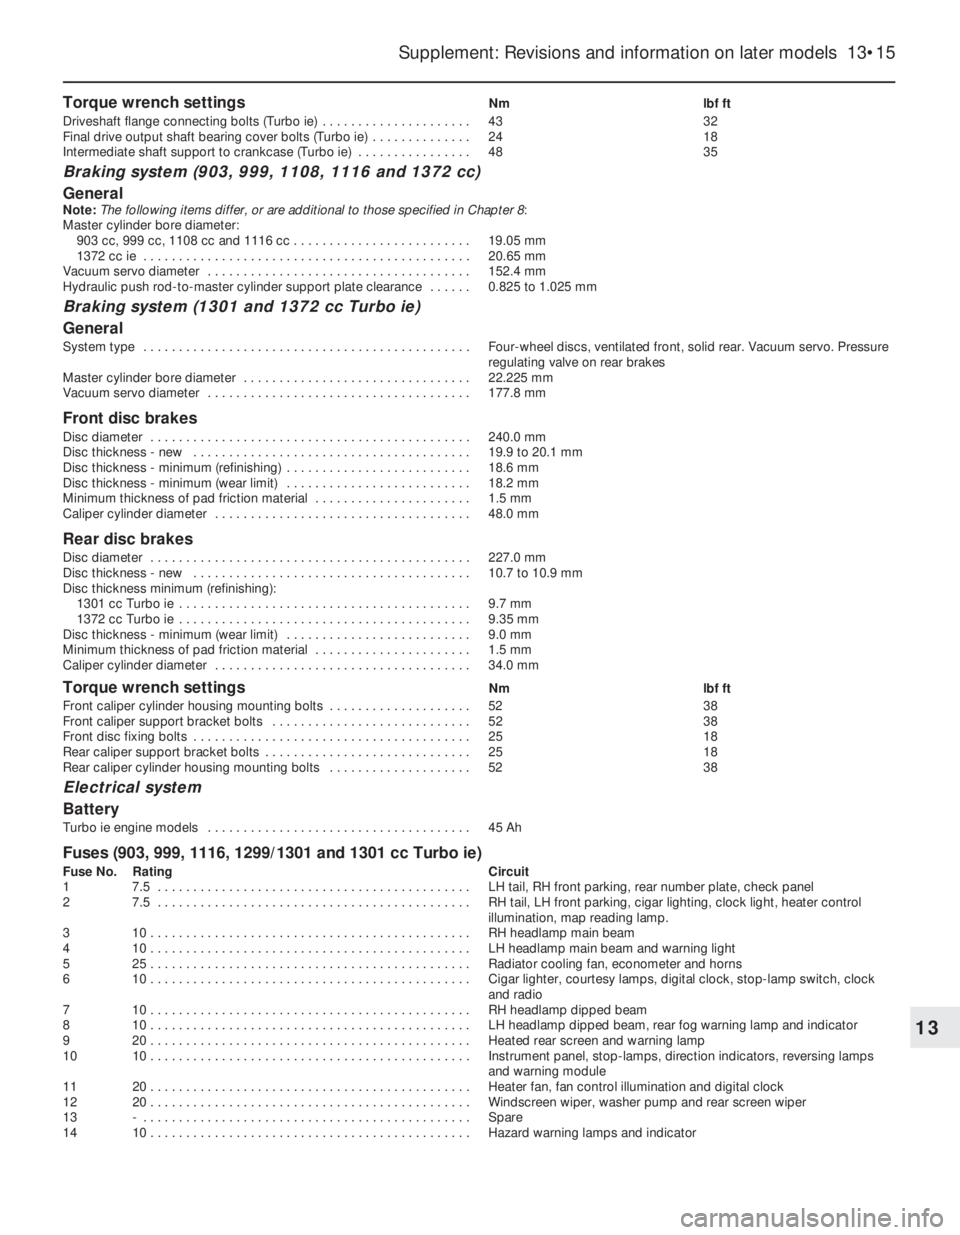
Braking system (903, 999, 1108, 1116 and 1372 cc)
General
Note:The following items differ, or are additional to those specified in Chapter 8:
Master cylinder bore diameter:
903 cc, 999 cc, 1108 cc and 1116 cc . . . . . . . . . . . . . . . . . . . . . . . . . 19.05 mm
1372 cc ie . . . . . . . . . . . . . . . . . . . . . . . . . . . . . . . . . . . . . . . . . . . . . . 20.65 mm
Vacuum servo diameter . . . . . . . . . . . . . . . . . . . . . . . . . . . . . . . . . . . . . 152.4 mm
Hydraulic push rod-to-master cylinder support plate clearance . . . . . . 0.825 to 1.025 mm
Braking system (1301 and 1372 cc Turbo ie)
General
System type . . . . . . . . . . . . . . . . . . . . . . . . . . . . . . . . . . . . . . . . . . . . . . Four-wheel discs, ventilated front, solid rear. Vacuum servo. Pressure
regulating valve on rear brakes
Master cylinder bore diameter . . . . . . . . . . . . . . . . . . . . . . . . . . . . . . . . 22.225 mm
Vacuum servo diameter . . . . . . . . . . . . . . . . . . . . . . . . . . . . . . . . . . . . . 177.8 mm
Front disc brakes
Disc diameter . . . . . . . . . . . . . . . . . . . . . . . . . . . . . . . . . . . . . . . . . . . . . 240.0 mm
Disc thickness - new . . . . . . . . . . . . . . . . . . . . . . . . . . . . . . . . . . . . . . . 19.9 to 20.1 mm
Disc thickness - minimum (refinishing) . . . . . . . . . . . . . . . . . . . . . . . . . . 18.6 mm
Disc thickness - minimum (wear limit) . . . . . . . . . . . . . . . . . . . . . . . . . . 18.2 mm
Minimum thickness of pad friction material . . . . . . . . . . . . . . . . . . . . . . 1.5 mm
Caliper cylinder diameter . . . . . . . . . . . . . . . . . . . . . . . . . . . . . . . . . . . . 48.0 mm
Rear disc brakes
Disc diameter . . . . . . . . . . . . . . . . . . . . . . . . . . . . . . . . . . . . . . . . . . . . . 227.0 mm
Disc thickness - new . . . . . . . . . . . . . . . . . . . . . . . . . . . . . . . . . . . . . . . 10.7 to 10.9 mm
Disc thickness minimum (refinishing):
1301 cc Turbo ie . . . . . . . . . . . . . . . . . . . . . . . . . . . . . . . . . . . . . . . . . 9.7 mm
1372 cc Turbo ie . . . . . . . . . . . . . . . . . . . . . . . . . . . . . . . . . . . . . . . . . 9.35 mm
Disc thickness - minimum (wear limit) . . . . . . . . . . . . . . . . . . . . . . . . . . 9.0 mm
Minimum thickness of pad friction material . . . . . . . . . . . . . . . . . . . . . . 1.5 mm
Caliper cylinder diameter . . . . . . . . . . . . . . . . . . . . . . . . . . . . . . . . . . . . 34.0 mm
Torque wrench settingsNm lbf ft
Front caliper cylinder housing mounting bolts . . . . . . . . . . . . . . . . . . . . 52 38
Front caliper support bracket bolts . . . . . . . . . . . . . . . . . . . . . . . . . . . . 52 38
Front disc fixing bolts . . . . . . . . . . . . . . . . . . . . . . . . . . . . . . . . . . . . . . . 25 18
Rear caliper support bracket bolts . . . . . . . . . . . . . . . . . . . . . . . . . . . . . 25 18
Rear caliper cylinder housing mounting bolts . . . . . . . . . . . . . . . . . . . . 52 38
Electrical system
Battery
Turbo ie engine models . . . . . . . . . . . . . . . . . . . . . . . . . . . . . . . . . . . . . 45 Ah
Fuses (903, 999, 1116, 1299/1301 and 1301 cc Turbo ie)
Fuse No. Rating Circuit
1 7.5 . . . . . . . . . . . . . . . . . . . . . . . . . . . . . . . . . . . . . . . . . . . . LH tail, RH front parking, rear number plate, check panel
2 7.5 . . . . . . . . . . . . . . . . . . . . . . . . . . . . . . . . . . . . . . . . . . . . RH tail, LH front parking, cigar lighting, clock light, heater control
illumination, map reading lamp.
3 10 . . . . . . . . . . . . . . . . . . . . . . . . . . . . . . . . . . . . . . . . . . . . . RH headlamp main beam
4 10 . . . . . . . . . . . . . . . . . . . . . . . . . . . . . . . . . . . . . . . . . . . . . LH headlamp main beam and warning light
5 25 . . . . . . . . . . . . . . . . . . . . . . . . . . . . . . . . . . . . . . . . . . . . . Radiator cooling fan, econometer and horns
6 10 . . . . . . . . . . . . . . . . . . . . . . . . . . . . . . . . . . . . . . . . . . . . . Cigar lighter, courtesy lamps, digital clock, stop-lamp switch, clock
and radio
7 10 . . . . . . . . . . . . . . . . . . . . . . . . . . . . . . . . . . . . . . . . . . . . . RH headlamp dipped beam
8 10 . . . . . . . . . . . . . . . . . . . . . . . . . . . . . . . . . . . . . . . . . . . . . LH headlamp dipped beam, rear fog warning lamp and indicator
9 20 . . . . . . . . . . . . . . . . . . . . . . . . . . . . . . . . . . . . . . . . . . . . . Heated rear screen and warning lamp
10 10 . . . . . . . . . . . . . . . . . . . . . . . . . . . . . . . . . . . . . . . . . . . . . Instrument panel, stop-lamps, direction indicators, reversing lamps
and warning module
11 20 . . . . . . . . . . . . . . . . . . . . . . . . . . . . . . . . . . . . . . . . . . . . . Heater fan, fan control illumination and digital clock
12 20 . . . . . . . . . . . . . . . . . . . . . . . . . . . . . . . . . . . . . . . . . . . . . Windscreen wiper, washer pump and rear screen wiper
13 - . . . . . . . . . . . . . . . . . . . . . . . . . . . . . . . . . . . . . . . . . . . . . . Spare
14 10 . . . . . . . . . . . . . . . . . . . . . . . . . . . . . . . . . . . . . . . . . . . . . Hazard warning lamps and indicator
Supplement: Revisions and information on later models 13•15
13
Page 143 of 303
13•18 Supplement: Revisions and information on later models
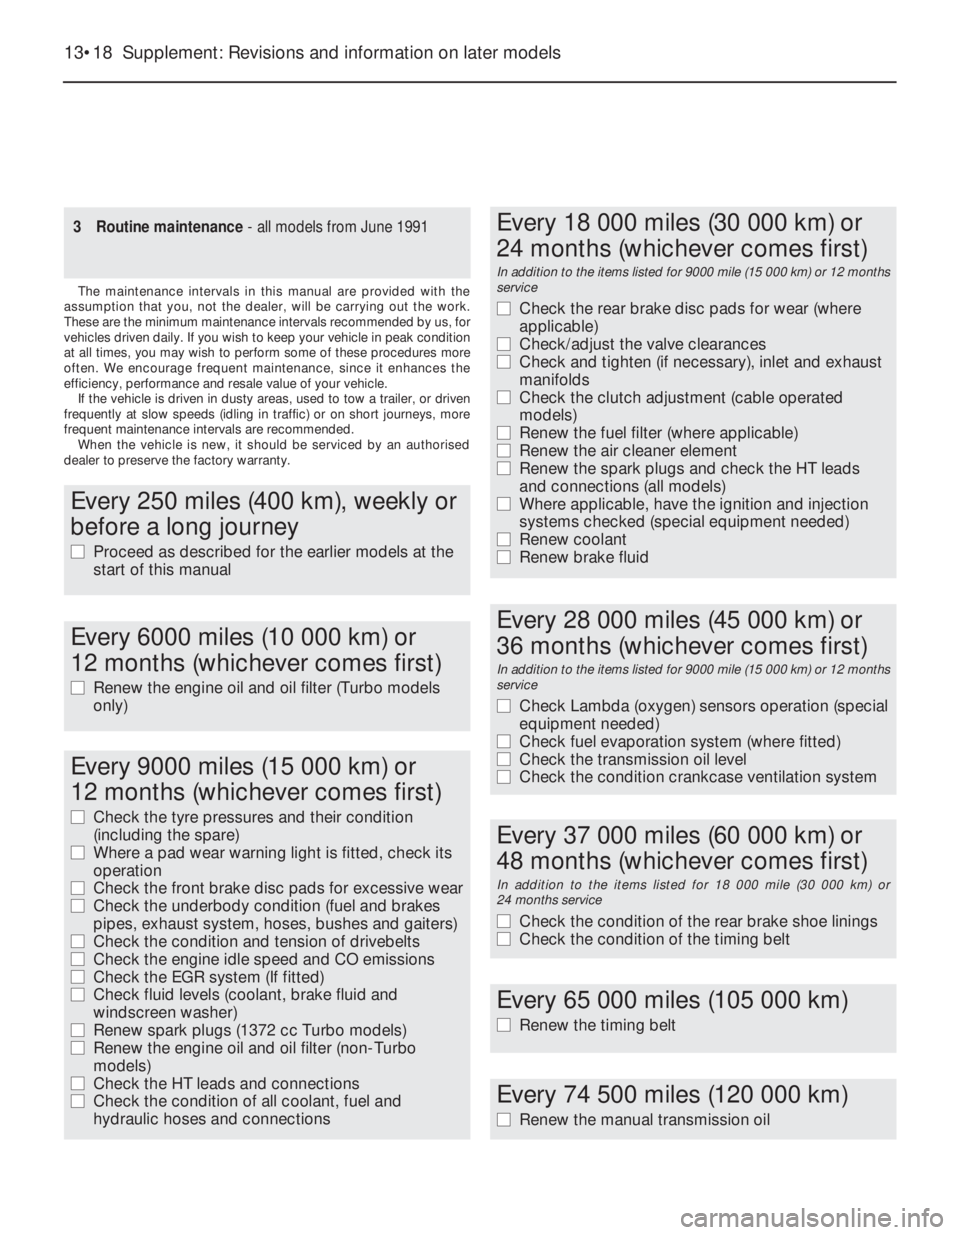
Every 9000 miles (15 000 km) or
12 months (whichever comes first)
m mCheck the tyre pressures and their condition
(including the spare)
m mWhere a pad wear warning light is fitted, check its
operation
m mCheck the front brake disc pads for excessive wear
m mCheck the underbody condition (fuel and brakes
pipes, exhaust system, hoses, bushes and gaiters)
m mCheck the condition and tension of drivebelts
m mCheck the engine idle speed and CO emissions
m mCheck the EGR system (If fitted)
m mCheck fluid levels (coolant, brake fluid and
windscreen washer)
m mRenew spark plugs (1372 cc Turbo models)
m mRenew the engine oil and oil filter (non-Turbo
models)
m mCheck the HT leads and connections
m mCheck the condition of all coolant, fuel and
hydraulic hoses and connections
Every 18 000 miles (30 000 km) or
24 months (whichever comes first)
In addition to the items listed for 9000 mile (15 000 km) or 12 months
service
m mCheck the rear brake disc pads for wear (where
applicable)
m mCheck/adjust the valve clearances
m mCheck and tighten (if necessary), inlet and exhaust
manifolds
m mCheck the clutch adjustment (cable operated
models)
m mRenew the fuel filter (where applicable)
m mRenew the air cleaner element
m mRenew the spark plugs and check the HT leads
and connections (all models)
m mWhere applicable, have the ignition and injection
systems checked (special equipment needed)
m mRenew coolant
m mRenew brake fluid
Every 28 000 miles (45 000 km) or
36 months (whichever comes first)
In addition to the items listed for 9000 mile (15 000 km) or 12 months
service
m mCheck Lambda (oxygen) sensors operation (special
equipment needed)
m mCheck fuel evaporation system (where fitted)
m mCheck the transmission oil level
m mCheck the condition crankcase ventilation system
Every 37 000 miles (60 000 km) or
48 months (whichever comes first)
In addition to the items listed for 18 000 mile (30 000 km) or
24 months service
m mCheck the condition of the rear brake shoe linings
m mCheck the condition of the timing belt
Every 65 000 miles (105 000 km)
m
mRenew the timing belt
Every 74 500 miles (120 000 km)
m
mRenew the manual transmission oil
Every 250 miles (400 km), weekly or
before a long journey
m mProceed as described for the earlier models at the
start of this manual
Every 6000 miles (10 000 km) or
12 months (whichever comes first)
m mRenew the engine oil and oil filter (Turbo models
only)
3 Routine maintenance- all models from June 1991
The maintenance intervals in this manual are provided with the
assumption that you, not the dealer, will be carrying out the work.
These are the minimum maintenance intervals recommended by us, for
vehicles driven daily. If you wish to keep your vehicle in peak condition
at all times, you may wish to perform some of these procedures more
often. We encourage frequent maintenance, since it enhances the
efficiency, performance and resale value of your vehicle.
If the vehicle is driven in dusty areas, used to tow a trailer, or driven
frequently at slow speeds (idling in traffic) or on short journeys, more
frequent maintenance intervals are recommended.
When the vehicle is new, it should be serviced by an authorised
dealer to preserve the factory warranty.
Page 145 of 303
mounted on the front end of the crankshaft
and driven by it.
11The flexible toothed timing belt drives thecamshaft and the coolant pump from a
sprocket on the front end of the crankshaft.
The belt is tensioned by an
eccentrically-mounted pulley.
12The distributor and the fuel pump
(carburettor models) are driven from the
flywheel end of the camshaft. The fuel pump
on fuel injection models is an integral unit
combined with the fuel gauge sender unit and
immersed in the fuel tank.
PART B:
OPERATIONS POSSIBLE
WITH ENGINE IN CAR
Valve clearances - adjustment
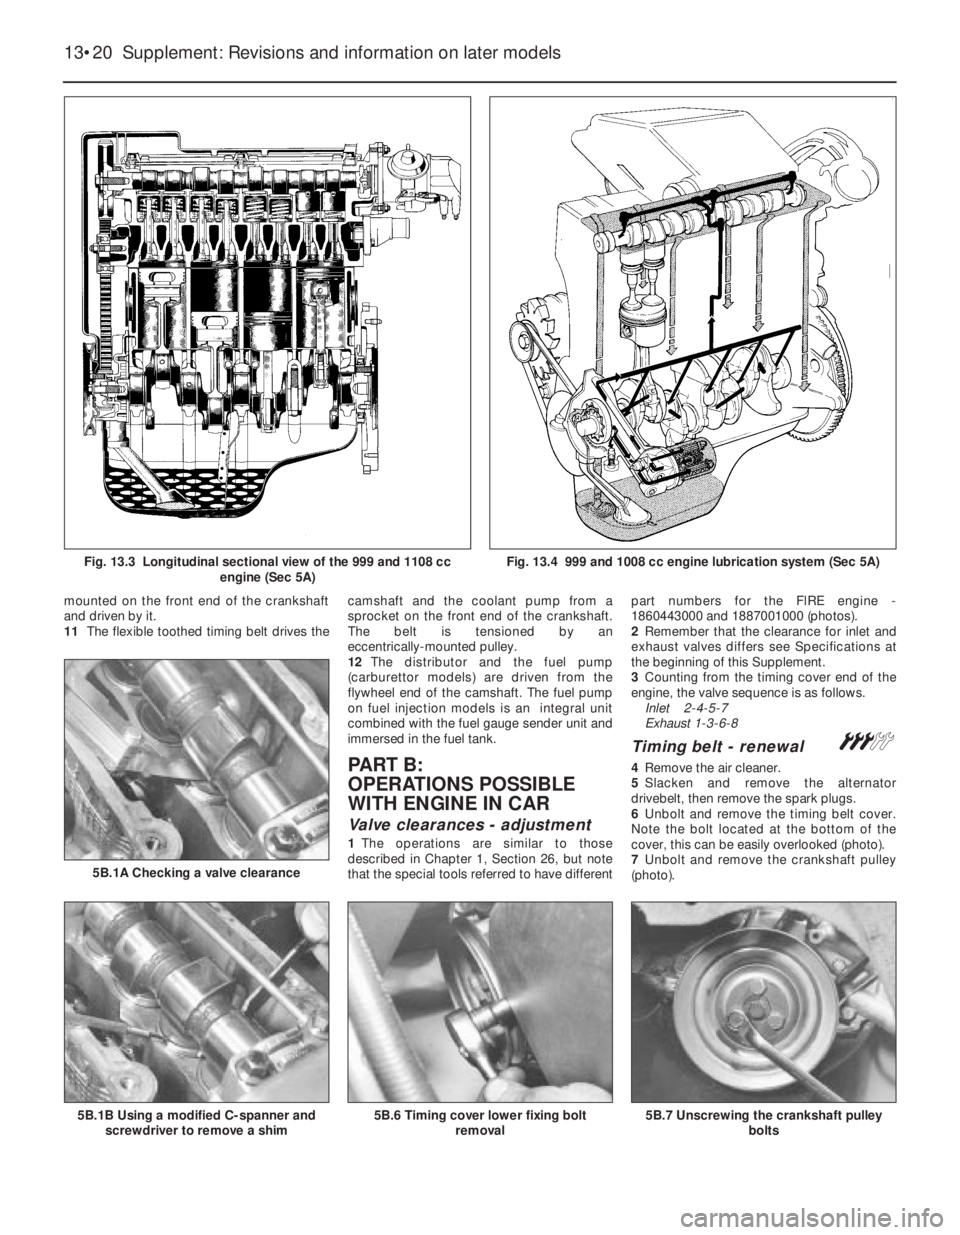
1The operations are similar to those
described in Chapter 1, Section 26, but note
that the special tools referred to have differentpart numbers for the FlRE engine -
1860443000 and 1887001000 (photos).
2Remember that the clearance for inlet and
exhaust valves differs see Specifications at
the beginning of this Supplement.
3Counting from the timing cover end of the
engine, the valve sequence is as follows.
Inlet 2-4-5-7
Exhaust 1-3-6-8
Timing belt - renewal #
4Remove the air cleaner.
5Slacken and remove the alternator
drivebelt, then remove the spark plugs.
6Unbolt and remove the timing belt cover.
Note the bolt located at the bottom of the
cover, this can be easily overlooked (photo).
7Unbolt and remove the crankshaft pulley
(photo).
13•20 Supplement: Revisions and information on later models
5B.7 Unscrewing the crankshaft pulley
bolts5B.6 Timing cover lower fixing bolt
removal5B.1B Using a modified C-spanner and
screwdriver to remove a shim
5B.1A Checking a valve clearance
Fig. 13.3 Longitudinal sectional view of the 999 and 1108 cc
engine (Sec 5A)Fig. 13.4 999 and 1008 cc engine lubrication system (Sec 5A)
Page 146 of 303
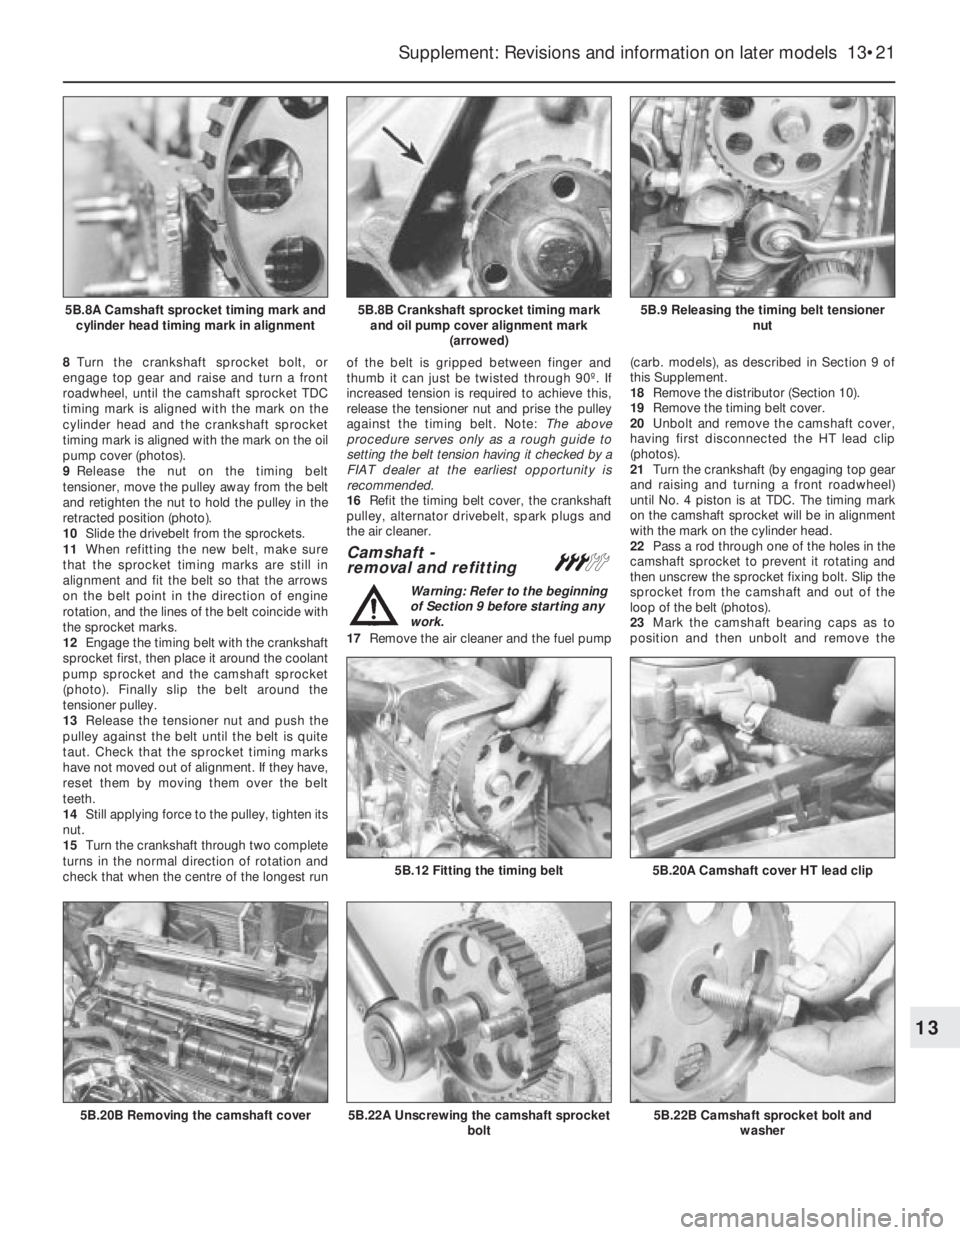
8Turn the crankshaft sprocket bolt, or
engage top gear and raise and turn a front
roadwheel, until the camshaft sprocket TDC
timing mark is aligned with the mark on the
cylinder head and the crankshaft sprocket
timing mark is aligned with the mark on the oil
pump cover (photos).
9Release the nut on the timing belt
tensioner, move the pulley away from the belt
and retighten the nut to hold the pulley in the
retracted position (photo).
10Slide the drivebelt from the sprockets.
11When refitting the new belt, make sure
that the sprocket timing marks are still in
alignment and fit the belt so that the arrows
on the belt point in the direction of engine
rotation, and the lines of the belt coincide with
the sprocket marks.
12Engage the timing belt with the crankshaft
sprocket first, then place it around the coolant
pump sprocket and the camshaft sprocket
(photo). Finally slip the belt around the
tensioner pulley.
13Release the tensioner nut and push the
pulley against the belt until the belt is quite
taut. Check that the sprocket timing marks
have not moved out of alignment. If they have,
reset them by moving them over the belt
teeth.
14Still applying force to the pulley, tighten its
nut.
15Turn the crankshaft through two complete
turns in the normal direction of rotation and
check that when the centre of the longest runof the belt is gripped between finger and
thumb it can just be twisted through 90º. If
increased tension is required to achieve this,
release the tensioner nut and prise the pulley
against the timing belt. Note: The above
procedure serves only as a rough guide to
setting the belt tension having it checked by a
FIAT dealer at the earliest opportunity is
recommended.
16Refit the timing belt cover, the crankshaft
pulley, alternator drivebelt, spark plugs and
the air cleaner.
Camshaft -
removal and refitting#
Warning: Refer to the beginning
of Section 9 before starting any
work.
17Remove the air cleaner and the fuel pump(carb. models), as described in Section 9 of
this Supplement.
18Remove the distributor (Section 10).
19Remove the timing belt cover.
20Unbolt and remove the camshaft cover,
having first disconnected the HT lead clip
(photos).
21Turn the crankshaft (by engaging top gear
and raising and turning a front roadwheel)
until No. 4 piston is at TDC. The timing mark
on the camshaft sprocket will be in alignment
with the mark on the cylinder head.
22Pass a rod through one of the holes in the
camshaft sprocket to prevent it rotating and
then unscrew the sprocket fixing bolt. Slip the
sprocket from the camshaft and out of the
loop of the belt (photos).
23Mark the camshaft bearing caps as to
position and then unbolt and remove the
Supplement: Revisions and information on later models 13•21
5B.9 Releasing the timing belt tensioner
nut5B.8B Crankshaft sprocket timing mark
and oil pump cover alignment mark
(arrowed)5B.8A Camshaft sprocket timing mark and
cylinder head timing mark in alignment
5B.22B Camshaft sprocket bolt and
washer5B.22A Unscrewing the camshaft sprocket
bolt
5B.20A Camshaft cover HT lead clip5B.12 Fitting the timing belt
5B.20B Removing the camshaft cover
13
Page 149 of 303
Sump pan -
removal and refitting Á
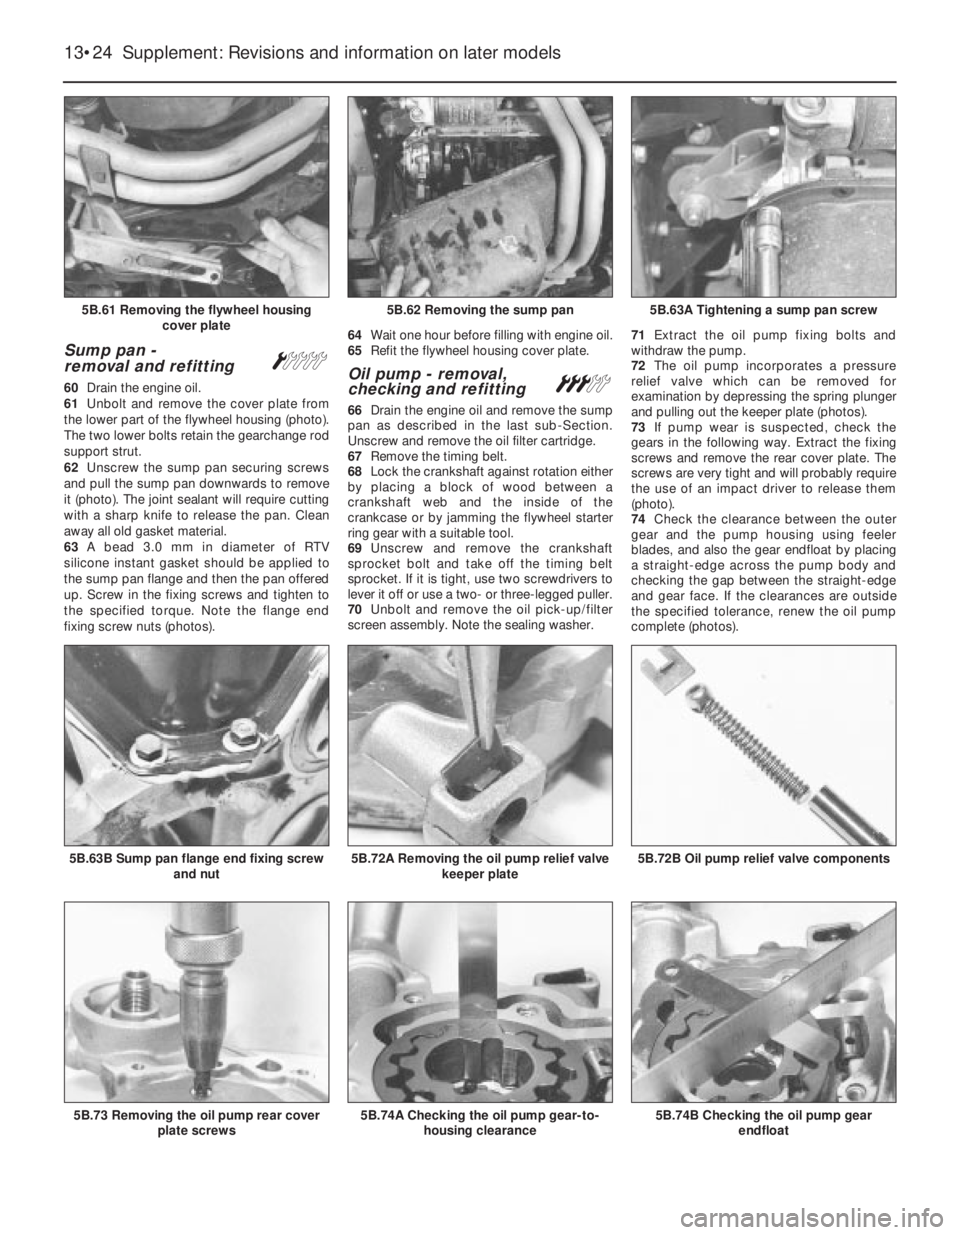
60Drain the engine oil.
61Unbolt and remove the cover plate from
the lower part of the flywheel housing (photo).
The two lower bolts retain the gearchange rod
support strut.
62Unscrew the sump pan securing screws
and pull the sump pan downwards to remove
it (photo). The joint sealant will require cutting
with a sharp knife to release the pan. Clean
away all old gasket material.
63A bead 3.0 mm in diameter of RTV
silicone instant gasket should be applied to
the sump pan flange and then the pan offered
up. Screw in the fixing screws and tighten to
the specified torque. Note the flange end
fixing screw nuts (photos).64Wait one hour before filling with engine oil.
65Refit the flywheel housing cover plate.Oil pump - removal,
checking and refitting#
66Drain the engine oil and remove the sump
pan as described in the last sub-Section.
Unscrew and remove the oil filter cartridge.
67Remove the timing belt.
68Lock the crankshaft against rotation either
by placing a block of wood between a
crankshaft web and the inside of the
crankcase or by jamming the flywheel starter
ring gear with a suitable tool.
69Unscrew and remove the crankshaft
sprocket bolt and take off the timing belt
sprocket. If it is tight, use two screwdrivers to
lever it off or use a two- or three-legged puller.
70Unbolt and remove the oil pick-up/filter
screen assembly. Note the sealing washer.71Extract the oil pump fixing bolts and
withdraw the pump.
72The oil pump incorporates a pressure
relief valve which can be removed for
examination by depressing the spring plunger
and pulling out the keeper plate (photos).
73If pump wear is suspected, check the
gears in the following way. Extract the fixing
screws and remove the rear cover plate. The
screws are very tight and will probably require
the use of an impact driver to release them
(photo).
74Check the clearance between the outer
gear and the pump housing using feeler
blades, and also the gear endfloat by placing
a straight-edge across the pump body and
checking the gap between the straight-edge
and gear face. If the clearances are outside
the specified tolerance, renew the oil pump
complete (photos).
13•24 Supplement: Revisions and information on later models
5B.74B Checking the oil pump gear
endfloat5B.74A Checking the oil pump gear-to-
housing clearance5B.73 Removing the oil pump rear cover
plate screws
5B.72B Oil pump relief valve components5B.72A Removing the oil pump relief valve
keeper plate5B.63B Sump pan flange end fixing screw
and nut
5B.63A Tightening a sump pan screw5B.62 Removing the sump pan5B.61 Removing the flywheel housing
cover plate
Page 150 of 303
75If the pump is unworn, refit the rear cover
plate and tighten the screws fully.
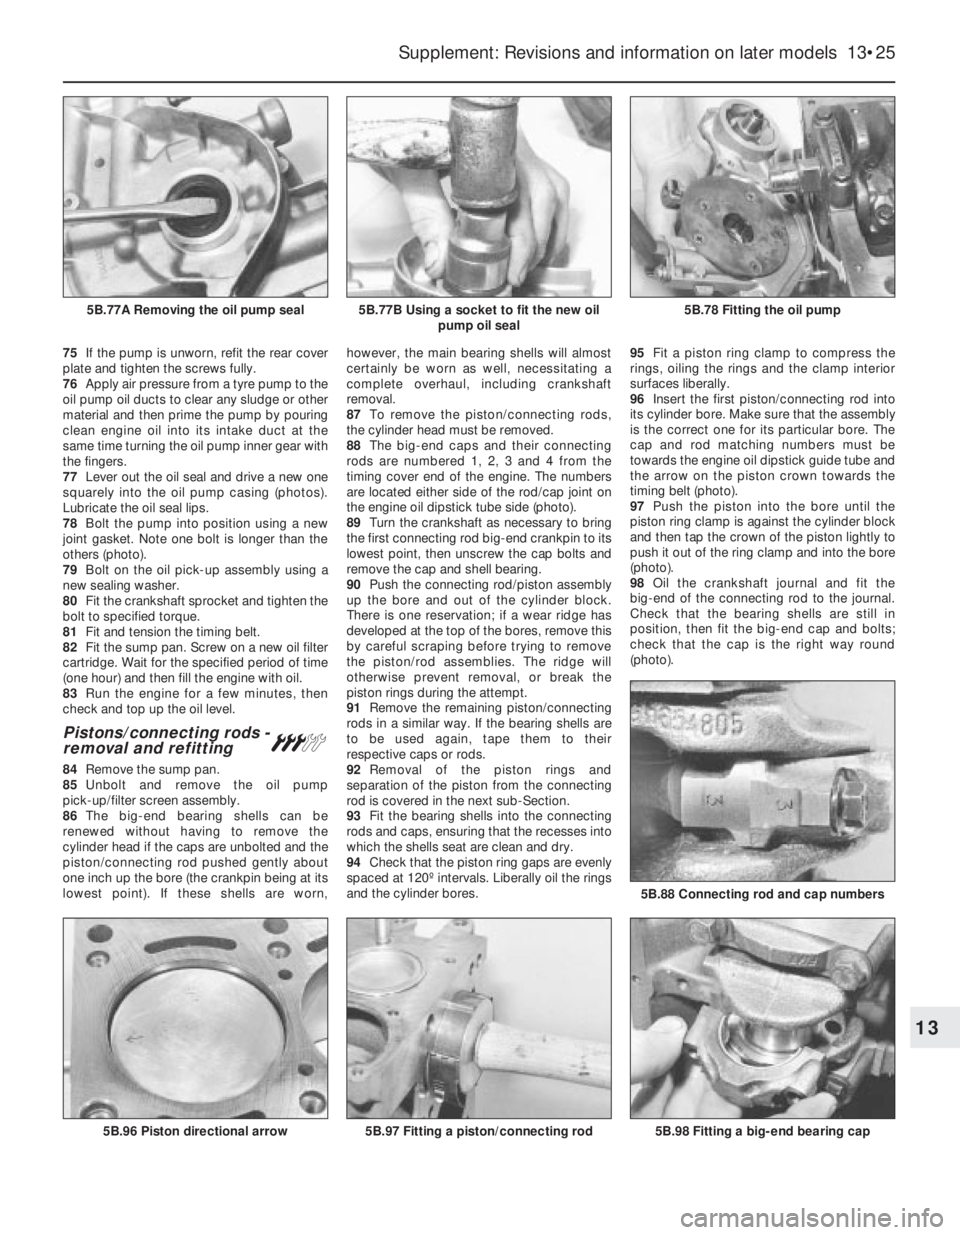
76Apply air pressure from a tyre pump to the
oil pump oil ducts to clear any sludge or other
material and then prime the pump by pouring
clean engine oil into its intake duct at the
same time turning the oil pump inner gear with
the fingers.
77Lever out the oil seal and drive a new one
squarely into the oil pump casing (photos).
Lubricate the oil seal lips.
78Bolt the pump into position using a new
joint gasket. Note one bolt is longer than the
others (photo).
79Bolt on the oil pick-up assembly using a
new sealing washer.
80Fit the crankshaft sprocket and tighten the
bolt to specified torque.
81Fit and tension the timing belt.
82Fit the sump pan. Screw on a new oil filter
cartridge. Wait for the specified period of time
(one hour) and then fill the engine with oil.
83Run the engine for a few minutes, then
check and top up the oil level.
Pistons/connecting rods -
removal and refitting#
84Remove the sump pan.
85Unbolt and remove the oil pump
pick-up/filter screen assembly.
86The big-end bearing shells can be
renewed without having to remove the
cylinder head if the caps are unbolted and the
piston/connecting rod pushed gently about
one inch up the bore (the crankpin being at its
lowest point). If these shells are worn,however, the main bearing shells will almost
certainly be worn as well, necessitating a
complete overhaul, including crankshaft
removal.
87To remove the piston/connecting rods,
the cylinder head must be removed.
88The big-end caps and their connecting
rods are numbered 1, 2, 3 and 4 from the
timing cover end of the engine. The numbers
are located either side of the rod/cap joint on
the engine oil dipstick tube side (photo).
89Turn the crankshaft as necessary to bring
the first connecting rod big-end crankpin to its
lowest point, then unscrew the cap bolts and
remove the cap and shell bearing.
90Push the connecting rod/piston assembly
up the bore and out of the cylinder block.
There is one reservation; if a wear ridge has
developed at the top of the bores, remove this
by careful scraping before trying to remove
the piston/rod assemblies. The ridge will
otherwise prevent removal, or break the
piston rings during the attempt.
91Remove the remaining piston/connecting
rods in a similar way. If the bearing shells are
to be used again, tape them to their
respective caps or rods.
92Removal of the piston rings and
separation of the piston from the connecting
rod is covered in the next sub-Section.
93Fit the bearing shells into the connecting
rods and caps, ensuring that the recesses into
which the shells seat are clean and dry.
94Check that the piston ring gaps are evenly
spaced at 120º intervals. Liberally oil the rings
and the cylinder bores.95Fit a piston ring clamp to compress the
rings, oiling the rings and the clamp interior
surfaces liberally.
96Insert the first piston/connecting rod into
its cylinder bore. Make sure that the assembly
is the correct one for its particular bore. The
cap and rod matching numbers must be
towards the engine oil dipstick guide tube and
the arrow on the piston crown towards the
timing belt (photo).
97Push the piston into the bore until the
piston ring clamp is against the cylinder block
and then tap the crown of the piston lightly to
push it out of the ring clamp and into the bore
(photo).
98Oil the crankshaft journal and fit the
big-end of the connecting rod to the journal.
Check that the bearing shells are still in
position, then fit the big-end cap and bolts;
check that the cap is the right way round
(photo).
Supplement: Revisions and information on later models 13•25
5B.78 Fitting the oil pump5B.77B Using a socket to fit the new oil
pump oil seal5B.77A Removing the oil pump seal
5B.98 Fitting a big-end bearing cap
5B.88 Connecting rod and cap numbers
5B.97 Fitting a piston/connecting rod5B.96 Piston directional arrow
13
Page 151 of 303
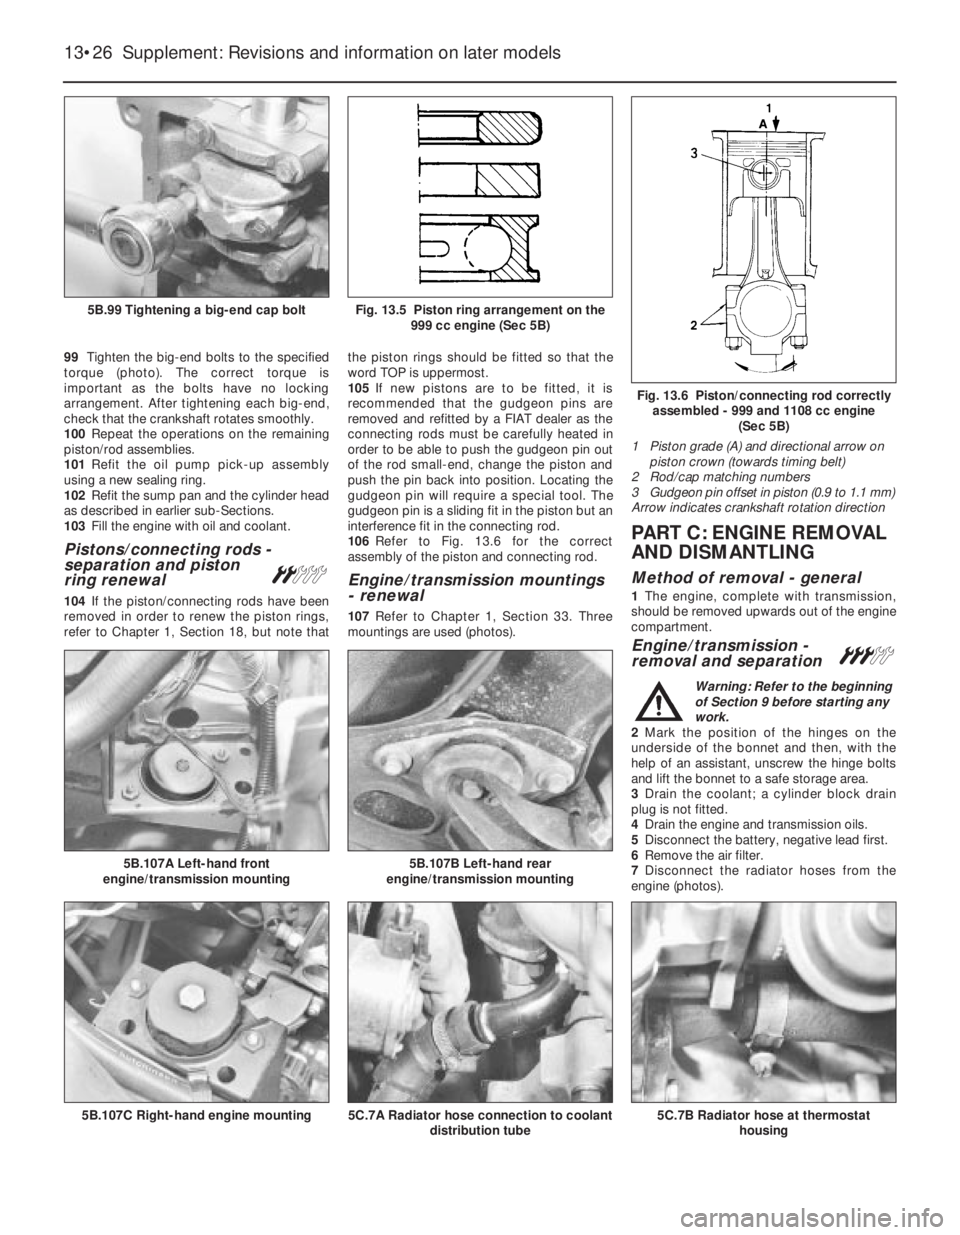
99Tighten the big-end bolts to the specified
torque (photo). The correct torque is
important as the bolts have no locking
arrangement. After tightening each big-end,
check that the crankshaft rotates smoothly.
100Repeat the operations on the remaining
piston/rod assemblies.
101Refit the oil pump pick-up assembly
using a new sealing ring.
102Refit the sump pan and the cylinder head
as described in earlier sub-Sections.
103Fill the engine with oil and coolant.
Pistons/connecting rods -
separation and piston
ring renewal
ª
104If the piston/connecting rods have been
removed in order to renew the piston rings,
refer to Chapter 1, Section 18, but note thatthe piston rings should be fitted so that the
word TOP is uppermost.
105If new pistons are to be fitted, it is
recommended that the gudgeon pins are
removed and refitted by a FIAT dealer as the
connecting rods must be carefully heated in
order to be able to push the gudgeon pin out
of the rod small-end, change the piston and
push the pin back into position. Locating the
gudgeon pin will require a special tool. The
gudgeon pin is a sliding fit in the piston but an
interference fit in the connecting rod.
106Refer to Fig. 13.6 for the correct
assembly of the piston and connecting rod.
Engine/transmission mountings
- renewal
107Refer to Chapter 1, Section 33. Three
mountings are used (photos).
PART C: ENGINE REMOVAL
AND DISMANTLING
Method of removal - general
1The engine, complete with transmission,
should be removed upwards out of the engine
compartment.
Engine/transmission -
removal and separation #
Warning: Refer to the beginning
of Section 9 before starting any
work.
2Mark the position of the hinges on the
underside of the bonnet and then, with the
help of an assistant, unscrew the hinge bolts
and lift the bonnet to a safe storage area.
3Drain the coolant; a cylinder block drain
plug is not fitted.
4Drain the engine and transmission oils.
5Disconnect the battery, negative lead first.
6Remove the air filter.
7Disconnect the radiator hoses from the
engine (photos).
13•26 Supplement: Revisions and information on later models
5C.7B Radiator hose at thermostat
housing5C.7A Radiator hose connection to coolant
distribution tube5B.107C Right-hand engine mounting
5B.107B Left-hand rear
engine/transmission mounting5B.107A Left-hand front
engine/transmission mounting
Fig. 13.6 Piston/connecting rod correctly
assembled - 999 and 1108 cc engine
(Sec 5B)
1 Piston grade (A) and directional arrow on
piston crown (towards timing belt)
2 Rod/cap matching numbers
3 Gudgeon pin offset in piston (0.9 to 1.1 mm)
Arrow indicates crankshaft rotation direction
Fig. 13.5 Piston ring arrangement on the
999 cc engine (Sec 5B)5B.99 Tightening a big-end cap bolt
Page 155 of 303
crankcase. If the shells are to be used again,
keep them with their respective bearing caps.
70The thrust washers which control
crankshaft endfloat are located in the
crankcase, and retained by the turned-over
edges of the centre main bearing shell.
71The engine is now fully stripped.
Examination and renovation
72The procedures for the following items are
essentially as described in Chapter 1, Sec-
tion 18.
Cylinder block and crankcase
Crankshaft and bearings
Flywheel
Oil seals and gaskets
Cylinder head
73Using a straight-edge, check the cylinder
head gasket surface for distortion. If it
exceeds the specified tolerance, it must be
surface ground by your dealer.74Refer to Chapter 1, Section 39, for
dismantling and renovation operations. Note
that single valve springs are fitted.
Oil pump
75Checking operations are described in
sub-Section B.
Pistons and connecting rods
76Refer to sub-Section B.
77If one or more connecting rods are
changed, it is important that its weight is
identical to that of the original. Use an
accurate balance to weigh them and remove
metal if necessary from the new rod in the
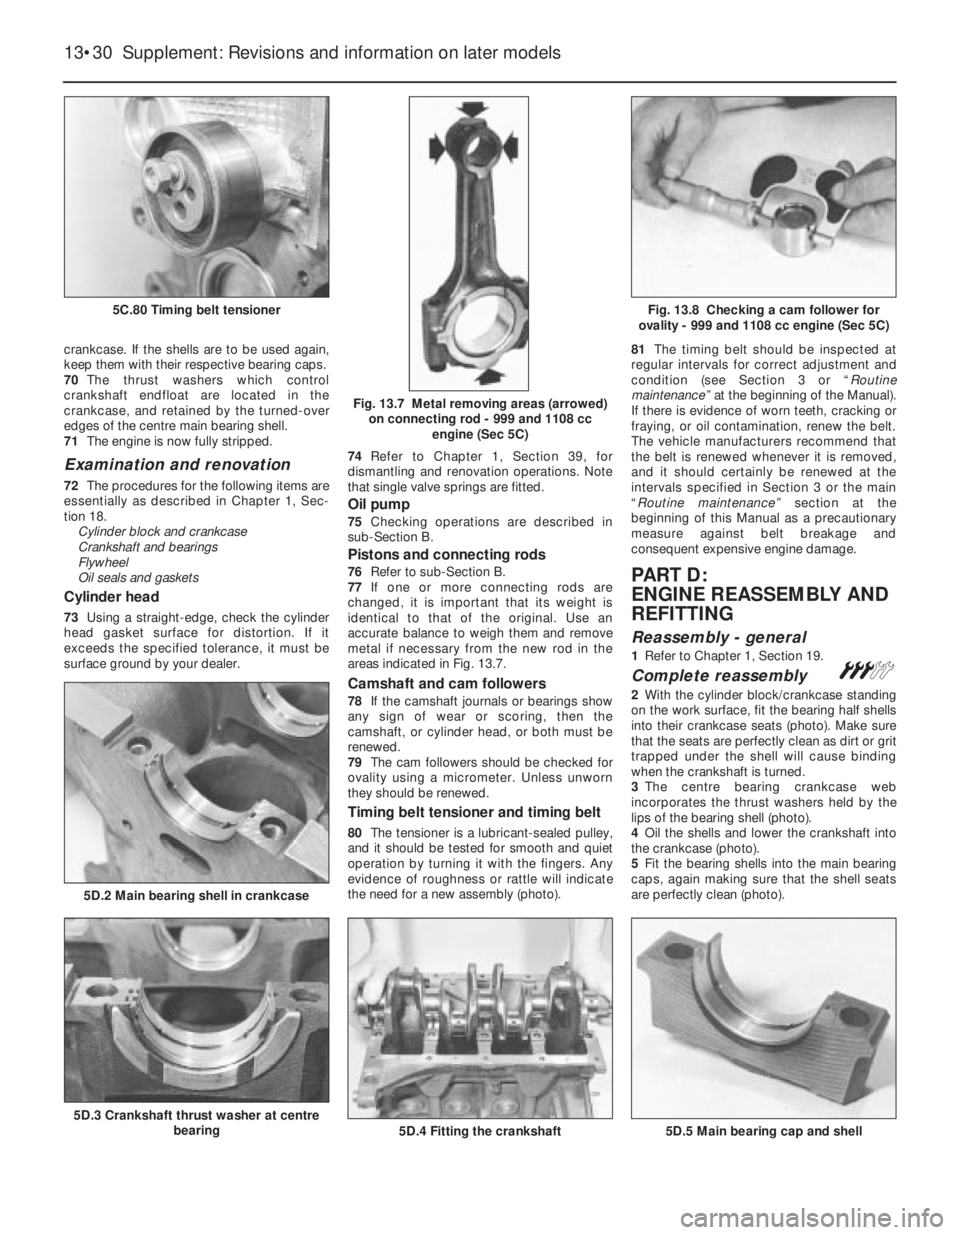
areas indicated in Fig. 13.7.
Camshaft and cam followers
78If the camshaft journals or bearings show
any sign of wear or scoring, then the
camshaft, or cylinder head, or both must be
renewed.
79The cam followers should be checked for
ovality using a micrometer. Unless unworn
they should be renewed.
Timing belt tensioner and timing belt
80The tensioner is a lubricant-sealed pulley,
and it should be tested for smooth and quiet
operation by turning it with the fingers. Any
evidence of roughness or rattle will indicate
the need for a new assembly (photo).81The timing belt should be inspected at
regular intervals for correct adjustment and
condition (see Section 3 or “Routine
maintenance” at the beginning of the Manual).
If there is evidence of worn teeth, cracking or
fraying, or oil contamination, renew the belt.
The vehicle manufacturers recommend that
the belt is renewed whenever it is removed,
and it should certainly be renewed at the
intervals specified in Section 3 or the main
“Routine maintenance” section at the
beginning of this Manual as a precautionary
measure against belt breakage and
consequent expensive engine damage.
PART D:
ENGINE REASSEMBLY AND
REFITTING
Reassembly - general
1Refer to Chapter 1, Section 19.
Complete reassembly#
2With the cylinder block/crankcase standing
on the work surface, fit the bearing half shells
into their crankcase seats (photo). Make sure
that the seats are perfectly clean as dirt or grit
trapped under the shell will cause binding
when the crankshaft is turned.
3The centre bearing crankcase web
incorporates the thrust washers held by the
lips of the bearing shell (photo).
4Oil the shells and lower the crankshaft into
the crankcase (photo).
5Fit the bearing shells into the main bearing
caps, again making sure that the shell seats
are perfectly clean (photo).
13•30 Supplement: Revisions and information on later models
5D.5 Main bearing cap and shell5D.4 Fitting the crankshaft5D.3 Crankshaft thrust washer at centre
bearing
5D.2 Main bearing shell in crankcase
Fig. 13.8 Checking a cam follower for
ovality - 999 and 1108 cc engine (Sec 5C)
Fig. 13.7 Metal removing areas (arrowed)
on connecting rod - 999 and 1108 cc
engine (Sec 5C)
5C.80 Timing belt tensioner