set clock FORD BRONCO 2023 Owners Manual
[x] Cancel search | Manufacturer: FORD, Model Year: 2023, Model line: BRONCO, Model: FORD BRONCO 2023Pages: 642, PDF Size: 14.71 MB
Page 17 of 642
Rear Axle Fluid Capacity andSpecification.............................................481
Vehicle Identification
Vehicle Identification Number...............482
Connected Vehicle
What Is a Connected Vehicle.................483
Connected Vehicle Requirements.......483
Connected Vehicle Limitations.............483
Connecting the Vehicle to a MobileNetwork.....................................................483
Connecting the Vehicle to a Wi-FiNetwork.....................................................483
Connected Vehicle – Troubleshooting.......................................................................484
Vehicle Wi-Fi Hotspot
Creating a Vehicle Wi-Fi Hotspot........486
Changing the Vehicle Wi-Fi HotspotName or Password................................486
Vehicle Wi-Fi Hotspot – Troubleshooting........................................................................487
Audio System
Audio System Precautions.....................488
Identifying the Audio Unit.......................488
Switching the Audio Unit On and Off.......................................................................488
Selecting the Audio Source....................488
Playing or Pausing the Audio Source.......................................................................488
Adjusting the Volume...............................489
Switching Shuffle Mode On and Off.......................................................................489
Switching Repeat Mode On and Off.......................................................................489
Setting a Memory Preset........................489
Muting the Audio........................................489
Adjusting the Sound Settings...............489
Setting the Clock and Date....................490
AM/FM Radio..............................................490
Switching the Display On and Off........491
Digital Radio..................................................491
Satellite Radio.............................................492
Audio System – Troubleshooting........494
Center Display Overview
Center Display Precautions....................498
Center Display Limitations.....................498
Status Bar.....................................................498
Feature Bar...................................................499
Information On Demand Screen -Vehicles With: 12 Inch Screen............499
Rebooting the Center Display...............500
Voice Interaction
Ford Assistant..............................................501
Alexa Built-In
What is Alexa Built-In...............................503
Alexa Built-In Requirements..................503
Signing Into Your Account.......................503
Using Alexa Built-In...................................503
Alexa Built-In Settings..............................503
Phone
Phone Precautions....................................505
Connecting Your Phone...........................505
Phone Menu.................................................505
Making and Receiving a Phone Call.....507
Sending and Receiving a Text Message.......................................................................508
Switching Text Message Notification Onand Off.......................................................509
Bluetooth®
Connecting a Bluetooth® Device..........510
Playing Media Using Bluetooth®..........510
Apps
App Precautions............................................511
13
2023 Bronco (TG1) Canada/United States of America, enUSA, Edition date: 202208, DOMTable of Contents
Page 140 of 642
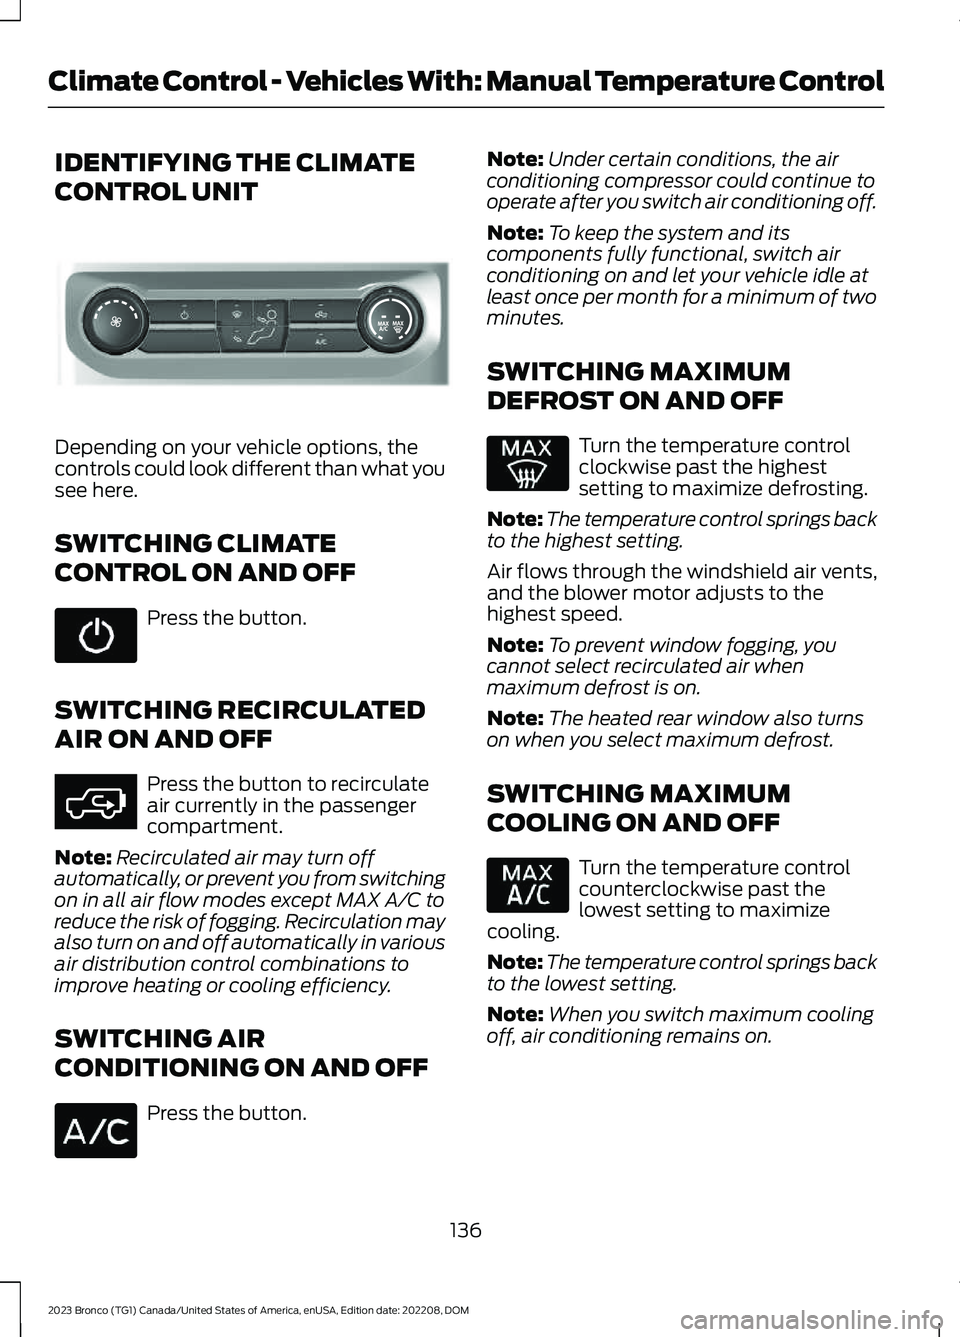
IDENTIFYING THE CLIMATE
CONTROL UNIT
Depending on your vehicle options, thecontrols could look different than what yousee here.
SWITCHING CLIMATE
CONTROL ON AND OFF
Press the button.
SWITCHING RECIRCULATED
AIR ON AND OFF
Press the button to recirculateair currently in the passengercompartment.
Note:Recirculated air may turn offautomatically, or prevent you from switchingon in all air flow modes except MAX A/C toreduce the risk of fogging. Recirculation mayalso turn on and off automatically in variousair distribution control combinations toimprove heating or cooling efficiency.
SWITCHING AIR
CONDITIONING ON AND OFF
Press the button.
Note:Under certain conditions, the airconditioning compressor could continue tooperate after you switch air conditioning off.
Note:To keep the system and itscomponents fully functional, switch airconditioning on and let your vehicle idle atleast once per month for a minimum of twominutes.
SWITCHING MAXIMUM
DEFROST ON AND OFF
Turn the temperature controlclockwise past the highestsetting to maximize defrosting.
Note:The temperature control springs backto the highest setting.
Air flows through the windshield air vents,and the blower motor adjusts to thehighest speed.
Note:To prevent window fogging, youcannot select recirculated air whenmaximum defrost is on.
Note:The heated rear window also turnson when you select maximum defrost.
SWITCHING MAXIMUM
COOLING ON AND OFF
Turn the temperature controlcounterclockwise past thelowest setting to maximizecooling.
Note:The temperature control springs backto the lowest setting.
Note:When you switch maximum coolingoff, air conditioning remains on.
136
2023 Bronco (TG1) Canada/United States of America, enUSA, Edition date: 202208, DOMClimate Control - Vehicles With: Manual Temperature ControlE308141 E363177
Page 141 of 642
SWITCHING THE HEATED
REAR WINDOW ON AND OFF (IF
EQUIPPED)
Press the button to clear the rearwindow of thin ice and fog. Theheated rear window turns offafter a short period of time.
Note:Do not use harsh chemicals, razorblades or other sharp objects to clean orremove decals from the inside of the heatedrear window as this could cause damage tothe heated rear window grid lines notcovered by the vehicle Warranty.
SETTING THE BLOWER MOTOR
SPEED
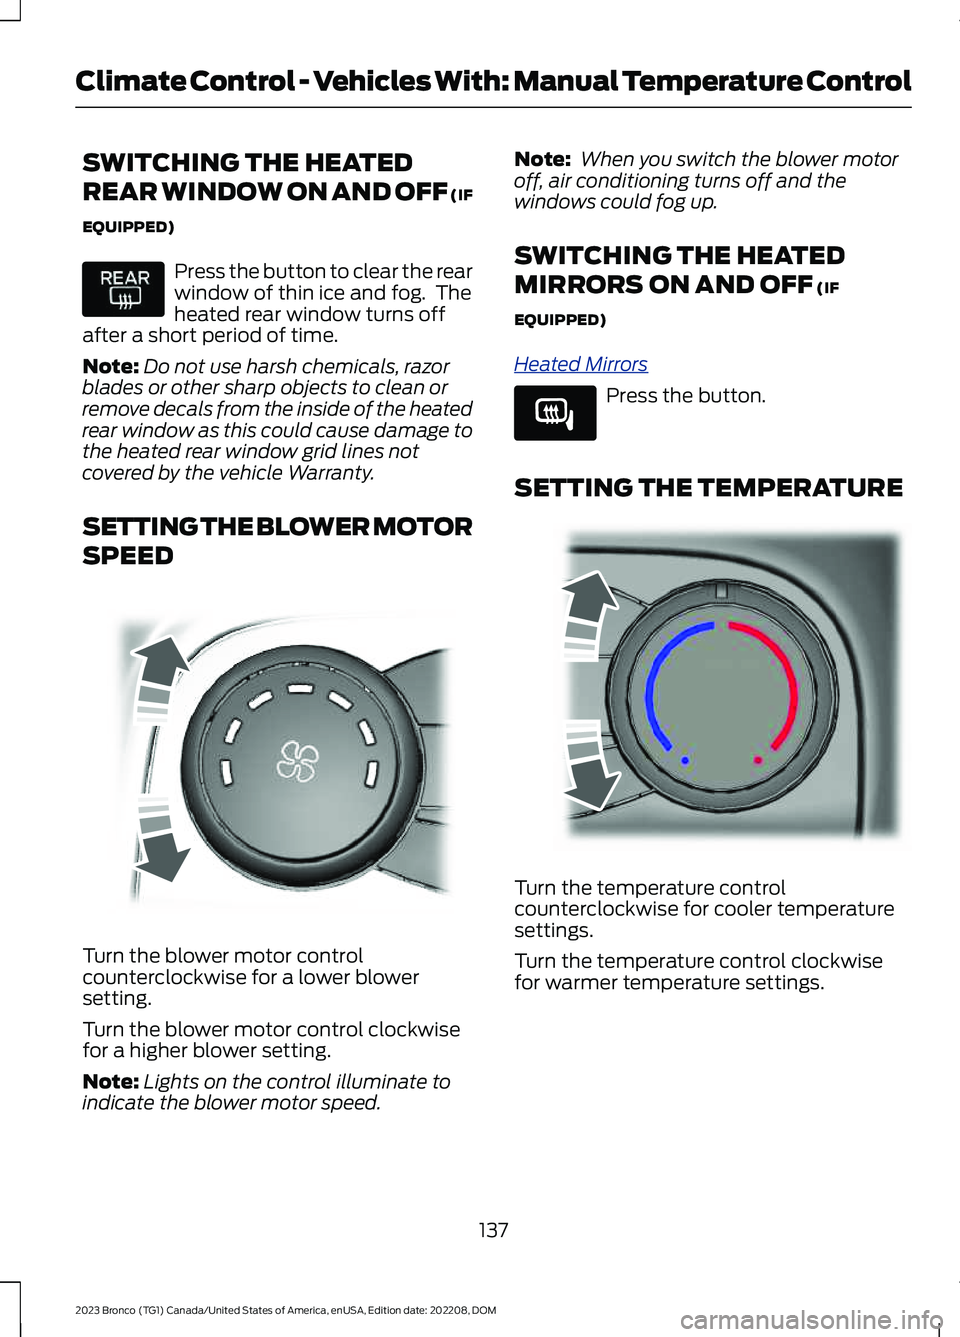
Turn the blower motor controlcounterclockwise for a lower blowersetting.
Turn the blower motor control clockwisefor a higher blower setting.
Note:Lights on the control illuminate toindicate the blower motor speed.
Note: When you switch the blower motoroff, air conditioning turns off and thewindows could fog up.
SWITCHING THE HEATED
MIRRORS ON AND OFF (IF
EQUIPPED)
Heated Mirrors
Press the button.
SETTING THE TEMPERATURE
Turn the temperature controlcounterclockwise for cooler temperaturesettings.
Turn the temperature control clockwisefor warmer temperature settings.
137
2023 Bronco (TG1) Canada/United States of America, enUSA, Edition date: 202208, DOMClimate Control - Vehicles With: Manual Temperature Control E317606 E266189 E244106
Page 207 of 642
WHAT IS THE ELECTRONIC
LOCKING DIFFERENTIAL
The electronic locking differential is adevice housed in the front or rear axle and,when activated allows both wheels on thataxle to turn at the same speed. Theelectronic locking differential can provideadditional traction should your vehiclebecome stuck. You can activate thedifferential electronically and shift it on thefly within the operating speed range. Theelectronic differential automaticallydisengages when the vehicle speedexceeds a set value and it automaticallyreengages when the vehicle speed goesbelow a set value. See Switching theElectronic Locking Differential On andOff (page 203). It also automaticallyengages based on certain selected G.O.A.Tmodes. See G.O.A.T. Mode Control(page 260). The electronic lockingdifferential is for use in mud, rocks, sand,or any off-road condition where you needmaximum traction. It is not for use on drypavement.
Note:The electronic locking differentialsare for off-road use only and not for use ondry pavement. Using the electronic lockingdifferentials on dry pavement results inincreased tire wear, noise and vibration ordriveline damage.
Note:The front electronic lockingdifferential is only available in four-wheeldrive low (4L).
Note:Locking the front differential reducesyour ability to make tight turning maneuversand creates additional resistance to steeringinputs.
Note:Switching the electronic lockingdifferentials off while turning results indisengagement difficulties. If the electroniclocking differential has difficultydisengaging, release the accelerator pedaland turn the steering wheel back and forthin small increments while maintainingcontrol and following a straight line.
SWITCHING THE ELECTRONIC
LOCKING DIFFERENTIAL ON
AND OFF - EXCLUDING:
RAPTOR
Bronco 4x4 Systems
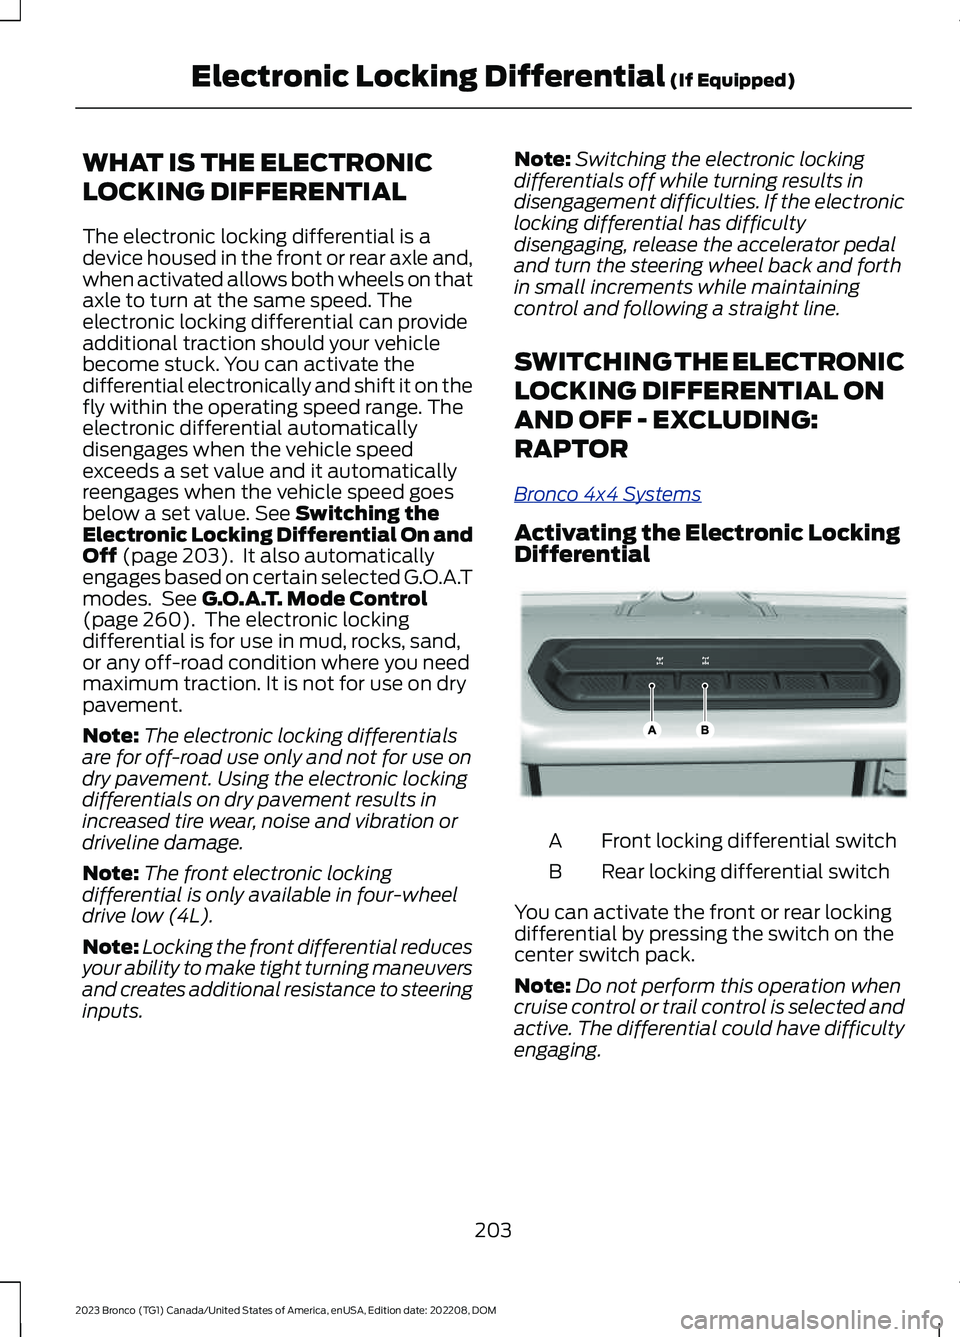
Activating the Electronic LockingDifferential
Front locking differential switchA
Rear locking differential switchB
You can activate the front or rear lockingdifferential by pressing the switch on thecenter switch pack.
Note:Do not perform this operation whencruise control or trail control is selected andactive. The differential could have difficultyengaging.
203
2023 Bronco (TG1) Canada/United States of America, enUSA, Edition date: 202208, DOMElectronic Locking Differential (If Equipped)E333068
Page 270 of 642
Note:When using rock crawl mode ondry/hard pavement, your vehicle couldexperience vibration, driveline bind up,damage and potential excessive tire andvehicle wear.
ROCK CRAWL - RAPTOR
For off-road driving andoptimum rock-climbingcapability.
Rock crawl mode has the followingfeatures:
•Engages both front and rear electroniclocking differentials.
•Disconnects the stabilizer bar.
•Turns on the cameras.
•Optimizes throttle response.
•Adjusts transmission shift points toprovide additional control of yourvehicle.
Four-wheel drive low (4L) is the onlytransfer case option available in rock crawlmode. Off-road is the default steeringsetting, but all steering modes areavailable. Off-road is the defaultsuspension mode, and Normal is thedefault exhaust mode. The system tunesthe engine and transmission controls torock crawl mode.
The electronic locking differentials engagewhen you select this mode, and you candisengage them at any time using thebuttons. See Switching the ElectronicLocking Differential On and Off (page203).
The stabilizer bar can be disconnected atspeeds below 50 mph (80 km/h).
Note:When using rock crawl mode ondry/hard pavement, your vehicle couldexperience vibration, driveline bind up,damage and potential excessive tire andvehicle wear.
SAND - EXCLUDING: RAPTOR
For off-road driving on soft, drysand or deep snow. This modemay help get your vehicleunstuck from deep snow or sand.
Four-wheel drive high (4H) is the defaultfour-wheel drive mode. Four-wheel drivelow (4L) is selectable in sand mode.
The front electronic locking differential isavailable below 25 mph (40 km/h) whenin four-wheel drive low (4L). The rearelectronic locking differential is engagedwhen in sand mode and is available at anyspeed in all selectable four-wheel drivemodes.
The stabilizer bar disconnect is availablein four-wheel drive high (4H) or four-wheeldrive low (4L).
Note:The front camera system switcheson when you are in sand mode and yourspeed is less than 15 mph (24 km/h). If youexceed 15 mph (24 km/h), the camera shutsoff until your vehicle speed is below 12 mph(20 km/h).
Note:When using Sand mode on dry/hardpavement, your vehicle could experiencevibration, driveline bind up, damage andpotential excessive tire and vehicle wear.
Note:Sand mode is not intended for useon firm, slippery surfaces, such as pavedroads covered with snow or ice. For slippery,firm surfaces use slippery mode.
SLIPPERY - ADVANCED 4X4 WITH4A MODE, EXCLUDING: RAPTOR
For less than ideal roadconditions, you can use thismode for crossing terrain wherea firm surface is covered with loose orslippery material, such as snow or ice.Slippery mode lowers throttle responseand optimizes shifting for slippery surfaces.
266
2023 Bronco (TG1) Canada/United States of America, enUSA, Edition date: 202208, DOMG.O.A.T. Mode ControlE366492 E332185 E295414
Page 328 of 642
When you are driving through water do notexceed 4 mph (7 km/h).
OFF-ROAD DRIVING AIDS
Bronco 4x4 Systems
Selecting an Off-Road G.O.A.TMode
Using the appropriate drive mode increasesyour vehicle's control. See G.O.A.T. ModeControl (page 260).
Note:Drive modes are selected by usingthe Goes Over Any-type of Terrain G.O.A.T.MODES controller.
Using Four-Wheel Drive
Your vehicle has a four-wheel drive systemthat offers various modes to help youoptimize traction on any off-road surface.See Four-Wheel Drive (page 195).
Using the Stabilizer BarDisconnect
The stabilizer bar disconnect improvessuspension articulation, improving tractionand comfort in rough terrain.
The vehicle's disconnect system ishydraulically actuated.
Your vehicle is capable of disconnectingunder high load. Your vehicle is alsocapable of reconnecting under allconditions.
It is not necessary for the vehicle to be onlevel ground in order to reconnect thestabilizer bar. See Stabilizer BarDisconnect (page 229).
Using the Cameras Off-Road
Use the 360 degree camera to enhanceyour off-road experience. See 360 DegreeCamera (page 247).
Using the Front and RearDifferential Lock
When engaged, the front and reardifferential lock provides additionaltraction to your vehicle by forcing eitherthe two rear wheels or two front wheels toturn at the same speed.
You can activate and deactivate the frontand rear differential lock on the fly withinthe operating speed range. See ElectronicLocking Differential (page 203).
Using Trail Control
The system works in a similar manner tocruise control in off-road conditions. TrailControl provides you the ability tomaneuver the vehicle without using thethrottle and brake pedals.
Trail Control allows you to set a speedbetween 1 mph (1.6 km/h) to 14 mph(23 km/h) in a forward motion and 1 mph(1.6 km/h) to 5 mph (8 km/h) in reverse.The system controls acceleration andbraking in difficult off-road environments,which allows you to focus on steering. SeeTrail Control (page 222).
Trail Control Performance:
•Manages wheel slip to maximizetraction.
•Removes the need for you to use bothfeet when driving in off-road situations.
•Provides braking to maximize tractionin descents.
•Gives you confidence in difficultenvironments.
Using Trail One Pedal Drive
Trail one pedal drive coordinatespropulsive and braking torque through yourapplication of the accelerator pedal tosimulate a two footed driving technique.
324
2023 Bronco (TG1) Canada/United States of America, enUSA, Edition date: 202208, DOMDriving Hints
Page 367 of 642
For longer, trouble-free operation, keep thetop of the battery clean and dry and thebattery cables tightly fastened to thebattery terminals. If any corrosion ispresent on the battery or terminals, removethe cables from the terminals and cleanwith a wire brush. You can neutralize theacid with a solution of baking soda andwater.
We recommend that you disconnect thenegative battery cable terminal from thebattery if you plan to store your vehicle foran extended period.
Note:If you only disconnect the negativebattery cable terminal, make sure it isisolated or placed away from the batteryterminal to avoid unintended connection orarcing.
If you disconnect or replace the batteryand your vehicle has an automatictransmission, it must relearn its adaptivestrategy. Because of this, the transmissionmay shift firmly when first driven. This isnormal operation while the transmissionfully updates its operation to optimumshift feel.
Removing the Battery
1.Apply the parking brake and switch theignition off.
2.Switch all electrical equipment off, forexample lights and radio.
3.Wait a minimum of two minutes beforedisconnecting the battery.
Note:The engine management system hasa power hold function and remains poweredfor a period of time after you switch theignition off. This is to allow diagnostic andadaptive tables to be stored. Disconnectingthe battery without waiting can causedamage not covered by the vehicleWarranty.
4.Disconnect and isolate the negativebattery cable terminal.
5.Disconnect and isolate the positivebattery cable terminal.
6.Remove the battery securing clamp.
7.Remove the battery.
If you disconnect or replace the vehiclebattery, you must reset the followingfeatures:
•Window bounce-back. See WindowBounce-Back (page 114).
•Clock Settings.
•Pre-set radio stations.
Replacing the Battery
Note:Before reconnecting the battery,make sure the ignition remains switched off.
You must replace the battery with one ofexactly the same specification.
To install, reverse the removal procedure.
Note:Make sure that you correctly installthe battery terminal covers, battery coverand battery cable terminals.
RESETTING THE BATTERYSENSOR
When you install a new battery, reset thebattery sensor by doing the following:
1.Switch the ignition on, and leave theengine off.
Note:Complete Steps 2 and 3 within 10seconds.
2.Flash the high beam headlamps fivetimes, ending with the high beams off.
3.Press and release the brake pedal threetimes.
The battery warning lamp flashes threetimes to confirm that the reset issuccessful.
363
2023 Bronco (TG1) Canada/United States of America, enUSA, Edition date: 202208, DOMMaintenance
Page 430 of 642

CLEANING VINYL
WARNING: On vehicles equippedwith seat-mounted airbags, do not usechemical solvents or strong detergents.Such products could contaminate theside airbag system and affectperformance of the side airbag in a crash.
We recommend that you only clean vinylsurfaces in the following way:
1.Remove dust and loose dirt with avacuum cleaner.
2.Wipe the surface with a soft, dampcloth and a mild soap and watersolution. Dry the area with a clean, softcloth.
3.For additional information andassistance, we recommend that youcontact an authorized dealer.
CLEANING CARPETS AND FLOORMATS
We recommend that you only clean yourcarpets in the following way:
1.Remove dust and loose dirt with avacuum cleaner.
2.Wipe the surface with a soft, dampcloth and a mild soap and watersolution. Dry the area with a clean, softcloth.
3.For additional information andassistance, we recommend that youcontact an authorized dealer.
For heavy stains, spot clean the area. If aring forms on the fabric, clean the entirearea immediately, but do not over-saturateor the ring could set.
We recommend that you only clean yourfloor mats in the following way:
1.Remove dust and loose dirt with avacuum cleaner.
2.Wash rubber floor mats using mildsoap and lukewarm or cold water.
3.Completely dry the floor mat beforeplacing them back in your vehicle.
Cleaning Rubber Floors
1.Remove the floor mats prior to washingout. See Floor Mats (page 327).
Note:Prior to washing out, remove largedebris to prevent clogging the drain.
2.Turn active drain plugs in eachpassenger compartmentcounterclockwise to open.
3.Wash out debris using a standardgarden style hose.
Note:Use caution to not spray seats,console, door interior, electrical connections,instrument cluster display and underside ofthe instrument panel on both driver andpassenger sides.
4.Wipe out remaining water or debrisfrom the floor.
5.Install active drain plugs and turnclockwise to close.
6.Reinstall floor mats.
CLEANING SEATBELTS
WARNING: Do not use cleaningsolvents, bleach or dye on the vehicle'sseatbelts, as these actions may weakenthe belt webbing.
1.Wipe the surface with a soft, dampcloth and a mild soap and watersolution. Dry the area with a clean, softcloth.
426
2023 Bronco (TG1) Canada/United States of America, enUSA, Edition date: 202208, DOMVehicle Care
Page 458 of 642
WARNING: To help prevent yourvehicle from moving when changing awheel, shift the transmission into park(P), set the parking brake and use anappropriate block or wheel chock tosecure the wheel diagonally opposite tothe wheel being changed. For example,when changing the front left wheel,place an appropriate block or wheelchock on the right rear wheel.
WARNING: Only use the jackprovided as original equipment with yourvehicle.
WARNING: Only use the specifiedjacking points. If you use any otherlocations you could damage vehiclecomponents, such as brake lines.
WARNING: Never place anythingbetween the vehicle jack and yourvehicle.
WARNING: Never place anythingbetween the vehicle jack and the ground.
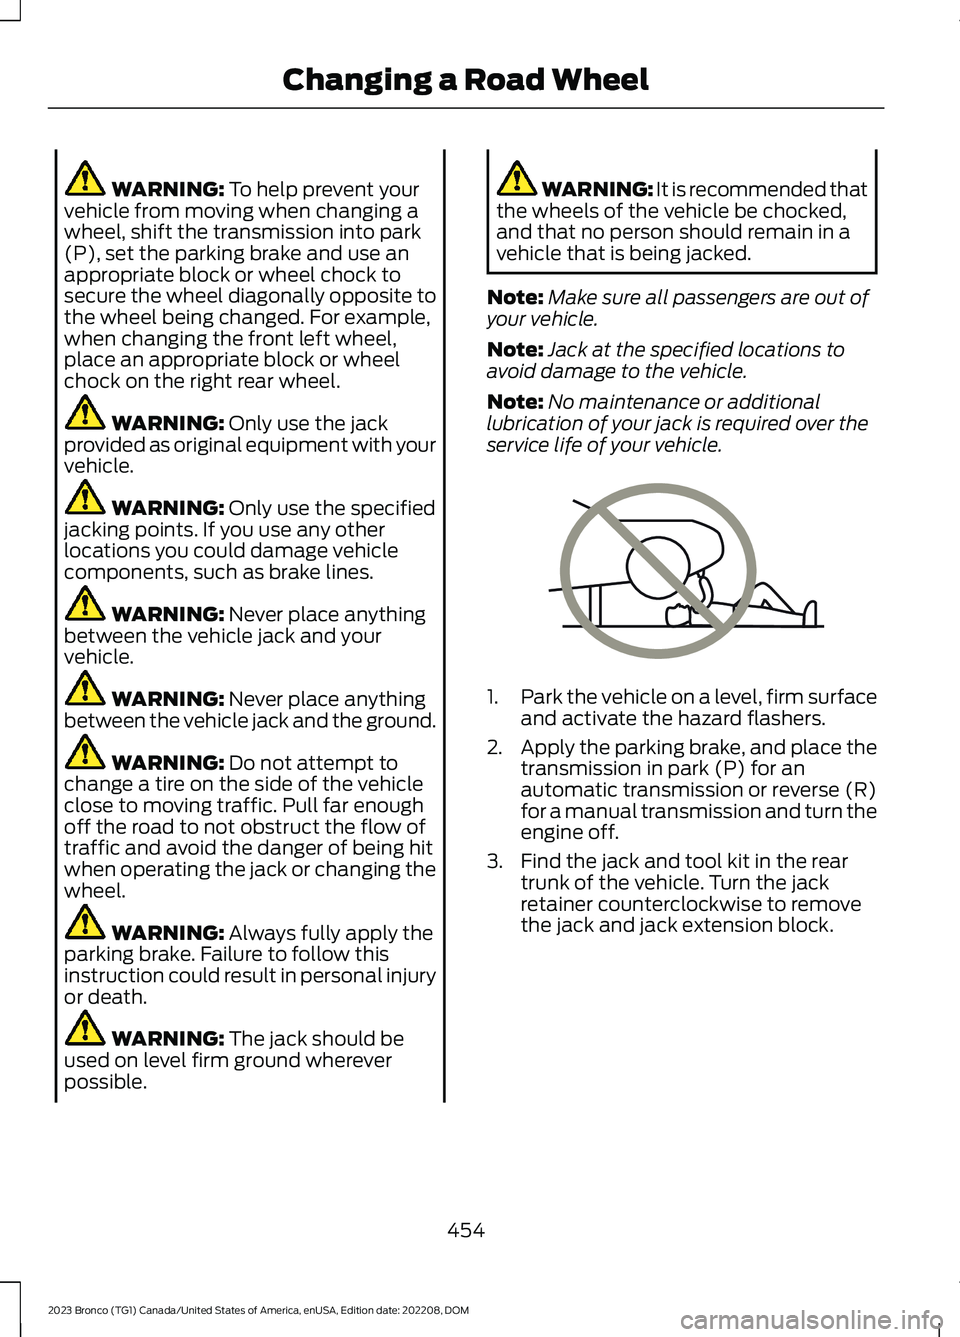
WARNING: Do not attempt tochange a tire on the side of the vehicleclose to moving traffic. Pull far enoughoff the road to not obstruct the flow oftraffic and avoid the danger of being hitwhen operating the jack or changing thewheel.
WARNING: Always fully apply theparking brake. Failure to follow thisinstruction could result in personal injuryor death.
WARNING: The jack should beused on level firm ground whereverpossible.
WARNING: It is recommended thatthe wheels of the vehicle be chocked,and that no person should remain in avehicle that is being jacked.
Note:Make sure all passengers are out ofyour vehicle.
Note:Jack at the specified locations toavoid damage to the vehicle.
Note:No maintenance or additionallubrication of your jack is required over theservice life of your vehicle.
1.Park the vehicle on a level, firm surfaceand activate the hazard flashers.
2.Apply the parking brake, and place thetransmission in park (P) for anautomatic transmission or reverse (R)for a manual transmission and turn theengine off.
3.Find the jack and tool kit in the reartrunk of the vehicle. Turn the jackretainer counterclockwise to removethe jack and jack extension block.
454
2023 Bronco (TG1) Canada/United States of America, enUSA, Edition date: 202208, DOMChanging a Road WheelE166722
Page 459 of 642
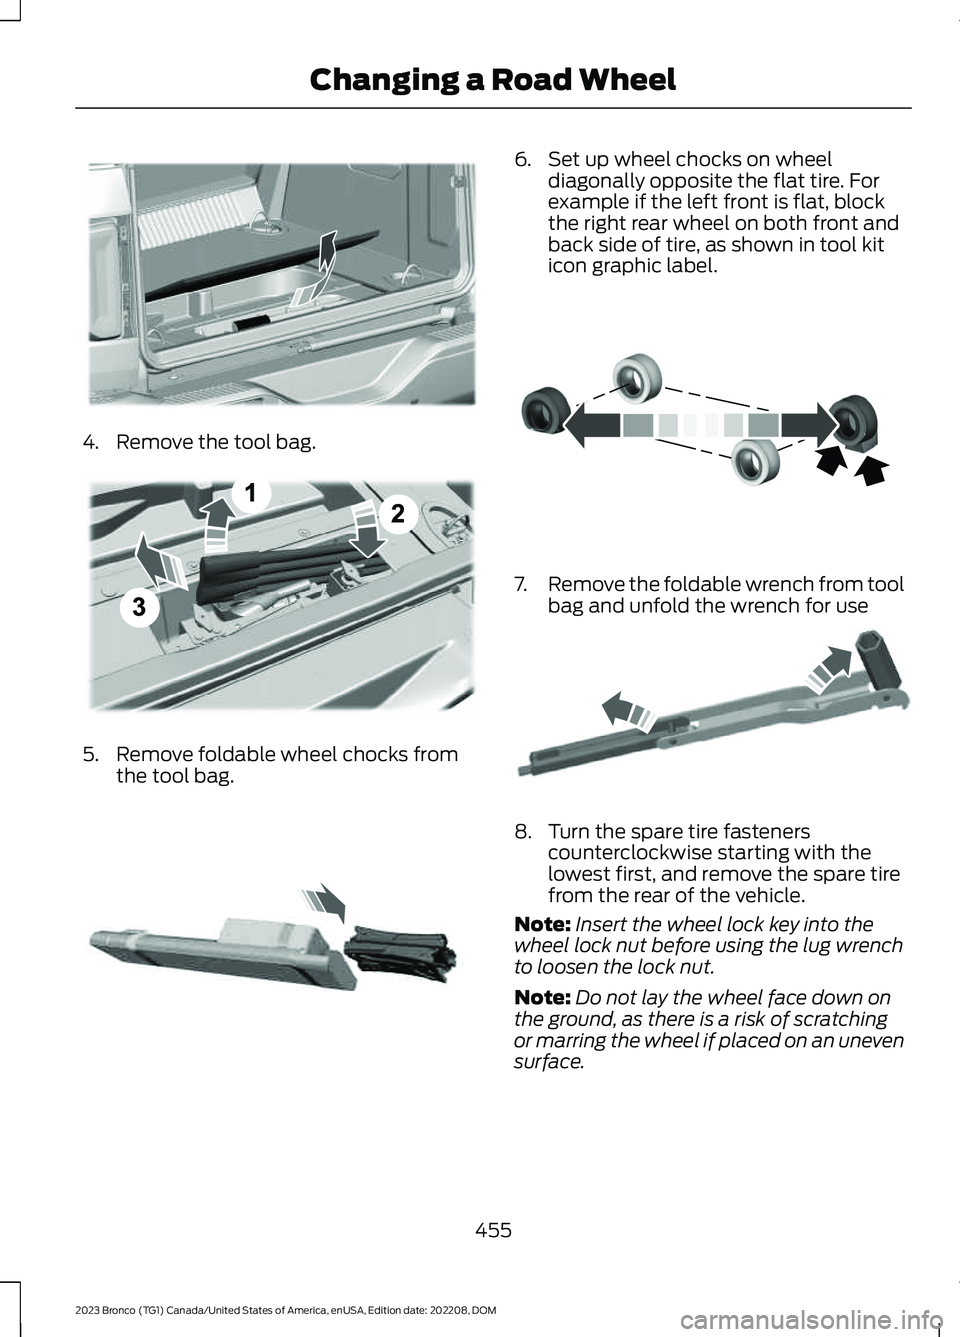
4.Remove the tool bag.
5.Remove foldable wheel chocks fromthe tool bag.
6.Set up wheel chocks on wheeldiagonally opposite the flat tire. Forexample if the left front is flat, blockthe right rear wheel on both front andback side of tire, as shown in tool kiticon graphic label.
7.Remove the foldable wrench from toolbag and unfold the wrench for use
8.Turn the spare tire fastenerscounterclockwise starting with thelowest first, and remove the spare tirefrom the rear of the vehicle.
Note:Insert the wheel lock key into thewheel lock nut before using the lug wrenchto loosen the lock nut.
Note:Do not lay the wheel face down onthe ground, as there is a risk of scratchingor marring the wheel if placed on an unevensurface.
455
2023 Bronco (TG1) Canada/United States of America, enUSA, Edition date: 202208, DOMChanging a Road WheelE324358 E343390 E370176 E370177 E181744