ignition switch FORD E-450 2019 Owners Manual
[x] Cancel search | Manufacturer: FORD, Model Year: 2019, Model line: E-450, Model: FORD E-450 2019Pages: 329, PDF Size: 6.24 MB
Page 5 of 329
Information Displays
General Information
.....................................58
Information Messages ................................
63
Climate Control
Manual Climate Control .............................
66
Hints on Controlling the Interior Climate ........................................................................\
...
67
Rear Passenger Climate Controls ...........
68
Seats
Sitting in the Correct Position ..................
69
Head Restraints .............................................
69
Manual Seats ..................................................
70
Power Seats ......................................................
71
Auxiliary Power Points
Auxiliary Power Points .................................
72
Starting and Stopping the Engine
General Information .....................................
74
Ignition Switch ................................................
74
Starting a Gasoline Engine ........................
74
Engine Block Heater .....................................
76
Fuel and Refueling
Safety Precautions ........................................
77
Fuel Quality - E85 ..........................................
77
Fuel Quality - Gasoline ................................
79
Running Out of Fuel .....................................
79
Refueling ..........................................................
80
Fuel Consumption .........................................
81
Engine Emission Control
Emission Law ..................................................
83
Catalytic Converter ......................................
84Transmission
Automatic Transmission
............................
87
Rear Axle
Limited Slip Differential .............................
90
Brakes
General Information ......................................
91
Hints on Driving With Anti-Lock Brakes ........................................................................\
...
91
Parking Brake ..................................................
92
Traction Control
Principle of Operation .................................
93
Using Traction Control ................................
93
Parking Aids
Rear View Camera ........................................
94
Cruise Control
Principle of Operation .................................
96
Using Cruise Control ....................................
96
Driving Aids
Steering ............................................................
98
Load Carrying
Load Limit ........................................................
99
Towing
Towing a Trailer ............................................
104
Recommended Towing Weights ...........
105
Essential Towing Checks .........................
108
Towing the Vehicle on Four Wheels ......
115
Driving Hints
Breaking-In ......................................................
116
Reduced Engine Performance .................
116
Economical Driving ......................................
116
2
E-Series (TE4) Canada/United States of America, enUSA, Edition date: 201804, Second-Printing Table of Contents
Page 19 of 329
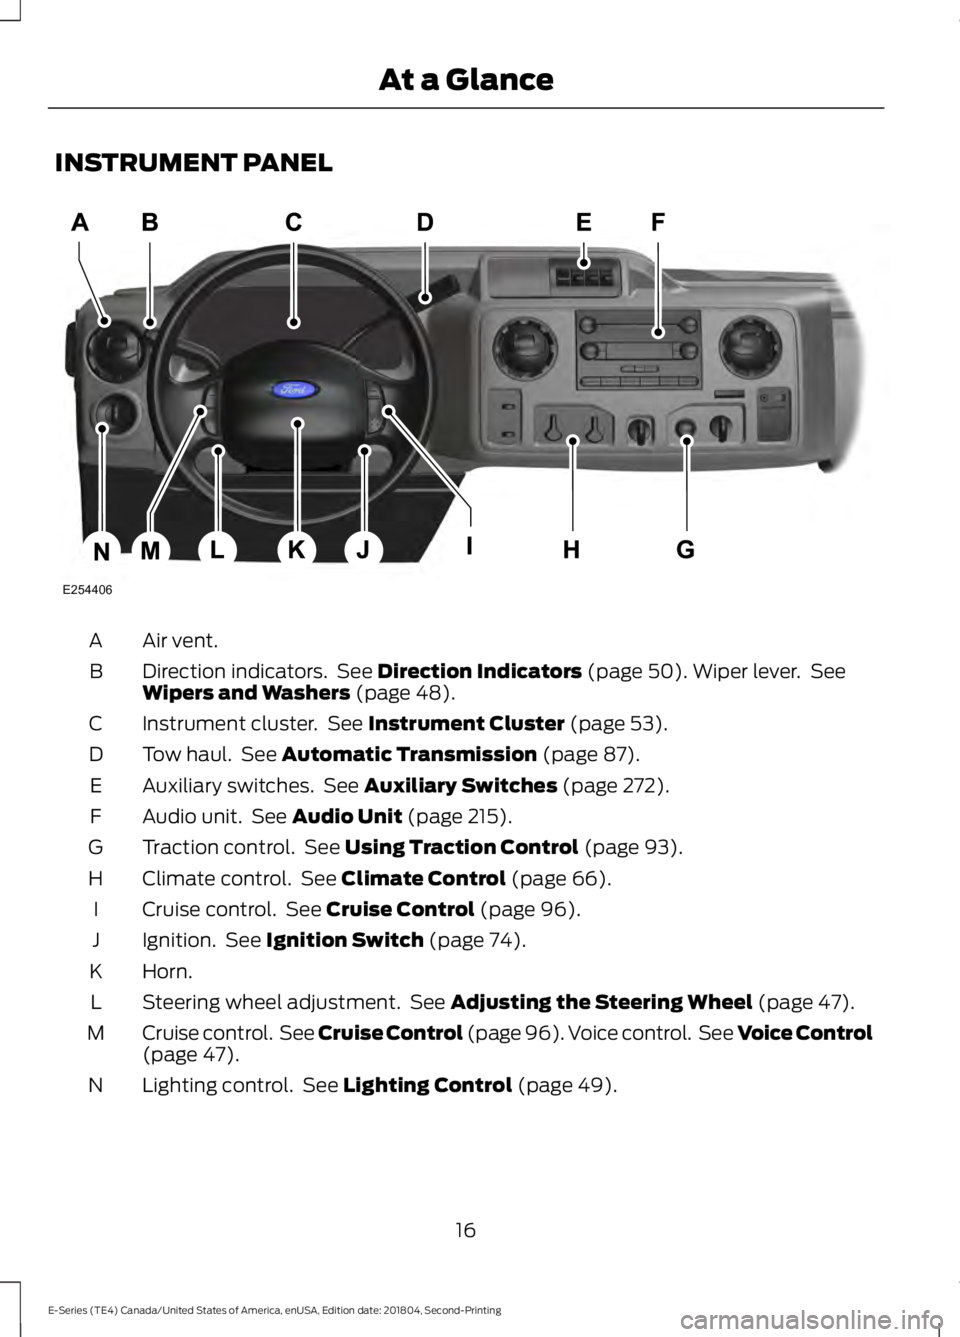
INSTRUMENT PANEL
Air vent.
A
Direction indicators. See Direction Indicators (page 50). Wiper lever. See
Wipers and Washers (page 48).
B
Instrument cluster. See
Instrument Cluster (page 53).
C
Tow haul. See
Automatic Transmission (page 87).
D
Auxiliary switches. See
Auxiliary Switches (page 272).
E
Audio unit. See
Audio Unit (page 215).
F
Traction control. See
Using Traction Control (page 93).
G
Climate control. See
Climate Control (page 66).
H
Cruise control. See
Cruise Control (page 96).
I
Ignition. See
Ignition Switch (page 74).
J
Horn.
K
Steering wheel adjustment. See
Adjusting the Steering Wheel (page 47).
L
Cruise control. See Cruise Control (page 96). Voice control. See Voice Control
(page
47).
M
Lighting control. See
Lighting Control (page 49).
N
16
E-Series (TE4) Canada/United States of America, enUSA, Edition date: 201804, Second-Printing At a GlanceE254406
Page 33 of 329
How to Disengage the Automatic
Locking Mode
Unbuckle the combination lap and
shoulder belt and allow it to retract
completely to disengage the automatic
locking mode and activate the vehicle
sensitive (emergency) locking mode.
SEATBELT HEIGHT
ADJUSTMENT
WARNING: Position the safety belt
height adjuster so that the belt rests
across the middle of your shoulder.
Failure to adjust the safety belt properly
could reduce the effectiveness of the
safety belt and increase the risk of injury
in a crash.
Adjust the height of the shoulder belt so
the belt rests across the middle of your
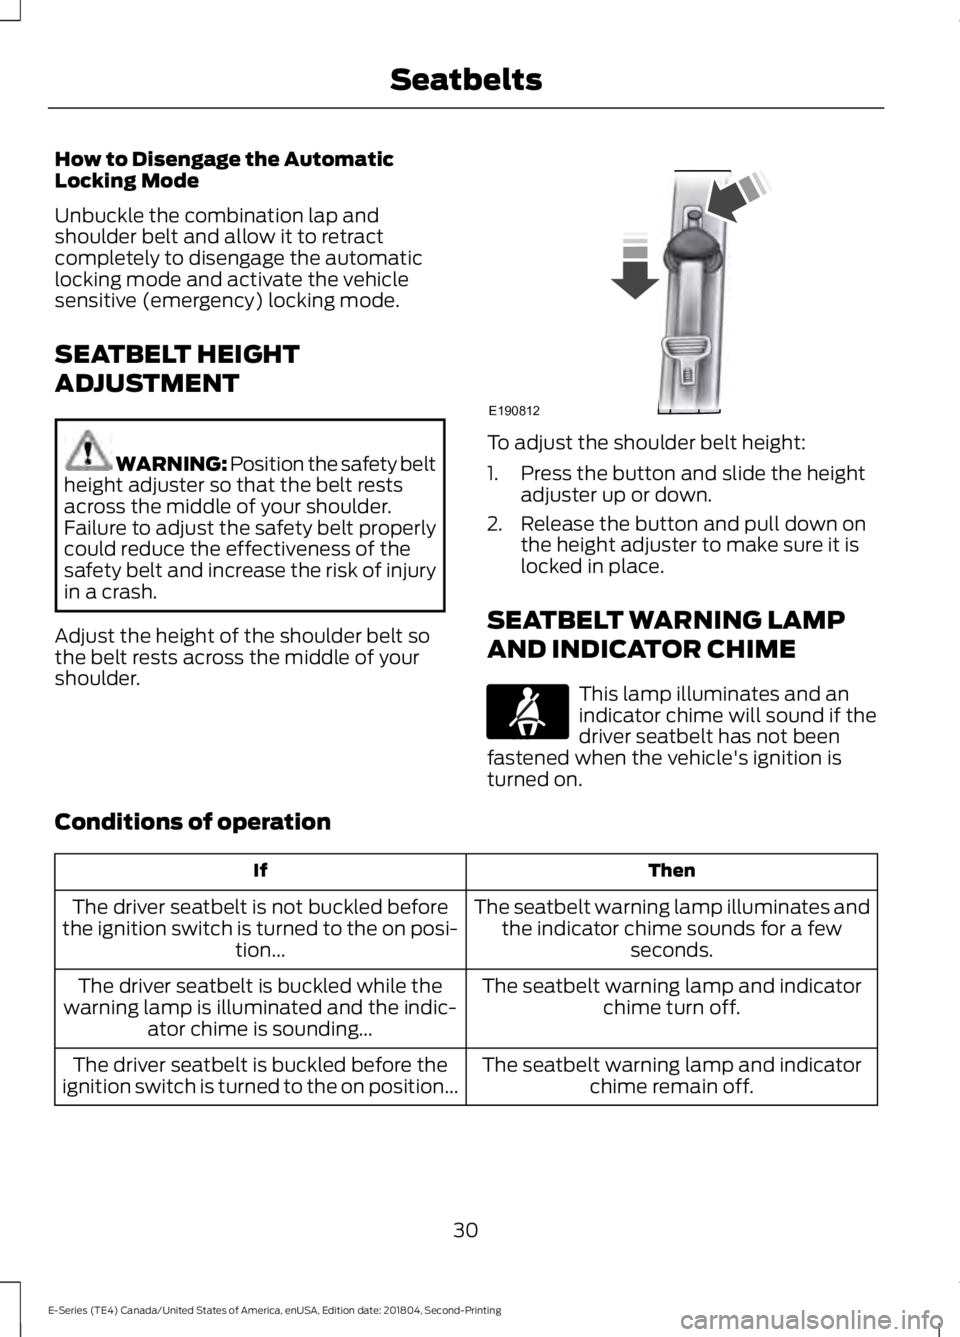
shoulder. To adjust the shoulder belt height:
1. Press the button and slide the height
adjuster up or down.
2. Release the button and pull down on the height adjuster to make sure it is
locked in place.
SEATBELT WARNING LAMP
AND INDICATOR CHIME This lamp illuminates and an
indicator chime will sound if the
driver seatbelt has not been
fastened when the vehicle's ignition is
turned on.
Conditions of operation Then
If
The seatbelt warning lamp illuminates andthe indicator chime sounds for a few seconds.
The driver seatbelt is not buckled before
the ignition switch is turned to the on posi- tion...
The seatbelt warning lamp and indicatorchime turn off.
The driver seatbelt is buckled while the
warning lamp is illuminated and the indic- ator chime is sounding...
The seatbelt warning lamp and indicatorchime remain off.
The driver seatbelt is buckled before the
ignition switch is turned to the on position...
30
E-Series (TE4) Canada/United States of America, enUSA, Edition date: 201804, Second-Printing SeatbeltsE190812 E71880
Page 36 of 329

properly restrained or are otherwise out of
position at the time of airbag deployment.
Thus, it is extremely important that
occupants be properly restrained as far
away from the airbag module as possible
while maintaining vehicle control.
Routine maintenance of the airbags is not
required.
DRIVER AND PASSENGER
AIRBAGS
WARNING: Do not place your arms
on the airbag cover or through the
steering wheel. Failure to follow this
instruction could result in personal injury. WARNING: Do not place a
rearward facing child restraint in front of
an active airbag. Failure to follow this
instruction could result in personal injury
or death. The driver and front passenger airbags
deploy during significant frontal and near
frontal crashes.
The driver and passenger front airbag
system consists of:
•
Driver and passenger airbag modules. · Crash sensors and monitoring
system with readiness indicator.
See Crash Sensors and Airbag
Indicator
(page 37).
Passenger Airbag On and Off
Switch
(If Equipped) WARNING:
Your vehicle may have
an airbag deactivation switch. Before
driving, always look at the switch to
make sure it is in the appropriate
position. Failure to put the switch in the
proper position can increase the risk of
serious injury or death in a crash.
Note: The passenger airbag on and off
switch may be on vehicles with no rear
seats.
Switching the Passenger Airbag Off WARNING:
If the light does not
illuminate when the passenger airbag
switch is off and you switch the ignition
on, have the passenger airbag switch
serviced immediately by a qualified
technician. WARNING:
To avoid switching on
the airbag, always remove the ignition
key with the switch in the off position. WARNING:
NEVER use a rearward
facing child restraint on a seat protected
by an ACTIVE AIRBAG in front of it,
DEATH or SERIOUS INJURY to the CHILD
can occur.
33
E-Series (TE4) Canada/United States of America, enUSA, Edition date: 201804, Second-Printing Supplementary Restraints SystemE151127 E67017
Page 37 of 329
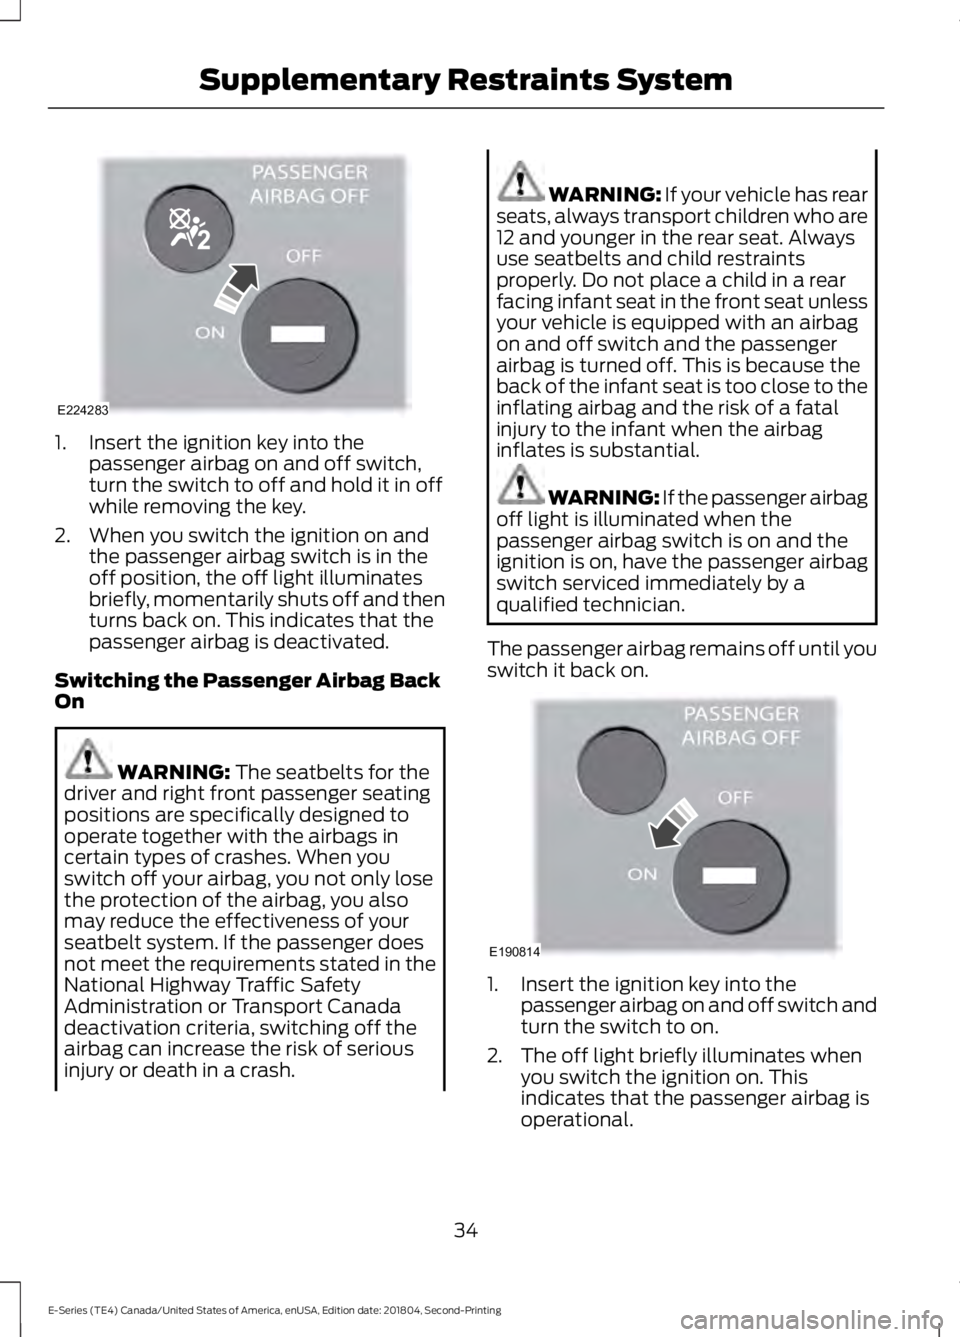
1. Insert the ignition key into the
passenger airbag on and off switch,
turn the switch to off and hold it in off
while removing the key.
2. When you switch the ignition on and the passenger airbag switch is in the
off position, the off light illuminates
briefly, momentarily shuts off and then
turns back on. This indicates that the
passenger airbag is deactivated.
Switching the Passenger Airbag Back
On WARNING: The seatbelts for the
driver and right front passenger seating
positions are specifically designed to
operate together with the airbags in
certain types of crashes. When you
switch off your airbag, you not only lose
the protection of the airbag, you also
may reduce the effectiveness of your
seatbelt system. If the passenger does
not meet the requirements stated in the
National Highway Traffic Safety
Administration or Transport Canada
deactivation criteria, switching off the
airbag can increase the risk of serious
injury or death in a crash. WARNING:
If your vehicle has rear
seats, always transport children who are
12 and younger in the rear seat. Always
use seatbelts and child restraints
properly. Do not place a child in a rear
facing infant seat in the front seat unless
your vehicle is equipped with an airbag
on and off switch and the passenger
airbag is turned off. This is because the
back of the infant seat is too close to the
inflating airbag and the risk of a fatal
injury to the infant when the airbag
inflates is substantial. WARNING: If the passenger airbag
off light is illuminated when the
passenger airbag switch is on and the
ignition is on, have the passenger airbag
switch serviced immediately by a
qualified technician.
The passenger airbag remains off until you
switch it back on. 1. Insert the ignition key into the
passenger airbag on and off switch and
turn the switch to on.
2. The off light briefly illuminates when you switch the ignition on. This
indicates that the passenger airbag is
operational.
34
E-Series (TE4) Canada/United States of America, enUSA, Edition date: 201804, Second-Printing Supplementary Restraints SystemE224283 E190814
Page 43 of 329
Reprogramming the Remote
Control
You must have all remote controls readily
accessible before beginning this
procedure. Any remote control that is not
present during the programming procedure
will no longer operate your vehicle.
Note:
You can program a maximum of four
coded keys to your vehicle.
Note: Do not apply the brake pedal during
this procedure.
1. Switch the ignition from off to on 8 times within 10 seconds, finishing in the
on position. The doors lock then unlock
to confirm that programming has
started.
2. Press any button on the remote control
that you want to program within 20
seconds. The doors lock then unlock
to confirm that programming was
successful.
3. Repeat step 2 to program each additional remote control.
4. After you have programmed all remote
controls, switch the ignition off.
5. The doors lock then unlock to confirm that programming is complete.
Changing the Remote Control
Battery
The remote control uses one coin-type
three-volt lithium battery CR2032 or
equivalent. Make sure that you dispose of
old batteries in an
environmentally friendly way.
Seek advice from your local authority
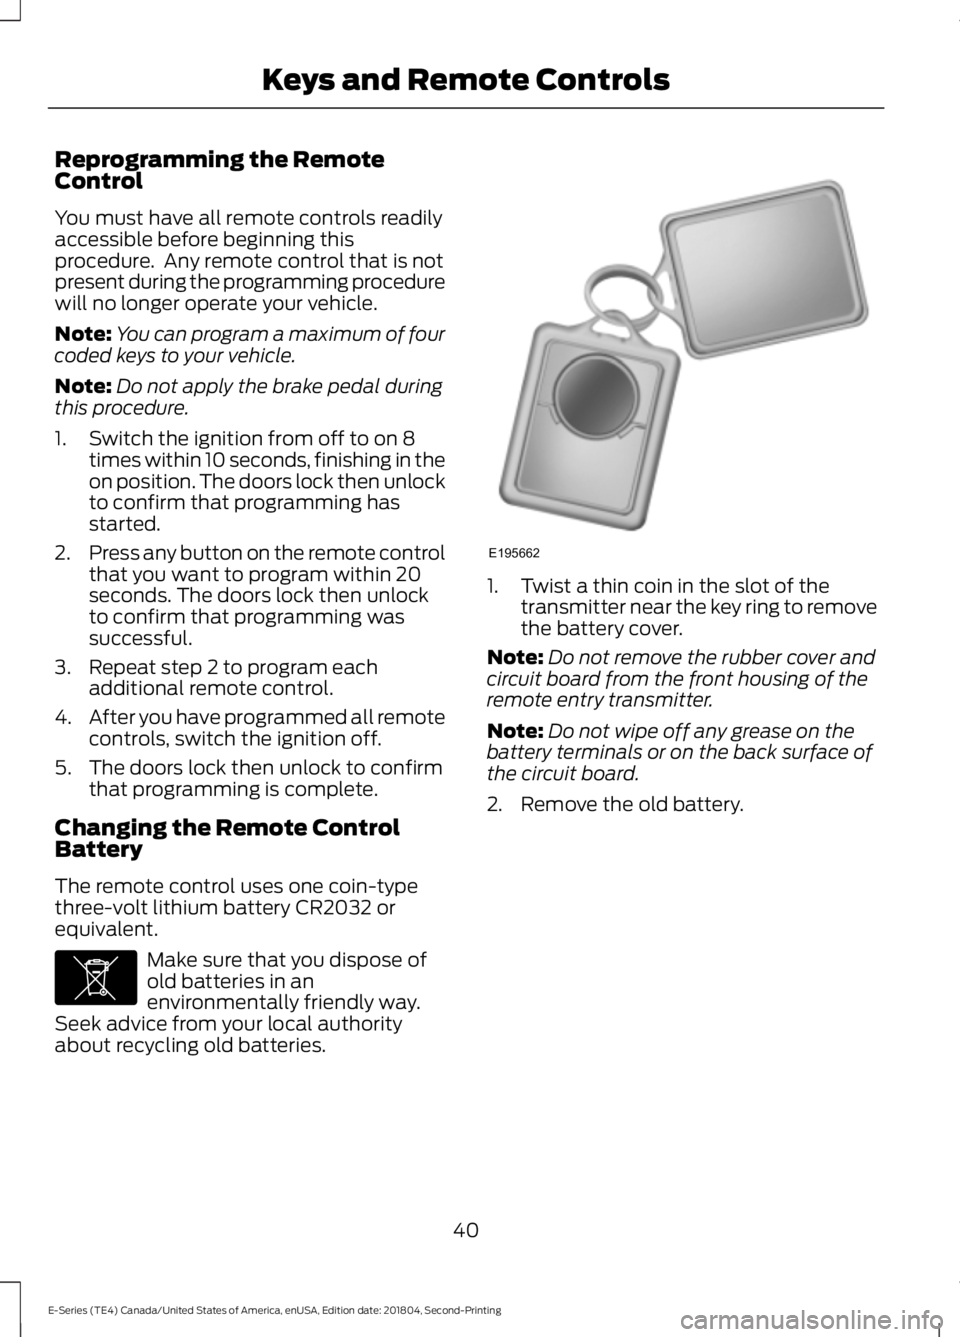
about recycling old batteries. 1. Twist a thin coin in the slot of the
transmitter near the key ring to remove
the battery cover.
Note: Do not remove the rubber cover and
circuit board from the front housing of the
remote entry transmitter.
Note: Do not wipe off any grease on the
battery terminals or on the back surface of
the circuit board.
2. Remove the old battery.
40
E-Series (TE4) Canada/United States of America, enUSA, Edition date: 201804, Second-Printing Keys and Remote ControlsE107998 E195662
Page 44 of 329
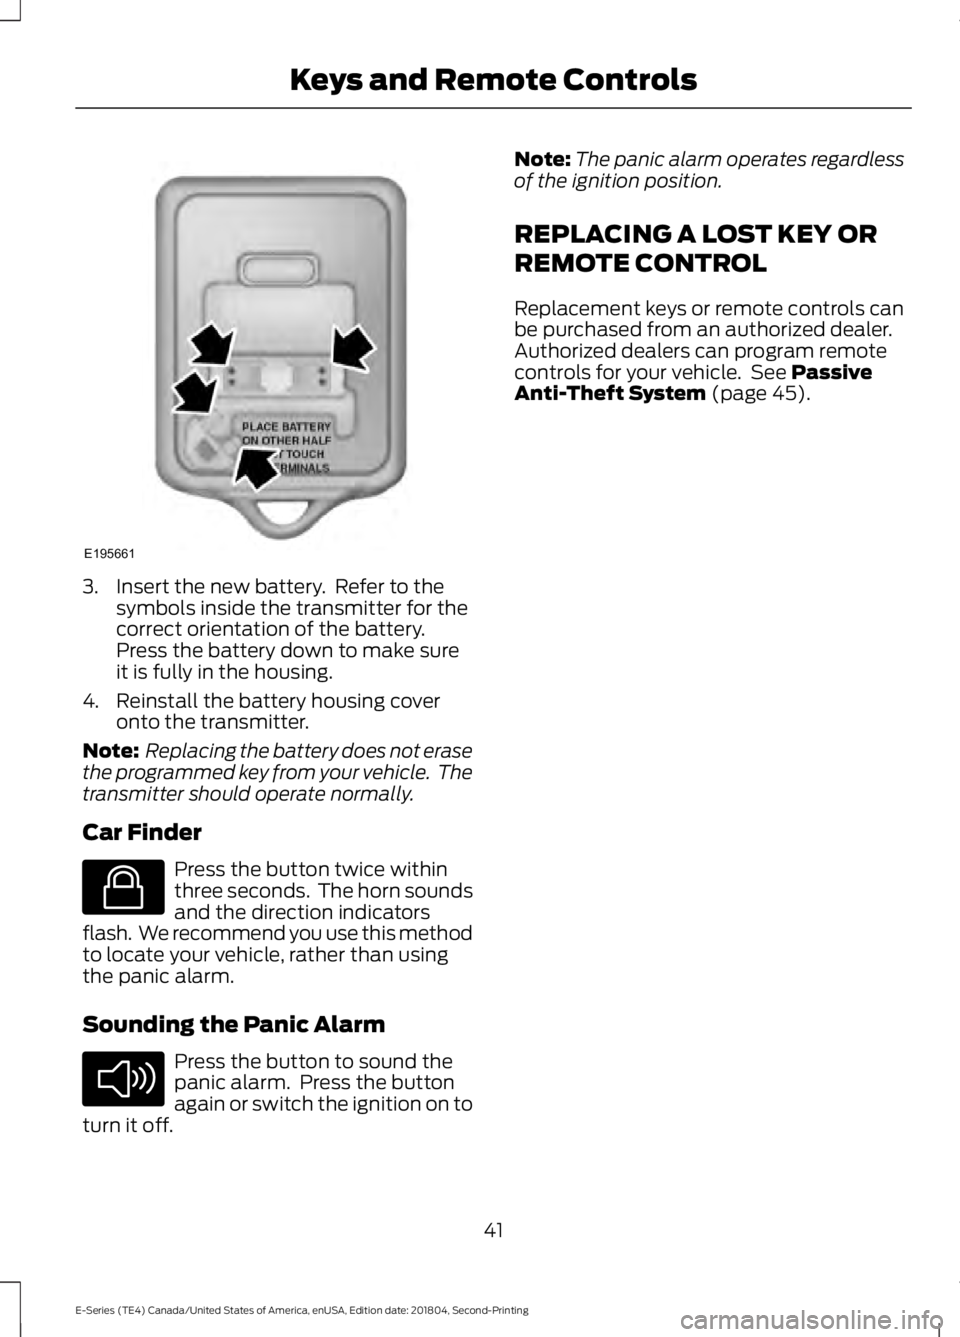
3. Insert the new battery. Refer to the
symbols inside the transmitter for the
correct orientation of the battery.
Press the battery down to make sure
it is fully in the housing.
4. Reinstall the battery housing cover onto the transmitter.
Note: Replacing the battery does not erase
the programmed key from your vehicle. The
transmitter should operate normally.
Car Finder Press the button twice within
three seconds. The horn sounds
and the direction indicators
flash. We recommend you use this method
to locate your vehicle, rather than using
the panic alarm.
Sounding the Panic Alarm Press the button to sound the
panic alarm. Press the button
again or switch the ignition on to
turn it off. Note:
The panic alarm operates regardless
of the ignition position.
REPLACING A LOST KEY OR
REMOTE CONTROL
Replacement keys or remote controls can
be purchased from an authorized dealer.
Authorized dealers can program remote
controls for your vehicle. See Passive
Anti-Theft System (page 45).
41
E-Series (TE4) Canada/United States of America, enUSA, Edition date: 201804, Second-Printing Keys and Remote ControlsE195661 E138623 E138624
Page 46 of 329
Autolock Feature
The autolock feature locks all the doors
when:
•
All doors are closed.
• The ignition is on.
• You shift into any gear putting your
vehicle in motion.
• The ignition is on, all the doors are
closed and your vehicle has been in
motion at a speed greater than 12 mph
(20 km/h).
Autounlock Feature
The autounlock feature unlocks all the
doors when:
• Your vehicle comes to a stop and you
switch the ignition off or to accessory.
• You open the driver door within 10
minutes of switching the ignition off or
to accessory.
Note: If you electronically lock your vehicle
after you switch the ignition off with the
driver door closed, the doors do not
autounlock.
Enabling or Disabling Autolock and
Autounlock
You can enable or disable the autolock and
autounlock features independently of each
other.
To enable or disable autolock, do the
following:
1. Switch the ignition on.
2. Press the power door unlock control three times.
3. Switch the ignition off.
4. Press the power door unlock control three times.
5. Switch the ignition on. The horn sounds
indicating your vehicle is in
programming mode. 6. Press the power door unlock control
and within five seconds, press the
power door lock control. The horn
sounds once if disabled or twice if
enabled.
7. Switch the ignition off. The horn sounds
indicating programming is complete.
Note: You can also switch this feature on
or off using the information display. See
Information Displays
(page 58).
To enable or disable autounlock, do the
following:
1. Switch the ignition on.
2. Press the power door unlock control three times.
3. Switch the ignition off.
4. Press the power door unlock control three times.
5. Switch the ignition on. The horn sounds
indicating your vehicle is in
programming mode.
6. Press the power door lock control and within five seconds, press the power
door unlock control. The horn sounds
once if disabled or twice if enabled.
7. Switch the ignition off. The horn sounds
indicating programming is complete.
Note: You can also switch this feature on
or off using the information display. See
Information Displays
(page 58).
Illuminated Entry
The interior lamps and some exterior
lamps illuminate when you unlock the
doors with the remote control.
The lamps turn off if:
• The ignition is on.
• You press the remote control lock
button.
• 25 seconds have elapsed.
43
E-Series (TE4) Canada/United States of America, enUSA, Edition date: 201804, Second-Printing Doors and Locks
Page 48 of 329
PASSIVE ANTI-THEFT
SYSTEM (IF EQUIPPED)
Note: The system is not compatible with
non-Ford aftermarket remote start systems.
Use of these systems may result in vehicle
starting problems and a loss of security
protection.
Note: Metallic objects, electronic devices
or a second coded key on the same key
chain may cause vehicle starting problems
if they are too close to the key when starting
the engine. Prevent these objects from
touching the coded key while starting the
engine. Switch the ignition off, move all
objects on the key chain away from the
coded key and restart the engine if a
problem occurs.
Note: Do not leave a duplicate coded key
in the vehicle. Always take your keys and
lock all doors when leaving the vehicle.
SecuriLock®
The system is an engine immobilization
system. It is designed to help prevent the
engine from being started unless a
correctly coded key for your vehicle is used.
Using an incorrectly coded key may
prevent the engine from starting. A
message may appear in the information
display.
If you are unable to start the engine with a
correctly coded key, a malfunction has
happened and a message may appear in
the information display.
Automatic Arming
The engine immobilization system arms
immediately after you switch the ignition
off. Automatic Disarming
Switching the ignition on with a correctly
coded key disarms the engine
immobilization system.
Replacement Keys
The integrated keyhead transmitter
functions as a programmed ignition key
that operates all the locks and starts your
vehicle, as well as a remote control.
If your keys are lost or stolen and you do
not have a spare correctly coded key, you
will need to have your vehicle towed to an
authorized dealer. You need to erase the
coded keys from your vehicle and program
new coded keys.
Store an extra correctly coded key away
from the vehicle in a safe place to help
prevent any inconveniences. See an
authorized dealer to purchase additional
spare or replacement keys.
Note:
Your vehicle comes with two
integrated keyhead transmitters.
Programming a Spare Integrated
Keyhead Transmitter
You can program your own integrated
keyhead transmitter or standard
SecuriLock coded keys to your vehicle. This
procedure will program both the engine
immobilizer keycode and the remote entry
portion of the remote control to your
vehicle
Only use integrated keyhead transmitters
or standard SecuriLock keys.
You must have two previously
programmed correctly coded keys and the
new unprogrammed key readily accessible.
See an authorized dealer to have the spare
key programmed if two previously
programmed correctly coded keys are not
available.
Read and understand the entire procedure
before you begin.
45
E-Series (TE4) Canada/United States of America, enUSA, Edition date: 201804, Second-Printing Security
Page 49 of 329
1.
Insert the first previously programmed
correctly coded key into the ignition.
2. Switch the ignition from off to on. Keep
the ignition on for at least three
seconds, but no more than 10 seconds.
3. Switch the ignition off and remove the
first correctly coded key from the
ignition.
4. After three seconds but within 10 seconds of switching the ignition off,
insert the second previously correctly
coded key into the ignition.
5. Switch the ignition from off to on. Keep
the ignition on for at least three
seconds, but no more than 10 seconds.
6. Switch the ignition off and remove the
second previously programmed
correctly coded key from the ignition.
7. After three seconds but within 10 seconds of switching the ignition off
and removing the previously
programmed correctly coded key,
insert the new unprogrammed key into
the ignition.
8. Switch the ignition from off to on. Keep
the ignition on for at least six seconds.
9. Remove the newly programmed correctly coded key from the ignition.
If the key has been successfully
programmed it will start the engine and
operate the remote entry system (if the
new key is an integrated keyhead
transmitter).
If the key was not successfully
programmed, wait 10 seconds and repeat
Steps 1 through 8. If you are still
unsuccessful, take your vehicle to an
authorized dealer.
Note: You can program a maximum of eight
coded keys to your vehicle. All eight can be
integrated keyhead transmitters.
46
E-Series (TE4) Canada/United States of America, enUSA, Edition date: 201804, Second-Printing Security