ignition FORD E SERIES 2021 Owner's Guide
[x] Cancel search | Manufacturer: FORD, Model Year: 2021, Model line: E SERIES, Model: FORD E SERIES 2021Pages: 301, PDF Size: 3.05 MB
Page 102 of 301
developed sufficient torque to prevent your
vehicle from rolling down the slope. This
is an advantage when pulling away on a
slope, for example from a car park ramp,
traffic lights or when reversing uphill into
a parking space.
The system activates on any slope that
causes your vehicle to roll.
Note:
There is no warning light to indicate
the system is either on or off.
Using Hill Start Assist
1. Press the brake pedal to bring your vehicle to a complete standstill. Keep
the brake pedal pressed and shift into
first gear when facing uphill or reverse
(R) when facing downhill.
2. If the sensors detect that your vehicle is on a slope, the system activates
automatically.
3. When you remove your foot from the brake pedal, your vehicle remains on
the slope without rolling away for
about two to three seconds. This hold
time automatically extends if you are
in the process of driving off.
4. Drive off in the normal manner. The system releases the brakes
automatically.
Note: When you remove your foot from the
brake pedal and press the pedal again when
the system is active, you will experience
significantly reduced brake pedal travel. This
is normal.
Switching the System On and Off
Vehicles with Manual Transmission
You can switch this feature on or off in the
information display. The system
remembers the last setting when you start
your vehicle. Vehicles with Automatic Transmission
You cannot turn the system on or off.
When you switch the ignition on, the
system automatically turns on.
99
E-Series (TE4) Canada/United States of America, enUSA, Edition date: 201910, First-Printing Brakes
Page 103 of 301
PRINCIPLE OF OPERATION
The traction control system helps avoid
drive wheel spin and loss of traction.
If your vehicle begins to slide, the system
applies the brakes to individual wheels
and, when needed, reduces engine power
at the same time. If the wheels spin when
accelerating on slippery or loose surfaces,
the system reduces engine power in order
to increase traction.
USING TRACTION CONTROL
WARNING: The traction control
light illuminates steadily if a failure is
detected in the system. Verify that the
traction control system was not
manually disabled using the switch. If
the traction control light is still
illuminating steadily, have the system
serviced by an authorized dealer
immediately. Operating your vehicle with
traction control disabled could lead to
an increased risk of loss of vehicle
control, vehicle rollover, personal injury
and death.
The system automatically turns on each
time you switch the ignition on.
If your vehicle is stuck in mud or snow,
switching traction control off may be
beneficial as this allows the wheels to spin.
Switching the System Off The switch for the traction
control system is located on the
instrument panel.
When you switch the system off, an
illuminated icon appears on the instrument
cluster.
Use the switch again to return the traction
control system to normal operation. System Indicator Lights and
Messages The traction control light
temporarily illuminates on
engine start-up and flashes
when a driving condition activates the
system. The traction control off light
temporarily illuminates on
engine start-up and stays on:
• When you switch the traction control
system off.
• If a problem occurs in the system.
100
E-Series (TE4) Canada/United States of America, enUSA, Edition date: 201910, First-Printing Traction Control
(If Equipped)E194301 E138639 E194301
Page 106 of 301
WHAT IS CRUISE CONTROL
Cruise control lets you maintain a set
speed without keeping your foot on the
accelerator pedal. You can use cruise
control when your vehicle speed is greater
than 20 mph (30 km/h).
SWITCHING CRUISE CONTROL
ON AND OFF WARNING:
Do not use cruise
control on winding roads, in heavy traffic
or when the road surface is slippery. This
could result in loss of vehicle control,
serious injury or death.
The cruise controls are on the steering
wheel. See
Cruise Control (page 48).
Switching Cruise Control On Press the button.
Switching Cruise Control Off Press the button when the
system is in standby mode.
The system also turns off when you switch
the ignition off.
Note: The set speed erases when you
switch the system off.
SETTING THE CRUISE
CONTROL SPEED WARNING:
When you are going
downhill, your vehicle speed could
increase above the set speed. The
system does not apply the brakes. Drive to the speed you prefer. Press either button to set the
current speed.
Take your foot off the accelerator pedal.
Note: The indicator changes color in the
information display.
Changing the Set Speed Press and release the button to
increase the set speed in small
increments.
Press and hold the button to accelerate.
Release the button when you reach your
preferred speed. Press and release the button to
decrease the set speed in small
increments.
Press and hold the button to decelerate.
Release the button when you reach your
preferred speed.
Note: If you accelerate by pressing the
accelerator pedal, the set speed does not
change. When you release the accelerator
pedal, your vehicle returns to the speed that
you previously set.
CANCELING THE SET SPEED Press the button, or tap the
brake pedal to cancel the set
speed.
Note: The system remembers the set
speed.
Note: The system cancels if the vehicle
speed drops below 10 mph (16 km/h) under
the set speed when driving uphill.
103
E-Series (TE4) Canada/United States of America, enUSA, Edition date: 201910, First-Printing Cruise Control
(If Equipped)E265296 E265297 E265298
Page 111 of 301
Note:
Tow/Haul mode increases the time
gaps and allows more distance for braking.
Switching Adaptive Cruise Control
Off Press and release the button
when the system is in standby
mode, or switch the ignition off.
Note: You erase the set speed and gap
setting when you switch the system off.
Detection Issues WARNING: On rare occasions,
detection issues can occur due to the
road infrastructures, for example bridges,
tunnels and safety barriers. In these
cases, the system may brake late or
unexpectedly. At all times, you are
responsible for controlling your vehicle,
supervising the system and intervening,
if required. WARNING:
If the system
malfunctions, have your vehicle checked
as soon as possible.
The radar sensor has a limited field of view.
It may not detect vehicles at all or detect
a vehicle later than expected in some
situations. The lead vehicle graphic does
not illuminate if the system does not
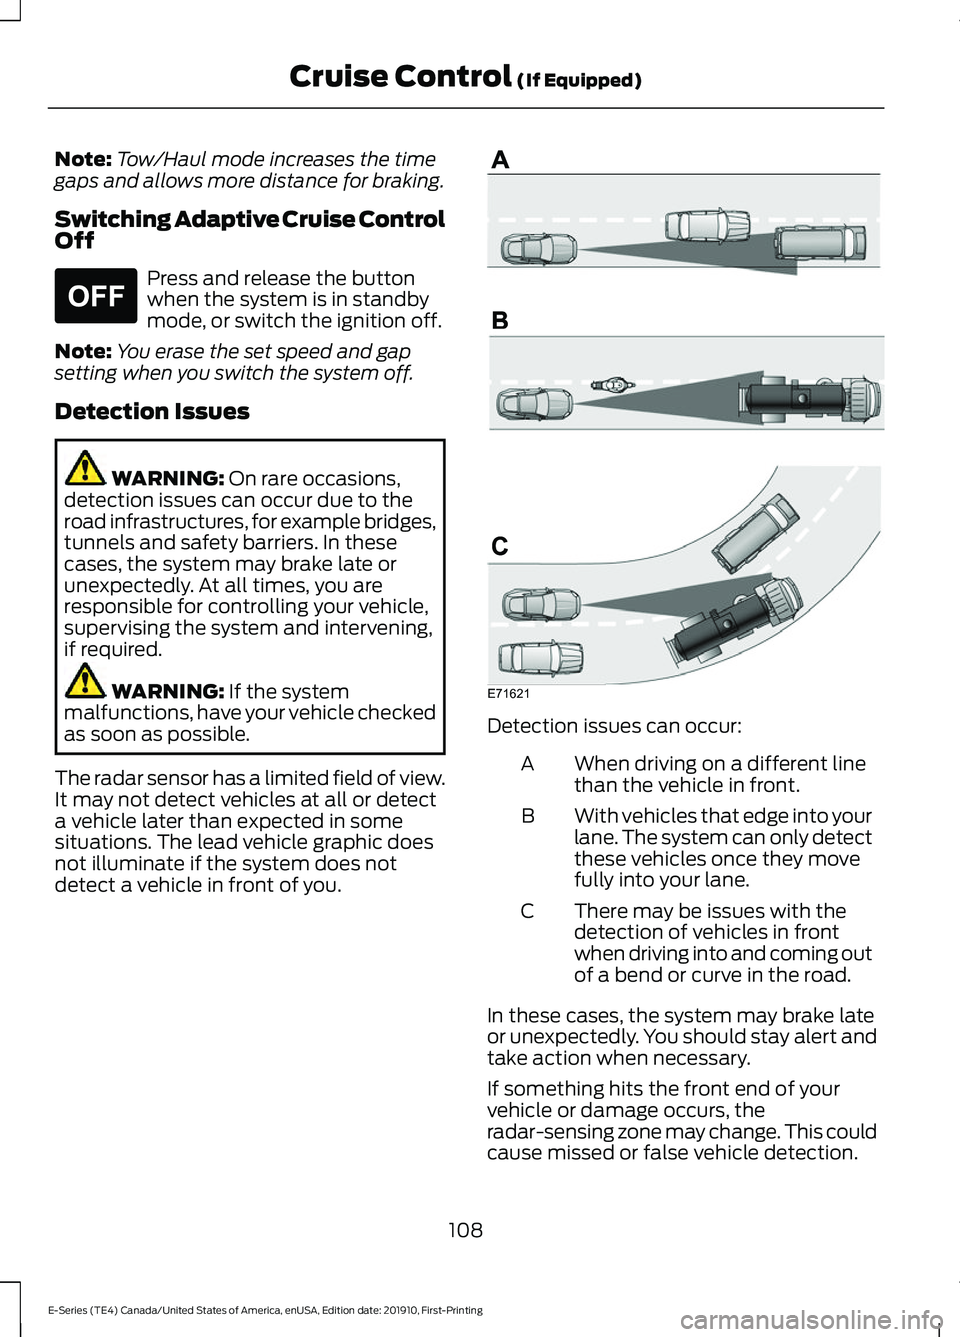
detect a vehicle in front of you. Detection issues can occur:
When driving on a different line
than the vehicle in front.
A
With vehicles that edge into your
lane. The system can only detect
these vehicles once they move
fully into your lane.
B
There may be issues with the
detection of vehicles in front
when driving into and coming out
of a bend or curve in the road.
C
In these cases, the system may brake late
or unexpectedly. You should stay alert and
take action when necessary.
If something hits the front end of your
vehicle or damage occurs, the
radar-sensing zone may change. This could
cause missed or false vehicle detection.
108
E-Series (TE4) Canada/United States of America, enUSA, Edition date: 201910, First-Printing Cruise Control
(If Equipped)E265297 E71621
Page 115 of 301
System Warnings
Note:
The system will not issue warnings
below approximately 40 mph (64 km/h).
The warning system is in two stages. At
first the system issues a temporary warning
that you need to take a rest. This message
will only appear for a short time. If the
system detects further reduction in driving
alertness, another warning may be issued
which will remain in the information display
for a longer time. Press OK on the steering
wheel control to clear the warning. When
active the system will run automatically in
the background and only issue a warning
if required.
Resetting the System
You can reset the system by either:
• Switching the ignition off and on.
• Stopping the vehicle and then opening
and closing the driver ’s door.
LANE KEEPING SYSTEM
(IF
EQUIPPED) WARNING: You are responsible for
controlling your vehicle at all times. The
system is designed to be an aid and does
not relieve you of your responsibility to
drive with due care and attention. Failure
to follow this instruction could result in
the loss of control of your vehicle,
personal injury or death. WARNING:
Always drive with due
care and attention when using and
operating the controls and features on
your vehicle. WARNING:
In cold and severe
weather conditions the system may not
function. Rain, snow and spray can all
limit sensor performance. WARNING:
The system will not
operate if the sensor cannot track the
road lane markings. WARNING:
The sensor may
incorrectly track lane markings as other
structures or objects. This can result in
a false or missed warning. WARNING:
Large contrasts in
outside lighting can limit sensor
performance. WARNING:
The system may not
operate properly if the sensor is blocked.
Keep the windshield free from
obstruction. WARNING:
If damage occurs in the
immediate area surrounding the sensor,
have your vehicle checked as soon as
possible. WARNING:
The system may not
correctly operate if your vehicle is fitted
with a suspension kit not approved by
us.
Note: The system works as long as the
camera can detect one lane marking at a
speed above
40 mph (64 km/h).
Note: The system may not function with a
blocked camera, or if the windshield is
damaged or dirty.
112
E-Series (TE4) Canada/United States of America, enUSA, Edition date: 201910, First-Printing Driving Aids
Page 120 of 301
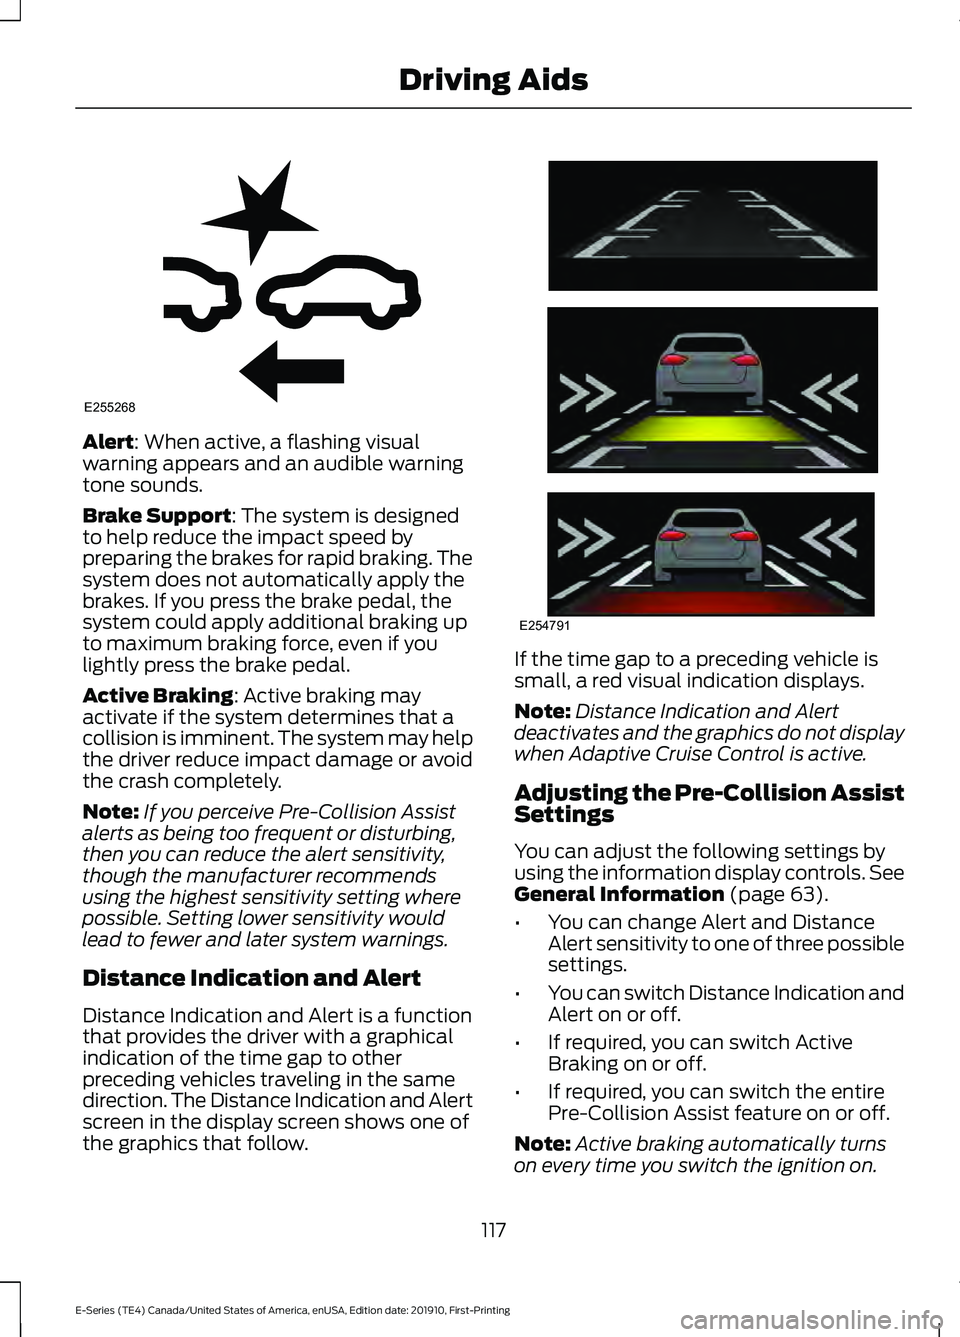
Alert: When active, a flashing visual
warning appears and an audible warning
tone sounds.
Brake Support
: The system is designed
to help reduce the impact speed by
preparing the brakes for rapid braking. The
system does not automatically apply the
brakes. If you press the brake pedal, the
system could apply additional braking up
to maximum braking force, even if you
lightly press the brake pedal.
Active Braking
: Active braking may
activate if the system determines that a
collision is imminent. The system may help
the driver reduce impact damage or avoid
the crash completely.
Note: If you perceive Pre-Collision Assist
alerts as being too frequent or disturbing,
then you can reduce the alert sensitivity,
though the manufacturer recommends
using the highest sensitivity setting where
possible. Setting lower sensitivity would
lead to fewer and later system warnings.
Distance Indication and Alert
Distance Indication and Alert is a function
that provides the driver with a graphical
indication of the time gap to other
preceding vehicles traveling in the same
direction. The Distance Indication and Alert
screen in the display screen shows one of
the graphics that follow. If the time gap to a preceding vehicle is
small, a red visual indication displays.
Note:
Distance Indication and Alert
deactivates and the graphics do not display
when Adaptive Cruise Control is active.
Adjusting the Pre-Collision Assist
Settings
You can adjust the following settings by
using the information display controls.
See
General Information (page 63).
• You can change Alert and Distance
Alert sensitivity to one of three possible
settings.
• You can switch Distance Indication and
Alert on or off.
• If required, you can switch Active
Braking on or off.
• If required, you can switch the entire
Pre-Collision Assist feature on or off.
Note: Active braking automatically turns
on every time you switch the ignition on.
117
E-Series (TE4) Canada/United States of America, enUSA, Edition date: 201910, First-Printing Driving AidsE255268 E254791
Page 135 of 301
Integrated Trailer Brake Controller (If
Equipped)
WARNING: Use the integrated
trailer brake controller to properly adjust
the trailer brakes and check all
connections before towing a trailer.
Failure to follow this instruction could
result in the loss of control of your
vehicle, personal injury or death.
Note: The Ford trailer brake controller has
been verified to be compatible with trailers
having electric-actuated drum brakes (one
to four axles) and electric-over-hydraulic
brakes. It will not activate hydraulic
surge-style trailer brakes. It is the
responsibility of the customer to ensure that
the trailer brakes are adjusted appropriately,
functioning normally and all electric
connections are properly made. When used properly, the trailer brake
controller assists in smooth and effective
trailer braking by powering the trailer
’s
electric or electric-over-hydraulic brakes
with a proportional output based on the
towing vehicle ’s brake pressure.
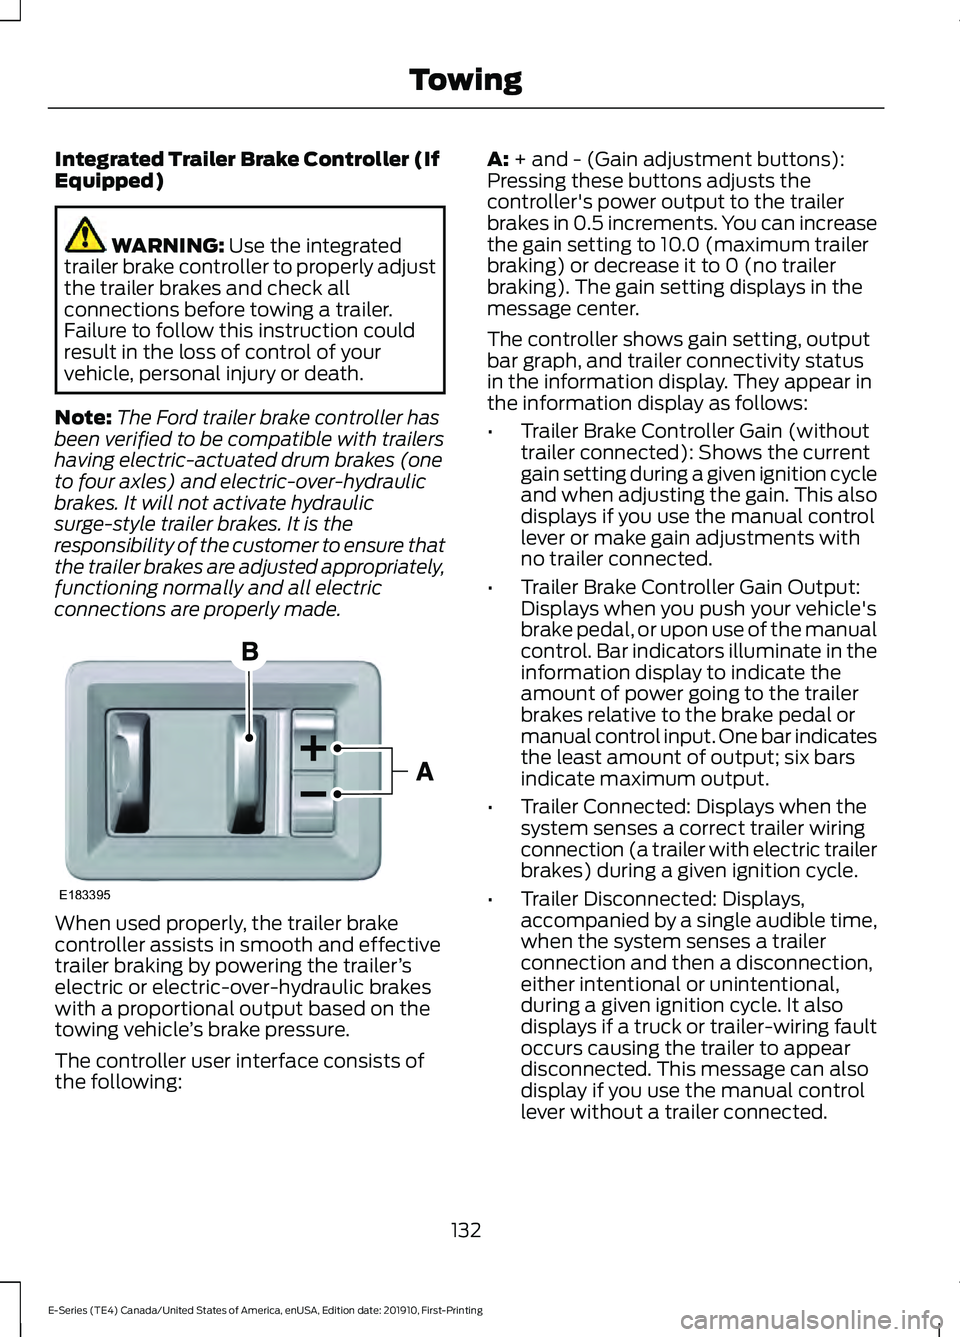
The controller user interface consists of
the following: A:
+ and - (Gain adjustment buttons):
Pressing these buttons adjusts the
controller's power output to the trailer
brakes in 0.5 increments. You can increase
the gain setting to 10.0 (maximum trailer
braking) or decrease it to 0 (no trailer
braking). The gain setting displays in the
message center.
The controller shows gain setting, output
bar graph, and trailer connectivity status
in the information display. They appear in
the information display as follows:
• Trailer Brake Controller Gain (without
trailer connected): Shows the current
gain setting during a given ignition cycle
and when adjusting the gain. This also
displays if you use the manual control
lever or make gain adjustments with
no trailer connected.
• Trailer Brake Controller Gain Output:
Displays when you push your vehicle's
brake pedal, or upon use of the manual
control. Bar indicators illuminate in the
information display to indicate the
amount of power going to the trailer
brakes relative to the brake pedal or
manual control input. One bar indicates
the least amount of output; six bars
indicate maximum output.
• Trailer Connected: Displays when the
system senses a correct trailer wiring
connection (a trailer with electric trailer
brakes) during a given ignition cycle.
• Trailer Disconnected: Displays,
accompanied by a single audible time,
when the system senses a trailer
connection and then a disconnection,
either intentional or unintentional,
during a given ignition cycle. It also
displays if a truck or trailer-wiring fault
occurs causing the trailer to appear
disconnected. This message can also
display if you use the manual control
lever without a trailer connected.
132
E-Series (TE4) Canada/United States of America, enUSA, Edition date: 201910, First-Printing TowingE183395
Page 137 of 301
wiring. Consult your trailer dealer for
assistance. This can be a short to ground
(such as a chaffed wire), short to voltage
(such as a pulled pin on trailer emergency
breakaway battery) or the trailer brakes
may be drawing too much current.
Points to Remember
Note:
Do not attempt removal of the trailer
brake controller without consulting the
Workshop Manual. Damage to the unit may
result.
• Adjust gain setting before using the
trailer brake controller for the first time.
• Adjust gain setting, using the procedure
above, whenever road, weather and
trailer or vehicle loading conditions
change from when the gain was initially
set.
• Only use the manual control lever for
proper adjustment of the gain during
trailer setup. Misuse, such as
application during trailer sway, could
cause instability of trailer or tow
vehicle.
• Avoid towing in adverse weather
conditions. The trailer brake controller
does not provide anti-lock control of
the trailer wheels. Trailer wheels can
lock up on slippery surfaces, resulting
in reduced stability of trailer and tow
vehicle.
• The trailer brake controller is equipped
with a feature that reduces output at
vehicle speeds below 11 mph (18 km/h)
so trailer and vehicle braking is not jerky
or harsh. This feature is only available
when applying the brakes using your
vehicle's brake pedal, not the
controller.
• The controller interacts with the brake
control system and powertrain control
system of your vehicle to provide the
best performance on different road
conditions. •
Your vehicle's brake system and the
trailer brake system work
independently of each other. Changing
the gain setting on the controller does
not affect the operation of your
vehicle's brakes whether you attach a
trailer or not.
• When you switch the engine off, the
controller output is disabled and the
display and module shut down. The
controller module and display turn on
when you switch the ignition on.
• The trailer brake controller is only a
factory-installed or dealer-installed
item. Ford is not responsible for
warranty or performance of the
controller due to misuse or customer
installation.
Trailer Lamps WARNING: Never connect any
trailer lamp wiring to the vehicle's tail
lamp wiring; this may damage the
electrical system resulting in fire. Contact
your authorized dealer as soon as
possible for assistance in proper trailer
tow wiring installation. Additional
electrical equipment may be required.
Trailer lamps are required on most towed
vehicles. Make sure all running lights, brake
lights, direction indicators and hazard lights
are working.
Before Towing a Trailer
Practice turning, stopping and backing up
to get the feel of your vehicle-trailer
combination before starting on a trip.
When turning, make wider turns so the
trailer wheels clear curbs and other
obstacles.
134
E-Series (TE4) Canada/United States of America, enUSA, Edition date: 201910, First-Printing Towing
Page 139 of 301
Exceeding these limits may allow water to
enter vehicle components:
•
Causing internal damage to the
components.
• Affecting driveability, emissions and
reliability.
Replace the rear axle lubricant anytime
the rear axle has been submerged in water.
Water may have contaminated the rear
axle lubricant, which is not normally
checked or changed unless a leak is
suspected or other axle repair is required.
TOWING THE VEHICLE ON
FOUR WHEELS
Emergency Towing WARNING: If your vehicle has a
steering wheel lock make sure the
ignition is in the accessory or on position
when being towed.
You can flat-tow (all wheels on the
ground, regardless of the powertrain or
transmission configuration) your disabled
vehicle (without access to wheel dollies
or vehicle transport trailer) under the
following conditions:
• Your vehicle is facing forward so you
tow it in a forward direction.
• You shift into Neutral (N). If you cannot
shift into Neutral (N), you may need to
override the transmission. See
Transmission
(page 92).
• Maximum speed is 35 mph (56 km/h).
• Maximum distance is
50 mi (80 km).
Recreational Towing
Note: Put your climate control system in
recirculated air mode to prevent exhaust
fumes from entering the vehicle. See
Climate Control
(page 70). Follow these guidelines if you have a need
for recreational (RV) towing. An example
of recreational towing would be towing
your vehicle behind a motorhome. These
guidelines are to make sure you do not
damage the transmission during towing.
Do not tow your vehicle with any wheels
on the ground, as vehicle or transmission
damage may occur. It is recommended to
tow your vehicle with all four wheels off
the ground, for example when using a
vehicle transport trailer. Otherwise, you
cannot tow your vehicle.
136
E-Series (TE4) Canada/United States of America, enUSA, Edition date: 201910, First-Printing Towing
Page 161 of 301
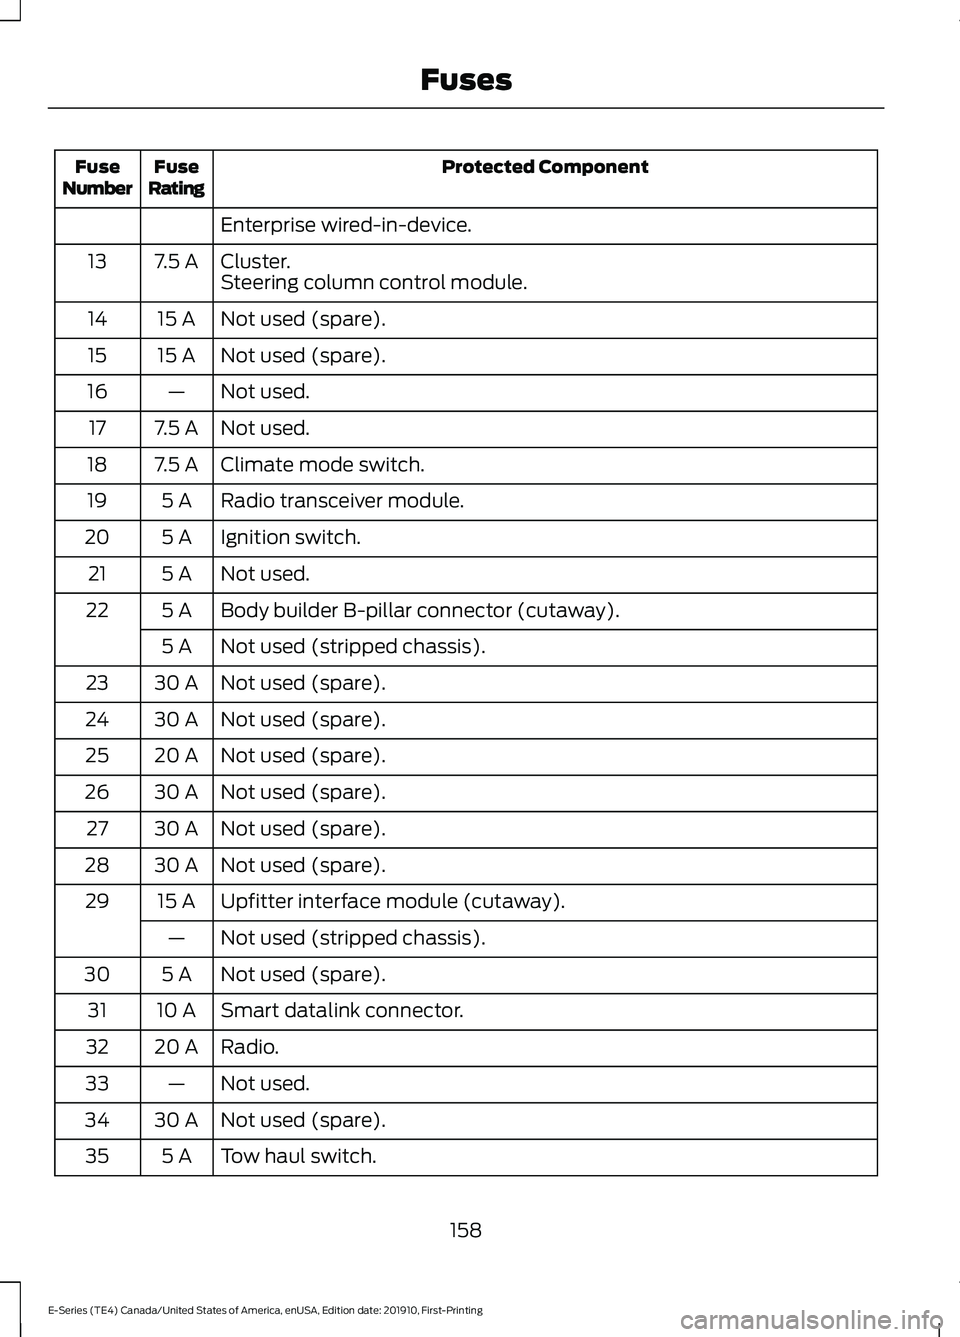
Protected Component
Fuse
Rating
Fuse
Number
Enterprise wired-in-device.
Cluster.
7.5 A
13
Steering column control module.
Not used (spare).
15 A
14
Not used (spare).
15 A
15
Not used.
—
16
Not used.
7.5 A
17
Climate mode switch.
7.5 A
18
Radio transceiver module.
5 A
19
Ignition switch.
5 A
20
Not used.
5 A
21
Body builder B-pillar connector (cutaway).
5 A
22
Not used (stripped chassis).
5 A
Not used (spare).
30 A
23
Not used (spare).
30 A
24
Not used (spare).
20 A
25
Not used (spare).
30 A
26
Not used (spare).
30 A
27
Not used (spare).
30 A
28
Upfitter interface module (cutaway).
15 A
29
Not used (stripped chassis).
—
Not used (spare).
5 A
30
Smart datalink connector.
10 A
31
Radio.
20 A
32
Not used.
—
33
Not used (spare).
30 A
34
Tow haul switch.
5 A
35
158
E-Series (TE4) Canada/United States of America, enUSA, Edition date: 201910, First-Printing Fuses