ECU FORD ESCAPE 2015 3.G Quick Reference Guide
[x] Cancel search | Manufacturer: FORD, Model Year: 2015, Model line: ESCAPE, Model: FORD ESCAPE 2015 3.GPages: 20, PDF Size: 2.45 MB
Page 7 of 20
6
Getting Started with
Your SYNC System
SYNC is a hands-free, voice
recognition system used for
entertainment, information
and communication.
SYNC. Say the Word.
Before You Get Started
1. Set up your owner account at
SyncMyRide.com (U.S.) or
SyncMyRide.ca (Canada).
Register by following the on-screen
instructions. After registering, you can
see what available services you are
eligible for.
2. SYNC uses a wireless connection
called
Bluetooth® to communicate
with your phone. Switch on Bluetooth
mode in your phone’s menu
options. This lets your phone find
SYNC. If you need more details on
setting up your phone with SYNC,
visit SyncMyRide.com (U.S.) or
SyncMyRide.ca (Canada), or your
phone manufacturer’s website.
Pairing Your Phone with SYNC
In order to use many of the features of
SYNC, such as making a phone call or
receiving a text , you must first pair and
connect your phone with SYNC.
To Pair Your Phone for the First Time
1. Make sure that your vehicle is in
park (P), you switch the ignition and
radio on, and your cellular phone is in
the proper mode. See your phone’s
manual, if necessary.
2. Press the phone button. When the
display indicates No Phone Found,
press OK.
3. When Find SYNC appears in the
display, press OK.
Note: If the system prompts you to enter
a PIN on your cellular phone, it does not
support Secure Simple Pairing. To pair,
enter the PIN displayed on the SYNC
touchscreen, then skip Steps 4 and 5.
4. When prompted on your phone’s
display, confirm that the PIN provided
by SYNC matches the PIN displayed
on your cellular phone. 5.
When prompted from SYNC, confirm
that the PIN provided by SYNC
matches the PIN that your cellular
phone displayed.
6. The display indicates when the
pairing is successful.
Note: The system may prompt you
to set your phone as primary or favorite
(the primary phone receives messages
and voicemail); download your phone
book (a requirement to use the full set
of voice commands); and switch on
911 Assist
®.
Tips
• Make sure that you accept the
request from SYNC to access
your phone.
• To pair subsequent phones, please
refer to Pairing Subsequent Phones
in the SYNC chapter of your
Owner’s Manual.
• If you experience pairing problems,
try performing a clean pairing by
deleting your services from SYNC
and deleting the SYNC connection
from your phone, and then repeat
the process.
SYNC®
Page 9 of 20
8
Pairing Your Phone with MyFord Touch
Make sure your vehicle is in park (P), your
ignition and radio are switched on and your
cellular phone is in the proper mode. See
your phone’s manual, if necessary.
1. Touch Add Phone on your touchscreen.
Find SYNC appears on the screen, and
instructs you to begin the pairing process
from your device.
2. Select SYNC and a six-digit PIN appears
on your device. If prompted to enter a
PIN on your device, it does not support
Secure Simple Pairing. To pair, enter the
PIN displayed on the touchscreen, and
then skip the next step.
3. When prompted on your phone’s display,
confirm that the PIN provided by SYNC
matches the PIN displayed on your
cellular phone. The display indicates
when pairing is successful.
SYNC® with MyFord Touch®*
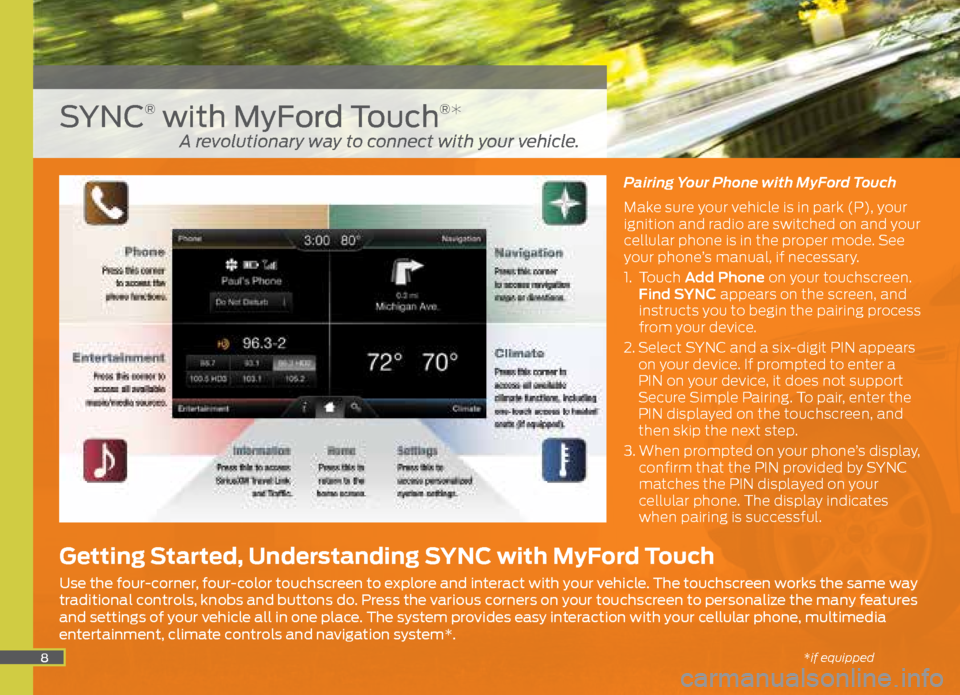
Getting Started, Understanding SYNC with MyFord Touch
Use the four-corner, four-color touchscreen to explore and interact with your vehicle. The touchscreen works the same way
traditional controls, knobs and buttons do. Press the various corners on your touchscreen to personalize the many features
and settings of your vehicle all in one place. The system provides easy interaction with your cellular phone, multimedia
entertainment, climate controls and navigation system*.
A revolutionary way to connect with your vehicle.
*if equipped
Page 10 of 20
9
Phone
Voice-control your phone for hands-
free calling with your phone securely
put away. With SYNC, you won’t even
need to know the phone number.
Just say the name of the person you
want from your contacts.
Your Phone Connects You
with Many Other Features*
• Automatically connect to a
911 Operator in the event of an
accident (you must switch this
feature on prior to the event).
• Transfer calls seamlessly from
SYNC to phone as you get in or
out of your vehicle.
Refer to the SYNC with MyFord Touch
chapter of your Owner’s Manual for
complete details.
Navigation*
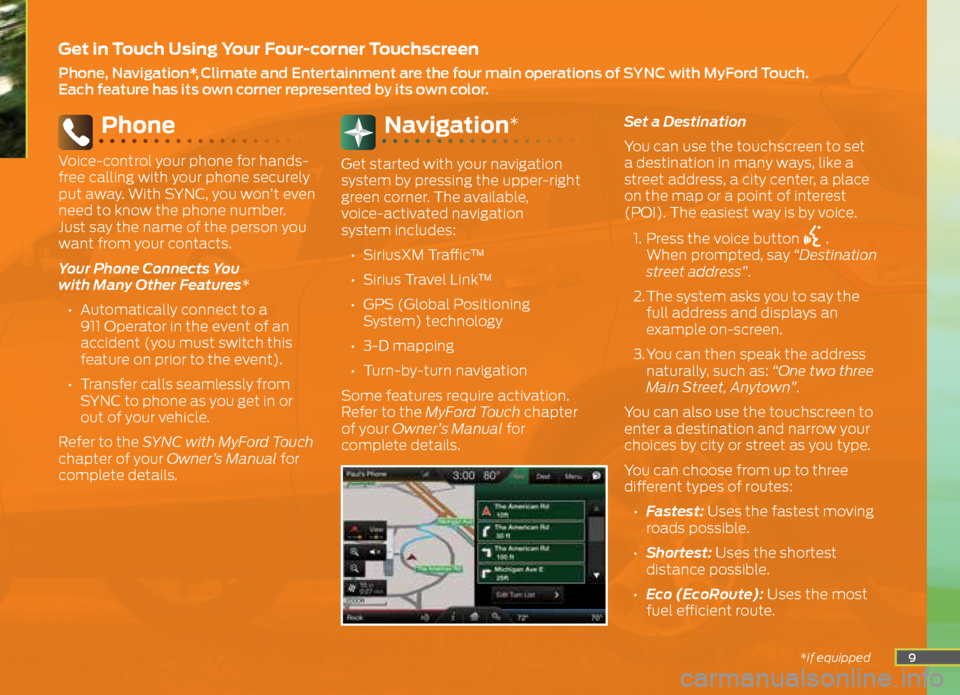
Get started with your navigation
system by pressing the upper-right
green corner. The available,
voice-activated navigation
system includes:
• SiriusXM Traffic™
• Sirius Travel Link™
• GPS (Global Positioning
System) technology
• 3-D mapping
• Turn-by-turn navigation
Some features require activation.
Refer to the MyFord Touch chapter
of your Owner’s Manual for
complete details. Set a Destination
You can use the touchscreen to set
a destination in many ways, like a
street address, a city center, a place
on the map or a point of interest
(POI). The easiest way is by voice.
1. Press the voice button
.
When prompted, say “Destination
street address”.
2. The system asks you to say the
full address and displays an
example on-screen.
3. You can then speak the address
naturally, such as: “One two three
Main Street, Anytown”.
You can also use the touchscreen to
enter a destination and narrow your
choices by city or street as you type.
You can choose from up to three
different types of routes:
• Fastest: Uses the fastest moving
roads possible.
• Shortest: Uses the shortest
distance possible.
• Eco (EcoRoute): Uses the most
fuel efficient route.
Get in Touch Using Your Four-corner Touchscreen
Phone, Navigation*, Climate and Entertainment are the four main operations of SYNC with MyFord Touch.
Each feature has its own corner represented by its own color.
*if equipped
Page 12 of 20
11
Remote Entry Icons
• Press once to lock all doors.
Press again within three seconds to
confirm all doors are locked.
• Press
once to unlock the driver’s
door. Press again within three
seconds to unlock all doors.
• Press
to activate the panic
alarm. Press again or switch on the
ignition to deactivate.
• Press
twice within three
seconds to open the liftgate.
• Car finder: Press
twice within
three seconds to locate your
vehicle. The horn sounds and the
lamps flash.
Intelligent Access*
Note: Your
transmitter
must be within
3 feet (1 meter)
of the vehicle
for intelligent
access to
function
properly. To unlock and open the door, pull a
front exterior door handle. To lock
the doors, press and hold the
sensor button on the door handle.
To unlock and open the liftgate, press
the exterior liftgate release button
in the top of the pull cup handle.
The intelligent access transmitter also
contains a mechanical key blade that
you can use to unlock the driver door,
if necessary.
Remote Start*
Remote start allows you to start the
engine from outside your vehicle using
your transmitter. To start, press
and then press twice within three
seconds. Once inside, apply the brake
while pressing the ENGINE START
STOP button. Shift into drive (D)
and go. To switch off the engine from
outside the vehicle after using your
remote start, press
once.
Universal Garage Door Opener*
Your driver’s
side visor has a
built-in wireless
transmitter
that replaces
the common hand-held garage door
opener. This system can also be
programmed to security systems, entry gates and home or office
lighting. Refer to the Universal Garage
Door Opener chapter in your Owner’s
Manual for programming instructions
and additional information on how to
use this device.
Active Park Assist*
The active park
assist system
can detect
an available
parallel parking
space and
automatically
steer the vehicle
into that space
(hands-free). The system visually
and audibly provides you with
braking, accelerating and gearshifting
instructions to park the vehicle. To
initiate active park assist, press the
AUTO |P| button located on the
instrument panel. To stop the parking
procedure, grab the steering wheel or
press the control again. For complete
information, refer to the Parking Aids
chapter of your Owner’s Manual.
Note: The driver is always responsible
for controlling the vehicle, supervising
the system and intervening, if required.
*if equipped
Convenience
Page 13 of 20
Comfort
*if equipped12
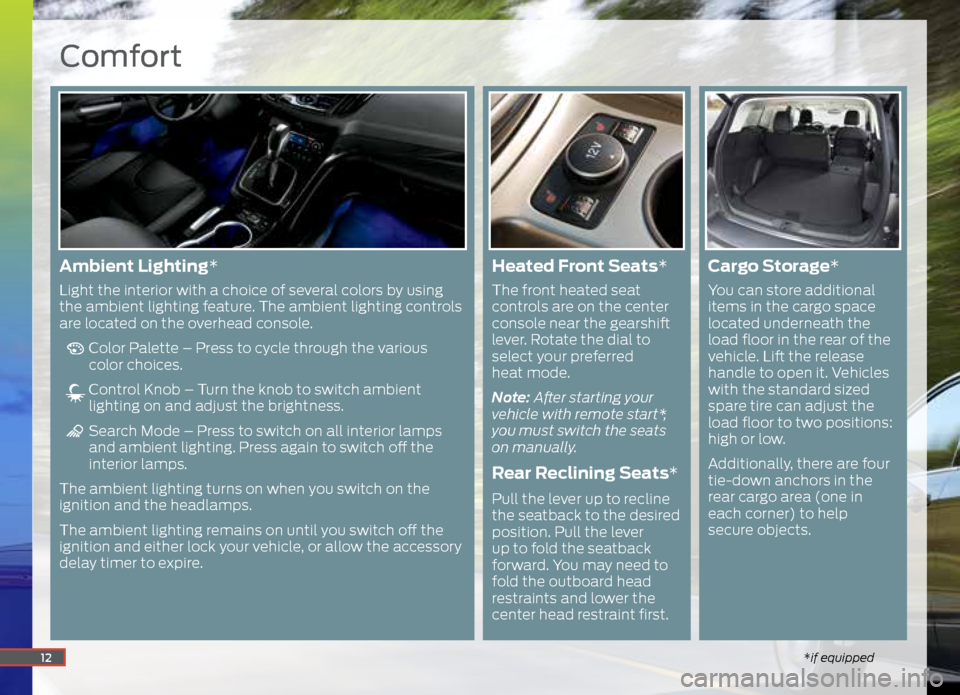
Ambient Lighting*
Light the interior with a choice of several colors by using
the ambient lighting feature. The ambient lighting controls
are located on the overhead console.
Color Palette – Press to cycle through the various
color choices.
Control Knob – Turn the knob to switch ambient
lighting on and adjust the brightness.
Search Mode – Press to switch on all interior lamps
and ambient lighting. Press again to switch off the
interior lamps.
The ambient lighting turns on when you switch on the
ignition and the headlamps.
The ambient lighting remains on until you switch off the
ignition and either lock your vehicle, or allow the accessory
delay timer to expire.
Heated Front Seats*
The front heated seat
controls are on the center
console near the gearshift
lever. Rotate the dial to
select your preferred
heat mode.
Note: After starting your
vehicle with remote start*,
you must switch the seats
on manually.
Rear Reclining Seats*
Pull the lever up to recline
the seatback to the desired
position. Pull the lever
up to fold the seatback
forward. You may need to
fold the outboard head
restraints and lower the
center head restraint first.
Cargo Storage *
You can store additional
items in the cargo space
located underneath the
load floor in the rear of the
vehicle. Lift the release
handle to open it. Vehicles
with the standard sized
spare tire can adjust the
load floor to two positions:
high or low.
Additionally, there are four
tie-down anchors in the
rear cargo area (one in
each corner) to help
secure objects.
Page 17 of 20
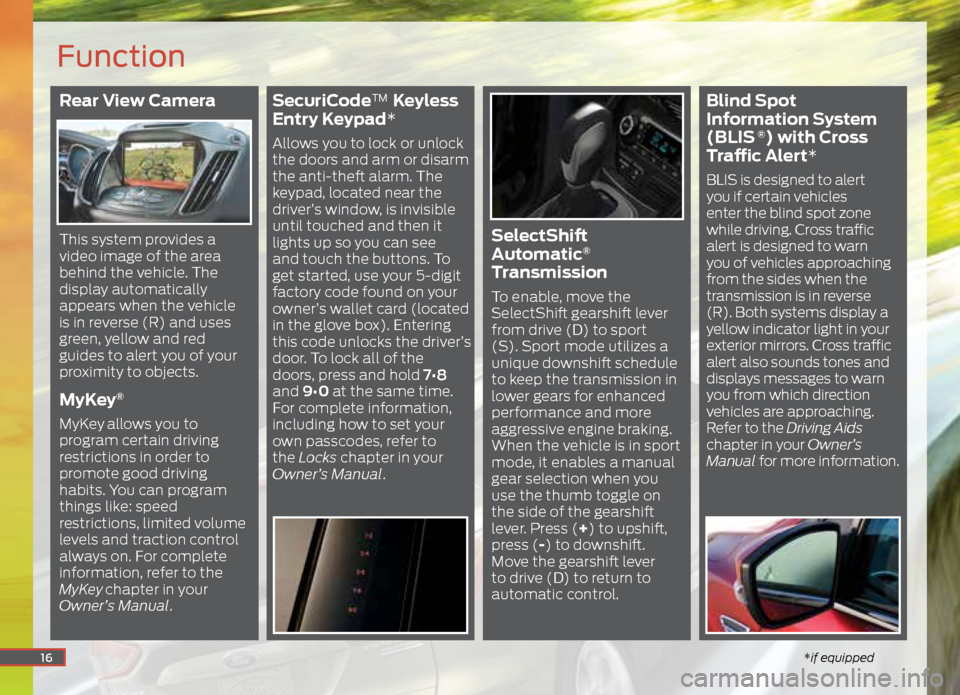
Rear View Camera
This system provides a
video image of the area
behind the vehicle. The
display automatically
appears when the vehicle
is in reverse (R) and uses
green, yellow and red
guides to alert you of your
proximity to objects.
MyKey®
MyKey allows you to
program certain driving
restrictions in order to
promote good driving
habits. You can program
things like: speed
restrictions, limited volume
levels and traction control
always on. For complete
information, refer to the
MyKey
chapter in your
Owner’s Manual.
SecuriCode™ Keyless
Entry Keypad*
Allows you to lock or unlock
the doors and arm or disarm
the anti-theft alarm. The
keypad, located near the
driver’s window, is invisible
until touched and then it
lights up so you can see
and touch the buttons. To
get started, use your 5-digit
factory code found on your
owner’s wallet card (located
in the glove box). Entering
this code unlocks the driver’s
door. To lock all of the
doors, press and hold 7•8
and 9•0 at the same time.
For complete information,
including how to set your
own passcodes, refer to
the Locks chapter in your
Owner’s Manual.
SelectShift
Automatic®
Transmission
To enable, move the
SelectShift gearshift lever
from drive (D) to sport
(S). Sport mode utilizes a
unique downshift schedule
to keep the transmission in
lower gears for enhanced
performance and more
aggressive engine braking.
When the vehicle is in sport
mode, it enables a manual
gear selection when you
use the thumb toggle on
the side of the gearshift
lever. Press (+) to upshift,
press (-) to downshift.
Move the gearshift lever
to drive (D) to return to
automatic control.
Blind Spot
Information System
(BLIS
®) with Cross
Traffic Alert*
BLIS is designed to alert
you if certain vehicles
enter the blind spot zone
while driving. Cross traffic
alert is designed to warn
you of vehicles approaching
from the sides when the
transmission is in reverse
(R). Both systems display a
yellow indicator light in your
exterior mirrors. Cross traffic
alert also sounds tones and
displays messages to warn
you from which direction
vehicles are approaching.
Refer to the Driving Aids
chapter in your Owner’s
Manual for more information.
16
Function
*if equipped