door lock FORD EXPLORER 2006 4.G Owner's Manual
[x] Cancel search | Manufacturer: FORD, Model Year: 2006, Model line: EXPLORER, Model: FORD EXPLORER 2006 4.GPages: 328, PDF Size: 3.59 MB
Page 108 of 328

Autolock
The autolock feature will lock all the doors, liftgate and liftgate window
when:
²all doors are closed,
²the ignition is in the 3 (ON) position,
²you shift into any gear putting the vehicle in motion, and
²the vehicle attains a speed greater than 12 mph (20 km/h).
The autolock feature repeats when:
²any door is opened then closed while the ignition is in the 3 (ON)
position and the vehicle speed is 9 mph (15 km/h) or lower, and
²the vehicle attains a speed greater than 12 mph (20 km/h).
Deactivating/activating autolock
Your vehicle comes with the autolock feature enabled. There are four
methods to enable/disable this feature:
²Through your authorized dealer, or
²Performing the power door lock control procedure, or
²Performing the keyless entry key pad (if equipped) procedure, or
²Performing the message center (if equipped) procedure.
Note:The autolock feature can be activated/deactivated independently
of the autounlock feature.
Before following the activation or deactivation procedures, make sure
that the anti-theft system is not armed, ignition is in the 1 (OFF/LOCK)
position, and all vehicle doors, liftgate and liftgate window are closed.
Power door unlock/lock procedure
You must complete Steps 1-5 within
30 seconds or the procedure will
have to be repeated. If the
procedure needs to be repeated,
you must wait 30 seconds.Note:
Alldoors must be closed and
remain closed throughout the
configuration process.
1. Turn the ignition to the 3 (ON) position.
2. Press the power door unlock control three times.
3. Turn the ignition from the 3 (ON) to the 1 (OFF/LOCK) position.
Locks and Security
108
Page 109 of 328

4. Press the power door unlock control three times.
5. Turn the ignition back to the 3 (ON) position. The horn will chirp.
6. Press the unlock control, then press the lock control. The horn will
chirp once if autolock was deactivated or twice (one short and one long
chirp) if autolock was activated.
7. Turn the ignition to the 1 (OFF/LOCK) position. The horn will chirp
once to confirm the procedure is complete.
Keyless entry key pad procedure
1. Turn the ignition to the 1 (OFF/LOCK) position.
2. Close all doors, the liftgate and liftgate window.
3. Enter 5±digit entry code
4. Press and hold the 3²4. While holding the 3²4 press the 7²8.
5. Release the 7²8.
6. Release the 3²4.
The user should receive a horn chirp to indicate the system has been
disabled or a chirp followed by a honk to indicate the system has been
enabled.
Message center procedure
For information on activating/deactivating the autolock feature using the
vehicle's message center (if equipped), refer toMessage center
information in theDriver Controlschapter.
Autounlock
The autounlock feature will unlock all the doors when:
²the ignition is in the 3 (ON) position, all the doors are closed, and the
vehicle has been in motion at a speed greater than 12 mph (20 km/h);
²the vehicle has then come to a stop and the ignition is turned to the 1
(OFF/LOCK) or 2 (ACC) position; and
²the driver door is opened within 10 minutes of the ignition being
transitioned to the 1 (OFF/LOCK) or 2 (ACC) position.
Note:The doors will not autounlock if the vehicle has been
electronically locked before the driver door is opened.
Locks and Security
109
Page 110 of 328
Deactivating/activating autounlock
Your vehicle comes with the autounlock feature activated. There are four
methods to enable/disable this feature:
²Through your authorized dealer, or
²Performing the power door lock control procedure, or
²Performing the keyless entry key pad (if equipped) procedure, or
²Performing the message center (if equipped) procedure.
Before following the activation or deactivation procedures, make sure
that the anti-theft system is not armed, ignition is in the 1 (OFF/LOCK)
position, and all vehicle doors, liftgate and liftgate window are closed.
Power door unlock/lock procedure
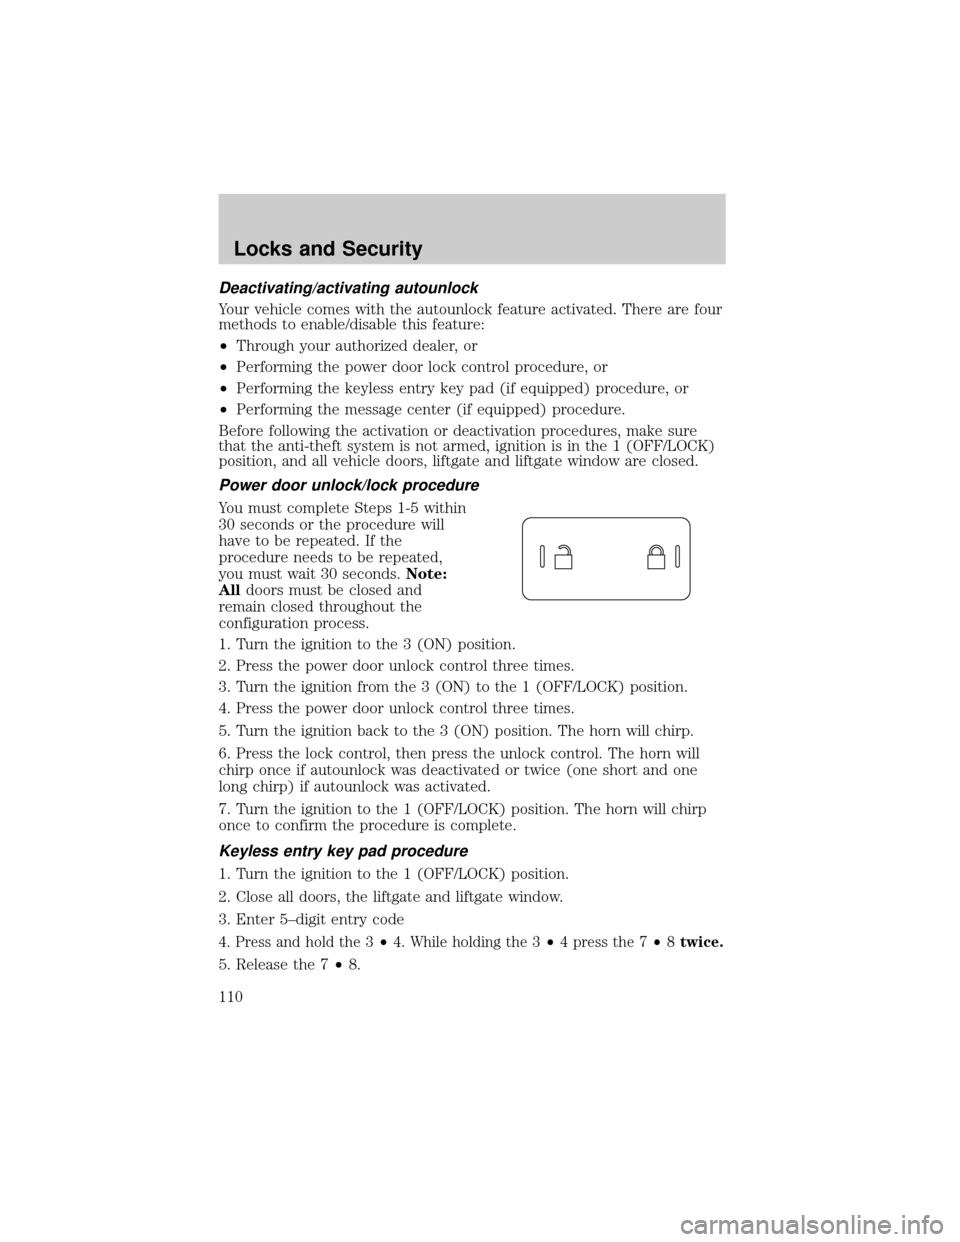
You must complete Steps 1-5 within
30 seconds or the procedure will
have to be repeated. If the
procedure needs to be repeated,
you must wait 30 seconds.Note:
Alldoors must be closed and
remain closed throughout the
configuration process.
1. Turn the ignition to the 3 (ON) position.
2. Press the power door unlock control three times.
3. Turn the ignition from the 3 (ON) to the 1 (OFF/LOCK) position.
4. Press the power door unlock control three times.
5. Turn the ignition back to the 3 (ON) position. The horn will chirp.
6. Press the lock control, then press the unlock control. The horn will
chirp once if autounlock was deactivated or twice (one short and one
long chirp) if autounlock was activated.
7. Turn the ignition to the 1 (OFF/LOCK) position. The horn will chirp
once to confirm the procedure is complete.
Keyless entry key pad procedure
1. Turn the ignition to the 1 (OFF/LOCK) position.
2. Close all doors, the liftgate and liftgate window.
3. Enter 5±digit entry code
4. Press and hold the 3²4. While holding the 3²4 press the 7²8twice.
5. Release the 7²8.
Locks and Security
110
Page 120 of 328
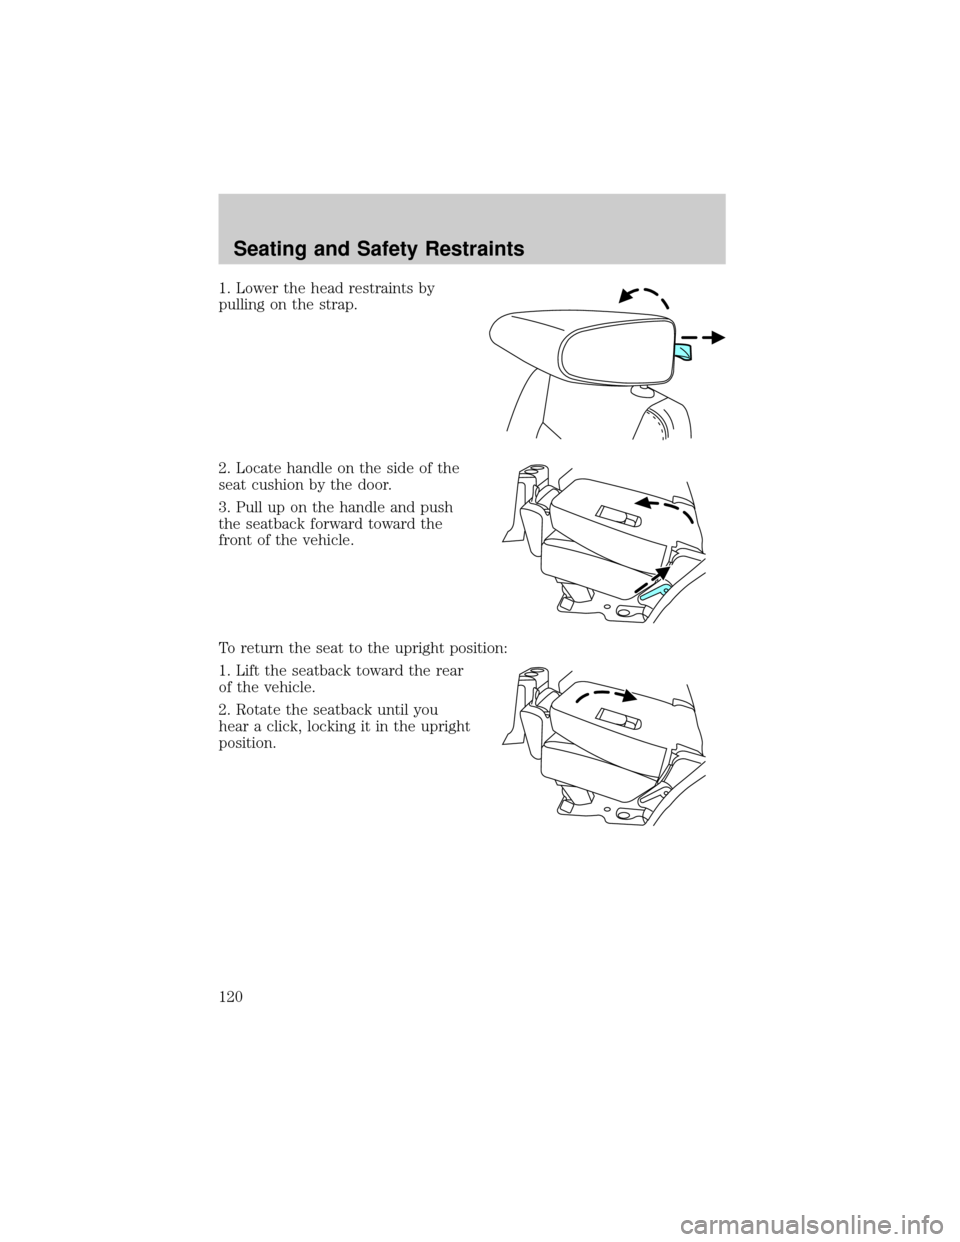
1. Lower the head restraints by
pulling on the strap.
2. Locate handle on the side of the
seat cushion by the door.
3. Pull up on the handle and push
the seatback forward toward the
front of the vehicle.
To return the seat to the upright position:
1. Lift the seatback toward the rear
of the vehicle.
2. Rotate the seatback until you
hear a click, locking it in the upright
position.
Seating and Safety Restraints
120
Page 125 of 328
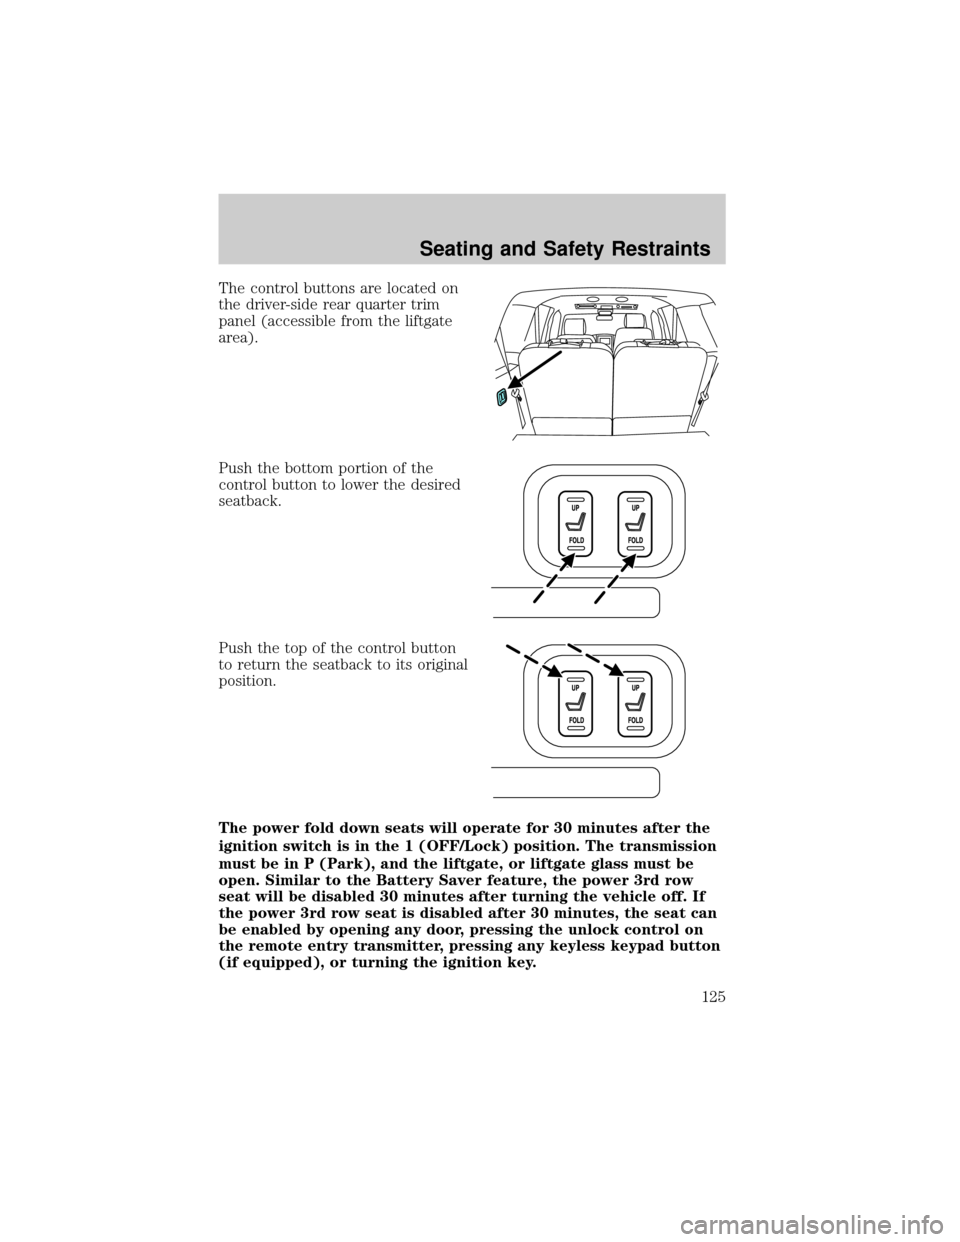
The control buttons are located on
the driver-side rear quarter trim
panel (accessible from the liftgate
area).
Push the bottom portion of the
control button to lower the desired
seatback.
Push the top of the control button
to return the seatback to its original
position.
The power fold down seats will operate for 30 minutes after the
ignition switch is in the 1 (OFF/Lock) position. The transmission
must be in P (Park), and the liftgate, or liftgate glass must be
open. Similar to the Battery Saver feature, the power 3rd row
seat will be disabled 30 minutes after turning the vehicle off. If
the power 3rd row seat is disabled after 30 minutes, the seat can
be enabled by opening any door, pressing the unlock control on
the remote entry transmitter, pressing any keyless keypad button
(if equipped), or turning the ignition key.
Seating and Safety Restraints
125
Page 241 of 328
Fuse/Relay
LocationFuse Amp
RatingPassenger Compartment Fuse
Panel Description
6 20A Liftglass release motor, Door
unlock/lock
7 15A Trailer stop/turn
8 15A Ignition switch power, PATS
9 2A 6R TCM/PCM (Ignition
RUN/START), Fuel pump relay
10 5A Front wiper RUN/ACC relay in
PDB
11 5A Radio start
12 5A Rear wiper motor RUN/ACC,
Trailer battery charge relay in
PDB, Radio
13 15A Heated mirror, Rear defrost
indicator
14 20A Horn
15 10A Reverse lamps
16 10A Trailer reverse lamps
17 10A RCM, PAD lamp, OCS module
18 10A Reverse park aid, IVD switch,
IVD, 4x4 module, 4x4 switch,
Heated seat switches, Compass,
Electrochromatic mirror, AUX
climate control
19 Ð Not used
20 10A Manual climate, DEATC, Brake
shift
21 Ð Not used
22 15A Brake switch, Stop lamps, Turn
lamps
23 15A Power mirrors, Interior lamps,
Puddle lamps, Battery saver,
Instrument illumination, Homelink
Roadside Emergencies
241
Page 270 of 328

PAINT CHIPS
Your authorized dealer has touch-up paint and sprays to match your
vehicle's color. Take your color code (printed on a sticker in the driver's
door jamb) to your authorized dealer to ensure you get the correct color.
²Remove particles such as bird droppings, tree sap, insect deposits, tar
spots, road salt and industrial fallout before repairing paint chips.
²Always read the instructions before using the products.
ALUMINUM WHEELS AND WHEEL COVERS
Aluminum wheels and wheel covers are coated with a clearcoat paint
finish. In order to maintain their shine:
²Clean weekly with Motorcraft Wheel and Tire Cleaner (ZC-37±A),
which is available from your authorized dealer. Heavy dirt and brake
dust accumulation may require agitation with a sponge. Rinse
thoroughly with a strong stream of water.
²Never apply any cleaning chemical to hot or warm wheel rims or
covers.
²Some automatic car washes may cause damage to the finish on your
wheel rims or covers. Chemical-strength cleaners, or cleaning
chemicals, in combination with brush agitation to remove brake dust
and dirt, could wear away the clearcoat finish over time.
²Do not use hydrofluoric acid-based or high caustic-based wheel
cleaners, steel wool, fuels or strong household detergent.
²To remove tar and grease, use Motorcraft Bug and Tar Remover
(ZC-42), available from your authorized dealer.
ENGINE
Engines are more efficient when they are clean because grease and dirt
buildup keep the engine warmer than normal. When washing:
²Take care when using a power washer to clean the engine. The high
pressure fluid could penetrate the sealed parts and cause damage.
²Do not spray a hot engine with cold water to avoid cracking the
engine block or other engine components.
²Spray Motorcraft Engine Shampoo and Degreaser (ZC-20) on all parts
that require cleaning and pressure rinse clean.
Cleaning
270
Page 310 of 328
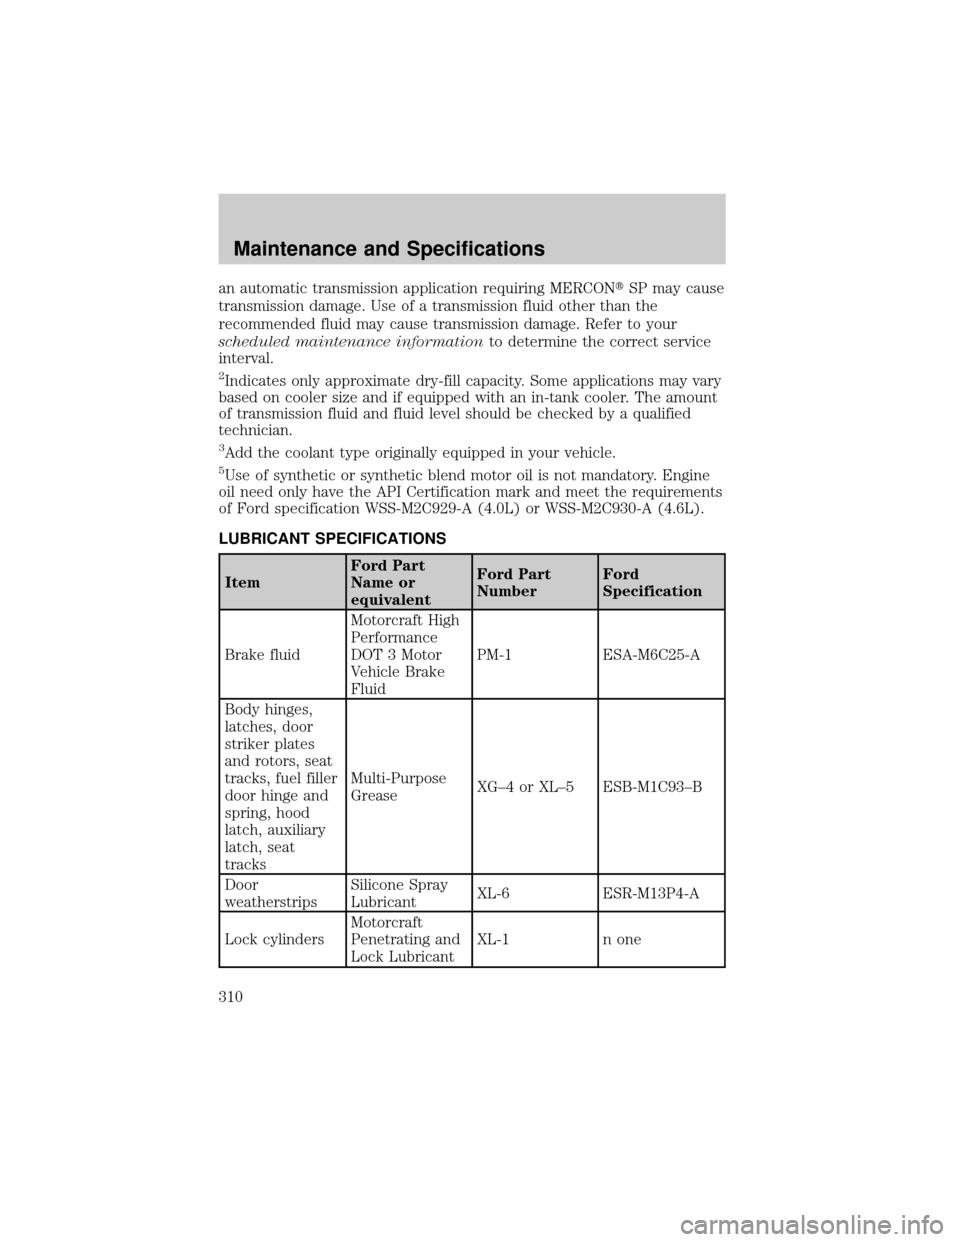
an automatic transmission application requiring MERCONtSP may cause
transmission damage. Use of a transmission fluid other than the
recommended fluid may cause transmission damage. Refer to your
scheduled maintenance informationto determine the correct service
interval.
2Indicates only approximate dry-fill capacity. Some applications may vary
based on cooler size and if equipped with an in-tank cooler. The amount
of transmission fluid and fluid level should be checked by a qualified
technician.
3Add the coolant type originally equipped in your vehicle.
5Use of synthetic or synthetic blend motor oil is not mandatory. Engine
oil need only have the API Certification mark and meet the requirements
of Ford specification WSS-M2C929-A (4.0L) or WSS-M2C930-A (4.6L).
LUBRICANT SPECIFICATIONS
ItemFord Part
Name or
equivalentFord Part
NumberFord
Specification
Brake fluidMotorcraft High
Performance
DOT 3 Motor
Vehicle Brake
FluidPM-1 ESA-M6C25-A
Body hinges,
latches, door
striker plates
and rotors, seat
tracks, fuel filler
door hinge and
spring, hood
latch, auxiliary
latch, seat
tracksMulti-Purpose
GreaseXG±4 or XL±5 ESB-M1C93±B
Door
weatherstripsSilicone Spray
LubricantXL-6 ESR-M13P4-A
Lock cylindersMotorcraft
Penetrating and
Lock LubricantXL-1 n one
Maintenance and Specifications
310
Page 321 of 328

wheels ......................................270
wiper blades ............................272
Climate control (see Air
conditioning or Heating) ............37
Clock adjust
6-CD in dash .............................29
Compass, electronic ....................75
calibration .................................77
set zone adjustment ...........76, 89
Console ........................................56
overhead ....................................54
rear ............................................56
Controls
power seat ...............................116
steering column ........................62
Coolant
checking and adding ..............288
refill capacities ................292, 308
specifications ..................310, 313
Cruise control
(see Speed control) ....................60
Customer Assistance ................235
Ford Extended Service
Plan ..........................................266
Getting assistance outside
the U.S. and Canada ..............267
Getting roadside assistance ...235
Getting the service you
need .........................................262
Ordering additional owner's
literature .................................267
Utilizing the
Mediation/Arbitration
Program ...................................265
D
Daytime running lamps
(see Lamps) ................................43Defrost
rear window ..............................41
Dipstick
automatic transmission
fluid ..........................................305
engine oil .................................281
Doors
lubricant specifications ..........310
Driveline universal joint and
slip yoke ....................................306
Driving under special
conditions ..................224, 228, 232
sand .........................................230
snow and ice ...........................233
through water .................231, 234
Dual automatic temperature
control (DATC) ...........................37
DVD system .................................34
E
Electronic message center ...69, 80
Emergencies, roadside
jump-starting ..........................256
Emergency Flashers .................237
Emission control system ..........302
Engine ........................................313
cleaning ...................................270
coolant .....................................288
fail-safe cooling .......................293
idle speed control ...................286
lubrication
specifications ..................310, 313
refill capacities ........................308
service points ..................278±279
starting after a collision .........237
Engine block heater .................209
Engine oil ..................................281
Index
321
Page 323 of 328

Inspection/maintenance (I/M)
testing ........................................304
Instrument panel
cleaning ...................................272
cluster ........................................12
J
Jack ....................................246, 250
positioning .......................246, 252
storage .....................246, 249±250
Jump-starting your vehicle ......256
K
Keyless entry system ...............106
autolock ...........................108±109
Keys
positions of the ignition .........207
L
Lamps
bulb replacement
specifications chart ............46±47
daytime running light ...............43
fog lamps ...................................42
interior lamps ...........................46
Liftgate ................................96, 102
Lights, warning and indicator ....12
anti-lock brakes (ABS) ..........210
Load limits .................................192
Loading instructions .................199
Locks
autolock ...........................108±109
childproof ................................100
doors ..........................................98
Lubricant specifications ...310, 313
Lug nuts ....................................255Luggage rack ...............................97
Lumbar support, seats .....116, 119
M
Message center ...............69, 80±81
english/metric button .........73, 85
system check button ..........72, 84
warning messages ...............77, 91
Mirrors .........................................53
automatic dimming rearview
mirror ........................................58
fold away ...................................59
heated ........................................59
side view mirrors (power) .......58
Moon roof ....................................64
Motorcraft parts ........274, 294, 307
N
Navigation system .......................34
O
Octane rating ............................298
Oil (see Engine oil) ..................281
P
Parking brake ............................211
Parts (see Motorcraft parts) ....307
Passenger Occupant
Classification Sensor .................127
Pedals (see Power adjustable
foot pedals) .................................59
Power adjustable foot pedals .....59
Power distribution box
(see Fuses) ...............................243
Power door locks ........................98
Index
323