headlamp FORD EXPLORER 2011 5.G User Guide
[x] Cancel search | Manufacturer: FORD, Model Year: 2011, Model line: EXPLORER, Model: FORD EXPLORER 2011 5.GPages: 449, PDF Size: 4.03 MB
Page 87 of 449
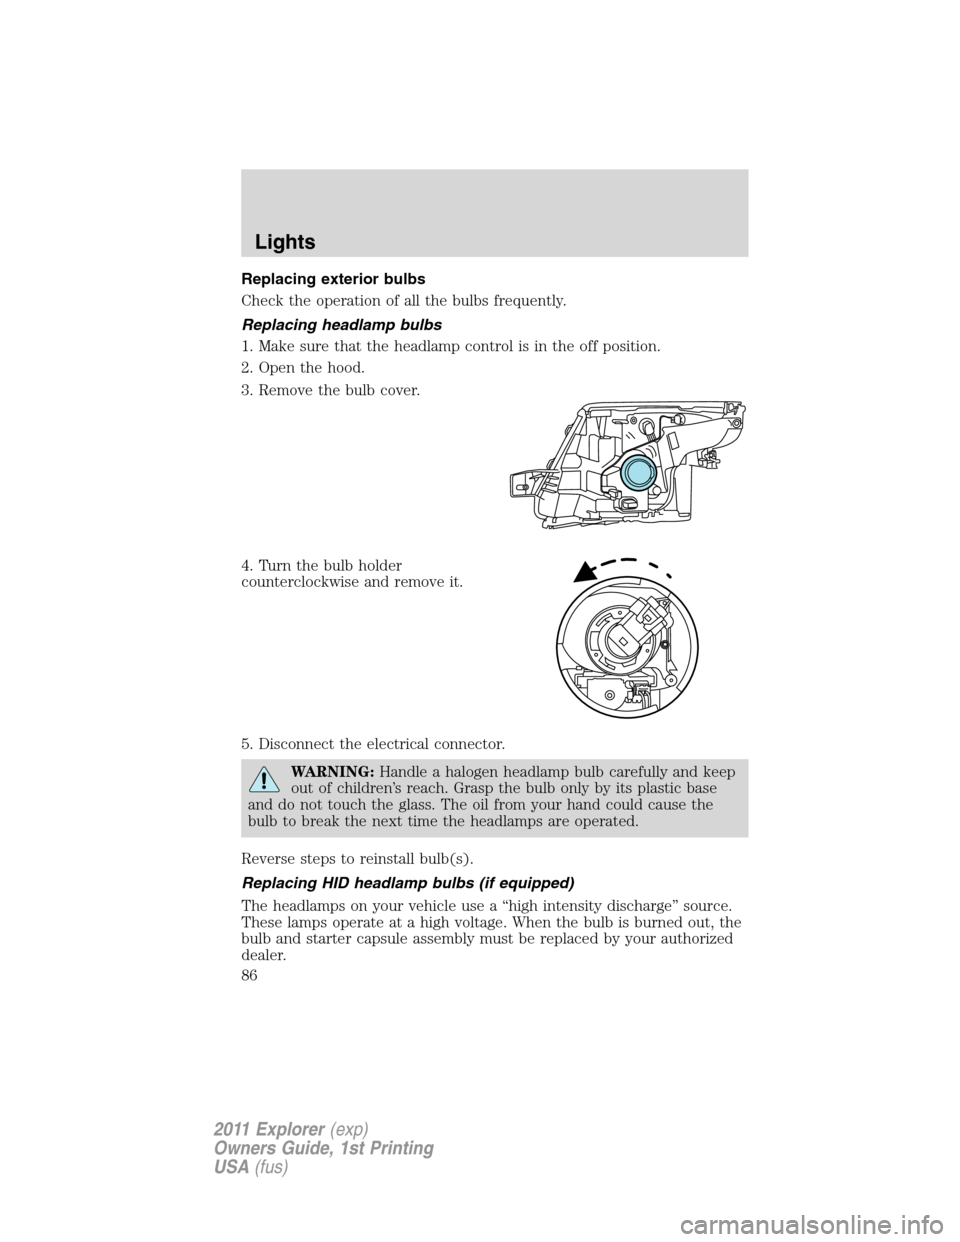
Replacing exterior bulbs
Check the operation of all the bulbs frequently.
Replacing headlamp bulbs
1. Make sure that the headlamp control is in the off position.
2. Open the hood.
3. Remove the bulb cover.
4. Turn the bulb holder
counterclockwise and remove it.
5. Disconnect the electrical connector.
WARNING:Handle a halogen headlamp bulb carefully and keep
out of children’s reach. Grasp the bulb only by its plastic base
and do not touch the glass. The oil from your hand could cause the
bulb to break the next time the headlamps are operated.
Reverse steps to reinstall bulb(s).
Replacing HID headlamp bulbs (if equipped)
The headlamps on your vehicle use a “high intensity discharge” source.
These lamps operate at a high voltage. When the bulb is burned out, the
bulb and starter capsule assembly must be replaced by your authorized
dealer.
Lights
86
2011 Explorer(exp)
Owners Guide, 1st Printing
USA(fus)
Page 88 of 449
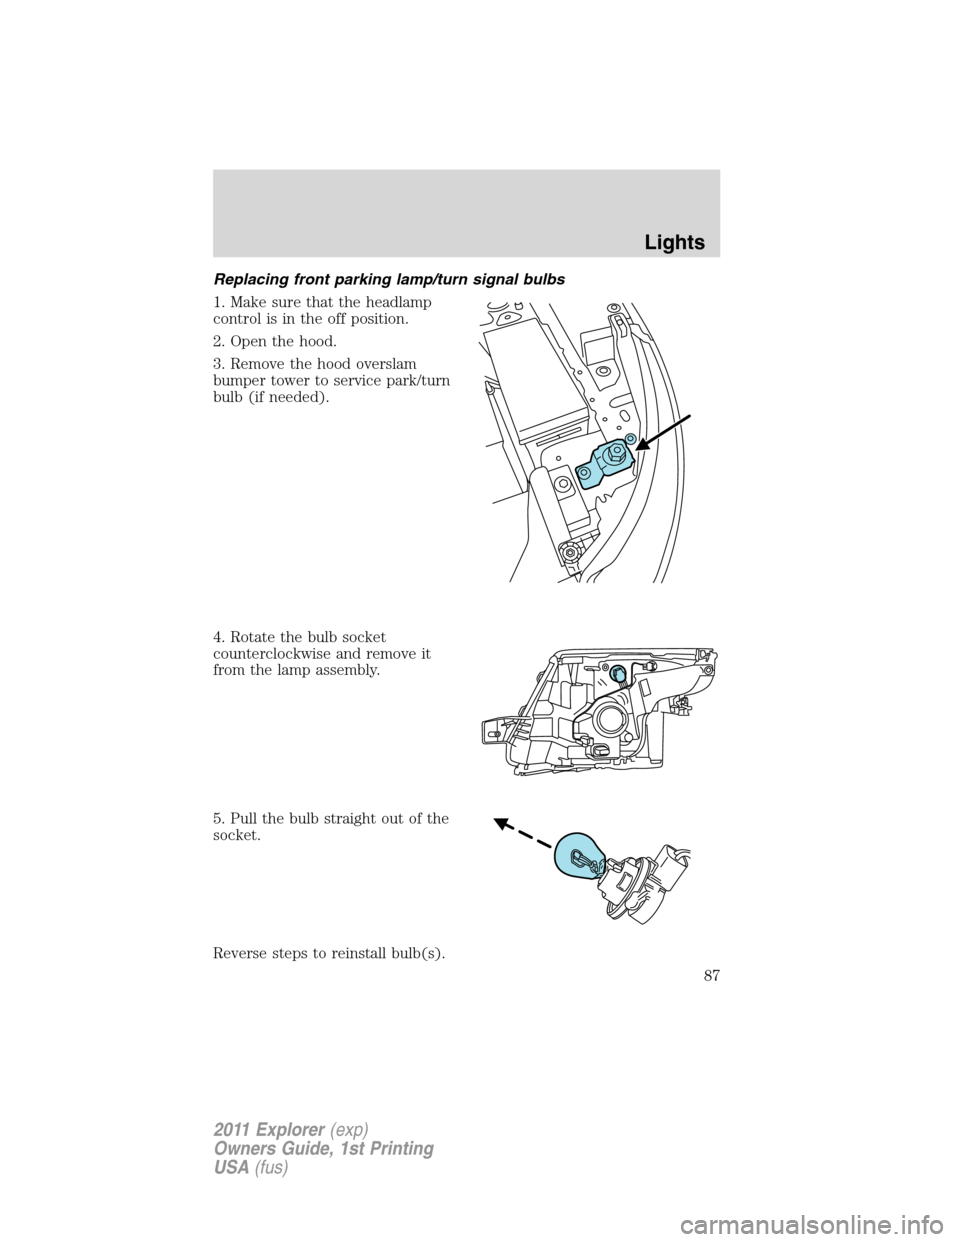
Replacing front parking lamp/turn signal bulbs
1. Make sure that the headlamp
control is in the off position.
2. Open the hood.
3. Remove the hood overslam
bumper tower to service park/turn
bulb (if needed).
4. Rotate the bulb socket
counterclockwise and remove it
from the lamp assembly.
5. Pull the bulb straight out of the
socket.
Reverse steps to reinstall bulb(s).
Lights
87
2011 Explorer(exp)
Owners Guide, 1st Printing
USA(fus)
Page 89 of 449
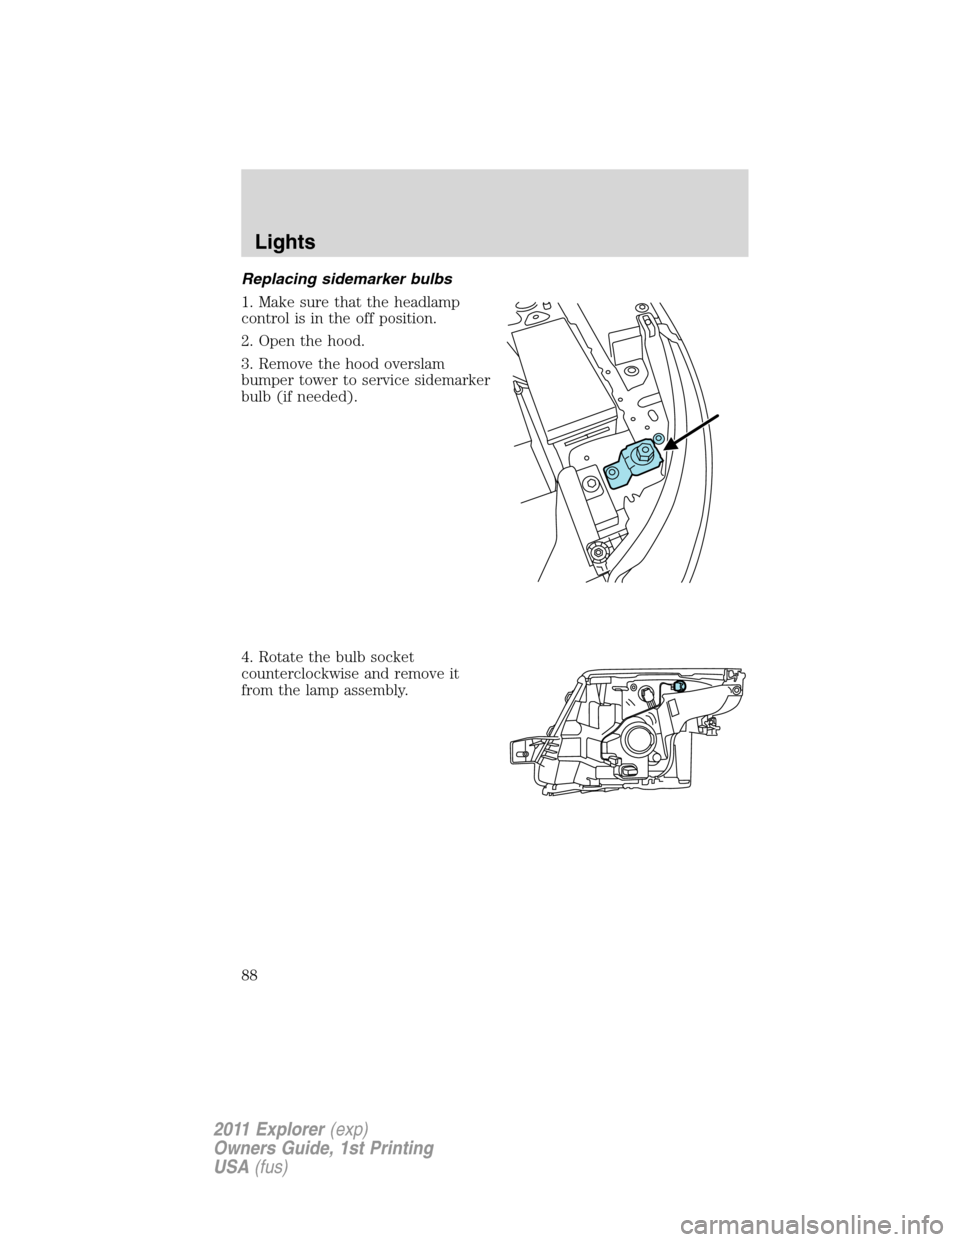
Replacing sidemarker bulbs
1. Make sure that the headlamp
control is in the off position.
2. Open the hood.
3. Remove the hood overslam
bumper tower to service sidemarker
bulb (if needed).
4. Rotate the bulb socket
counterclockwise and remove it
from the lamp assembly.
Lights
88
2011 Explorer(exp)
Owners Guide, 1st Printing
USA(fus)
Page 90 of 449
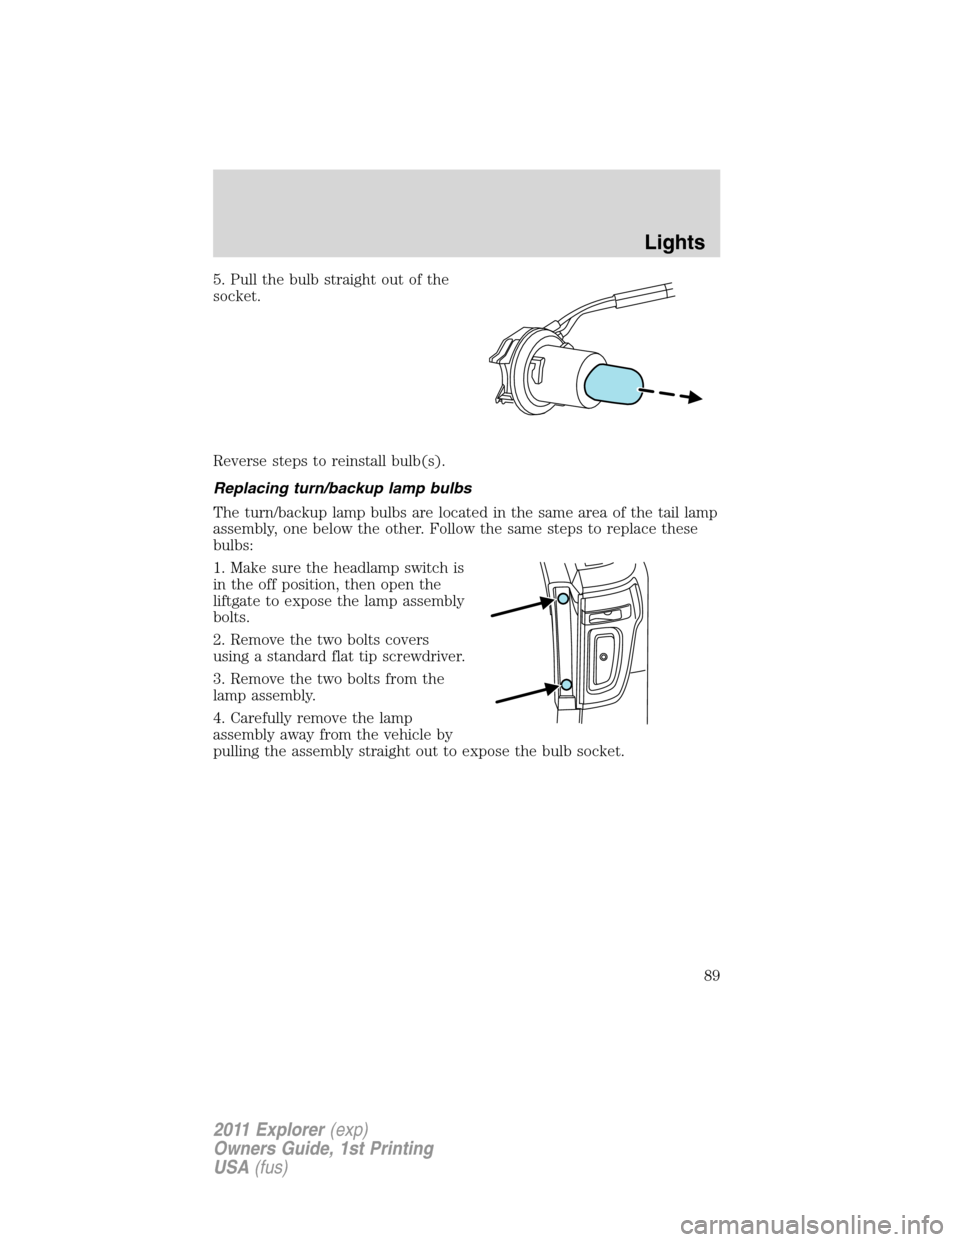
5. Pull the bulb straight out of the
socket.
Reverse steps to reinstall bulb(s).
Replacing turn/backup lamp bulbs
The turn/backup lamp bulbs are located in the same area of the tail lamp
assembly, one below the other. Follow the same steps to replace these
bulbs:
1. Make sure the headlamp switch is
in the off position, then open the
liftgate to expose the lamp assembly
bolts.
2. Remove the two bolts covers
using a standard flat tip screwdriver.
3. Remove the two bolts from the
lamp assembly.
4. Carefully remove the lamp
assembly away from the vehicle by
pulling the assembly straight out to expose the bulb socket.
Lights
89
2011 Explorer(exp)
Owners Guide, 1st Printing
USA(fus)
Page 92 of 449
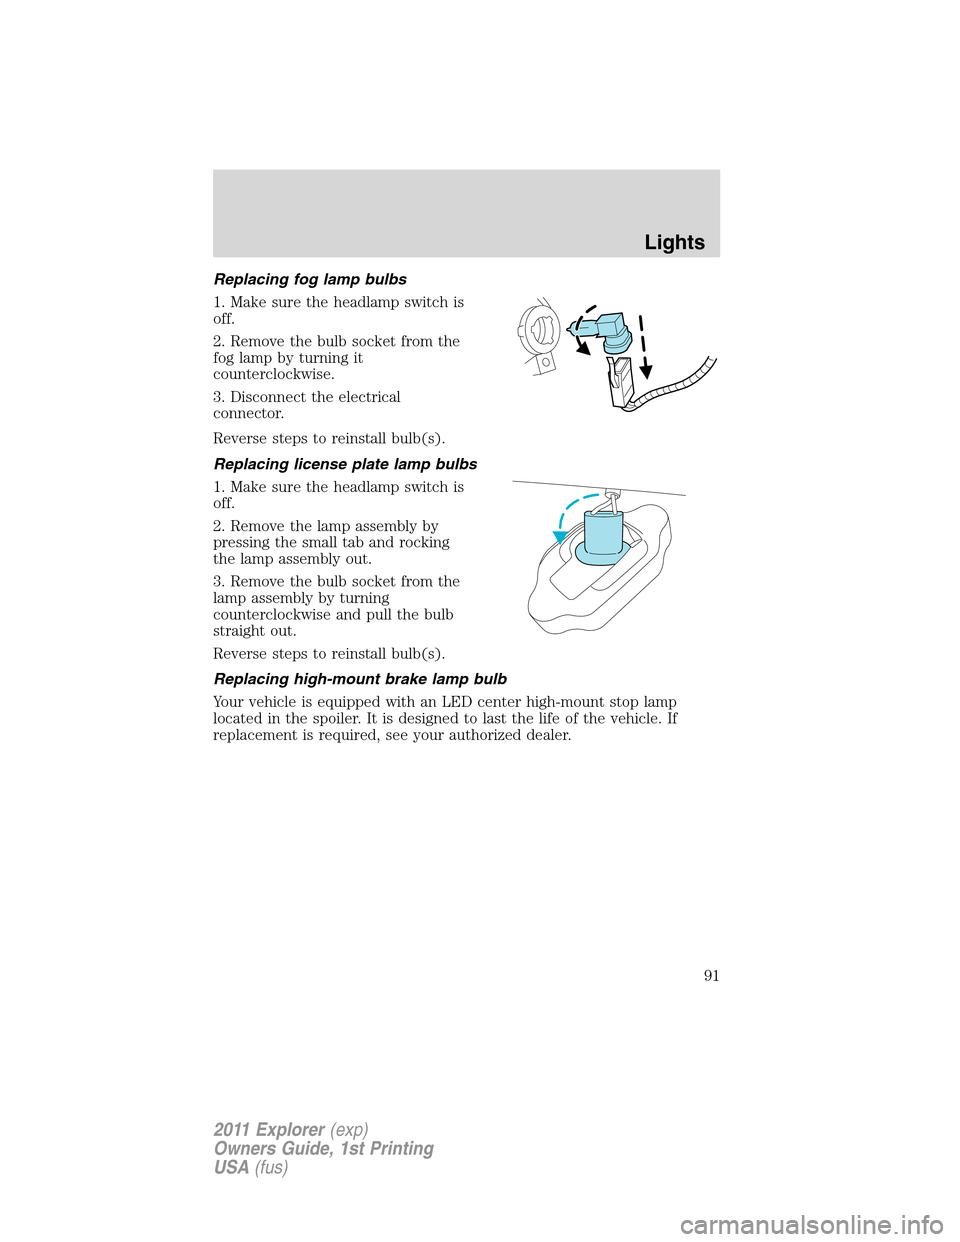
Replacing fog lamp bulbs
1. Make sure the headlamp switch is
off.
2. Remove the bulb socket from the
fog lamp by turning it
counterclockwise.
3. Disconnect the electrical
connector.
Reverse steps to reinstall bulb(s).
Replacing license plate lamp bulbs
1. Make sure the headlamp switch is
off.
2. Remove the lamp assembly by
pressing the small tab and rocking
the lamp assembly out.
3. Remove the bulb socket from the
lamp assembly by turning
counterclockwise and pull the bulb
straight out.
Reverse steps to reinstall bulb(s).
Replacing high-mount brake lamp bulb
Your vehicle is equipped with an LED center high-mount stop lamp
located in the spoiler. It is designed to last the life of the vehicle. If
replacement is required, see your authorized dealer.
Lights
91
2011 Explorer(exp)
Owners Guide, 1st Printing
USA(fus)
Page 94 of 449
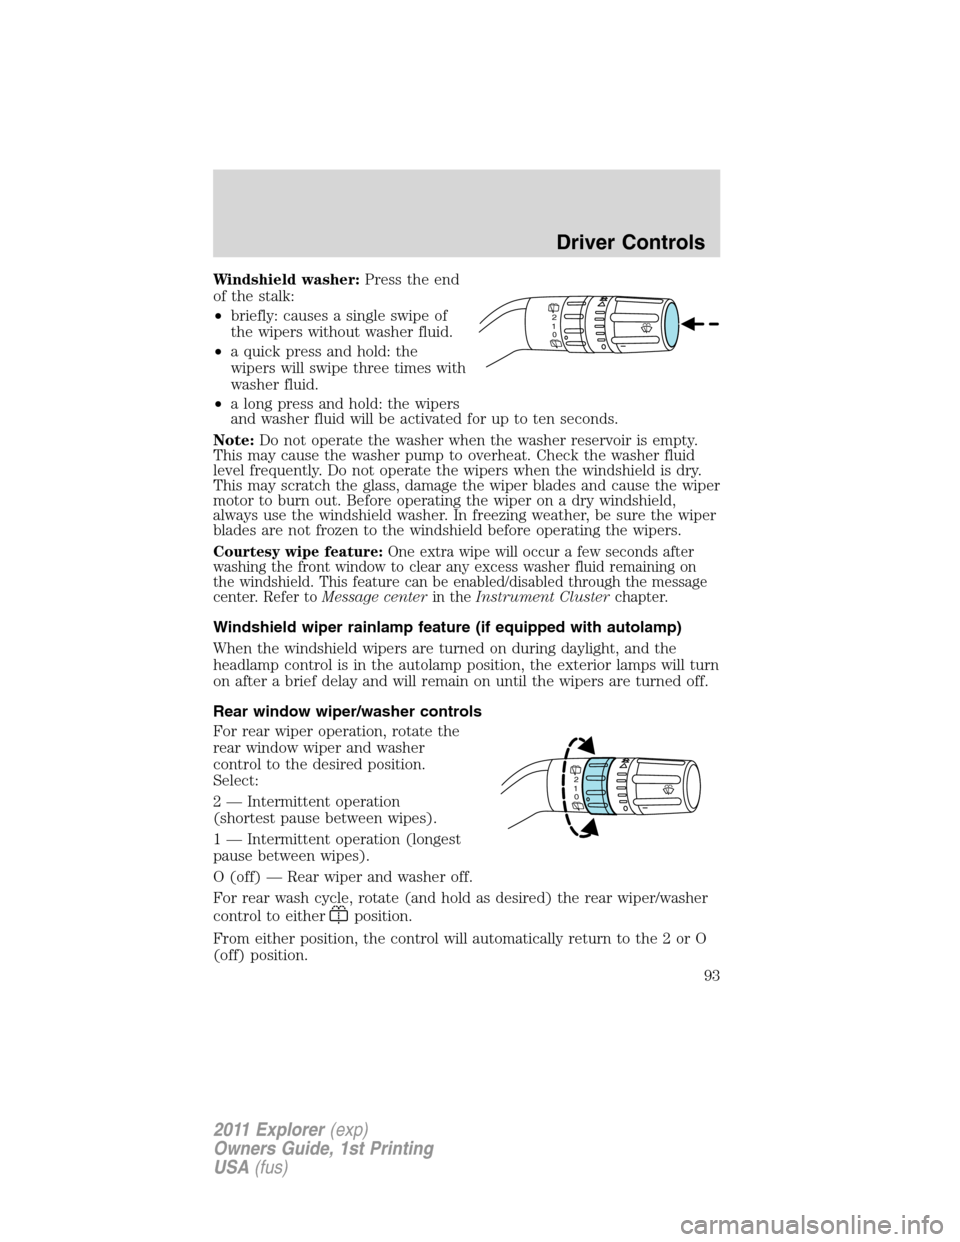
Windshield washer:Press the end
of the stalk:
•briefly: causes a single swipe of
the wipers without washer fluid.
•a quick press and hold: the
wipers will swipe three times with
washer fluid.
•a long press and hold: the wipers
and washer fluid will be activated for up to ten seconds.
Note:Do not operate the washer when the washer reservoir is empty.
This may cause the washer pump to overheat. Check the washer fluid
level frequently. Do not operate the wipers when the windshield is dry.
This may scratch the glass, damage the wiper blades and cause the wiper
motor to burn out. Before operating the wiper on a dry windshield,
always use the windshield washer. In freezing weather, be sure the wiper
blades are not frozen to the windshield before operating the wipers.
Courtesy wipe feature:One extra wipe will occur a few seconds after
washing the front window to clear any excess washer fluid remaining on
the windshield. This feature can be enabled/disabled through the message
center. Refer toMessage centerin theInstrument Clusterchapter.
Windshield wiper rainlamp feature (if equipped with autolamp)
When the windshield wipers are turned on during daylight, and the
headlamp control is in the autolamp position, the exterior lamps will turn
on after a brief delay and will remain on until the wipers are turned off.
Rear window wiper/washer controls
For rear wiper operation, rotate the
rear window wiper and washer
control to the desired position.
Select:
2 — Intermittent operation
(shortest pause between wipes).
1 — Intermittent operation (longest
pause between wipes).
O (off) — Rear wiper and washer off.
For rear wash cycle, rotate (and hold as desired) the rear wiper/washer
control to either
position.
From either position, the control will automatically return to the 2 or O
(off) position.
2
1
0
2
1
0
Driver Controls
93
2011 Explorer(exp)
Owners Guide, 1st Printing
USA(fus)
Page 150 of 449
Illuminated exit
When all vehicle doors are closed, the ignition is turned off and the key
is removed from the ignition (IKT only), the interior dome lamps,
parking lamps and the puddle lamps (if equipped) will illuminate.
The lamps will turn off if all the doors remain closed and
•25 seconds elapse, or
•the key is inserted in the ignition (IKT only) or (if equipped with
intelligent access with push button start feature) the start button is
pressed.
Battery saver
The battery saver will shut off the lamps 10 minutes after the ignition
has been turned off.
•If the dome lamps were turned on using the panel dimmer control, the
battery saver will shut them off 10 minutes after the ignition has been
turned off.
•If the courtesy lamps were turned on because one of the vehicle doors
or the trunk was opened, the battery saver will shut them off
10 minutes after the ignition has been turned off.
•The battery saver will shut off the headlamps 10 minutes after the
ignition has been turned off.
Accessory mode battery saver for intelligent access keys with
push button start (if equipped)
If you shut off the engine and leave the ignition in the on or accessory
mode, the ignition will shut off after 30 minutes.
Remote start (if equipped)
The remote start feature allows you to start the engine from outside the
vehicle. If your transmitter has a
icon, you have remote start. The
remote start feature has an extended operating range which allows you
to remote start your vehicle from a farther distance from your vehicle.
All the buttons have this increased range performance capability when
equipped with remote start.
Vehicles with automatic climate control can be configured to operate
when the vehicle is started. Refer toRemote start climate optionsin
theClimate Controlschapter for more information and also refer to
Message centerin theInstrument Clusterchapter to learn how to
enable different climate options. A manual climate control system will
run at the setting it was set to when the vehicle was last turned off.
Locks and Security
149
2011 Explorer(exp)
Owners Guide, 1st Printing
USA(fus)
Page 269 of 449
WARNING:Do not start your vehicle in a closed garage or in
other enclosed areas. Exhaust fumes can be toxic. Always open
the garage door before you start the engine. SeeGuarding against
exhaust fumesin this chapter for more instructions.
WARNING:If you smell exhaust fumes inside your vehicle, have
your dealer inspect your vehicle immediately. Do not drive if you
smell exhaust fumes.
Important safety precautions
When the engine starts, the idle RPM runs faster to warm the engine. If
the engine idle speed does not slow down automatically, have the vehicle
checked.
If the vehicle is operated in a heavy snow storm or blowing snow
conditions, the engine air induction may become partially clogged with
snow and/or ice. If this occurs the engine may experience a significant
reduction in power output. At the earliest opportunity, clear all snow
and/or ice away for the air induction inlet.
Before starting the vehicle:
1. Make sure all occupants buckle their safety belts. For more
information on safety belts and their proper usage, refer to theSeating
and Safety Restraintschapter.
2. Make sure the headlamps and electrical accessories are off.
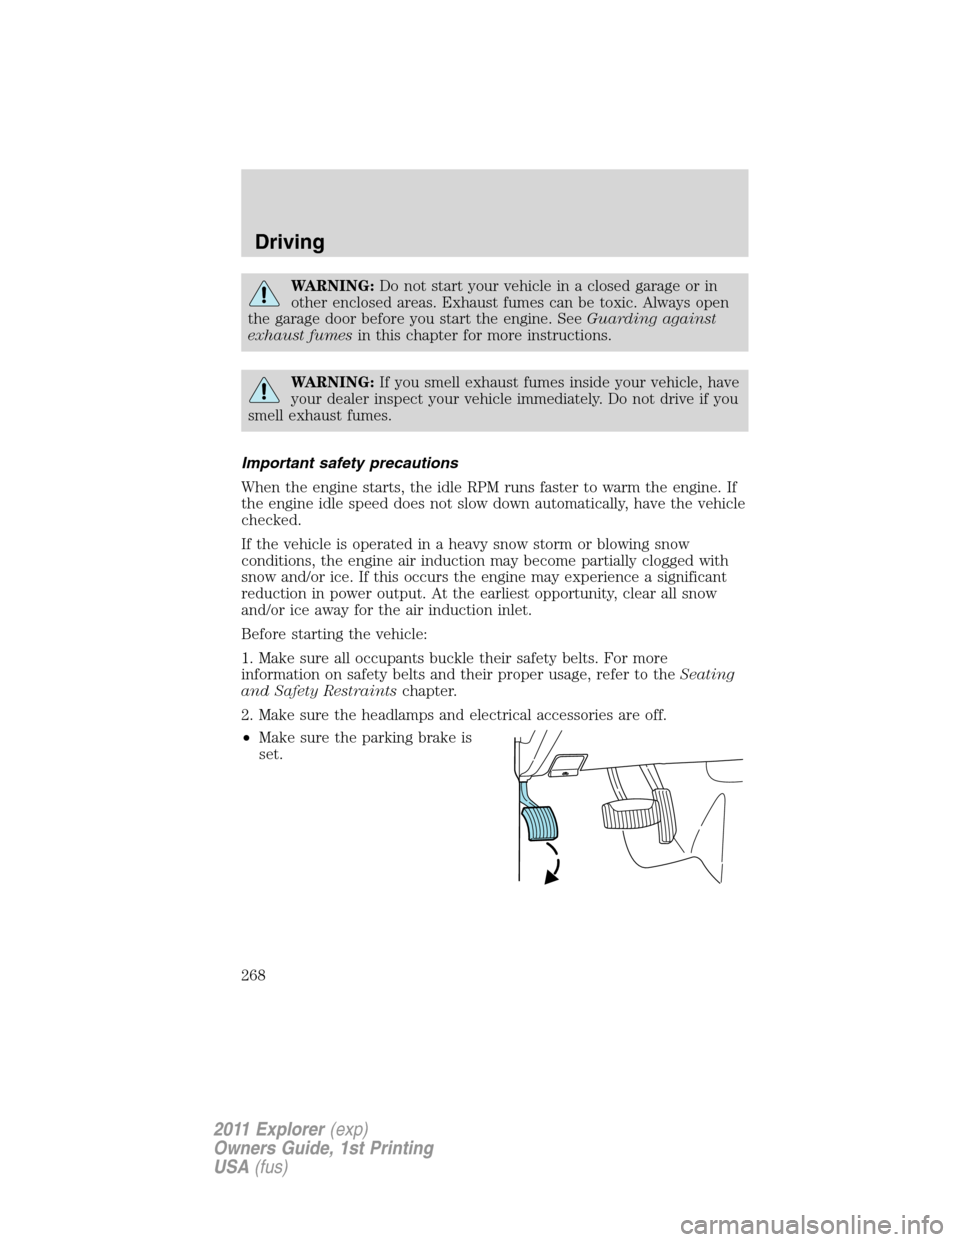
•Make sure the parking brake is
set.
Driving
268
2011 Explorer(exp)
Owners Guide, 1st Printing
USA(fus)
Page 290 of 449
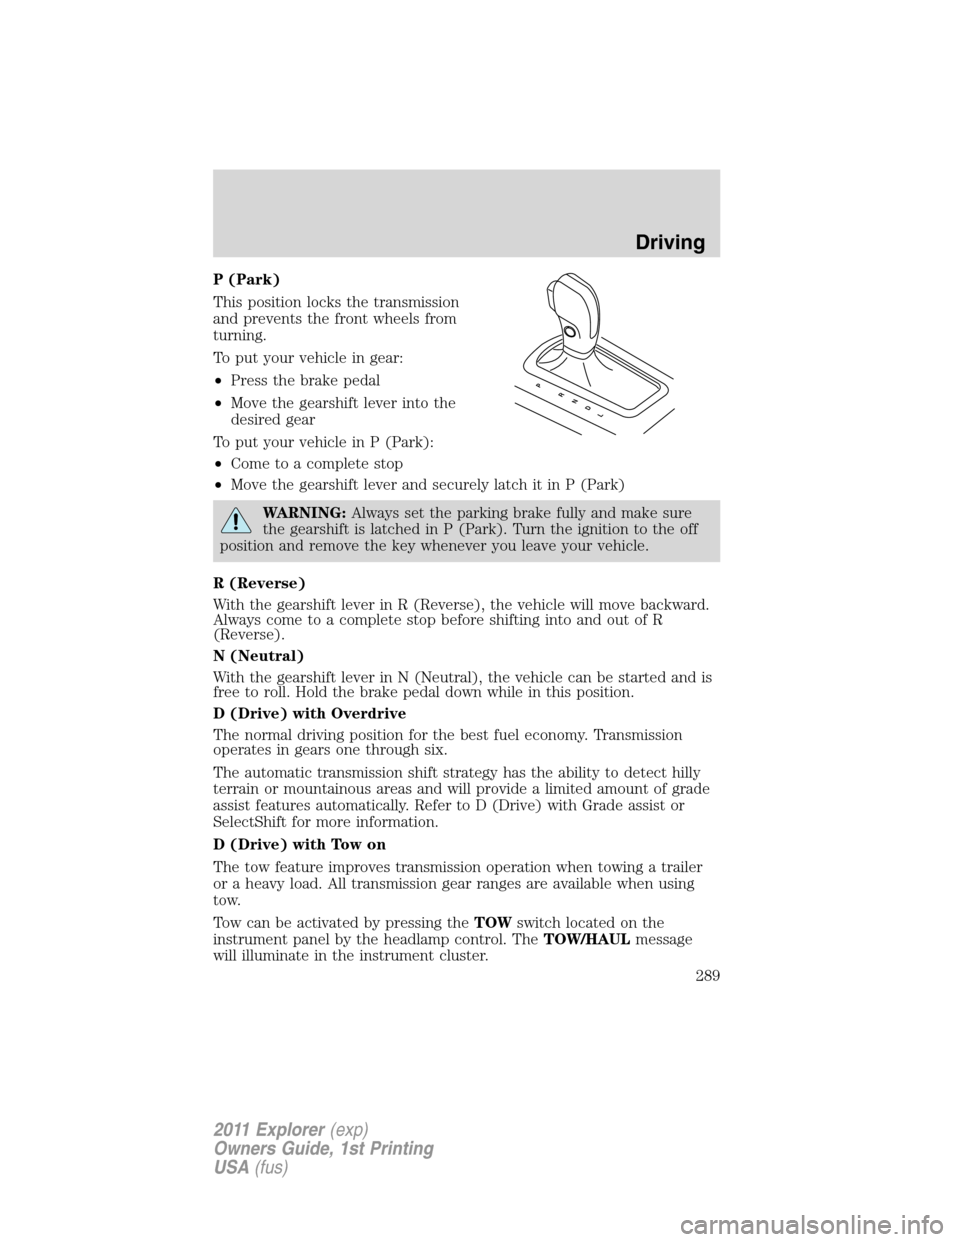
P (Park)
This position locks the transmission
and prevents the front wheels from
turning.
To put your vehicle in gear:
•Press the brake pedal
•Move the gearshift lever into the
desired gear
To put your vehicle in P (Park):
•Come to a complete stop
•Move the gearshift lever and securely latch it in P (Park)
WARNING:Always set the parking brake fully and make sure
the gearshift is latched in P (Park). Turn the ignition to the off
position and remove the key whenever you leave your vehicle.
R (Reverse)
With the gearshift lever in R (Reverse), the vehicle will move backward.
Always come to a complete stop before shifting into and out of R
(Reverse).
N (Neutral)
With the gearshift lever in N (Neutral), the vehicle can be started and is
free to roll. Hold the brake pedal down while in this position.
D (Drive) with Overdrive
The normal driving position for the best fuel economy. Transmission
operates in gears one through six.
The automatic transmission shift strategy has the ability to detect hilly
terrain or mountainous areas and will provide a limited amount of grade
assist features automatically. Refer to D (Drive) with Grade assist or
SelectShift for more information.
D (Drive) with Tow on
The tow feature improves transmission operation when towing a trailer
or a heavy load. All transmission gear ranges are available when using
tow.
Tow can be activated by pressing theTOWswitch located on the
instrument panel by the headlamp control. TheTOW/HAULmessage
will illuminate in the instrument cluster.
PRNDL
Driving
289
2011 Explorer(exp)
Owners Guide, 1st Printing
USA(fus)
Page 302 of 449
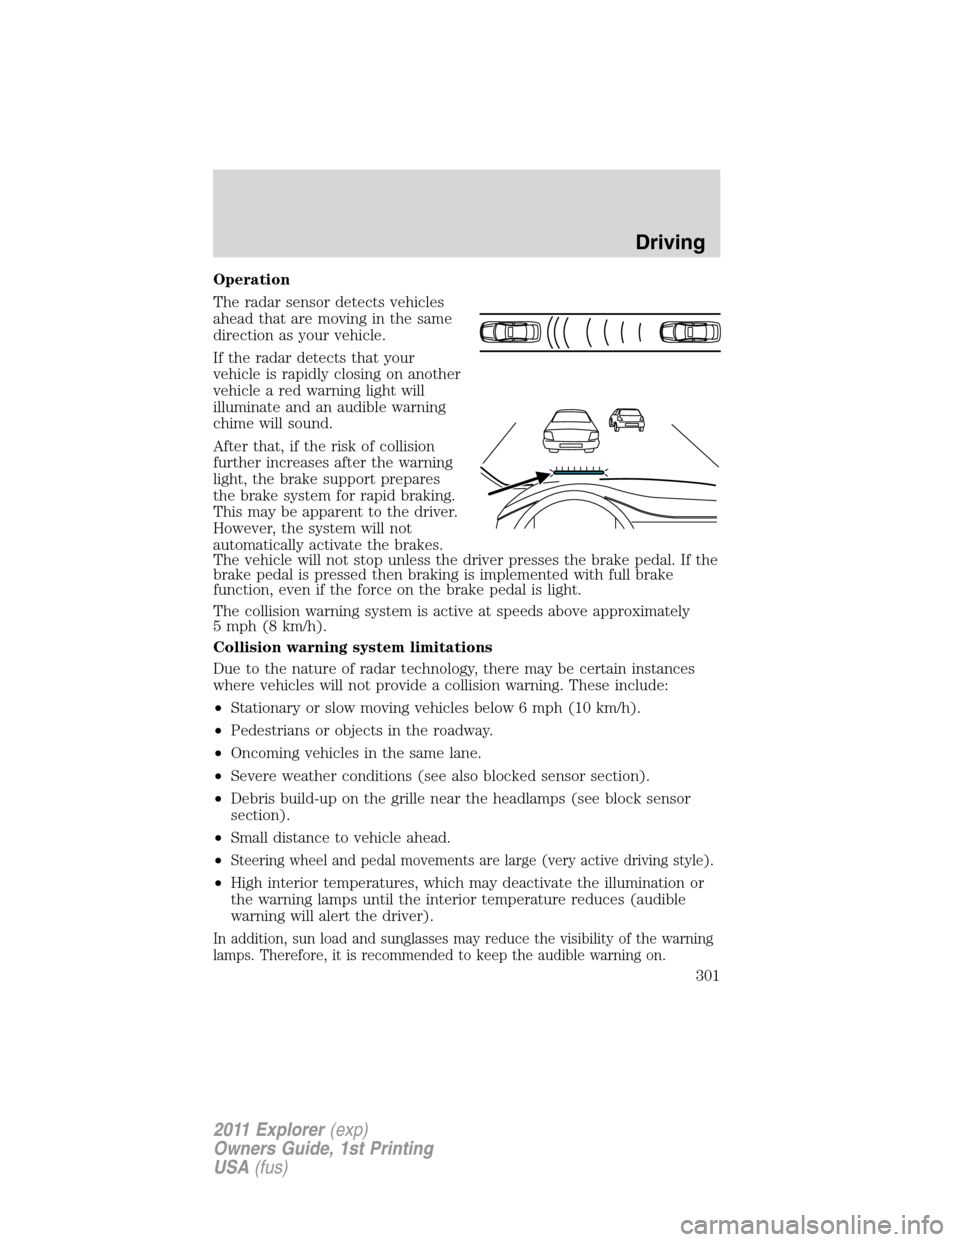
Operation
The radar sensor detects vehicles
ahead that are moving in the same
direction as your vehicle.
If the radar detects that your
vehicle is rapidly closing on another
vehicle a red warning light will
illuminate and an audible warning
chime will sound.
After that, if the risk of collision
further increases after the warning
light, the brake support prepares
the brake system for rapid braking.
This may be apparent to the driver.
However, the system will not
automatically activate the brakes.
The vehicle will not stop unless the driver presses the brake pedal. If the
brake pedal is pressed then braking is implemented with full brake
function, even if the force on the brake pedal is light.
The collision warning system is active at speeds above approximately
5 mph (8 km/h).
Collision warning system limitations
Due to the nature of radar technology, there may be certain instances
where vehicles will not provide a collision warning. These include:
•Stationary or slow moving vehicles below 6 mph (10 km/h).
•Pedestrians or objects in the roadway.
•Oncoming vehicles in the same lane.
•Severe weather conditions (see also blocked sensor section).
•Debris build-up on the grille near the headlamps (see block sensor
section).
•Small distance to vehicle ahead.
•
Steering wheel and pedal movements are large (very active driving style).
•High interior temperatures, which may deactivate the illumination or
the warning lamps until the interior temperature reduces (audible
warning will alert the driver).
In addition, sun load and sunglasses may reduce the visibility of the warning
lamps. Therefore, it is recommended to keep the audible warning on.
Driving
301
2011 Explorer(exp)
Owners Guide, 1st Printing
USA(fus)