FORD EXPLORER 2011 5.G Manual PDF
Manufacturer: FORD, Model Year: 2011, Model line: EXPLORER, Model: FORD EXPLORER 2011 5.GPages: 449, PDF Size: 4.03 MB
Page 71 of 449
Operating tips
•To reduce fog build-up on the windshield during humid weather,
select
(defrost) or(floor/defrost).
•To reduce humidity build-up inside the vehicle, do not drive with the
system off or with
(recirculated air) engaged and A/C off.
•Do not put objects under the front seats that will interfere with the
airflow to the back seats.
•Remove any snow, ice or leaves from the air intake area at the base of
the windshield.
•To improve the A/C cool down, drive with the windows slightly open
for 2-3 minutes after start-up or until the vehicle has been “aired out.”
•A small amount of air may be felt from the floor vent regardless of the
air distribution setting that is selected.
For maximum cooling performance:
•Automatic operation:
1. Press AUTO for full automatic operation.
2. Do not override A/C or
(recirculated air).
3. Set the temperature to 60°F (16°C).
•Manual operation:
1. Select MAX A/C.
2. Select
(panel) or(panel/floor).
3. Select
(recirculated air) to provide colder airflow.
4. Set the temperature to 60°F (16°C).
5. Set highest fan setting initially, then adjust to maintain comfort.
To aid in side window defogging/demisting in cold weather:
1. Select
(panel/floor).
2. Select A/C.
3. Adjust the temperature control to maintain comfort.
4. Set the fan speed to the highest setting.
5. Direct the outer instrument panel vents towards the side windows.
To increase airflow to the outer instrument panel vents, close the vents
located in the middle of the instrument panel.
Climate Controls
70
2011 Explorer(exp)
Owners Guide, 1st Printing
USA(fus)
Page 72 of 449
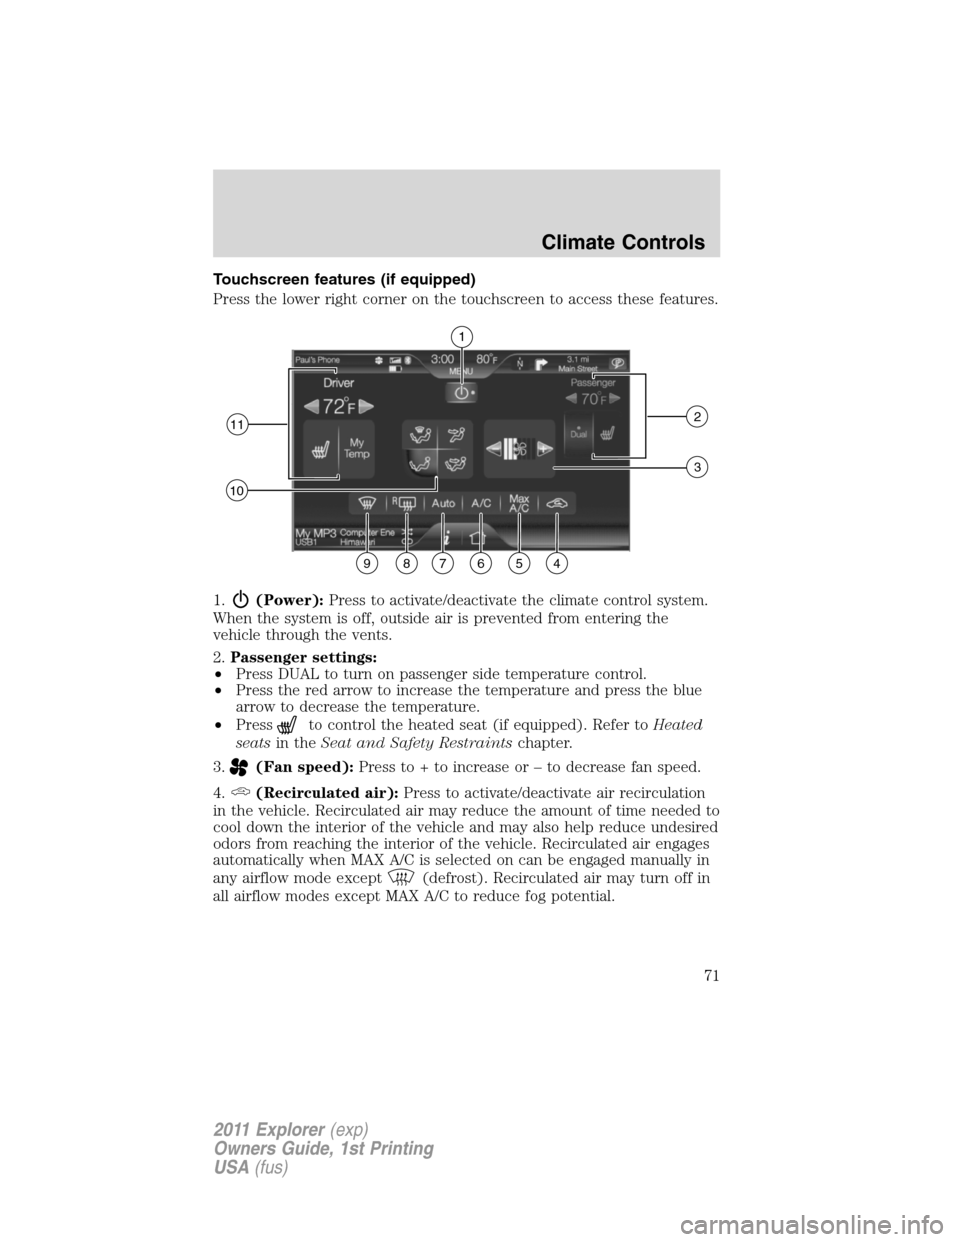
Touchscreen features (if equipped)
Press the lower right corner on the touchscreen to access these features.
1.
(Power):Press to activate/deactivate the climate control system.
When the system is off, outside air is prevented from entering the
vehicle through the vents.
2.Passenger settings:
•Press DUAL to turn on passenger side temperature control.
•Press the red arrow to increase the temperature and press the blue
arrow to decrease the temperature.
•Press
to control the heated seat (if equipped). Refer toHeated
seatsin theSeat and Safety Restraintschapter.
3.
(Fan speed):Press to + to increase or – to decrease fan speed.
4.
(Recirculated air):Press to activate/deactivate air recirculation
in the vehicle. Recirculated air may reduce the amount of time needed to
cool down the interior of the vehicle and may also help reduce undesired
odors from reaching the interior of the vehicle. Recirculated air engages
automatically when MAX A/C is selected on can be engaged manually in
any airflow mode except
(defrost). Recirculated air may turn off in
all airflow modes except MAX A/C to reduce fog potential.
1
112
10
3
987654
Climate Controls
71
2011 Explorer(exp)
Owners Guide, 1st Printing
USA(fus)
Page 73 of 449
5.MAX A/C:Press to distribute recirculated air through the instrument
panel vents to cool the vehicle. This is more economical and efficient
than normal A/C mode. Recirculated air may also help reduce
undesirable odors from entering the vehicle. Press again for normal A/C
operation.
6.A/C:Press to activate/deactivate air conditioning. Use with
recirculated air to improve cooling performance and efficiency. Engages
automatically in MAX A/C,
(defrost) and(floor/defrost).
7.AUTO:Press to engage full automatic operation. Select the desired
temperature using the temperature control. The system will
automatically determine fan speed, airflow distribution, A/C on or off,
and outside or recirculated air, to heat or cool the vehicle in order to
reach the desired temperature.
8.
R(Rear defroster):Press to activate/deactivate the rear window
defroster. This button will also activate/deactivate the heated mirror (if
equipped). Refer toRear window defrosterlater in this chapter for
more information.
9.
(Defrost):Press to distribute outside air through the windshield
defroster vents and demister vents. Can be used to clear the windshield
of fog and thin ice. The system will automatically provide outside air to
reduce window fogging. Press this button again to return to the previous
air flow selection. To return to full automatic control, press AUTO.
10.Manual controls:Select any of the following to determine where
airflow is directed:
•
:Distributes air through the windshield defroster vents, demister
vents, floor vents and rear seat floor vents. The system will
automatically provide outside air to reduce window fogging. To return
to full automatic control, press AUTO.
•
:Distributes air through the instrument panel vents. To return to
full automatic control, press AUTO.
•
:Distributes air through the instrument panel vents, demister
vents, floor vents, rear seat floor vents. To return to full automatic
control, press AUTO.
•
:Distributes air through the demister vents, floor vents and rear
seat floor vents. To return to full automatic control, press AUTO.
Climate Controls
72
2011 Explorer(exp)
Owners Guide, 1st Printing
USA(fus)
Page 74 of 449
11.Driver settings:
•Press the red arrow to increase the temperature and press the blue
arrow to decrease the temperature.
•Press
to control the heated seat (if equipped). Refer toHeated
seatsin theSeat and Safety Restraintschapter.
•Press and hold MyTemp to select a temperature you would like the
vehicle to remember and maintain for you.
Rear controls
To access, press ‘Rear’ in the lower right status bar. When the arrow icon is
down (
), you have access to the rear controls and they will display
along on the bottom of the screen under the Rear Climate heading.
•Pressto turn on/off the Rear Climate controls.
•Press ‘Rear Control’ to allow the rear seat passengers to have control
over of the rear auxiliary climate controls. Press again to control via
the touchscreen.
•Press the blue/red arrow to decrease/increase the temperature.
•Press
+/- to increase/decrease the fan speed.
To close access to the rear controls, press the arrow in the lower right
status bar again.
Climate control voice commands (if equipped)
The following voice commands are available at the main menu level of a
voice session. For example, press
and after the prompt, “Say a
command”, you may say any of the following commands:
•Climate On•Climate Off
•Climate Automatic•Climate My Temperature
•Climate Temperature <15.5–29.5>
degrees•Climate Temperature <60–85>
degrees
There are additional climate control commands but in order to access
them, you have to say “Climate” first, then when the system is ready to
listen, you may say any of the following commands:
•Automatic•Dual Off
•Off•On
•A/C Off•A/C On
•Max A/C On•Max A/C Off
•Defrost On•Defrost Off
Climate Controls
73
2011 Explorer(exp)
Owners Guide, 1st Printing
USA(fus)
Page 75 of 449
•Rear Defrost On•Rear Defrost Off
•Recirc On•Recirc Off
•Panel On•Panel Floor On
•Floor On•Windshield Floor On
•Temperature High•Temperature Low
•Fan Increase•Fan Decrease
•Temperature•Temperature Increase
•Temperature Decrease•Temperature <15.5–29.5>
degrees
•Temperature <60–85> degrees•My Temp
•Help
*Note:If you have said “Temperature”, you can then say any of the
following commands:
•High•Low
•<15.5–29.5> degrees•<60–85> degrees
For more information on your touchscreen system, refer to theMyFord
Touch™ / MyLincoln Touch™ supplement.
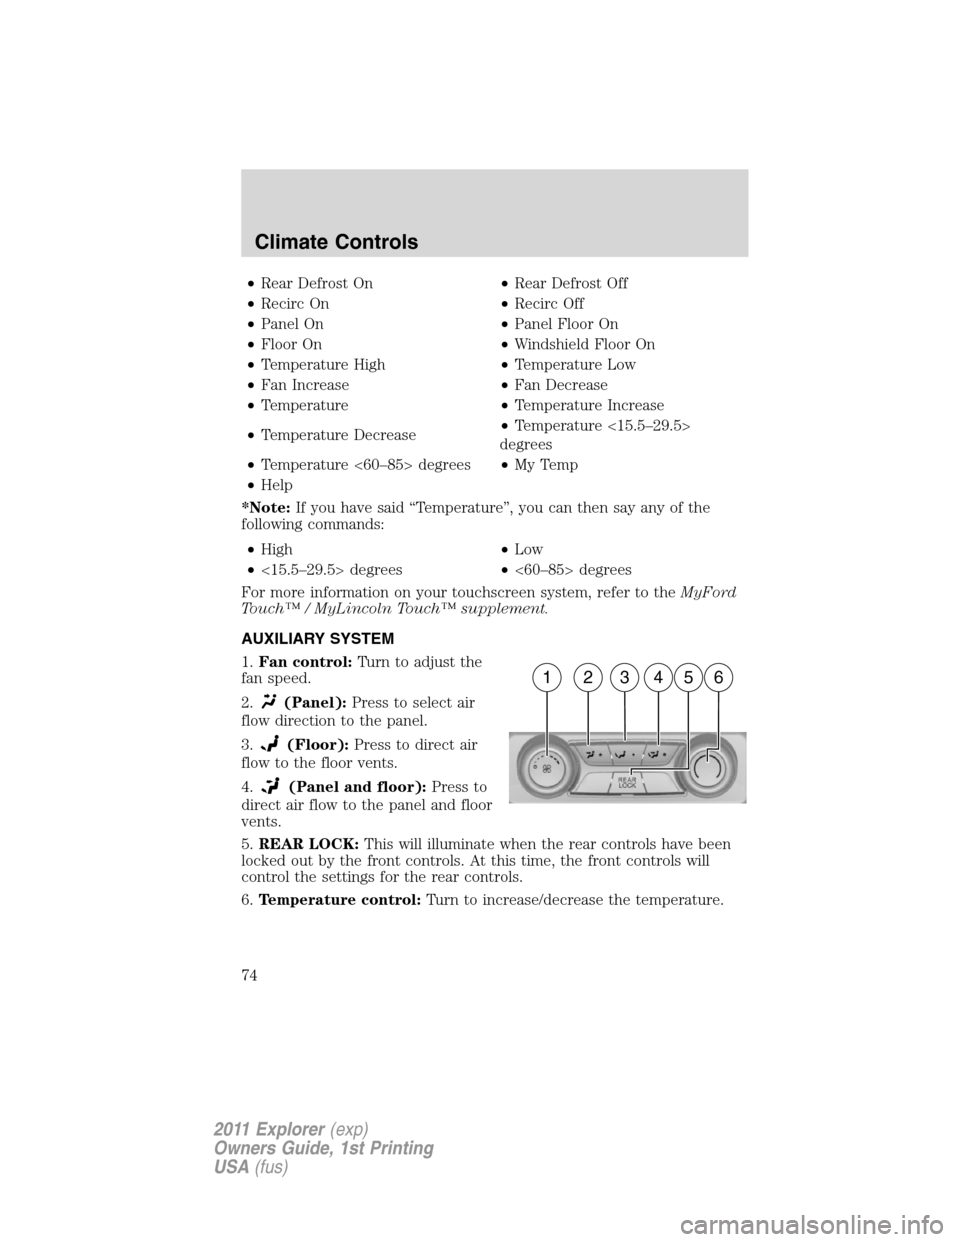
AUXILIARY SYSTEM
1.Fan control:Turn to adjust the
fan speed.
2.
(Panel):Press to select air
flow direction to the panel.
3.
(Floor):Press to direct air
flow to the floor vents.
4.
(Panel and floor):Press to
direct air flow to the panel and floor
vents.
5.REAR LOCK:This will illuminate when the rear controls have been
locked out by the front controls. At this time, the front controls will
control the settings for the rear controls.
6.Temperature control:Turn to increase/decrease the temperature.
162345
Climate Controls
74
2011 Explorer(exp)
Owners Guide, 1st Printing
USA(fus)
Page 76 of 449
REAR WINDOW DEFROSTER
The rear defroster control is located on the instrument panel or in the
touchscreen display (if equipped).
Press the rear defroster control
Rto clear the rear window of thin ice
and fog.
The ignition must be in the on position to operate the rear window defroster.
The defroster turns off automatically after 10 minutes or when the
ignition is turned to off or the accessory position. To manually turn off
the defroster before 10 minutes have passed, push the control again.
REMOTE START CLIMATE OPERATION (IF EQUIPPED)
The climate control system will condition the cabin temperature during
remote start. Engine idle may increase to help with adjusting the cabin
temperature.
Note:No climate control adjustments will be recognized during remote
start operation. Once the ignition is cycled to the on position, the climate
control system will return to the previous settings (last ignition-on cycle)
and adjustments can be made normally. If the previous setting was off,
the climate control system will turn off.
Automatic climate control
For hot weather conditions:
•The interior cabin will be cooled to 72°F (22°C).
•The cooled seats (if equipped) will be set to high.
For cold weather conditions:
•The interior cabin will be heated to 72°F (22°C).
•The heated seats (if equipped) will be set to high.
•Rear defrost/heated mirrors (if equipped) will be activated.
For moderate weather conditions:
•The interior cabin will be heated, cooled, or off, based upon the
previous operating state (last ignition-on cycle).
•Heated/cooled seats (if equipped) will be deactivated.
•Rear defrost/heated mirrors (if equipped) will be deactivated.
Climate Controls
75
2011 Explorer(exp)
Owners Guide, 1st Printing
USA(fus)
Page 77 of 449
CABIN AIR FILTER
The cabin air filter element is designed to reduce the concentration of
airborne particles such as dust, spores and pollen in the air being
supplied to the interior of the vehicle. The presence of a particulate filter
element provides the following benefits:
•Improves your driving comfort by reducing particle concentration.
•Improves the interior compartment cleanliness.
•Protects the climate control components from particle deposits.
Note:A cabin air filter must be installed at all times to prevent foreign
objects from entering the system. Running the system without a filter in
place could result in degradation or damage to the system.
For replacement intervals regarding the cabin air filter, see the
scheduled maintenance information. For more information regarding
your filter, see your authorized dealer.
Climate Controls
76
2011 Explorer(exp)
Owners Guide, 1st Printing
USA(fus)
Page 78 of 449
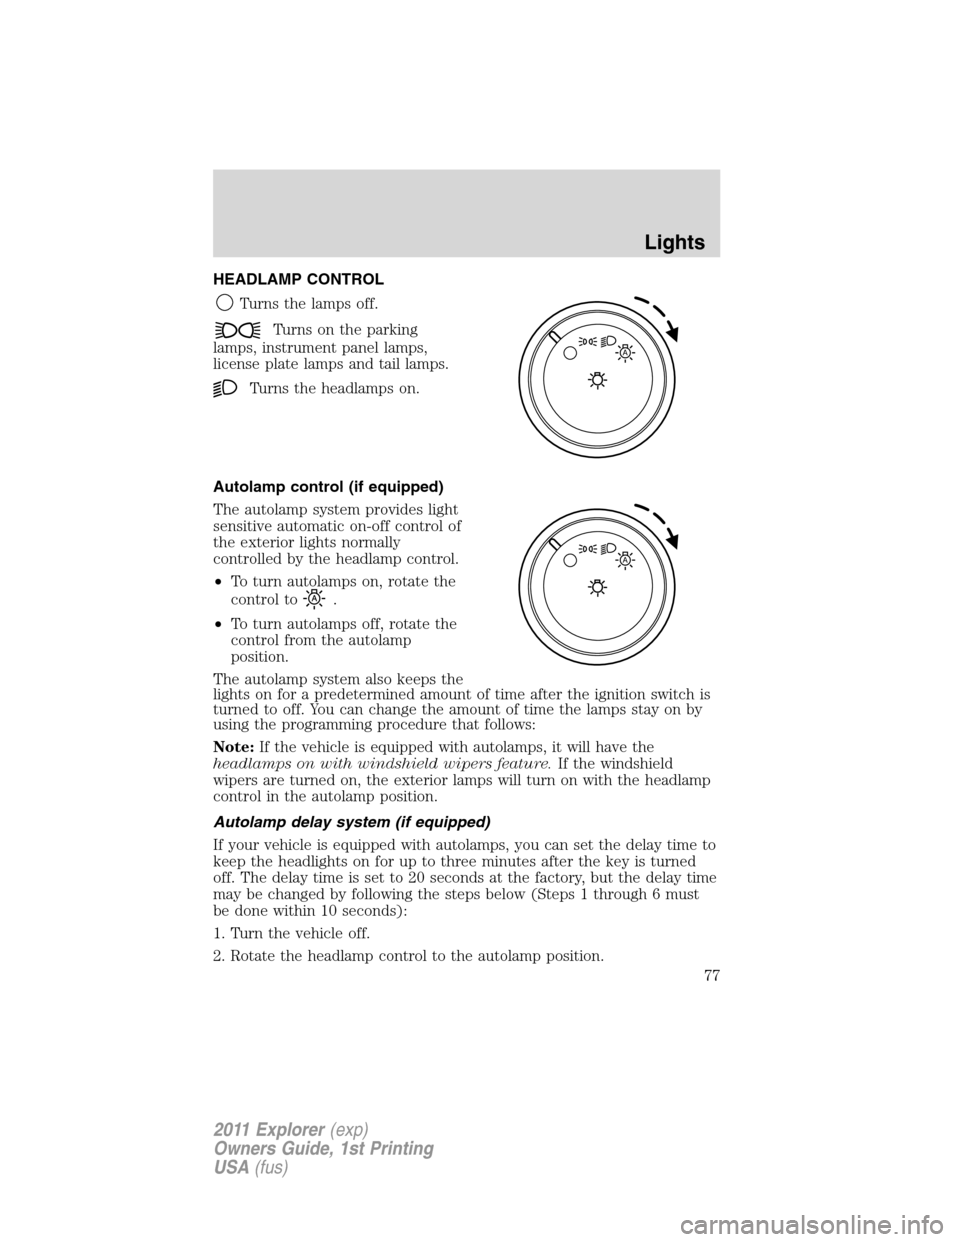
HEADLAMP CONTROL
Turns the lamps off.
Turns on the parking
lamps, instrument panel lamps,
license plate lamps and tail lamps.
Turns the headlamps on.
Autolamp control (if equipped)
The autolamp system provides light
sensitive automatic on-off control of
the exterior lights normally
controlled by the headlamp control.
•To turn autolamps on, rotate the
control to
.
•To turn autolamps off, rotate the
control from the autolamp
position.
The autolamp system also keeps the
lights on for a predetermined amount of time after the ignition switch is
turned to off. You can change the amount of time the lamps stay on by
using the programming procedure that follows:
Note:If the vehicle is equipped with autolamps, it will have the
headlamps on with windshield wipers feature.If the windshield
wipers are turned on, the exterior lamps will turn on with the headlamp
control in the autolamp position.
Autolamp delay system (if equipped)
If your vehicle is equipped with autolamps, you can set the delay time to
keep the headlights on for up to three minutes after the key is turned
off. The delay time is set to 20 seconds at the factory, but the delay time
may be changed by following the steps below (Steps 1 through 6 must
be done within 10 seconds):
1. Turn the vehicle off.
2. Rotate the headlamp control to the autolamp position.
A
A
Lights
77
2011 Explorer(exp)
Owners Guide, 1st Printing
USA(fus)
Page 79 of 449
3. Rotate the headlamp control to the off position.
4. Turn the vehicle on.
5. Turn the vehicle off.
6. Turn the headlamp control to the autolamp position (the headlights
should turn on).
7. Turn the headlamp control to the off position when the desired delay
time (up to three minutes) has been reached.
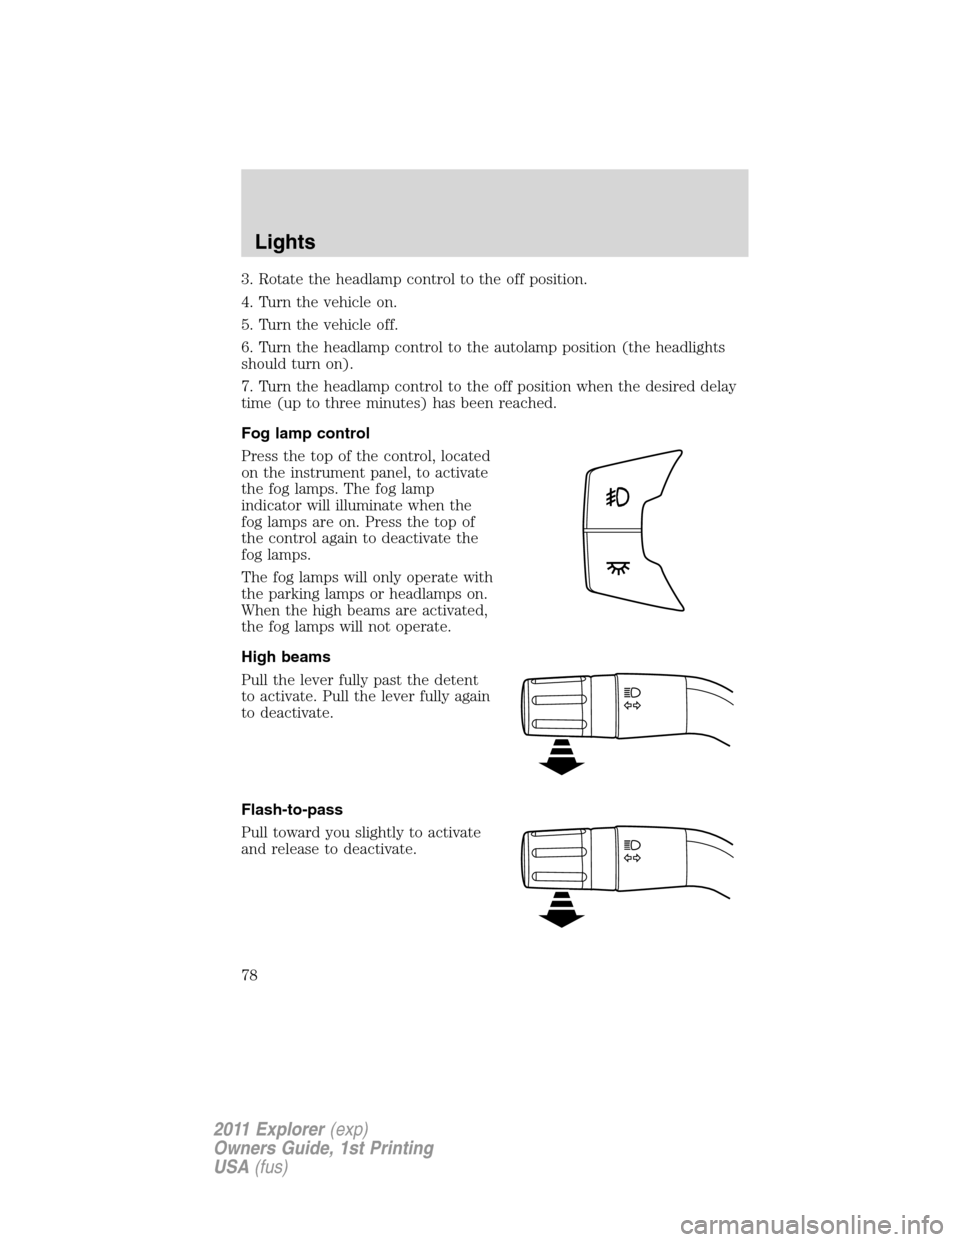
Fog lamp control
Press the top of the control, located
on the instrument panel, to activate
the fog lamps. The fog lamp
indicator will illuminate when the
fog lamps are on. Press the top of
the control again to deactivate the
fog lamps.
The fog lamps will only operate with
the parking lamps or headlamps on.
When the high beams are activated,
the fog lamps will not operate.
High beams
Pull the lever fully past the detent
to activate. Pull the lever fully again
to deactivate.
Flash-to-pass
Pull toward you slightly to activate
and release to deactivate.
Lights
78
2011 Explorer(exp)
Owners Guide, 1st Printing
USA(fus)
Page 80 of 449
Daytime running lamps (DRL) (if equipped)
To activate DRL:
•the ignition must be in the on position and
•the headlamp control is in the
orposition
•the transmission is not in P (Park).
WARNING:Always remember to turn on your headlamps at
dusk or during inclement weather. The Daytime Running Light
(DRL) System does not activate your tail lamps and generally may not
provide adequate lighting during these conditions. Failure to activate
your headlamps under these conditions may result in a collision.
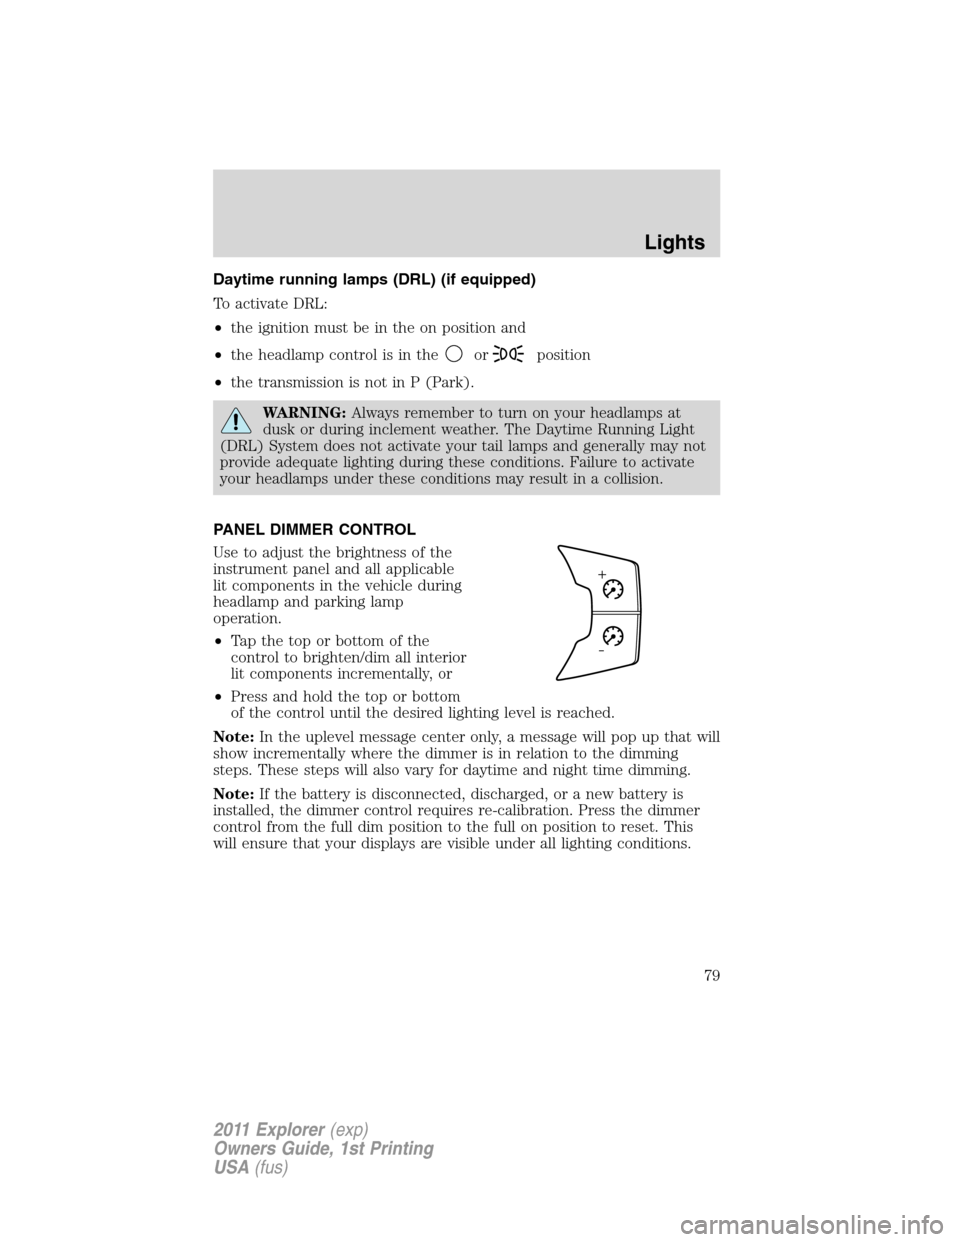
PANEL DIMMER CONTROL
Use to adjust the brightness of the
instrument panel and all applicable
lit components in the vehicle during
headlamp and parking lamp
operation.
•Tapthetoporbottomofthe
control to brighten/dim all interior
lit components incrementally, or
•Press and hold the top or bottom
of the control until the desired lighting level is reached.
Note:In the uplevel message center only, a message will pop up that will
show incrementally where the dimmer is in relation to the dimming
steps. These steps will also vary for daytime and night time dimming.
Note:If the battery is disconnected, discharged, or a new battery is
installed, the dimmer control requires re-calibration. Press the dimmer
control from the full dim position to the full on position to reset. This
will ensure that your displays are visible under all lighting conditions.
Lights
79
2011 Explorer(exp)
Owners Guide, 1st Printing
USA(fus)