brake light FORD EXPLORER 2015 5.G Owners Manual
[x] Cancel search | Manufacturer: FORD, Model Year: 2015, Model line: EXPLORER, Model: FORD EXPLORER 2015 5.GPages: 596, PDF Size: 6.32 MB
Page 13 of 596
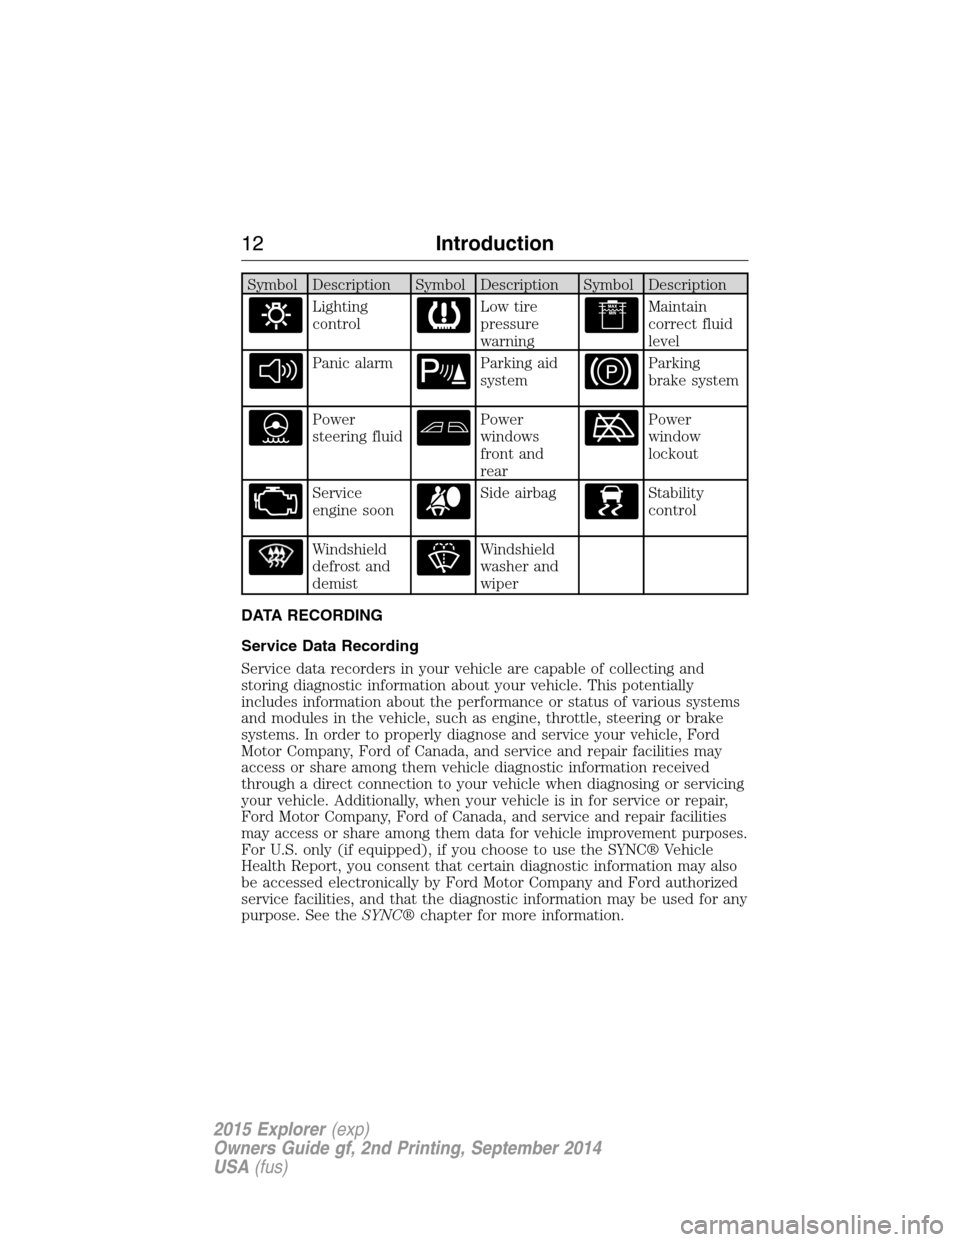
Symbol Description Symbol Description Symbol Description
Lighting
controlLow tire
pressure
warningMaintain
correct fluid
level
Panic alarmParking aid
systemParking
brake system
Power
steering fluidPower
windows
front and
rearPower
window
lockout
Service
engine soonSide airbagStability
control
Windshield
defrost and
demistWindshield
washer and
wiper
DATA RECORDING
Service Data Recording
Service data recorders in your vehicle are capable of collecting and
storing diagnostic information about your vehicle. This potentially
includes information about the performance or status of various systems
and modules in the vehicle, such as engine, throttle, steering or brake
systems. In order to properly diagnose and service your vehicle, Ford
Motor Company, Ford of Canada, and service and repair facilities may
access or share among them vehicle diagnostic information received
through a direct connection to your vehicle when diagnosing or servicing
your vehicle. Additionally, when your vehicle is in for service or repair,
Ford Motor Company, Ford of Canada, and service and repair facilities
may access or share among them data for vehicle improvement purposes.
For U.S. only (if equipped), if you choose to use the SYNC® Vehicle
Health Report, you consent that certain diagnostic information may also
be accessed electronically by Ford Motor Company and Ford authorized
service facilities, and that the diagnostic information may be used for any
purpose. See theSYNC®chapter for more information.
12Introduction
2015 Explorer(exp)
Owners Guide gf, 2nd Printing, September 2014
USA(fus)
Page 42 of 596
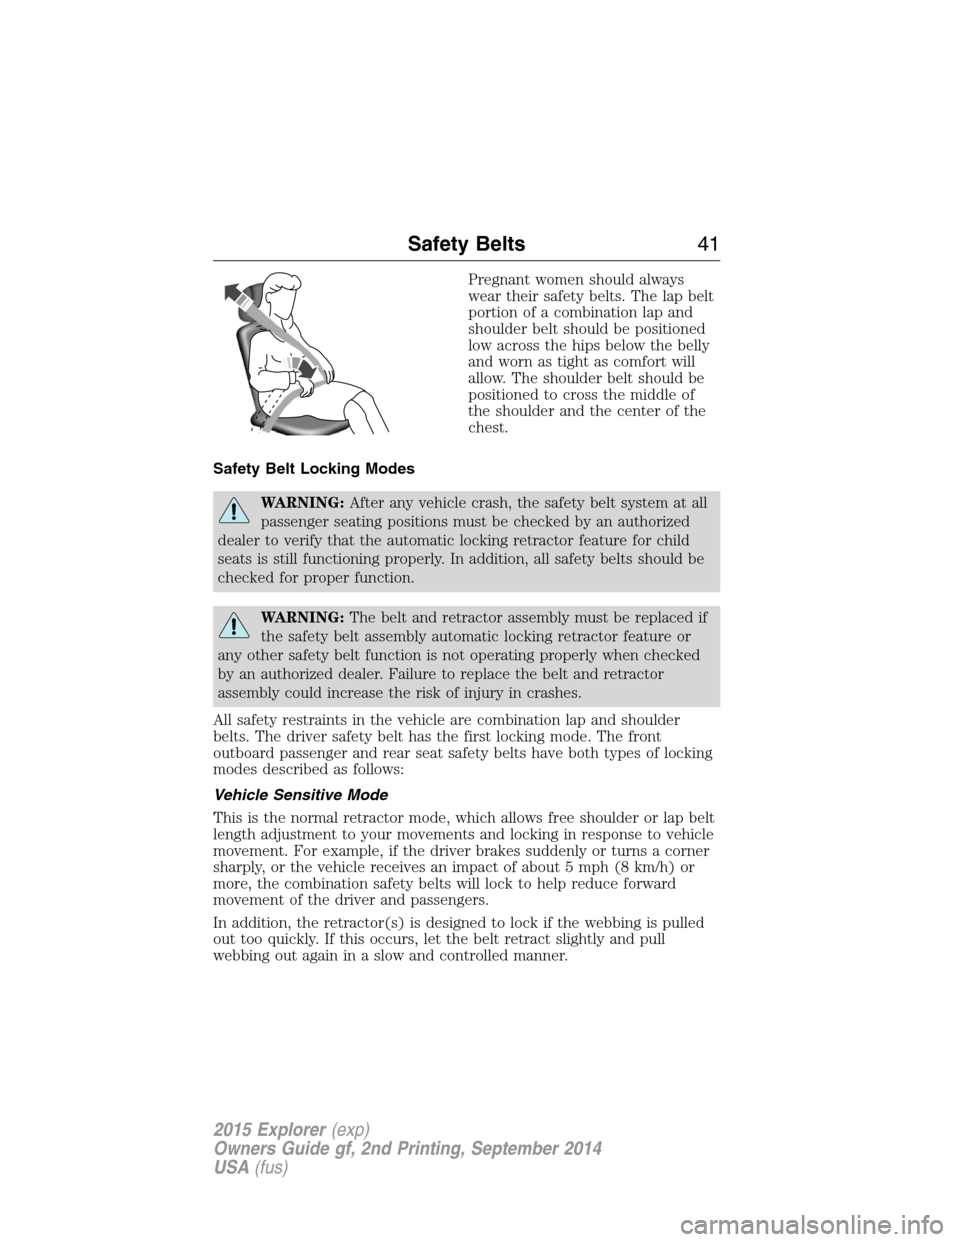
Pregnant women should always
wear their safety belts. The lap belt
portion of a combination lap and
shoulder belt should be positioned
low across the hips below the belly
and worn as tight as comfort will
allow. The shoulder belt should be
positioned to cross the middle of
the shoulder and the center of the
chest.
Safety Belt Locking Modes
WARNING:After any vehicle crash, the safety belt system at all
passenger seating positions must be checked by an authorized
dealer to verify that the automatic locking retractor feature for child
seats is still functioning properly. In addition, all safety belts should be
checked for proper function.
WARNING:The belt and retractor assembly must be replaced if
the safety belt assembly automatic locking retractor feature or
any other safety belt function is not operating properly when checked
by an authorized dealer. Failure to replace the belt and retractor
assembly could increase the risk of injury in crashes.
All safety restraints in the vehicle are combination lap and shoulder
belts. The driver safety belt has the first locking mode. The front
outboard passenger and rear seat safety belts have both types of locking
modes described as follows:
Vehicle Sensitive Mode
This is the normal retractor mode, which allows free shoulder or lap belt
length adjustment to your movements and locking in response to vehicle
movement. For example, if the driver brakes suddenly or turns a corner
sharply, or the vehicle receives an impact of about 5 mph (8 km/h) or
more, the combination safety belts will lock to help reduce forward
movement of the driver and passengers.
In addition, the retractor(s) is designed to lock if the webbing is pulled
out too quickly. If this occurs, let the belt retract slightly and pull
webbing out again in a slow and controlled manner.
Safety Belts41
2015 Explorer(exp)
Owners Guide gf, 2nd Printing, September 2014
USA(fus)
Page 46 of 596
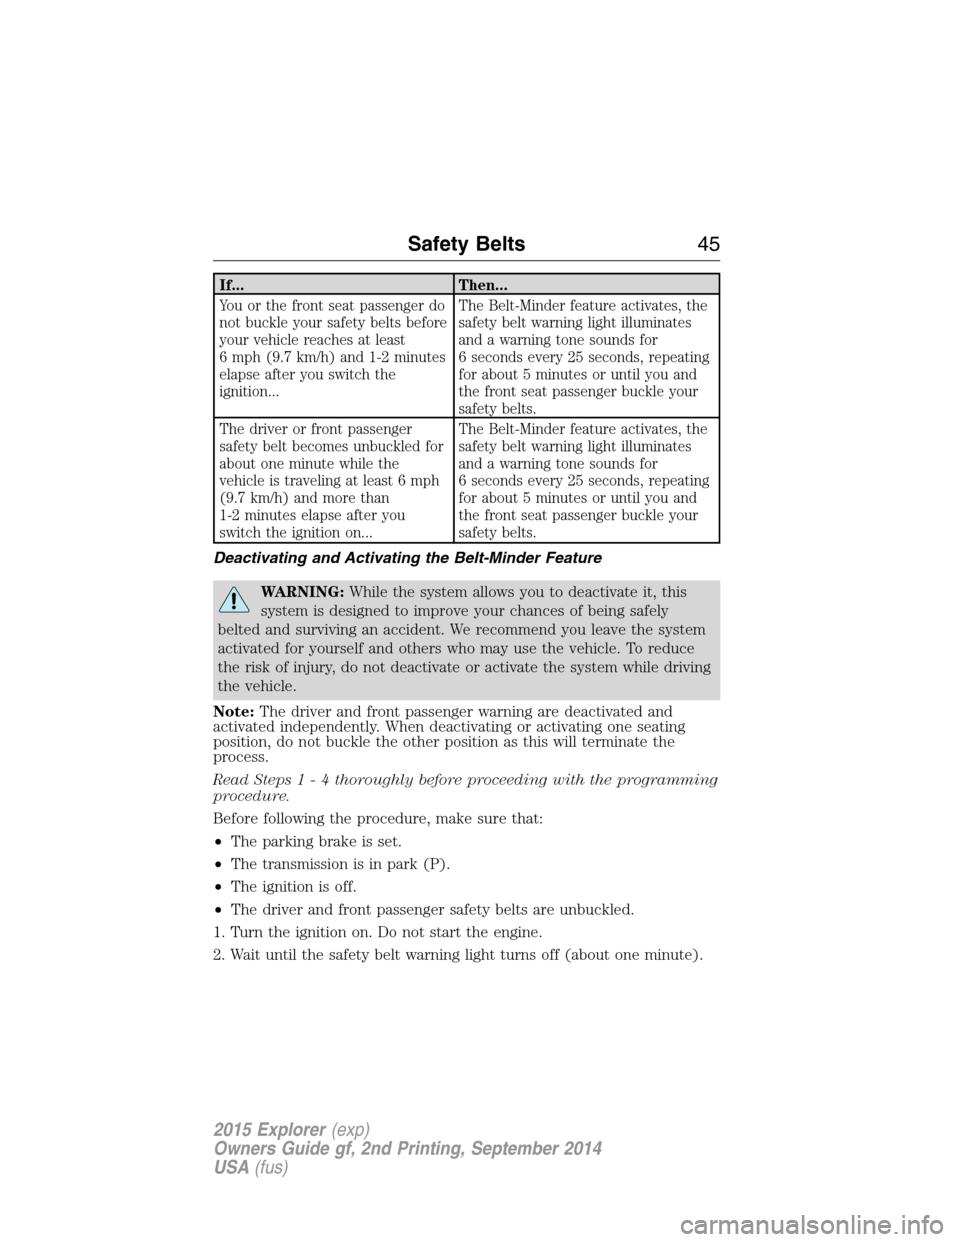
If... Then...
You or the front seat passenger do
not buckle your safety belts before
your vehicle reaches at least
6 mph (9.7 km/h) and 1-2 minutes
elapse after you switch the
ignition...The Belt-Minder feature activates, the
safety belt warning light illuminates
and a warning tone sounds for
6 seconds every 25 seconds, repeating
for about 5 minutes or until you and
the front seat passenger buckle your
safety belts.
The driver or front passenger
safety belt becomes unbuckled for
about one minute while the
vehicle is traveling at least 6 mph
(9.7 km/h) and more than
1-2 minutes elapse after you
switch the ignition on...The Belt-Minder feature activates, the
safety belt warning light illuminates
and a warning tone sounds for
6 seconds every 25 seconds, repeating
for about 5 minutes or until you and
the front seat passenger buckle your
safety belts.
Deactivating and Activating the Belt-Minder Feature
WARNING:While the system allows you to deactivate it, this
system is designed to improve your chances of being safely
belted and surviving an accident. We recommend you leave the system
activated for yourself and others who may use the vehicle. To reduce
the risk of injury, do not deactivate or activate the system while driving
the vehicle.
Note:The driver and front passenger warning are deactivated and
activated independently. When deactivating or activating one seating
position, do not buckle the other position as this will terminate the
process.
Read Steps1-4thoroughly before proceeding with the programming
procedure.
Before following the procedure, make sure that:
•The parking brake is set.
•The transmission is in park (P).
•The ignition is off.
•The driver and front passenger safety belts are unbuckled.
1. Turn the ignition on. Do not start the engine.
2. Wait until the safety belt warning light turns off (about one minute).
Safety Belts45
2015 Explorer(exp)
Owners Guide gf, 2nd Printing, September 2014
USA(fus)
Page 68 of 596
The remote start system will not work if:
•the ignition is on
•the alarm system is triggered
•you disable the feature
•the hood is open
•the transmission is not inP
•the vehicle battery voltage is too low
•the fuel is too low
•the service engine soon light is on.
Remote Starting the Vehicle
Note:You must press each button within three seconds of each other.
Your vehicle will not remote start and the horn will not sound if you do
not follow this sequence.
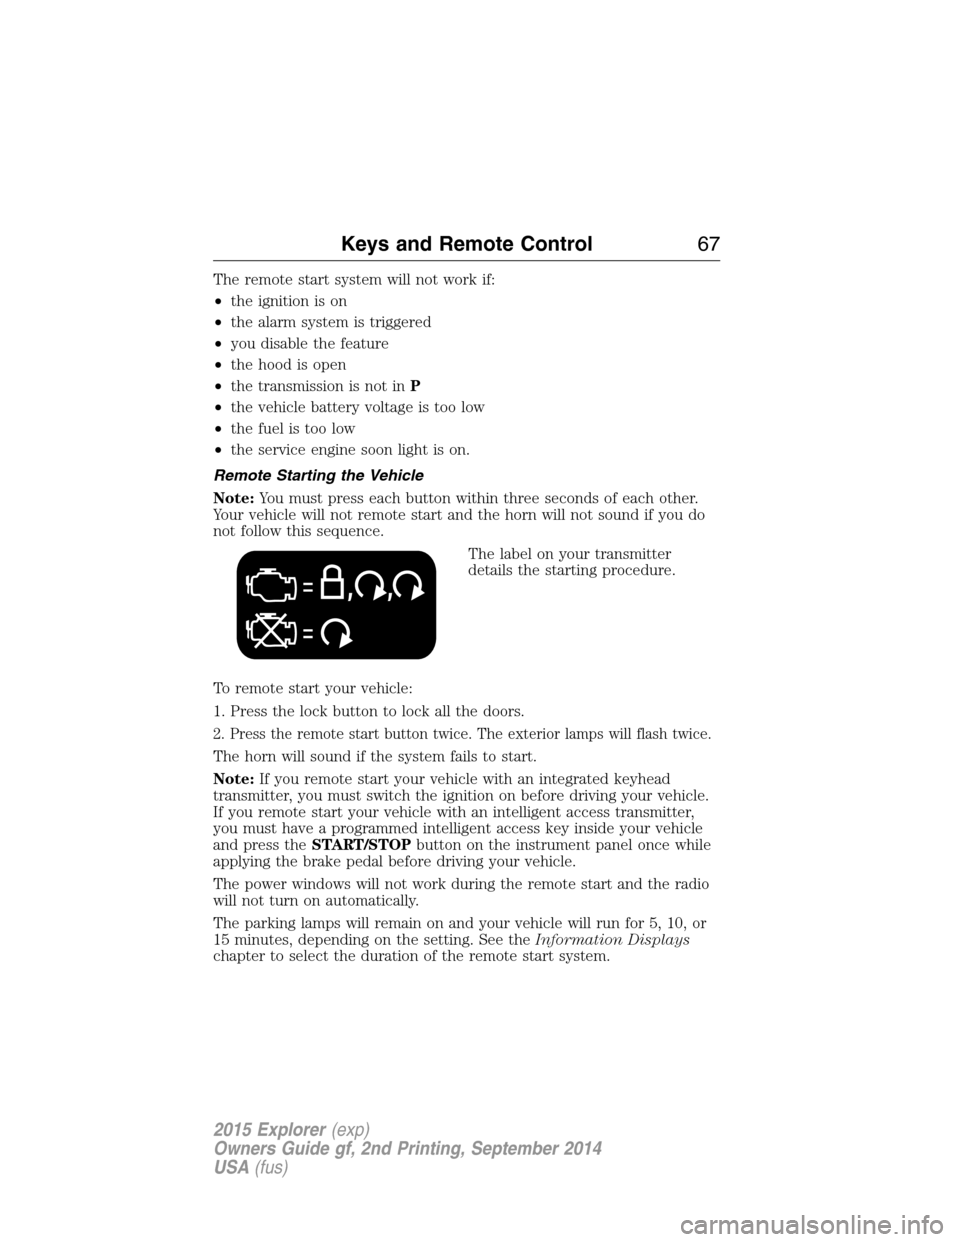
The label on your transmitter
details the starting procedure.
To remote start your vehicle:
1. Press the lock button to lock all the doors.
2. Press the remote start button twice. The exterior lamps will flash twice.
The horn will sound if the system fails to start.
Note:If you remote start your vehicle with an integrated keyhead
transmitter, you must switch the ignition on before driving your vehicle.
If you remote start your vehicle with an intelligent access transmitter,
you must have a programmed intelligent access key inside your vehicle
and press theSTART/STOPbutton on the instrument panel once while
applying the brake pedal before driving your vehicle.
The power windows will not work during the remote start and the radio
will not turn on automatically.
The parking lamps will remain on and your vehicle will run for 5, 10, or
15 minutes, depending on the setting. See theInformation Displays
chapter to select the duration of the remote start system.
Keys and Remote Control67
2015 Explorer(exp)
Owners Guide gf, 2nd Printing, September 2014
USA(fus)
Page 118 of 596
WARNING LAMPS AND INDICATORS
There are indicators that can alert you to a vehicle condition that may
become serious enough to cause expensive repairs. Many lights will
illuminate when you start your vehicle to make sure they work. If any
light remains on after starting the vehicle, refer to the respective system
warning light for additional information.
Note:Some warning indicators are reconfigurable telltales (RTT). These
indicators appear in the information display and function the same as a
warning light, but do not display on startup.
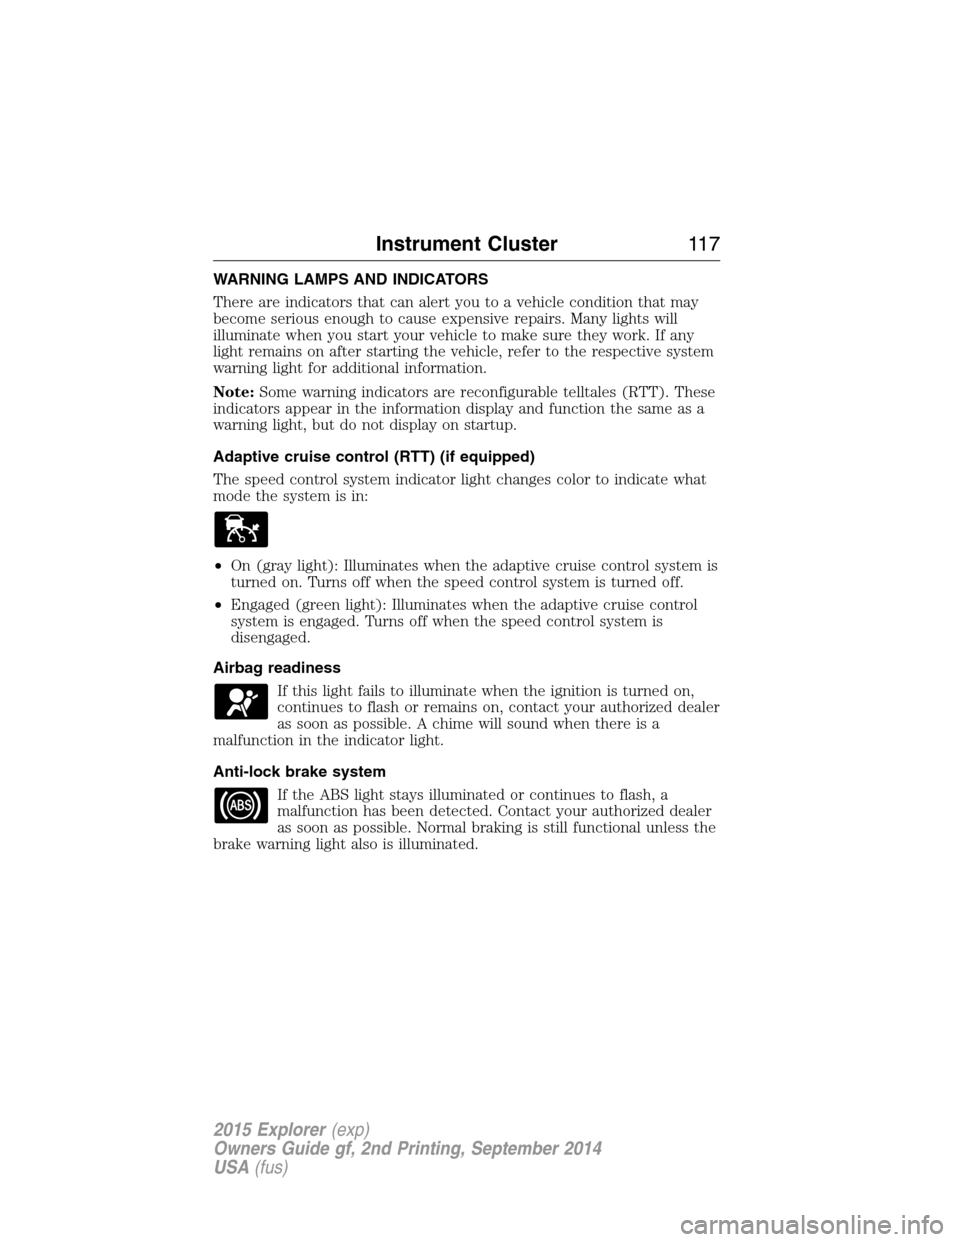
Adaptive cruise control (RTT) (if equipped)
The speed control system indicator light changes color to indicate what
mode the system is in:
•On (gray light): Illuminates when the adaptive cruise control system is
turned on. Turns off when the speed control system is turned off.
•Engaged (green light): Illuminates when the adaptive cruise control
system is engaged. Turns off when the speed control system is
disengaged.
Airbag readiness
If this light fails to illuminate when the ignition is turned on,
continues to flash or remains on, contact your authorized dealer
as soon as possible. A chime will sound when there is a
malfunction in the indicator light.
Anti-lock brake system
If the ABS light stays illuminated or continues to flash, a
malfunction has been detected. Contact your authorized dealer
as soon as possible. Normal braking is still functional unless the
brake warning light also is illuminated.
Instrument Cluster11 7
2015 Explorer(exp)
Owners Guide gf, 2nd Printing, September 2014
USA(fus)
Page 119 of 596
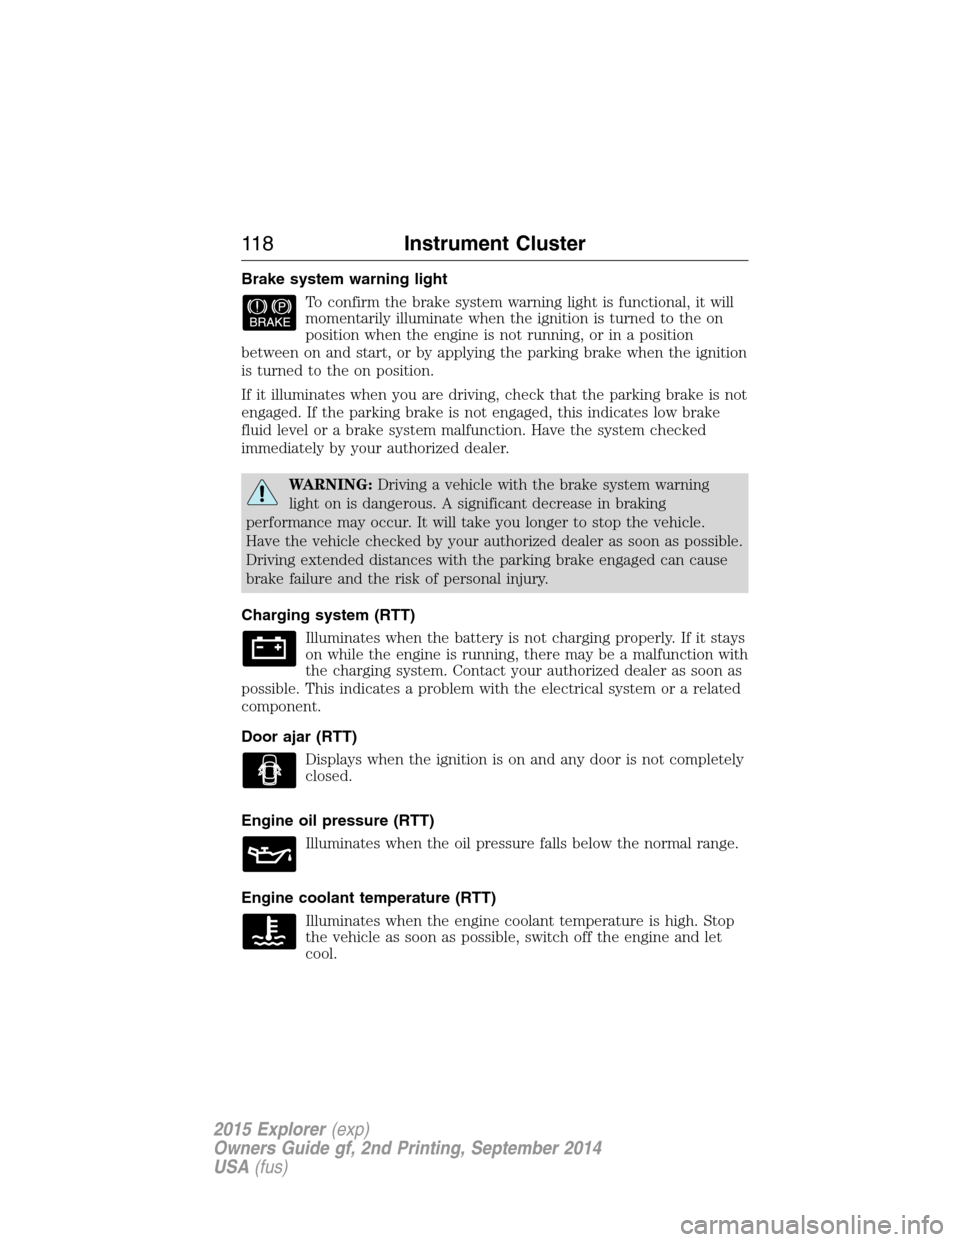
Brake system warning light
To confirm the brake system warning light is functional, it will
momentarily illuminate when the ignition is turned to the on
position when the engine is not running, or in a position
between on and start, or by applying the parking brake when the ignition
is turned to the on position.
If it illuminates when you are driving, check that the parking brake is not
engaged. If the parking brake is not engaged, this indicates low brake
fluid level or a brake system malfunction. Have the system checked
immediately by your authorized dealer.
WARNING:Driving a vehicle with the brake system warning
light on is dangerous. A significant decrease in braking
performance may occur. It will take you longer to stop the vehicle.
Have the vehicle checked by your authorized dealer as soon as possible.
Driving extended distances with the parking brake engaged can cause
brake failure and the risk of personal injury.
Charging system (RTT)
Illuminates when the battery is not charging properly. If it stays
on while the engine is running, there may be a malfunction with
the charging system. Contact your authorized dealer as soon as
possible. This indicates a problem with the electrical system or a related
component.
Door ajar (RTT)
Displays when the ignition is on and any door is not completely
closed.
Engine oil pressure (RTT)
Illuminates when the oil pressure falls below the normal range.
Engine coolant temperature (RTT)
Illuminates when the engine coolant temperature is high. Stop
the vehicle as soon as possible, switch off the engine and let
cool.
11 8Instrument Cluster
2015 Explorer(exp)
Owners Guide gf, 2nd Printing, September 2014
USA(fus)
Page 190 of 596
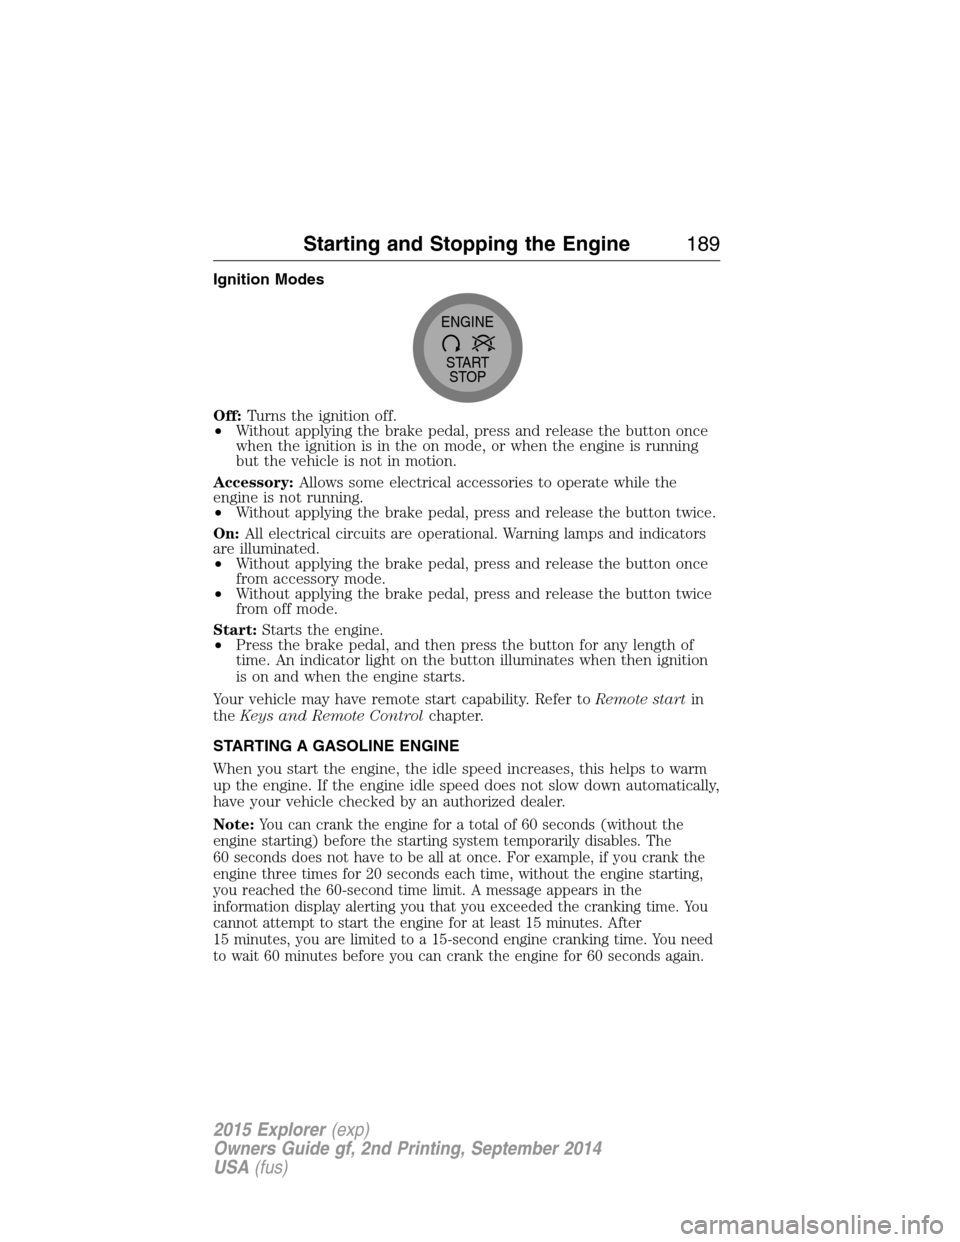
Ignition Modes
Off:Turns the ignition off.
•Without applying the brake pedal, press and release the button once
when the ignition is in the on mode, or when the engine is running
but the vehicle is not in motion.
Accessory:Allows some electrical accessories to operate while the
engine is not running.
•Without applying the brake pedal, press and release the button twice.
On:All electrical circuits are operational. Warning lamps and indicators
are illuminated.
•Without applying the brake pedal, press and release the button once
from accessory mode.
•Without applying the brake pedal, press and release the button twice
from off mode.
Start:Starts the engine.
•Press the brake pedal, and then press the button for any length of
time. An indicator light on the button illuminates when then ignition
is on and when the engine starts.
Your vehicle may have remote start capability. Refer toRemote startin
theKeys and Remote Controlchapter.
STARTING A GASOLINE ENGINE
When you start the engine, the idle speed increases, this helps to warm
up the engine. If the engine idle speed does not slow down automatically,
have your vehicle checked by an authorized dealer.
Note:
You can crank the engine for a total of 60 seconds (without the
engine starting) before the starting system temporarily disables. The
60 seconds does not have to be all at once. For example, if you crank the
engine three times for 20 seconds each time, without the engine starting,
you reached the 60-second time limit. A message appears in the
information display alerting you that you exceeded the cranking time. You
cannot attempt to start the engine for at least 15 minutes. After
15 minutes, you are limited to a 15-second engine cranking time. You need
to wait 60 minutes before you can crank the engine for 60 seconds again.
START
STOP ENGINE
Starting and Stopping the Engine189
2015 Explorer(exp)
Owners Guide gf, 2nd Printing, September 2014
USA(fus)
Page 206 of 596
AUTOMATIC TRANSMISSION
WARNING:Always set the parking brake fully and make sure
the gearshift is latched inP(Park). Turn the ignition to the off
position and remove the key whenever you leave your vehicle.
WARNING:Do not use the tow feature when driving in icy or
slippery conditions as the increased engine braking can cause the
rear wheels to slide and the vehicle to swing around with the possible
loss of vehicle control.
Your vehicle has been designed to improve fuel economy by reducing
fuel usage while coasting or decelerating. When you take your foot off
the accelerator pedal and the vehicle begins to slow down, the torque
converter clutch locks up and aggressively shuts off fuel flow to the
engine while decelerating. This fuel economy benefit may be perceived
as a light to medium braking sensation when removing your foot from
the accelerator pedal.
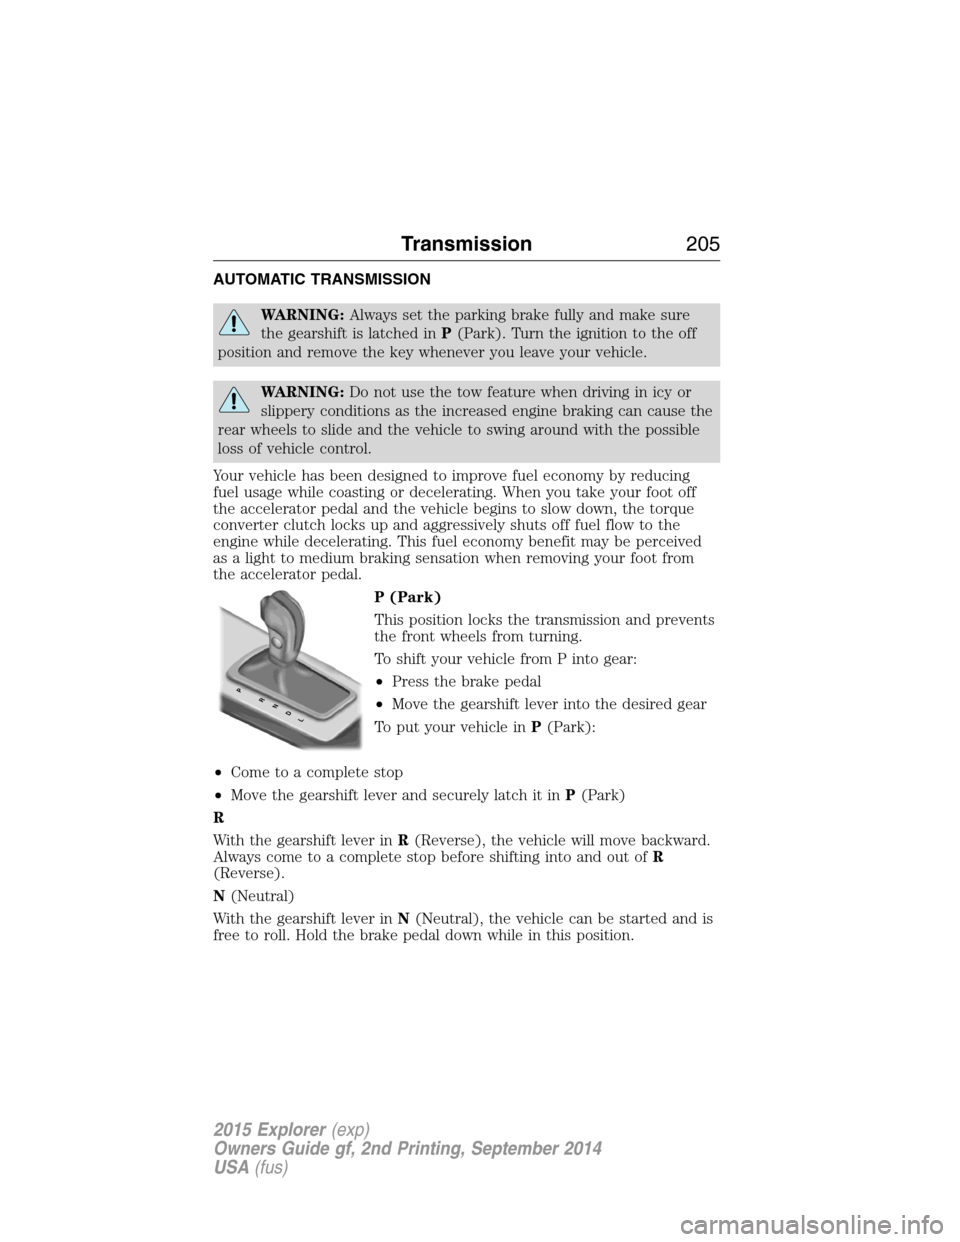
P (Park)
This position locks the transmission and prevents
the front wheels from turning.
To shift your vehicle from P into gear:
•Press the brake pedal
•Move the gearshift lever into the desired gear
To put your vehicle inP(Park):
•Come to a complete stop
•Move the gearshift lever and securely latch it inP(Park)
R
With the gearshift lever inR(Reverse), the vehicle will move backward.
Always come to a complete stop before shifting into and out ofR
(Reverse).
N(Neutral)
With the gearshift lever inN(Neutral), the vehicle can be started and is
free to roll. Hold the brake pedal down while in this position.
PRNDL
Transmission205
2015 Explorer(exp)
Owners Guide gf, 2nd Printing, September 2014
USA(fus)
Page 207 of 596
D (Drive) with Overdrive
The normal driving position for the best fuel economy. Transmission
operates in gears one through six.
The automatic transmission shift strategy has the ability to detect hilly
terrain or mountainous areas and will provide a limited amount of grade
assist features automatically. Refer toD(Drive) with Grade assist or
SelectShift for more information.
D (Drive) with Tow on
Press theTOWswitch located on the instrument panel by the headlamp
control to activate tow. TheTOW/HAULmessage will illuminate in the
instrument cluster.
The tow feature improves transmission operation when towing a trailer or a
heavy load. All transmission gear ranges are available when using tow.
The tow feature delays upshifts to reduce frequency of transmission
shifting. Tow also provides engine braking in all forward gears when the
transmission is in theD(Overdrive) position. This engine braking will
slow the vehicle and assist the driver in controlling the vehicle when
descending a grade. Depending on driving conditions and load
conditions, the transmission may downshift, slow the vehicle and control
the vehicle speed when descending a hill, without the accelerator pedal
being pressed. The amount of downshift braking provided will vary based
upon the amount the brake pedal is depressed.
Press theTOWbutton to deactivate the tow feature and return to
normal driving mode. The tow light will no longer be illuminated.
When you shut-off and restart the engine, the transmission will
automatically return to normalD(Overdrive) mode (tow off).
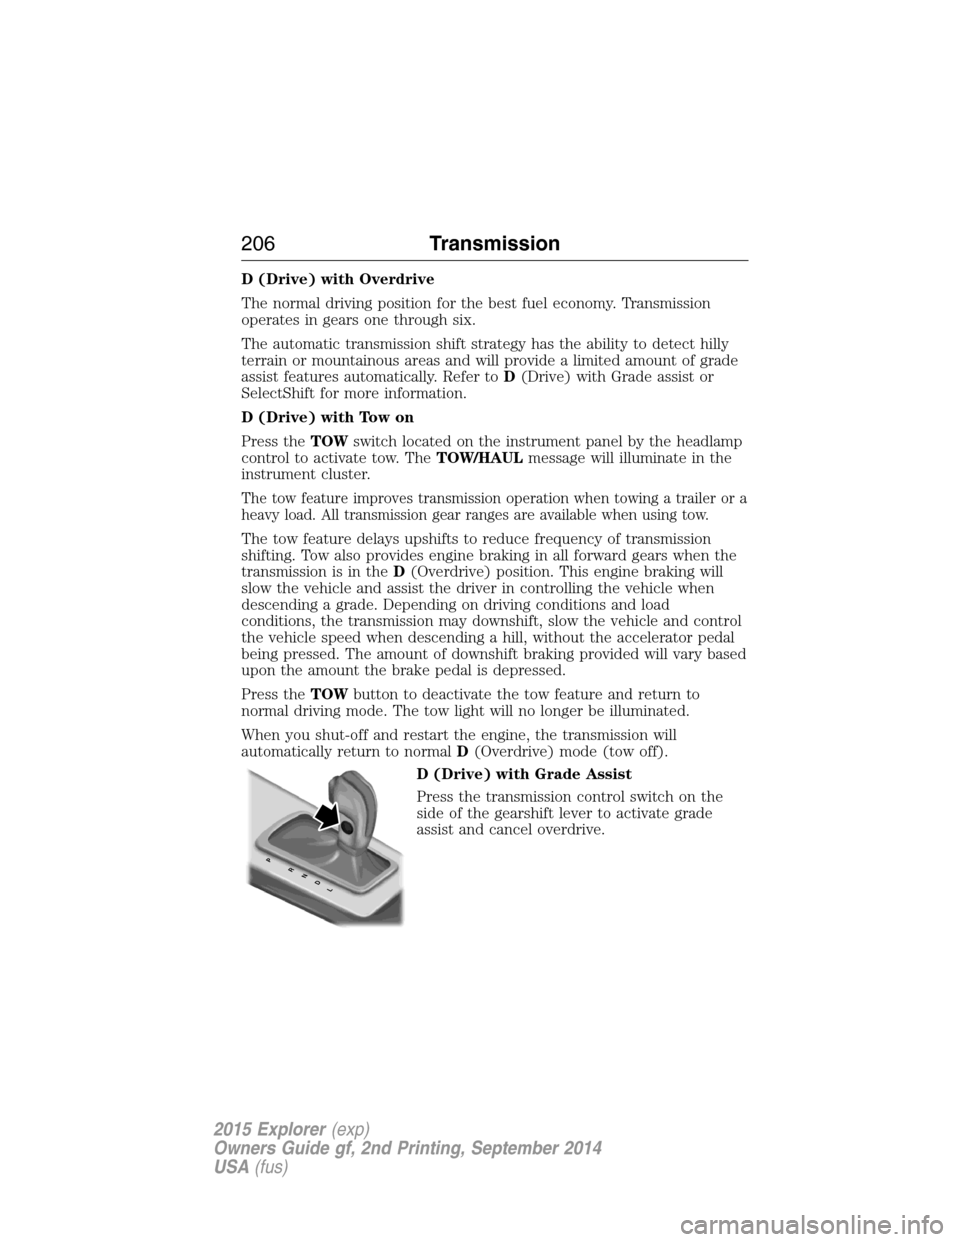
D (Drive) with Grade Assist
Press the transmission control switch on the
side of the gearshift lever to activate grade
assist and cancel overdrive.
PRNDL
206Transmission
2015 Explorer(exp)
Owners Guide gf, 2nd Printing, September 2014
USA(fus)
Page 216 of 596
If your vehicle gets stuck in mud or snow it may be rocked out by
shifting between forward and reverse gears, stopping between shifts, in a
steady pattern. Press lightly on the accelerator in each gear.
Note:Do not rock the vehicle if the engine is not at normal operating
temperature or damage to the transmission may occur.
Note:Do not rock the vehicle for more than a few minutes or damage to
the transmission and tires may occur or the engine may overheat.
Emergency maneuvers
WARNING:Vehicles with a higher center of gravity such as
utility and four-wheel drive vehicles handle differently than
vehicles with a lower center of gravity. Utility and four-wheel drive
vehicles are not designed for cornering at speeds as high as passenger
cars any more than low-slung sports cars are designed to perform
satisfactorily under off-road conditions. Avoid sharp turns, excessive
speed and abrupt maneuvers in these vehicles. Failure to drive
cautiously could result in an increased risk of loss of vehicle control,
vehicle rollover, personal injury and death.
•In an unavoidable emergency situation where a sudden sharp turn
must be made, remember to avoid “over-driving” your vehicle, i.e.,
turn the steering wheel only as rapidly and as far as required to avoid
the emergency. Excessive steering will result in less vehicle control,
not more. Additionally, smooth variations of the accelerator and/or
brake pedal pressure should be utilized if changes in vehicle speed are
called for. Avoid abrupt steering, acceleration or braking which could
result in an increased risk of loss of vehicle control, vehicle rollover
and/or personal injury. Use all available road surface to return the
vehicle to a safe direction of travel.
•In the event of an emergency stop, avoid skidding the tires and do not
attempt any sharp steering wheel movements.
•If the vehicle goes from one type of surface to another (i.e., from
concrete to gravel) there will be a change in the way the vehicle
responds to a maneuver (steering, acceleration or braking). Again,
avoid these abrupt inputs.
Sand
When driving over sand, try to keep all four wheels on the most solid
area of the trail. Avoid reducing the tire pressures but shift to a lower
gear and drive steadily through the terrain. Apply the accelerator slowly
and avoid spinning the wheels.
Four-Wheel Drive (If Equipped)215
2015 Explorer(exp)
Owners Guide gf, 2nd Printing, September 2014
USA(fus)