FORD F150 2004 11.G Owners Manual
Manufacturer: FORD, Model Year: 2004, Model line: F150, Model: FORD F150 2004 11.GPages: 280, PDF Size: 4.13 MB
Page 151 of 280
TRACTION-LOK AXLE (IF EQUIPPED)
This axle provides added traction on slippery surfaces, particularly when
one wheel is on a poor traction surface. Under normal conditions, the
Traction-Lok axle functions like a standard rear axle.
PREPARING TO DRIVE YOUR VEHICLE
Utility vehicles have a significantly higher rollover rate than
other types of vehicles.
In a rollover crash, an unbelted person is significantly more likely
to die than a person wearing a safety belt.
Your vehicle has larger tires and increased ground clearance, giving the
vehicle a higher center of gravity than a passenger car.
Vehicles with a higher center of gravity such as utility and
four-wheel drive vehicles handle differently than vehicles with a
lower center of gravity. Utility and four-wheel drive vehicles arenot
designed for cornering at speeds as high as passenger cars any more
than low-slung sports cars are designed to perform satisfactorily under
off-road conditions. Avoid sharp turns, excessive speed and abrupt
maneuvers in these vehicles. Failure to drive cautiously could result in
an increased risk of loss of vehicle control, vehicle rollover, personal
injury and death.
Loaded vehicles, with a higher center of gravity, may handle
differently than unloaded vehicles. Extra precautions, such as
slower speeds and increased stopping distance, should be taken when
driving a heavily loaded vehicle.
AUTOMATIC TRANSMISSION OPERATION
Brake-shift interlock - column-shift transmission
This vehicle is equipped with a park/brake-shift interlock feature that
prevents the gearshift lever from being moved from P (Park) when the
ignition is in the ON position unless brake pedal is depressed.
If you cannot move the gearshift lever out of P (Park) with ignition in
the ON position and the brake pedal depressed, it is possible that a fuse
Driving
151
Page 152 of 280
has blown or the vehicle's brakelamps are not operating properly. Refer
toFuses and relaysin theRoadside emergencieschapter.
If the fuse is not blown, perform the following procedure:
1. Apply the parking brake, turn the ignition to OFF/LOCK, then remove
the key.
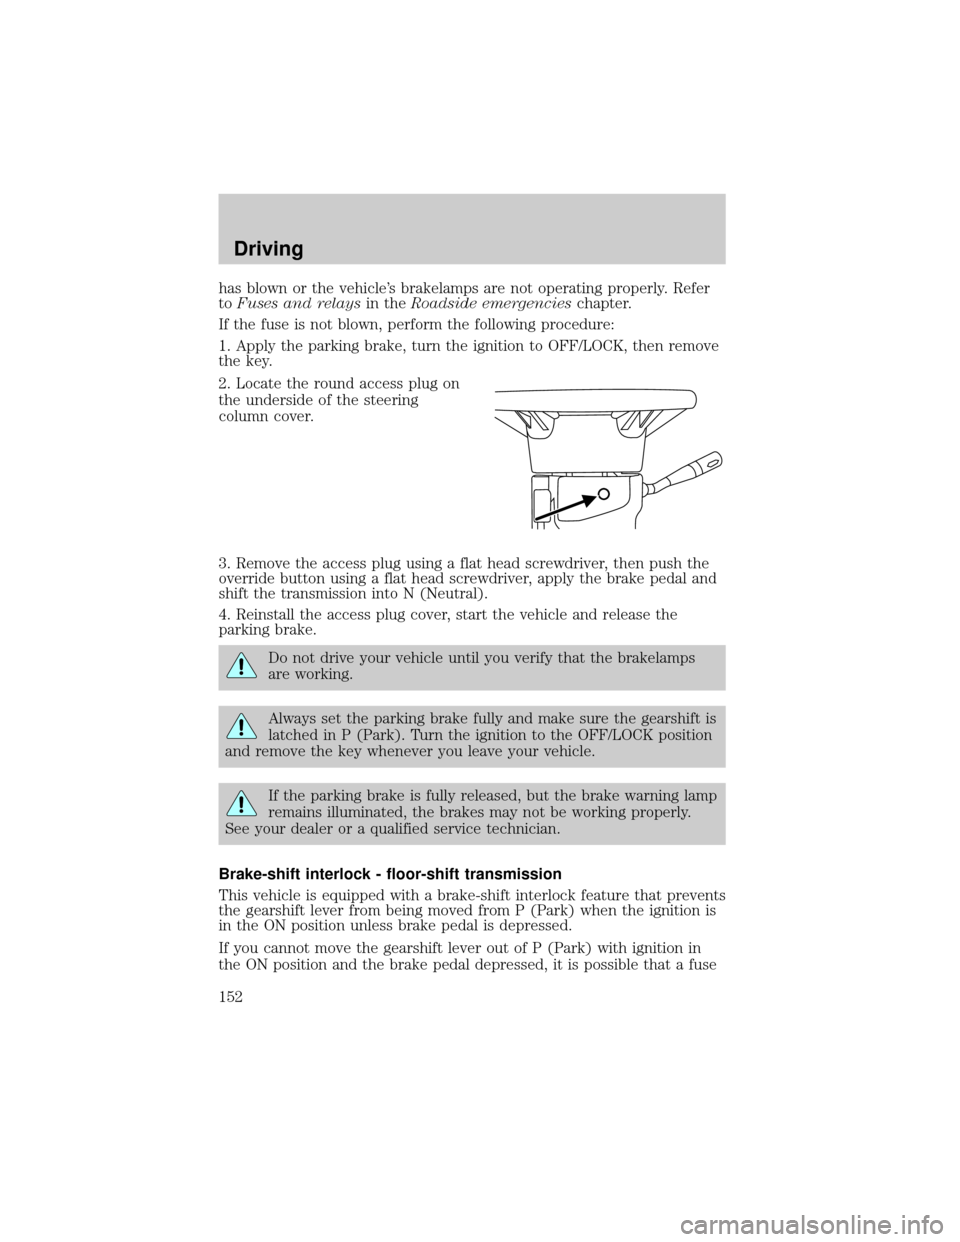
2. Locate the round access plug on
the underside of the steering
column cover.
3. Remove the access plug using a flat head screwdriver, then push the
override button using a flat head screwdriver, apply the brake pedal and
shift the transmission into N (Neutral).
4. Reinstall the access plug cover, start the vehicle and release the
parking brake.
Do not drive your vehicle until you verify that the brakelamps
are working.
Always set the parking brake fully and make sure the gearshift is
latched in P (Park). Turn the ignition to the OFF/LOCK position
and remove the key whenever you leave your vehicle.
If the parking brake is fully released, but the brake warning lamp
remains illuminated, the brakes may not be working properly.
See your dealer or a qualified service technician.
Brake-shift interlock - floor-shift transmission
This vehicle is equipped with a brake-shift interlock feature that prevents
the gearshift lever from being moved from P (Park) when the ignition is
in the ON position unless brake pedal is depressed.
If you cannot move the gearshift lever out of P (Park) with ignition in
the ON position and the brake pedal depressed, it is possible that a fuse
Driving
152
Page 153 of 280
has blown or the vehicle's brakelamps are not operating properly. Refer
toFuses and relaysin theRoadside emergencieschapter.
If the fuse is not blown, perform the following procedure:
1. Apply the parking brake, turn the ignition to LOCK, then remove the
key.
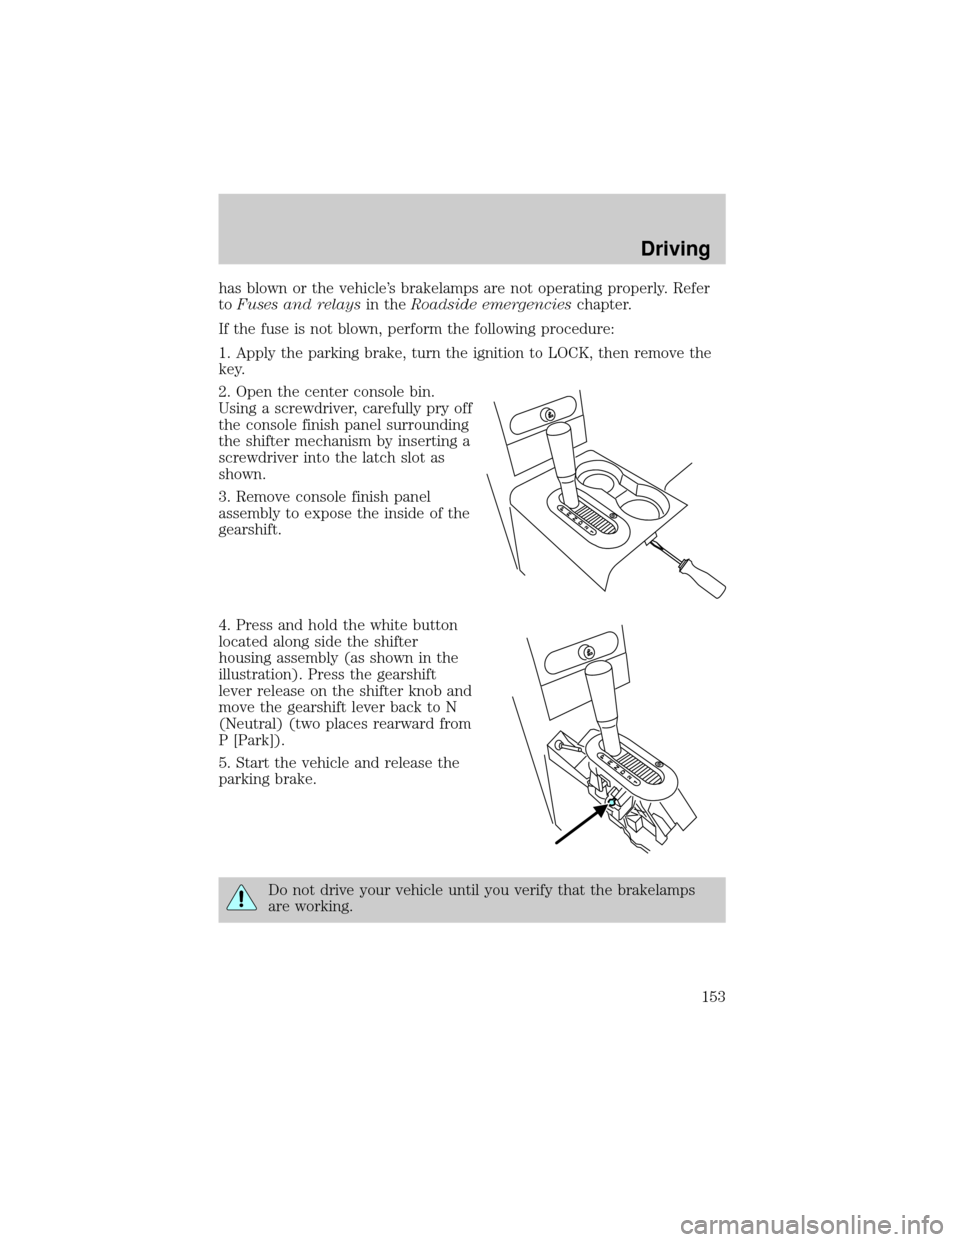
2. Open the center console bin.
Using a screwdriver, carefully pry off
the console finish panel surrounding
the shifter mechanism by inserting a
screwdriver into the latch slot as
shown.
3. Remove console finish panel
assembly to expose the inside of the
gearshift.
4. Press and hold the white button
located along side the shifter
housing assembly (as shown in the
illustration). Press the gearshift
lever release on the shifter knob and
move the gearshift lever back to N
(Neutral) (two places rearward from
P [Park]).
5. Start the vehicle and release the
parking brake.
Do not drive your vehicle until you verify that the brakelamps
are working.
Driving
153
Page 154 of 280
Always set the parking brake fully and make sure the gearshift is
latched in P (Park). Turn the ignition to the LOCK position and
remove the key whenever you leave your vehicle.
If the parking brake is fully released, but the brake warning lamp
remains illuminated, the brakes may not be working properly.
See your dealer or a qualified service technician.
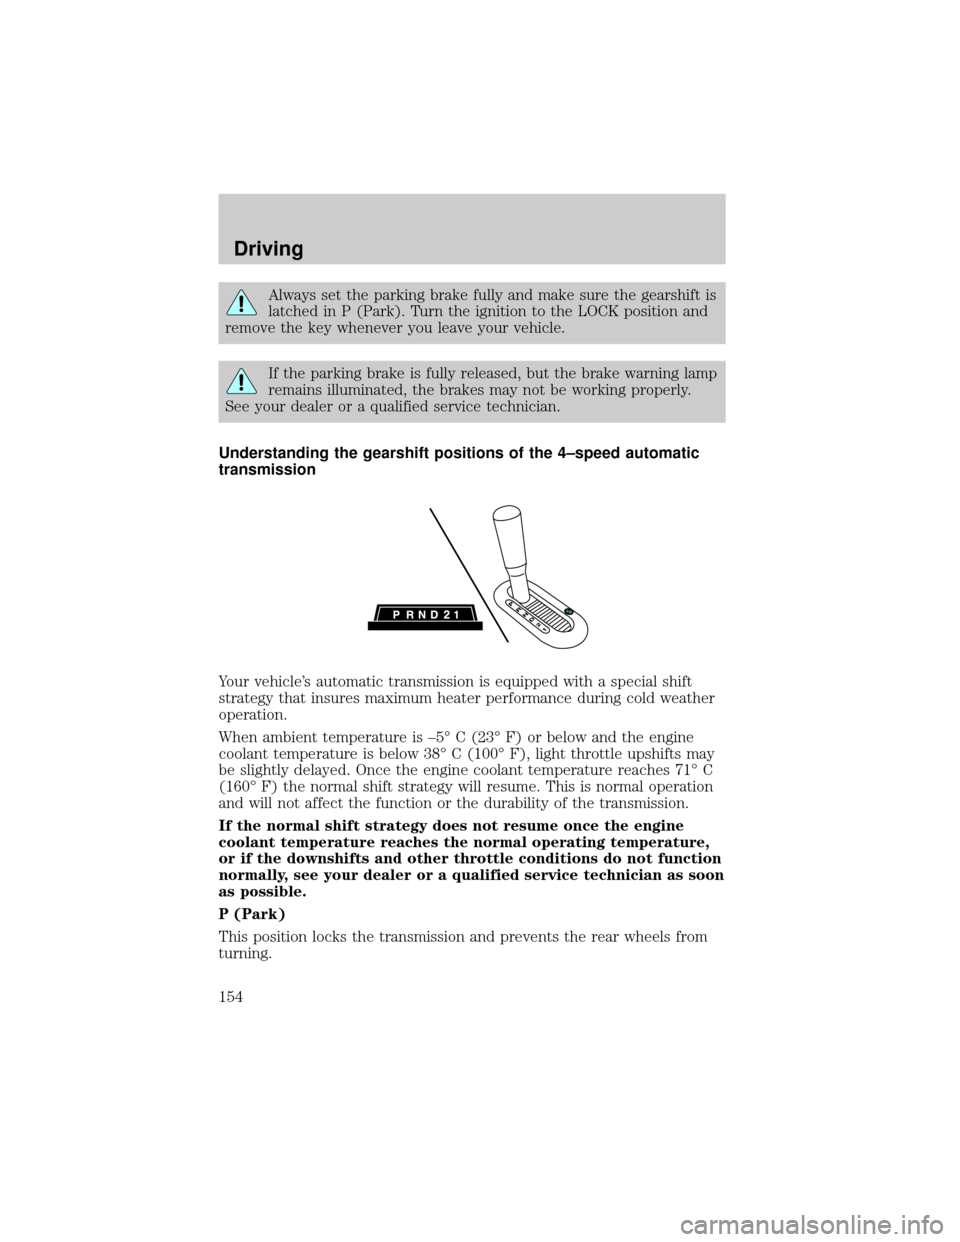
Understanding the gearshift positions of the 4±speed automatic
transmission
Your vehicle's automatic transmission is equipped with a special shift
strategy that insures maximum heater performance during cold weather
operation.
When ambient temperature is ±5É C (23É F) or below and the engine
coolant temperature is below 38É C (100É F), light throttle upshifts may
be slightly delayed. Once the engine coolant temperature reaches 71É C
(160É F) the normal shift strategy will resume. This is normal operation
and will not affect the function or the durability of the transmission.
If the normal shift strategy does not resume once the engine
coolant temperature reaches the normal operating temperature,
or if the downshifts and other throttle conditions do not function
normally, see your dealer or a qualified service technician as soon
as possible.
P (Park)
This position locks the transmission and prevents the rear wheels from
turning.
Driving
154
Page 155 of 280
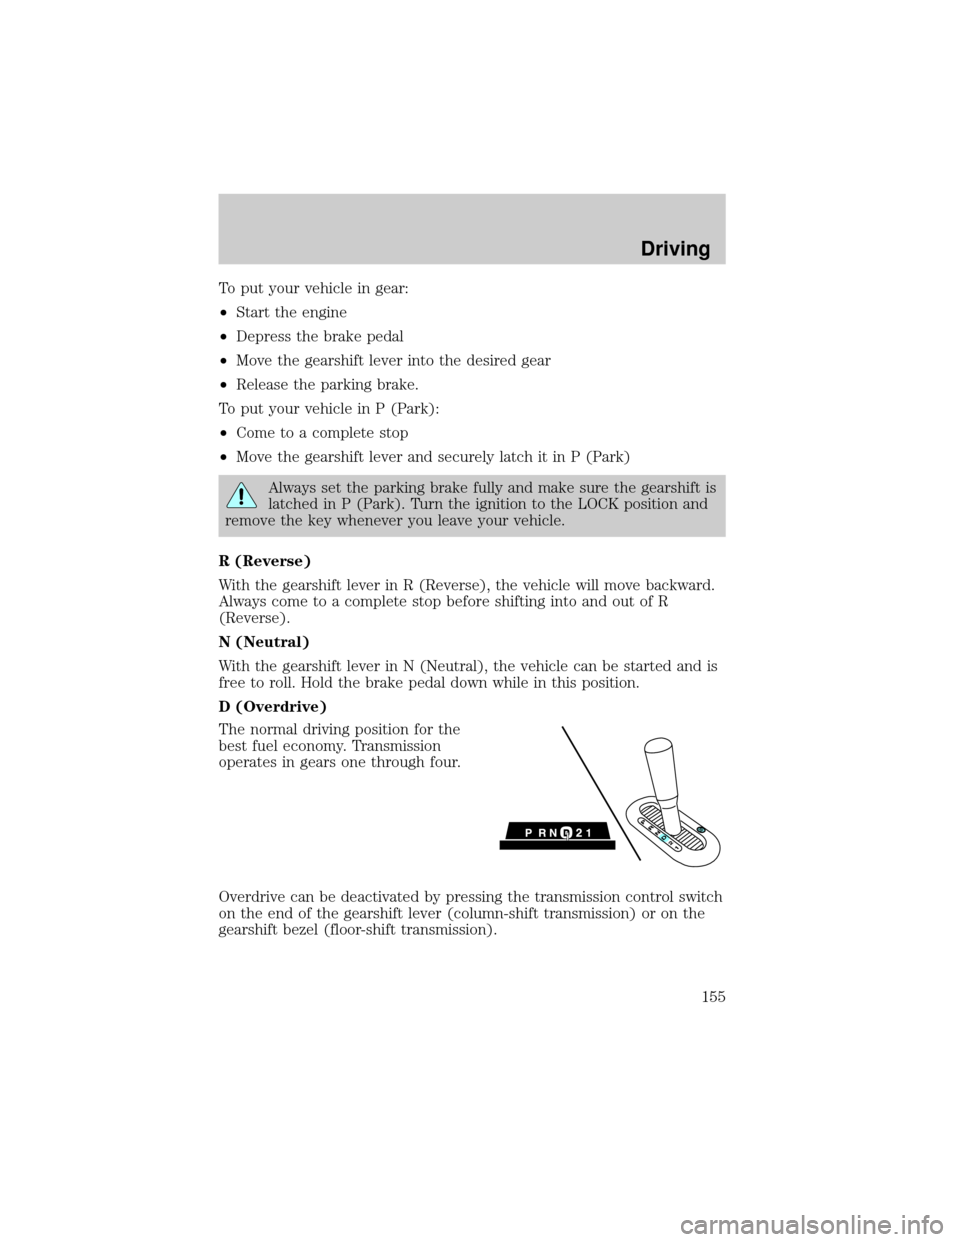
To put your vehicle in gear:
²Start the engine
²Depress the brake pedal
²Move the gearshift lever into the desired gear
²Release the parking brake.
To put your vehicle in P (Park):
²Come to a complete stop
²Move the gearshift lever and securely latch it in P (Park)
Always set the parking brake fully and make sure the gearshift is
latched in P (Park). Turn the ignition to the LOCK position and
remove the key whenever you leave your vehicle.
R (Reverse)
With the gearshift lever in R (Reverse), the vehicle will move backward.
Always come to a complete stop before shifting into and out of R
(Reverse).
N (Neutral)
With the gearshift lever in N (Neutral), the vehicle can be started and is
free to roll. Hold the brake pedal down while in this position.
D (Overdrive)
The normal driving position for the
best fuel economy. Transmission
operates in gears one through four.
Overdrive can be deactivated by pressing the transmission control switch
on the end of the gearshift lever (column-shift transmission) or on the
gearshift bezel (floor-shift transmission).
Driving
155
Page 156 of 280
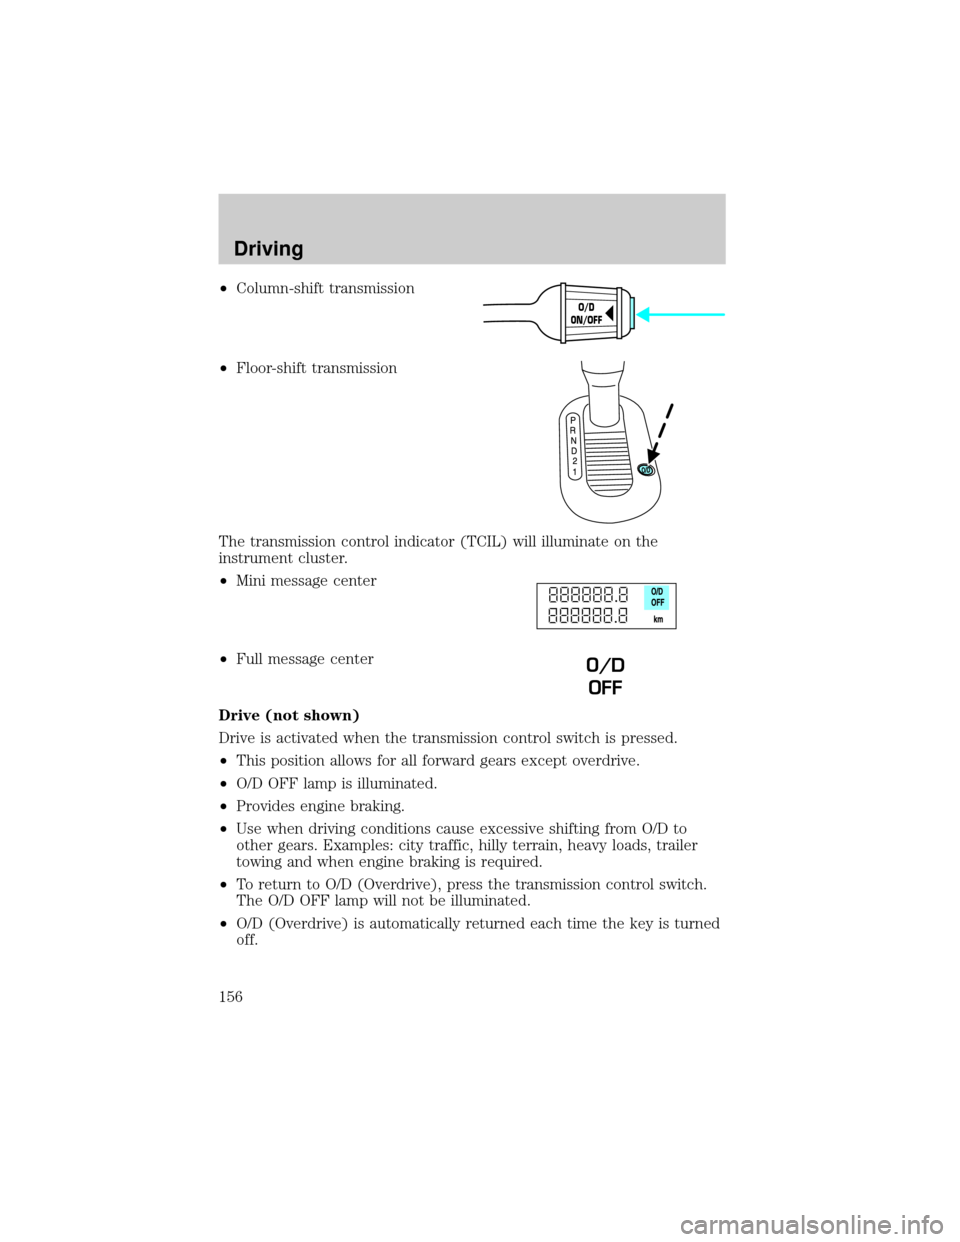
²Column-shift transmission
²Floor-shift transmission
The transmission control indicator (TCIL) will illuminate on the
instrument cluster.
²Mini message center
²Full message center
Drive (not shown)
Drive is activated when the transmission control switch is pressed.
²This position allows for all forward gears except overdrive.
²O/D OFF lamp is illuminated.
²Provides engine braking.
²Use when driving conditions cause excessive shifting from O/D to
other gears. Examples: city traffic, hilly terrain, heavy loads, trailer
towing and when engine braking is required.
²To return to O/D (Overdrive), press the transmission control switch.
The O/D OFF lamp will not be illuminated.
²O/D (Overdrive) is automatically returned each time the key is turned
off.
O/D
ON/OFF
O/D
OFF
Driving
156
Page 157 of 280
2 (Second)
This position allows for second gear only.
²Provides engine braking.
²Use to start-up on slippery roads.
²To return to D (Overdrive), move the gearshift lever into the D
(Overdrive) position.
²Selecting 2 (Second) at higher speeds will cause the transmission to
downshift to second gear at the appropriate vehicle speed.
1 (First)
²Provides maximum engine braking.
²Allows upshifts by moving gearshift lever.
²Will not downshift into 1 (First) at high speeds; allows for 1 (First)
when vehicle reaches slower speeds.
Forced downshifts
²Allowed in D (Overdrive) or Drive.
²Depress the accelerator to the floor.
²Allows transmission to select an appropriate gear.
If your vehicle gets stuck in mud or snow
If your vehicle gets stuck in mud or snow, it may be rocked out by
shifting from forward and reverse gears, stopping between shifts in a
steady pattern. Press lightly on the accelerator in each gear.
Do not rock the vehicle if the engine is not at normal operating
temperature or damage to the transmission may occur.
Do not rock the vehicle for more than a minute or damage to the
transmission and tires may occur, or the engine may overheat.
REVERSE SENSING SYSTEM (IF EQUIPPED)
The Reverse Sensing System (RSS) sounds a tone to warn the driver of
obstacles near the rear bumper when the R (Reverse) is selected and the
vehicle is moving at speeds less than 5 km/h (3 mph). The system is not
effective at speeds above 5 km/h (3 mph) and may not detect certain
angular or moving objects.
To help avoid personal injury, please read and understand the
limitations of the reverse sensing system as contained in this
section. Reverse sensing is only an aid for some (generally large and
fixed) objects when moving in reverse on a flat surface at ªparking
speedsº. Inclement weather may also affect the function of the RSS;
this may include reduced performance or a false activation.
Driving
157
Page 158 of 280
To help avoid personal injury, always use caution when in
reverse and when using the RSS.
This system is not designed to prevent contact with small or
moving objects. The system is designed to provide a warning to
assist the driver in detecting large stationary objects to avoid damaging
the vehicle. The system may not detect smaller objects, particularly
those close to the ground.
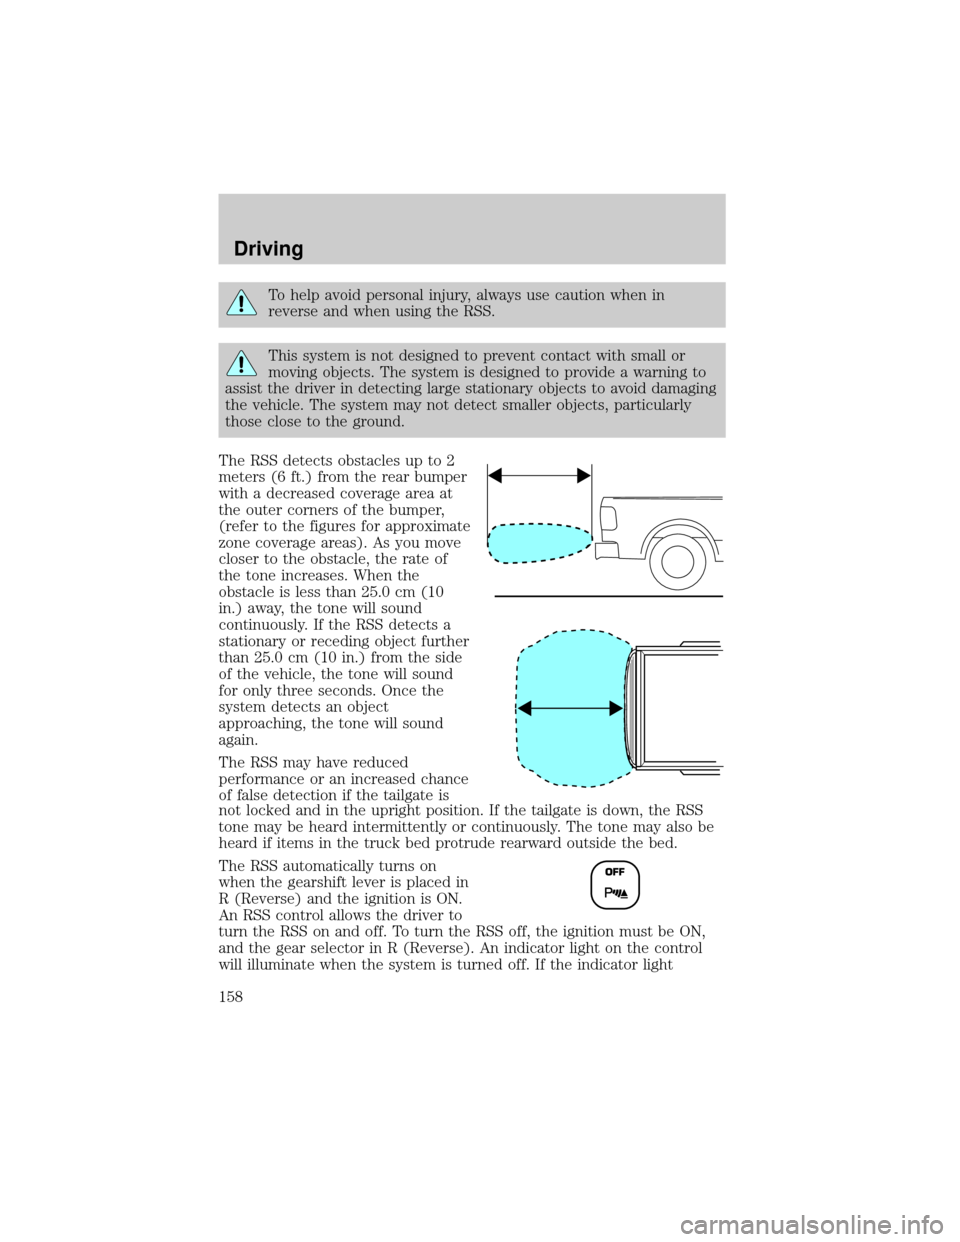
The RSS detects obstacles up to 2
meters (6 ft.) from the rear bumper
with a decreased coverage area at
the outer corners of the bumper,
(refer to the figures for approximate
zone coverage areas). As you move
closer to the obstacle, the rate of
the tone increases. When the
obstacle is less than 25.0 cm (10
in.) away, the tone will sound
continuously. If the RSS detects a
stationary or receding object further
than 25.0 cm (10 in.) from the side
of the vehicle, the tone will sound
for only three seconds. Once the
system detects an object
approaching, the tone will sound
again.
The RSS may have reduced
performance or an increased chance
of false detection if the tailgate is
not locked and in the upright position. If the tailgate is down, the RSS
tone may be heard intermittently or continuously. The tone may also be
heard if items in the truck bed protrude rearward outside the bed.
The RSS automatically turns on
when the gearshift lever is placed in
R (Reverse) and the ignition is ON.
An RSS control allows the driver to
turn the RSS on and off. To turn the RSS off, the ignition must be ON,
and the gear selector in R (Reverse). An indicator light on the control
will illuminate when the system is turned off. If the indicator light
Driving
158
Page 159 of 280
illuminates when the RSS is not turned off, it may indicate a failure in
the RSS. The RSS will remain off until either the RSS control is pushed
again or the ignition switch is recycled.
Keep the RSS sensors (located on the rear bumper/fascia) free
from snow, ice and large accumulations of dirt (do not clean the
sensors with sharp objects). If the sensors are covered, it will
affect the accuracy of the RSS.
If your vehicle sustains damage to the rear bumper/fascia, leaving
it misaligned or bent, the sensing zone may be altered causing
inaccurate measurement of obstacles or false alarms.
FOUR-WHEEL DRIVE (4WD) OPERATION (IF EQUIPPED)
For important information regarding safe operation of this type
of vehicle, seePreparing to drive your vehiclein this chapter.
Four±wheel drive (4WD) supplies power to all four wheels. 4WD should
not be operated on dry pavement; driveline damage may occur.
If equipped with the Electronic Shift 4WD System, and 4WD Low
is selected while the vehicle is moving, the 4WD system will not
engage. This is normal and should be no reason for concern.Refer
toShifting to/from 4WD Lowfor proper operation.
System indicator lights
²4X4 HI- Momentarily illuminates
when the engine is started.
Illuminates when 4H is selected.
²4X4 LOW± Momentarily
illuminates when the engine is
started. Illuminates when 4L is
selected.
4x4 HI
4x4
LOW
Driving
159
Page 160 of 280

Using a manual 4WD system (if equipped)
2H (2WD High)± Power to the rear wheels only; used for street and
highway driving. Provides optimal smoothness and fuel economy at high
speeds.
4H (4WD High)± Used for extra traction such as in snow or icy roads
or in off-road situations. Not intended for use on dry pavement.
N (Neutral)± No power to either front or rear wheels.
4L (4WD Low)± Uses extra gearing to provide maximum power to all
four wheels at reduced speeds. Intended only for off-road applications
such as deep sand, steep grades or pulling heavy objects. 4L (4WD Low)
will not engage while the vehicle is moving; this is normal and should be
no reason for concern. Refer toShifting to/from 4L (4WD Low)for
proper operation.
Shifting between 2H (2WD high) and 4H (4WD high)
²Move the transfer case lever between 2H (2WD High) and 4H (4WD
High) at a stop or any forward speed up to 88 km/h (55 mph).
Note:Do not perform this operation at speeds above 72 km/h (45 mph)
if the outside temperature is below 0ÉC (32ÉF).
Note:Do not perform this operation if the rear wheels are slipping.
Note:Some noise may be heard as the system shifts or engages; this is
normal.
Shifting to/from 4L (4WD Low)
1. Bring the vehicle to a complete stop.
2. Depress the brake.
3. On vehicles equipped with an automatic transmission, place the
transmission in N (Neutral); on vehicles equipped with a manual
transmission, depress the clutch.
2H
4H
4L N
Driving
160