light FORD F250 SUPER DUTY 2015 User Guide
[x] Cancel search | Manufacturer: FORD, Model Year: 2015, Model line: F250 SUPER DUTY, Model: FORD F250 SUPER DUTY 2015Pages: 470, PDF Size: 18.27 MB
Page 42 of 470
WARNINGS
the protection of the airbag, you also mayreduce the effectiveness of your safety beltsystem, which was designed to work withthe airbag. If you are not a person whomeets the requirements stated in theNational Highway Traffic SafetyAdministration or Transport Canadadeactivation criteria turning off the airbagcan increase the risk of serious injury ordeath in a crash.
If your vehicle has rear seats, alwaystransport children who are 12 andyounger in the rear seat. Always usesafety belts and child restraints properly.Do not place a child in a rear facing infantseat in the front seat unless your vehicle isequipped with an airbag on and off switchand the passenger airbag is turned off. Thisis because the back of the infant seat istoo close to the inflating airbag and therisk of a fatal injury to the infant when theairbag inflates is substantial.
If the pass airbag off light isilluminated when the passengerairbag switch is on and the ignitionis on, have the passenger airbag switchserviced at your authorized dealerimmediately.
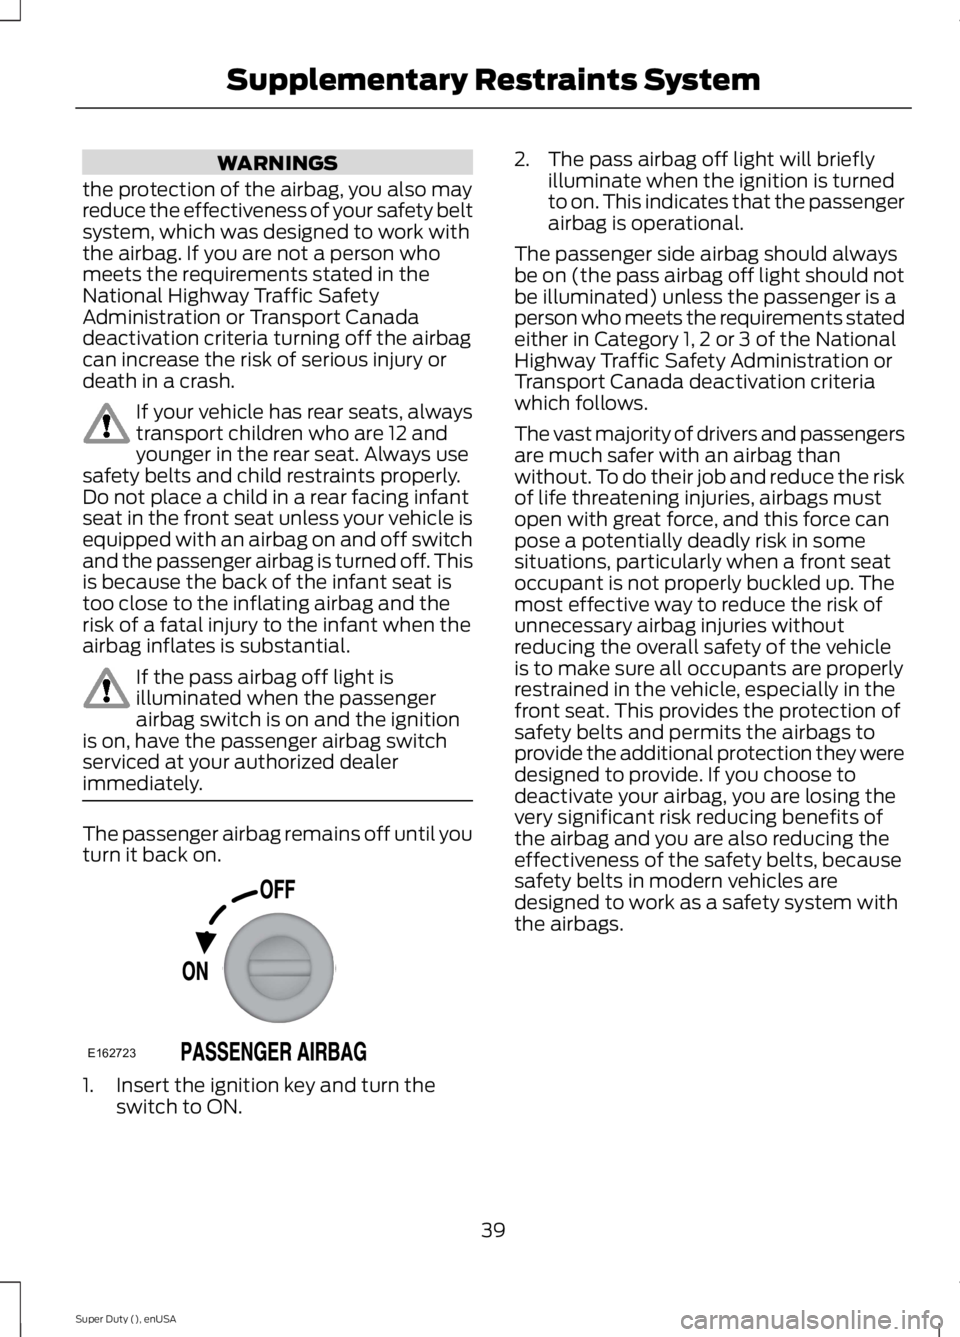
The passenger airbag remains off until youturn it back on.
1. Insert the ignition key and turn theswitch to ON.
2. The pass airbag off light will brieflyilluminate when the ignition is turnedto on. This indicates that the passengerairbag is operational.
The passenger side airbag should alwaysbe on (the pass airbag off light should notbe illuminated) unless the passenger is aperson who meets the requirements statedeither in Category 1, 2 or 3 of the NationalHighway Traffic Safety Administration orTransport Canada deactivation criteriawhich follows.
The vast majority of drivers and passengersare much safer with an airbag thanwithout. To do their job and reduce the riskof life threatening injuries, airbags mustopen with great force, and this force canpose a potentially deadly risk in somesituations, particularly when a front seatoccupant is not properly buckled up. Themost effective way to reduce the risk ofunnecessary airbag injuries withoutreducing the overall safety of the vehicleis to make sure all occupants are properlyrestrained in the vehicle, especially in thefront seat. This provides the protection ofsafety belts and permits the airbags toprovide the additional protection they weredesigned to provide. If you choose todeactivate your airbag, you are losing thevery significant risk reducing benefits ofthe airbag and you are also reducing theeffectiveness of the safety belts, becausesafety belts in modern vehicles aredesigned to work as a safety system withthe airbags.
39
Super Duty (), enUSA
Supplementary Restraints SystemE162723
Page 44 of 470
Transport Canada Deactivation Criteria(Canada Only)
WARNING
This vehicle has special energymanagement safety belts for thedriver and right front passenger.These particular belts are specificallydesigned to work with airbags to helpreduce the risk of injury in a crash. Theenergy management safety belt isdesigned to give or release additional beltwebbing in some accidents to reduceconcentration of force on an occupant'schest and reduce the risk of certain bonefractures and injuries to underlying organs.In a crash, if the airbag is turned off, thisenergy management safety belt mightpermit the person wearing the belt to moveforward enough to incur a serious or fatalinjury. The more severe the crash, and theheavier the occupant, the greater the riskis. Be sure the airbag is turned on for anyperson who does not qualify under theNational Highway Traffic SafetyAdministration deactivation criteria.
1.Infant: An infant (less than 1 year old)must ride in the front seat because:
•my vehicle has no rear seat;
•the rear seat in my vehicle cannotaccommodate a rear-facing infantseat;
•the infant has a medical conditionwhich, according to the infant'sphysician, makes it necessary for theinfant to ride in the front seat so thatthe driver can monitor the infant'scondition.
2.Child age 12 or under: A child age 12 orunder must ride in the front seat because:
•my vehicle has no rear seat;
•although children age 12 and under ridein the rear seat whenever possible,children age 12 and under have nooption but to sometimes ride in thefront seat because rear seat space isinsufficient;
•the child has a medical condition that,according to the child's physician,makes it necessary for the child to ridein the front seat so that the driver canmonitor the child's condition.
3.Medical condition: A passenger has amedical condition that, according to his orher physician:
•poses a special risk for the passengerif the airbag deploys; and
•makes the potential harm from thepassenger airbag deployment greaterthan the potential harm from turningoff the airbag and experiencing a crashwithout the protection offered by theairbag
Proper Driver and Front PassengerSeating Adjustment
WARNING
The National Highway Traffic SafetyAdministration recommends aminimum distance of at least 10inches (25 centimeters) between anoccupant’s chest and the driver airbagmodule.
To properly position yourself away fromthe airbag:
•Move your seat to the rear as far as youcan while still reaching the pedalscomfortably.
•Recline the seat slightly (one or twodegrees) from the upright position.
41
Super Duty (), enUSA
Supplementary Restraints System
Page 48 of 470
The restraints control module alsomonitors the readiness of the above safetydevices plus the crash and occupantsensors. The readiness of the safetysystem is indicated by a warning indicatorlight in the instrument cluster or by abackup tone if the warning light is notworking. See Instrument Cluster (page75). Routine maintenance of the airbag isnot required.
A difficulty with the system is indicated byone or more of the following:
The readiness light will notilluminate immediately after theignition is turned on.
•The readiness light will either flash orstay lit.
•A series of five beeps will be heard. Thetone pattern will repeat periodicallyuntil the problem, the light or both arerepaired.
If any of these things happen, evenintermittently, have the supplementalrestraint system serviced at an authorizeddealer immediately. Unless serviced, thesystem may not function properly in theevent of a crash.
The fact that the safety belt pretensionersor front airbags did not activate for bothfront seat occupants in a crash does notmean that something is wrong with thesystem. Rather, it means the restraintscontrol module determined the accidentconditions (crash severity, belt usage)were not appropriate to activate thesesafety devices.
•The design of the front airbags is toactivate only in frontal and near-frontalcrashes (not rollovers, side impacts orrear impacts) unless the crash causessufficient frontal deceleration.
•The design of the safety beltpretensioners is to activate in frontal,near-frontal and side crashes, and inrollovers.
•The design of the side airbags is toinflate in certain side impact crashes.Side airbags may activate in othertypes of crashes if the vehicleexperiences sufficient sideways motionor deformation.
•The design of the Safety Canopy is toinflate in certain side impact crashesor rollover events. The Safety Canopymay activate in other types of crashesif the vehicle experiences sufficientsideways motion or deformation, or acertain likelihood of rollover.
AIRBAG DISPOSAL
Contact your authorized dealer as soon aspossible. Airbags must be disposed of byqualified personnel.
45
Super Duty (), enUSA
Supplementary Restraints System
Page 58 of 470

The autolock feature will unlock all thedoors when:
•autolock has locked the doors
•you stop the vehicle and switch theignition off or to accessory mode, and
•you open the driver door within 10minutes.
Note:The doors will not autounlock if youhave electronically locked them beforeopening the driver door.
Enabling or Disabling
You can enable or disable these featuresin the information display or yourauthorized dealer can do it for you. SeeGeneral Information (page 81).
Note:You can enable or disable theautolock and autounlock featuresindependently of each other.
Illuminated Entry
The interior lamps and select exteriorlamps will illuminate when you unlock thedoors with the remote entry system.
The illuminated entry system will turn offthe lights if:
•the ignition is on
•you press the remote control lockbutton, or
•after 25 seconds of illumination.
The dome lamp will not turn on if thecontrol is set to the off position.
The lights will not turn off if:
•you turn them on with the dimmercontrol, or
•any door is open.
Battery Saver
The battery saver turns off the interiorlamps 30 minutes after you switch theignition off if a door is open and the domelamp switch is on. It turns off the interiorlamps after 10 minutes if the dome lampswitch is off.
KEYLESS ENTRY (IF EQUIPPED)
SECURICODE™ KEYLESS ENTRYKEYPAD
The keypad is located near the driverwindow.
Note:If you enter your entry code too faston the keypad, the unlock function may notwork. Re-enter your entry code more slowly.
You can use the keypad to lock or unlockthe doors without using a key.
You can operate the keypad with thefactory-set 5-digit entry code. The code islocated on the owner’s wallet card in theglove box and is available from anauthorized dealer. You can also create upto five of your own 5-digit personal entrycodes.
Programming a Personal Entry Code
To create your own personal entry code:
1. Enter the factory-set code.
2. Press 1·2 on the keypad within fiveseconds.
55
Super Duty (), enUSA
LocksE163050
Page 68 of 470
LIGHTING CONTROL
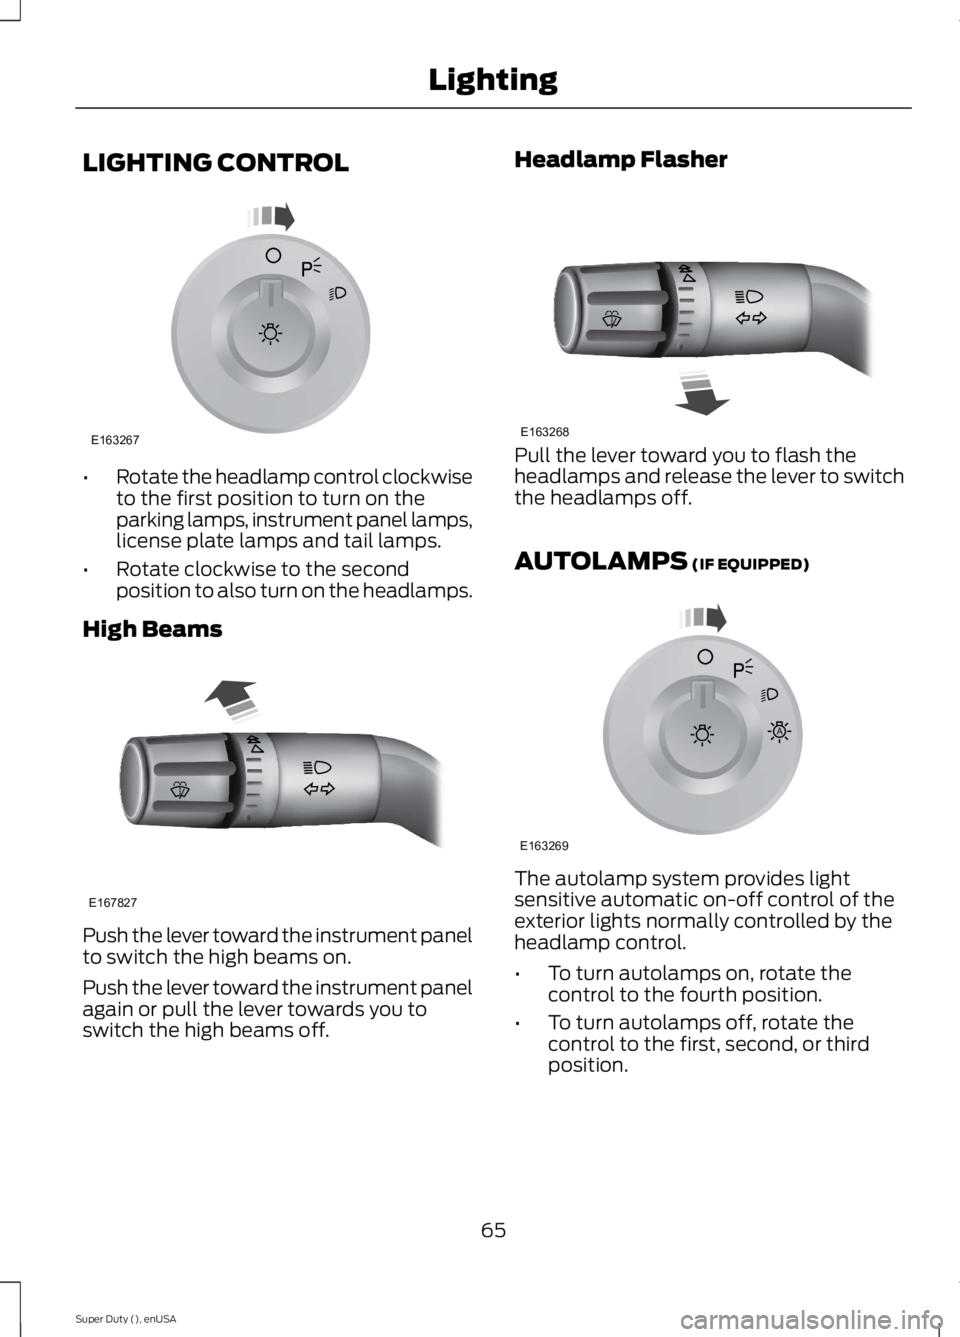
•Rotate the headlamp control clockwiseto the first position to turn on theparking lamps, instrument panel lamps,license plate lamps and tail lamps.
•Rotate clockwise to the secondposition to also turn on the headlamps.
High Beams
Push the lever toward the instrument panelto switch the high beams on.
Push the lever toward the instrument panelagain or pull the lever towards you toswitch the high beams off.
Headlamp Flasher
Pull the lever toward you to flash theheadlamps and release the lever to switchthe headlamps off.
AUTOLAMPS (IF EQUIPPED)
The autolamp system provides lightsensitive automatic on-off control of theexterior lights normally controlled by theheadlamp control.
•To turn autolamps on, rotate thecontrol to the fourth position.
•To turn autolamps off, rotate thecontrol to the first, second, or thirdposition.
65
Super Duty (), enUSA
LightingE163267 E167827 E163268 E163269
A
Page 69 of 470
Note:If the vehicle is equipped withautolamps, it will have the headlamps onwith windshield wipers feature. If thewindshield wipers are turned on, the exteriorlamps will turn on with the headlampcontrol in the autolamp position.
The autolamp system also keeps the lightson for a predetermined amount of time afterthe ignition switch is turned to off. You canchange the amount of time the lamps stayon by using the programming procedure thatfollows:
Autolamps - Programmable ExitDelay
Programmable exit delay allows the lengthof the autolamp exit delay to be changed.
To program the auto lamp exit time delay:
1.Start with the ignition in the off positionand the headlamp control in theautolamp position.
2. Turn the headlamp control to off.
3.Turn the ignition switch to on and thenback to off.
4. Turn the headlamp control to theautolamp position. The headlamps willturn on.
5. Wait the desired amount of time forthe exit delay you want (up to threeminutes), then turn the headlamps off.
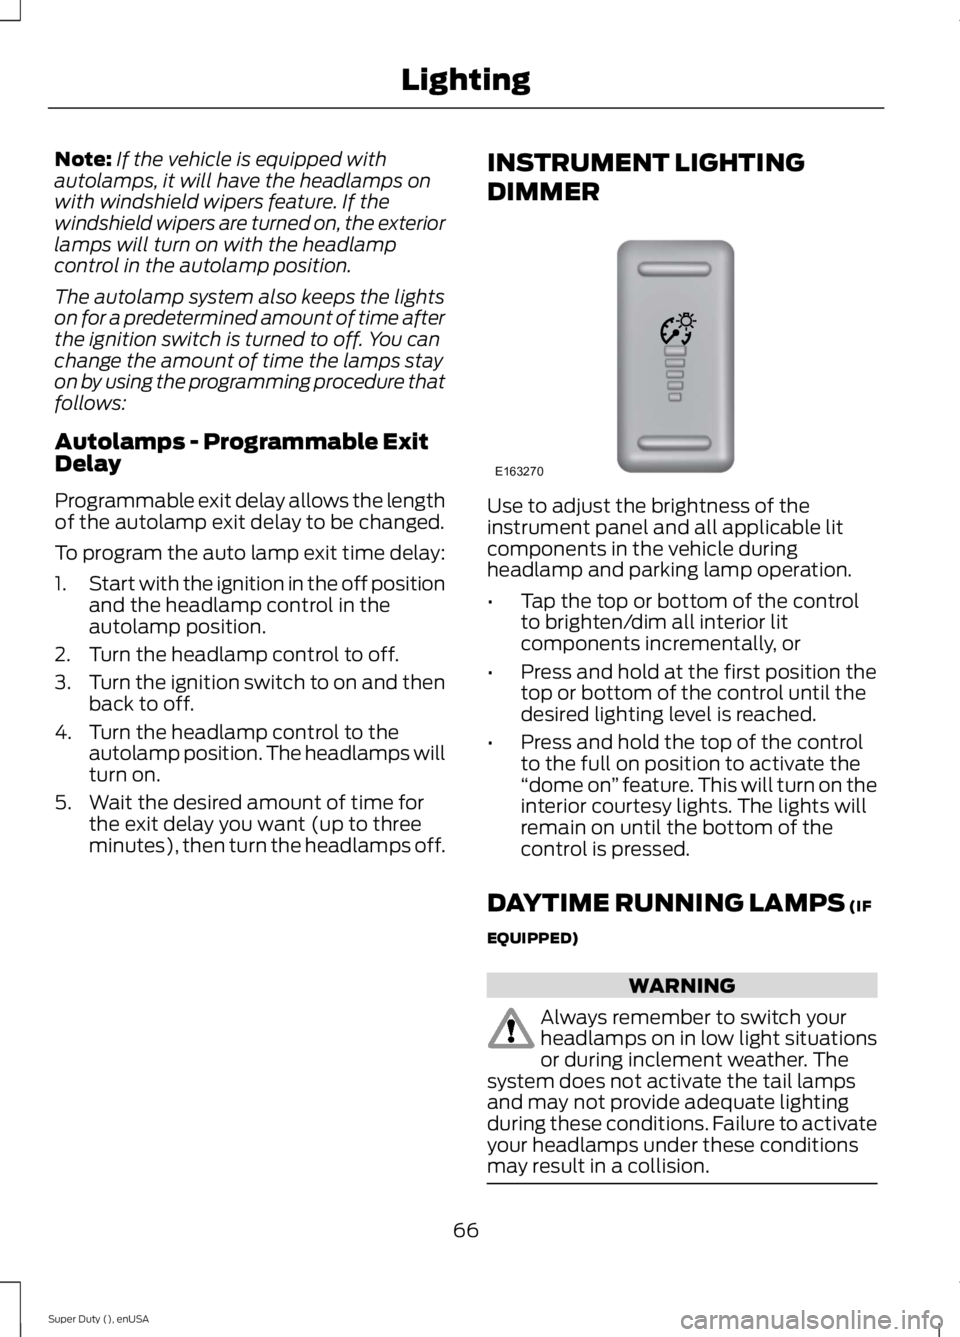
INSTRUMENT LIGHTING
DIMMER
Use to adjust the brightness of theinstrument panel and all applicable litcomponents in the vehicle duringheadlamp and parking lamp operation.
•Tap the top or bottom of the controlto brighten/dim all interior litcomponents incrementally, or
•Press and hold at the first position thetop or bottom of the control until thedesired lighting level is reached.
•Press and hold the top of the controlto the full on position to activate the“dome on” feature. This will turn on theinterior courtesy lights. The lights willremain on until the bottom of thecontrol is pressed.
DAYTIME RUNNING LAMPS (IF
EQUIPPED)
WARNING
Always remember to switch yourheadlamps on in low light situationsor during inclement weather. Thesystem does not activate the tail lampsand may not provide adequate lightingduring these conditions. Failure to activateyour headlamps under these conditionsmay result in a collision.
66
Super Duty (), enUSA
LightingE163270
Page 70 of 470
The system switches the headlamps onwith a reduced output in daylightconditions.
To switch the system on:
1. Switch the ignition on.
2. Switch the lighting control to the off,or parking lamp position.
3. Disengage the parking brake.
4. Make sure the transmission selectorlever is not in position P.
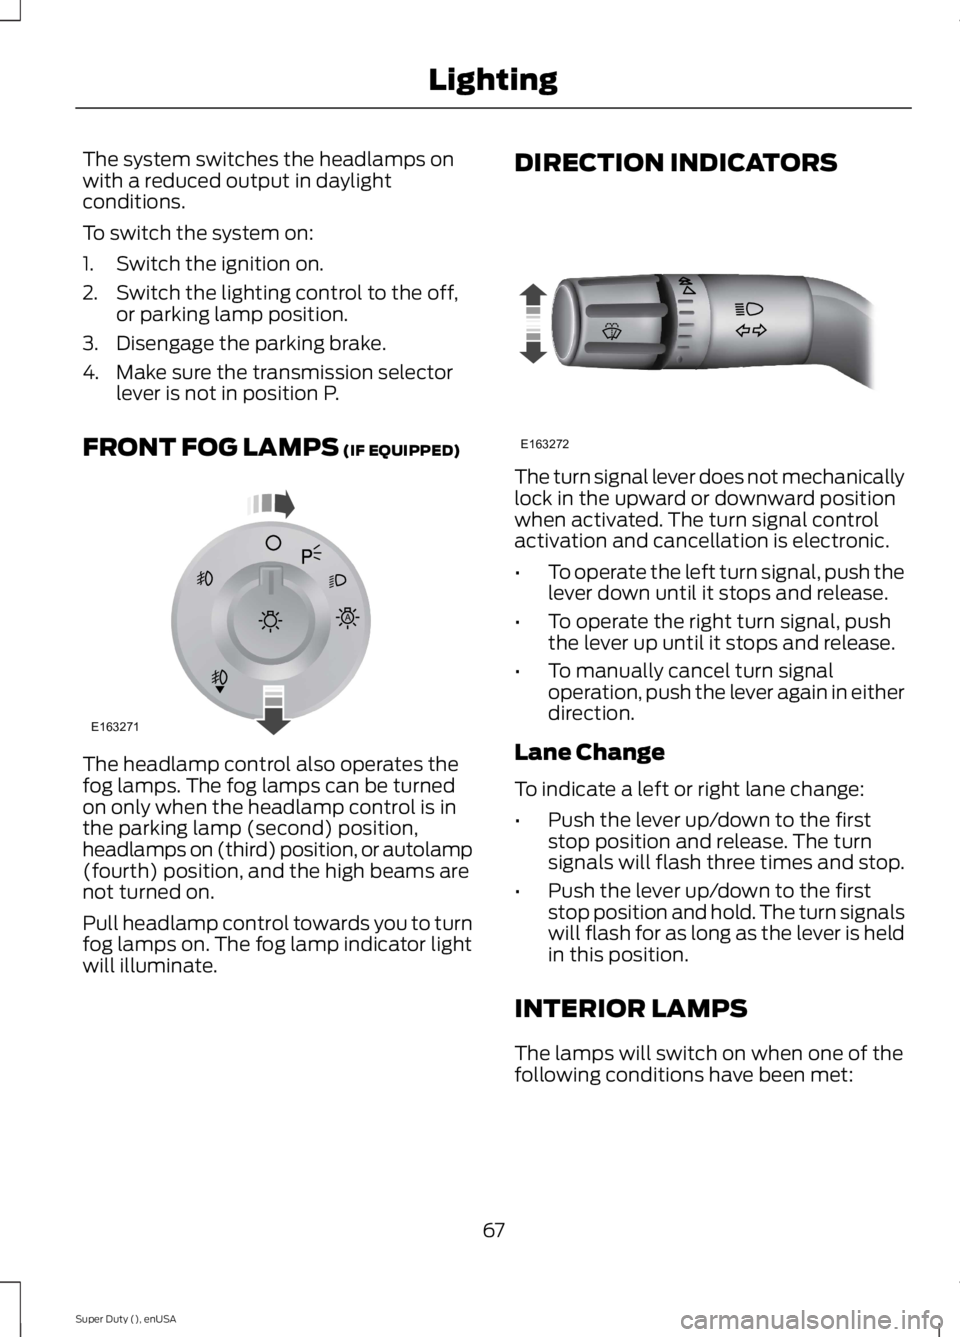
FRONT FOG LAMPS (IF EQUIPPED)
The headlamp control also operates thefog lamps. The fog lamps can be turnedon only when the headlamp control is inthe parking lamp (second) position,headlamps on (third) position, or autolamp(fourth) position, and the high beams arenot turned on.
Pull headlamp control towards you to turnfog lamps on. The fog lamp indicator lightwill illuminate.
DIRECTION INDICATORS
The turn signal lever does not mechanicallylock in the upward or downward positionwhen activated. The turn signal controlactivation and cancellation is electronic.
•To operate the left turn signal, push thelever down until it stops and release.
•To operate the right turn signal, pushthe lever up until it stops and release.
•To manually cancel turn signaloperation, push the lever again in eitherdirection.
Lane Change
To indicate a left or right lane change:
•Push the lever up/down to the firststop position and release. The turnsignals will flash three times and stop.
•Push the lever up/down to the firststop position and hold. The turn signalswill flash for as long as the lever is heldin this position.
INTERIOR LAMPS
The lamps will switch on when one of thefollowing conditions have been met:
67
Super Duty (), enUSA
LightingE163271
A E163272
Page 71 of 470
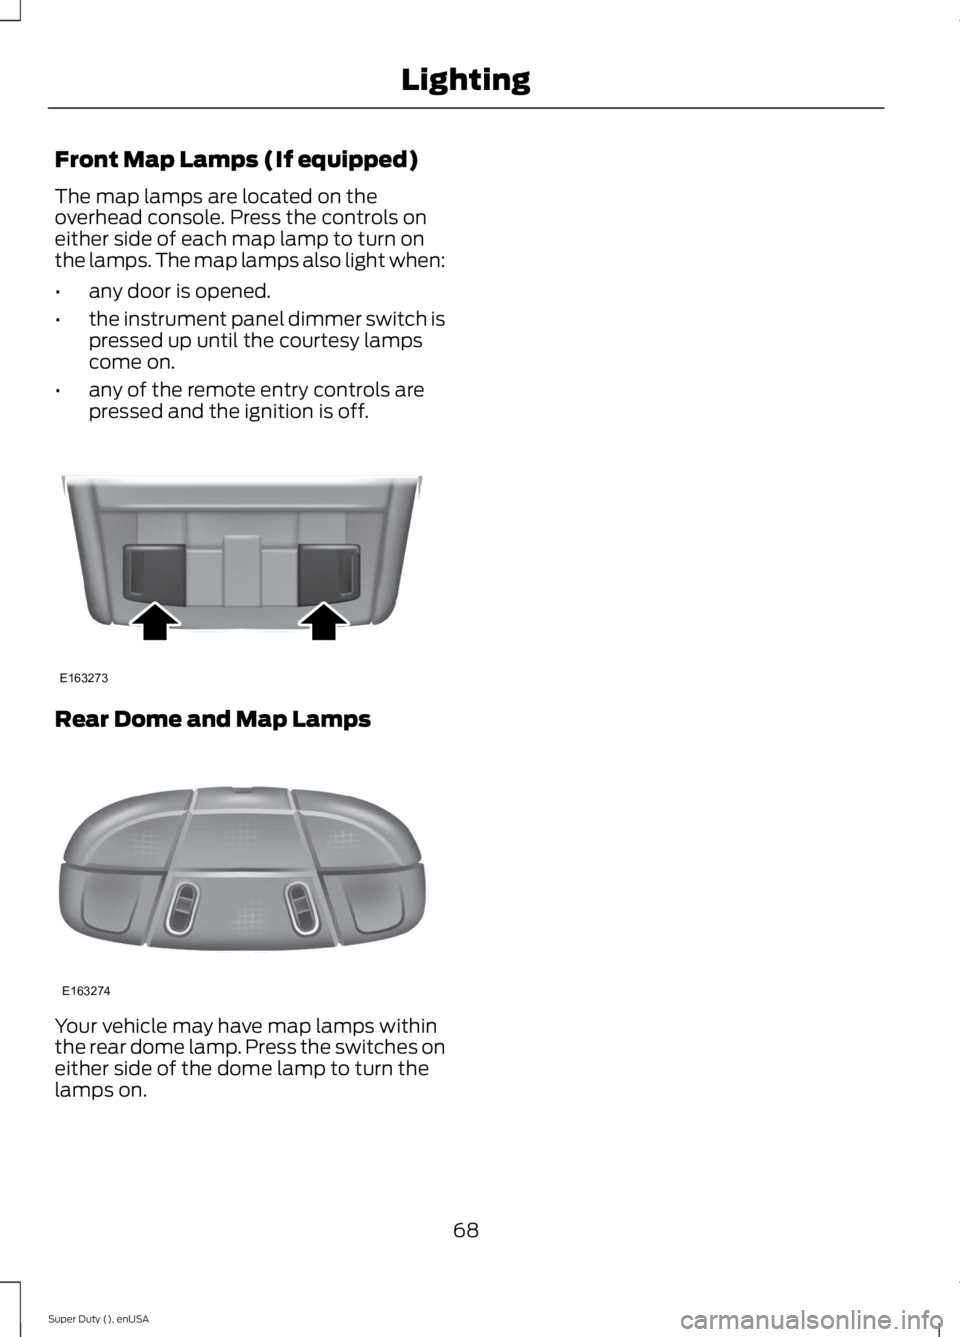
Front Map Lamps (If equipped)
The map lamps are located on theoverhead console. Press the controls oneither side of each map lamp to turn onthe lamps. The map lamps also light when:
•any door is opened.
•the instrument panel dimmer switch ispressed up until the courtesy lampscome on.
•any of the remote entry controls arepressed and the ignition is off.
Rear Dome and Map Lamps
Your vehicle may have map lamps withinthe rear dome lamp. Press the switches oneither side of the dome lamp to turn thelamps on.
68
Super Duty (), enUSA
LightingE163273 E163274
Page 72 of 470
POWER WINDOWS (IF EQUIPPED)
WARNINGS
Do not leave children unattended inyour vehicle and do not let them playwith the power windows. They mayseriously injure themselves.
When closing the power windows,you should verify they are free ofobstructions and make sure thatchildren and pets are not in the proximityof the window openings.
Note:You may hear a pulsing noise whenjust one of the windows is open. Lower theopposite window slightly to reduce thisnoise.
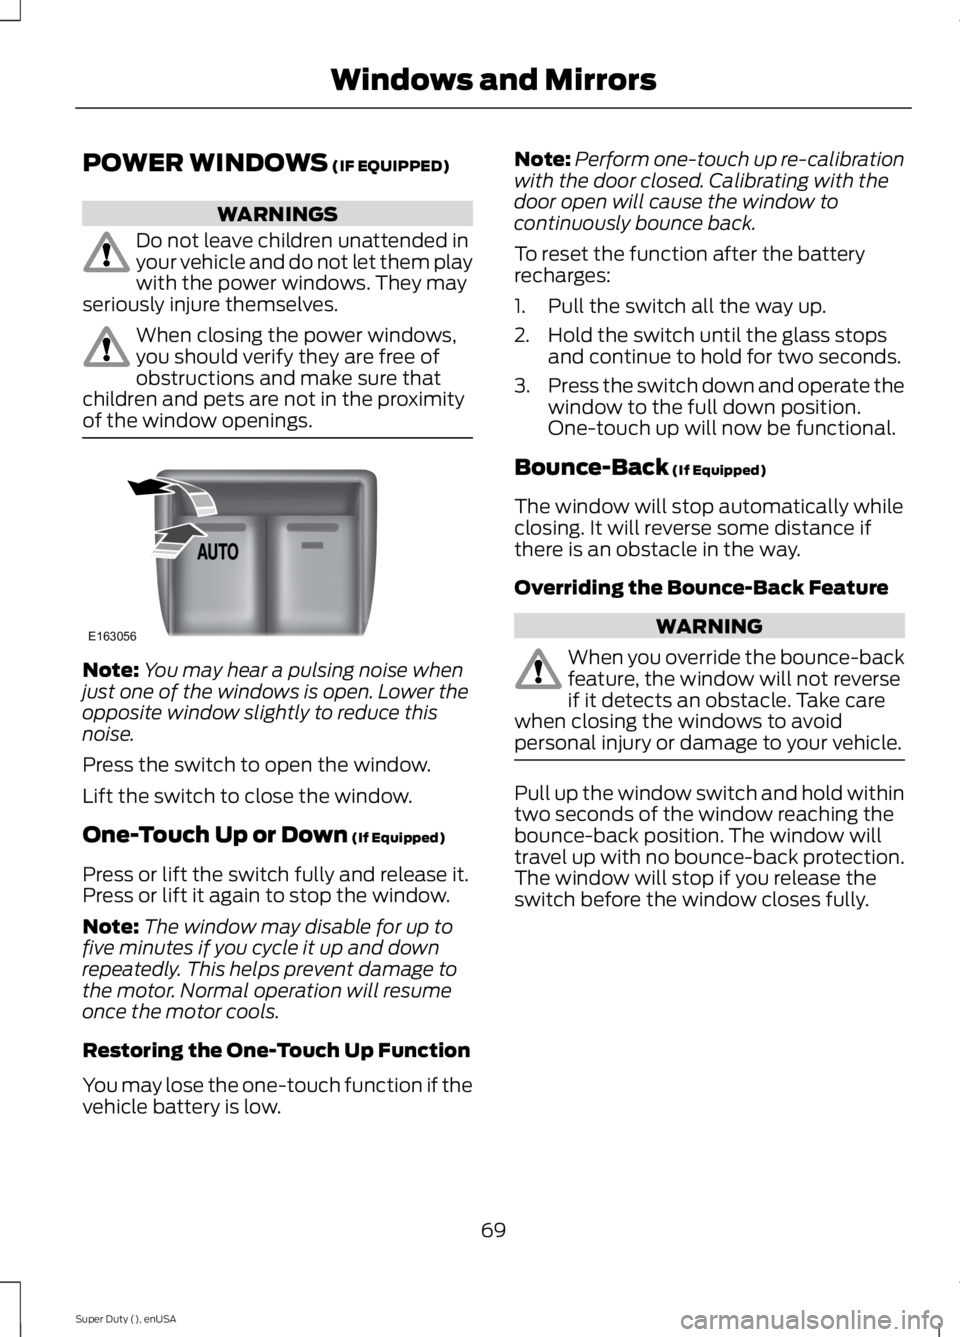
Press the switch to open the window.
Lift the switch to close the window.
One-Touch Up or Down (If Equipped)
Press or lift the switch fully and release it.Press or lift it again to stop the window.
Note:The window may disable for up tofive minutes if you cycle it up and downrepeatedly. This helps prevent damage tothe motor. Normal operation will resumeonce the motor cools.
Restoring the One-Touch Up Function
You may lose the one-touch function if thevehicle battery is low.
Note:Perform one-touch up re-calibrationwith the door closed. Calibrating with thedoor open will cause the window tocontinuously bounce back.
To reset the function after the batteryrecharges:
1. Pull the switch all the way up.
2. Hold the switch until the glass stopsand continue to hold for two seconds.
3.Press the switch down and operate thewindow to the full down position.One-touch up will now be functional.
Bounce-Back (If Equipped)
The window will stop automatically whileclosing. It will reverse some distance ifthere is an obstacle in the way.
Overriding the Bounce-Back Feature
WARNING
When you override the bounce-backfeature, the window will not reverseif it detects an obstacle. Take carewhen closing the windows to avoidpersonal injury or damage to your vehicle.
Pull up the window switch and hold withintwo seconds of the window reaching thebounce-back position. The window willtravel up with no bounce-back protection.The window will stop if you release theswitch before the window closes fully.
69
Super Duty (), enUSA
Windows and MirrorsE163056
Page 74 of 470
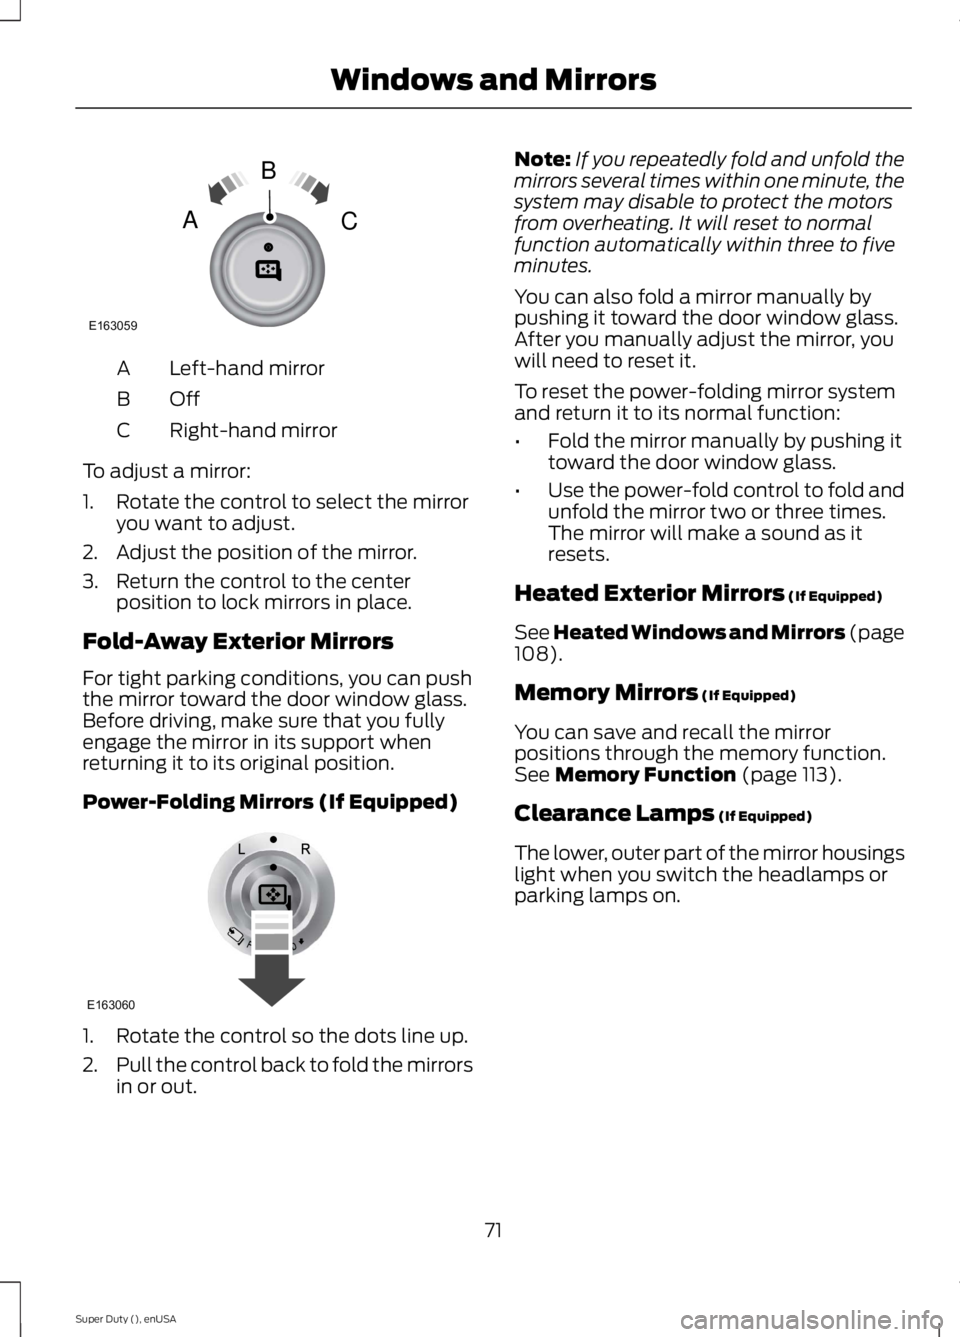
Left-hand mirrorA
OffB
Right-hand mirrorC
To adjust a mirror:
1. Rotate the control to select the mirroryou want to adjust.
2. Adjust the position of the mirror.
3. Return the control to the centerposition to lock mirrors in place.
Fold-Away Exterior Mirrors
For tight parking conditions, you can pushthe mirror toward the door window glass.Before driving, make sure that you fullyengage the mirror in its support whenreturning it to its original position.
Power-Folding Mirrors (If Equipped)
1. Rotate the control so the dots line up.
2.Pull the control back to fold the mirrorsin or out.
Note:If you repeatedly fold and unfold themirrors several times within one minute, thesystem may disable to protect the motorsfrom overheating. It will reset to normalfunction automatically within three to fiveminutes.
You can also fold a mirror manually bypushing it toward the door window glass.After you manually adjust the mirror, youwill need to reset it.
To reset the power-folding mirror systemand return it to its normal function:
•Fold the mirror manually by pushing ittoward the door window glass.
•Use the power-fold control to fold andunfold the mirror two or three times.The mirror will make a sound as itresets.
Heated Exterior Mirrors (If Equipped)
See Heated Windows and Mirrors (page108).
Memory Mirrors (If Equipped)
You can save and recall the mirrorpositions through the memory function.See Memory Function (page 113).
Clearance Lamps (If Equipped)
The lower, outer part of the mirror housingslight when you switch the headlamps orparking lamps on.
71
Super Duty (), enUSA
Windows and MirrorsE163059
B
AC E163060