DRIVE SHAFT FORD FIESTA 2007 Owner's Manual
[x] Cancel search | Manufacturer: FORD, Model Year: 2007, Model line: FIESTA, Model: FORD FIESTA 2007Pages: 1226, PDF Size: 61.26 MB
Page 169 of 1226
205-04-1 7 Front Drive Halfshafts 205-04-1 7
REMOVAL AND INSTALLATION
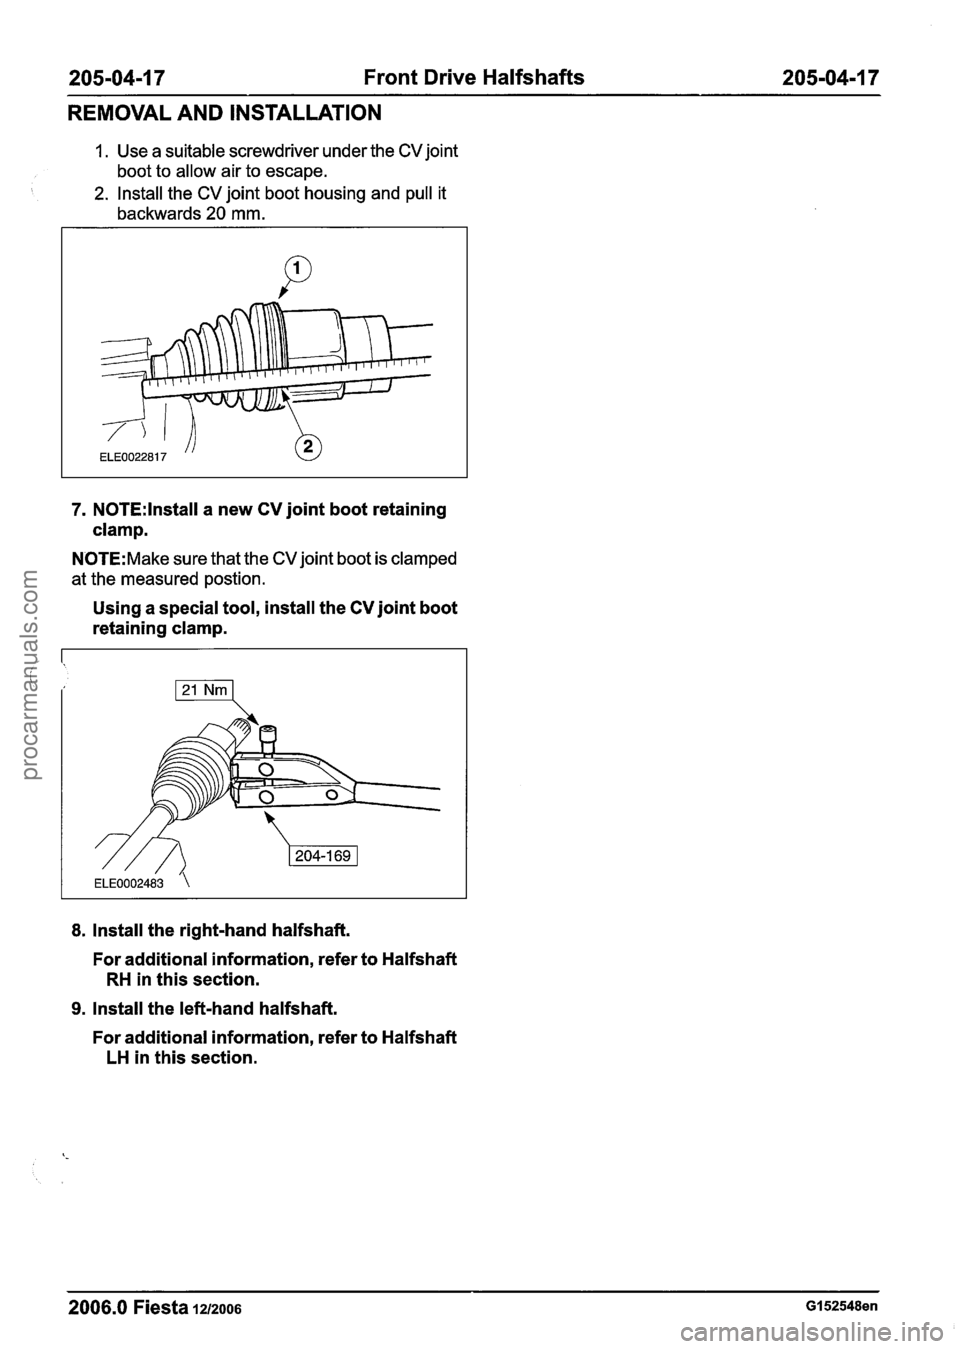
1. Use a suitable screwdriver under the CV joint
boot to allow air to escape.
2. Install the CV joint boot housing and pull it
backwards
20 mm.
7. N0TE:lnstall a new CV joint boot retaining
clamp.
N0TE:Make sure that the CV joint boot is clamped
at the measured
postion.
Using a special tool, install the CV joint boot
retaining clamp.
8. Install the right-hand halfshaft.
For additional information, refer to Halfshaft
RH in this section.
9. Install the left-hand halfshaft.
For additional information, refer to Halfshaft
LH in this section.
2006.0 Fiesta 1212006 GI 52548en
procarmanuals.com
Page 170 of 1226
205-04-1 8 Front Drive Halfshafts 205-04-1 8
REMOVAL AND INSTALLATION
Outer Constant Velocity (CV) Joint Boot(l4 338 0)
Special Tool(~)
I
-
I Clamping Tool, Boot
Retaining Clamp
204-1 69 (1 4-044)
14044
Materials
Name Specification
1 Grease I WSS-MI ~259-v
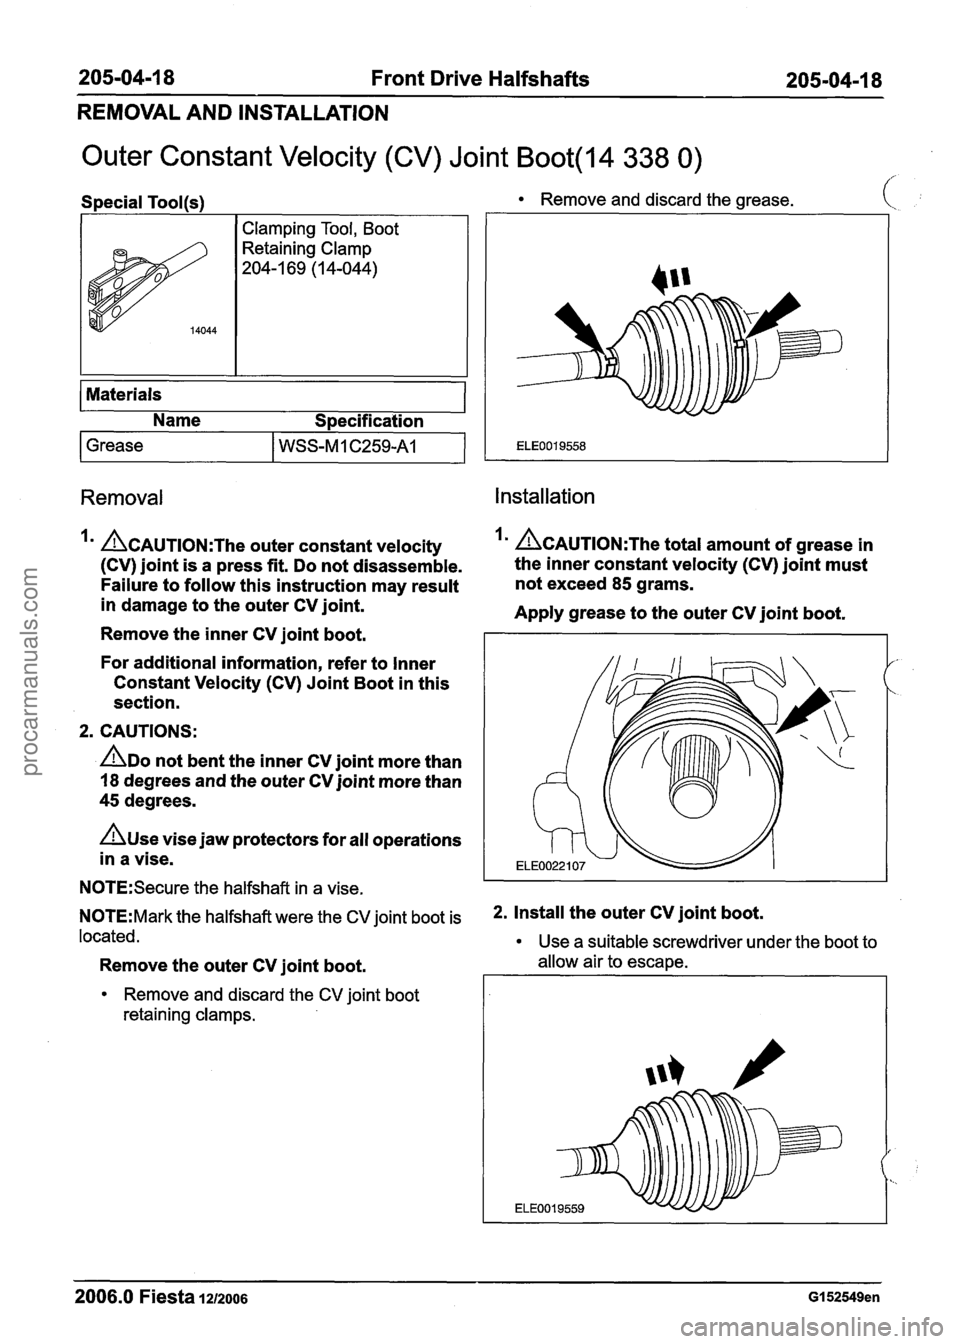
Remove and discard the grease. I
Removal Installation
&AUTION:The outer constant velocity I' ~CAUTION:T~~ total amount of grease in
(CV) joint is a press fit. Do not disassemble. the
inner constant velocity (CV) joint must
Failure to follow this instruction may result not
exceed
85 grams.
in damage to the outer CV joint.
Apply grease to the outer CV joint boot.
Remove the inner CV joint boot.
For additional information, refer to Inner
Constant Velocity (CV) Joint Boot in this
section.
2. CAUTIONS:
ADO not bent the inner CV joint more than
18 degrees and the outer CV joint more than
45 degrees.
n~se vise jaw protectors for all operations
in a vise.
N0TE:Secure the halfshaft in a vise.
N0TE:Mark the halfshaft were the CV joint boot is *. Install the Outer CV joint boot=
located.
Use a suitable screwdriver under the boot to
Remove the outer CV joint boot. allow air to escape.
Remove and discard the CV joint boot
retaining clamps.
2006.0 Fiesta 1212006 GI 52549en
procarmanuals.com
Page 171 of 1226
205-04-1 9 Front Drive Halfshafts 205-04-1 9
REMOVAL AND INSTALLATION
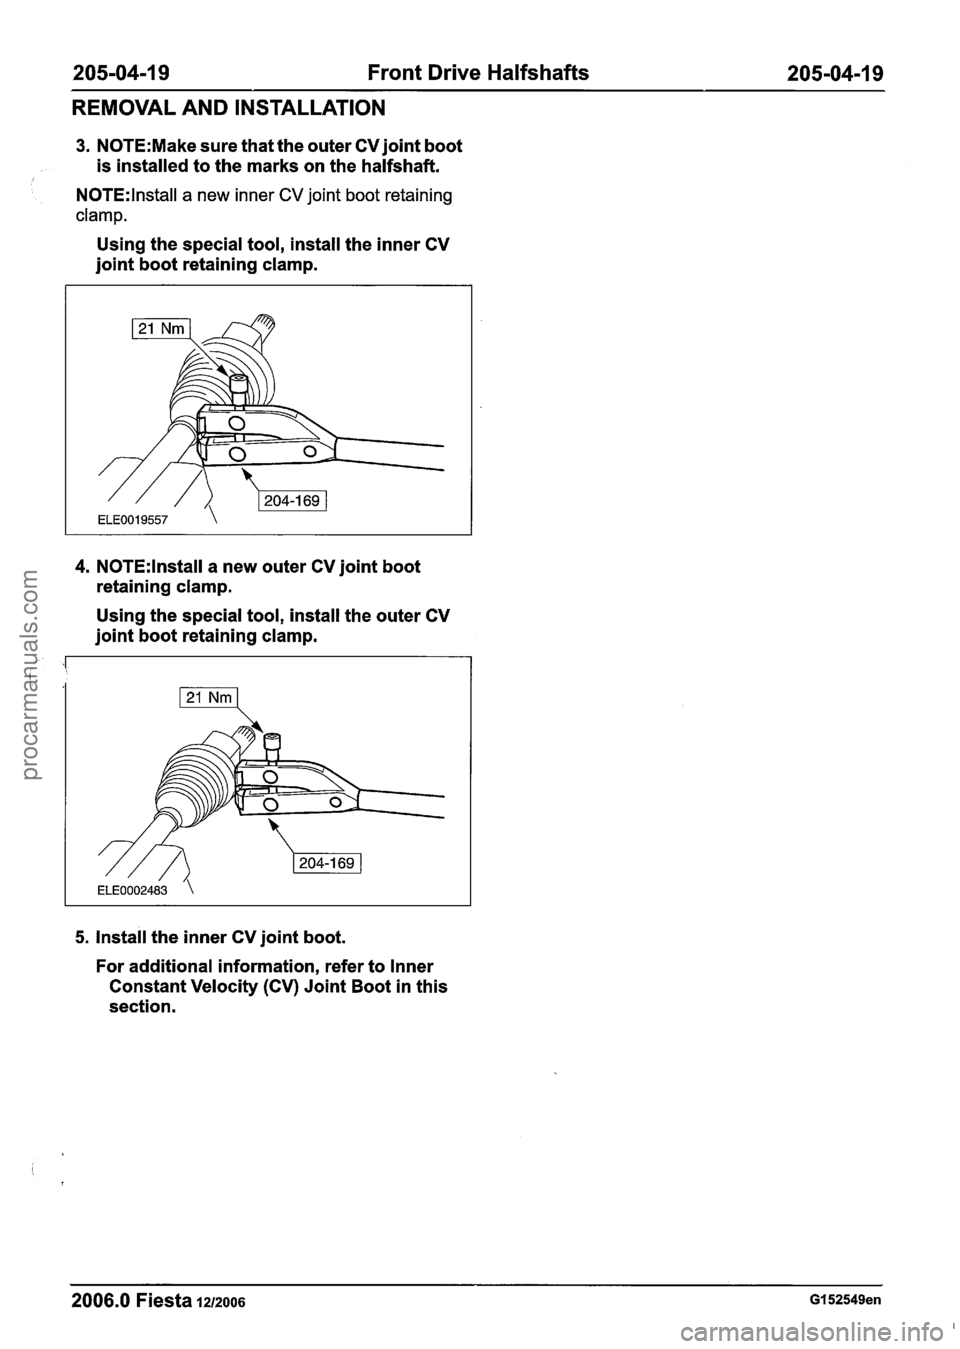
3. N0TE:Make sure that the outer CV joint boot
is installed to the marks on the halfshaft.
N0TE:lnstall a new inner CV joint boot retaining
clamp.
Using the special tool, install the inner CV
joint boot retaining clamp.
4. N0TE:lnstall a new outer CV joint boot
retaining clamp.
Using the special tool, install the outer CV
joint boot retaining clamp.
5. Install the inner CV joint boot.
For additional information, refer to Inner
Constant Velocity (CV) Joint Boot in this
section.
2006.0 Fiesta 1212006 GI 52549en
procarmanuals.com
Page 325 of 1226
211 -00-5 Steering System - General Information 211 -00-5
DIAGNOSIS AND TESTING
Steering System
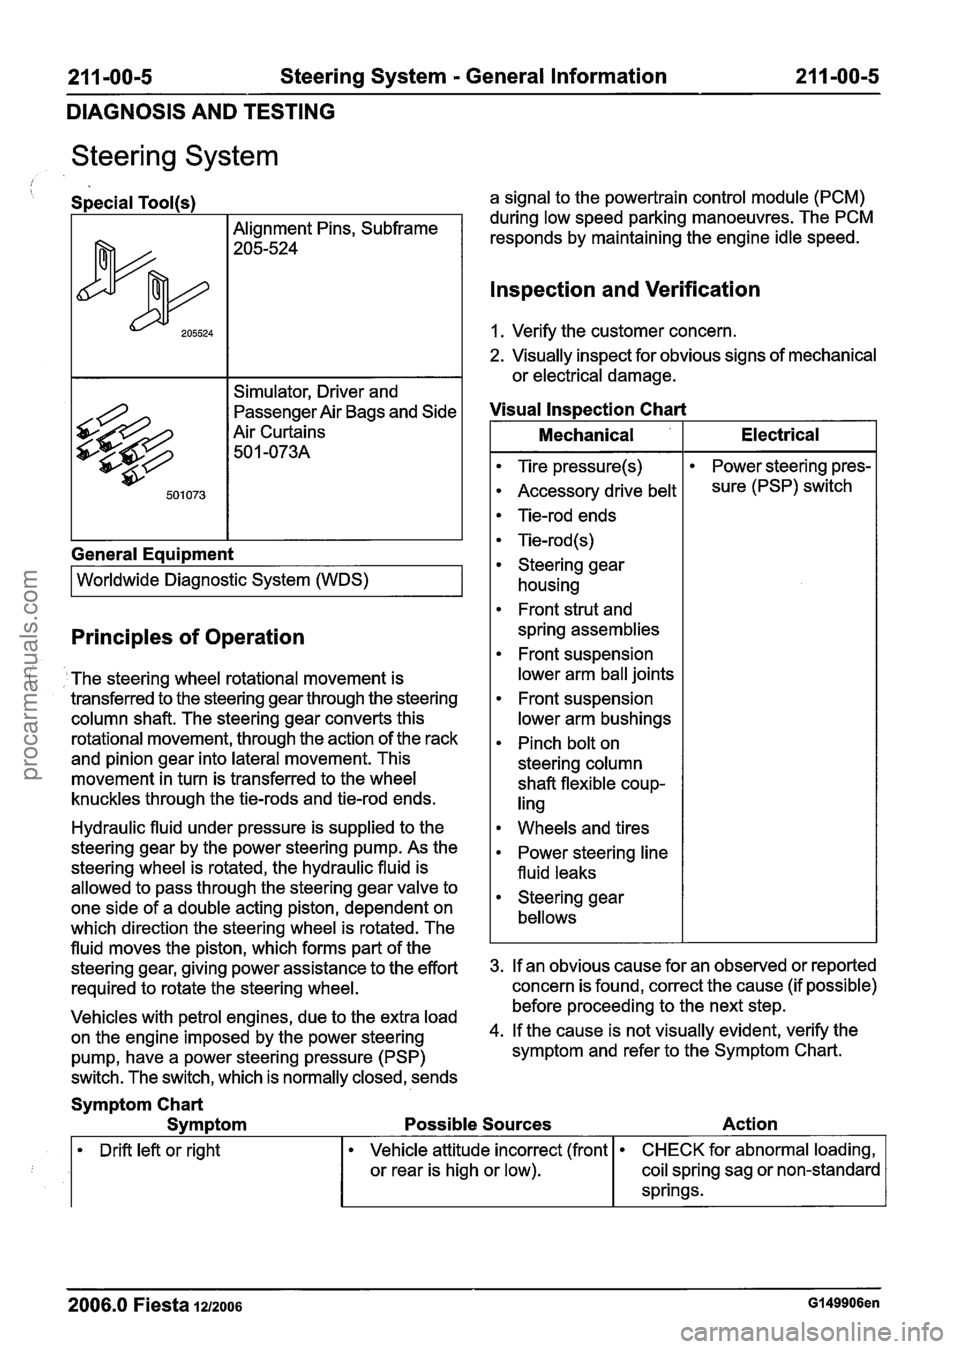
/ Special Tool(s)
Alignment Pins, Subframe
205-524
Simulator, Driver and
passenger ~ir Bags and Side
Air Curtains 50
1 -073A
General Eaui~ment
I Worldwide Diagnostic System (WDS) I
Principles of Operation
The steering wheel rotational movement is
transferred to the steering gear through the steering
column shaft. The steering gear converts this
rotational movement, through the action of the rack
and pinion gear into lateral movement. This
movement in turn is transferred to the wheel
knuckles through the tie-rods and tie-rod ends.
Hydraulic fluid under pressure is supplied to the
steering gear by the power steering pump. As the
steering wheel is rotated, the hydraulic fluid is
allowed to pass through the steering gear valve to
one side of a double acting piston, dependent on
which direction the steering wheel is rotated. The
fluid moves the piston, which forms part of the
steering gear, giving power assistance to the effort
required to rotate the steering wheel.
Vehicles with petrol engines, due to the extra load
on the engine imposed by the power steering
pump, have a power steering pressure (PSP)
switch. The switch, which is normally closed, sends a signal
to the powertrain control module (PCM)
during low speed parking manoeuvres. The PCM
responds by maintaining the engine idle speed.
lnspection and Verification
1. Verify the customer concern.
2. Visually inspect for obvious signs of mechanical
or electrical damage.
Visual lnspection Chart
I Mechanical I Electrical I
Tire pressure(s)
Accessory drive belt
Tie-rod ends
Tie-rod (s)
Steering gear housing
Front strut and
spring assemblies
Front suspension
lower arm ball joints
Front suspension
lower arm bushings
Pinch bolt on
steering column
shaft flexible coup-
ling Power
steering pres-
sure (PSP) switch
Wheels and tires
Power steering line
fluid leaks
Steering gear
bellows
3. If an obvious cause for an observed or reported
concern is found, correct the cause (if possible)
before proceeding to the next step.
4. If the cause is not visually evident, verify the
symptom and refer to the Symptom Chart.
Symptom Chart
Symptom Possible Sources Action
Drift left or right
2006.0 Fiesta 1212006 Gl49906en
Vehicle attitude incorrect (front
or rear is high or low). CHECK for abnormal loading,
coil spring sag or non-standard
springs.
procarmanuals.com
Page 337 of 1226
211 -00-1 7 Steering System - General Information 21 1 -00-1 7
DIAGNOSIS AND TESTING
11. Install a new driver air bag module wiring
harness to the drive air bag module. If the
movement is not smooth or resistance
is felt, renew the steering column.
REFER to: Driver Air Bag Module Wiring REFER
to: Steering Column (21 1-04 Steering
Harness (501 -20 Supplemental Restraint Column,
Removal and Installation).
System, Removal and lnstallation).
12 Install the driver air bag module.
3. Hold both of the steering column shaft universal
joint yokes and then twist them clockwise and
REFER to: Driver Air Bag Module (501-20 counterclockwise.
Supplemental Restraint System, Removal and If
any movement is felt, install a new steering
installation). column.
REFER to: Steering Column (21 1-04 Steering
Column, Removal and lnstallation).
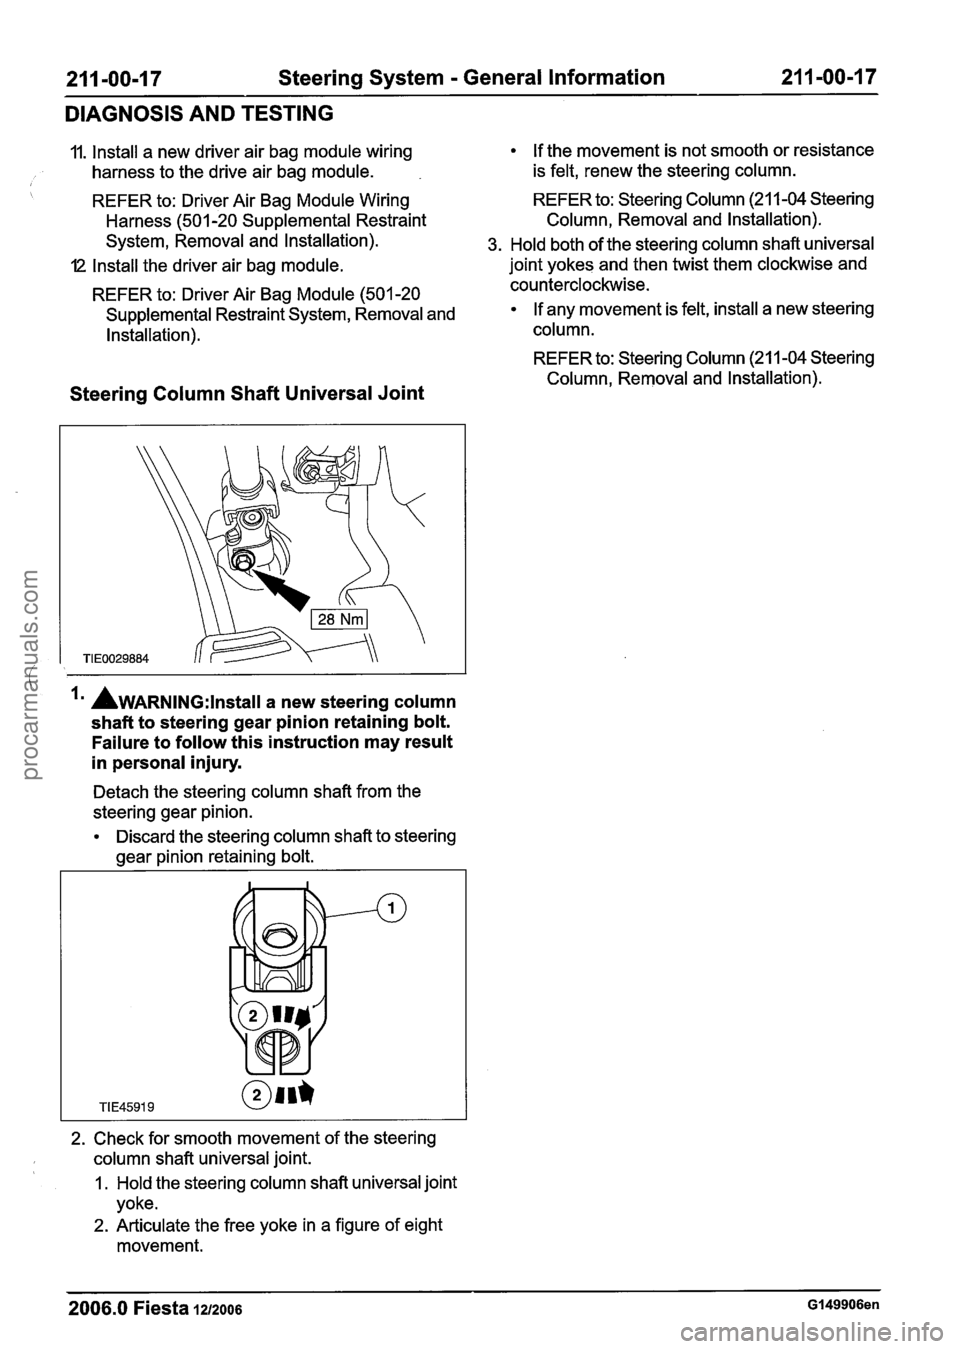
Steering Column Shaft Universal Joint
la AwARNING:~~~~~~~ a new steering column
shaft to steering gear pinion retaining bolt.
Failure to follow this instruction may result
in personal injury.
Detach the steering column shaft from the
steering gear pinion.
Discard the steering column shaft to steering
gear pinion retaining bolt.
2. Check for smooth movement of the steering
column shaft universal joint.
1. Hold the steering column shaft universal joint
yoke.
2. Articulate the free yoke in a figure of eight
movement.
2006.0 Fiesta 1212006 GI 49906en
procarmanuals.com
Page 358 of 1226

21 1-02-1 0 Power Steering 21 1-02-1 0
REMOVAL AND INSTALLATION
Power Steering Pump - 2.OL Duratec-HE (M14)
f
I I Remover, Power Steering I
1 I Installer, Camshaft Pulley 1
7 I Removerllnstaller, Cooling I
1. Remove the right-hand headlamp assembly.
For additional information, refer to:
Headlamp Assembly (41 7-01 Exterior
Lighting, Removal and Installation).
2. Remove the accessory drive belt.
For additional information, refer to:
Accessory Drive Belt
- 2.OL Duratec-HE
(M14) (303-05 Accessory Drive, Removal
and Installation).
I
3. Detach the power steering pump to steering
, gear pressure line from the intake manifold. I
1 4. Lower the vehicle.
5. Remove the components in the order
indicated in the following
illustration(s) and
table(s).
2006.0 Fiesta 1212006 G428496en
procarmanuals.com
Page 369 of 1226
21 1-02-21 Power Steering 21 1-02-21
REMOVAL AND INSTALLATION
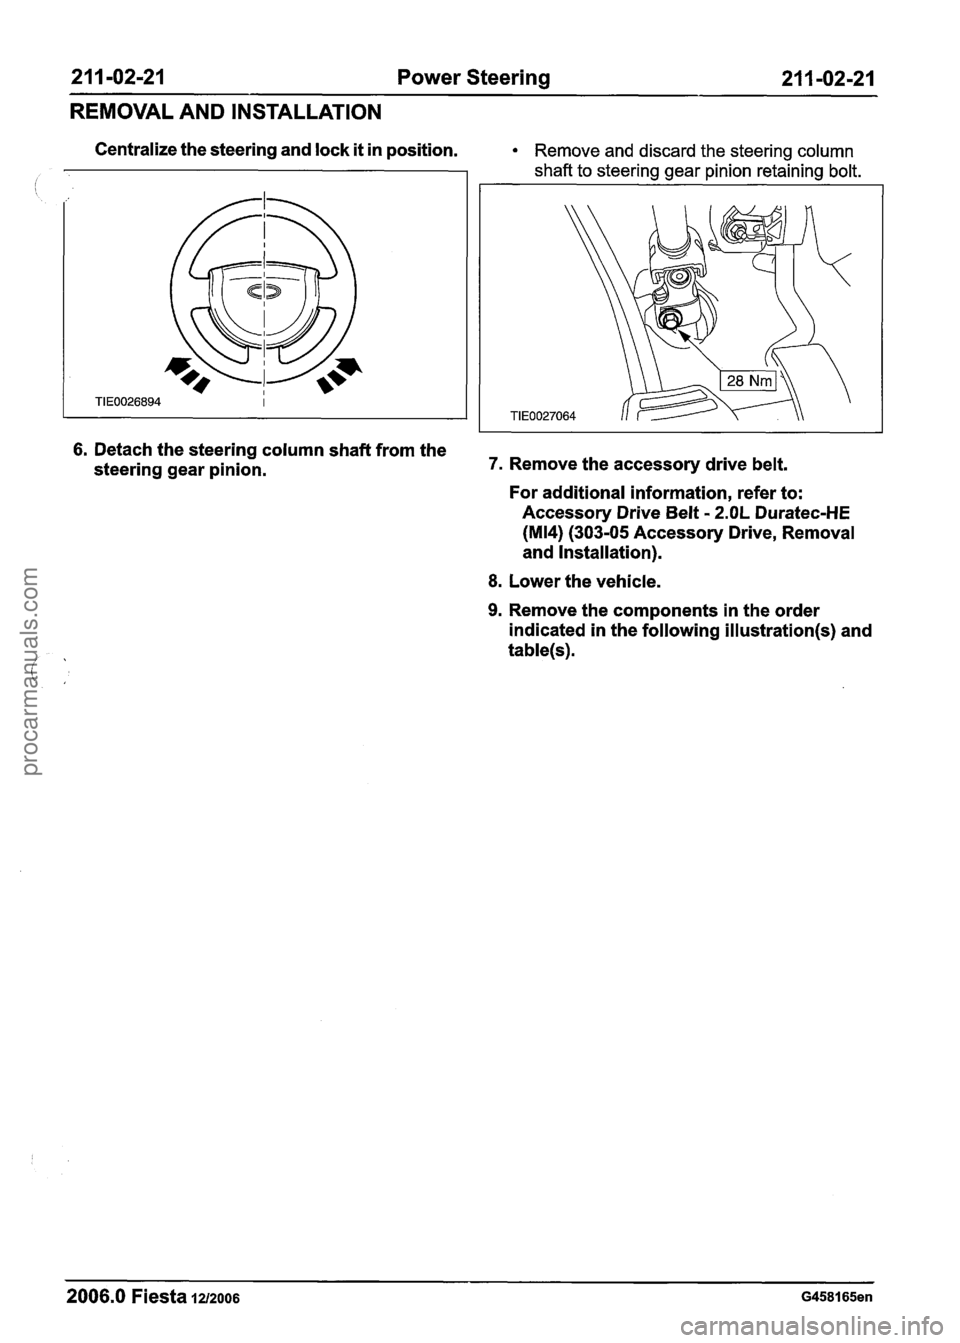
Centralize the steering and lock it in position. Remove and discard the steering column
shaft to steering gear pinion retaining bolt.
6. Detach the steering column shaft from the
steering gear pinion. 7. Remove the accessory drive belt.
For additional information, refer to:
Accessory Drive Belt
- 2.OL Duratec-HE
(M14) (303-05 Accessory Drive, Removal
and Installation).
8. Lower the vehicle.
9. Remove the components in the order
indicated in the following
illustration(s) and
table(s).
2006.0 Fiesta 1212006 G458165en
procarmanuals.com
Page 394 of 1226
2 1 1 -02-46 Power Steering 211 -02-46
REMOVAL AND INSTALLATION
Steering Gear to Fluid Cooler Return Hose(l3 439 0)
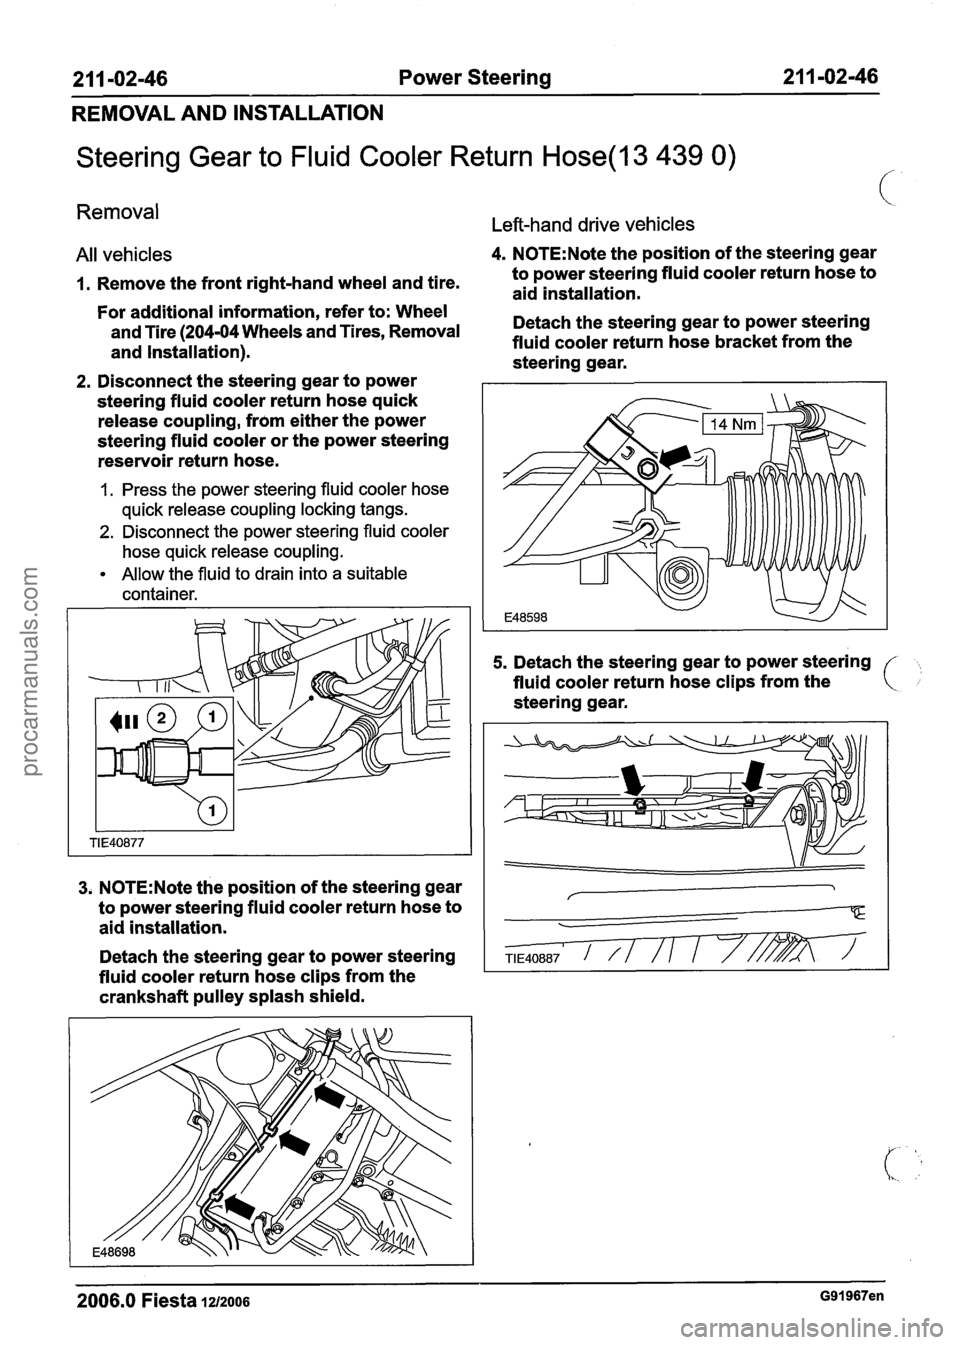
Removal
Left-hand drive vehicles
All vehicles 4. N0TE:Note the position of the steering gear
1. Remove the front right-hand wheel and tire. to
power steering fluid cooler return hose to
aid installation.
For additional information, refer to: Wheel
and Tire
(204-04 Wheels and Tires, Removal Detach
the steering gear to power steering
and Installation). fluid
cooler return hose bracket from the
steering gear.
2. Disconnect the steering gear to power
steering fluid cooler return hose quick
release coupling, from either the power
steering fluid cooler or the power steering
reservoir return hose.
1. Press the power steering fluid cooler hose
quick release coupling locking tangs.
2. Disconnect the power steering fluid cooler
hose quick release coupling.
Allow the fluid to drain into a suitable
container.
3. N0TE:Note the position of the steering gear
to power steering fluid cooler return hose to
aid installation.
Detach the steering gear to power steering
, fluid cooler return hose clips from the
crankshaft pulley splash shield.
5. Detach the steering gear to power steering
fluid cooler return hose clips from the
steering gear.
2006.0 Fiesta IZIZOO~ G91967en
procarmanuals.com
Page 460 of 1226
303-00-38 Engine System - General Information 303-00-38
GENERAL PROCEDURES
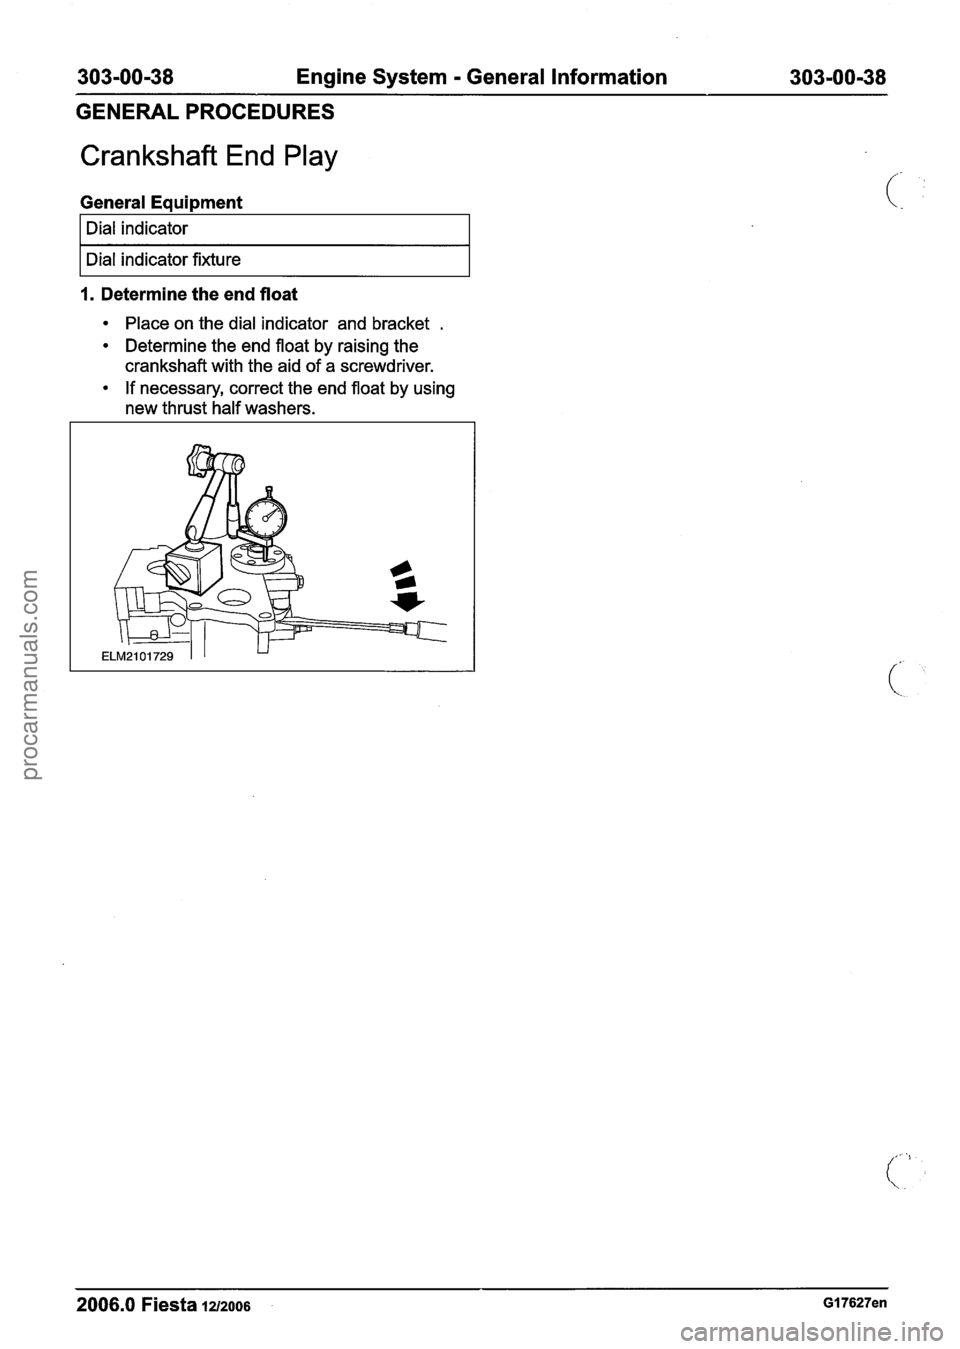
Crankshaft End Play
General Equipment
I Dial indicator I
I Dial indicator fixture I
1. Determine the end float
Place on the dial indicator and bracket .
Determine the end float by raising the
crankshaft with the aid of a screwdriver.
If necessary, correct the end float by using
new thrust half washers.
2006.0 Fiesta 1212006 GI 7627en
procarmanuals.com
Page 513 of 1226
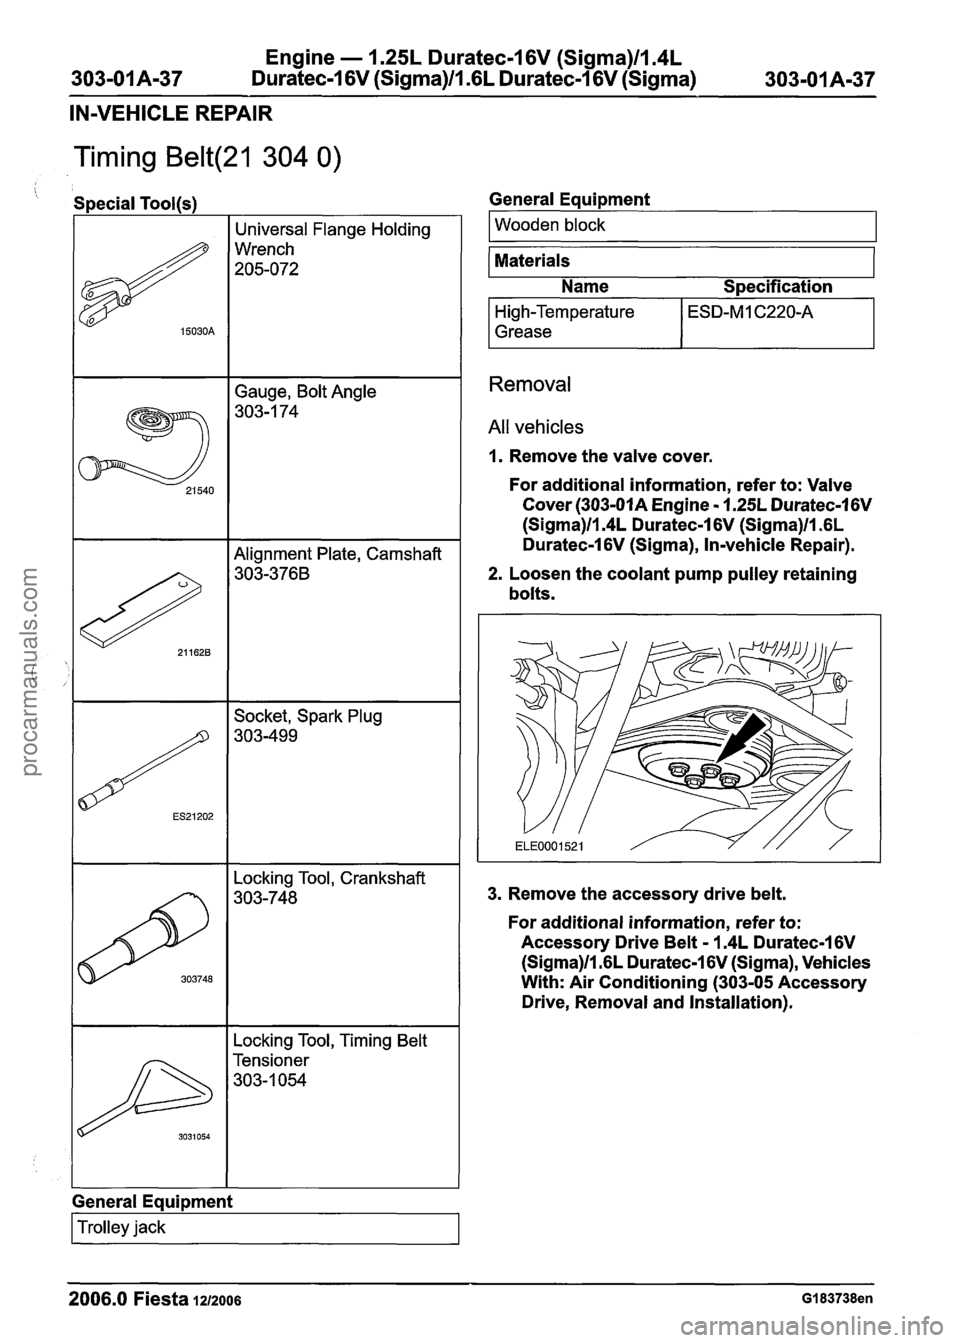
Engine - 1.25L Duratec-1 6V (Sigma)lIl4L
303-01 A-37 Duratec-1 6V (Sigma)ll.GL Duratec-1 6V (Sigma) 303-01A-37
IN-VEHICLE REPAIR
Timing Belt(21 304 0)
Gauge, Bolt Angle
303-1 74
' Special Tool(s)
# 15030A
Locking Tool, Timing Belt
I Tensioner
303-1054
Universal Flange Holding
Wrench
205-072
303748
General Equipment
Locking Tool, Crankshaft
303-748
I Trolley jack I
General Eaui~ment
I Wooden block I - --
Materials
Name
S~ecification
High-Temperature
Grease
Removal
All vehicles
1. Remove the valve cover.
For additional information, refer to: Valve
Cover
(303-01A Engine - 1.25L Duratec-1 6V
(Sigma)ll.4L Duratec-1 6V (Sigma)ll .6L
Duratec-1
6V (Sigma), In-vehicle Repair).
2. Loosen the coolant pump pulley retaining
bolts.
3. Remove the accessory drive belt.
For additional information, refer to:
Accessory Drive Belt
- 1.4L Duratec-I 6V
(Sigma)/l.GL Duratec-1 6V (Sigma), Vehicles
With: Air Conditioning (303-05 Accessory
Drive, Removal and Installation).
2006.0 Fiesta 1212006 GI 83738en
procarmanuals.com