seats FORD FLEX 2015 1.G Quick Reference Guide
[x] Cancel search | Manufacturer: FORD, Model Year: 2015, Model line: FLEX, Model: FORD FLEX 2015 1.GPages: 10, PDF Size: 1.38 MB
Page 6 of 10

1110
SYNC® WITH MYFORD TOUCH®* FLEX
A REVOLUTIONARY WAY TO CONNECT WITH YOUR VEHICLE.
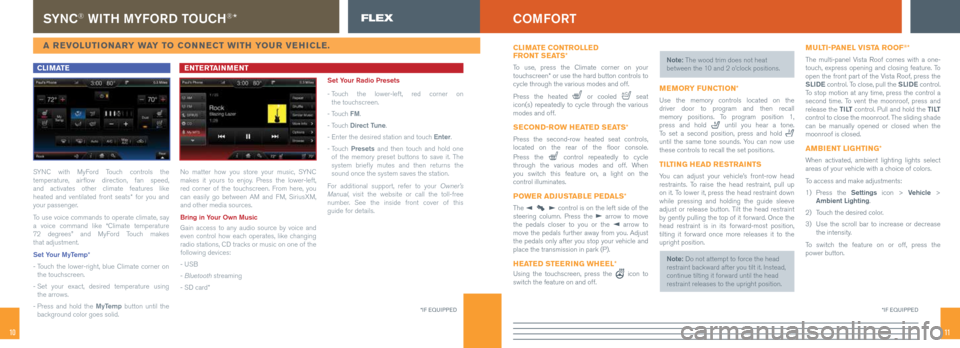
CLIMATE
SYNC with MyFord Touch controls the
temperature, airflow direction, fan speed,
and activates other climate features like
heated and ventilated front seats* for you and
your passenger.
To use voice commands to operate climate, say
a voice command like “Climate temperature
72 degrees” and MyFord Touch makes
that adjustment.
Set Your MyTemp*
- Touch the lower-right, blue Climate corner on
the touchscreen.
- Set your exact, desired temperature using
the arrows.
- Press and hold the MyTemp button until the
background color goes solid.
ENTERTAINMENT
No matter how you store your music, SYNC
makes it yours to enjoy. Press the lower-left,
red corner of the touchscreen. From here, you
can easily go between AM and FM, SiriusXM,
and other media sources.
Bring in Your Own Music
Gain access to any audio source by voice and
even control how each operates, like changing
radio stations, CD tracks or music on one of the
following devices:
- USB
- Bluetooth streaming
- SD card* Set Your Radio Presets
-
Touch the lower-left, red corner on
the touchscreen.
- Touch FM.
- Touch Direct Tune.
- Enter the desired station and touch Enter.
- Touch Presets and then touch and hold one
of the memory preset buttons to save it. The
system briefly mutes and then returns the
sound once the system saves the station.
For additional support, refer to your Owner’s
Manual, visit the website or call the toll-free
number. See the inside front cover of this
guide for details.
*IF EQUIPPED
COMFORT
*IF EQUIPPED
CLIMATE CONTROLLED
FRONT SEATS *
To use, press the Climate corner on your
touchscreen* or use the hard button controls to
cycle through the various modes and off.
Press the heated
or cooled seat
icon(s) repeatedly to cycle through the various
modes and off.
SECOND-ROW HEATED SEATS *
Press the second-row heated seat controls,
located on the rear of the floor console.
Press the
control repeatedly to cycle
through the various modes and off. When
you switch this feature on, a light on the
control illuminates.
POWER ADJUSTABLE PEDALS *
The control is on the left side of the
steering column. Press the arrow to move
the pedals closer to you or the arrow to
move the pedals further away from you. Adjust
the pedals only after you stop your vehicle and
place the transmission in park (P).
HEATED STEERING WHEEL *
Using the touchscreen, press the icon to
switch the feature on and off. Note: The wood trim does not heat
between the 10 and 2 o’clock positions.
MEMORY FUNCTION
*
Use the memory controls located on the
driver door to program and then recall
memory positions. To program position 1,
press and hold
until you hear a tone.
To set a second position, press and hold
until the same tone sounds. You can now use
these controls to recall the set positions.
TILTING HEAD RESTRAINTS
You can adjust your vehicle’s front-row head
restraints. To raise the head restraint, pull up
on it. To lower it, press the head restraint down
while pressing and holding the guide sleeve
adjust or release button. Tilt the head restraint
by gently pulling the top of it forward. Once the
head restraint is in its forward-most position,
tilting it forward once more releases it to the
upright position.
Note: Do not attempt to force the head
restraint backward after you tilt it. Instead,
continue tilting it forward until the head
restraint releases to the upright position.
MULTI-PANEL VISTA ROOF®*
The multi-panel Vista Roof comes with a one-
touch, express opening and closing feature. To
open the front part of the Vista Roof, press the
SLIDE control. To close, pull the SLIDE control.
To stop motion at any time, press the control a
second time. To vent the moonroof, press and
release the T I LT control. Pull and hold the T I LT
control to close the moonroof. The sliding shade
can be manually opened or closed when the
moonroof is closed.
AMBIENT LIGHTING *
When activated, ambient lighting lights select
areas of your vehicle with a choice of colors.
To access and make adjustments:
1) Press the Settings icon > Vehicle >
Ambient Lighting.
2) Touch the desired color.
3) Use the scroll bar to increase or decrease
the intensity.
To switch the feature on or off, press the
power button.
Page 7 of 10

1312
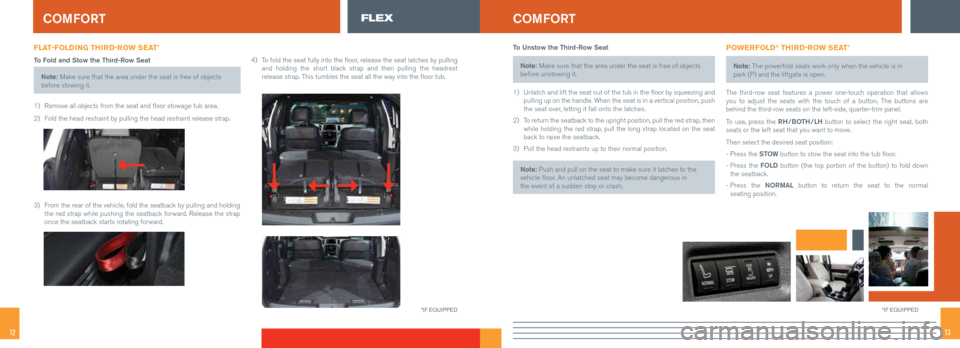
FLAT-FOLDING THIRD-ROW SEAT*
To Fold and Stow the Third-Row SeatNote: Make sure that the area under the seat is free of objects
before stowing it.
1) Remove all objects from the seat and floor stowage tub area.
2) Fold the head restraint by pulling the head restraint release strap.
3) From the rear of the vehicle, fold the seatback by pulling and holding
the red strap while pushing the seatback forward. Release the strap
once the seatback starts rotating forward. 4)
To fold the seat fully into the floor, release the seat latches by pulling
and holding the short black strap and then pulling the headrest
release strap. This tumbles the seat all the way into the floor tub.
COMFORTFLEX
*IF EQUIPPED
COMFORT
To Unstow the Third-Row Seat
Note: Make sure that the area under the seat is free of objects
before unstowing it.
1) Unlatch and lift the seat out of the tub in the floor by squeezing and
pulling up on the handle. When the seat is in a vertical position, push
the seat over, letting it fall onto the latches.
2) To return the seatback to the upright position, pull the red strap, then
while holding the red strap, pull the long strap located on the seat
back to raise the seatback.
3) Pull the head restraints up to their normal position.
Note: Push and pull on the seat to make sure it latches to the
vehicle floor. An unlatched seat may become dangerous in
the event of a sudden stop or crash.POWERFOLD® THIRD-ROW SEAT *
Note: The powerfold seats work only when the vehicle is in
park (P) and the liftgate is open.
The third-row seat features a power one-touch operation that allows
you to adjust the seats with the touch of a button. The buttons are
behind the third-row seats on the left-side, quarter-trim panel.
To use, press the RH/BOTH/LH button to select the right seat, both
seats or the left seat that you want to move.
Then select the desired seat position:
- Press the STOW button to stow the seat into the tub floor.
- Press the FOLD button (the top portion of the button) to fold down
the seatback.
- Press the NORMAL button to return the seat to the normal
seating position.
*IF EQUIPPED
Page 10 of 10

1918
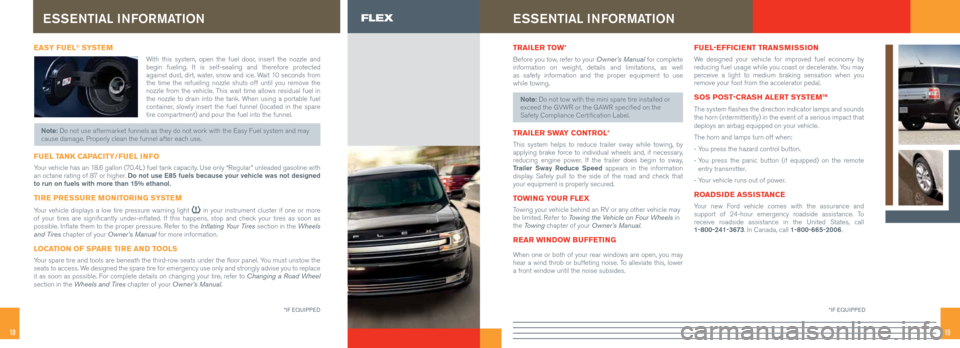
EASY FUEL® SYSTE M
With this system, open the fuel door, insert the nozzle and
begin fueling. It is self-sealing and therefore protected
against dust, dirt, water, snow and ice. Wait 10 seconds from
the time the refueling nozzle shuts off until you remove the
nozzle from the vehicle. This wait time allows residual fuel in
the nozzle to drain into the tank. When using a portable fuel
container, slowly insert the fuel funnel (located in the spare
tire compartment) and pour the fuel into the funnel.
Note: Do not use aftermarket funnels as they do not work with the Easy Fuel system and may
cause damage. Properly clean the funnel after each use.
FUEL TANK CAPACITY/FUEL INFO
Your vehicle has an 18.6 gallon (70.4L) fuel tank capacity. Use only “Regular” unleaded gasoline with
an octane rating of 87 or higher. Do not use E85 fuels because your vehicle was not designed
to run on fuels with more than 15% ethanol.
TIRE PRESSURE MONITORING SYSTEM
Your vehicle displays a low tire pressure warning light in your instrument cluster if one or more
of your tires are significantly under-inflated. If this happens, stop and check your tires as soon as
possible. Inflate them to the proper pressure. Refer to the Inflating Your Tires section in the Wheels
and Tires chapter of your Owner’s Manual for more information.
LOCATION OF SPARE TIRE AND TOOLS
Your spare tire and tools are beneath the third-row seats under the flo\
or panel. You must unstow the
seats to access. We designed the spare tire for emergency use only and strongly advise you\
to replace
it as soon as possible. For complete details on changing your tire, refer to Changing a Road Wheel
section in the Wheels and Tires chapter of your Owner’s Manual.
ESSENTIAL INFORMATIONFLEX
*IF EQUIPPED
ESSENTIAL INFORMATION
TRAILER TOW *
Before you tow, refer to your Owner’s Manual for complete
information on weight, details and limitations, as well
as safety information and the proper equipment to use
while towing.
Note: Do not tow with the mini spare tire installed or
exceed the GVWR or the GAWR specified on the
Safety Compliance Certification Label.
TRAILER SWAY CONTROL *
This system helps to reduce trailer sway while towing, by
applying brake force to individual wheels and, if necessary,
reducing engine power. If the trailer does begin to sway,
Trailer Sway Reduce Speed appears in the information
display. Safely pull to the side of the road and check that
your equipment is properly secured.
TOWING YOUR FLEX
Towing your vehicle behind an RV or any other vehicle may
be limited. Refer to Towing the Vehicle on Four Wheels in
the Towing chapter of your Owner’s Manual.
REAR WINDOW BUFFETING
When one or both of your rear windows are open, you may
hear a wind throb or buffeting noise. To alleviate this, lower
a front window until the noise subsides.
FUEL-EFFICIENT TRANSMISSION
We designed your vehicle for improved fuel economy by
reducing fuel usage while you coast or decelerate. You may
perceive a light to medium braking sensation when you
remove your foot from the accelerator pedal.
SOS POST-CRASH ALERT SYSTEM™
The system flashes the direction indicator lamps and sounds
the horn (intermittently) in the event of a serious impact that
deploys an airbag equipped on your vehicle.
The horn and lamps turn off when:
- You press the hazard control button.
- You press the panic button (if equipped) on the remote
entry transmitter.
- Your vehicle runs out of power.
ROADSIDE ASSISTANCE
Your new Ford vehicle comes with the assurance and
support of 24-hour emergency roadside assistance. To
receive roadside assistance in the United States, call
1-800-241-3673. In Canada, call 1-800-665-2006.
*IF EQUIPPED