stop start FORD FLEX 2019 User Guide
[x] Cancel search | Manufacturer: FORD, Model Year: 2019, Model line: FLEX, Model: FORD FLEX 2019Pages: 513, PDF Size: 39.3 MB
Page 148 of 513
GENERAL INFORMATION
WARNING: Extended idling at high
engine speeds can produce very high
temperatures in the engine and exhaust
system, creating the risk of fire or other
damage. WARNING: Do not park, idle or drive
your vehicle on dry grass or other dry
ground cover. The emission system heats
up the engine compartment and exhaust
system, creating the risk of fire. WARNING:
Do not start the engine
in a closed garage or in other enclosed
areas. Exhaust fumes can be toxic. Always
open the garage door before you start the
engine. WARNING: Exhaust leaks may result
in entry of harmful and potentially lethal
fumes into the passenger compartment.
If you smell exhaust fumes inside your
vehicle, have your vehicle inspected
immediately. Do not drive if you smell
exhaust fumes.
If you disconnect the battery, your vehicle
may exhibit some unusual driving
characteristics for approximately
5 mi
(8 km) after you reconnect it. This is
because the engine management system
must realign itself with the engine. You
can disregard any unusual driving
characteristics during this period.
The powertrain control system meets all
Canadian interference-causing equipment
standard requirements regulating the
impulse electrical field or radio noise. When you start the engine, avoid pressing
the accelerator pedal before and during
operation. Only use the accelerator pedal
when you have difficulty starting the
engine.
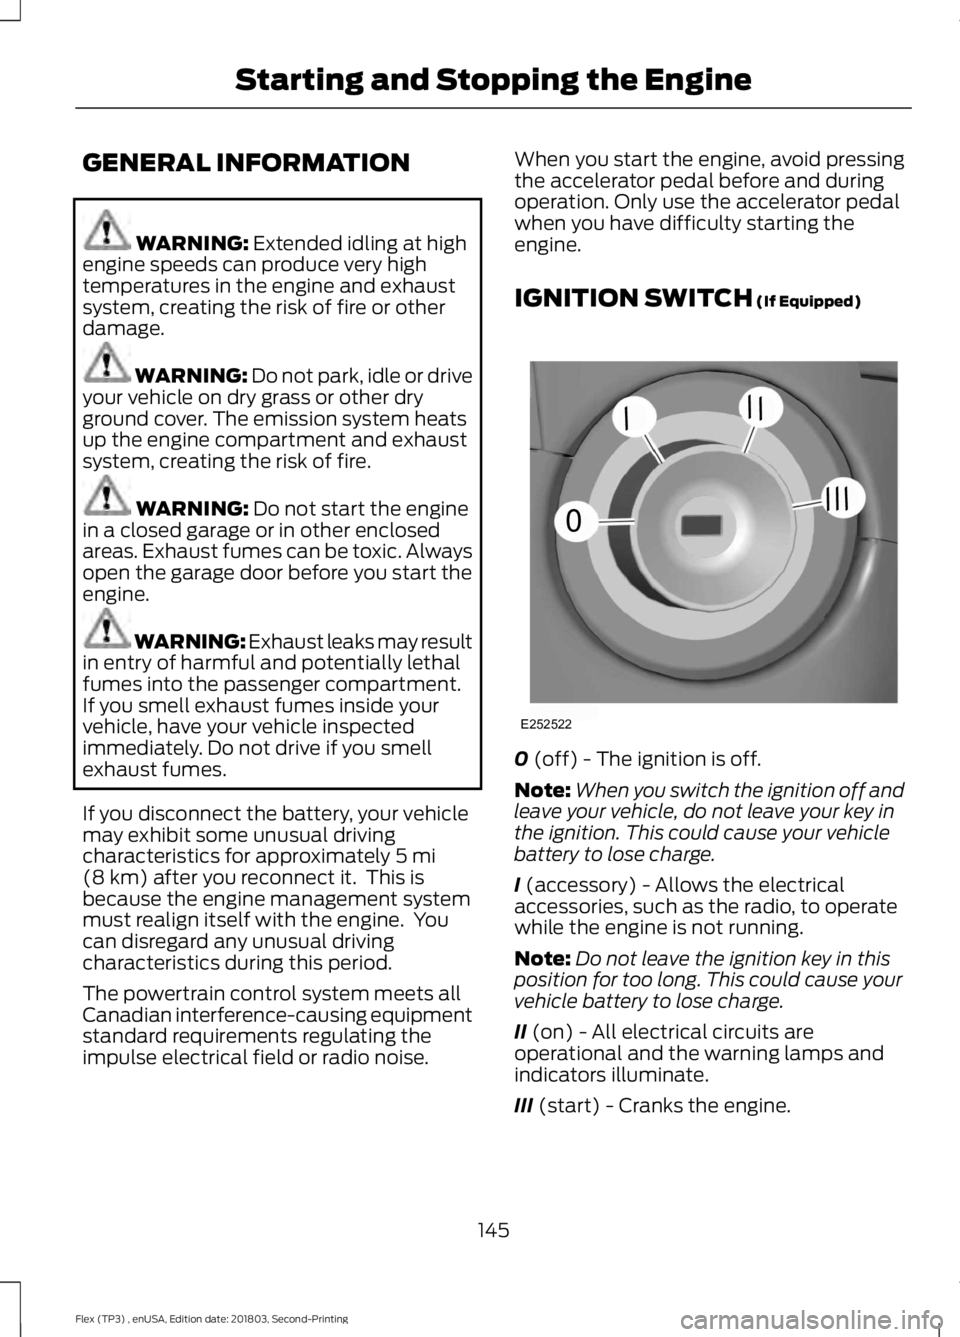
IGNITION SWITCH
(If Equipped)
0
(off) - The ignition is off.
Note: When you switch the ignition off and
leave your vehicle, do not leave your key in
the ignition. This could cause your vehicle
battery to lose charge.
I
(accessory) - Allows the electrical
accessories, such as the radio, to operate
while the engine is not running.
Note: Do not leave the ignition key in this
position for too long. This could cause your
vehicle battery to lose charge.
II
(on) - All electrical circuits are
operational and the warning lamps and
indicators illuminate.
III
(start) - Cranks the engine.
145
Flex (TP3) , enUSA, Edition date: 201803, Second-Printing Starting and Stopping the EngineE252522
0
///
///
Page 149 of 513
KEYLESS STARTING (If Equipped)
Note: The keyless starting system may not
function if the key is close to metal objects
or electronic devices such as cellular
phones.
Note: A valid key must be located inside
your vehicle to switch the ignition on and
start the engine.
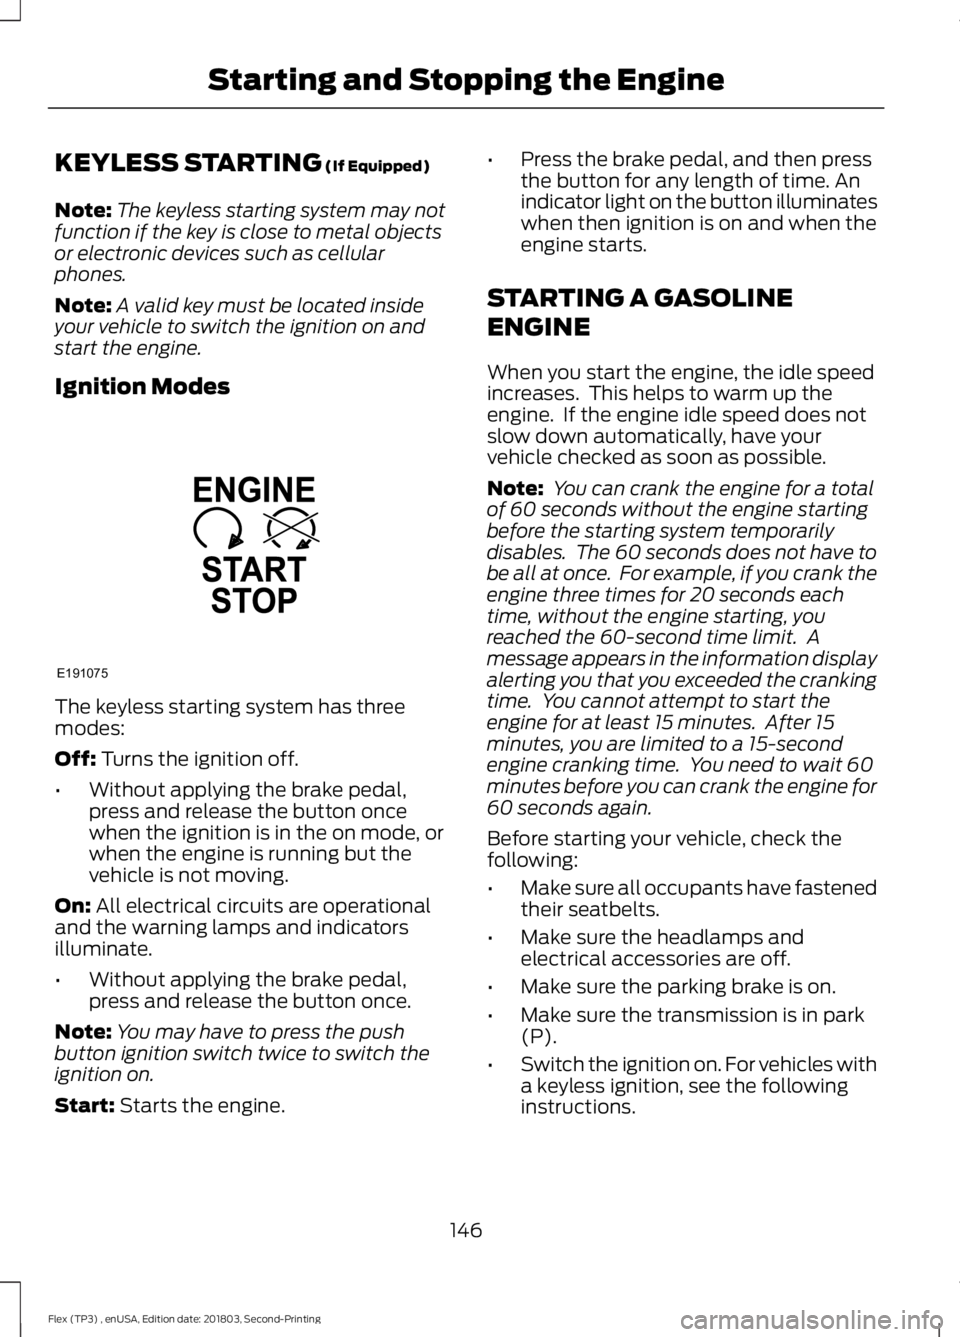
Ignition Modes The keyless starting system has three
modes:
Off:
Turns the ignition off.
• Without applying the brake pedal,
press and release the button once
when the ignition is in the on mode, or
when the engine is running but the
vehicle is not moving.
On:
All electrical circuits are operational
and the warning lamps and indicators
illuminate.
• Without applying the brake pedal,
press and release the button once.
Note: You may have to press the push
button ignition switch twice to switch the
ignition on.
Start:
Starts the engine. •
Press the brake pedal, and then press
the button for any length of time. An
indicator light on the button illuminates
when then ignition is on and when the
engine starts.
STARTING A GASOLINE
ENGINE
When you start the engine, the idle speed
increases. This helps to warm up the
engine. If the engine idle speed does not
slow down automatically, have your
vehicle checked as soon as possible.
Note: You can crank the engine for a total
of 60 seconds without the engine starting
before the starting system temporarily
disables. The 60 seconds does not have to
be all at once. For example, if you crank the
engine three times for 20 seconds each
time, without the engine starting, you
reached the 60-second time limit. A
message appears in the information display
alerting you that you exceeded the cranking
time. You cannot attempt to start the
engine for at least 15 minutes. After 15
minutes, you are limited to a 15-second
engine cranking time. You need to wait 60
minutes before you can crank the engine for
60 seconds again.
Before starting your vehicle, check the
following:
• Make sure all occupants have fastened
their seatbelts.
• Make sure the headlamps and
electrical accessories are off.
• Make sure the parking brake is on.
• Make sure the transmission is in park
(P).
• Switch the ignition on. For vehicles with
a keyless ignition, see the following
instructions.
146
Flex (TP3) , enUSA, Edition date: 201803, Second-Printing Starting and Stopping the EngineE191075
Page 150 of 513
Vehicles with an Ignition Key
Note:
Do not touch the accelerator pedal.
1. Fully press the brake pedal.
2. Turn the key to the start position to start your vehicle.
Note: The engine may continue cranking
for up to 15 seconds or until it starts.
Note: If you cannot start the engine on the
first try, wait for a short period and try again.
Vehicles with Keyless Start
Note: Do not touch the accelerator pedal.
Note: You must have your intelligent access
key in your vehicle in order to shift the
transmission out of park (P).
1. Fully press the brake pedal.
2. Press the push button ignition switch.
The system does not function if:
• The passive key frequencies are
jammed.
• The key battery has no charge.
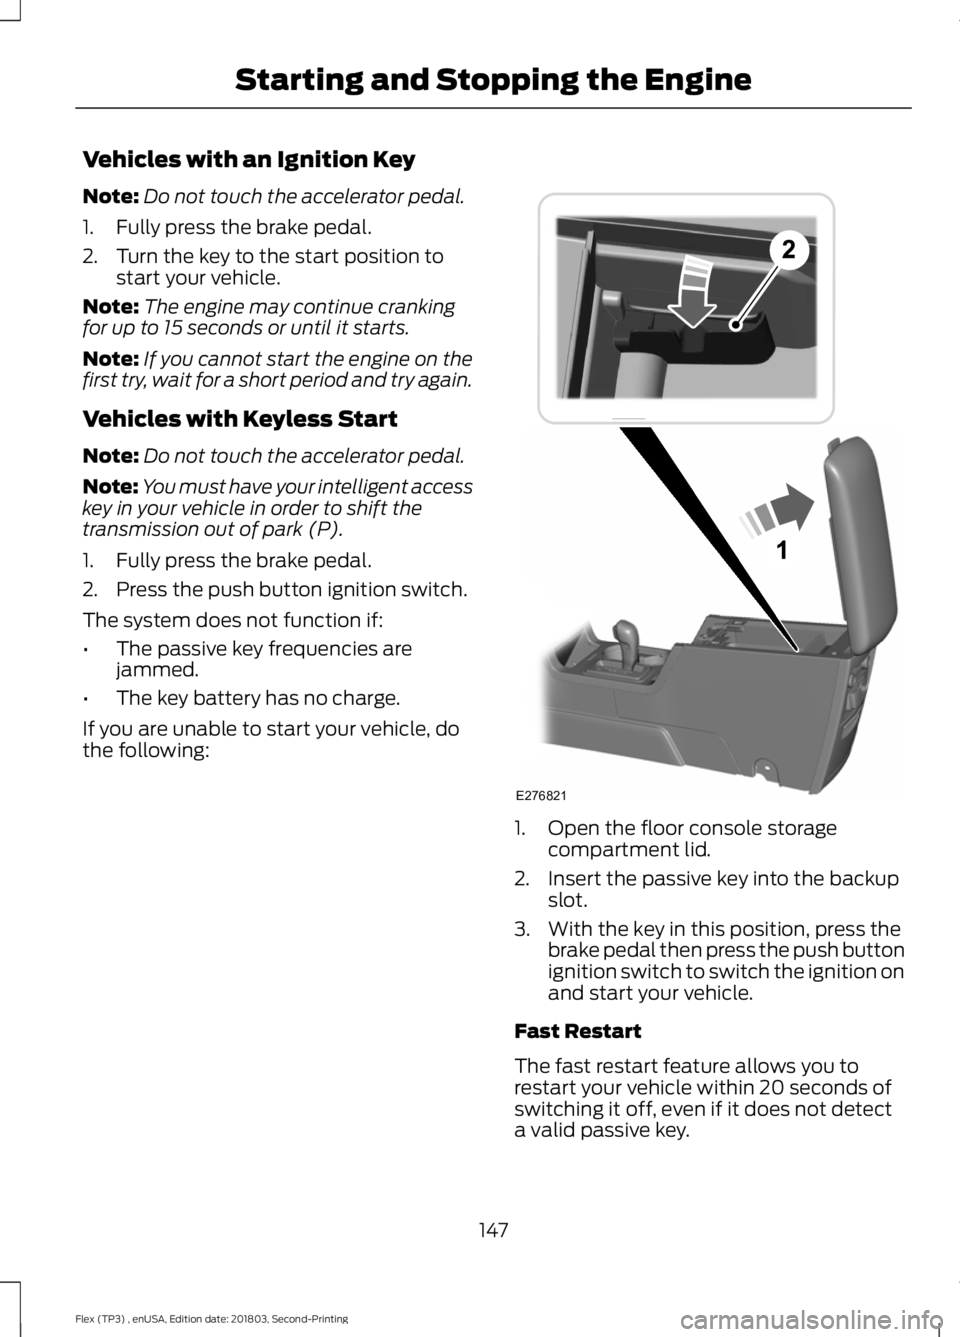
If you are unable to start your vehicle, do
the following: 1. Open the floor console storage
compartment lid.
2. Insert the passive key into the backup slot.
3. With the key in this position, press the brake pedal then press the push button
ignition switch to switch the ignition on
and start your vehicle.
Fast Restart
The fast restart feature allows you to
restart your vehicle within 20 seconds of
switching it off, even if it does not detect
a valid passive key.
147
Flex (TP3) , enUSA, Edition date: 201803, Second-Printing Starting and Stopping the EngineE276821
Page 151 of 513
Within 20 seconds of switching the engine
off, press the brake pedal and press the
push button ignition switch. After 20
seconds, you can no longer start your
vehicle if it does not detect a valid passive
key.
Once your vehicle starts, it remains running
until you press the push button ignition
switch, even if your vehicle does not detect
a valid passive key. If you open and close
a door while your vehicle is running, the
system searches for a valid passive key.
You cannot start your vehicle if the system
does not detect a valid passive key within
20 seconds.
Failure to Start
If you cannot start the engine after three
attempts, wait 10 seconds and follow this
procedure:
1. Fully press the brake pedal.
2. Shift into park (P).
3.
Fully depress the accelerator pedal and
hold it there.
4. Start the engine.
Automatic Engine Shutdown
This automatically shuts down your vehicle
if it has been idling for an extended period
of time. The ignition also turns off in order
to save battery power. Before your vehicle
shuts down, a message appears in the
information display showing a timer
counting down from 30 seconds. If you do
not intervene within 30 seconds, your
vehicle shuts down. Another message
appears in the information display to
inform you that your vehicle has shut down
to save fuel. Start your vehicle as you
normally do. Automatic Engine Shutdown Override
Note:
You cannot permanently switch off
the automatic shutdown feature. When you
switch it off temporarily, it turns on at the
next ignition cycle.
You can stop the shutdown, or reset the
timer, at any point before the 30-second
countdown has expired by doing any of the
following:
• You can reset the timer by interacting
with your vehicle, for example pressing
the brake or accelerator pedal.
• You can temporarily switch off the
shutdown feature any time the ignition
is on using the information display. See
Information Displays (page 95). The
feature only remains off for the current
ignition cycle.
• During the 30-second countdown, the
system prompts you to press OK or
RESET to temporarily switch the
feature off for the current ignition cycle
only.
Stopping the Engine When Your
Vehicle is Stationary
Vehicles with an Ignition Key
1. Shift into park (P).
2. Switch the ignition off.
3. Apply the parking brake.
Vehicles with Keyless Start
1. Shift into park (P).
2. Press the push button ignition switch.
3. Apply the parking brake.
Note: The ignition, all electrical circuits and
all warning lamps and indicators will be
turned off.
Note: If the engine is idling for 30 minutes,
the ignition and engine automatically shut
down.
148
Flex (TP3) , enUSA, Edition date: 201803, Second-Printing Starting and Stopping the Engine
Page 152 of 513
Stopping the Engine When Your
Vehicle is Moving
WARNING: Switching off the engine
when your vehicle is still moving results in
a significant decrease in braking
assistance. Higher effort is required to
apply the brakes and to stop your vehicle.
A significant decrease in steering
assistance could also occur. The steering
does not lock, but higher effort could be
required to steer your vehicle. When you
switch the ignition off, some electrical
circuits, for example airbags, also turn off.
If you unintentionally switch the ignition
off, shift into neutral (N) and restart the
engine.
Vehicles with an Ignition Key
1. Shift into neutral and use the brakes to
bring your vehicle to a safe stop.
2. When your vehicle has stopped, shift into park (P) and switch the ignition
off.
3. Apply the parking brake.
Vehicles with Keyless Start
1. Shift into neutral and use the brakes to
bring your vehicle to a safe stop.
2. When your vehicle has stopped, shift into park (P).
3. Press and hold the push button ignition
switch, or press it three times within
two seconds.
4. Apply the parking brake. Guarding Against Exhaust Fumes WARNING: Exhaust leaks may result
in entry of harmful and potentially lethal
fumes into the passenger compartment.
If you smell exhaust fumes inside your
vehicle, have your vehicle inspected
immediately. Do not drive if you smell
exhaust fumes.
Important Ventilating Information
If you stop your vehicle and then leave the
engine idling for long periods, we
recommend that you do one of the
following:
• Open the windows at least 1 in (3 cm).
• Set your climate control to outside air.
ENGINE BLOCK HEATER
(If
Equipped) WARNING:
Failure to follow engine
block heater instructions could result in
property damage or serious personal injury. WARNING:
Do not use your heater
with ungrounded electrical systems or
two-pronged adapters. There is a risk of
electrical shock. WARNING:
Do not fully close the
hood, or allow it to drop under its own
weight when using the engine block heater.
This could damage the power cable and
may cause an electrical short resulting in
fire, injury and property damage.
Note: The heater is most effective when
outdoor temperatures are below
0°F
(-18°C).
149
Flex (TP3) , enUSA, Edition date: 201803, Second-Printing Starting and Stopping the Engine
Page 153 of 513
The heater acts as a starting aid by
warming the engine coolant. This allows
the climate control system to respond
quickly. The equipment includes a heater
element (installed in the engine block) and
a wire harness. You can connect the
system to a grounded 120-volt AC
electrical source.
We recommend that you do the following
for a safe and correct operation:
•
Use a 16-gauge outdoor extension cord
that is product certified by
Underwriter ’s Laboratory (UL) or
Canadian Standards Association
(CSA). This extension cord must be
suitable for use outdoors, in cold
temperatures, and be clearly marked
Suitable for Use with Outdoor
Appliances. Do not use an indoor
extension cord outdoors. This could
result in an electric shock or become a
fire hazard.
• Use as short an extension cord as
possible.
• Do not use multiple extension cords.
• Make sure that when in operation, the
extension cord plug and heater cord
plug connections are free and clear of
water. This could cause an electric
shock or fire.
• Make sure your vehicle is parked in a
clean area, clear of combustibles.
• Make sure the heater, heater cord and
extension cord are firmly connected.
• Check for heat anywhere in the
electrical hookup once the system has
been operating for approximately 30
minutes. •
Make sure the system is unplugged and
properly stowed before starting and
driving your vehicle. Make sure the
protective cover seals the prongs of the
block heater cord plug when not in use.
• Make sure the heater system is
checked for proper operation before
winter.
Using the Engine Block Heater
Make sure the receptacle terminals are
clean and dry prior to use. Clean them with
a dry cloth if necessary.
The heater uses 0.4 to 1.0 kilowatt-hours
of energy per hour of use. The system does
not have a thermostat. It achieves
maximum temperature after
approximately three hours of operation.
Using the heater longer than three hours
does not improve system performance and
unnecessarily uses electricity.
150
Flex (TP3) , enUSA, Edition date: 201803, Second-Printing Starting and Stopping the Engine
Page 159 of 513
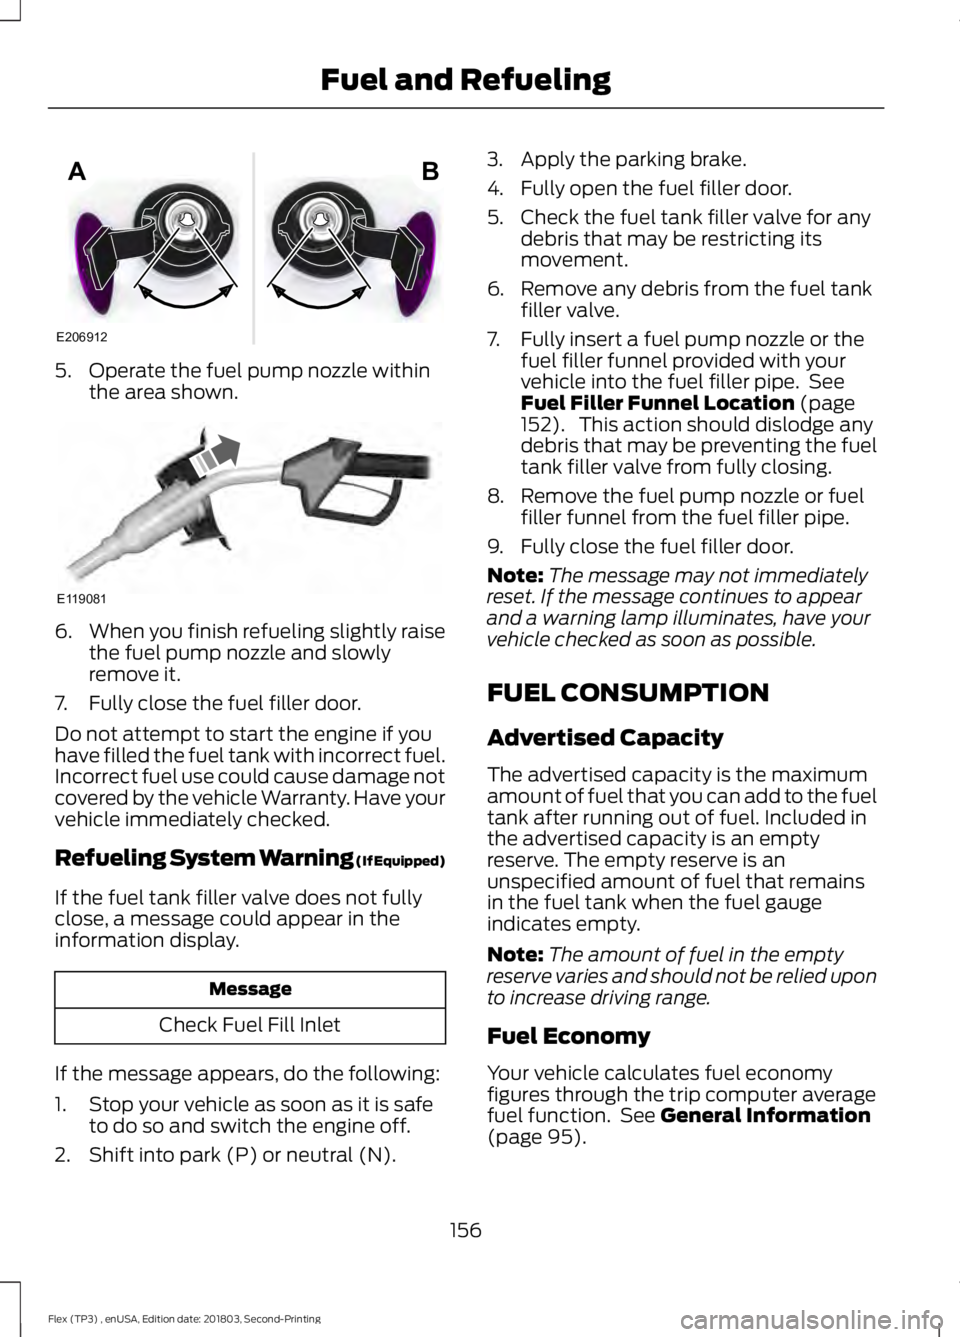
5. Operate the fuel pump nozzle within
the area shown. 6.
When you finish refueling slightly raise
the fuel pump nozzle and slowly
remove it.
7. Fully close the fuel filler door.
Do not attempt to start the engine if you
have filled the fuel tank with incorrect fuel.
Incorrect fuel use could cause damage not
covered by the vehicle Warranty. Have your
vehicle immediately checked.
Refueling System Warning (If Equipped)
If the fuel tank filler valve does not fully
close, a message could appear in the
information display. Message
Check Fuel Fill Inlet
If the message appears, do the following:
1. Stop your vehicle as soon as it is safe to do so and switch the engine off.
2. Shift into park (P) or neutral (N). 3. Apply the parking brake.
4. Fully open the fuel filler door.
5. Check the fuel tank filler valve for any
debris that may be restricting its
movement.
6. Remove any debris from the fuel tank filler valve.
7. Fully insert a fuel pump nozzle or the fuel filler funnel provided with your
vehicle into the fuel filler pipe. See
Fuel Filler Funnel Location (page
152). This action should dislodge any
debris that may be preventing the fuel
tank filler valve from fully closing.
8. Remove the fuel pump nozzle or fuel filler funnel from the fuel filler pipe.
9. Fully close the fuel filler door.
Note: The message may not immediately
reset. If the message continues to appear
and a warning lamp illuminates, have your
vehicle checked as soon as possible.
FUEL CONSUMPTION
Advertised Capacity
The advertised capacity is the maximum
amount of fuel that you can add to the fuel
tank after running out of fuel. Included in
the advertised capacity is an empty
reserve. The empty reserve is an
unspecified amount of fuel that remains
in the fuel tank when the fuel gauge
indicates empty.
Note: The amount of fuel in the empty
reserve varies and should not be relied upon
to increase driving range.
Fuel Economy
Your vehicle calculates fuel economy
figures through the trip computer average
fuel function. See
General Information
(page 95).
156
Flex (TP3) , enUSA, Edition date: 201803, Second-Printing Fuel and RefuelingE206912
AB E119081
Page 164 of 513
Your vehicle may not pass the I/M test if
the service engine soon indicator is on or
not working properly (bulb is burned out),
or if the OBD-II system has determined
that some of the emission control systems
have not been properly checked. In this
case, the vehicle is not ready for I/M
testing.
If the vehicle
’s engine or transmission has
just been serviced, or the battery has
recently run down or been replaced, the
OBD-II system may indicate that the
vehicle is not ready for I/M testing. To
determine if the vehicle is ready for I/M
testing, turn the ignition key to the on
position for 15 seconds without cranking
the engine. If the service engine soon
indicator blinks eight times, it means that
the vehicle is not ready for I/M testing; if
the service engine soon indicator stays on
solid, it means that your vehicle is ready
for I/M testing.
The OBD-II system checks the emission
control system during normal driving. A
complete check may take several days.
If the vehicle is not ready for I/M testing,
you can perform the following driving cycle
consisting of mixed city and highway
driving:
1. 15 minutes of steady driving on an expressway or highway followed by 20
minutes of stop-and-go driving with at
least four 30-second idle periods.
2. Allow your vehicle to sit for at least eight hours with the ignition off. Then,
start the vehicle and complete the
above driving cycle. The vehicle must
warm up to its normal operating
temperature. Once started, do not turn
off the vehicle until the above driving
cycle is complete.
If the vehicle is still not ready for I/M
testing, you need to repeat the above
driving cycle.
161
Flex (TP3) , enUSA, Edition date: 201803, Second-Printing Engine Emission Control
Page 165 of 513
AUTOMATIC TRANSMISSION
WARNING: Always fully apply the
parking brake. Make sure you shift into park
(P) for vehicles with an automatic
transmission. Switch the ignition off and
remove the key whenever you leave your
vehicle. WARNING:
Do not apply the brake
pedal and accelerator pedal
simultaneously. Applying both pedals
simultaneously for more than a few
seconds will limit engine performance,
which may result in difficulty maintaining
speed in traffic and could lead to serious
injury.
Understanding the Positions of
Your Automatic Transmission
Putting your vehicle in gear:
1. Fully press down the brake pedal.
2. Move the gearshift lever into the desired gear.
3. Come to a complete stop.
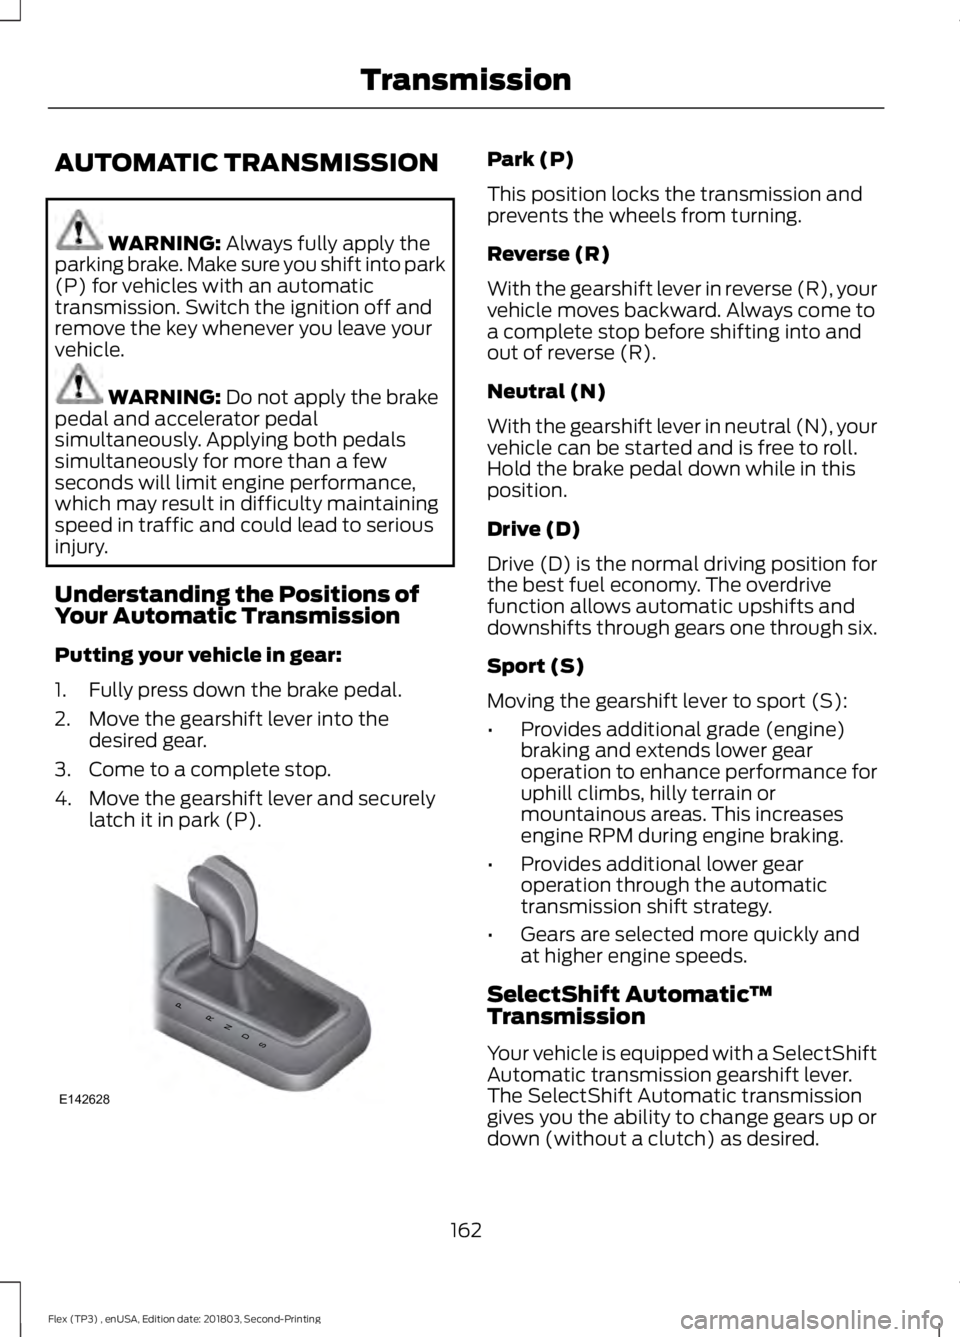
4. Move the gearshift lever and securely latch it in park (P). Park (P)
This position locks the transmission and
prevents the wheels from turning.
Reverse (R)
With the gearshift lever in reverse (R), your
vehicle moves backward. Always come to
a complete stop before shifting into and
out of reverse (R).
Neutral (N)
With the gearshift lever in neutral (N), your
vehicle can be started and is free to roll.
Hold the brake pedal down while in this
position.
Drive (D)
Drive (D) is the normal driving position for
the best fuel economy. The overdrive
function allows automatic upshifts and
downshifts through gears one through six.
Sport (S)
Moving the gearshift lever to sport (S):
•
Provides additional grade (engine)
braking and extends lower gear
operation to enhance performance for
uphill climbs, hilly terrain or
mountainous areas. This increases
engine RPM during engine braking.
• Provides additional lower gear
operation through the automatic
transmission shift strategy.
• Gears are selected more quickly and
at higher engine speeds.
SelectShift Automatic ™
Transmission
Your vehicle is equipped with a SelectShift
Automatic transmission gearshift lever.
The SelectShift Automatic transmission
gives you the ability to change gears up or
down (without a clutch) as desired.
162
Flex (TP3) , enUSA, Edition date: 201803, Second-Printing TransmissionPRNDS
E142628
Page 167 of 513
Brake-Shift Interlock
WARNING: Do not drive your vehicle
until you verify that the stoplamps are
working. WARNING: When doing this
procedure, you need to take the
transmission out of park (P) which means
your vehicle can roll freely. To avoid
unwanted vehicle movement, always fully
apply the parking brake prior to doing this
procedure. Use wheels chocks if
appropriate. WARNING:
If the parking brake is
fully released, but the brake warning lamp
remains illuminated, the brakes may not
be working properly. Have your vehicle
checked as soon as possible.
Note: For some markets this feature will be
disabled.
Your vehicle is equipped with a brake-shift
interlock feature that prevents moving the
gearshift lever from park (P) when the
ignition is in the on position and the brake
pedal is not pressed.
If you cannot move the gearshift lever out
of park (P) position with the ignition in the
on position and the brake pedal pressed,
a malfunction may have occurred. It is
possible that a fuse has blown or your
vehicle ’s brake lamps are not operating
properly. See
Fuse Specification Chart
(page 232).
If the fuse is not blown and the brake
lamps are working properly, the following
procedure will allow you to move the
gearshift lever from park (P):
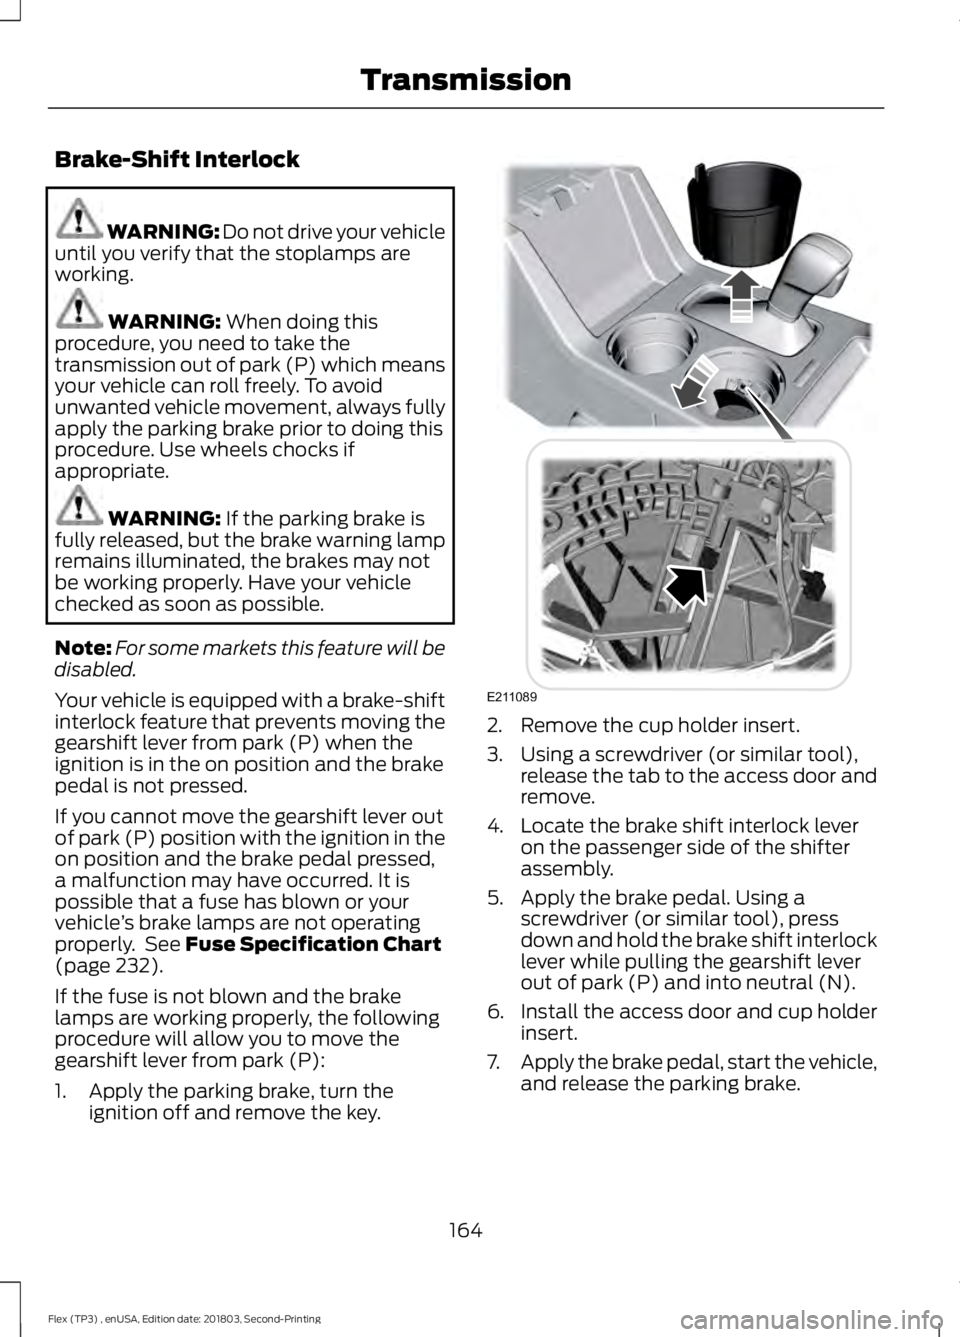
1. Apply the parking brake, turn the ignition off and remove the key. 2. Remove the cup holder insert.
3. Using a screwdriver (or similar tool),
release the tab to the access door and
remove.
4. Locate the brake shift interlock lever on the passenger side of the shifter
assembly.
5. Apply the brake pedal. Using a screwdriver (or similar tool), press
down and hold the brake shift interlock
lever while pulling the gearshift lever
out of park (P) and into neutral (N).
6. Install the access door and cup holder insert.
7. Apply the brake pedal, start the vehicle,
and release the parking brake.
164
Flex (TP3) , enUSA, Edition date: 201803, Second-Printing TransmissionE211089