display FORD RANGER 2019 Workshop Manual
[x] Cancel search | Manufacturer: FORD, Model Year: 2019, Model line: RANGER, Model: FORD RANGER 2019Pages: 512, PDF Size: 7.63 MB
Page 160 of 512
2H (4X2)
For general on-road driving, this mode
provides optimal smoothness and fuel
economy. Sends power to the rear wheels
only.
Note:
2H may engage or disengage based
on terrain mode selection. See Principle of
Operation (page 156).
4H (4X4 HIGH)
Provides mechanically locked four-wheel
drive power to both the front and rear
wheels for use in off-road or winter
conditions such as deep snow, sand or
mud. This mode is not for use on dry
pavement.
Note: 4H may engage or disengage based
on terrain mode selection. See Principle of
Operation
(page 156).
4L (4X4 LOW)
Provides mechanically locked four-wheel
drive power to both the front and rear
wheels with additional gearing for
increased torque multiplication. Intended
only for off-road applications such as deep
sand, steep grades, or pulling heavy
objects.
Note: 4L may engage or disengage based
on terrain mode selection. See Principle of
Operation
(page 156).
Shifting Between 4WD System Modes
Note: Momentarily releasing the accelerator
pedal when performing a shift aids the
performance of engagement or
disengagement.
Note: Do not perform this operation if the
rear wheels are slipping or when applying
the accelerator pedal.
Note: You may hear some noise as the
system shifts or engages; this is normal. You can move the control between 2H to
4H at a stop or when driving up to 68 mph
(110 km/h)
. The information display may
display a message indicating a 4X4 shift
and the LED for the selected mode flashes.
Once the shift is complete, the LED light
for the selected mode remains illuminated.
Shifting To or From 4L (4X4 low)
Note: You may hear some noise as the
system shifts or engages; this is normal.
1. Stop your vehicle when it is safe to do so.
2. Place the transmission in neutral (N).
3. Turn the transfer shift switch from 2H to 4L or 4L to 2H.
The information display should display a
message indicating a 4X4 shift is in
progress followed by the system mode
selected. If any of the above shift
conditions are not present, the shift should
not occur and the information display
shows information guiding you through the
proper shifting procedures.
How Your Vehicle Differs From
Other Vehicles WARNING: Vehicles with a higher
center of gravity (utility and four-wheel
drive vehicles) handle differently than
vehicles with a lower center of gravity
(passenger cars). Avoid sharp turns,
excessive speed and abrupt steering in
these vehicles. Failure to drive cautiously
increases the risk of losing control of your
vehicle, vehicle rollover, personal injury
and death.
Truck and utility vehicles can differ from
some other vehicles. Your vehicle may be
higher to allow it to travel over rough
terrain without getting hung up or
damaging underbody components.
157
Ranger (TFG) Canada/United States of America, enUSA, Edition date: 201809, Fourth-Printing Four-Wheel Drive
(If Equipped)
Page 161 of 512
The differences that make your vehicle so
versatile also make it handle differently
than an ordinary passenger car.
Maintain steering wheel control at all
times, especially in rough terrain. Since
sudden changes in terrain can result in
abrupt steering wheel motion, make sure
you grip the steering wheel from the
outside. Do not grip the spokes of the
steering wheel.
Drive cautiously to avoid vehicle damage
from concealed objects such as rocks and
stumps.
You should either know the terrain or
examine maps of the area before driving.
Map out your route before driving in the
area. To maintain steering and braking
control of your vehicle, you must have all
four wheels on the ground and they must
be rolling, not sliding or spinning.
Driving Off-Road With Truck and
Utility Vehicles
Note:
On some models, the initial shift from
two-wheel drive to four-wheel drive when
your vehicle is moving can cause some
momentary clunk or ratchet sounds. This is
the front drivetrain coming up to speed.
Note: Your vehicle may have a front air
dam. Due to low ground clearance, you can
damage it when taking your vehicle off-road.
You can take the air dam off by removing
the bolts that secure it.
Note: Momentarily releasing the
accelerator pedal when a shift in progress
message displays, should improve
engagement or disengagement
performance.
Four-wheel drive vehicles are specially
designed for driving on sand, snow, mud
and rough terrain and have operating
characteristics that are somewhat
different from conventional vehicles, both
on and off the road. The transfer case supplies power to all four
wheels. On four-wheel drive vehicles, the
transfer case allows you to select different
4WD modes when necessary. You can find
information on transfer case operation and
shifting procedures in this chapter. You can
find information on transfer case
maintenance in the Maintenance chapter.
You should become thoroughly familiar
with this information before you operate
your vehicle.
Four-wheel drive uses all four wheels to
power your vehicle. This increases traction,
enabling you to drive over terrain and road
conditions that a conventional two-wheel
drive vehicle cannot.
Basic Operating Principles
•
Drive slower in strong crosswinds which
can affect the normal steering
characteristics of your vehicle.
• When driving your vehicle on surfaces
made slippery by loose sand, water,
gravel, snow or ice proceed with care.
• Do not use 4H or 4L on dry, hard
surfaced roads. Doing so can produce
excessive noise, increase tire wear and
may damage drive components. 4H or
4L modes are only for consistently
slippery or loose surfaces.
If Your Vehicle Leaves the Road
If your vehicle leaves the road, reduce your
vehicle speed and avoid severe braking.
When your vehicle speed decreases, ease
your vehicle back onto the road. Do not
sharply turn the steering wheel when
returning your vehicle to the road.
It may be safer to stay on the shoulder of
the road and gradually slow down before
returning to the road. You may lose control
if you do not slow down or if you too
sharply or abruptly turn the steering wheel.
158
Ranger (TFG) Canada/United States of America, enUSA, Edition date: 201809, Fourth-Printing Four-Wheel Drive (If Equipped)
Page 170 of 512
developed sufficient torque to prevent your
vehicle from rolling down the slope. This
is an advantage when pulling away on a
slope, for example from a car park ramp,
traffic lights or when reversing uphill into
a parking space.
The system activates on any slope that
causes your vehicle to roll.
Note:
There is no warning light to indicate
the system is either on or off.
Using Hill Start Assist
1. Press the brake pedal to bring your vehicle to a complete standstill. Keep
the brake pedal pressed and shift into
first gear when facing uphill or reverse
(R) when facing downhill.
2. If the sensors detect that your vehicle is on a slope, the system activates
automatically.
3. When you remove your foot from the brake pedal, your vehicle remains on
the slope without rolling away for
about two to three seconds. This hold
time automatically extends if you are
in the process of driving off.
4. Drive off in the normal manner. The system releases the brakes
automatically.
Note: When you remove your foot from the
brake pedal and press the pedal again when
the system is active, you will experience
significantly reduced brake pedal travel. This
is normal.
Switching the System On and Off
Vehicles with Manual Transmission
You can switch this feature on or off in the
information display. The system
remembers the last setting when you start
your vehicle. Vehicles with Automatic Transmission
You cannot turn the system on or off.
When you switch the ignition on, the
system automatically turns on.
167
Ranger (TFG) Canada/United States of America, enUSA, Edition date: 201809, Fourth-Printing Brakes
Page 171 of 512
PRINCIPLE OF OPERATION
The traction control system helps avoid
drive wheel spin and loss of traction.
If your vehicle begins to slide, the system
applies the brakes to individual wheels
and, when needed, reduces engine power
at the same time. If the wheels spin when
accelerating on slippery or loose surfaces,
the system reduces engine power in order
to increase traction.
USING TRACTION CONTROL
WARNING: The stability and
traction control light illuminates steadily
if the system detects a failure. Make sure
you did not manually disable the traction
control system using the information
display controls or the switch. If the
stability control and traction control light
is still illuminating steadily, have the
system serviced by an authorized dealer
immediately. Operating your vehicle with
the traction control disabled could lead
to an increased risk of loss of vehicle
control, vehicle rollover, personal injury
and death.
The system automatically turns on each
time you switch the ignition on.
If your vehicle is stuck in mud or snow,
switching traction control off may be
beneficial as this allows the wheels to spin.
Note: When you switch traction control off,
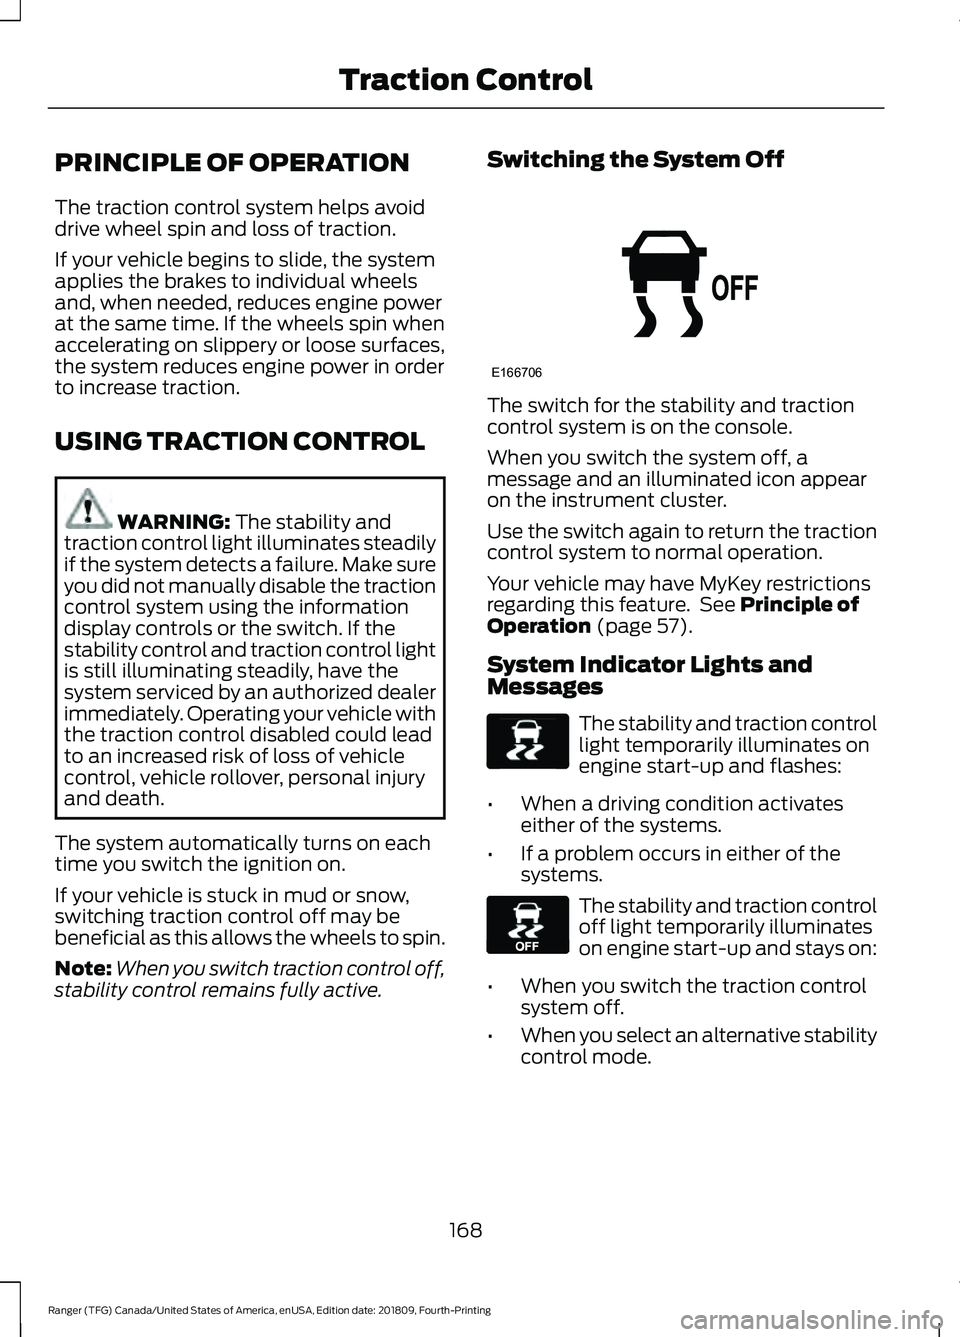
stability control remains fully active. Switching the System Off The switch for the stability and traction
control system is on the console.
When you switch the system off, a
message and an illuminated icon appear
on the instrument cluster.
Use the switch again to return the traction
control system to normal operation.
Your vehicle may have MyKey restrictions
regarding this feature. See
Principle of
Operation (page 57).
System Indicator Lights and
Messages The stability and traction control
light temporarily illuminates on
engine start-up and flashes:
• When a driving condition activates
either of the systems.
• If a problem occurs in either of the
systems. The stability and traction control
off light temporarily illuminates
on engine start-up and stays on:
• When you switch the traction control
system off.
• When you select an alternative stability
control mode.
168
Ranger (TFG) Canada/United States of America, enUSA, Edition date: 201809, Fourth-Printing Traction ControlE166706 E138639 E130458
Page 175 of 512
PRINCIPLE OF OPERATION
Using the Terrain Management
System
The terrain management system optimizes
drivability and comfort by maximizing
traction when operating on different types
of terrain.
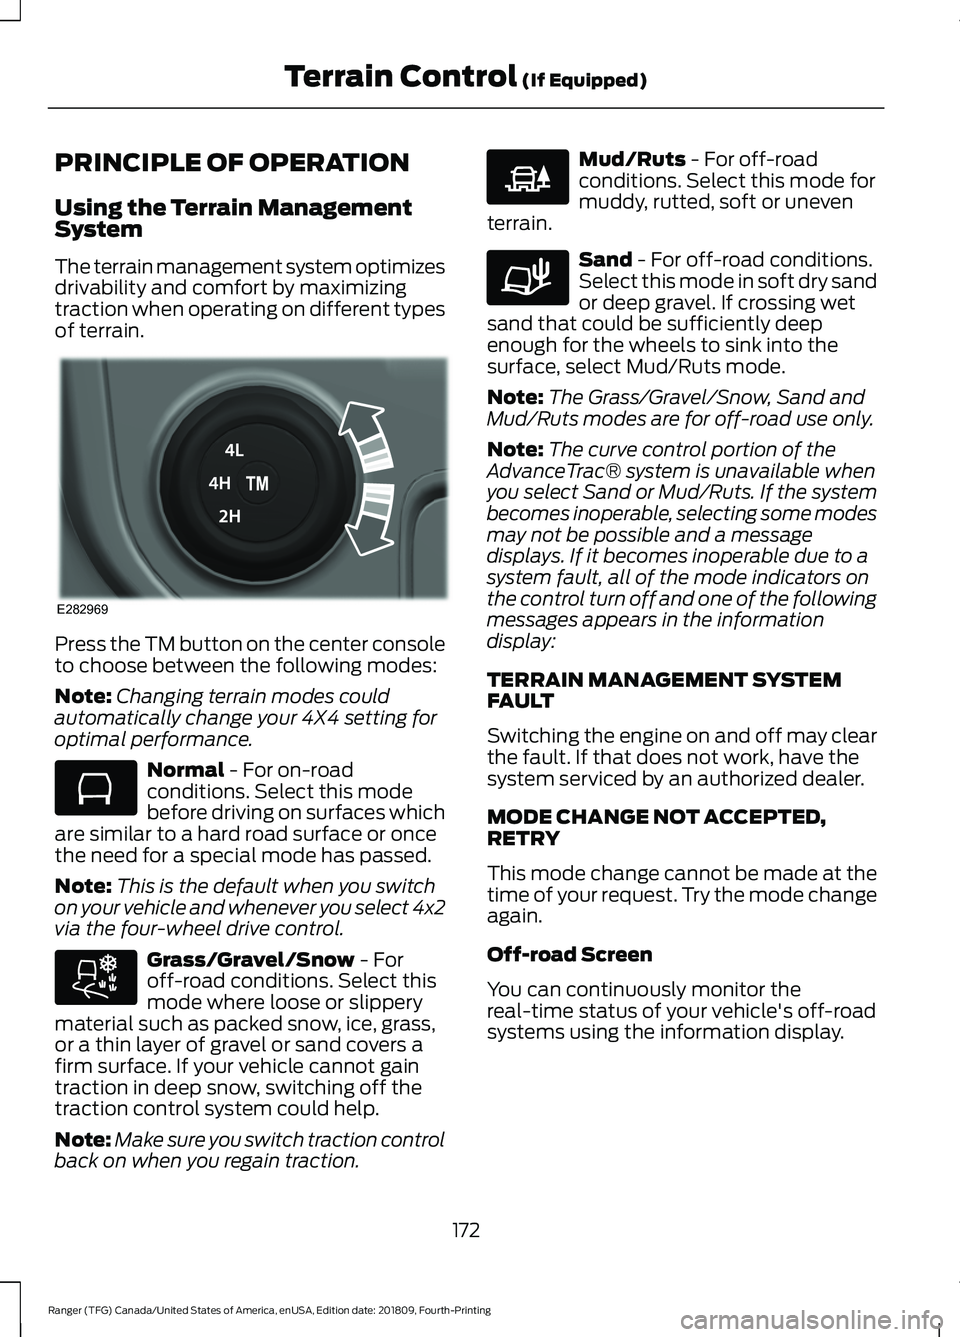
Press the TM button on the center console
to choose between the following modes:
Note:
Changing terrain modes could
automatically change your 4X4 setting for
optimal performance. Normal - For on-road
conditions. Select this mode
before driving on surfaces which
are similar to a hard road surface or once
the need for a special mode has passed.
Note: This is the default when you switch
on your vehicle and whenever you select 4x2
via the four-wheel drive control. Grass/Gravel/Snow
- For
off-road conditions. Select this
mode where loose or slippery
material such as packed snow, ice, grass,
or a thin layer of gravel or sand covers a
firm surface. If your vehicle cannot gain
traction in deep snow, switching off the
traction control system could help.
Note: Make sure you switch traction control
back on when you regain traction. Mud/Ruts
- For off-road
conditions. Select this mode for
muddy, rutted, soft or uneven
terrain. Sand
- For off-road conditions.
Select this mode in soft dry sand
or deep gravel. If crossing wet
sand that could be sufficiently deep
enough for the wheels to sink into the
surface, select Mud/Ruts mode.
Note: The Grass/Gravel/Snow, Sand and
Mud/Ruts modes are for off-road use only.
Note: The curve control portion of the
AdvanceTrac® system is unavailable when
you select Sand or Mud/Ruts. If the system
becomes inoperable, selecting some modes
may not be possible and a message
displays. If it becomes inoperable due to a
system fault, all of the mode indicators on
the control turn off and one of the following
messages appears in the information
display:
TERRAIN MANAGEMENT SYSTEM
FAULT
Switching the engine on and off may clear
the fault. If that does not work, have the
system serviced by an authorized dealer.
MODE CHANGE NOT ACCEPTED,
RETRY
This mode change cannot be made at the
time of your request. Try the mode change
again.
Off-road Screen
You can continuously monitor the
real-time status of your vehicle's off-road
systems using the information display.
172
Ranger (TFG) Canada/United States of America, enUSA, Edition date: 201809, Fourth-Printing Terrain Control
(If Equipped)E282969 E283048 E283044 E225313 E283037
Page 178 of 512
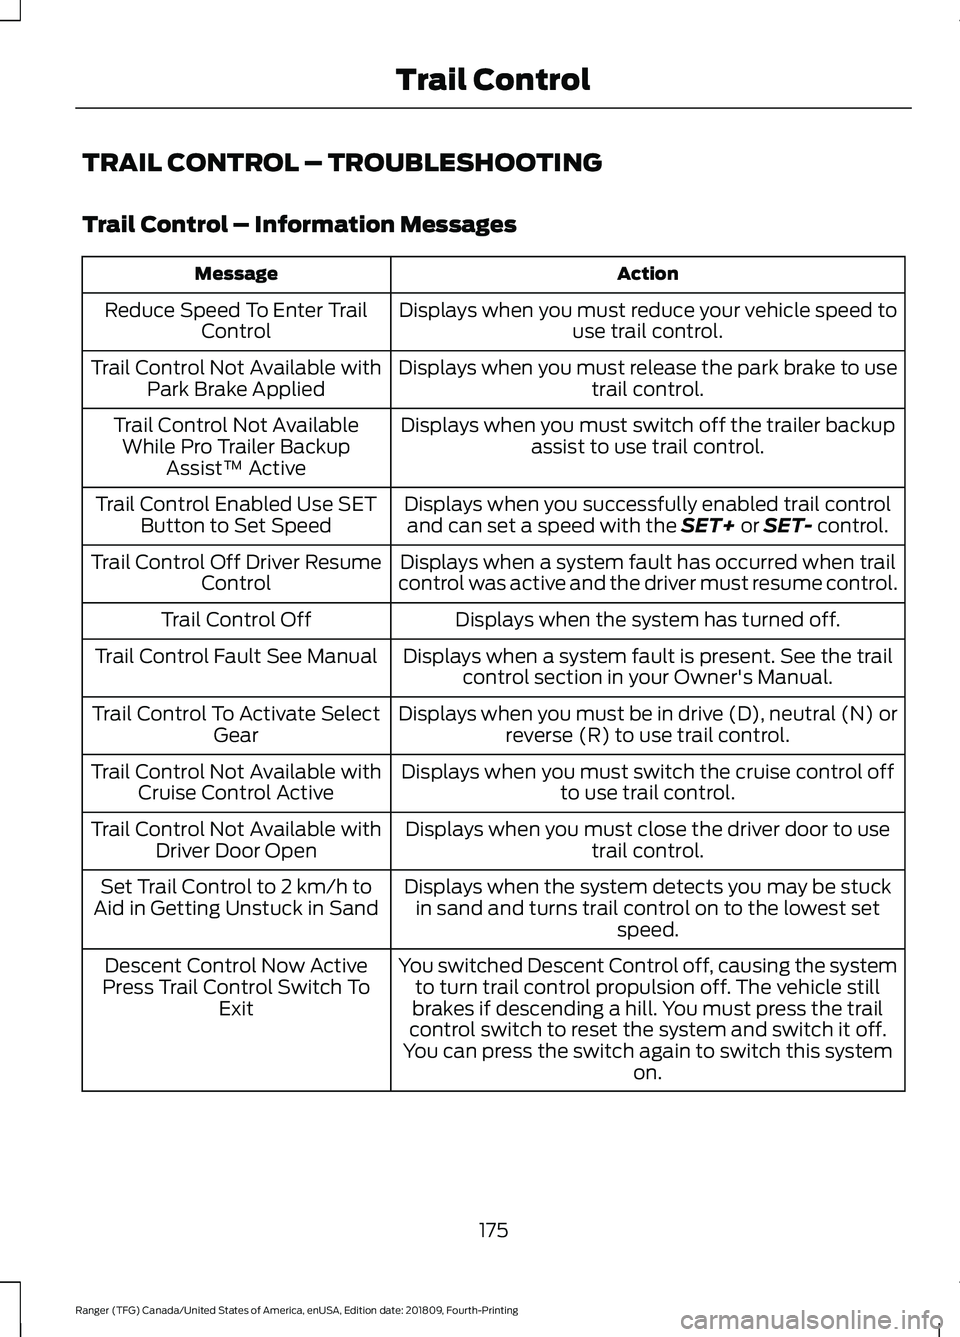
TRAIL CONTROL – TROUBLESHOOTING
Trail Control – Information Messages
Action
Message
Displays when you must reduce your vehicle speed touse trail control.
Reduce Speed To Enter Trail
Control
Displays when you must release the park brake to usetrail control.
Trail Control Not Available with
Park Brake Applied
Displays when you must switch off the trailer backupassist to use trail control.
Trail Control Not Available
While Pro Trailer Backup Assist™ Active
Displays when you successfully enabled trail controland can set a speed with the SET+ or SET- control.
Trail Control Enabled Use SET
Button to Set Speed
Displays when a system fault has occurred when trail
control was active and the driver must resume control.
Trail Control Off Driver Resume
Control
Displays when the system has turned off.
Trail Control Off
Displays when a system fault is present. See the trailcontrol section in your Owner's Manual.
Trail Control Fault See Manual
Displays when you must be in drive (D), neutral (N) orreverse (R) to use trail control.
Trail Control To Activate Select
Gear
Displays when you must switch the cruise control offto use trail control.
Trail Control Not Available with
Cruise Control Active
Displays when you must close the driver door to usetrail control.
Trail Control Not Available with
Driver Door Open
Displays when the system detects you may be stuckin sand and turns trail control on to the lowest set speed.
Set Trail Control to 2 km/h to
Aid in Getting Unstuck in Sand
You switched Descent Control off, causing the systemto turn trail control propulsion off. The vehicle still
brakes if descending a hill. You must press the trail
control switch to reset the system and switch it off.
You can press the switch again to switch this system on.
Descent Control Now Active
Press Trail Control Switch To Exit
175
Ranger (TFG) Canada/United States of America, enUSA, Edition date: 201809, Fourth-Printing Trail Control
Page 179 of 512
PRINCIPLE OF OPERATION
WARNING: To help avoid personal
injury, always use caution when in
reverse (R) and when using the sensing
system. WARNING: The system may not
detect objects with surfaces that absorb
reflection. Always drive with due care
and attention. Failure to take care may
result in a crash. WARNING:
Traffic control
systems, inclement weather, air brakes,
external motors and fans may affect the
correct operation of the sensing
system.This may cause reduced
performance or false alerts. WARNING:
The system may not
detect small or moving objects,
particularly those close to the ground.
Note: If your vehicle has MyKey ™, the
sensing system cannot be switched off
when a MyKey ™ is present.
See Principle
of Operation (page 57).
Note: Keep the sensors on the bumper or
fascia free from snow, ice and large
accumulations of dirt. If the sensors are
covered, the system ’s accuracy can be
affected. Do not clean the sensors with
sharp objects.
Note: If your vehicle sustains damage to
the bumper or fascia, leaving it misaligned
or bent, the sensing zone may be altered
causing inaccurate measurement of
obstacles or false alerts. Note:
Certain add-on devices installed
around the bumper or fascia may create
false alerts. For example, large trailer
hitches, bike or surfboard racks, license plate
brackets, bumper covers or any other device
that may block the normal detection zone
of the system. Remove the add-on device
to prevent false alerts.
Note: When you connect a trailer to your
vehicle, the rear parking aid may detect the
trailer and therefore provide an alert. Disable
the rear parking aid when you connect a
trailer to prevent the alert.
The sensing system warns the driver of
obstacles within a certain range of your
vehicle. The system turns on automatically
whenever you switch the ignition on.
You can switch the system off through the
information display menu or from the
pop-up message that appears once you
shift the transmission into reverse (R). See
General Information
(page 90). If your
vehicle has a parking aid button, you can
switch the system off by pressing the
button.
If a fault is present in the system, a warning
message appears in the information
display. See
Information Messages
(page 98).
REAR PARKING AID
The rear sensors are only active when the
transmission is in reverse (R). As your
vehicle moves closer to the obstacle, the
rate of the audible warning increases.
When the obstacle is less than
12 in
(30 cm) away, the warning sounds
continuously. If the system detects a
stationary or receding object farther than
12 in (30 cm)
from the corners of the
bumper, the tone sounds for only three
seconds. Once the system detects an
object approaching, the warning sounds
again.
176
Ranger (TFG) Canada/United States of America, enUSA, Edition date: 201809, Fourth-Printing Parking Aids
(If Equipped)
Page 180 of 512
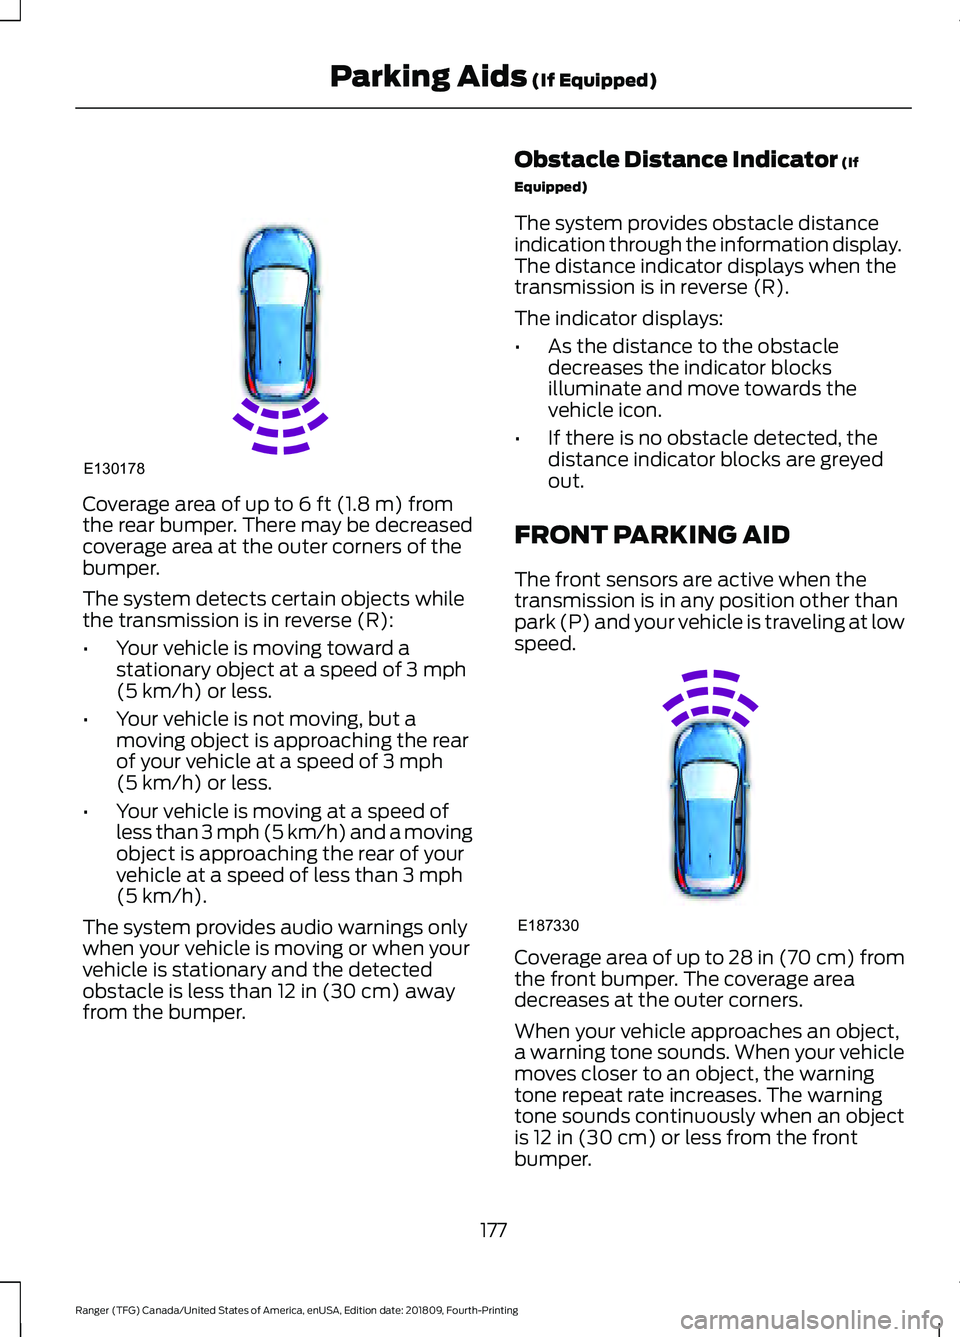
Coverage area of up to 6 ft (1.8 m) from
the rear bumper. There may be decreased
coverage area at the outer corners of the
bumper.
The system detects certain objects while
the transmission is in reverse (R):
• Your vehicle is moving toward a
stationary object at a speed of
3 mph
(5 km/h) or less.
• Your vehicle is not moving, but a
moving object is approaching the rear
of your vehicle at a speed of
3 mph
(5 km/h) or less.
• Your vehicle is moving at a speed of
less than 3 mph (5 km/h) and a moving
object is approaching the rear of your
vehicle at a speed of less than
3 mph
(5 km/h).
The system provides audio warnings only
when your vehicle is moving or when your
vehicle is stationary and the detected
obstacle is less than
12 in (30 cm) away
from the bumper. Obstacle Distance Indicator
(If
Equipped)
The system provides obstacle distance
indication through the information display.
The distance indicator displays when the
transmission is in reverse (R).
The indicator displays:
• As the distance to the obstacle
decreases the indicator blocks
illuminate and move towards the
vehicle icon.
• If there is no obstacle detected, the
distance indicator blocks are greyed
out.
FRONT PARKING AID
The front sensors are active when the
transmission is in any position other than
park (P) and your vehicle is traveling at low
speed. Coverage area of up to
28 in (70 cm) from
the front bumper. The coverage area
decreases at the outer corners.
When your vehicle approaches an object,
a warning tone sounds. When your vehicle
moves closer to an object, the warning
tone repeat rate increases. The warning
tone sounds continuously when an object
is
12 in (30 cm) or less from the front
bumper.
177
Ranger (TFG) Canada/United States of America, enUSA, Edition date: 201809, Fourth-Printing Parking Aids
(If Equipped)E130178 E187330
Page 181 of 512
You can switch the system off through the
information display menu or from the
pop-up message that appears once you
shift the transmission into reverse (R). See
General Information (page 90). If your
vehicle has a parking aid button, you can
switch the system off by pressing the
button.
Obstacle Distance Indicator
(If
Equipped)
The system provides obstacle distance
indication through the information display.
The indicator displays:
• As the distance to the obstacle
decreases the indicator blocks
illuminate and move towards the
vehicle icon.
• If there is no obstacle detected, the
distance indicator blocks turn grey.
If the transmission is in reverse (R), the
front sensing system provides audio
warnings when your vehicle is moving and
the detected obstacle is moving towards
your vehicle. Once the vehicle is stationary,
the audio warning stops after two seconds.
Visual indication is always present in
reverse (R).
If the transmission is in drive (D) or any
other forward gear (for example, low (L),
sport (S) or any forward gear in a manual
transmission), the front sensing system
provides audio and visual warnings when
your vehicle is moving below a speed of
5 mph (8 km/h)
and an obstacle is inside
the detection area. Once the vehicle is
stationary, the audio warning stops after
two seconds and the visual indication
stops after four seconds. If the obstacles
detected are within
12 in (30 cm), the
visual indication remains on. If the transmission is in neutral (N), the
system provides visual indication only
when your vehicle is moving at
5 mph
(8 km/h) or below and an obstacle is
inside the detection area. Once your vehicle
is stationary, the visual indication stops
after four seconds.
REAR VIEW CAMERA WARNING: The rear view camera
system is a reverse aid supplement
device that still requires the driver to use
it in conjunction with the interior and
exterior mirrors for maximum coverage. WARNING: Objects that are close
to either corner of the bumper or under
the bumper, might not be seen on the
screen due to the limited coverage of the
camera system. WARNING:
Reverse your vehicle
slowly. Failure to follow this instruction
could result in the loss of control of your
vehicle, personal injury or death. WARNING:
Use caution when the
rear cargo door is ajar. If the rear cargo
door is ajar, the camera will be out of
position and the video image may be
incorrect. All guidelines disappear when
the rear cargo door is ajar. Failure to
follow this instruction could result in
personal injury. WARNING:
Use caution when
turning camera features on or off when
the transmission is not in park (P). Make
sure your vehicle is not moving.
The rear view camera system provides a
video image of the area behind your
vehicle.
178
Ranger (TFG) Canada/United States of America, enUSA, Edition date: 201809, Fourth-Printing Parking Aids
(If Equipped)
Page 182 of 512
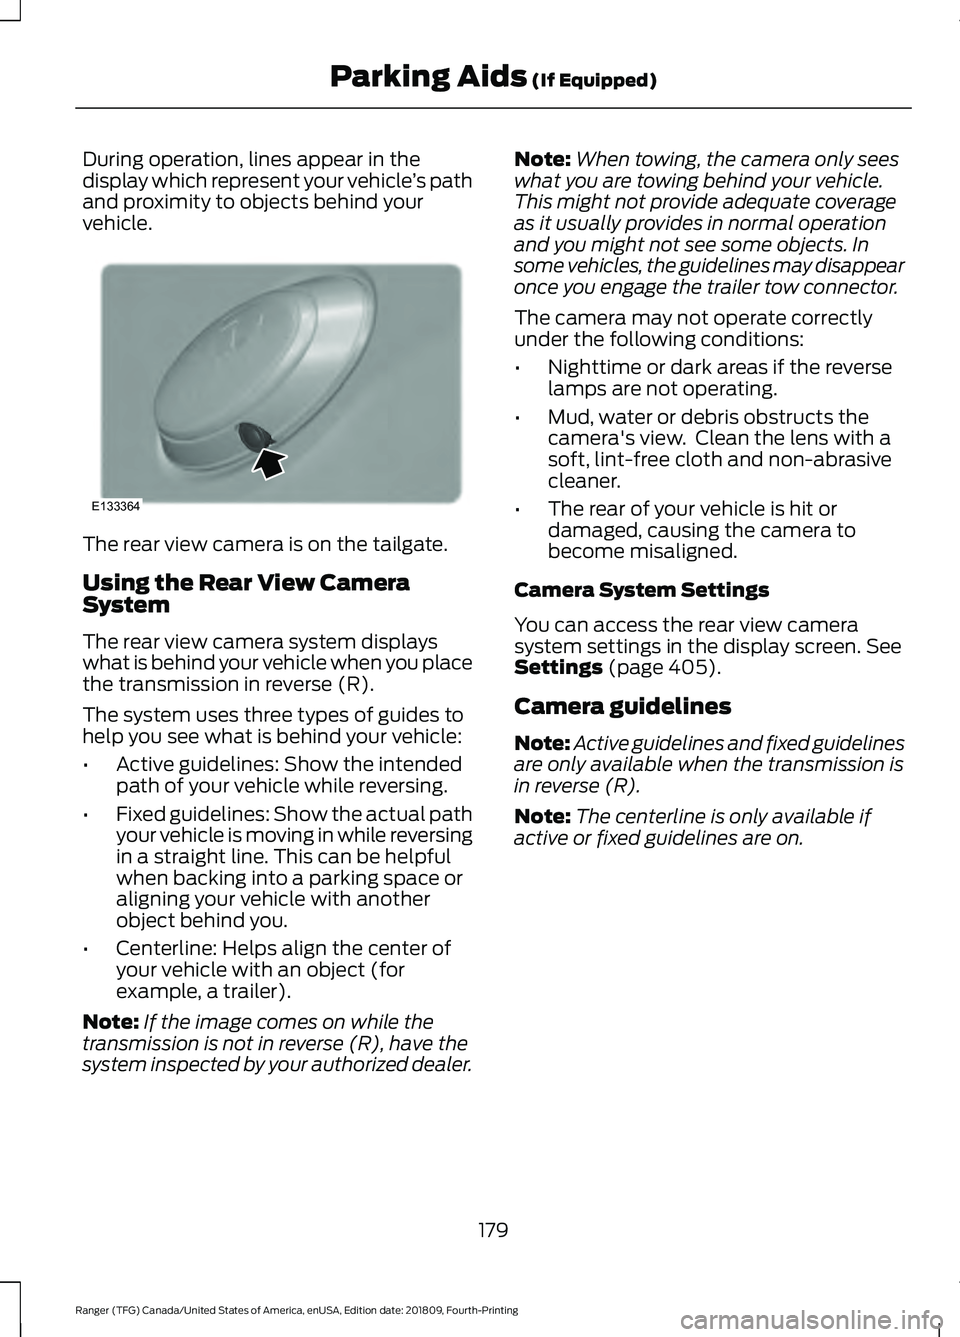
During operation, lines appear in the
display which represent your vehicle
’s path
and proximity to objects behind your
vehicle. The rear view camera is on the tailgate.
Using the Rear View Camera
System
The rear view camera system displays
what is behind your vehicle when you place
the transmission in reverse (R).
The system uses three types of guides to
help you see what is behind your vehicle:
•
Active guidelines: Show the intended
path of your vehicle while reversing.
• Fixed guidelines: Show the actual path
your vehicle is moving in while reversing
in a straight line. This can be helpful
when backing into a parking space or
aligning your vehicle with another
object behind you.
• Centerline: Helps align the center of
your vehicle with an object (for
example, a trailer).
Note: If the image comes on while the
transmission is not in reverse (R), have the
system inspected by your authorized dealer. Note:
When towing, the camera only sees
what you are towing behind your vehicle.
This might not provide adequate coverage
as it usually provides in normal operation
and you might not see some objects. In
some vehicles, the guidelines may disappear
once you engage the trailer tow connector.
The camera may not operate correctly
under the following conditions:
• Nighttime or dark areas if the reverse
lamps are not operating.
• Mud, water or debris obstructs the
camera's view. Clean the lens with a
soft, lint-free cloth and non-abrasive
cleaner.
• The rear of your vehicle is hit or
damaged, causing the camera to
become misaligned.
Camera System Settings
You can access the rear view camera
system settings in the display screen. See
Settings (page 405).
Camera guidelines
Note: Active guidelines and fixed guidelines
are only available when the transmission is
in reverse (R).
Note: The centerline is only available if
active or fixed guidelines are on.
179
Ranger (TFG) Canada/United States of America, enUSA, Edition date: 201809, Fourth-Printing Parking Aids
(If Equipped)E133364