FORD TAURUS 2017 Owners Manual
Manufacturer: FORD, Model Year: 2017, Model line: TAURUS, Model: FORD TAURUS 2017Pages: 504, PDF Size: 5.84 MB
Page 291 of 504
Please note that the TPMS is not asubstitute for proper tire maintenance, andit is the driver’s responsibility to maintaincorrect tire pressure, even if under-inflationhas not reached the level to triggerillumination of the TPMS low tire pressuretelltale.
Your vehicle has also been equipped witha TPMS malfunction indicator to indicatewhen the system is not operating properly.The TPMS malfunction indicator iscombined with the low tire pressuretelltale. When the system detects amalfunction, the telltale will flash forapproximately one minute and then remaincontinuously illuminated. This sequencewill continue upon subsequent vehiclestart-ups as long as the malfunction exists.
When the malfunction indicator isilluminated, the system may not be ableto detect or signal low tire pressure asintended. TPMS malfunctions may occurfor a variety of reasons, including theinstallation of replacement or alternatetires or wheels on the vehicle that preventthe TPMS from functioning properly.Always check the TPMS malfunctiontelltale after replacing one or more tires orwheels on your vehicle to ensure that thereplacement or alternate tires and wheelsallow the TPMS to continue to functionproperly.
This device complies with Part 15 of theFCC Rules and with Industry Canadalicense-exempt RSS standard(s).Operation is subject to the following twoconditions:
•This device may not cause harmfulinterference.
•This device must accept anyinterference received, includinginterference that may cause undesiredoperation.
Changing Tires With a TirePressure Monitoring System
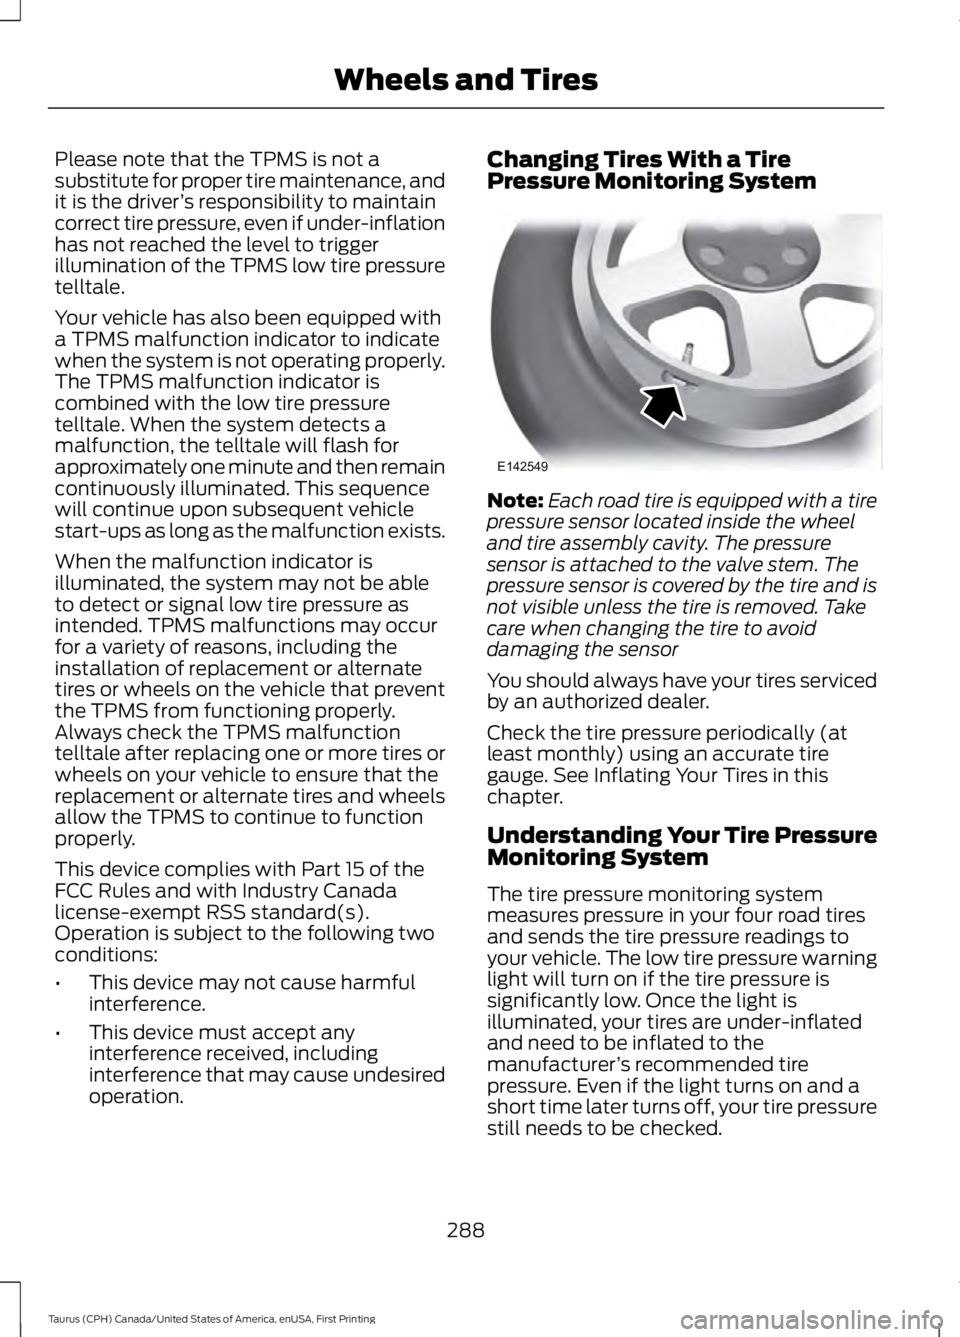
Note:Each road tire is equipped with a tirepressure sensor located inside the wheeland tire assembly cavity. The pressuresensor is attached to the valve stem. Thepressure sensor is covered by the tire and isnot visible unless the tire is removed. Takecare when changing the tire to avoiddamaging the sensor
You should always have your tires servicedby an authorized dealer.
Check the tire pressure periodically (atleast monthly) using an accurate tiregauge. See Inflating Your Tires in thischapter.
Understanding Your Tire PressureMonitoring System
The tire pressure monitoring systemmeasures pressure in your four road tiresand sends the tire pressure readings toyour vehicle. The low tire pressure warninglight will turn on if the tire pressure issignificantly low. Once the light isilluminated, your tires are under-inflatedand need to be inflated to themanufacturer’s recommended tirepressure. Even if the light turns on and ashort time later turns off, your tire pressurestill needs to be checked.
288
Taurus (CPH) Canada/United States of America, enUSA, First Printing
Wheels and TiresE142549
Page 292 of 504
When Your Temporary Spare Tire isInstalled
When one of your road tires needs to bereplaced with the temporary spare, thesystem will continue to identify an issue toremind you that the damaged road wheeland tire assembly needs to be repaired andput back on your vehicle.
To restore the full function of the tirepressure monitoring system, have thedamaged road wheel and tire assemblyrepaired and remounted on your vehicle.
When You Believe Your System is NotOperating Properly
The main function of the tire pressuremonitoring system is to warn you whenyour tires need air. It can also warn you inthe event the system is no longer capableof functioning as intended. See thefollowing chart for information concerningyour tire pressure monitoring system:
289
Taurus (CPH) Canada/United States of America, enUSA, First Printing
Wheels and Tires
Page 293 of 504
Customer action requiredPossible causeLow tire pressurewarning light
Make sure tires are at the proper pres-sure. See Inflating your tires in thischapter. After inflating your tires to themanufacturer’s recommended pressureas shown on the Tire Label (located onthe edge of driver’s door or the B-Pillar),the vehicle must be driven for at leasttwo minutes over 20 mph (32 km/h)before the light turns off.
Tire(s) under-inflatedSolid warning light
Repair the damaged road wheel and tireassembly and reinstall it on the vehicleto restore system function. For adescription on how the system functions,see When your temporary spare tireis installed in this section.
Spare tire in use
If the tires are properly inflated and thespare tire is not in use but the lightremains on, contact your authorizeddealer as soon as possible.
TPMS malfunction
Repair the damaged road wheel and tireassembly and reinstall it on the vehicleto restore system function. For adescription on how the system functions,see When your temporary spare tireis installed in this section.
Spare tire in useFlashing warninglight
If the tires are properly inflated and thespare tire is not in use but the lightremains on, contact your authorizeddealer as soon as possible.
TPMS malfunction
When Inflating Your Tires
When putting air into your tires (such as ata gas station or in your garage), the tirepressure monitoring system may notrespond immediately to the air added toyour tires.
It may take up to two minutes of drivingover 20 mph (32 km/h) for the light to turnoff after you have filled your tires to therecommended inflation pressure
290
Taurus (CPH) Canada/United States of America, enUSA, First Printing
Wheels and Tires
Page 294 of 504
How Temperature Affects Your TirePressure
The tire pressure monitoring systemmonitors tire pressure in each pneumatictire. While driving in a normal manner, atypical passenger tire inflation pressuremay increase about 2–4 psi (14–28 kPa)from a cold start situation. If the vehicle isstationary overnight with the outsidetemperature significantly lower than thedaytime temperature, the tire pressure maydecrease about 3 psi (21 kPa) for a drop of30°F (17°C) in ambient temperature. Thislower pressure value may be detected bythe tire pressure monitoring system asbeing significantly lower than therecommended inflation pressure andactivate the system warning light for lowtire pressure. If the low tire pressurewarning light is on, visually check each tireto verify that no tire is flat. If one or moretires are flat, repair as necessary. Checkthe air pressure in the road tires. If any tireis under-inflated, carefully drive the vehicleto the nearest location where air can beadded to the tires. Inflate all the tires tothe recommended inflation pressure.
CHANGING A ROAD WHEEL
WARNINGS
Do not use tire sealants as they maydamage the tire pressure monitoringsystem.
If the tire pressure monitor sensorbecomes damaged it may notfunction.
Note:The tire pressure monitoring systemindicator light will illuminate when the sparetire is in use. To restore the full function ofthe monitoring system, all road wheelsequipped with tire pressure monitoringsensors must be mounted on the vehicle.
If you get a flat tire while driving, do notapply the brake heavily. Instead, graduallydecrease your speed. Hold the steeringwheel firmly and slowly move to a safeplace on the side of the road.
Have a flat serviced by an authorizeddealer in order to prevent damage to thetire pressure monitoring system sensors.See Tire Pressure Monitoring System(page 287). Replace the spare tire with aroad tire as soon as possible. Duringrepairing or replacing of the flat tire, havethe authorized dealer inspect the tirepressure monitoring system sensor fordamage.
Dissimilar Spare Wheel and TireAssembly Information
WARNING
Failure to follow these guidelinescould result in an increased risk ofloss of vehicle control, injury or death.
If you have a dissimilar spare wheel andtire, then it is intended for temporary useonly. This means that if you need to use it,you should replace it as soon as possiblewith a road wheel and tire assembly thatis the same size and type as the road tiresand wheels that were originally providedby Ford. If the dissimilar spare tire or wheelis damaged, it should be replaced ratherthan repaired.
A dissimilar spare wheel and tire assemblyis defined as a spare wheel and tireassembly that is different in brand, size orappearance from the road tires and wheelsand can be one of three types:
1.T-type mini-spare: This spare tirebegins with the letter T for tire size andmay have Temporary Use Only molded inthe sidewall.
291
Taurus (CPH) Canada/United States of America, enUSA, First Printing
Wheels and Tires
Page 295 of 504
2.Full-size dissimilar spare with labelon wheel: This spare tire has a label onthe wheel that states: THIS WHEEL ANDTIRE ASSEMBLY FOR TEMPORARY USEONLY.
When driving with one of the dissimilarspare tires listed above, do not:
•Exceed 50 mph (80 km/h).
•Load the vehicle beyond maximumvehicle load rating listed on the SafetyCompliance Label.
•Tow a trailer.
•Use snow chains on the end of thevehicle with the dissimilar spare tire.
•Use more than one dissimilar spare tireat a time.
•Use commercial car washingequipment.
•Try to repair the dissimilar spare tire.
Use of one of the dissimilar spare tireslisted above at any one wheel location canlead to impairment of the following:
•Handling, stability and brakingperformance.
•Comfort and noise.
•Ground clearance and parking at curbs.
•Winter weather driving capability.
•Wet weather driving capability.
•All-wheel driving capability.
3.Full-size dissimilar spare withoutlabel on wheel
When driving with the full-size dissimilarspare wheel and tire assembly, do not:
•Exceed 70 mph (113 km/h).
•Use more than one dissimilar sparewheel and tire assembly at a time.
•Use commercial car washingequipment.
•Use snow chains on the end of thevehicle with the dissimilar spare wheeland tire assembly.
The usage of a full-size dissimilar sparewheel and tire assembly can lead toimpairment of the following:
•Handling, stability and brakingperformance.
•Comfort and noise.
•Ground clearance and parking at curbs.
•Winter weather driving capability.
•Wet weather driving capability.
•All-wheel driving capability.
When driving with the full-size dissimilarspare wheel and tire assembly additionalcaution should be given to:
•Towing a trailer.
•Driving vehicles equipped with acamper body.
•Driving vehicles with a load on thecargo rack.
Drive cautiously when using a full-sizedissimilar spare wheel and tire assemblyand seek service as soon as possible.
Tire Change Procedure
WARNINGS
When one of the front wheels is offthe ground, the transmission alonewill not prevent the vehicle frommoving or slipping off the jack, even if thetransmission is in park (P).
To help prevent your vehicle frommoving when changing a wheel, shiftthe transmission into park (P), setthe parking brake and use an appropriateblock or wheel chock to secure the wheeldiagonally opposite to the wheel beingchanged. For example, when changing thefront left wheel, place an appropriate blockor wheel chock on the right rear wheel.
Do not work on your vehicle whenthe jack is the only support. If thevehicle slips off the jack, you orsomeone else could be seriously injured.
292
Taurus (CPH) Canada/United States of America, enUSA, First Printing
Wheels and Tires
Page 296 of 504
WARNINGS
Do not attempt to change a tire onthe side of the vehicle close tomoving traffic. Pull far enough off theroad to avoid the danger of being hit whenoperating the jack or changing the wheel.
Always use the jack provided asoriginal equipment with your vehicle.If using a jack other than the oneprovided, make sure the jack capacity isadequate for the vehicle weight, includingany vehicle cargo or modifications. If youare unsure if the jack capacity is adequate,contact the authorized dealer.
Note:Passengers should not remain in yourvehicle when the vehicle is being jacked.
Note:Jack at the specified locations toavoid damage to the vehicle.
1.Park on a level surface, set the parkingbrake and activate the hazard flashers.
2.Place the transmission in park (P) andturn the engine off.
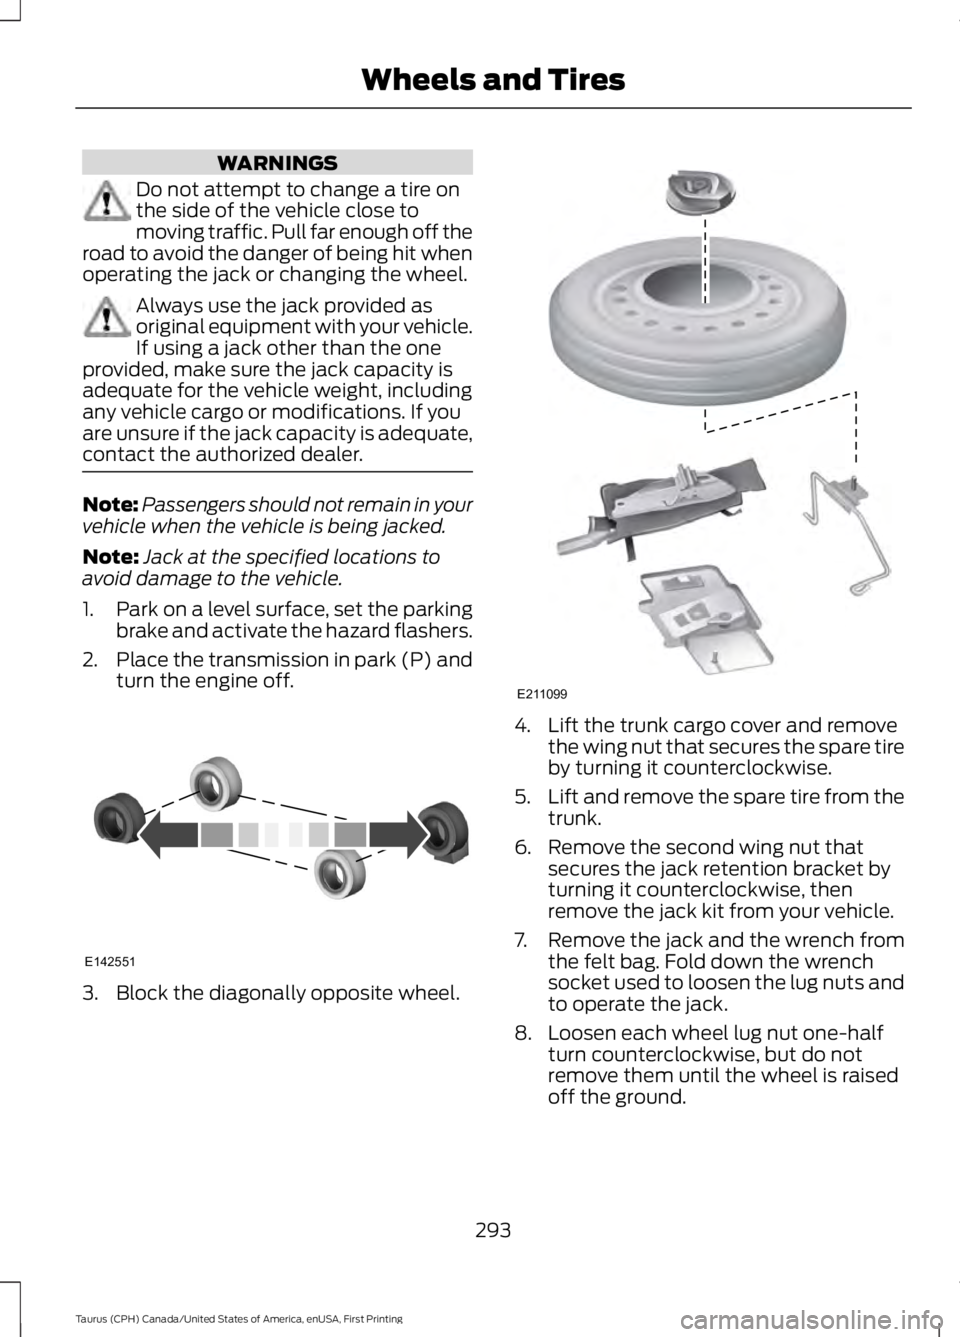
3. Block the diagonally opposite wheel.
4. Lift the trunk cargo cover and removethe wing nut that secures the spare tireby turning it counterclockwise.
5.Lift and remove the spare tire from thetrunk.
6. Remove the second wing nut thatsecures the jack retention bracket byturning it counterclockwise, thenremove the jack kit from your vehicle.
7. Remove the jack and the wrench fromthe felt bag. Fold down the wrenchsocket used to loosen the lug nuts andto operate the jack.
8. Loosen each wheel lug nut one-halfturn counterclockwise, but do notremove them until the wheel is raisedoff the ground.
293
Taurus (CPH) Canada/United States of America, enUSA, First Printing
Wheels and TiresE142551 E211099
Page 297 of 504
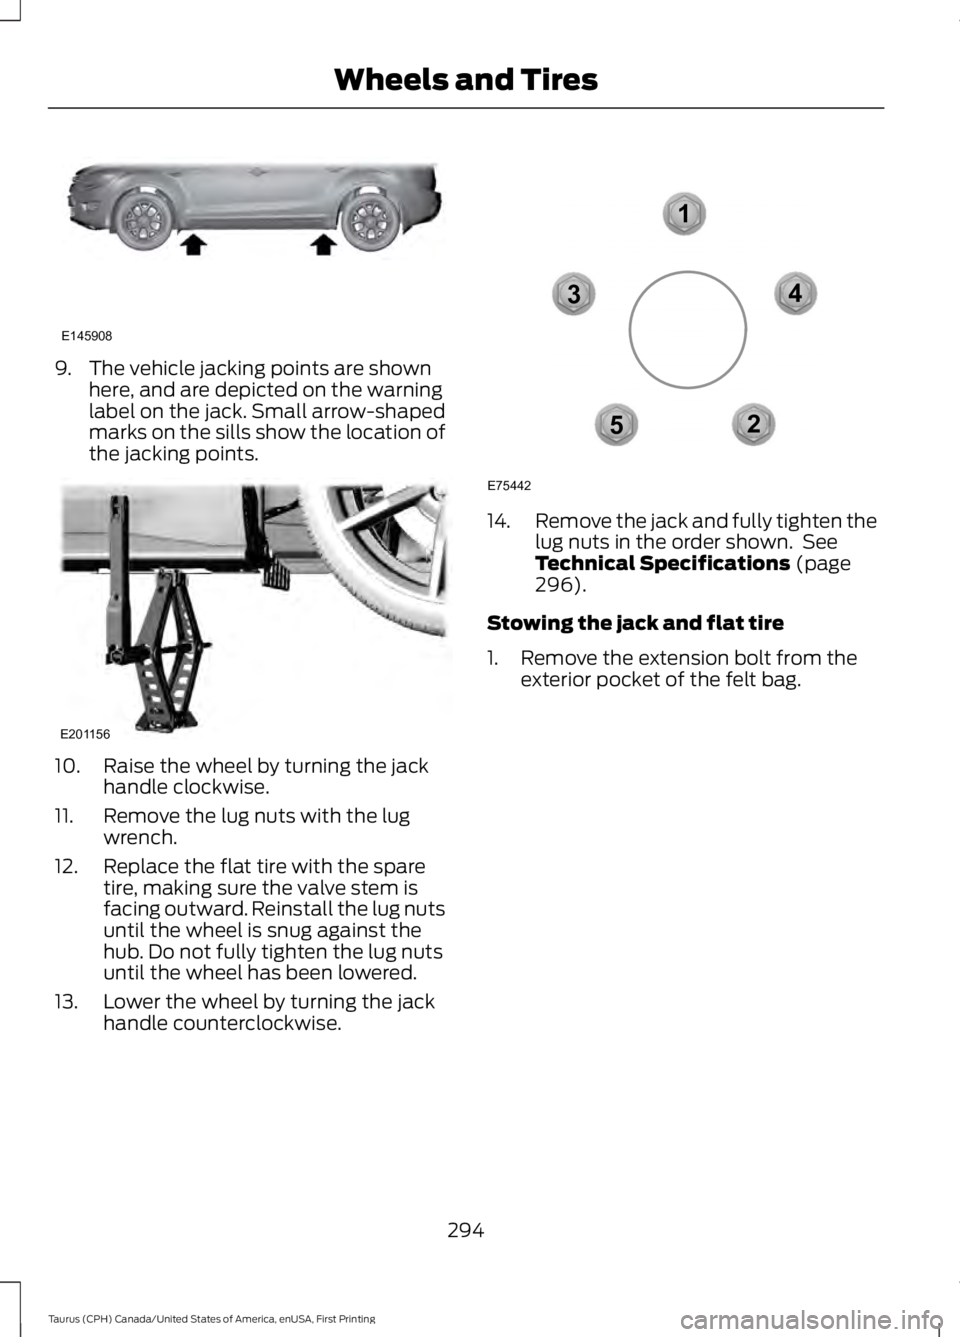
9. The vehicle jacking points are shownhere, and are depicted on the warninglabel on the jack. Small arrow-shapedmarks on the sills show the location ofthe jacking points.
10. Raise the wheel by turning the jackhandle clockwise.
11. Remove the lug nuts with the lugwrench.
12. Replace the flat tire with the sparetire, making sure the valve stem isfacing outward. Reinstall the lug nutsuntil the wheel is snug against thehub. Do not fully tighten the lug nutsuntil the wheel has been lowered.
13. Lower the wheel by turning the jackhandle counterclockwise.
14.Remove the jack and fully tighten thelug nuts in the order shown. SeeTechnical Specifications (page296).
Stowing the jack and flat tire
1. Remove the extension bolt from theexterior pocket of the felt bag.
294
Taurus (CPH) Canada/United States of America, enUSA, First Printing
Wheels and TiresE145908 E201156 12
3
4
5
E75442
Page 298 of 504
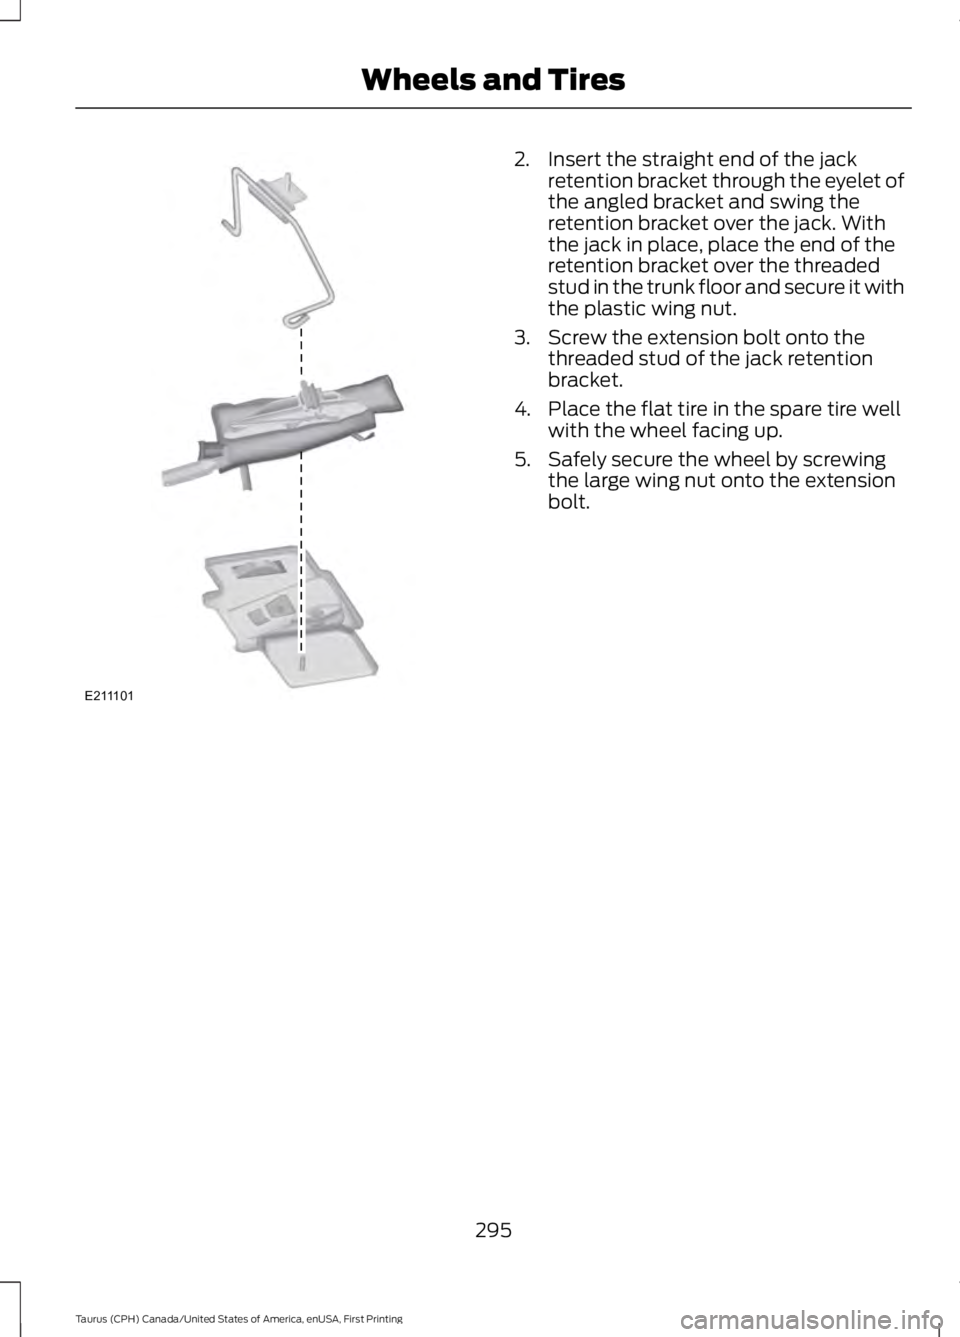
2. Insert the straight end of the jackretention bracket through the eyelet ofthe angled bracket and swing theretention bracket over the jack. Withthe jack in place, place the end of theretention bracket over the threadedstud in the trunk floor and secure it withthe plastic wing nut.
3. Screw the extension bolt onto thethreaded stud of the jack retentionbracket.
4. Place the flat tire in the spare tire wellwith the wheel facing up.
5. Safely secure the wheel by screwingthe large wing nut onto the extensionbolt.
295
Taurus (CPH) Canada/United States of America, enUSA, First Printing
Wheels and TiresE211101
Page 299 of 504
TECHNICAL SPECIFICATIONS
Wheel Lug Nut Torque Specifications
WARNING
When a wheel is installed, always remove any corrosion, dirt or foreign materialspresent on the mounting surfaces of the wheel or the surface of the wheel hub,brake drum or brake disc that contacts the wheel. Make sure that any fastenersthat attach the rotor to the hub are secured so they do not interfere with the mountingsurfaces of the wheel. Installing wheels without correct metal-to-metal contact at thewheel mounting surfaces can cause the wheel nuts to loosen and the wheel to come offwhile your vehicle is in motion, resulting in loss of control.
Ib-ft (Nm)*Bolt size
100 (135)1/2-20 x 1.5
*Torque specifications are for nut and bolt threads free of dirt and rust. Use only Fordrecommended replacement fasteners.
Retighten the lug nuts to the specified torque within 100 miles (160 kilometers) after anywheel disturbance (such as tire rotation, changing a flat tire, wheel removal).
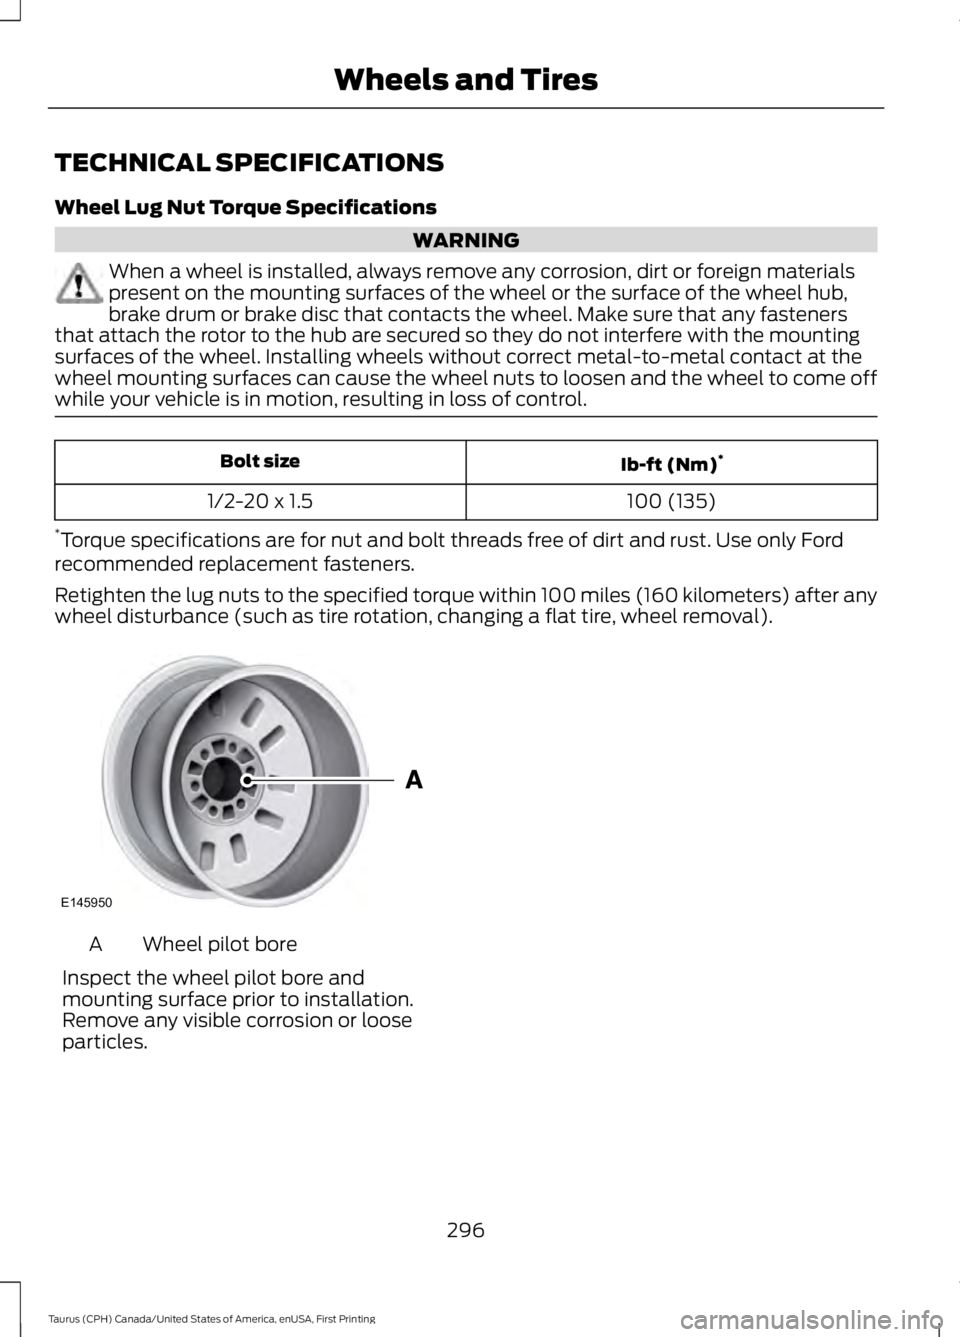
Wheel pilot boreA
Inspect the wheel pilot bore andmounting surface prior to installation.Remove any visible corrosion or looseparticles.
296
Taurus (CPH) Canada/United States of America, enUSA, First Printing
Wheels and TiresE145950
Page 300 of 504
ENGINE SPECIFICATIONS - 2.0L ECOBOOST™
2.0L EcoBoostEngine
122Cubic inches
1-3-4-2Firing order
Coil on plugIgnition system
9.3:1Compression ratio
0.027-0.031 in. (0.70-0.80 mm)Spark plug gap
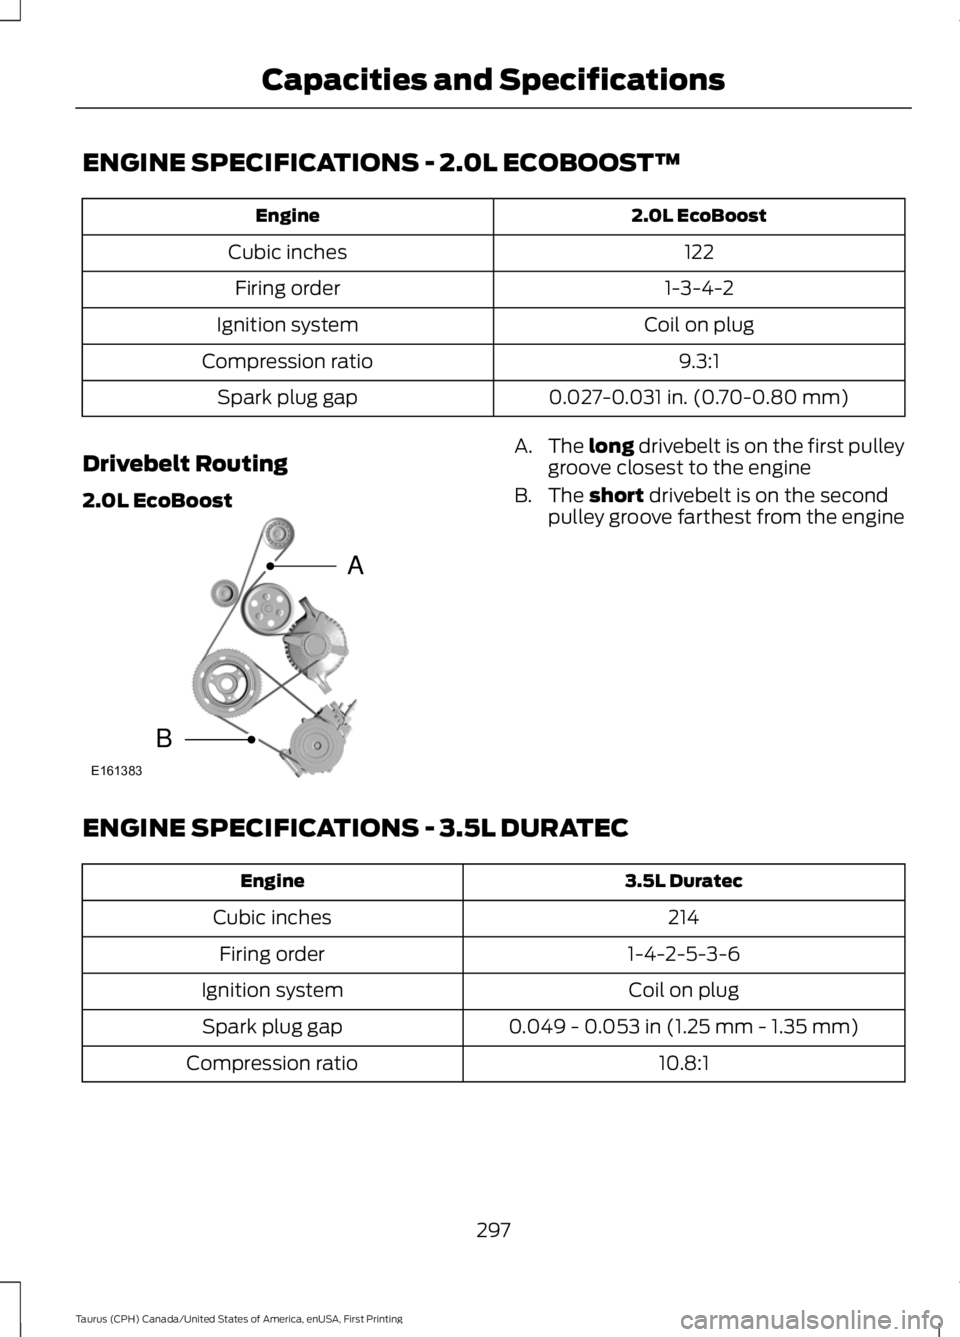
Drivebelt Routing
2.0L EcoBoost
A.The long drivebelt is on the first pulleygroove closest to the engine
B. The short drivebelt is on the secondpulley groove farthest from the engine
ENGINE SPECIFICATIONS - 3.5L DURATEC
3.5L DuratecEngine
214Cubic inches
1-4-2-5-3-6Firing order
Coil on plugIgnition system
0.049 - 0.053 in (1.25 mm - 1.35 mm)Spark plug gap
10.8:1Compression ratio
297
Taurus (CPH) Canada/United States of America, enUSA, First Printing
Capacities and SpecificationsE161383
A
B