display FORD TRANSIT 2016 5.G Owners Manual
[x] Cancel search | Manufacturer: FORD, Model Year: 2016, Model line: TRANSIT, Model: FORD TRANSIT 2016 5.GPages: 411, PDF Size: 5.65 MB
Page 4 of 411
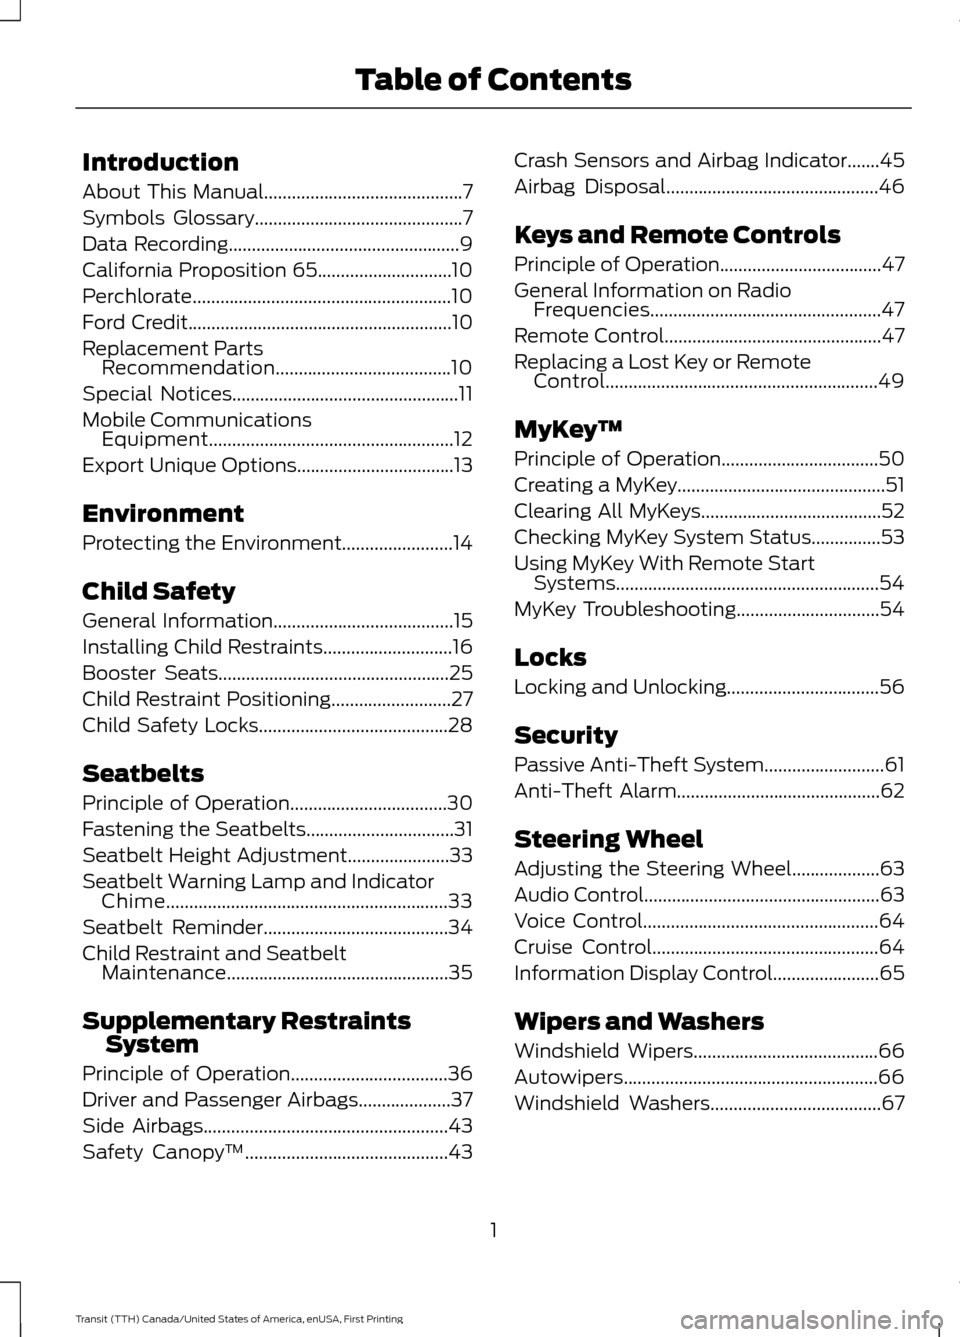
Introduction
About This Manual...........................................7
Symbols Glossary
.............................................7
Data Recording
..................................................9
California Proposition 65.............................10
Perchlorate........................................................10
Ford Credit
.........................................................10
Replacement Parts Recommendation......................................10
Special Notices
.................................................11
Mobile Communications Equipment.....................................................12
Export Unique Options..................................13
Environment
Protecting the Environment........................14
Child Safety
General Information
.......................................15
Installing Child Restraints
............................16
Booster Seats..................................................25
Child Restraint Positioning
..........................27
Child Safety Locks.........................................28
Seatbelts
Principle of Operation
..................................30
Fastening the Seatbelts
................................31
Seatbelt Height Adjustment
......................33
Seatbelt Warning Lamp and Indicator Chime
.............................................................33
Seatbelt Reminder
........................................34
Child Restraint and Seatbelt Maintenance
................................................35
Supplementary Restraints System
Principle of Operation..................................36
Driver and Passenger Airbags....................37
Side Airbags
.....................................................43
Safety Canopy ™
............................................43Crash Sensors and Airbag Indicator.......45
Airbag Disposal
..............................................46
Keys and Remote Controls
Principle of Operation...................................47
General Information on Radio Frequencies..................................................47
Remote Control
...............................................47
Replacing a Lost Key or Remote Control...........................................................49
MyKey ™
Principle of Operation..................................50
Creating a MyKey.............................................51
Clearing All MyKeys.......................................52
Checking MyKey System Status...............53
Using MyKey With Remote Start Systems.........................................................54
MyKey Troubleshooting
...............................54
Locks
Locking and Unlocking
.................................56
Security
Passive Anti-Theft System
..........................61
Anti-Theft Alarm............................................62
Steering Wheel
Adjusting the Steering Wheel...................63
Audio Control
...................................................63
Voice Control
...................................................64
Cruise Control.................................................64
Information Display Control.......................65
Wipers and Washers
Windshield Wipers
........................................66
Autowipers.......................................................66
Windshield Washers
.....................................67
1
Transit (TTH) Canada/United States of America, enUSA, First Printing Table of Contents
Page 5 of 411
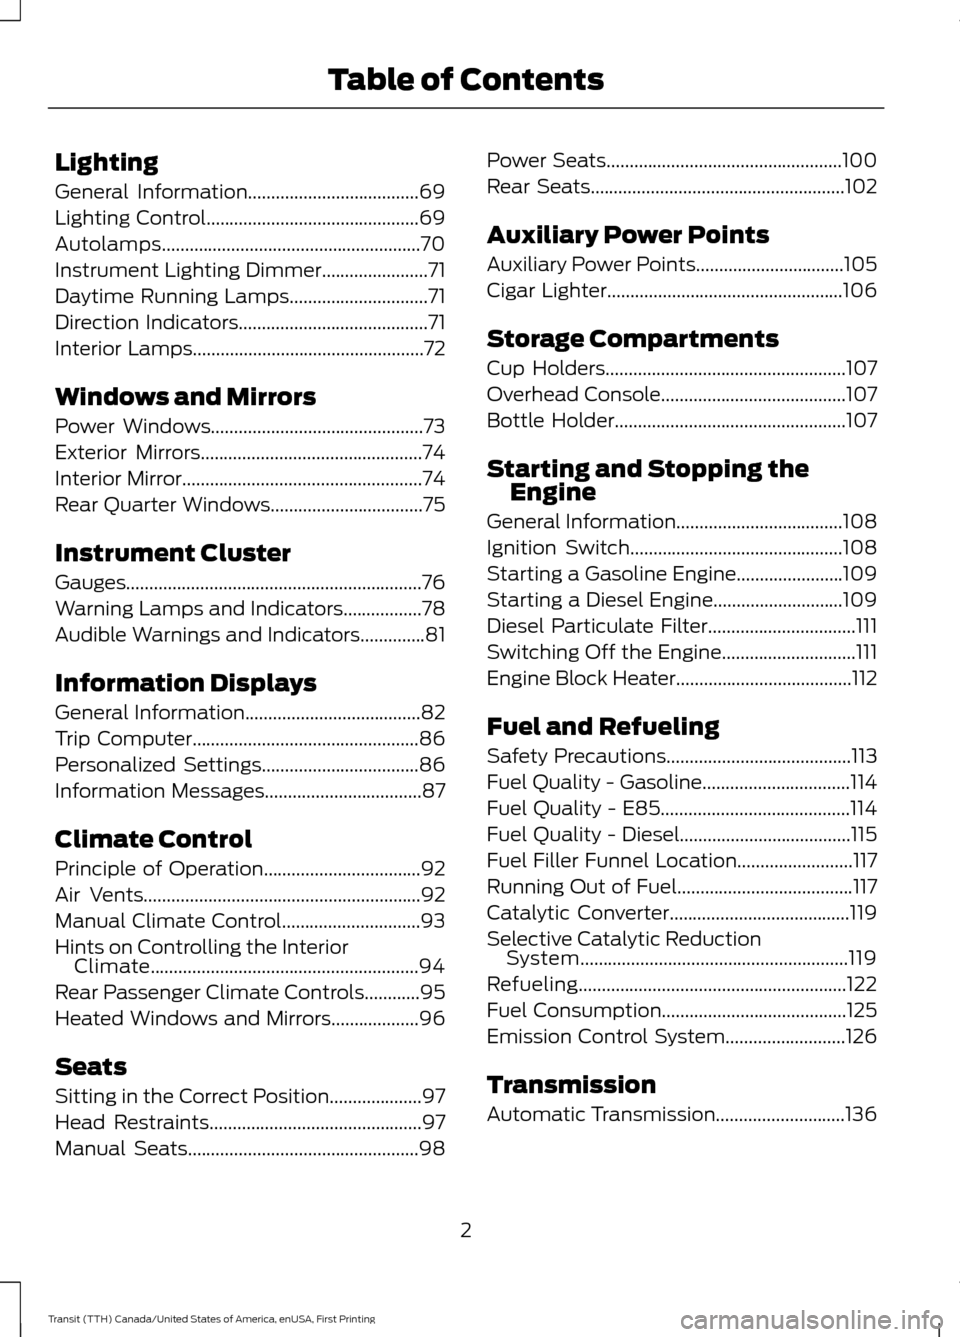
Lighting
General Information.....................................69
Lighting Control..............................................69
Autolamps........................................................70
Instrument Lighting Dimmer.......................71
Daytime Running Lamps
..............................71
Direction Indicators
.........................................71
Interior Lamps
..................................................72
Windows and Mirrors
Power Windows
..............................................73
Exterior Mirrors
................................................74
Interior Mirror
....................................................74
Rear Quarter Windows
.................................75
Instrument Cluster
Gauges................................................................76
Warning Lamps and Indicators.................78
Audible Warnings and Indicators
..............81
Information Displays
General Information......................................82
Trip Computer
.................................................86
Personalized Settings
..................................86
Information Messages
..................................87
Climate Control
Principle of Operation..................................92
Air Vents
............................................................92
Manual Climate Control..............................93
Hints on Controlling the Interior Climate..........................................................94
Rear Passenger Climate Controls............95
Heated Windows and Mirrors...................96
Seats
Sitting in the Correct Position....................97
Head Restraints
..............................................97
Manual Seats
..................................................98 Power Seats...................................................100
Rear Seats.......................................................102
Auxiliary Power Points
Auxiliary Power Points
................................105
Cigar Lighter
...................................................106
Storage Compartments
Cup Holders
....................................................107
Overhead Console
........................................107
Bottle Holder
..................................................107
Starting and Stopping the Engine
General Information....................................108
Ignition Switch..............................................108
Starting a Gasoline Engine
.......................109
Starting a Diesel Engine............................109
Diesel Particulate Filter................................111
Switching Off the Engine.............................111
Engine Block Heater......................................112
Fuel and Refueling
Safety Precautions
........................................113
Fuel Quality - Gasoline
................................114
Fuel Quality - E85.........................................114
Fuel Quality - Diesel.....................................115
Fuel Filler Funnel Location
.........................117
Running Out of Fuel
......................................117
Catalytic Converter
.......................................119
Selective Catalytic Reduction System..........................................................119
Refueling..........................................................122
Fuel Consumption........................................125
Emission Control System..........................126
Transmission
Automatic Transmission............................136
2
Transit (TTH) Canada/United States of America, enUSA, First Printing Table of Contents
Page 53 of 411
PRINCIPLE OF OPERATION
MyKey allows you to program keys with
restricted driving modes to promote good
driving habits. All but one of the keys can
be activated with these restricted modes.
Any keys that remain unprogrammed are
referred to as administrator keys or admin
keys. They can be used to:
•
Create a MyKey.
• Program configurable MyKey settings.
• Clear all MyKey features.
When you have created a MyKey, you can
access the following information by using
the information display to determine:
• How many admin keys and MyKeys are
programmed to your vehicle.
• The total distance your vehicle traveled
with a MyKey.
Note: Switch the ignition on to use the
system.
Note: All MyKeys are programmed to the
same settings. You cannot program them
individually.
Non-configurable Settings
The following settings cannot be changed
by an admin key user:
• Safety belt minder. You cannot disable
this feature. The audio system will
mute when the driver's safety belt is
not fastened.
• Early low fuel. The low-fuel warning
activates earlier, giving the MyKey user
more time to refuel.
• Driver assist features, if equipped on
your vehicle, are forced on: parking aid,
Blind Spot Information System (BLIS)
with cross traffic alert, lane departure
warning and forward collision warning
system. Configurable Settings
With an admin key, you can configure
certain MyKey settings when you first
create a MyKey and before you recycle the
key or restart the engine. You can also
change the settings afterward with an
admin key.
•
A vehicle speed limit can be set.
Warnings will be shown in the display
followed by an audible tone when your
vehicle reaches the set speed. You
cannot override the set speed by fully
depressing the accelerator pedal or by
setting cruise control. WARNING
Do not set MyKey maximum speed
limit to a limit that will prevent the
driver from maintaining a safe speed
considering posted speed limits and
prevailing road conditions. The driver is
always responsible to drive in accordance
with local laws and prevailing conditions.
Failure to do so could result in accident or
injury. •
Various vehicle speed minders can be
set. Once you select a speed, it will be
shown in the display, followed by an
audible tone when the preselected
vehicle speed is exceeded.
• Audio system maximum volume of
45%. A message will be shown in the
display when you attempt to exceed
the limited volume. Also, the
speed-sensitive or compensated
automatic volume control will be
disabled.
• Always on setting. When this is
selected, you will not be able to turn
off traction control (if your vehicle is
equipped with this feature).
50
Transit (TTH) Canada/United States of America, enUSA, First Printing MyKey
™ (If Equipped)
Page 54 of 411
CREATING A MYKEY
You can program a MyKey using the
information display control on the steering
wheel. See Information Displays (page
82).
Insert the key you want to program into the
ignition and switch the ignition on.
Press the left arrow button to access the main menu and scroll to: Action and Description
Message
Press the
OK button.
Settings
Press the
OK button.
MyKey
When prompted, hold the OK button until you see a message
informing you to label this key as a MyKey. The key will be
restricted at your vehicle's next start.
Create MyKey
Make sure you label the key so you can distinguish it from the
admin keys.
You can also program configurable settings for the key(s).
Refer to the following Programming/Changing Configur-
able Settings
.
Programming/Changing
Configurable Settings
Switch the ignition on using an admin key
or fob.
Use the information display to access the configurable MyKey settings, scroll to: Action and Description
Message
Press the
OK button.
Settings
Use the up and down arrow buttons to scroll to a configurable
feature.
MyKey
Press the
OK or right arrow button to make a selection.
Choose your applicable setting.
Note: You can clear or change your MyKey settings at any time during the same key cycle
as you created the MyKey. Once you switch the ignition off you will need an admin key to
change or clear your MyKey settings.
51
Transit (TTH) Canada/United States of America, enUSA, First Printing MyKey
™
(If Equipped)
Page 55 of 411
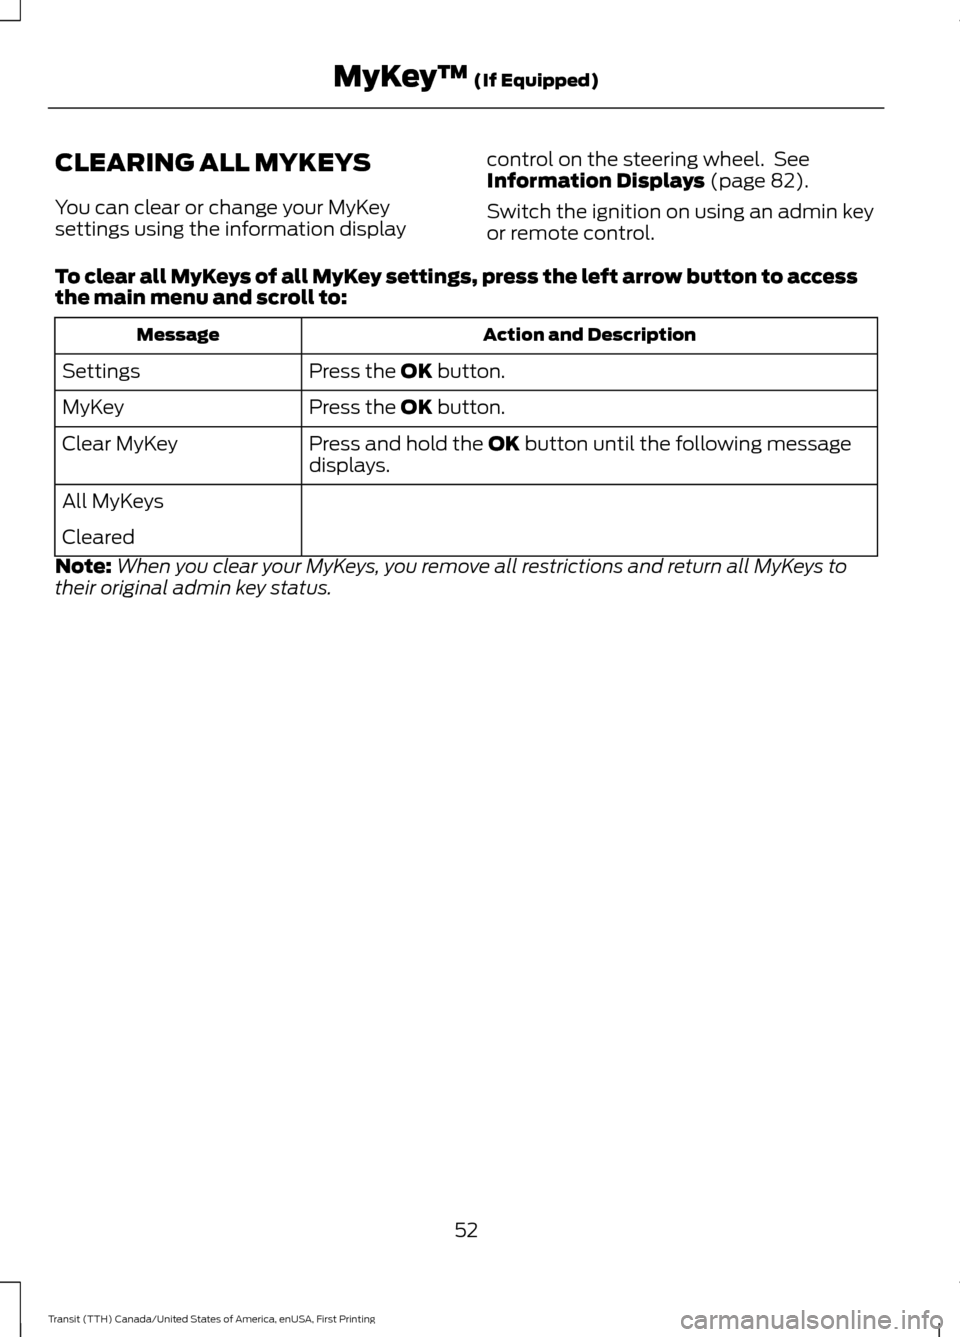
CLEARING ALL MYKEYS
You can clear or change your MyKey
settings using the information display
control on the steering wheel. See
Information Displays (page 82).
Switch the ignition on using an admin key
or remote control.
To clear all MyKeys of all MyKey settings, press the left arrow button to access
the main menu and scroll to: Action and Description
Message
Press the
OK button.
Settings
Press the
OK button.
MyKey
Press and hold the
OK button until the following message
displays.
Clear MyKey
All MyKeys
Cleared
Note: When you clear your MyKeys, you remove all restrictions and return all MyKeys to
their original admin key status.
52
Transit (TTH) Canada/United States of America, enUSA, First Printing MyKey
™
(If Equipped)
Page 56 of 411
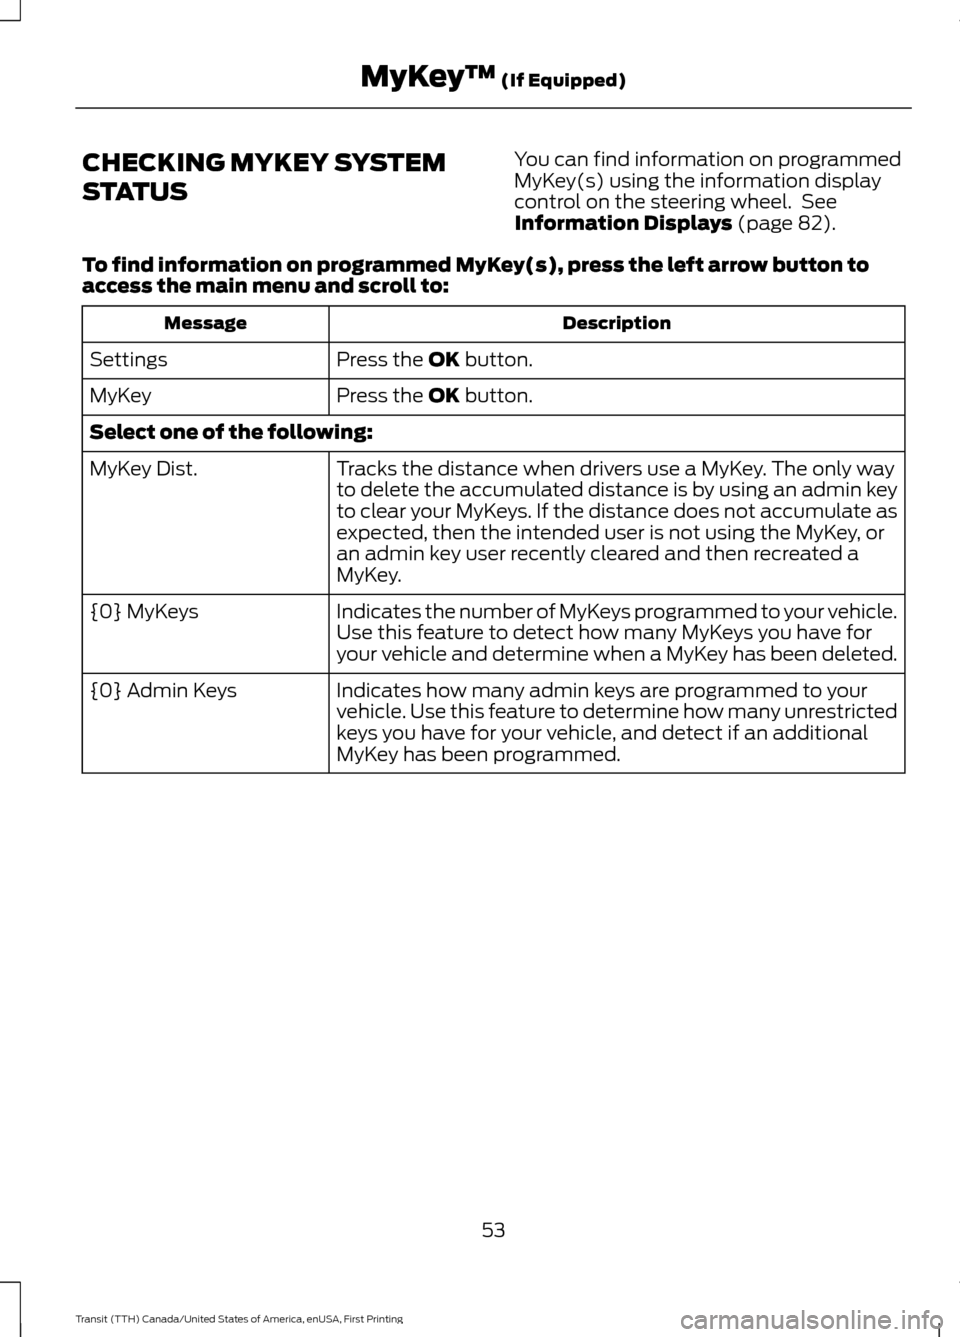
CHECKING MYKEY SYSTEM
STATUS
You can find information on programmed
MyKey(s) using the information display
control on the steering wheel. See
Information Displays (page 82).
To find information on programmed MyKey(s), press the left arrow button to
access the main menu and scroll to: Description
Message
Press the
OK button.
Settings
Press the
OK button.
MyKey
Select one of the following:
Tracks the distance when drivers use a MyKey. The only way
to delete the accumulated distance is by using an admin key
to clear your MyKeys. If the distance does not accumulate as
expected, then the intended user is not using the MyKey, or
an admin key user recently cleared and then recreated a
MyKey.
MyKey Dist.
Indicates the number of MyKeys programmed to your vehicle.
Use this feature to detect how many MyKeys you have for
your vehicle and determine when a MyKey has been deleted.
{0} MyKeys
Indicates how many admin keys are programmed to your
vehicle. Use this feature to determine how many unrestricted
keys you have for your vehicle, and detect if an additional
MyKey has been programmed.
{0} Admin Keys
53
Transit (TTH) Canada/United States of America, enUSA, First Printing MyKey
™
(If Equipped)
Page 63 of 411
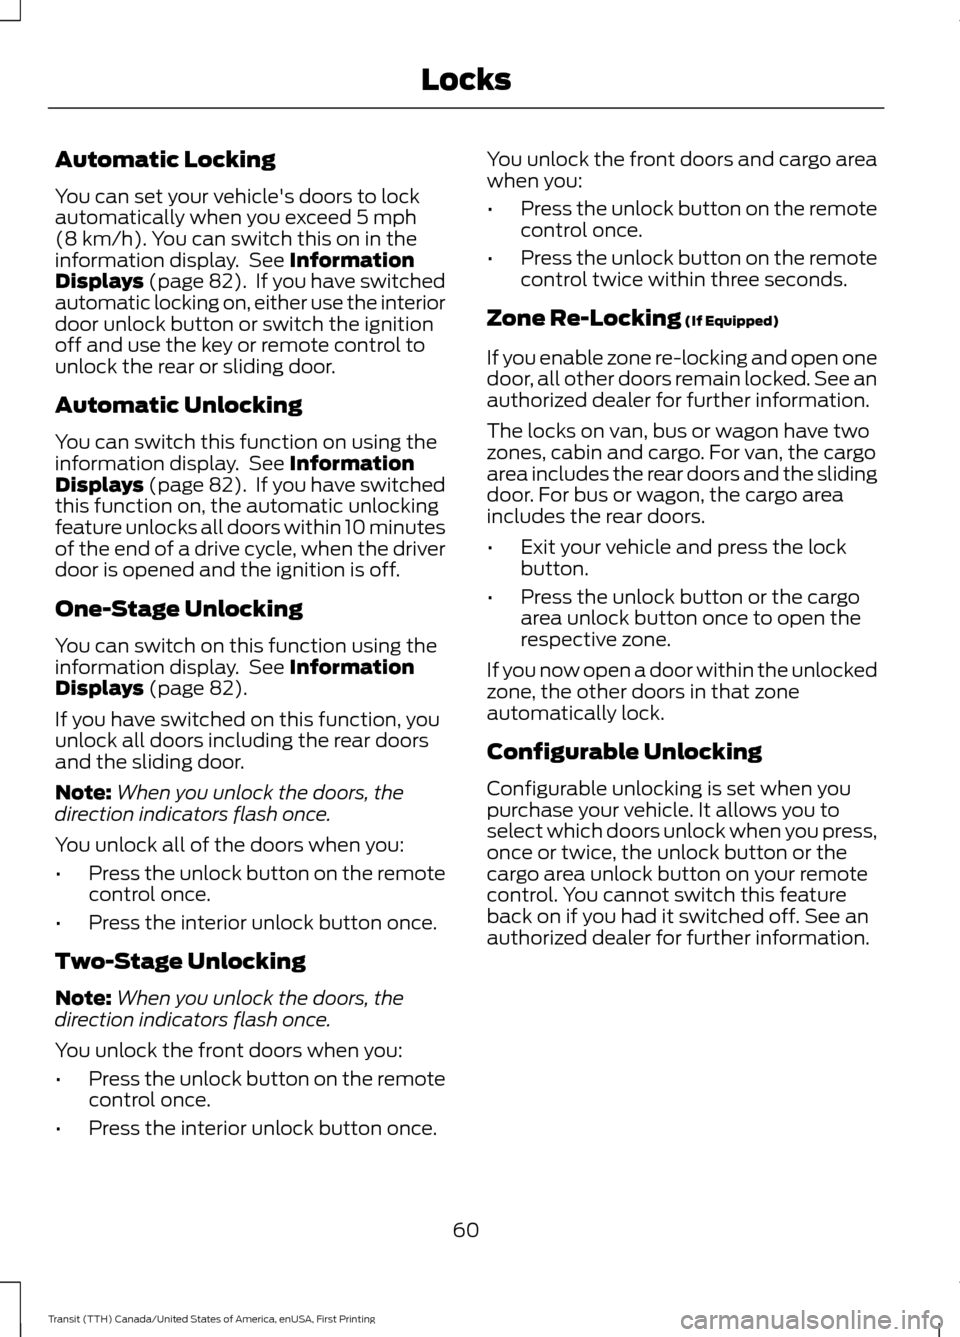
Automatic Locking
You can set your vehicle's doors to lock
automatically when you exceed 5 mph
(8 km/h). You can switch this on in the
information display. See Information
Displays (page 82). If you have switched
automatic locking on, either use the interior
door unlock button or switch the ignition
off and use the key or remote control to
unlock the rear or sliding door.
Automatic Unlocking
You can switch this function on using the
information display. See
Information
Displays (page 82). If you have switched
this function on, the automatic unlocking
feature unlocks all doors within 10 minutes
of the end of a drive cycle, when the driver
door is opened and the ignition is off.
One-Stage Unlocking
You can switch on this function using the
information display. See
Information
Displays (page 82).
If you have switched on this function, you
unlock all doors including the rear doors
and the sliding door.
Note: When you unlock the doors, the
direction indicators flash once.
You unlock all of the doors when you:
• Press the unlock button on the remote
control once.
• Press the interior unlock button once.
Two-Stage Unlocking
Note: When you unlock the doors, the
direction indicators flash once.
You unlock the front doors when you:
• Press the unlock button on the remote
control once.
• Press the interior unlock button once. You unlock the front doors and cargo area
when you:
•
Press the unlock button on the remote
control once.
• Press the unlock button on the remote
control twice within three seconds.
Zone Re-Locking
(If Equipped)
If you enable zone re-locking and open one
door, all other doors remain locked. See an
authorized dealer for further information.
The locks on van, bus or wagon have two
zones, cabin and cargo. For van, the cargo
area includes the rear doors and the sliding
door. For bus or wagon, the cargo area
includes the rear doors.
• Exit your vehicle and press the lock
button.
• Press the unlock button or the cargo
area unlock button once to open the
respective zone.
If you now open a door within the unlocked
zone, the other doors in that zone
automatically lock.
Configurable Unlocking
Configurable unlocking is set when you
purchase your vehicle. It allows you to
select which doors unlock when you press,
once or twice, the unlock button or the
cargo area unlock button on your remote
control. You cannot switch this feature
back on if you had it switched off. See an
authorized dealer for further information.
60
Transit (TTH) Canada/United States of America, enUSA, First Printing Locks
Page 64 of 411
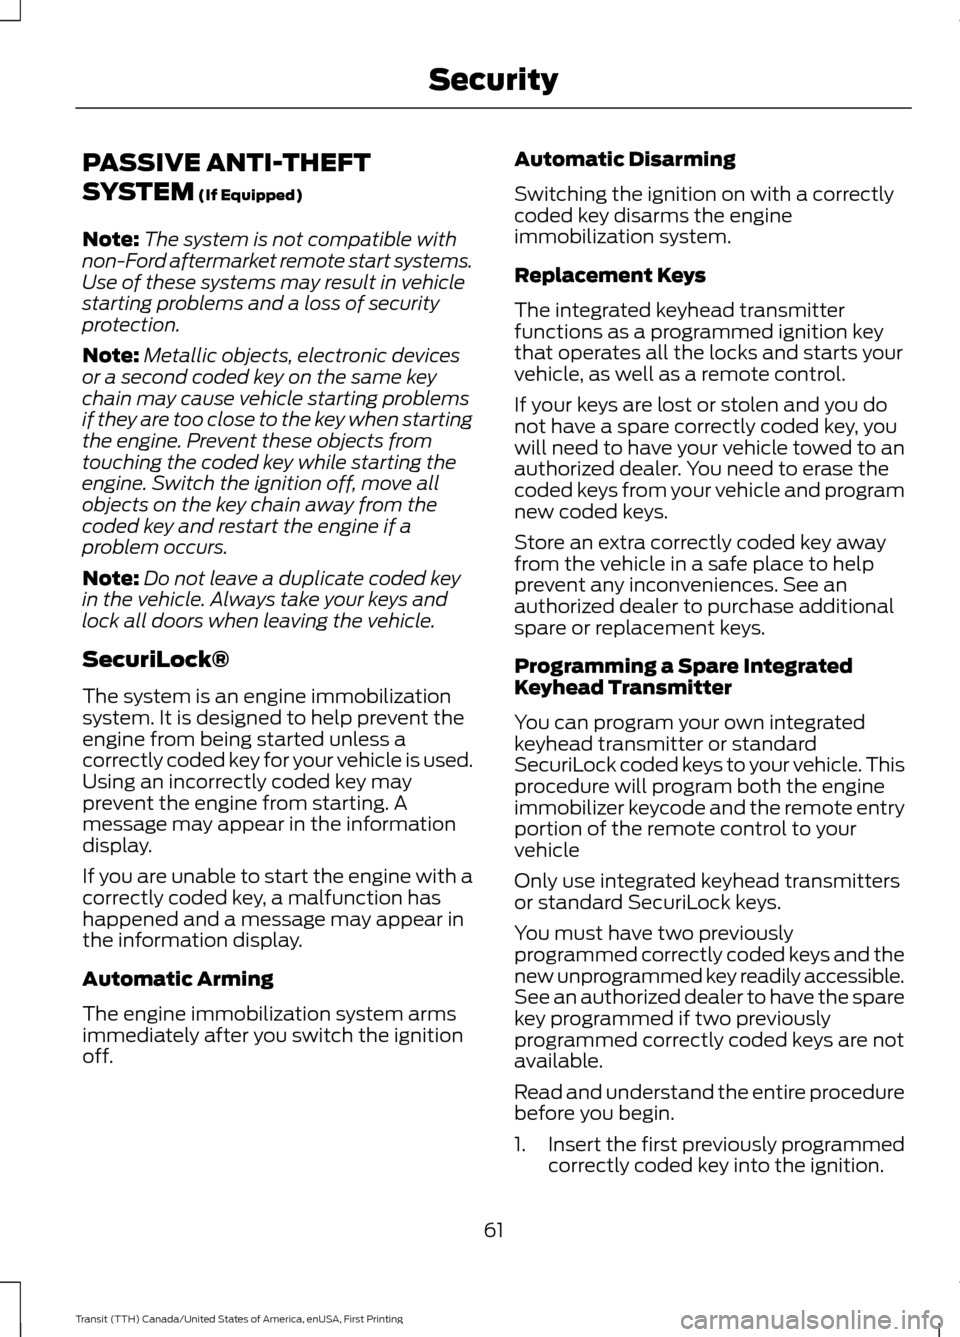
PASSIVE ANTI-THEFT
SYSTEM (If Equipped)
Note: The system is not compatible with
non-Ford aftermarket remote start systems.
Use of these systems may result in vehicle
starting problems and a loss of security
protection.
Note: Metallic objects, electronic devices
or a second coded key on the same key
chain may cause vehicle starting problems
if they are too close to the key when starting
the engine. Prevent these objects from
touching the coded key while starting the
engine. Switch the ignition off, move all
objects on the key chain away from the
coded key and restart the engine if a
problem occurs.
Note: Do not leave a duplicate coded key
in the vehicle. Always take your keys and
lock all doors when leaving the vehicle.
SecuriLock®
The system is an engine immobilization
system. It is designed to help prevent the
engine from being started unless a
correctly coded key for your vehicle is used.
Using an incorrectly coded key may
prevent the engine from starting. A
message may appear in the information
display.
If you are unable to start the engine with a
correctly coded key, a malfunction has
happened and a message may appear in
the information display.
Automatic Arming
The engine immobilization system arms
immediately after you switch the ignition
off. Automatic Disarming
Switching the ignition on with a correctly
coded key disarms the engine
immobilization system.
Replacement Keys
The integrated keyhead transmitter
functions as a programmed ignition key
that operates all the locks and starts your
vehicle, as well as a remote control.
If your keys are lost or stolen and you do
not have a spare correctly coded key, you
will need to have your vehicle towed to an
authorized dealer. You need to erase the
coded keys from your vehicle and program
new coded keys.
Store an extra correctly coded key away
from the vehicle in a safe place to help
prevent any inconveniences. See an
authorized dealer to purchase additional
spare or replacement keys.
Programming a Spare Integrated
Keyhead Transmitter
You can program your own integrated
keyhead transmitter or standard
SecuriLock coded keys to your vehicle. This
procedure will program both the engine
immobilizer keycode and the remote entry
portion of the remote control to your
vehicle
Only use integrated keyhead transmitters
or standard SecuriLock keys.
You must have two previously
programmed correctly coded keys and the
new unprogrammed key readily accessible.
See an authorized dealer to have the spare
key programmed if two previously
programmed correctly coded keys are not
available.
Read and understand the entire procedure
before you begin.
1.
Insert the first previously programmed
correctly coded key into the ignition.
61
Transit (TTH) Canada/United States of America, enUSA, First Printing Security
Page 68 of 411
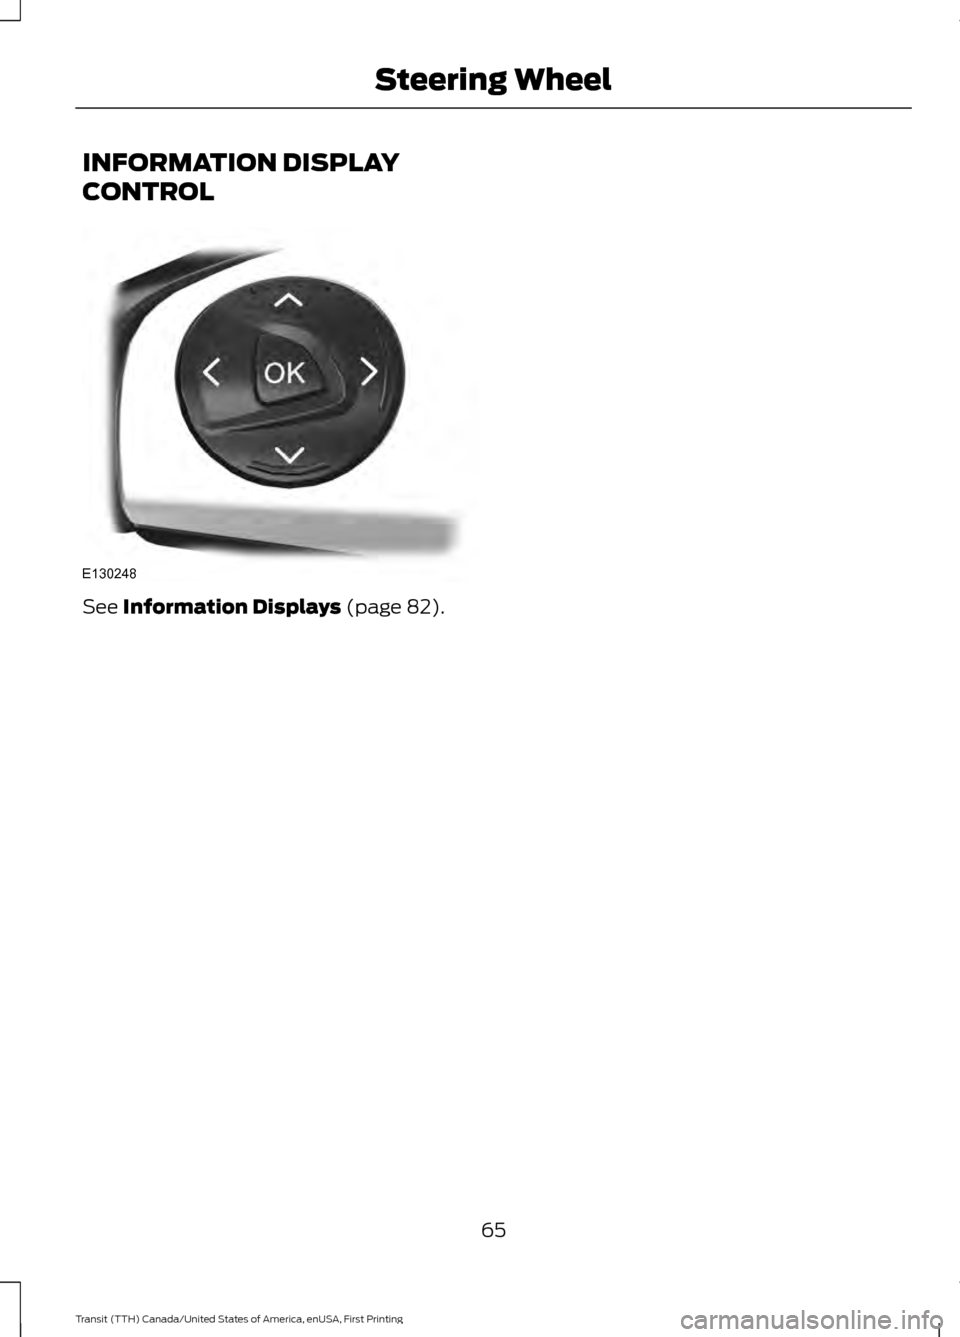
INFORMATION DISPLAY
CONTROL
See Information Displays (page 82).
65
Transit (TTH) Canada/United States of America, enUSA, First Printing Steering WheelE130248
Page 70 of 411
Note:
Wet or winter driving conditions with
ice, snow or salty road mist can cause
inconsistent and unexpected wiping or
smearing.
In these conditions, you can do the
following to help keep your windshield
clear:
• Lower the sensitivity of the autowipers
to reduce the amount of smearing.
• Switch to normal or high-speed wipe.
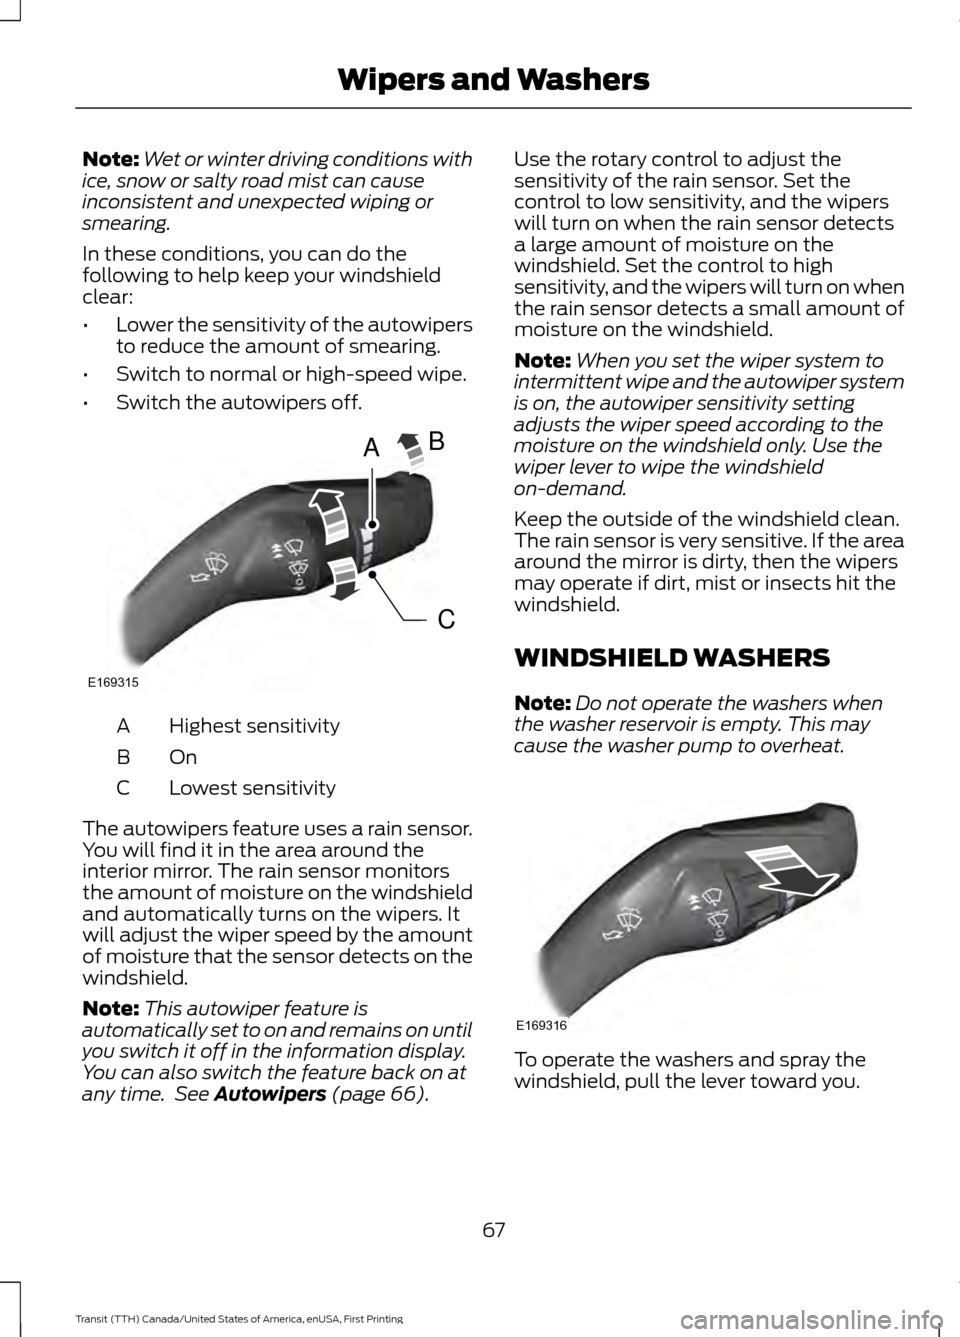
• Switch the autowipers off. Highest sensitivity
A
OnB
Lowest sensitivity
C
The autowipers feature uses a rain sensor.
You will find it in the area around the
interior mirror. The rain sensor monitors
the amount of moisture on the windshield
and automatically turns on the wipers. It
will adjust the wiper speed by the amount
of moisture that the sensor detects on the
windshield.
Note: This autowiper feature is
automatically set to on and remains on until
you switch it off in the information display.
You can also switch the feature back on at
any time. See Autowipers (page 66). Use the rotary control to adjust the
sensitivity of the rain sensor. Set the
control to low sensitivity, and the wipers
will turn on when the rain sensor detects
a large amount of moisture on the
windshield. Set the control to high
sensitivity, and the wipers will turn on when
the rain sensor detects a small amount of
moisture on the windshield.
Note:
When you set the wiper system to
intermittent wipe and the autowiper system
is on, the autowiper sensitivity setting
adjusts the wiper speed according to the
moisture on the windshield only. Use the
wiper lever to wipe the windshield
on-demand.
Keep the outside of the windshield clean.
The rain sensor is very sensitive. If the area
around the mirror is dirty, then the wipers
may operate if dirt, mist or insects hit the
windshield.
WINDSHIELD WASHERS
Note: Do not operate the washers when
the washer reservoir is empty. This may
cause the washer pump to overheat. To operate the washers and spray the
windshield, pull the lever toward you.
67
Transit (TTH) Canada/United States of America, enUSA, First Printing Wipers and WashersA
C
B
E169315 E169316