FORD TRANSIT 2018 Repair Manual
Manufacturer: FORD, Model Year: 2018, Model line: TRANSIT, Model: FORD TRANSIT 2018Pages: 521, PDF Size: 8.65 MB
Page 61 of 521
In the Event of a Crash
Not all crashes will deploy an airbag or
activate the fuel pump shut-off (the
triggers for 911 Assist). If a connected cell
phone sustains damage or loses its
connection to SYNC during a crash, SYNC
will search for and try to connect to a
previously paired cell phone; SYNC will
then attempt to call the emergency
services.
Before making the call:
•
SYNC provides a short window of time
(about 10 seconds) to cancel the call.
If you fail to cancel the call, SYNC
attempts to dial 911.
• SYNC says the following, or a similar
message: "SYNC will attempt to call
911, to cancel the call, press Cancel on
your screen or press and hold the
phone button on your steering wheel."
If you do not cancel the call, and SYNC
makes a successful call, a pre-recorded
message plays for the 911 operator, and
then the occupant(s) in your vehicle is able
to talk with the operator. Be prepared to
provide your name, phone number and
location immediately, because not all 911
systems are capable of receiving this
information electronically.
911 Assist May Not Work If
• Your cellular phone or 911 Assist
hardware sustains damage in a crash.
• The vehicle's battery or the SYNC
system has no power.
• The phone(s) thrown from your vehicle
are the ones paired and connected to
the system. 911 Assist Privacy Notice
When you switch on 911 Assist, it may
disclose to emergency services that your
vehicle has been in a crash involving the
deployment of an airbag or activation of
the fuel pump shut-off. Certain versions or
updates to 911 Assist may also be capable
of electronically or verbally disclosing to
911 operators your vehicle location or other
details about your vehicle or crash to assist
911 operators to provide the most
appropriate emergency services. If you do
not want to disclose this information, do
not switch the feature on.
58
2018 Transit (TTH) Canada/United States of America, JK3J 19A321 AA enUSA, Edition date: 201705, Third-Printing- Automatic Crash Notification System
Page 62 of 521
PRINCIPLE OF OPERATION
The remote control allows you to:
•
remotely lock or unlock the vehicle
doors
• unlock the doors without actively using
a key or remote control (intelligent
access only)
• remotely open the power liftgate (if
equipped)
• remotely start or stop the engine (if
equipped)
• arm and disarm the anti-theft system
• activate the panic alarm.
GENERAL INFORMATION ON
RADIO FREQUENCIES
This device complies with Part 15 of the
FCC Rules and with Licence exempt RSS
Standards of Industry Canada. Operation
is subject to the following two conditions:
• This device may not cause harmful
interference, and
• This device must accept any
interference received, including
interference that may cause undesired
operation. WARNING: Changes or
modifications not expressively approved
by the party responsible for compliance
could void the user's authority to operate
the equipment. The term "IC:" before the
radio certification number only signifies
that Industry Canada technical
specifications were met. The typical operating range for your
transmitter is approximately
33 ft (10 m).
Vehicles with the remote start feature will
have a greater range. One of the following
could cause a decrease in operating range:
• Weather conditions.
• Nearby radio towers.
• Structures around the vehicle.
• Other vehicles parked next to your
vehicle.
Other short distance radio transmissions,
for example amateur radios, medical
equipment, wireless headphones, remote
controls and alarm systems can also use
the radio frequency used by your remote
control. If the frequencies are jammed, you
will not be able to use your remote control.
You can lock and unlock the doors with the
key.
Note: Make sure to lock your vehicle before
leaving it unattended.
Note: If you are in range, the remote control
will operate if you press any button
unintentionally.
Note: The remote control contains sensitive
electrical components. Exposure to moisture
or impact may cause permanent damage.
59
2018 Transit (TTH) Canada/United States of America, JK3J 19A321 AA enUSA, Edition date: 201705, Third-Printing- Keys and Remote Controls
Page 63 of 521
REMOTE CONTROL - VEHICLES
WITHOUT: PASSIVE ANTI-
THEFT SYSTEM (PATS)
Integrated Keyhead Transmitter (If
Equipped)
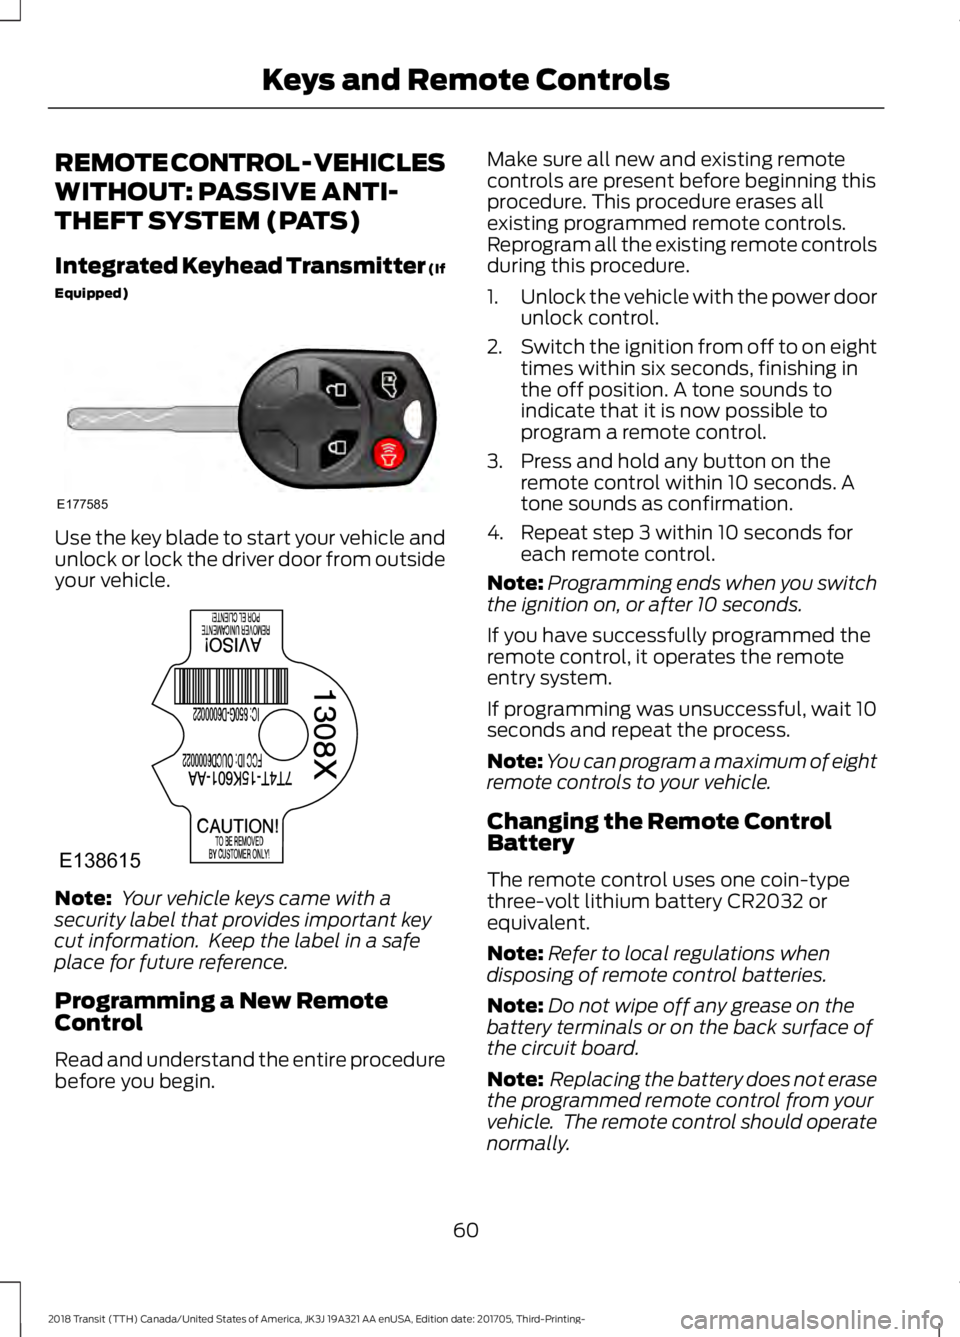
Use the key blade to start your vehicle and
unlock or lock the driver door from outside
your vehicle.
Note:
Your vehicle keys came with a
security label that provides important key
cut information. Keep the label in a safe
place for future reference.
Programming a New Remote
Control
Read and understand the entire procedure
before you begin. Make sure all new and existing remote
controls are present before beginning this
procedure. This procedure erases all
existing programmed remote controls.
Reprogram all the existing remote controls
during this procedure.
1.
Unlock the vehicle with the power door
unlock control.
2. Switch the ignition from off to on eight
times within six seconds, finishing in
the off position. A tone sounds to
indicate that it is now possible to
program a remote control.
3. Press and hold any button on the remote control within 10 seconds. A
tone sounds as confirmation.
4. Repeat step 3 within 10 seconds for each remote control.
Note: Programming ends when you switch
the ignition on, or after 10 seconds.
If you have successfully programmed the
remote control, it operates the remote
entry system.
If programming was unsuccessful, wait 10
seconds and repeat the process.
Note: You can program a maximum of eight
remote controls to your vehicle.
Changing the Remote Control
Battery
The remote control uses one coin-type
three-volt lithium battery CR2032 or
equivalent.
Note: Refer to local regulations when
disposing of remote control batteries.
Note: Do not wipe off any grease on the
battery terminals or on the back surface of
the circuit board.
Note: Replacing the battery does not erase
the programmed remote control from your
vehicle. The remote control should operate
normally.
60
2018 Transit (TTH) Canada/United States of America, JK3J 19A321 AA enUSA, Edition date: 201705, Third-Printing- Keys and Remote ControlsE177585 E138615
Page 64 of 521
Integrated Keyhead Transmitter
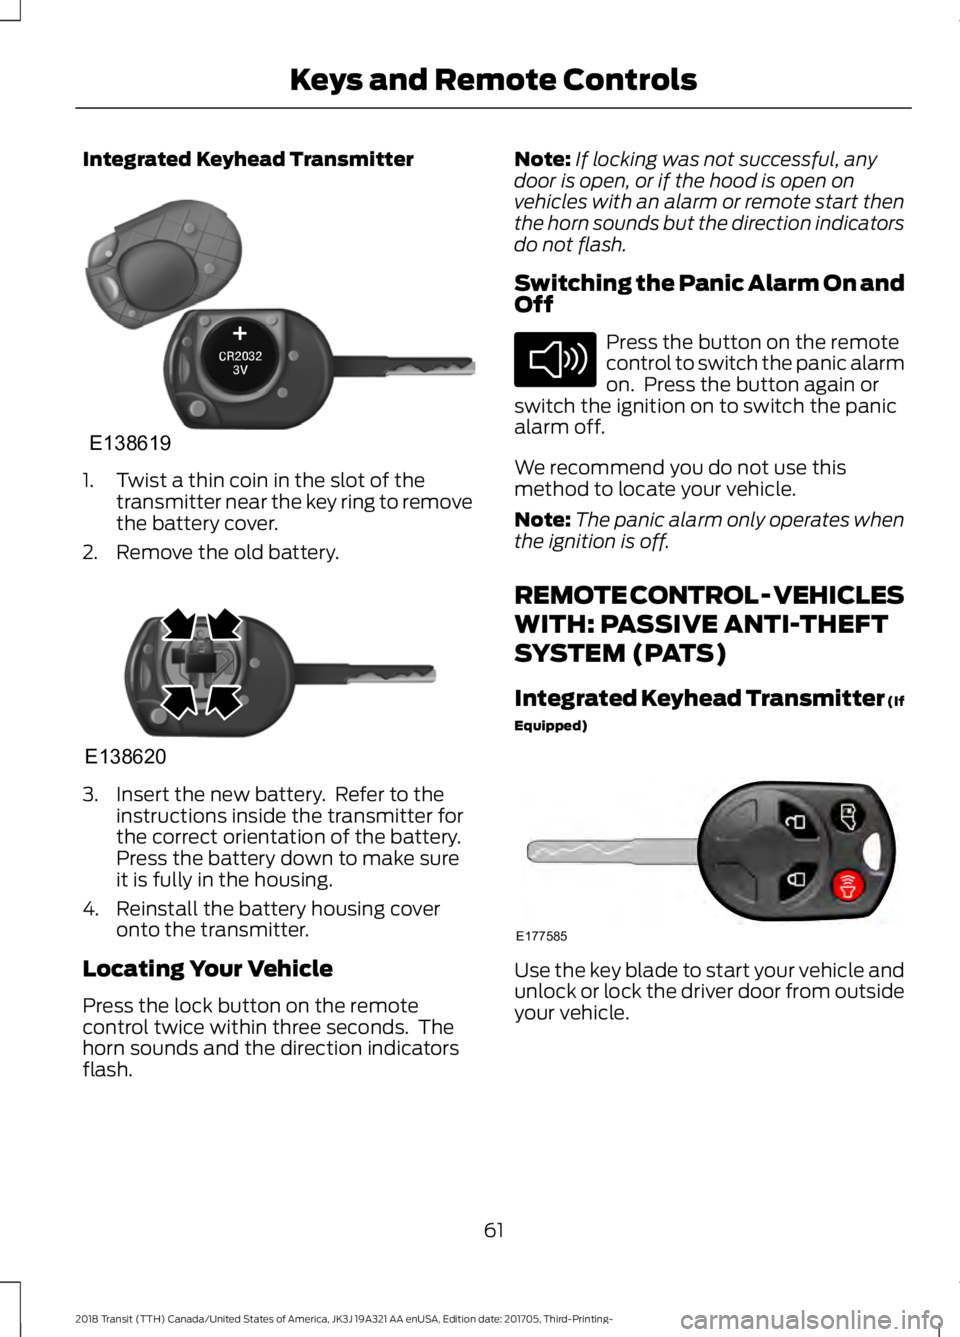
1. Twist a thin coin in the slot of the
transmitter near the key ring to remove
the battery cover.
2. Remove the old battery. 3. Insert the new battery. Refer to the
instructions inside the transmitter for
the correct orientation of the battery.
Press the battery down to make sure
it is fully in the housing.
4. Reinstall the battery housing cover onto the transmitter.
Locating Your Vehicle
Press the lock button on the remote
control twice within three seconds. The
horn sounds and the direction indicators
flash. Note:
If locking was not successful, any
door is open, or if the hood is open on
vehicles with an alarm or remote start then
the horn sounds but the direction indicators
do not flash.
Switching the Panic Alarm On and
Off Press the button on the remote
control to switch the panic alarm
on. Press the button again or
switch the ignition on to switch the panic
alarm off.
We recommend you do not use this
method to locate your vehicle.
Note: The panic alarm only operates when
the ignition is off.
REMOTE CONTROL - VEHICLES
WITH: PASSIVE ANTI-THEFT
SYSTEM (PATS)
Integrated Keyhead Transmitter (If
Equipped) Use the key blade to start your vehicle and
unlock or lock the driver door from outside
your vehicle.
61
2018 Transit (TTH) Canada/United States of America, JK3J 19A321 AA enUSA, Edition date: 201705, Third-Printing- Keys and Remote ControlsE138619 E138620 E138624 E177585
Page 65 of 521
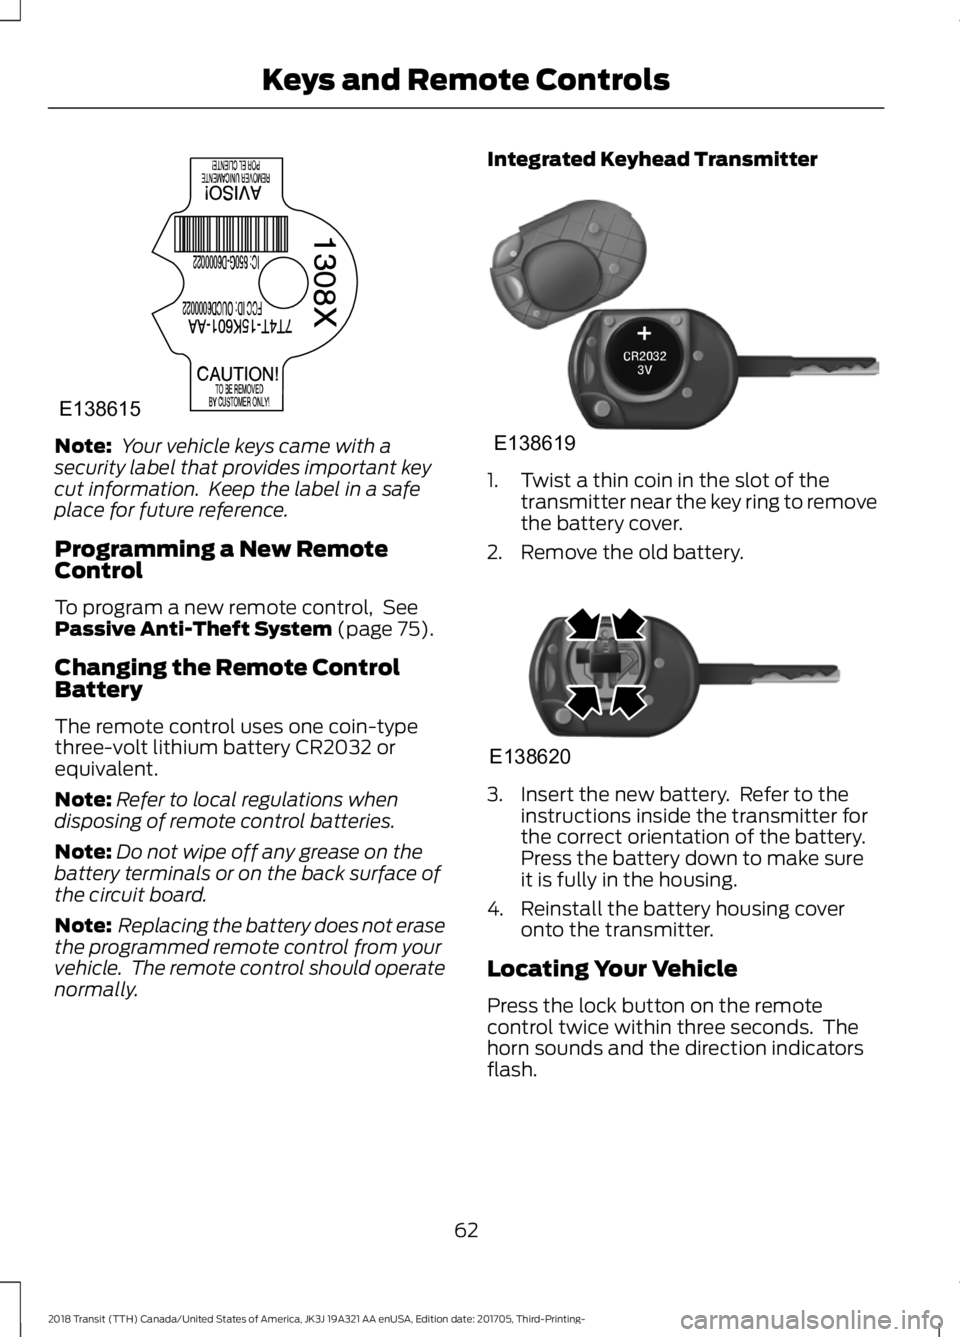
Note:
Your vehicle keys came with a
security label that provides important key
cut information. Keep the label in a safe
place for future reference.
Programming a New Remote
Control
To program a new remote control, See
Passive Anti-Theft System (page 75).
Changing the Remote Control
Battery
The remote control uses one coin-type
three-volt lithium battery CR2032 or
equivalent.
Note: Refer to local regulations when
disposing of remote control batteries.
Note: Do not wipe off any grease on the
battery terminals or on the back surface of
the circuit board.
Note: Replacing the battery does not erase
the programmed remote control from your
vehicle. The remote control should operate
normally. Integrated Keyhead Transmitter
1. Twist a thin coin in the slot of the
transmitter near the key ring to remove
the battery cover.
2. Remove the old battery. 3. Insert the new battery. Refer to the
instructions inside the transmitter for
the correct orientation of the battery.
Press the battery down to make sure
it is fully in the housing.
4. Reinstall the battery housing cover onto the transmitter.
Locating Your Vehicle
Press the lock button on the remote
control twice within three seconds. The
horn sounds and the direction indicators
flash.
62
2018 Transit (TTH) Canada/United States of America, JK3J 19A321 AA enUSA, Edition date: 201705, Third-Printing- Keys and Remote ControlsE138615 E138619 E138620
Page 66 of 521
Note:
If locking was not successful, any
door is open, or if the hood is open on
vehicles with an alarm or remote start then
the horn sounds but the direction indicators
do not flash.
Switching the Panic Alarm On and
Off Press the button on the remote
control to switch the panic alarm
on. Press the button again or
switch the ignition on to switch the panic
alarm off.
We recommend you do not use this
method to locate your vehicle.
Note: The panic alarm only operates when
the ignition is off.
REPLACING A LOST KEY OR
REMOTE CONTROL
You can purchase replacement keys or
remote controls from an authorized dealer.
Authorized dealers can program remote
controls for your vehicle. See Remote
Control (page 61).
To re-program the passive anti-theft
system see an authorized dealer.
63
2018 Transit (TTH) Canada/United States of America, JK3J 19A321 AA enUSA, Edition date: 201705, Third-Printing- Keys and Remote ControlsE138624
Page 67 of 521
PRINCIPLE OF OPERATION
MyKey allows you to program keys with
restricted driving modes to promote good
driving habits. You can only program up to
two keys with the restrictions. Any keys
that you did not program are administrator
keys or admin keys.
You can use admin keys to:
•
Create a MyKey with certain vehicle
restrictions.
• Program certain MyKey settings.
• Clear all MyKey restrictions.
After you program a MyKey, you can view
the following information through the
information display:
• The total number of admin keys and
MyKeys for your vehicle.
• The total distance a MyKey driver
traveled with your vehicle.
Note: Every MyKey receives the same
restrictions and settings. You cannot
program them individually.
Note: For vehicles equipped with a
push-button start switch: When both a
MyKey and an admin key are present when
you start your vehicle, the system recognizes
the admin key only. Standard Settings
Not every vehicle includes the features
listed below. If your vehicle has this
equipment, then you cannot change the
following settings when using a MyKey:
•
Seatbelt reminder or Belt-Minder™.
MyKey mutes the audio system until
drivers, and in some instances,
passengers, fasten their seatbelts.
Note: If your vehicle includes an
AM/FM radio or a very basic audio
system, then the radio may not mute.
• Earlier low-fuel warning. The low-fuel
warning activates earlier for MyKey
drivers, giving them more time to refuel.
• Certain driver alerts, stability systems
or parking aids turn on automatically
when you use the MyKey system. For
example, Blind Spot Information
System (BLIS), cross traffic alert, lane
departure warning or forward collision
warning. Note:
MyKey drivers may be
able to turn the lane departure warning
feature off, but this feature turns back
on automatically with every new key
cycle.
• Restricted touchscreen operation in
some markets. For example, MyKey
may prevent manual navigation
destination input while the vehicle is in
any gear other than park (P) or when
the vehicle reaches a certain rate of
speed.
• Satellite radio adult content
restrictions, if this feature is available
in your market.
Optional Settings
You can configure certain vehicle feature
settings when you first create a MyKey. You
can also change the settings afterward
with an admin key.
64
2018 Transit (TTH) Canada/United States of America, JK3J 19A321 AA enUSA, Edition date: 201705, Third-Printing- MyKey
™
(If Equipped)
Page 68 of 521
Note:
Not every feature applies to every
vehicle in every market. When they are
available for your vehicle, then they appear
in your information display, providing
choices to switch them on or off, or to select
a more specific setting.
• Various vehicle speed limits so the
MyKey driver cannot exceed certain
speeds. The information display shows
warnings followed by an audible tone
when the MyKey driver reaches the set
speed. You cannot override the set
speed by fully depressing the
accelerator pedal. WARNING: Do not set MyKey
maximum speed limit to a limit that will
prevent the driver from maintaining a safe
speed considering posted speed limits and
prevailing road conditions. The driver is
always responsible to drive in accordance
with local laws and prevailing conditions.
Failure to do so could result in accident or
injury. •
Various vehicle speed reminders so
MyKey drivers know when their vehicle
speed approaches the limits. Warnings
appear in your information display and
a tone sounds when the MyKey drivers
exceed the set vehicle speed.
• The audio system's maximum volume
limits to 45% so MyKey drivers can
concentrate on the road. A message
appears in the information display
when MyKey drivers attempt to exceed
the limited volume. MyKey also
disables the automatic volume control.
Note:
If your vehicle includes an
AM/FM radio or a very basic audio
system, then the radio may not limit.
• Always on setting. This setting forces
certain features to remain on and
active for MyKey drivers. For example,
E911 or emergency assistance and the
do not disturb features stay on even if
a MyKey driver uses the feature's
control to switch it off. When you
select, you will not be able to turn off
Advance Trac or traction control (if
your vehicle has this feature).
CREATING A MYKEY
Use the information display to create a
MyKey:
1. Insert the key you want to program into
the ignition. See Starting a Gasoline
Engine
(page 127). If your vehicle is
equipped with a push-button start,
place the remote control into the
backup slot. See Starting a Gasoline
Engine
(page 127).
2. Switch the ignition on.
65
2018 Transit (TTH) Canada/United States of America, JK3J 19A321 AA enUSA, Edition date: 201705, Third-Printing- MyKey
™
(If Equipped)
Page 69 of 521
3. Access the main menu in the
information display and then scroll
through the menus to change the
settings of your MyKey. From the
MyKey menu select the option Create
MyKey. See Information Displays
(page 99).
4. When prompted, hold the
OK button
until you see a message informing you
to label this key as a MyKey. The
programmed restrictions apply when
you key off, open and close the driver
door and restart your vehicle with the
programmed key or transmitter.
MyKey is successfully created. Make sure
you label it so you can distinguish it from
the admin keys.
You can also program configurable
settings for the key(s). See
Programming/Changing Configurable
Settings
.
Programming/Changing
Configurable Settings
Use the information display to access your
configurable MyKey settings.
1. Switch the ignition on using the key or the transmitter you want to program.
2. Access the main menu in the information display and then scroll
through the menus to change the
settings of your MyKey. See
Information Displays
(page 99).
3. Follow the instructions in the display. Note:
You can clear or change your MyKey
settings at any time during the same key
cycle as you created the MyKey. Once you
have switched the vehicle off, however, you
will need an admin key to change or clear
your MyKey settings.
CLEARING ALL MYKEYS
When you clear your MyKeys, you remove
all restrictions and return all MyKeys to
their original admin key status at once. To
clear all MyKeys of all MyKey settings, use
the information display.
1. Switch the ignition on using an admin key.
2. Access the main menu in the information display and then scroll
through the menus to begin clearing
your MyKey programming. See
Information Displays
(page 99).
3. Follow the instructions in the display.
4. A confirmation message appears in the
display after you finish clearing your
MyKeys.
Note: When you clear your MyKeys, you
remove all restrictions and return all MyKeys
to their original admin key status. You
cannot remove the MyKey restrictions
individually.
CHECKING MYKEY SYSTEM
STATUS
You can find information on programmed
MyKey(s) using the information display
control on the steering wheel. See
Information Displays
(page 99).
66
2018 Transit (TTH) Canada/United States of America, JK3J 19A321 AA enUSA, Edition date: 201705, Third-Printing- MyKey
™
(If Equipped)
Page 70 of 521
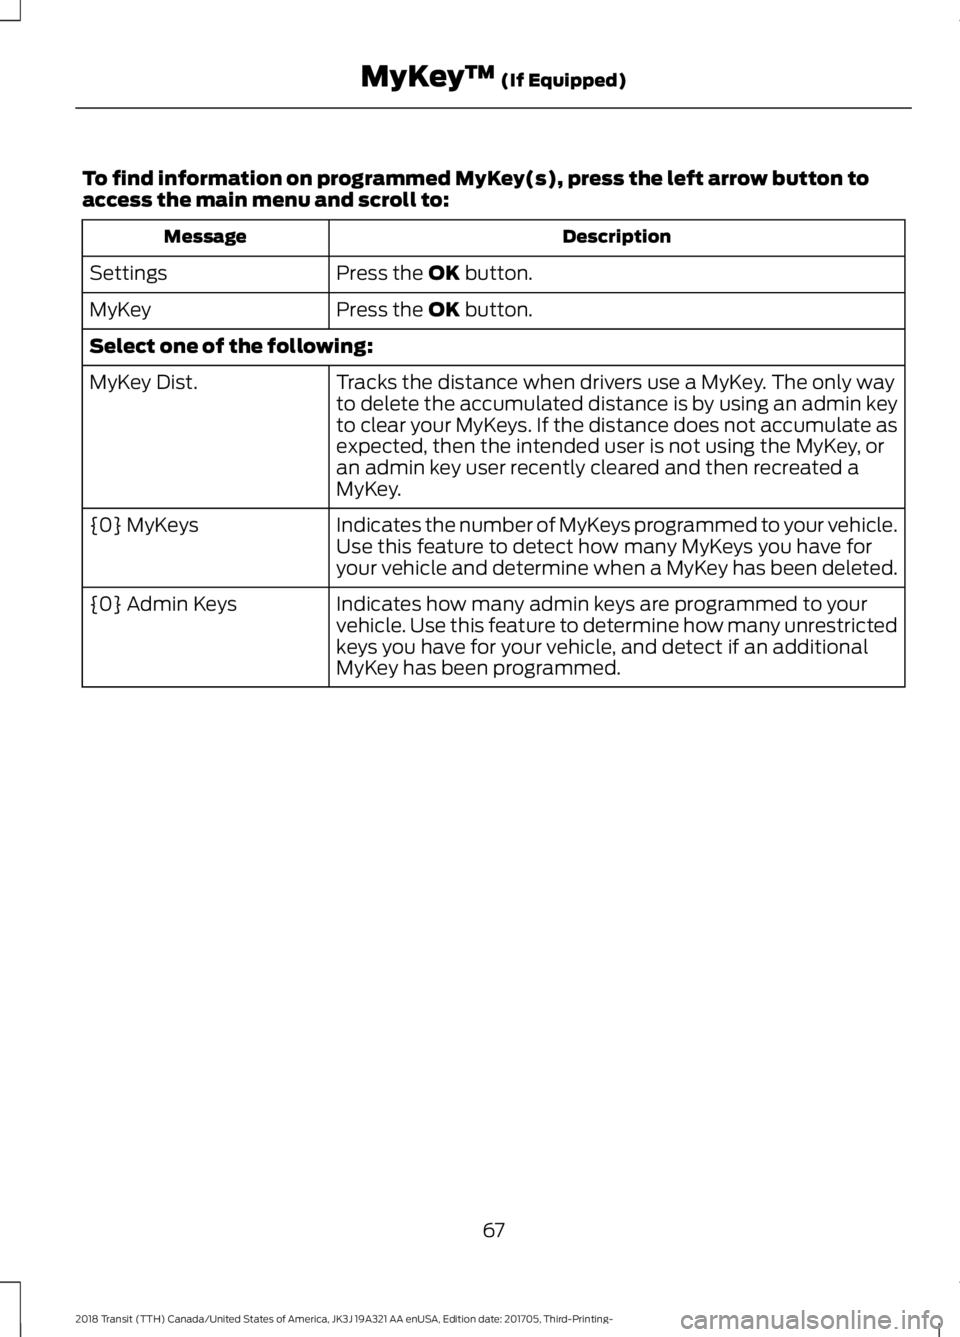
To find information on programmed MyKey(s), press the left arrow button to
access the main menu and scroll to:
Description
Message
Press the OK button.
Settings
Press the
OK button.
MyKey
Select one of the following:
Tracks the distance when drivers use a MyKey. The only way
to delete the accumulated distance is by using an admin key
to clear your MyKeys. If the distance does not accumulate as
expected, then the intended user is not using the MyKey, or
an admin key user recently cleared and then recreated a
MyKey.
MyKey Dist.
Indicates the number of MyKeys programmed to your vehicle.
Use this feature to detect how many MyKeys you have for
your vehicle and determine when a MyKey has been deleted.
{0} MyKeys
Indicates how many admin keys are programmed to your
vehicle. Use this feature to determine how many unrestricted
keys you have for your vehicle, and detect if an additional
MyKey has been programmed.
{0} Admin Keys
67
2018 Transit (TTH) Canada/United States of America, JK3J 19A321 AA enUSA, Edition date: 201705, Third-Printing- MyKey
™
(If Equipped)