remote start FORD TRANSIT CONNECT 2020 Owners Manual
[x] Cancel search | Manufacturer: FORD, Model Year: 2020, Model line: TRANSIT CONNECT, Model: FORD TRANSIT CONNECT 2020Pages: 509, PDF Size: 7.73 MB
Page 5 of 509
Introduction
About This Manual
..........................................7
Symbols Glossary ............................................
7
Data Recording .................................................
9
Perchlorate .......................................................
13
Ford Credit ........................................................
13
Replacement Parts Recommendation ........................................................................\
...
14
Special Notices ...............................................
14
Mobile Communications Equipment ........................................................................\
....
15
Export Unique Options ................................
16
Environment
Protecting the Environment .......................
17
At a Glance
Instrument Panel - RHD ..............................
18
Instrument Panel - LHD ...............................
19
Child Safety
General Information ......................................
21
Installing Child Restraints ..........................
23
Booster Seats .................................................
30
Child Restraint Positioning ........................
32
Child Safety Locks .........................................
33
Seatbelts
Principle of Operation .................................
35
Fastening the Seatbelts .............................
36
Seatbelt Height Adjustment .....................
38
Seatbelt Warning Lamp and Indicator Chime ............................................................
38
Seatbelt Reminder .......................................
39
Child Restraint and Seatbelt Maintenance ................................................
41
Seatbelt Extension ........................................
41
Personal Safety System ™
Personal Safety System ™.........................
42 Supplementary Restraints
System
Principle of Operation .................................
43
Driver and Passenger Airbags ..................
44
Front Passenger Sensing System ...........
45
Side Airbags ....................................................
48
Driver Knee Airbag ........................................
49
Safety Canopy ™...........................................
49
Crash Sensors and Airbag Indicator ......
50
Airbag Disposal ...............................................
51
911 Assist
About 911 Assist .............................................
52
Emergency Call Requirements .................
52
Emergency Call Limitations ......................
53
Keys and Remote Controls
General Information on Radio Frequencies .................................................
54
Remote Control - Vehicles With: Keyless Entry and Push Button Start ................
54
Remote Control - Vehicles With: Remote Flip Key ..........................................................
57
Replacing a Lost Key or Remote Control ........................................................................\
..
58
Passive Key Backup Position ....................
58
MyKey ™
Principle of Operation .................................
59
MyKey Settings ..............................................
59
Creating a MyKey - Vehicles Without: Push Button Start ....................................
60
Creating a MyKey - Vehicles With: Push Button Start ................................................
60
Programming a MyKey .................................
61
Clearing All MyKeys ......................................
63
Checking MyKey System Status ..............
63
Using MyKey With Remote Start Systems ........................................................
64
MyKey – Troubleshooting - Vehicles Without: Push Button Start ..................
64
1
2020 Transit Connect (CHC) Canada/United States of America, CG3739en enUSA, Edition date: 201903, First-Printing Table of Contents
Page 58 of 509
GENERAL INFORMATION ON
RADIO FREQUENCIES
This device complies with Part 15 of the
FCC Rules and with Licence exempt RSS
Standards of Industry Canada. Operation
is subject to the following two conditions:
•
This device may not cause harmful
interference, and
• This device must accept any
interference received, including
interference that may cause undesired
operation. WARNING: Changes or
modifications not expressively approved
by the party responsible for compliance
could void the user's authority to operate
the equipment. The term "IC:" before the
radio certification number only signifies
that Industry Canada technical
specifications were met.
The typical operating range for your
transmitter is approximately
33 ft (10 m).
Vehicles with the remote start feature will
have a greater range. One of the following
could cause a decrease in operating range:
• Weather conditions.
• Nearby radio towers.
• Structures around the vehicle.
• Other vehicles parked next to your
vehicle.
Other short distance radio transmissions,
for example amateur radios, medical
equipment, wireless headphones, remote
controls and alarm systems can also use
the radio frequency used by your remote
control. If the frequencies are jammed, you
will not be able to use your remote control.
You can lock and unlock the doors with the
key. Note:
Make sure to lock your vehicle before
leaving it unattended.
Note: If you are in range, the remote control
will operate if you press any button
unintentionally.
Note: The remote control contains sensitive
electrical components. Exposure to moisture
or impact may cause permanent damage.
REMOTE CONTROL - VEHICLES
WITH: KEYLESS ENTRY AND
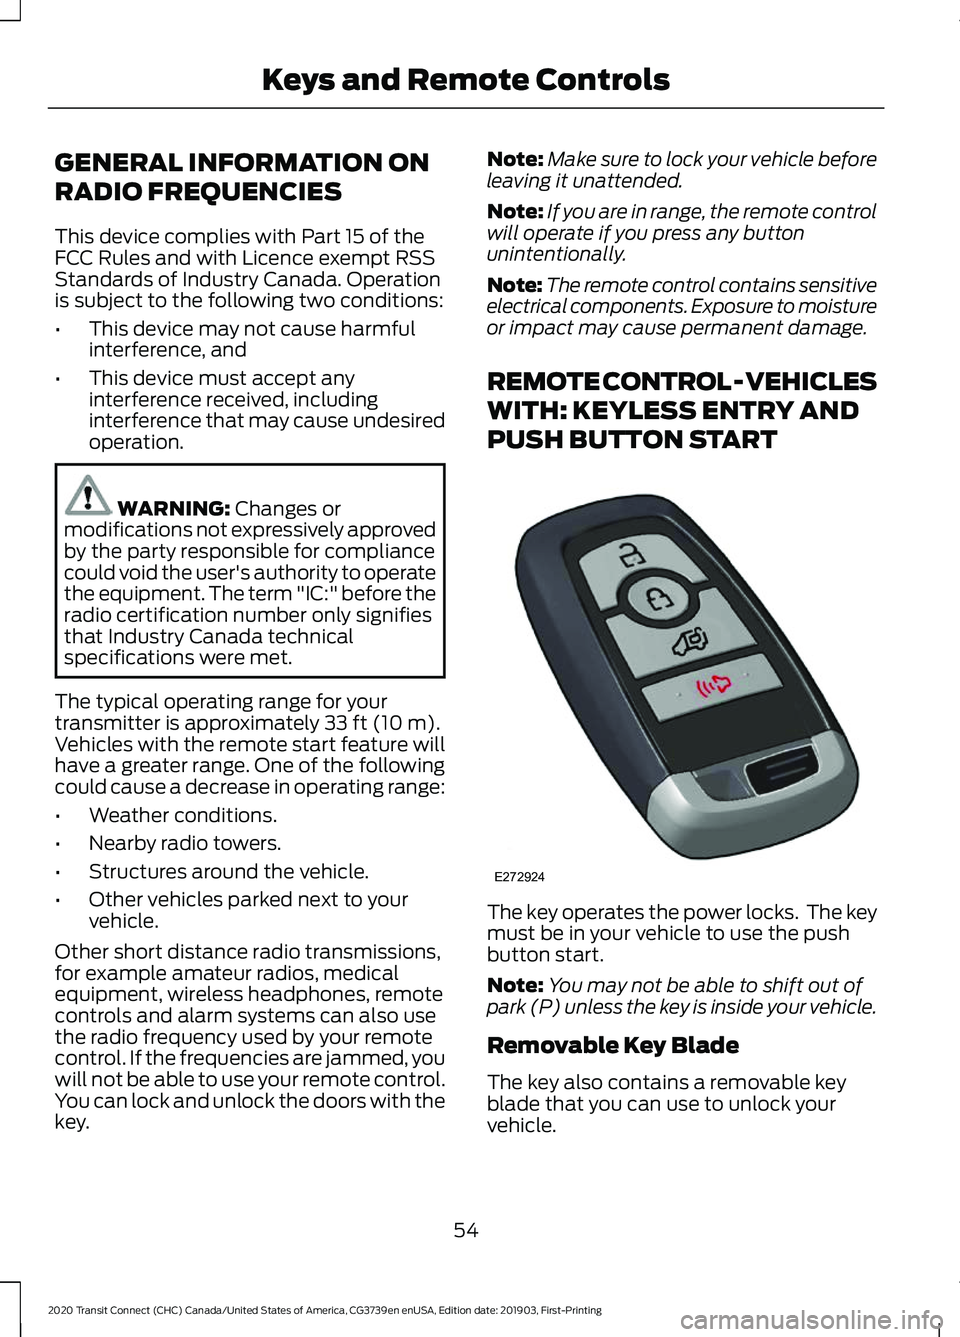
PUSH BUTTON START The key operates the power locks. The key
must be in your vehicle to use the push
button start.
Note:
You may not be able to shift out of
park (P) unless the key is inside your vehicle.
Removable Key Blade
The key also contains a removable key
blade that you can use to unlock your
vehicle.
54
2020 Transit Connect (CHC) Canada/United States of America, CG3739en enUSA, Edition date: 201903, First-Printing Keys and Remote ControlsE272924
Page 61 of 509
REMOTE CONTROL - VEHICLES
WITH: REMOTE FLIP KEY
Use the key blade to start your vehicle and
unlock or lock the driver door from outside
your vehicle. The buttons on the key
operate the remote control function.
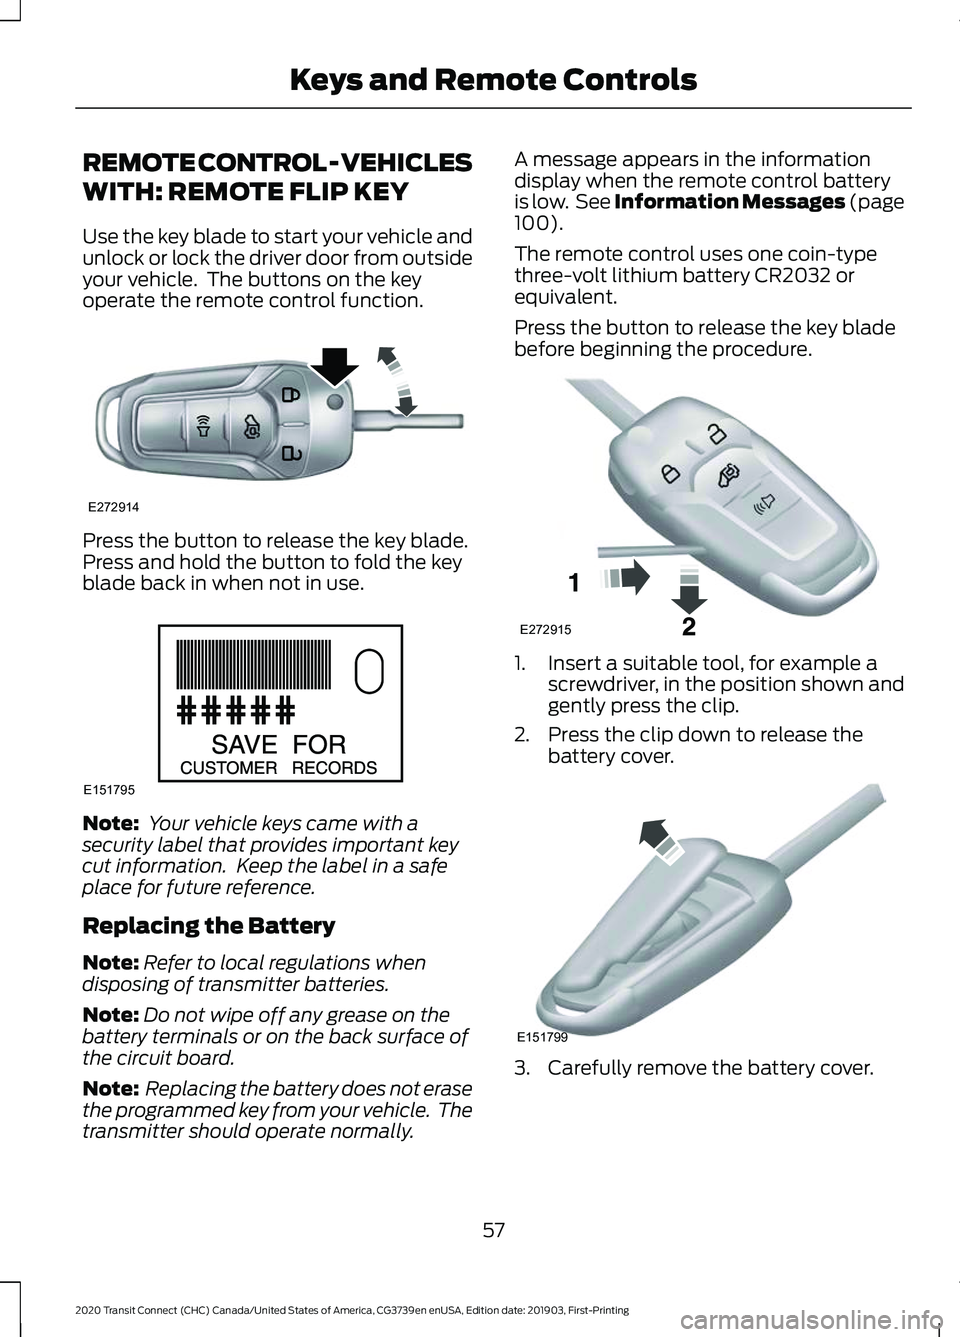
Press the button to release the key blade.
Press and hold the button to fold the key
blade back in when not in use.
Note:
Your vehicle keys came with a
security label that provides important key
cut information. Keep the label in a safe
place for future reference.
Replacing the Battery
Note: Refer to local regulations when
disposing of transmitter batteries.
Note: Do not wipe off any grease on the
battery terminals or on the back surface of
the circuit board.
Note: Replacing the battery does not erase
the programmed key from your vehicle. The
transmitter should operate normally. A message appears in the information
display when the remote control battery
is low. See Information Messages (page
100).
The remote control uses one coin-type
three-volt lithium battery CR2032 or
equivalent.
Press the button to release the key blade
before beginning the procedure. 1. Insert a suitable tool, for example a
screwdriver, in the position shown and
gently press the clip.
2. Press the clip down to release the battery cover. 3. Carefully remove the battery cover.
57
2020 Transit Connect (CHC) Canada/United States of America, CG3739en enUSA, Edition date: 201903, First-Printing Keys and Remote ControlsE272914 E151795 E272915 E151799
Page 68 of 509
USING MYKEY WITH REMOTE
START SYSTEMS
The system is not compatible with
non-Ford remote start systems.
MYKEY – TROUBLESHOOTING
- VEHICLES WITHOUT: PUSH
BUTTON START
What is an admin key?
•
An admin key is a key that has not been
created as a MyKey. See Creating a
MyKey (page 60).
Why can I not create a MyKey?
• The key used to switch the ignition on
is not an admin key.
• The key used to switch the ignition on
is the only admin key. There always has
to be at least one admin key.
Why can I not program a MyKey?
• The key used to switch the ignition on
is not an admin key.
• No MyKeys are created. See Creating
a MyKey
(page 60).
Why can I not clear the MyKeys?
• The key used to switch the ignition on
is not an admin key.
• No MyKeys are created. See Creating
a MyKey
(page 60).
Why does the MyKey distance not
accumulate?
• The key used to start the engine is an
admin key.
• No MyKeys are created. See Creating
a MyKey
(page 60).
• The MyKeys have been cleared. MYKEY – TROUBLESHOOTING
- VEHICLES WITH: PUSH
BUTTON START
What is an admin key?
•
An admin key is a key that has not been
created as a MyKey. See
Creating a
MyKey (page 60).
Why can I not create a MyKey?
• The admin key is not placed in the
backup position. See
Passive Key
Backup Position (page 58).
• The key used to switch the ignition on
is not an admin key.
• The key used to switch the ignition on
is the only admin key. There always has
to be at least one admin key.
• The last MyKey was created without
switching the ignition off.
Why can I not program a MyKey?
• The admin key is not inside your
vehicle.
• The key used to switch the ignition on
is not an admin key.
• No MyKeys are created. See Creating
a MyKey
(page 60).
Why can I not clear the MyKeys?
• The admin key is not inside your
vehicle.
• The key used to switch the ignition on
is not an admin key.
• No MyKeys are created. See Creating
a MyKey
(page 60).
64
2020 Transit Connect (CHC) Canada/United States of America, CG3739en enUSA, Edition date: 201903, First-Printing MyKey
™
Page 70 of 509
LOCKING AND UNLOCKING
Remote Control
You can use the remote control at any
time.
Unlocking the Doors
The position lamps illuminate when you
unlock the doors. When you switch the
ignition on, they automatically turn off.
Note:
You can unlock the driver door with
the key. Use the key when the remote
control is not functioning.
Note: When you leave your vehicle
unattended for several weeks, the remote
control turns off. Your vehicle must be
unlocked and the engine started using the
key. Unlocking and starting your vehicle
once enables the remote control.
One-Stage Unlocking Press the button to unlock all
doors. The direction indicators
will flash.
Two-Stage Unlocking Press the button to unlock the
front doors. Press the button
again within three seconds to
unlock all doors. The direction indicators
will flash.
Reprogramming the Unlocking
Function
When you press the unlock button only the
driver and passenger doors unlock.
Pressing the unlock button again unlocks
all doors.
You can reprogram the unlocking function
so that all doors unlock when you press
the unlock button once.
1. Switch the ignition off. 2. Press and hold both the lock and
unlock buttons on the remote control
until the direction indicators flash twice
to confirm the change.
To return to the original unlocking function,
repeat the process.
Locking the Doors Press the button to lock all
doors. The direction indicators
will flash.
Press the button again within three
seconds to confirm that all the doors are
closed. The doors will lock again, the horn
will sound and the direction indicators will
flash if all the doors and the liftgate are
closed.
Note: If any door or the liftgate is open, or
if the hood is open on vehicles with an
anti-theft alarm or remote start, the horn
does not sound.
Locking and Unlocking the Doors
From Inside
The power door lock control is on the driver
and front passenger door panels. Press the button to lock or
unlock all the doors. The lamp
illuminates with the doors
locked.
Opening the Double Rear Doors
Note: If there is a ladder fitted to the rear
cargo door, do not open the door fully if the
side-loading door is open.
66
2020 Transit Connect (CHC) Canada/United States of America, CG3739en enUSA, Edition date: 201903, First-Printing Doors and Locks E102566
Page 75 of 509
For vehicles with double locking, touch a
locking sensor twice within three seconds
to double lock your vehicle and arm the
alarm.
Note:
When locking your vehicle, do not
grip the door handle.
Note: Your vehicle remains locked for
approximately one second. When the delay
period is over, you can open the doors again,
provided the passive key is within the
respective detection range.
Note: Your vehicle does not automatically
lock. If you do not touch a locking sensor
your vehicle remains unlocked.
Two short flashes of the direction
indicators confirms that all the doors and
the liftgate have been locked and that the
alarm has been armed.
At the Liftgate
The liftgate cannot be closed and will
reopen if the passive key is located inside
the luggage compartment with the doors
locked.
Note: If a second valid passive key is
located within the liftgate detection range,
the liftgate can be closed.
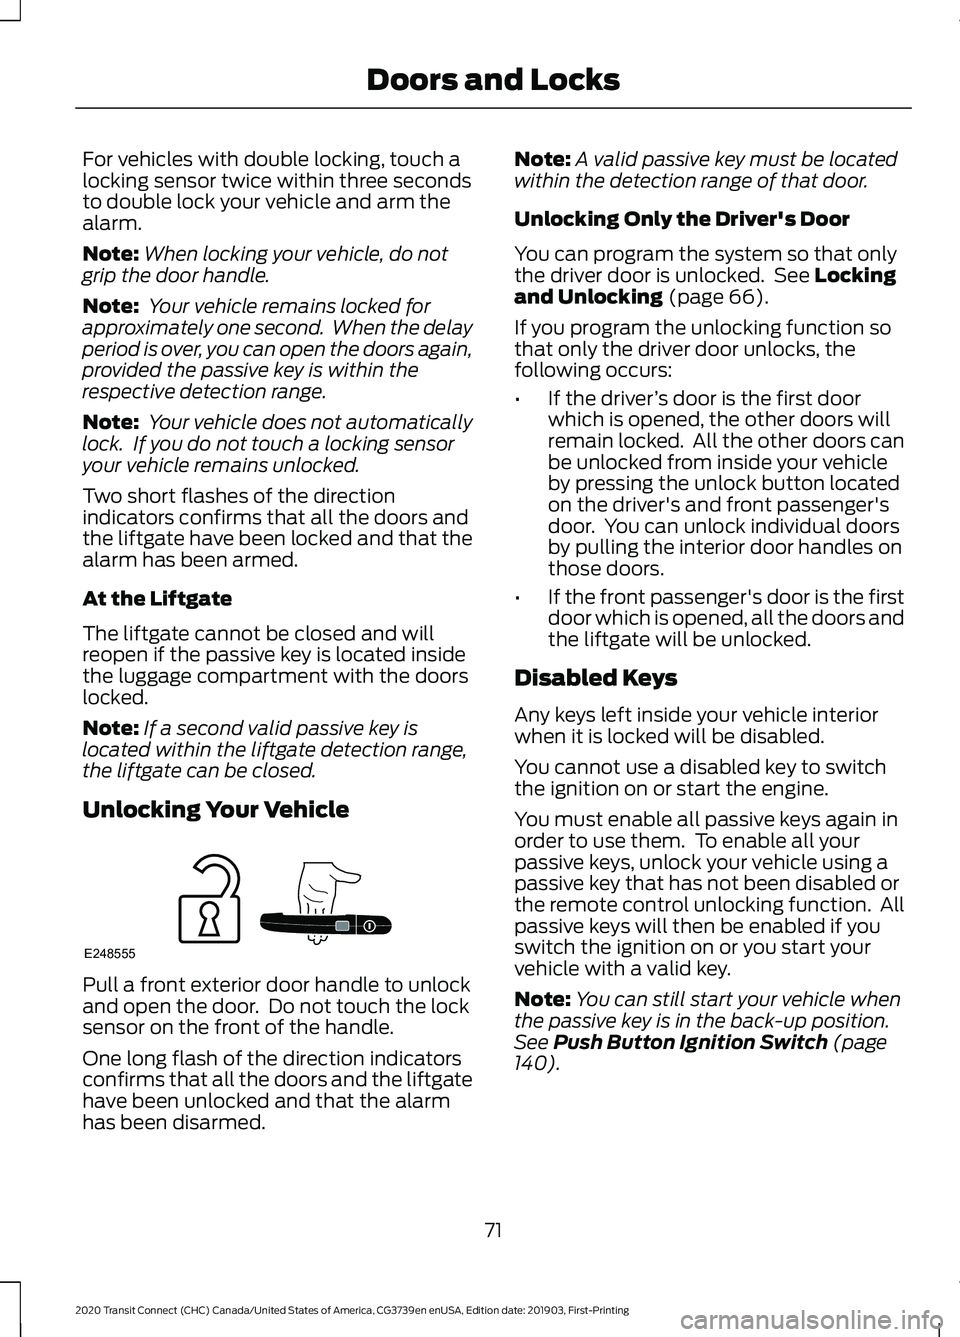
Unlocking Your Vehicle Pull a front exterior door handle to unlock
and open the door. Do not touch the lock
sensor on the front of the handle.
One long flash of the direction indicators
confirms that all the doors and the liftgate
have been unlocked and that the alarm
has been disarmed. Note:
A valid passive key must be located
within the detection range of that door.
Unlocking Only the Driver's Door
You can program the system so that only
the driver door is unlocked. See Locking
and Unlocking (page 66).
If you program the unlocking function so
that only the driver door unlocks, the
following occurs:
• If the driver ’s door is the first door
which is opened, the other doors will
remain locked. All the other doors can
be unlocked from inside your vehicle
by pressing the unlock button located
on the driver's and front passenger's
door. You can unlock individual doors
by pulling the interior door handles on
those doors.
• If the front passenger's door is the first
door which is opened, all the doors and
the liftgate will be unlocked.
Disabled Keys
Any keys left inside your vehicle interior
when it is locked will be disabled.
You cannot use a disabled key to switch
the ignition on or start the engine.
You must enable all passive keys again in
order to use them. To enable all your
passive keys, unlock your vehicle using a
passive key that has not been disabled or
the remote control unlocking function. All
passive keys will then be enabled if you
switch the ignition on or you start your
vehicle with a valid key.
Note: You can still start your vehicle when
the passive key is in the back-up position.
See
Push Button Ignition Switch (page
140).
71
2020 Transit Connect (CHC) Canada/United States of America, CG3739en enUSA, Edition date: 201903, First-Printing Doors and LocksE248555
Page 78 of 509
PASSIVE ANTI-THEFT
SYSTEM
Note:
The system is not compatible with
non-Ford aftermarket remote start systems.
Use of these systems may result in vehicle
starting problems and a loss of security
protection.
Note: Metallic objects, electronic devices
or a second programmed key on the same
key chain may cause vehicle starting
problems if they are too close to the key
when starting the engine. Prevent these
objects from touching the programmed key
while starting the engine. Switch the ignition
off, move all objects on the key chain away
from the programmed key and restart the
engine if a problem occurs.
Note: Do not leave a duplicate
programmed key in your vehicle. Always
take your keys and lock all doors when
leaving your vehicle.
SecuriLock®
The system is an engine immobilization
system. It is designed to help prevent the
engine from being started unless a
programmed key for your vehicle is used.
Using an incorrectly programmed key may
prevent the engine from starting. A
message may appear in the information
display.
If you are unable to start the engine with a
programmed key, a malfunction has
happened and a message may appear in
the information display.
Automatic Arming
The engine immobilization system arms
immediately after you switch the ignition
off. Automatic Disarming
Switching the ignition on with a
programmed key disarms the engine
immobilization system.
Replacement Keys
If your keys are lost or stolen and you do
not have a spare programmed key, you will
need to have your vehicle towed to an
authorized dealer. You need to erase the
programmed keys from your vehicle and
program new keys.
Store an extra programmed key away from
your vehicle in a safe place to help prevent
any inconveniences. We recommend that
you contact an authorized dealer to
purchase additional spare or replacement
keys.
Note:
Your vehicle comes with two keys.
Programming a Remote Flip Key
The procedure programs both the vehicle
immobilizer keycode and the remote entry
portion of the remote control to your
vehicle.
To program a new key, you require two
programmed keys and one unprogrammed
key with you in your vehicle.
We recommend that you contact an
authorized dealer to have the key
programmed if you do not have two
programmed keys.
Make sure that you complete the
procedure within 30 seconds.
Stop and wait for at least one minute
before you start again if you miss a step.
Note: You can program a maximum of six
keys to your vehicle.
Read the entire procedure before you
begin.
1. Close all the doors.
74
2020 Transit Connect (CHC) Canada/United States of America, CG3739en enUSA, Edition date: 201903, First-Printing Security
Page 79 of 509
Note:
Keep the doors closed throughout
the procedure.
2. Switch the ignition off.
Note: Do not press the brake pedal or
accelerator pedal throughout the procedure.
3. Insert the first programmed key into the ignition.
4. Switch the ignition on.
5. Wait five seconds.
6. Switch the ignition off and remove the
key from the ignition.
7. Within 10 seconds, insert the second programmed key into the ignition.
8. Switch the ignition on.
9. Wait five seconds.
10. Switch the ignition off and remove the key from the ignition.
11. Within 10 seconds, insert the unprogrammed key into the ignition.
12. Switch the ignition on.
13. Wait five seconds.
14. Switch the ignition off and remove the key from the ignition.
Check that the remote control functions
operate and your vehicle starts with the
new key.
Note: Wait 10 seconds and repeat the
procedure if the remote control functions
do not operate and you cannot start the
engine.
Wait 20 seconds and repeat the procedure
to program an additional key.
Programming a Passive Key
The procedure programs both the vehicle
immobilizer keycode and the remote entry
portion of the remote control to your
vehicle. To program a new key, you require two
programmed keys and one unprogrammed
key with you in your vehicle.
We recommend that you contact an
authorized dealer to have the key
programmed if you do not have two
programmed keys.
Make sure that you complete the
procedure within 30 seconds.
Stop and wait for at least one minute
before you start again if you miss a step.
Note:
You can program a maximum of four
keys to your vehicle.
Read the entire procedure before you
begin.
1. Close all the doors.
Note: Keep the doors closed throughout
the procedure.
2. Switch the ignition off.
Note: Do not press the brake pedal or
accelerator throughout the procedure.
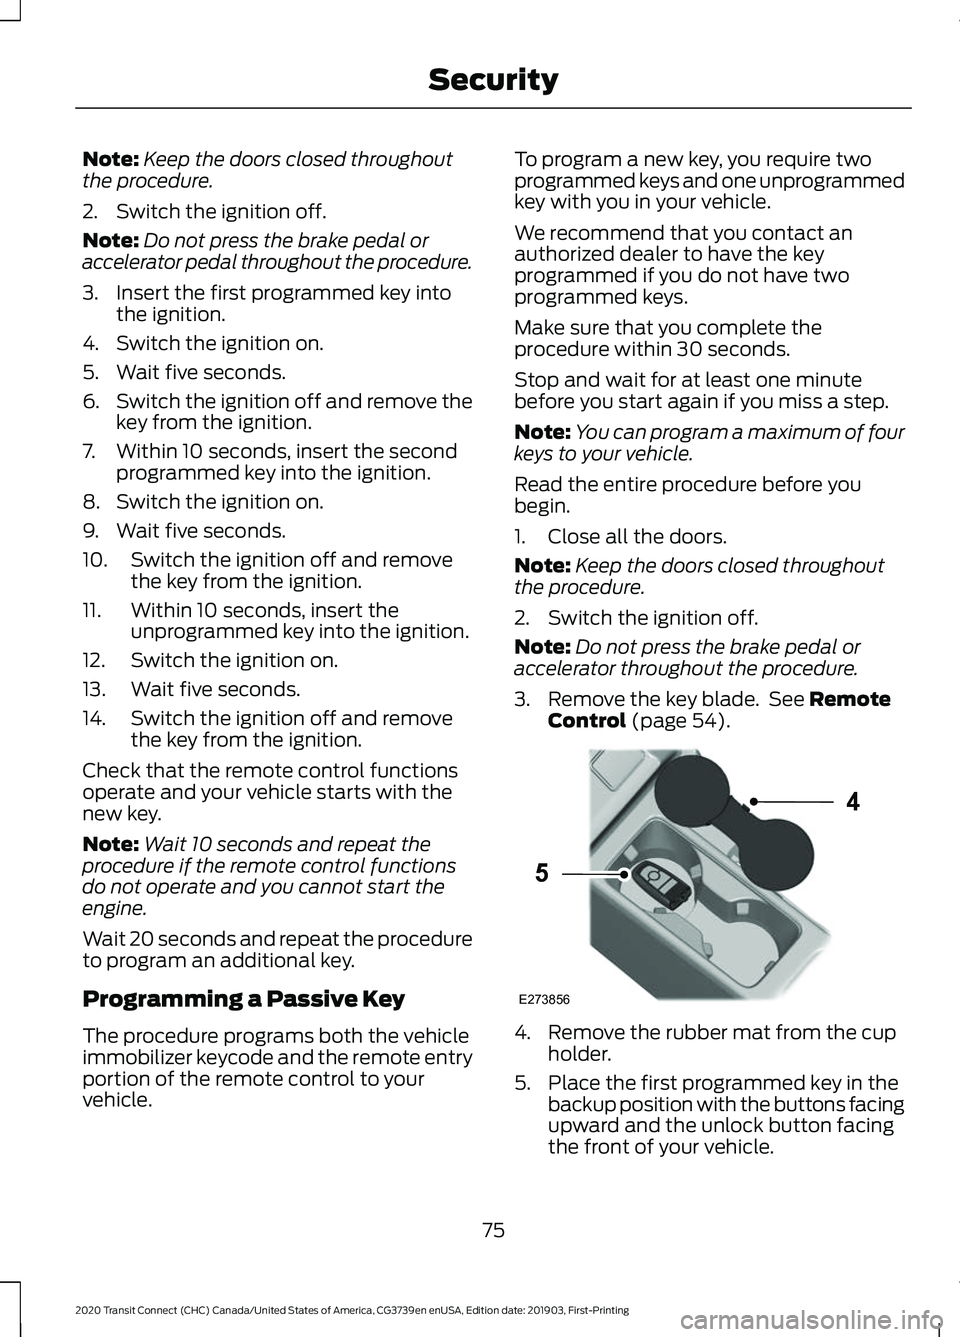
3. Remove the key blade. See Remote
Control (page 54). 4. Remove the rubber mat from the cup
holder.
5. Place the first programmed key in the backup position with the buttons facing
upward and the unlock button facing
the front of your vehicle.
75
2020 Transit Connect (CHC) Canada/United States of America, CG3739en enUSA, Edition date: 201903, First-Printing SecurityE273856
4
5
Page 94 of 509
Start the engine.
1. Lift and hold the control until you fully
close the window. Continue to hold the
control for a few seconds after you
close the window.
2. Release the control.
3. Press and hold the control until you fully open the window.
4. Release the control.
5. Lift and hold the control until you fully close the window.
Note: Repeat the procedure if the window
does not close when you use one-touch.
Rear Window Lock Press the control to lock or
unlock the rear window controls.
It illuminates when you lock the
rear window controls.
POWER WINDOWS - VEHICLES
WITH: ONE-TOUCH OPEN
DRIVER WINDOW WARNING: Do not leave children
unattended in your vehicle and do not
let them play with the power windows.
Failure to follow this instruction could
result in personal injury. WARNING:
When closing the
power windows, verify they are free of
obstruction and make sure that children
and pets are not in the proximity of the
window openings. Press the control to open the
window. Lift the control to close
the window. Note:
The power windows operate with the
ignition on, and for several minutes after you
switch the ignition off or until you open a
front door.
To reduce wind noise or pulsing noise when
just one window is open, slightly open the
opposite window.
One-Touch Open
(If Equipped)
Fully press the control and release it. Press
again or lift it to stop the window.
GLOBAL OPENING
1. Press and release the unlock button on
the remote control.
2. Press and hold the unlock button on the remote control.
3. Release the button when the windows
start to open.
Press the lock or the unlock button on the
remote control to stop global opening.
Note: You can use global opening for a
short period of time when you unlock your
vehicle using the remote control.
EXTERIOR MIRRORS
Adjusting the Mirrors WARNING:
Do not adjust the
mirrors when your vehicle is moving. This
could result in the loss of control of your
vehicle, serious personal injury or death.
90
2020 Transit Connect (CHC) Canada/United States of America, CG3739en enUSA, Edition date: 201903, First-Printing Windows and Mirrors
Page 258 of 509
1. Remove the jumper cable from the
ground metal surface or connecting
point, if available.
2. Remove the jumper cable on the negative (-) terminal of the booster
vehicle's battery.
3. Remove the jumper cable from the positive (+) terminal of the booster
vehicle's battery.
4. Remove the jumper cable from the positive (+) terminal of the disabled
vehicle's battery.
After starting your vehicle and removing
the jumper cables, allow it to idle for
several minutes so the battery can
recharge.
POST-CRASH ALERT SYSTEM
The system flashes the turn signal lamps
and sounds the horn (intermittently) in the
event of a serious impact that deploys an
airbag (front, side, side curtain or Safety
Canopy) or the seatbelt pretensioners.
The horn and lamps will turn off when:
• The hazard control button is pressed
• The panic button (if equipped) is
pressed on the remote entry
transmitter
• Your vehicle runs out of power
TOWING POINTS
Front Towing Point WARNING: Make sure that the
towing eye is fully tightened. Failure to
follow this instruction could result in
personal injury. WARNING:
You must switch the
ignition on when your vehicle is being
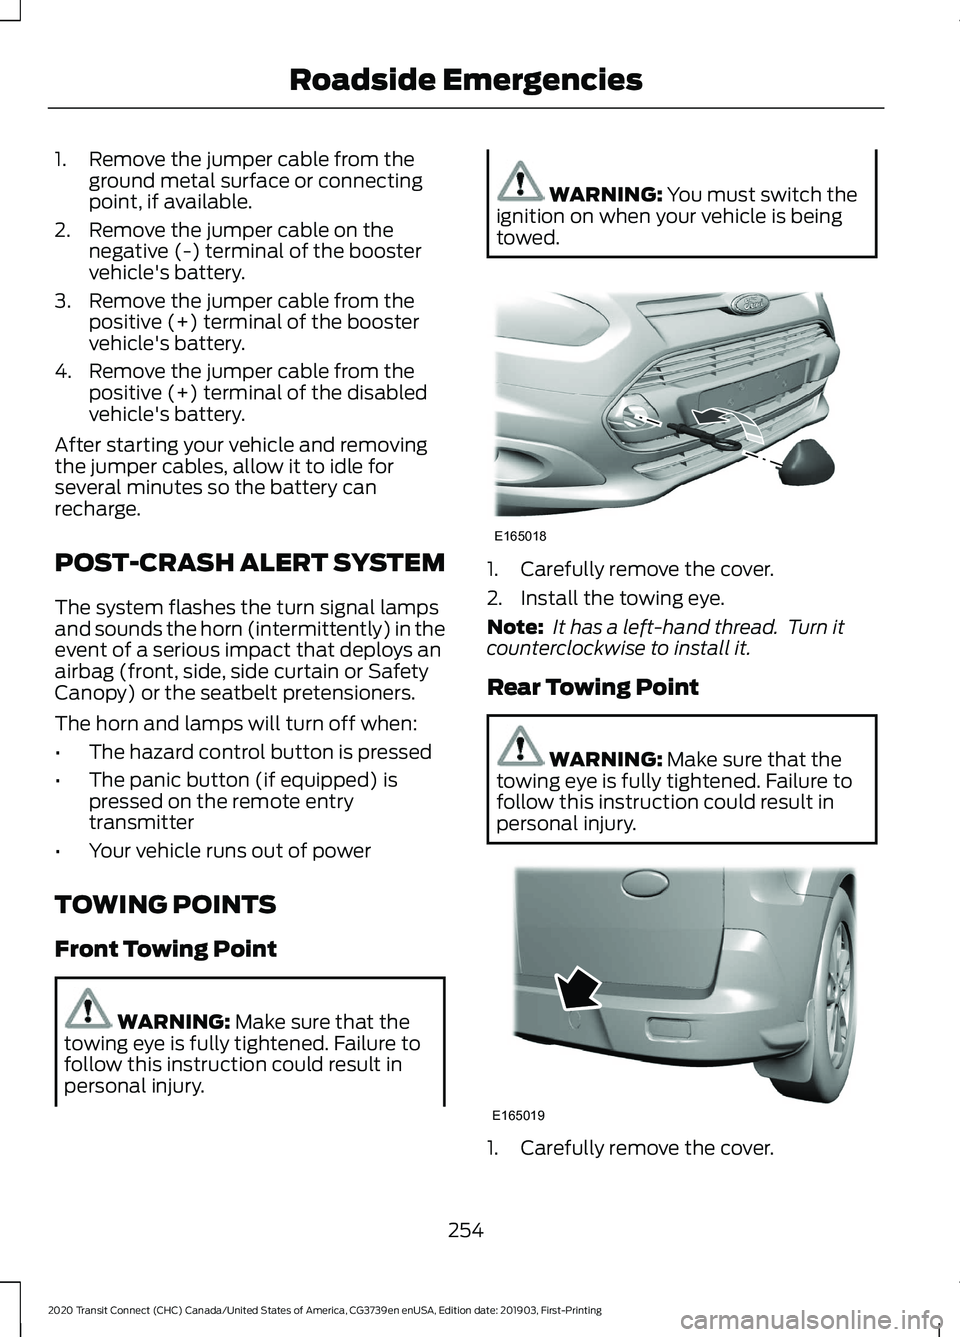
towed. 1. Carefully remove the cover.
2. Install the towing eye.
Note:
It has a left-hand thread. Turn it
counterclockwise to install it.
Rear Towing Point WARNING:
Make sure that the
towing eye is fully tightened. Failure to
follow this instruction could result in
personal injury. 1. Carefully remove the cover.
254
2020 Transit Connect (CHC) Canada/United States of America, CG3739en enUSA, Edition date: 201903, First-Printing Roadside EmergenciesE165018 E165019