GEELY FC 2008 Owners Manual
Manufacturer: GEELY, Model Year: 2008, Model line: FC, Model: GEELY FC 2008Pages: 419, PDF Size: 13.87 MB
Page 91 of 419

Starting and charging - Starting system(f) Connect magnetic field coil wire to terminal C.
(h) Torque: (i) Clamp starter with jaw vice.
(j) As shown in the diagram, connect battery with ampere
meter.
(k) Read current value displayed on ampere meter.
(l) Current value specification: 90 A or lower at 11.5 V.2. Starter relay80Terminal 50Terminal 30Ampere
meter Specified
conditions
Normal stateConductionConductionTerminal connected
by three-use meter Conditions
Supply battery voltage
to No. 1 and No. 2
terminals
Page 92 of 419

Starting and charging - Charging systemCharging systemPrecautions1. Check positive and negative wire of battery is con-
nected correctly.
2. When performing quick charge to battery, please
uncouple battery wire.
3. Do not test with high-pressure insulation resistance
tester.
4. do not uncouple battery wire during engine running.
81
Page 93 of 419

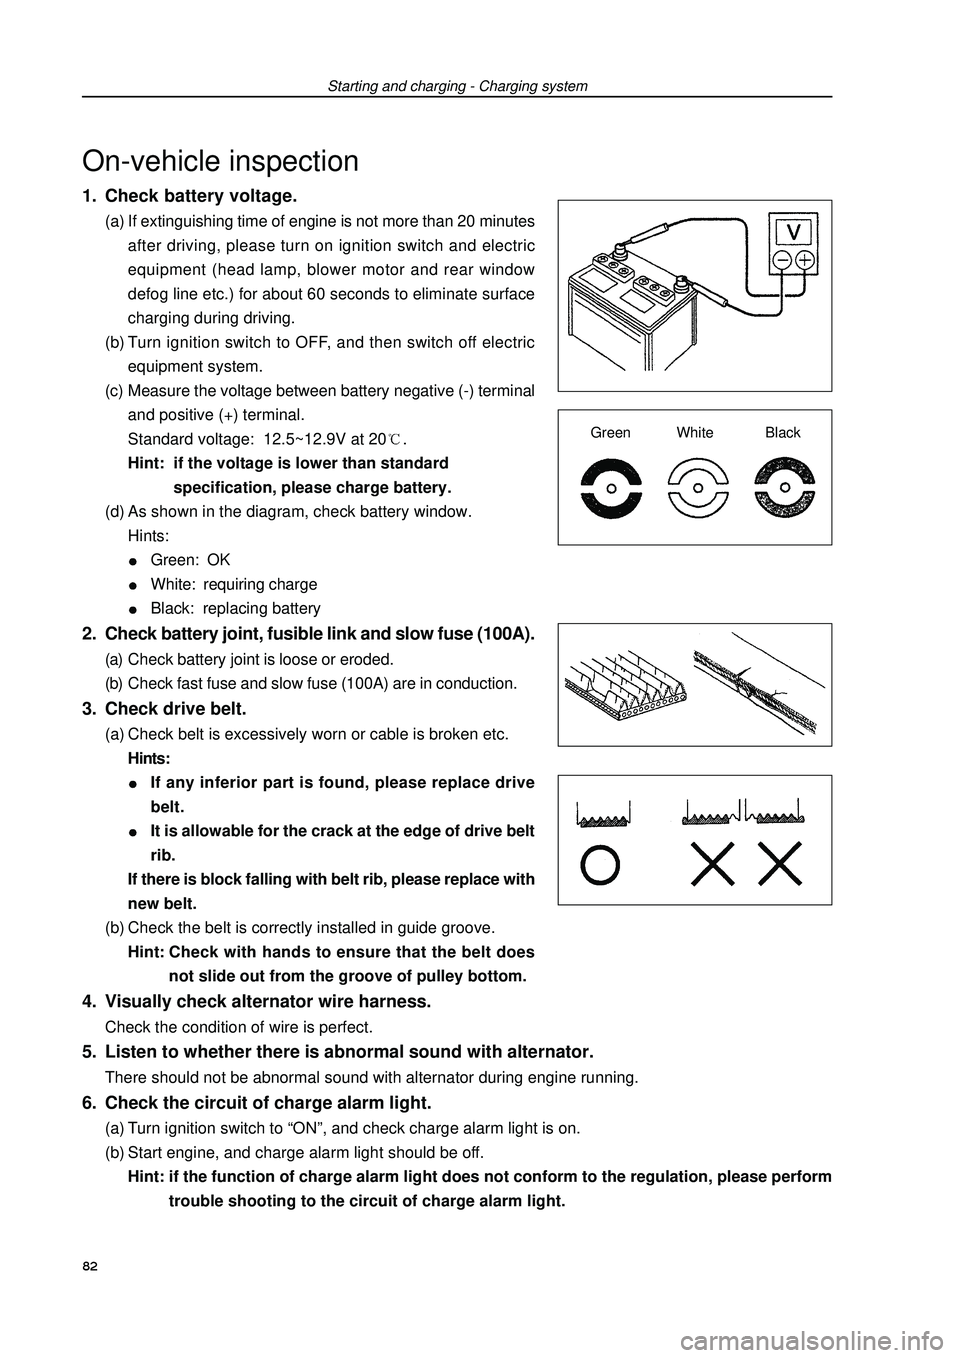
1. Check battery voltage.(a) If extinguishing time of engine is not more than 20 minutes
after driving, please turn on ignition switch and electric
equipment (head lamp, blower motor and rear window
defog line etc.) for about 60 seconds to eliminate surface
charging during driving.
(b) Turn ignition switch to OFF, and then switch off electric
equipment system.
(c) Measure the voltage between battery negative (-) terminal
and positive (+) terminal.
Standard voltage: 12.5~12.9V at 20.
Hint: if the voltage is lower than standard
specification, please charge battery.
(d) As shown in the diagram, check battery window.
Hints:Green: OKWhite: requiring chargeBlack: replacing battery2. Check battery joint, fusible link and slow fuse (100A).(a) Check battery joint is loose or eroded.
(b) Check fast fuse and slow fuse (100A) are in conduction.3. Check drive belt.(a) Check belt is excessively worn or cable is broken etc.
Hints:If any inferior part is found, please replace drive
belt.It is allowable for the crack at the edge of drive belt
rib.
If there is block falling with belt rib, please replace with
new belt.
(b) Check the belt is correctly installed in guide groove.
Hint:Check with hands to ensure that the belt does
not slide out from the groove of pulley bottom.4. Visually check alternator wire harness.Check the condition of wire is perfect.Starting and charging - Charging systemOn-vehicle inspectionGreen White Black5. Listen to whether there is abnormal sound with alternator.There should not be abnormal sound with alternator during engine running.6. Check the circuit of charge alarm light.(a) Turn ignition switch to “ON”, and check charge alarm light is on.
(b) Start engine, and charge alarm light should be off.
Hint: if the function of charge alarm light does not conform to the regulation, please perform
trouble shooting to the circuit of charge alarm light.82
Page 94 of 419

Starting and charging - Charging system7. Check charging system circuit at no load.(a) If there is battery/alternator tester, please connect tester
to charging system circuit as manufacturer instruction.
(b) If there is no battery/alternator tester, please connect volt-
meter to charging system circuit as the following way.
�zUncouple wire on engine terminal B, and connect wire
on negative (-) test bar of ampere meter.
�zConnect positive (+) test bar of ampere meter to alter-
nator terminal B.
�zConnect positive (+) test bar of voltmeter to alternator
terminal B.
�zConnect negative test bar of voltmeter to earth.8. Check charging system circuit at load.(a) Turn on high beam of front combination lamps with engine running at 2000rpm,and turn blower to
“HI” position.
(b) Check the reading of ampere meter.
Standard amperage: 30A or more.
Hints:If amperage is less than standard value, please repair alternator.If battery is under the state of full charge, amperage may be less than standard value sometimes. (c) Check charge system circuit.
(1) Check the readings of ampere meter and voltmeter with engine from idle speed to 2000rpm.
Standard current: 10A or less.
Standard voltage: 12.9~14.9V.
Hints:If voltmeter reading is more than standard value, please replace with new voltage regulator.If voltmeter reading is less than standard value, please check voltage regulator and alternator
as the following way.
(2) Earth terminal F, start engine and check voltage of
terminal B.
Hints:If voltmeter reading is more than standard value,
please replace with new voltage regulator.If voltmeter reading is less than standard value,
please check alternator.83Ampere meter
Uncoupling
terminal B wire
VoltmeterAlternatorBatteryTerminal F
Page 95 of 419

Starting and charging - Alternator componentsAlternator componentsReplacement1. Remove engine right bottom shield.
2. Remove drive belt.Slowly turn drive belt tensioner clockwise to loosen the belt,
then remove drive belt and put back the tensioner slowly to
completely loosen it.3. Remove alternator components.(a) Remove rubber cover and nuts.
(b) Uncouple alternator joint.
(c) Remove 2 bolts and alternator.4. Install alternator components.Torque:12mm head bolt : m
14mm head bolt : 84
Page 96 of 419

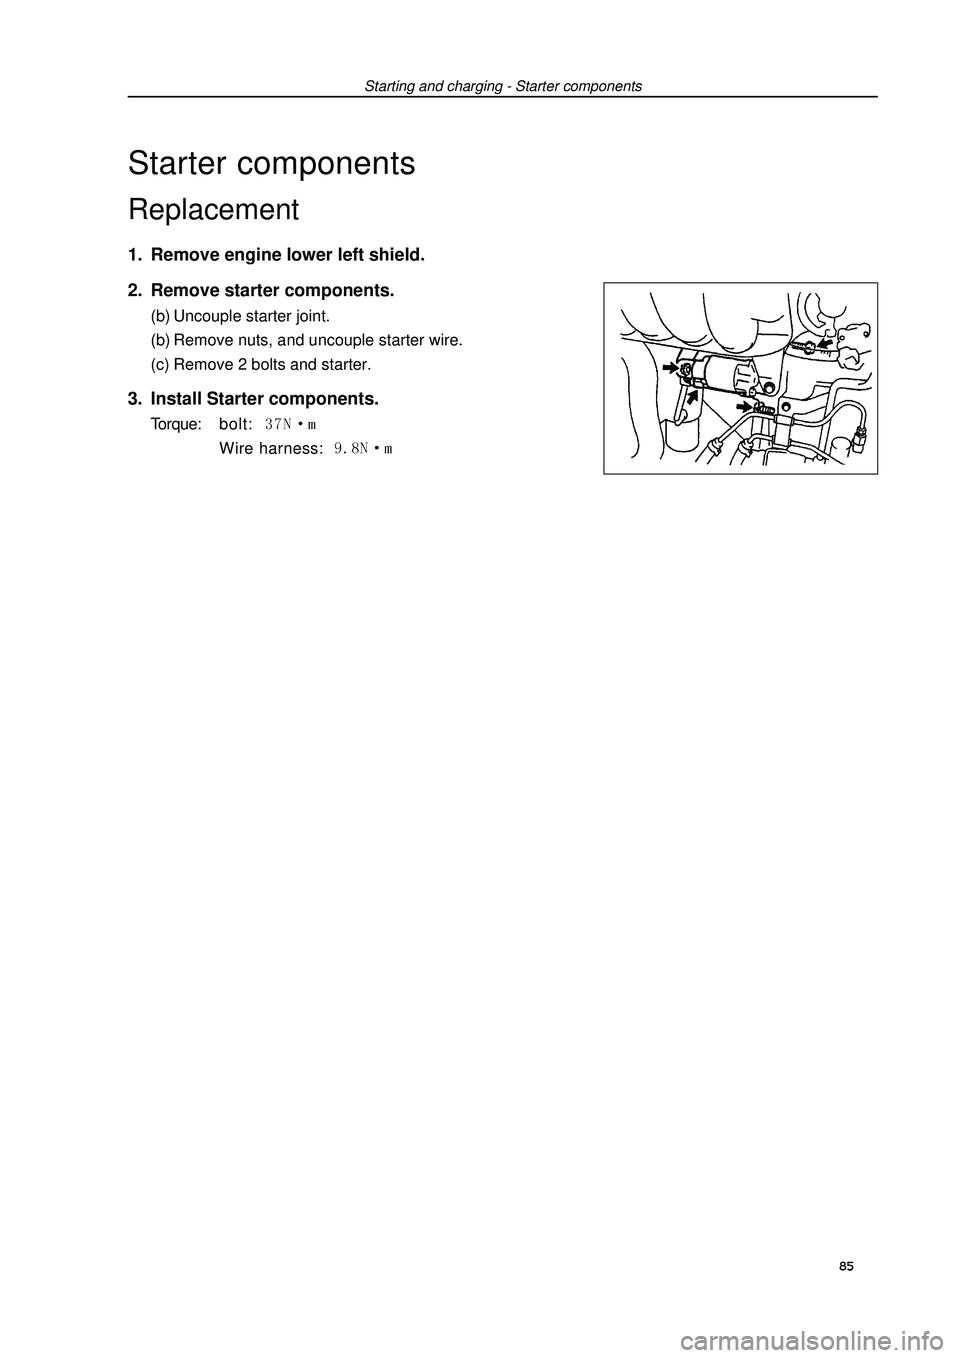
Starting and charging - Starter componentsStarter componentsReplacement1. Remove engine lower left shield.
2. Remove starter components.(b) Uncouple starter joint.
(b) Remove nuts, and uncouple starter wire.
(c) Remove 2 bolts and starter.3. Install Starter components.Torque:bolt: Wire harness: 85
Page 97 of 419

Front suspension - front suspension systemFront suspensionFront suspension systemTable on trouble occurrenceThis table could help you find out failure causes, and each figure in the table indicates the possible
sequence of failure causes, please check every part as the sequence, and replace if necessary.Trouble occurrence Possible trouble part Pages to refer to
1. Tire (abrasion or improper tire pressure) 109
2. Wheel alignment (incorrect) 87
Deflection/single side 3. Steering linkage (looseness or abrasion) -
4. Shaft hub bearing (abrasion) 123
5. Suspension parts (abrasion) -
6. Steering gear (poor adjustment or breakage) -
1. Vehicle (overload) -
Bottoming 2. Spring (elastic fatigue) 90
3. Absorber (abrasion) 90
1. Tire (abrasion or improper tire pressure) 109
Swaying left and right/ 2. Stabilizer bar (bending or breakage) 96shaking forward and backward3. Absorber (abrasion) 90
1. Tire (abrasion or improper tire pressure) 109
2. Wheel (poor balance) 109
3. Absorber (abrasion) 90
Front wheel shimmy 4. Wheel alignment (incorrect) 87
5. Ball joint (abrasion) 99
6. Shaft hub bearing (looseness or abrasion) 123
7. Steering linkage (looseness or abrasion) -
8. Steering gear (poor adjustment or breakage) -
1. Tire (abrasion or improper tire pressure) 109
Abnormal tire abrasion 2. Wheel alignment (incorrect) 87
3. Absorber(abrasion) 90
4. Suspension parts (abrasion) -86
Page 98 of 419

Front suspension - Front wheel alignmentFrontRearIf toe-in is not within specification, please adjust left and
right levers of steering gear.4. Adjustment of toe-in(a) Remove dust cover fixing clip.FrontRearToe-in(Total)Front wheel alignmentAdjustment1. Inspection(a) Check tire is worn and inflation pressure is proper.
Tire inflation pressure under normal temperature:Tire size Front and rear kPa*1 It is used under the condition of speed below 160 km/h.
*2 It is used under the condition of speed above 160 km/h.
(b) Check tire run-out with dial indicator.
Tire run-out: 3.0mm.2. Measurement of vehicle heightVehicle height:
(General road)
(Coarse road)
Measuring point:
A. Height for ground and front wheel center
B. Height for ground and bolt center in front of lower
control arm
C. Height for ground and fixed bolt center of rear axle beam
D. Height for ground and rear wheel center
Note: adjust vehicle height to standard value before checking front wheel alignment.
If vehicle height does not conform to regulations, please shake upward and downward or lift vehicle
body to adjust vehicle height.3. Inspection of toe-inToe-in:Front87
Page 99 of 419

Inside wheel38o452oOutside wheel: reference32o50Front suspension - Front wheel alignment(Coarse road)
Inside wheel39o052oOutside wheel: reference33o10Camber-031’45’Left-right error45’Caster242’45’Left-right error45’Steering shaft inclination18’45’Left-right error45’Camber-
018’45’Left-right error45’Caster230’45’Left-right error45’Steering shaft inclination1052’45’Left-right error45’A: inside
B: outsideFrontGauge If caster and steering axis inclination are not within specification, please adjust the caster and
then check parts of lower control arm is damaged or worn.(b) Loosen lock nuts at the end of transversal lever .
(c) Evenly rotate end levers of left and right rack to
adjust toe-in.
Hint: try adjusting toe-in to medium value.
(d) Ensure that the end lever length of left rack equals that
of right rack.
(e) Tighten lock nuts at the end of transversal lever.
Torque: 745 N.m
(f) Install dust cover fixing clip.
Hint: ensure that the dust cover does not distort.5. Inspection of turning angle(a) Completely rotate steering wheel to the bottom and then
measure turning angle.
Turning angle:
(General road)
(Coarse road)Wheel
alignment
tester88If left and right inside wheels are not within specification, please check the end lever length of left rack
and right rack.6. Inspection of camber, caster and steering shaft inclination(a) Install camber-caster-kingpin gauge or erect wheel alignment tester.
(b) Check camber, caster and steering-axis inclination.
Camber, caster and steering shaft inclination:
(General road)
Page 100 of 419

Front suspension - Front wheel alignment7. Adjustment of camberNote: after adjusting the camber, please check toe-in.
(a) Remove front wheels.
(b) Remove 2 nuts under absorber.
If it is necessary to repeat using bolts or nuts, please coat
oil to thread of nuts.
(c) Clean nut absorber and attachment face of steering knucle.
(d) Temporarily install 2 nuts.
(e) Push or pull lower end of absorber in the direction that cam-
ber requires adjustment to adjust the camber.
(f) Tighten nut.
Torque: 15310 N.m
(g) Install front wheels.
Torque: 10310 N.m
(h) Check camber.89