infotainment GENESIS G80 2021 User Guide
[x] Cancel search | Manufacturer: GENESIS, Model Year: 2021, Model line: G80, Model: GENESIS G80 2021Pages: 604, PDF Size: 11.47 MB
Page 125 of 604
Instrument Cluster
4-24
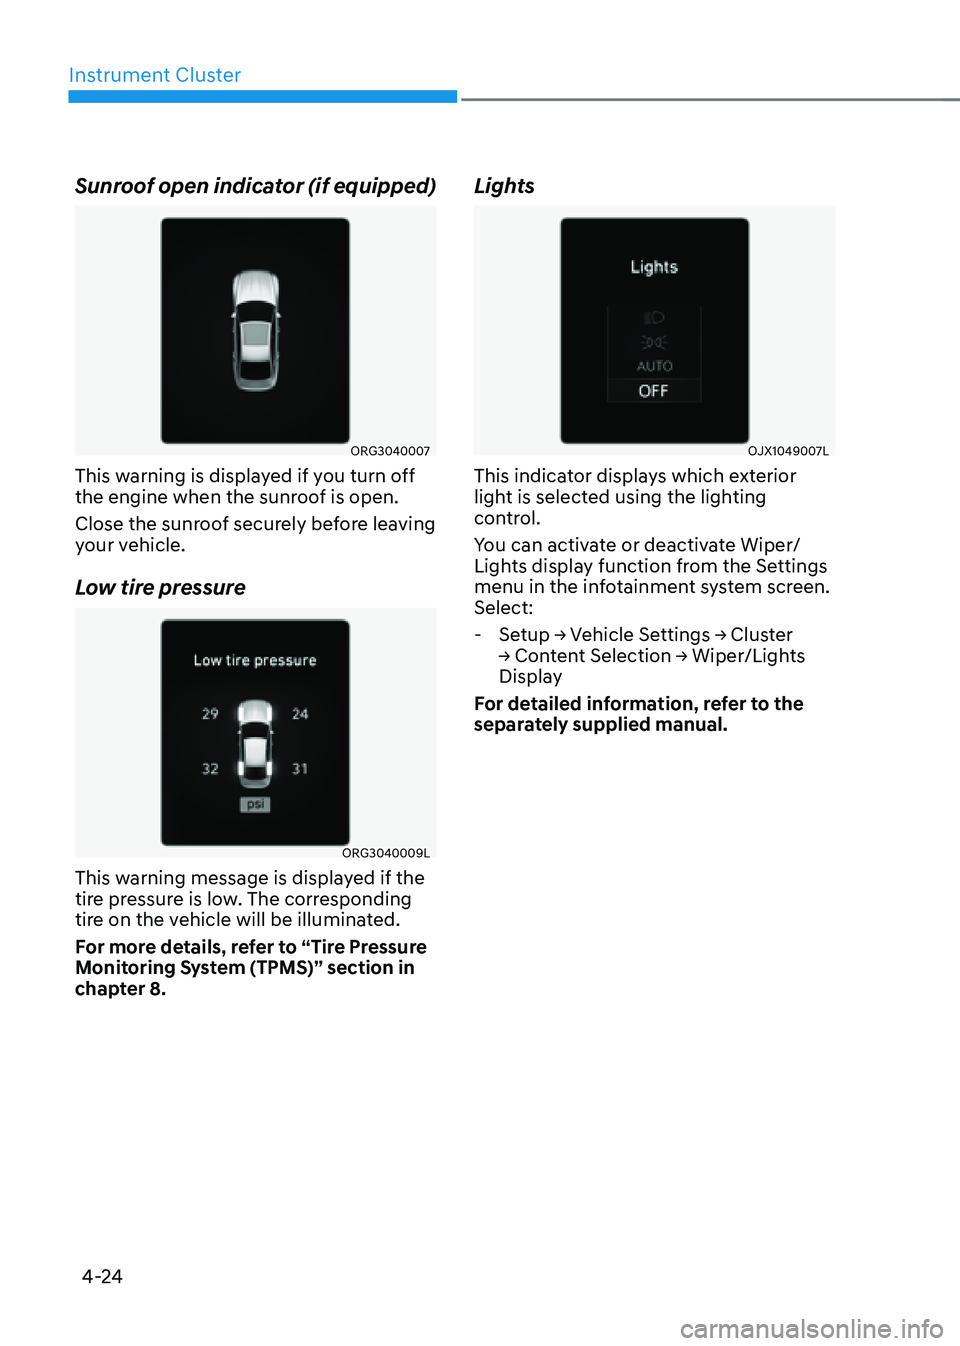
Sunroof open indicator (if equipped)
ORG3040007
This warning is displayed if you turn off
the engine when the sunroof is open.
Close the sunroof securely before leaving
your vehicle.
Low tire pressure
ORG3040009L
This warning message is displayed if the
tire pressure is low. The corresponding
tire on the vehicle will be illuminated.
For more details, refer to “Tire Pressure
Monitoring System (TPMS)” section in
chapter 8.
Lights
OJX1049007L
This indicator displays which exterior
light is selected using the lighting
control.
You can activate or deactivate Wiper/
Lights display function from the Settings
menu in the infotainment system screen.
Select:
-Setup → Vehicle Settings → Cluster
→ Content Selection → Wiper/Lights
Display
For detailed information, refer to the
separately supplied manual.
Page 126 of 604
04
4-25
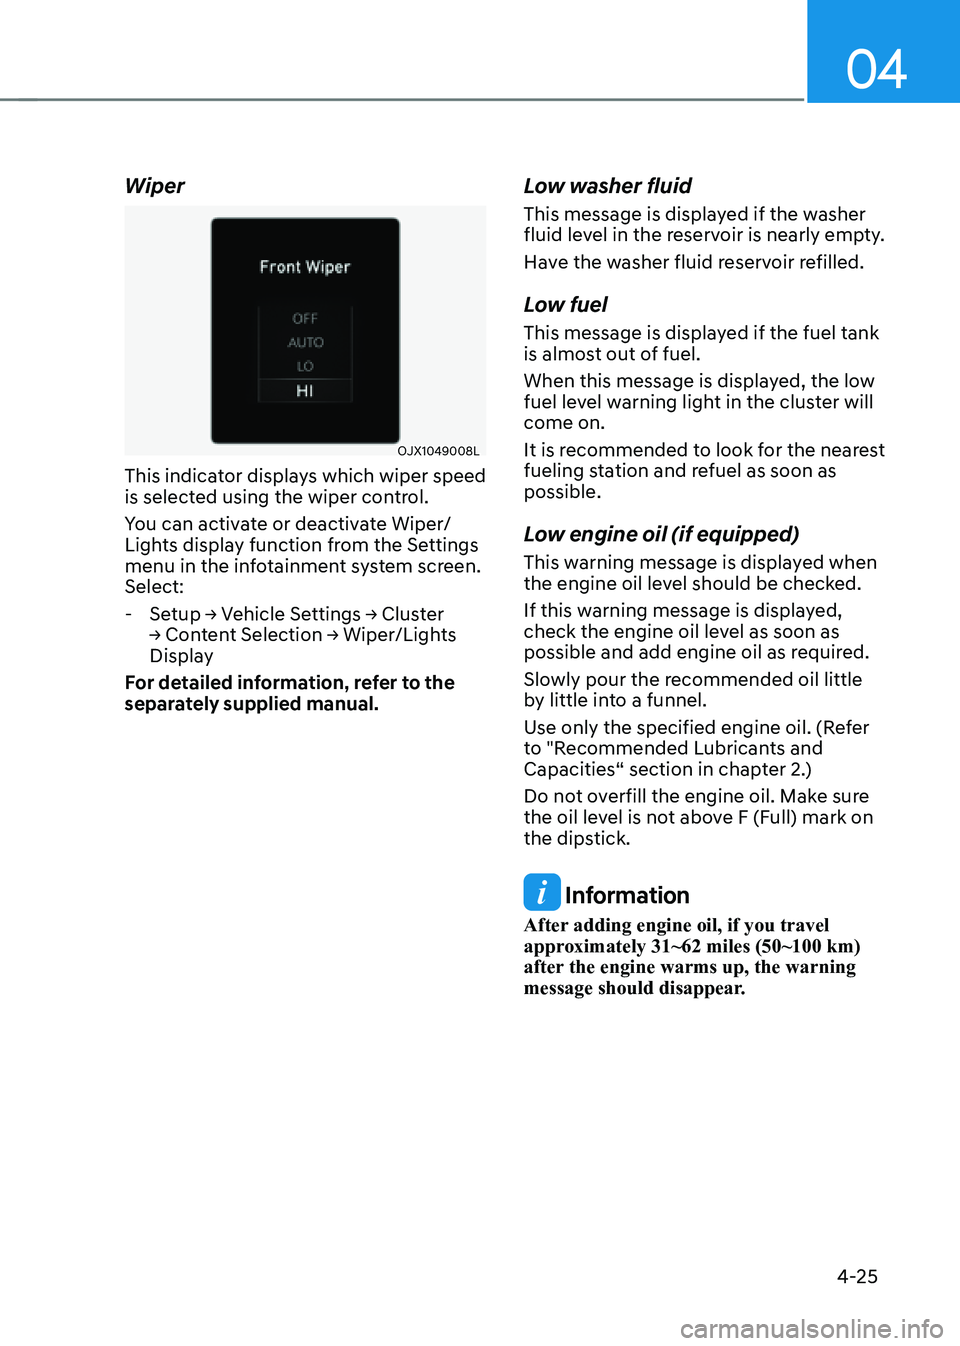
Wiper
OJX1049008L
This indicator displays which wiper speed
is selected using the wiper control.
You can activate or deactivate Wiper/
Lights display function from the Settings
menu in the infotainment system screen.
Select:
-Setup → Vehicle Settings → Cluster
→ Content Selection → Wiper/Lights
Display
For detailed information, refer to the
separately supplied manual.
Low washer fluid
This message is displayed if the washer
fluid level in the reservoir is nearly empty.
Have the washer fluid reservoir refilled.
Low fuel
This message is displayed if the fuel tank
is almost out of fuel.
When this message is displayed, the low
fuel level warning light in the cluster will
come on.
It is recommended to look for the nearest
fueling station and refuel as soon as
possible.
Low engine oil (if equipped)
This warning message is displayed when
the engine oil level should be checked.
If this warning message is displayed,
check the engine oil level as soon as
possible and add engine oil as required.
Slowly pour the recommended oil little
by little into a funnel.
Use only the specified engine oil. (Refer
to "Recommended Lubricants and
Capacities“ section in chapter 2.)
Do not overfill the engine oil. Make sure
the oil level is not above F (Full) mark on
the dipstick.
Information
After adding engine oil, if you travel
approximately 31~62 miles (50~100 km)
after the engine warms up, the warning
message should disappear.
Page 130 of 604
04
4-29
• Manual reset
To clear the average fuel economy
manually, press the OK switch on the
steering wheel for more than 1 second
when the Average Fuel Economy is
displayed.
• Automatic reset
To automatically reset the average
fuel economy, select between ‘After
Ignition’ or ‘After Refueling’ from the
Settings menu in the infotainment
system.
-After Ignition: When the engine has
been OFF for 4 hours or longer the
average fuel economy will reset
automatically.
-After Refueling: The average fuel
economy will reset automatically
after adding 1.6 gallons (6 liters) of
fuel or more and after driving speed
exceeds 1 mph (1 km/h).
à For 12.3-inch 3D instrument cluster,
you can check the fuel economy in
the center bottom of the cluster.
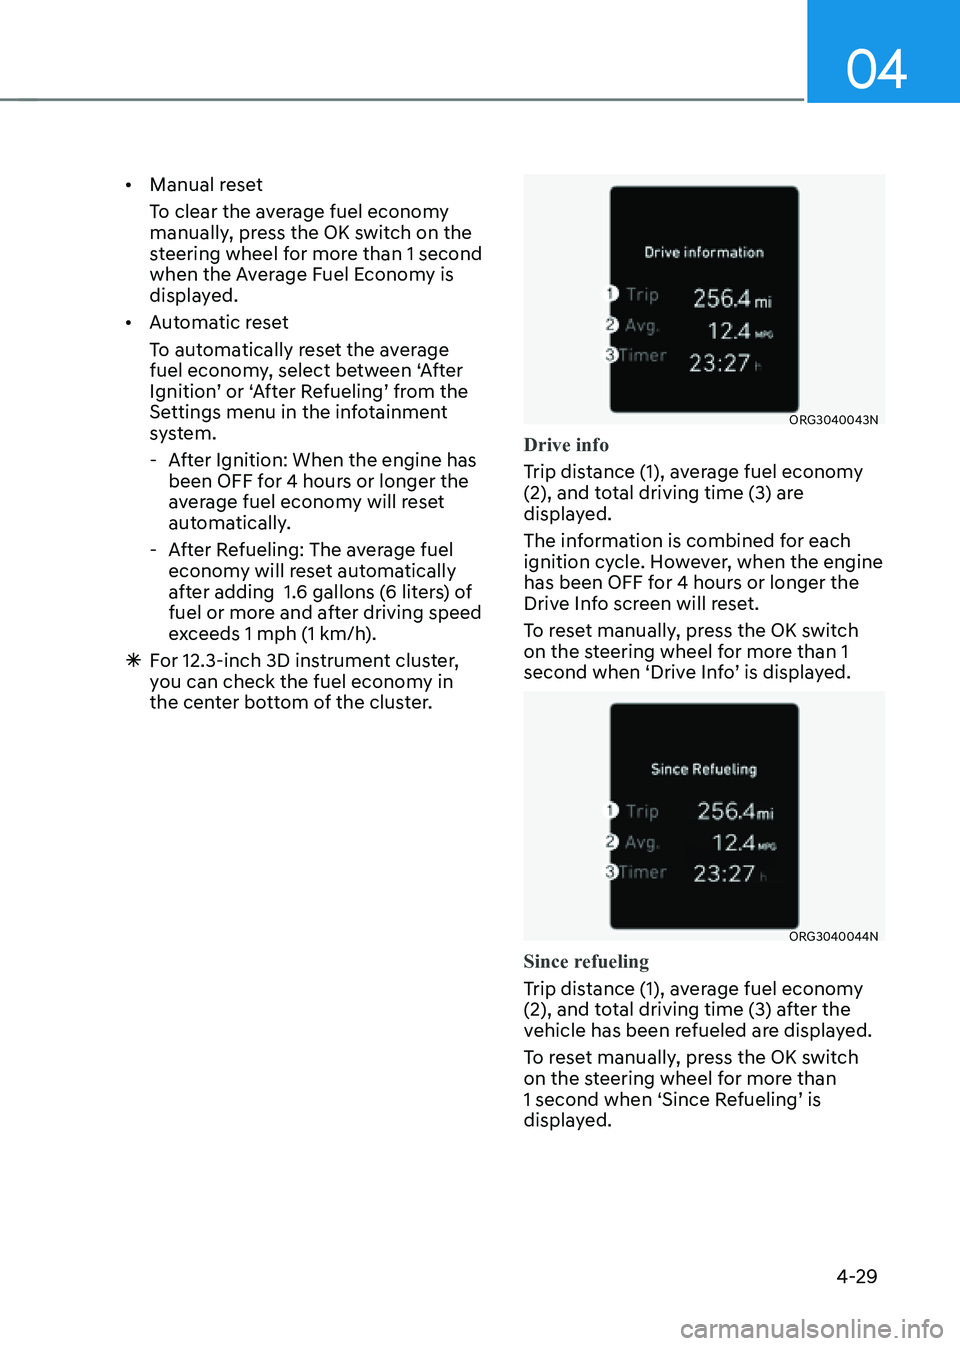
ORG3040043N
Drive info
Trip distance (1), average fuel economy
(2), and total driving time (3) are
displayed.
The information is combined for each
ignition cycle. However, when the engine
has been OFF for 4 hours or longer the
Drive Info screen will reset.
To reset manually, press the OK switch
on the steering wheel for more than 1
second when ‘Drive Info’ is displayed.
ORG3040044N
Since refueling
Trip distance (1), average fuel economy
(2), and total driving time (3) after the
vehicle has been refueled are displayed.
To reset manually, press the OK switch
on the steering wheel for more than
1 second when ‘Since Refueling’ is
displayed.
Page 133 of 604
Instrument Cluster
4-32
Additional information display
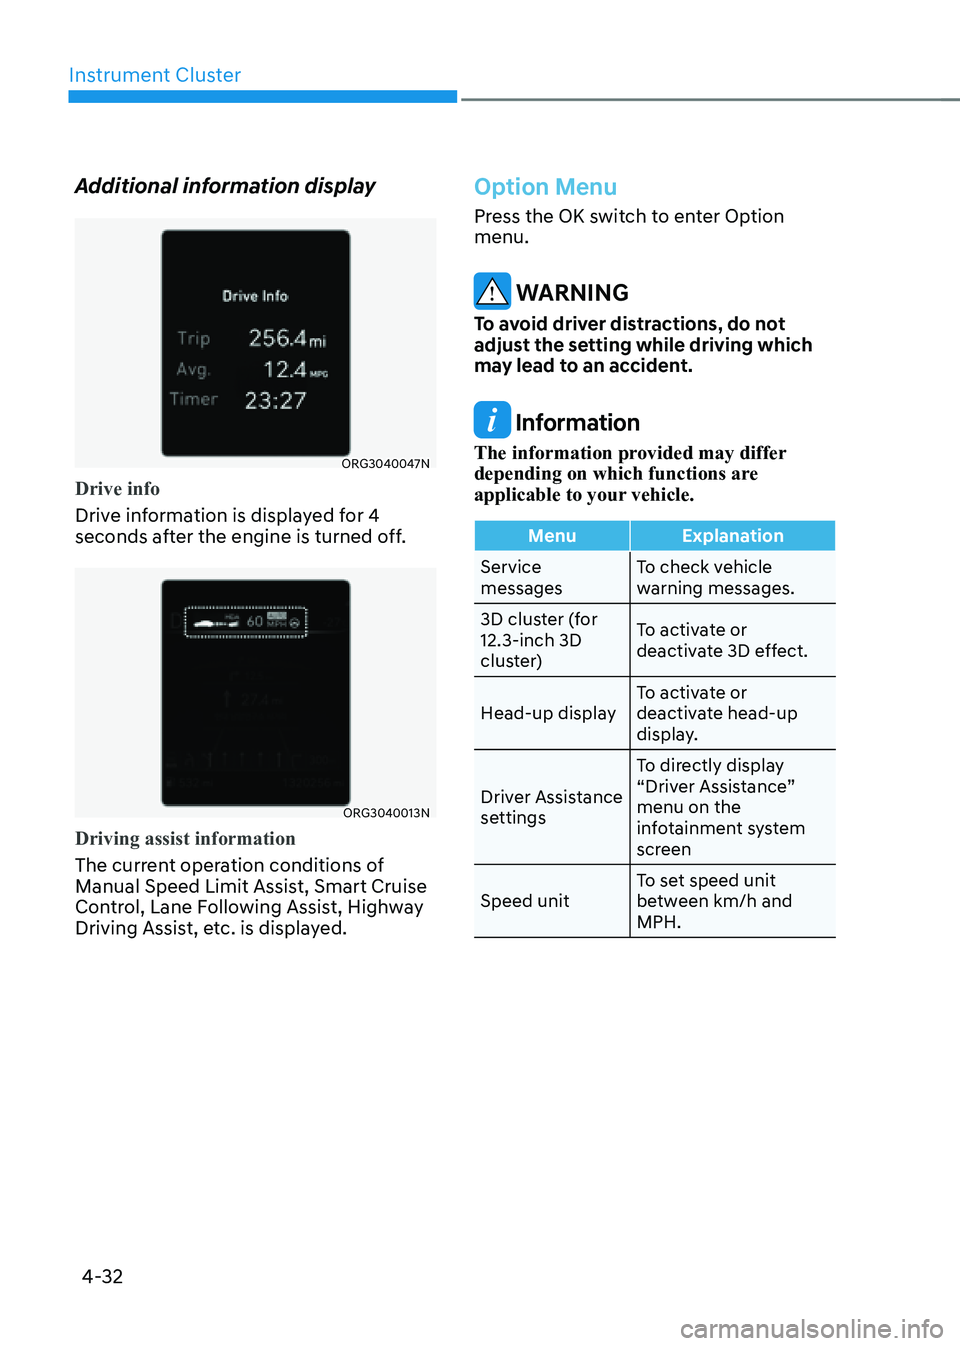
ORG3040047N
Drive info
Drive information is displayed for 4
seconds after the engine is turned off.
ORG3040013N
Driving assist information
The current operation conditions of
Manual Speed Limit Assist, Smart Cruise
Control, Lane Following Assist, Highway
Driving Assist, etc. is displayed.
Option Menu
Press the OK switch to enter Option
menu.
WARNING
To avoid driver distractions, do not
adjust the setting while driving which
may lead to an accident.
Information
The information provided may differ
depending on which functions are
applicable to your vehicle.
MenuExplanation
Service
messages To check vehicle
warning messages.
3D cluster (for
12.3-inch 3D
cluster) To activate or
deactivate 3D effect.
Head-up display To activate or
deactivate head-up
display.
Driver Assistance
settings To directly display
“Driver Assistance”
menu on the
infotainment system
screen
Speed unit To set speed unit
between km/h and
MPH.
Page 134 of 604

04
4-33
Service messages
ORG3040014L
When Service Messages menu is
selected, press the OK switch on the
steering wheel to check vehicle warning
messages.
3D cluster (for 12.3-inch 3D cluster)
ORG3040015L
When 3D Cluster menu is selected, press
the OK switch on the steering wheel. You
may select or deselect 3D cluster effect
by pressing the OK switch.
Head-up display (if equipped)
ORG3040016L
When Head-Up Display menu is selected,
press the OK switch on the steering
wheel. You may select or deselect head-
up display by pressing the OK switch.
Driver Assistance settings
ORG3040017L
When Driver Assistance Settings menu
is selected, press the OK switch on the
steering wheel. The ‘Driver Assistance’
menu will be displayed on the
infotainment system screen.
Page 135 of 604
Instrument Cluster
4-34
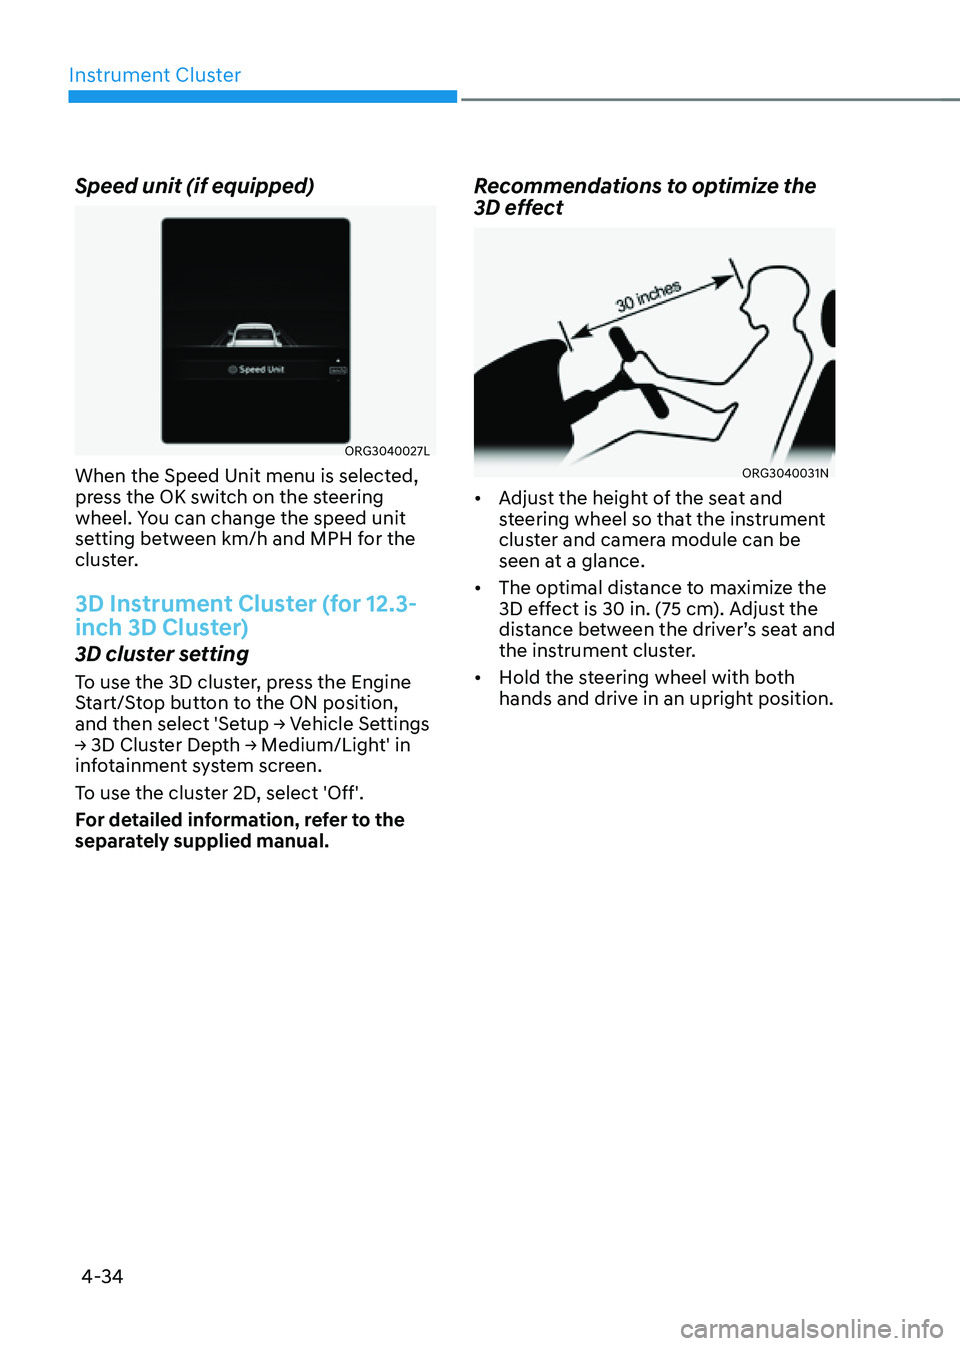
Speed unit (if equipped)
ORG3040027L
When the Speed Unit menu is selected,
press the OK switch on the steering
wheel. You can change the speed unit
setting between km/h and MPH for the
cluster.
3D Instrument Cluster (for 12.3-
inch 3D Cluster)
3D cluster setting
To use the 3D cluster, press the Engine
Start/Stop button to the ON position,
and then select 'Setup → Vehicle Settings
→ 3D Cluster Depth → Medium/Light' in
infotainment system screen.
To use the cluster 2D, select 'Off'.
For detailed information, refer to the
separately supplied manual.
Recommendations to optimize the
3D effect
ORG3040031N
• Adjust the height of the seat and
steering wheel so that the instrument
cluster and camera module can be
seen at a glance.
• The optimal distance to maximize the
3D effect is 30 in. (75 cm). Adjust the
distance between the driver’s seat and
the instrument cluster.
• Hold the steering wheel with both
hands and drive in an upright position.
Page 138 of 604
04
4-37
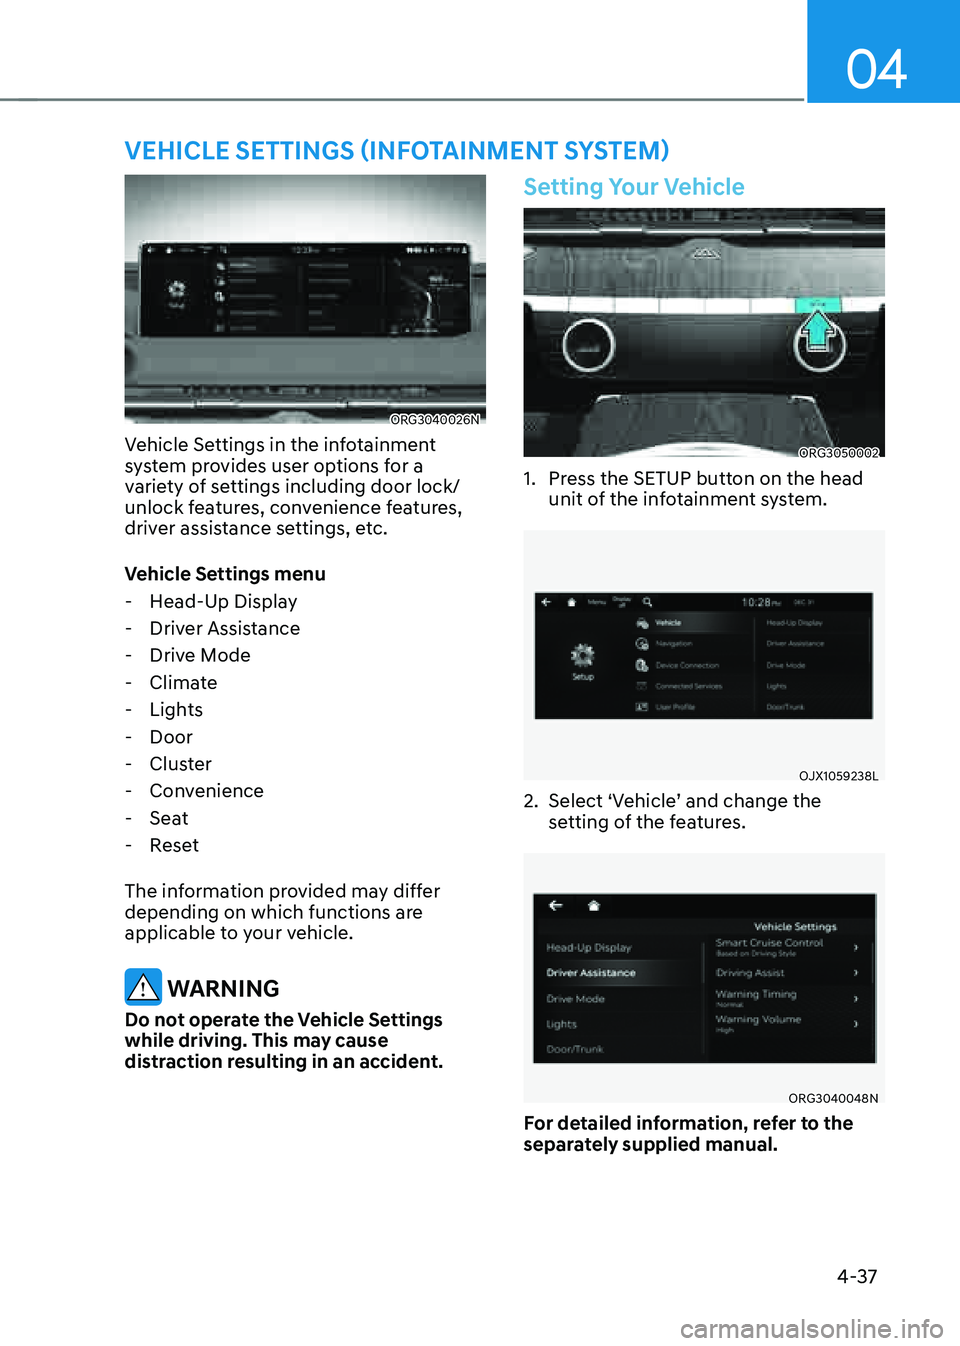
VEHICLE SETTINGS (INFOTAINMENT SYSTEM)
ORG3040026N
Vehicle Settings in the infotainment
system provides user options for a
variety of settings including door lock/
unlock features, convenience features,
driver assistance settings, etc.
Vehicle Settings menu
-Head-Up Display
-Driver Assistance
-Drive Mode
-Climate
-Lights
-Door
-Cluster
-Convenience
-Seat
-Reset
The information provided may differ
depending on which functions are
applicable to your vehicle.
WARNING
Do not operate the Vehicle Settings
while driving. This may cause
distraction resulting in an accident.
Setting Your Vehicle
ORG3050002
1. Press the SETUP button on the head
unit of the infotainment system.
OJX1059238L
2. Select ‘Vehicle’ and change the
setting of the features.
ORG3040048N
For detailed information, refer to the
separately supplied manual.
Page 141 of 604
5
Climate Control Additional Features .............................................................5-111Auto Defogging System ........................................................................\
.....................5-111
Auto Dehumidify ........................................................................\
..............................5-112
Recirculating Air when Washer Fluid is Used ..........................................................5-113
Sunroof Inside Air Recirculation ........................................................................\
......5-113
Storage Compartment ........................................................................\
............5-114Center Console Storage ........................................................................\
....................5-114
Rear Console Storage ........................................................................\
.......................5-114
Glove Box ........................................................................\
...........................................5-115
Sunglass Holder ........................................................................\
................................5-115
Interior Features ........................................................................\
......................5-116Cup Holder ........................................................................\
.........................................5-116
Sunvisor ........................................................................\
.............................................5-117
Rear Mirror ........................................................................\
........................................5-117
Power Outlet ........................................................................\
......................................5-118
USB Charger ........................................................................\
......................................5-119
Wireless Smart Phone Charging System ................................................................5-119
Clock ........................................................................\
..................................................5-121
Coat Hook ........................................................................\
..........................................5-121
Floor Mat Anchor(s) ........................................................................\
...........................5-122
Rear Side Window Sunshades ........................................................................\
.........5-123
Rear Window Sunshade ........................................................................\
...................5-123
Luggage Net Holder ........................................................................\
........................5-124
Infotainment System ........................................................................\
.............5-125USB Port ........................................................................\
.............................................5-125
Antenna ........................................................................\
..............................................5-125
Steering Wheel Remote Controls ........................................................................\
.....5-125
Infotainment System ........................................................................\
........................5-126
Voice Recognition ........................................................................\
............................5-126
Bluetooth® Wireless Technology ........................................................................\
......5-127
Lexicon Premium Sound System ........................................................................\
.....5-127
5. Convenient Features
Page 142 of 604
Convenient Features
5-4
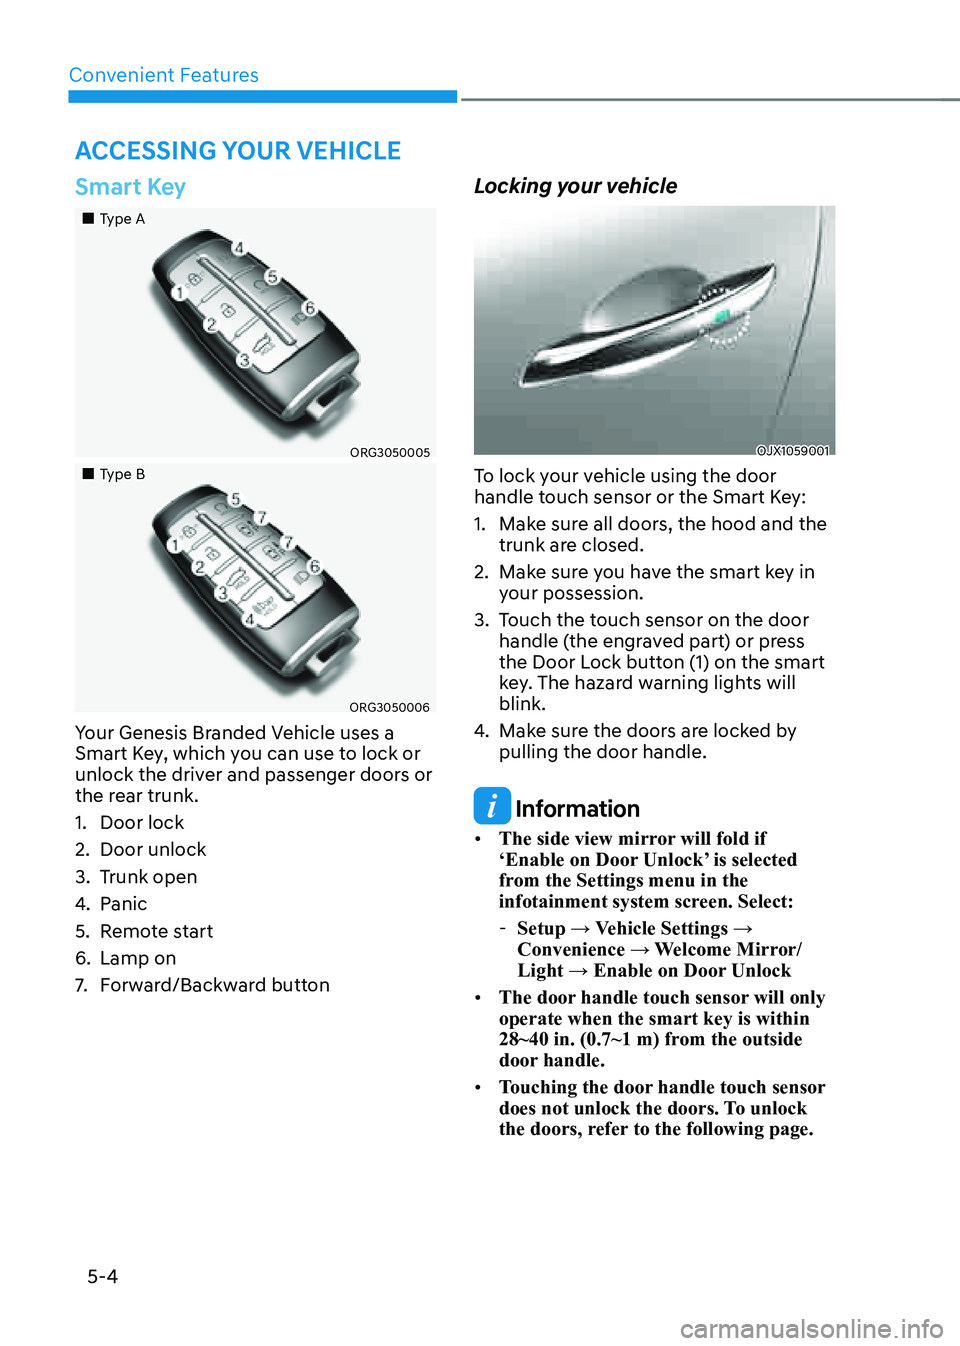
Smart Key
„„Type A
ORG3050005
„„Type B
ORG3050006
Your Genesis Branded Vehicle uses a
Smart Key, which you can use to lock or
unlock the driver and passenger doors or
the rear trunk.
1. Door lock
2. Door unlock
3. Trunk open
4. Panic
5. Remote start
6. Lamp on
7. Forward/Backward button
Locking your vehicle
OJX1059001
To lock your vehicle using the door
handle touch sensor or the Smart Key:
1. Make sure all doors, the hood and the
trunk are closed.
2. Make sure you have the smart key in
your possession.
3. Touch the touch sensor on the door
handle (the engraved part) or press
the Door Lock button (1) on the smart
key. The hazard warning lights will
blink.
4. Make sure the doors are locked by
pulling the door handle.
Information
• The side view mirror will fold if
‘Enable on Door Unlock’ is selected
from the Settings menu in the
infotainment system screen. Select:
-Setup → Vehicle Settings →
Convenience → Welcome Mirror/
Light → Enable on Door Unlock
• The door handle touch sensor will only
operate when the smart key is within
28~40 in. (0.7~1 m) from the outside
door handle.
• Touching the door handle touch sensor
does not unlock the doors. To unlock
the doors, refer to the following page.
ACCESSING YOUR VEHICLE
Page 144 of 604
Convenient Features
5-6
Unlocking your vehicle
(When the Two Press Unlock feature
is on)
To unlock your vehicle using the door
handle touch sensor or the Smart Key:
1. Make sure you have the smart key in
your possession.
2. Put your hand in the door handle or
press the Door Unlock button (2) on
the smart key.
3. The driver’s door will unlock.
4. If you touch the door unlock sensor
inside of the front door handle to
unlock the doors within 4 seconds, all
of the doors unlock. When the doors
unlock, the hazard warning lights will
blink two times and the chime will
sound.
5. After unlocking the doors, the doors
will automatically relock after 30
seconds unless a door is opened.
• The factory default setting is in
off mode so you should set in the
Settings menu in the infotainment
system screen.
• If you unlocked the door with the door
handle, the doors cannot be unlocked
with the sensor within 2 seconds.Two Press Unlock Feature
The priority for unlocking the driver door
only, or unlocking all the doors with one
press may be adjusted in the Settings
menu in the infotainment system screen.
The Two Press Unlock feature, when
enabled, will require the user to press
the door unlock button once for driver
door only and twice for unlocking all the
doors.
Setup → Vehicle Settings → Door → Two
Press Unlock
The Two Press Unlock feature can also be
enabled or disabled by pressing the door
lock and unlock buttons simultaneously
on the Key FOB:
Press and hold both the Door Lock
button and the Door Unlock button
simultaneously until the hazard warning
lights blink.
This will enable or disable the Two Press
Unlock feature. Repeat this procedure to
enable/disable the mode again. Information
If you press the front passenger outside
door handle with the smart key in your
possession, all the doors will unlock.