check engine GENESIS G90 2021 Owner's Manual
[x] Cancel search | Manufacturer: GENESIS, Model Year: 2021, Model line: G90, Model: GENESIS G90 2021Pages: 538, PDF Size: 13.02 MB
Page 7 of 538

FUEL REQUIREMENTS
F7
Introduction
Your new vehicle is designed to obtain maximum performance with UNLEAD-
ED FUEL, as well as minimize exhaust emissions and spark plug fouling.
Your new vehicle is designed to use only unleaded fuel having an octane num-
ber ((R+M)/2) of 87 (Research Octane Number 91) or higher. For improved
vehicle performance, premium unleaded fuel with an octane number ((R+M)/2)
of 91 (Research Octane Number 96) or higher is recommended. (Do not use
methanol blended fuels.)
To prevent damage to the engine and engine components, never add
any fuel system cleaning agents to the fuel tank other than what has
been specified.
Consult an authorized retailer of Genesis Branded products for addi-
tional information.
NOTICE
• Do not "top off" after the nozzle automatically shuts off when refu-
eling.
• Always check that the fuel cap is installed securely to prevent fuel
spillage in the event of an accident.
WARNING
Page 60 of 538

2-40
Safety system of your vehicle
The Pre-Tensioner Seat Belt System
consists mainly of the following com-
ponents. Their locations are shown in
the illustration above:
1. SRS air bag warning light
2. Retractor pre-tensioner
3. SRS control module
4. Emergency Fastening Device
System
Information
The sensor that activates the SRS air
bag is connected with the pre–tension-
er seat belts. The SRS air bag warning
light on the instrument panel will illu-
minate for approximately 6 seconds
after the Engine Start/Stop button in
the ON position, and then it should
turn off.
If the pre-tensioner is not working
properly, the warning light will illumi-
nate even if the SRS air bag is not mal-
functioning. If the warning light does
not illuminate, stays illuminated or
illuminates when the vehicle is being
driven, have an authorized retailer of
Genesis Branded products inspect the
pre-tensioner seat belts and SRS air
bags as soon as possible.
Information
• Both the driver's and front passen-
ger's pre-tensioner seat belts may be
activated in certain frontal or side
collisions or rollovers.
• When the pre-tensioner seat belts
are activated, a loud noise may be
heard and fine dust, which may
appear to be smoke, may be visible
in the passenger compartment.
These are normal operating condi-
tions and are not hazardous.
• Although it is non-toxic, the fine
dust may cause skin irritation and
should not be inhaled for prolonged
periods. Wash all exposed skin areas
thoroughly after an accident in
which the pre-tensioner seat belts
were activated.
• The pre-tensioner seat belt system
may get adversely affected by
installing an audio system to the
center console or welding/painting
the frontal vehicle body.
In this case, consult an authorized
retailer of Genesis Branded prod-
ucts. The air bag warning light illu-
minates, if there is a malfunction
with the pre-tensioner seat belt sys-
tem.
• In following situations, immediately
have the air bag system and the pre-
tensioner seat belt system checked
by an authorized retailer of Genesis
Branded products.
- The air bag warning light does not
illuminate at all after turning ON
the engine.
- The air bag warning light remains
ON over 6 seconds after turning
ON the engine.
i
i
OHI039175N
Page 82 of 538

2-62
Safety system of your vehicle
Curtain air bags
Curtain air bags are located along
both sides of the roof rails above the
front and rear doors.
They are designed to help protect the
heads of the front seat occupants
and the rear outboard seat occupants
in certain side impact collisions.
The curtain air bags are designed to
deploy only during certain side
impact collisions, depending on the
crash severity.
The side and curtain air bags on both
sides of the vehicle may deploy if a
rollover or possible rollover is detect-
ed.
However, the curtain air bags are not
designed to deploy in all side impact
or rollover situations. • Do not place any objects over
the air bag or between the air
bag and yourself. Also, do not
attach any objects around the
area the air bag inflates such
as the door, side door glass,
front and rear pillar.
• Do not place any objects
between the door and the
seat. They may become dan-
gerous projectiles if the side
air bag inflates.
• Do not install any accessories
on the side or near the side air
bags.
• Do not put any objects
between the side airbag label
and seat cushion. It could
cause harm if the vehicle is in
a crash severe enough to
cause the air bags to deploy.
• Do not cause impact to the
doors when the Engine Start/
Stop button is in the ON posi-
tion or this may cause the
side air bags to inflate.
• If the seat or seat cover is
damaged, have the vehicle
checked and repaired by an
authorized retailer of Genesis
Branded Vehicle.
OHI038051
OHI038052
Page 84 of 538

2-64
Safety system of your vehicle
SRS warning light
The SRS (Supplement Restraint
System) air bag warning light on the
instrument panel displays the air bag
symbol depicted in the illustration.
The system checks the air bag elec-
trical system for malfunctions. The
light indicates that there is a potential
malfunction with your air bag system,
which could include your side and
curtain air bags used for rollover pro-
tection.
If your SRS malfunctions, the
air bag may not inflate properly
during an accident increasing
the risk of serious injury or
death.
If any of the following condi-
tions occur, your SRS is mal-
functioning:
• The light does not turn on for
approximately six seconds
when the Engine Start/Stop
button is in the ON or START
position.
• The light stays on after illumi-
nating for approximately six
seconds.
• The light comes on while the
vehicle is in motion.
• The light blinks when the
engine is running.
Have an authorized retailer of
Genesis Branded products
inspect the SRS as soon as
possible if any of these condi-
tions occur.
WARNING
Page 104 of 538

3-3
03
Smart Key
Your G90 uses a Smart Key, which
you can use to lock or unlock the driv-
er and passenger doors or the trunk.
1. Door Lock
2. Door Unlock
3. Trunk Unlock
4. Panic
Locking your vehicle
To lock your vehicle using the door
handle button or the Smart Key:
1. Make sure all doors, the hood and
the trunk are closed.
2. Make sure you have the smart key
in your possession.3. Press either the button on the
door handle or the Door Lock but-
ton (1) on the smart key. The
chime will sound once and the
hazard warning lights will blink.
Also, the outer side view mirror will
fold, if the folding switch is in the
AUTO position.
4. Make sure the doors are locked by
checking the position of the door
lock button inside the vehicle.
Information
• The door handle button will only
operate when the smart key is with-
in 28~40 inches (0.7~1 m) from the
outside door handle.
• Pressing the door handle button
does not unlock the doors. To unlock
the doors, refer to the following
page.
Note that you cannot lock your vehi-
cle using the door handle button if
any of the following occur:
• The Smart Key is in the vehicle.
• The Engine Start/Stop button is in
ACC or ON position.
• Any door except the trunk is open.
i
ACCESSING YOUR VEHICLE
OHI048058
OHI048003
Page 116 of 538

This system helps to protect your
vehicle and valuables. The horn will
sound and the hazard warning lights
will blink continuously if any of the
following occur:
- A door is opened without using the
smart key.
- The trunk is opened without using
the smart key.
- The engine hood is opened.
The alarm continues for 30 seconds,
then the system resets. To turn off
the alarm, unlock the doors with the
smart key.
The Theft Alarm System automati-
cally sets 30 seconds after you lock
the doors and the trunk. For the sys-
tem to activate, you must lock the
doors and the trunk from outside the
vehicle with the smart key or by
pressing the button on the outside of
the door handles with the smart key
in your possession.
The hazard warning lights will blink
and the chime will sound once to
indicate the system is armed.
Once the security system is set,
opening any door, the trunk, or the
hood without using the smart key will
cause the alarm to activate.
The Theft Alarm System will not set if
the hood, the trunk, or any door is
not fully closed. If the system will not
set, check the hood, the trunk, or the
doors are fully closed.
Do not attempt to alter this system or
add other devices to it.Information
• Do not lock the doors until all pas-
sengers have left the vehicle. If the
remaining passenger leaves the
vehicle when the system is armed,
the alarm will be activated.
• If the vehicle is not disarmed with
the smart key, open the doors by
using the mechanical key or start
the engine by directly pressing the
Engine Start/Stop button with the
smart key.
• When the system is disarmed but a
door or trunk is not opened within 30
seconds, the system will be rearmed.
i
THEFT-ALARM SYSTEM
3-15
03
Page 117 of 538

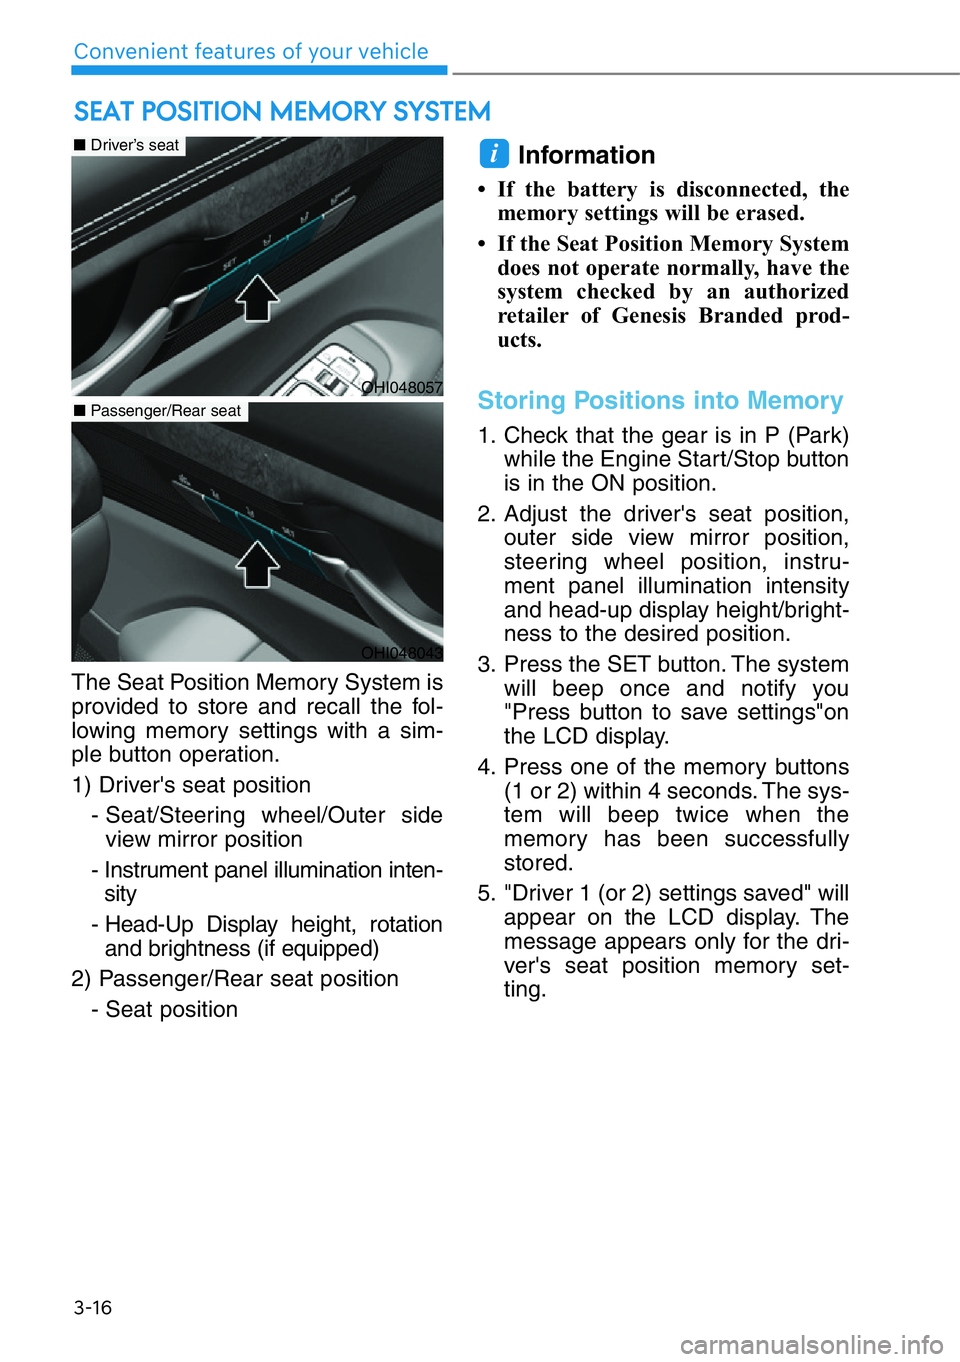
The Seat Position Memory System is
provided to store and recall the fol-
lowing memory settings with a sim-
ple button operation.
1) Driver's seat position
- Seat/Steering wheel/Outer side
view mirror position
- Instrument panel illumination inten-
sity
- Head-Up Display height, rotation
and brightness (if equipped)
2) Passenger/Rear seat position
- Seat position
Information
• If the battery is disconnected, the
memory settings will be erased.
• If the Seat Position Memory System
does not operate normally, have the
system checked by an authorized
retailer of Genesis Branded prod-
ucts.
Storing Positions into Memory
1. Check that the gear is in P (Park)
while the Engine Start/Stop button
is in the ON position.
2. Adjust the driver's seat position,
outer side view mirror position,
steering wheel position, instru-
ment panel illumination intensity
and head-up display height/bright-
ness to the desired position.
3. Press the SET button. The system
will beep once and notify you
"Press button to save settings"on
the LCD display.
4. Press one of the memory buttons
(1 or 2) within 4 seconds. The sys-
tem will beep twice when the
memory has been successfully
stored.
5. "Driver 1 (or 2) settings saved" will
appear on the LCD display. The
message appears only for the dri-
ver's seat position memory set-
ting.
i
SEAT POSITION MEMORY SYSTEM
3-16
Convenient features of your vehicle
OHI048057
■Driver’s seat
■Passenger/Rear seat
OHI048043
Page 118 of 538

3-17
03
Recalling Positions from
Memory
1. Check that the gear is in P (Park)
while the Engine Start/Stop button
is in the ON position.
2. Press the desired memory button
(1 or 2). The system will beep
once, and then the driver's seat
position, outer side view mirror
position, steering wheel position,
instrument panel illumination
intensity and head-up display
height/brightness will automatical-
ly adjust to the stored positions.
3. "Driver 1(or 2) settings applied"
will appear on the LCD display.
The message appears only for
the driver's seat position memory
setting.
Information
• If you press the SET button or num-
ber 1 button with the number 1 set-
ting in operation, the setting will tem-
porarily deactivate. If you press the
number 2 button, the number 2 set-
ting will activate.
• If you press the number 2 button or
SET button with the number 2 button
in operation, the number 2 setting
will temporarily deactivate. Press the
number 1 button, the number 1 set-
ting will activate.
• If you operate the seat adjustment
switch, side view mirror, steering
wheel, instrument panel illumination
or head-up display while recalling the
stored positions, the pre-set settings
will become ineffective.
Resetting the Seat Position
Memory System
Take the following procedures to
reset the seat position memory sys-
tem, when it does not operate prop-
erly.
To reset the seat position mem-
ory system
1. Stop the vehicle and open the dri-
ver's door with the Engine
Start/Stop button in the ON posi-
tion and the gear shifted to P
(Park).
2. Operate the control switch to set
the driver's seat and seatback to
the foremost position.
3. Simultaneously press the SET
button and push forward the dri-
ver's seat movement switch over 2
seconds.
While resetting the seat posi-
tion memory system
1. It starts with the notification sound.
2. The driver's seat and seatback is
adjusted to the rearward position
with the notification sound.
3. The driver's seat and seatback is
re-adjusted to the default position
(central position) with the notifica-
tion sound.
However, in the following cases, the
resetting procedure and the notifica-
tion sound may stop.
- The memory button is pressed.
- The seat control switch is operated.
- The gear is shifted out of P (Park).
- The driving speed exceeds 2 mph
(3 km/h).
- The driver's door is closed.
i
Page 120 of 538

3-19
03
The Smart Posture Care system
automatically provides a healthy pos-
ture (position) for the driver's back,
and sets the steering wheel, outer
side view mirrors, head-up display
positions according to the driver's
body measurements.
Information
If the Seat Posture Care System does
not operate normally, have the system
checked by an authorized retailer of
Genesis Branded products.1. Check that the gear is in P (Park)
while the Engine Start/Stop button
is in the ON position.
2. Press the SMART button on the
driver's door or select 'Setup →
Vehicle Settings →Convenience
→Smart Posture Care' from the
Settings menu in the AVN system
screen.
3. Enter information (Height, Pants
Inseam Length, Weight) in the
AVN system screen.
4. After entering the driver’s informa-
tion, press 'Adjust Posture'. The
driver’s seat, steering wheel, side
view mirror and head-up display
will be adjusted.
5. Press 'Save' and save the adjust-
ed seat position in 'Driver 1' or
'Driver 2'.
Reference table
For detailed information, scan the
QR code in a separately supplied
simple manual.
i
SMART POSTURE CARE SYSTEM (IF EQUIPPED)
OHI048042OHI049513N
Height4' 9'' ~ 6' 6"
Pants
Inseam
Length
Short/Average/Tall
Weight109 lbs. or Below ~
264 lbs. or Above
Page 121 of 538

3-20
Convenient features of your vehicle
STEERING WHEEL
Motor-Driven Power Steering
(MDPS)
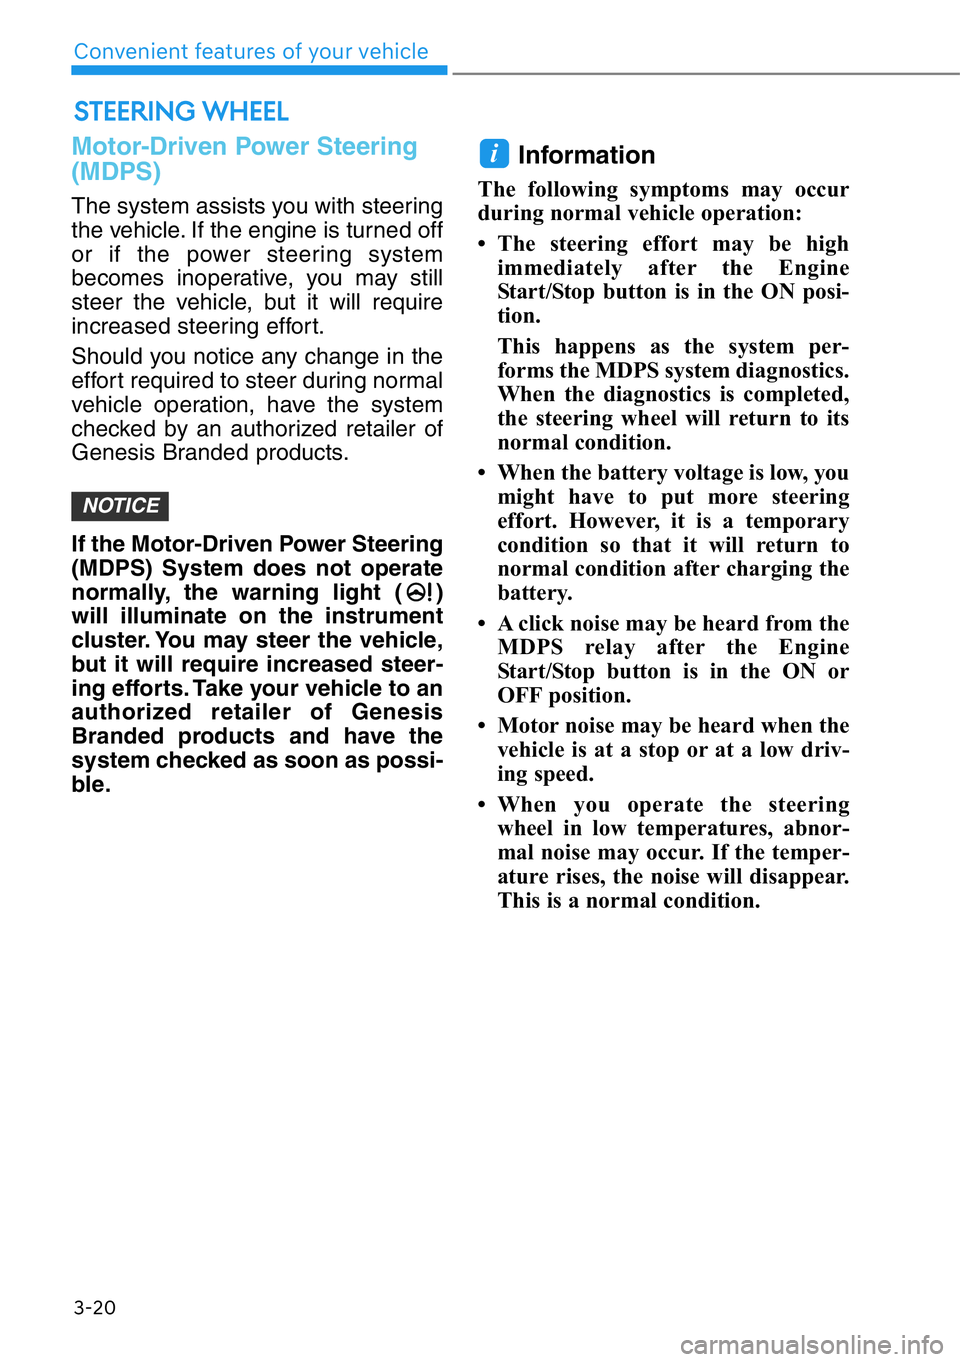
The system assists you with steering
the vehicle. If the engine is turned off
or if the power steering system
becomes inoperative, you may still
steer the vehicle, but it will require
increased steering effort.
Should you notice any change in the
effort required to steer during normal
vehicle operation, have the system
checked by an authorized retailer of
Genesis Branded products.
If the Motor-Driven Power Steering
(MDPS) System does not operate
normally, the warning light ( )
will illuminate on the instrument
cluster. You may steer the vehicle,
but it will require increased steer-
ing efforts. Take your vehicle to an
authorized retailer of Genesis
Branded products and have the
system checked as soon as possi-
ble.
Information
The following symptoms may occur
during normal vehicle operation:
• The steering effort may be high
immediately after the Engine
Start/Stop button is in the ON posi-
tion.
This happens as the system per-
forms the MDPS system diagnostics.
When the diagnostics is completed,
the steering wheel will return to its
normal condition.
• When the battery voltage is low, you
might have to put more steering
effort. However, it is a temporary
condition so that it will return to
normal condition after charging the
battery.
• A click noise may be heard from the
MDPS relay after the Engine
Start/Stop button is in the ON or
OFF position.
• Motor noise may be heard when the
vehicle is at a stop or at a low driv-
ing speed.
• When you operate the steering
wheel in low temperatures, abnor-
mal noise may occur. If the temper-
ature rises, the noise will disappear.
This is a normal condition.
i
NOTICE