change time GENESIS GV80 2021 Owner's Manual
[x] Cancel search | Manufacturer: GENESIS, Model Year: 2021, Model line: GV80, Model: GENESIS GV80 2021Pages: 632, PDF Size: 9.37 MB
Page 1 of 632
All information in this Owner’s Manual is current at the time
of publication. However, Genesis reserves the right to make
changes at any time so that our policy of continual product
improvement may be carried out.
This manual applies to all Genesis Branded Vehicle models and
includes descriptions and explanations of optional as well as
standard equipment.
As a result, you may find material in this manual that does not
apply to your specific vehicle.
OWNER’S MANUAL
Operation
Maintenance
Specifications
Introduction
1
Page 25 of 632
02
2-13
*1 : Refer to the recommended SAE viscosity numbers.
*2 : Engine oils labeled Energy Conserving Oil are now available. Along with other additional
benefits, they contribute to fuel economy by reducing the amount of fuel necessary
to overcome engine friction. Often, these improvements are difficult to measure in
everyday driving, but in a year’s time, they can offer significant cost and energy savings.
*3 : If the above recommended specification oil is not available, SAE 0W-30 grade synthetic
oil can be used. If mineral oil or semi-synthetic oil is used, it is a severe maintenance
condition in terms of engine oil change.
*4 : To maintain the best braking performance and ABS/ESC performance, we recommend
that you use genuine brake fluid that conform to specifications.
*5 : If the front/rear differential is submerged, we recommend that you visit an authorized
retailer of Genesis Branded products to replace the differential oil.
Recommended SAE Viscosity Number
CAUTION
Always be sure to clean the area around any filler cap, drain plug, or dipstick before
checking or draining any lubricant. This is especially important in dusty or sandy
areas and when the vehicle is used on unpaved roads. Cleaning the plug and dipstick
areas will prevent dirt and grit from entering the engine and other mechanisms that
could be damaged.
Engine oil viscosity (thickness) has an effect on fuel economy and cold weather
operating (engine start and engine oil flowability). Lower viscosity engine oils can
provide better fuel economy and cold weather performance, however, higher viscosity
engine oils are required for satisfactory lubrication in hot weather. Using oils of any
viscosity other than those recommended could result in engine damage.
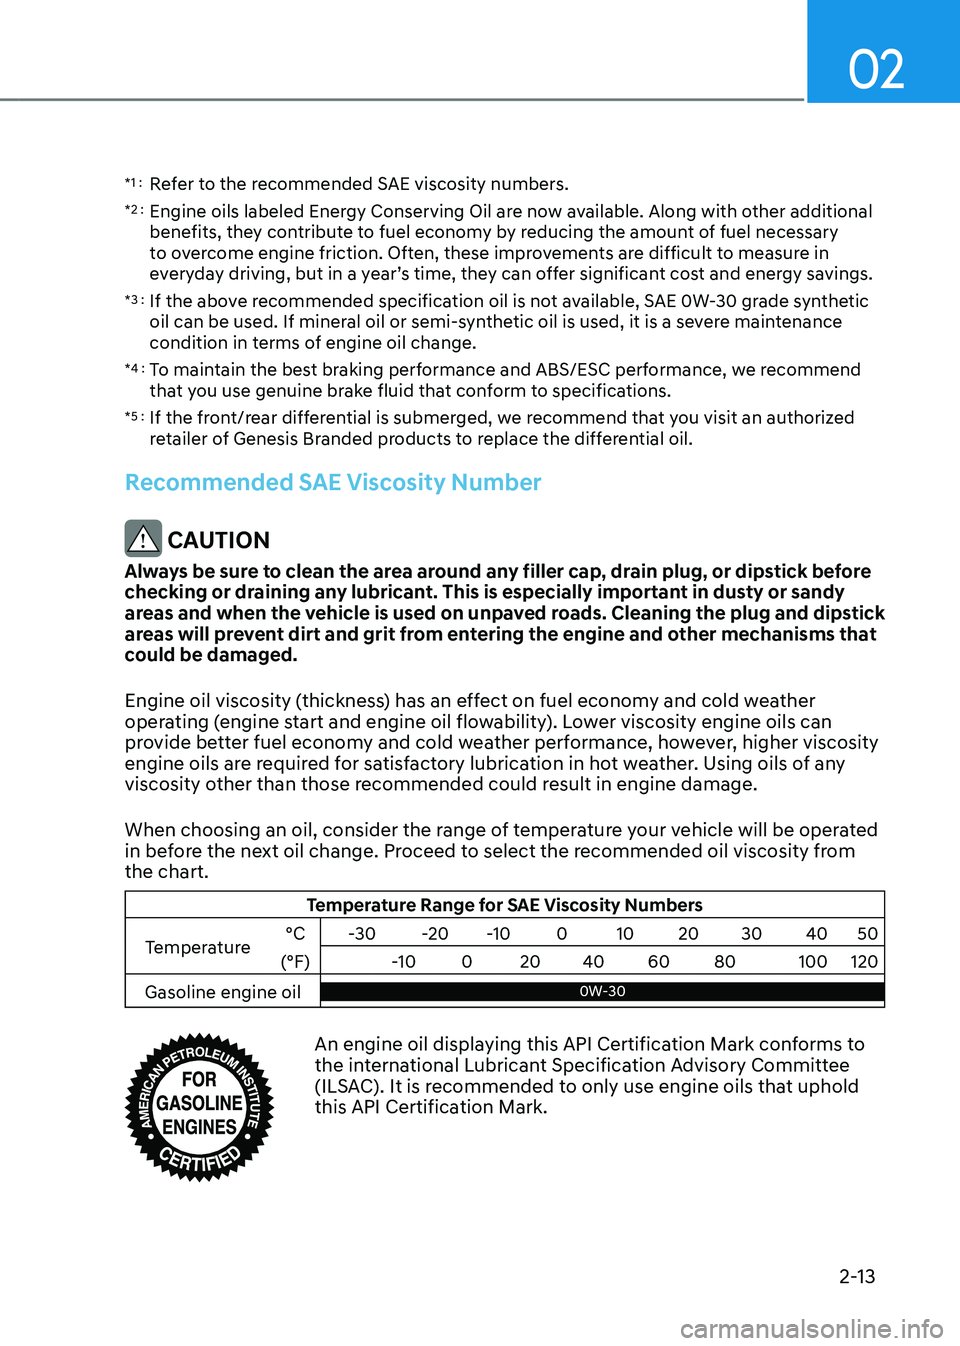
When choosing an oil, consider the range of temperature your vehicle will be operated
in before the next oil change. Proceed to select the recommended oil viscosity from
the chart.
Temperature Range for SAE Viscosity Numbers
Temperature °C
-30 -20-10 010 20 30 4050
(°F) -10020 40 60 80 100120
Gasoline engine oil
0W-300W-30
An engine oil displaying this API Certification Mark conforms to the international Lubricant Specification Advisory Committee
(ILSAC). It is recommended to only use engine oils that uphold
this API Certification Mark.
Page 38 of 632
03
3-9
WARNING
NEVER allow children in the vehicle
unattended. The power seats are
operable when the vehicle is turned off.
NOTICE
To prevent damage to the seats:
• Always stop adjusting the seats when
the seat has been adjusted as far
forward or rearward as possible.
• Do not adjust the seats longer than
necessary when the vehicle is turned
off. This may result in unnecessary
battery drain.
• Do not operate two or more seats at
the same time. This may result in an
electrical malfunction.
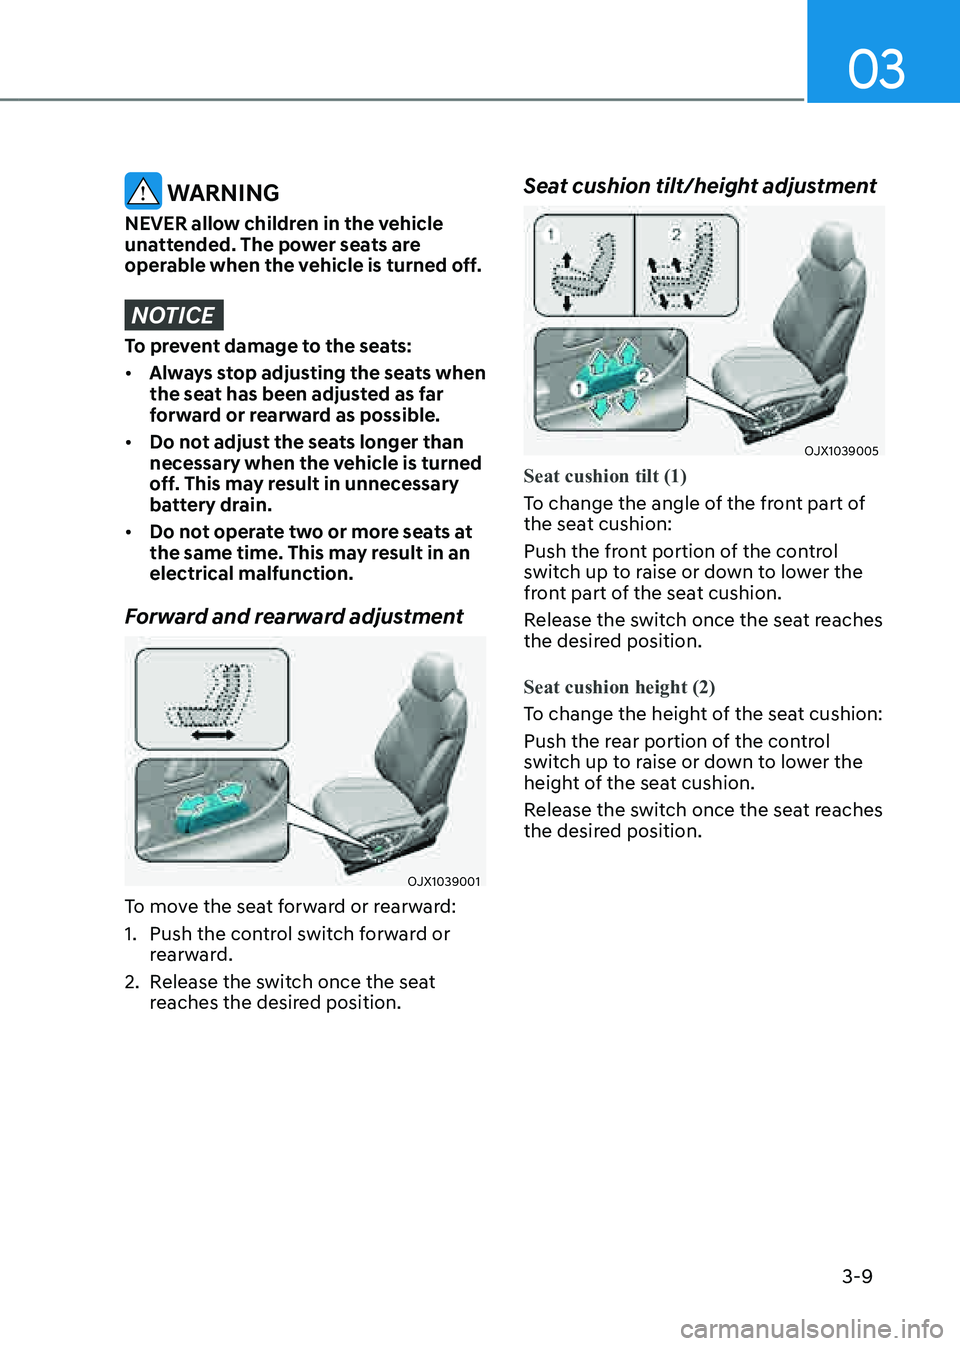
Forward and rearward adjustment
OJX1039001OJX1039001
To move the seat forward or rearward:
1. Push the control switch forward or
rearward.
2. Release the switch once the seat
reaches the desired position.
Seat cushion tilt/height adjustment
OJX1039005OJX1039005
Seat cushion tilt (1)
To change the angle of the front part of
the seat cushion:
Push the front portion of the control
switch up to raise or down to lower the
front part of the seat cushion.
Release the switch once the seat reaches
the desired position.
Seat cushion height (2)
To change the height of the seat cushion:
Push the rear portion of the control
switch up to raise or down to lower the
height of the seat cushion.
Release the switch once the seat reaches
the desired position.
Page 41 of 632
Safety System
3-12
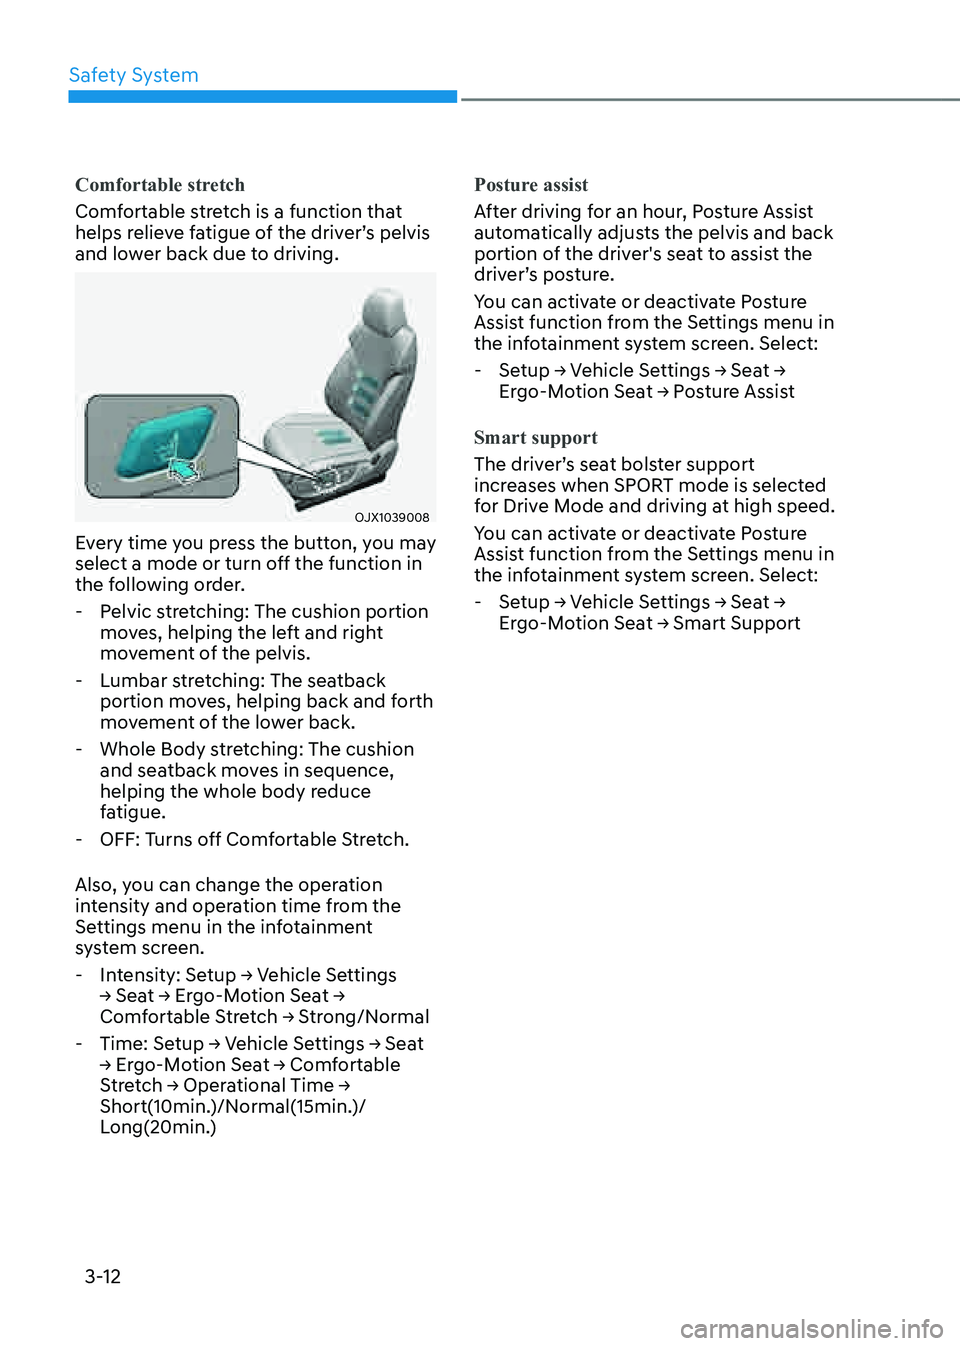
Comfortable stretch
Comfortable stretch is a function that
helps relieve fatigue of the driver’s pelvis
and lower back due to driving.
OJX1039008OJX1039008
Every time you press the button, you may
select a mode or turn off the function in
the following order.
-Pelvic stretching: The cushion portion
moves, helping the left and right
movement of the pelvis.
-Lumbar stretching: The seatback
portion moves, helping back and forth
movement of the lower back.
-Whole Body stretching: The cushion
and seatback moves in sequence,
helping the whole body reduce
fatigue.
-OFF: Turns off Comfortable Stretch.
Also, you can change the operation
intensity and operation time from the
Settings menu in the infotainment
system screen.
-Intensity: Setup -> Vehicle Settings -> Seat -> Ergo-Motion Seat -> Comfortable Stretch -> Strong/Normal
-Time: Setup -> Vehicle Settings -> Seat -> Ergo-Motion Seat -> Comfortable Stretch -> Operational Time -> Short(10min.)/Normal(15min.)/
Long(20min.) Posture assist
After driving for an hour, Posture Assist
automatically adjusts the pelvis and back
portion of the driver's seat to assist the
driver’s posture.
You can activate or deactivate Posture
Assist function from the Settings menu in
the infotainment system screen. Select:
-Setup -> Vehicle Settings -> Seat -> Ergo-Motion Seat -> Posture Assist
Smart support
The driver’s seat bolster support
increases when SPORT mode is selected
for Drive Mode and driving at high speed.
You can activate or deactivate Posture
Assist function from the Settings menu in
the infotainment system screen. Select:
-Setup -> Vehicle Settings -> Seat -> Ergo-Motion Seat -> Smart Support
Page 56 of 632
03
3-27
Seat Warmers
Seat warmers are provided to warm the
seats during cold weather.
During mild weather or under conditions
where the operation of the seat warmer
is not needed, keep the seat warmers
OFF.
WARNING
The seat warmers can cause a SERIOUS
BURN, even at low temperatures and
especially if used for long periods of
time.
Passengers must be able to feel if the
seat is becoming too warm so they can
turn it off, if needed.
People who cannot detect temperature
change or pain to the skin should
use extreme caution, especially the
following types of passengers:
• Infants, children, elderly or disabled
persons, or hospital outpatients.
• People with sensitive skin or who
burn easily.
• Fatigued individuals.
• Intoxicated individuals.
• People taking medication that can
cause drowsiness or sleepiness.
WARNING
NEVER place anything on the seat
that insulates against heat when the
seat warmer is in operation, such as a
blanket or seat cushion. This may cause
the seat warmer to overheat, causing a
burn or damage to the seat.
NOTICE
To prevent damage to the seat warmers
and seats:
• Never use a solvent such as paint
thinner, benzene, alcohol or gasoline
to clean the seats.
• Do not place heavy or sharp objects
on seats equipped with seat
warmers.
• Do not change the seat cover. It may
damage the seat warmer.
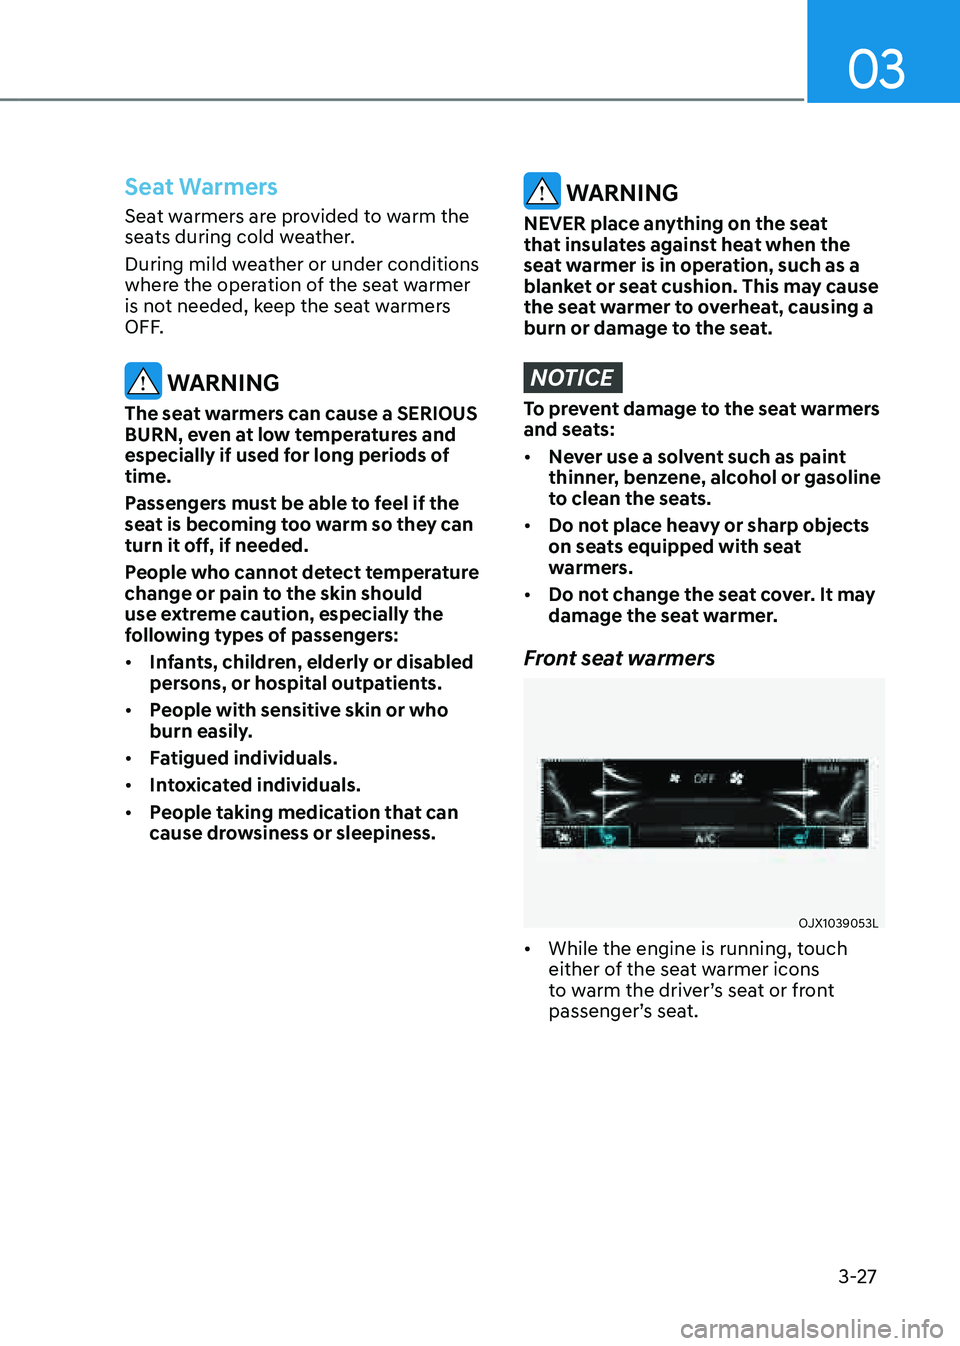
Front seat warmers
OJX1039053LOJX1039053L
• While the engine is running, touch
either of the seat warmer icons
to warm the driver’s seat or front
passenger’s seat.
Page 57 of 632
Safety System
3-28
• Manual temperature control
Each time you touch the icon, the
temperature setting of the seat is
changed as follows :
OFF → HIGH ( ) → MIDDLE ( ) → LOW ( )
• Automatic temperature control
The seat warmer starts to
automatically control the seat
temperature in order to prevent
low temperature burns after being
manually turned ON.
OFF → HIGH ( ) → MIDDLE ( ) → LOW ( )
30 min 60 min
You may manually touch the icon to
increase seat temperature. However,
the seat temperature is automatically
adjusted again.
• Seat Heater Balance
You may lower the seat warmer
setting, or may turn the seat warmer
off for either the seatback or seat
cushion, when the seat warmer is on.
To use this function, it must be
enabled from the Settings menu in the
infotainment system screen. Select:
-Setup -> Vehicle Settings -> Seat -> Heated/Ventilated Features -> Seat Heater Balance
• When touching the icon for more than
1.5 seconds with the seat warmer
operating, the seat warmer will turn
OFF.
• The seat warmer defaults to the OFF
position whenever the Engine Start/
Stop button is pressed to the ON
position.
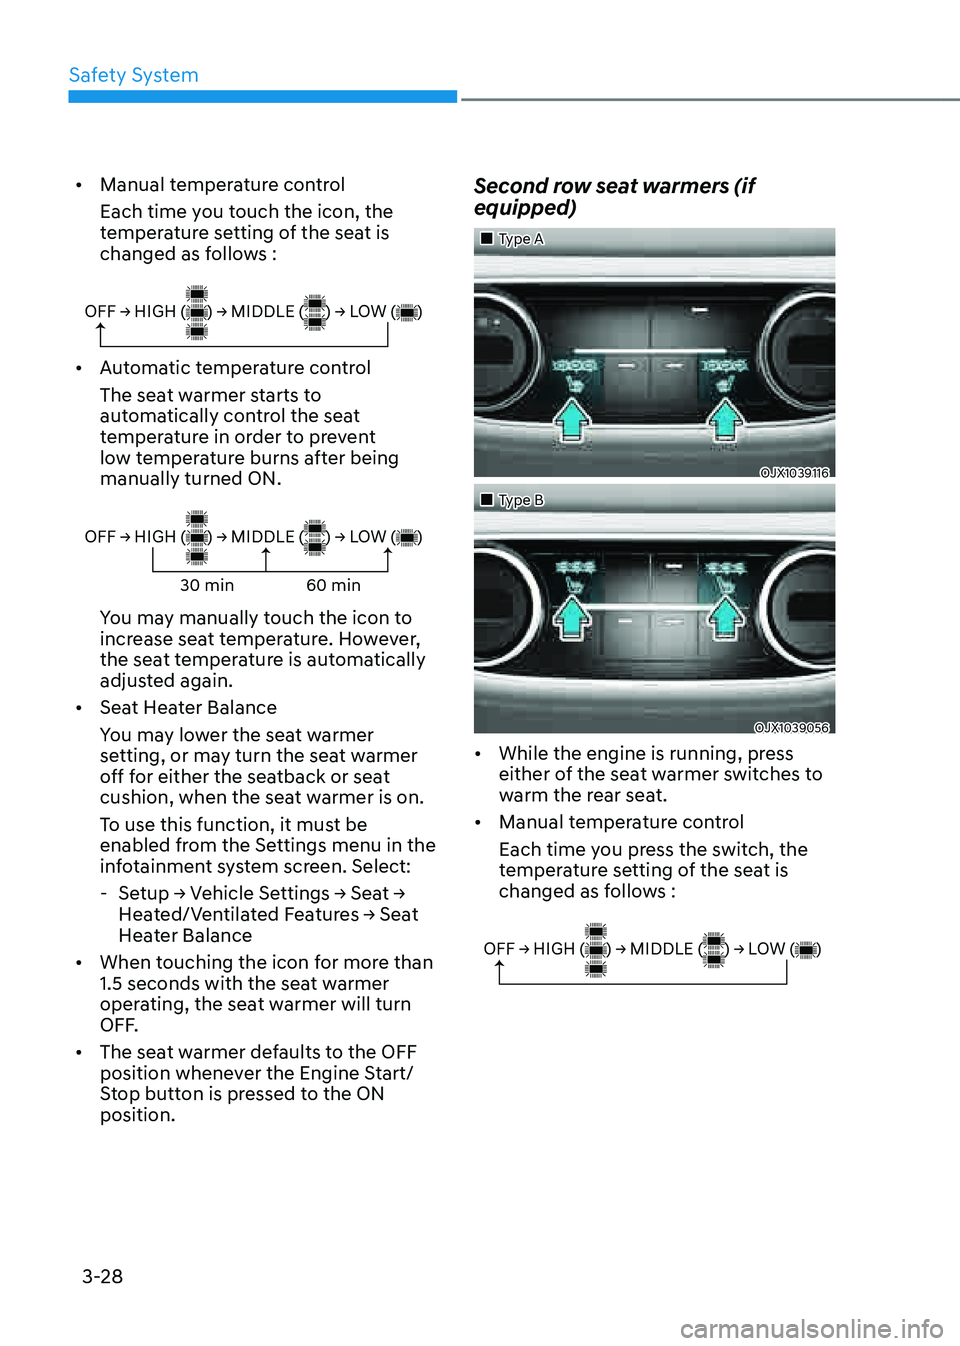
Second row seat warmers (if
equipped)
�
Page 59 of 632
Safety System
3-30
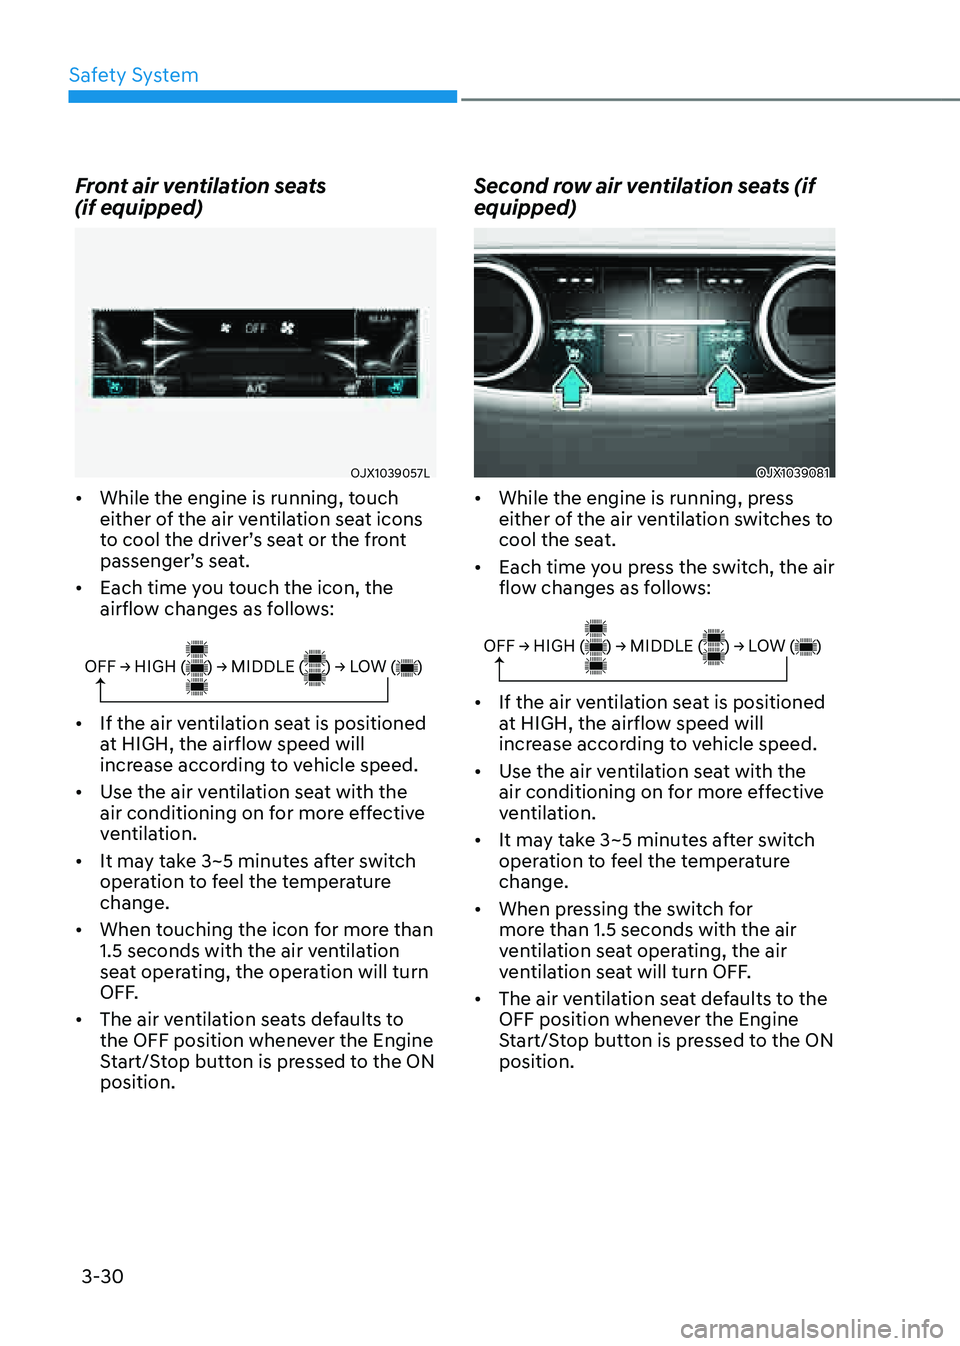
Front air ventilation seats
(if equipped)
OJX1039057LOJX1039057L
• While the engine is running, touch
either of the air ventilation seat icons
to cool the driver’s seat or the front
passenger’s seat.
• Each time you touch the icon, the
airflow changes as follows:
OFF → HIGH ( ) → MIDDLE ( ) → LOW ( )
• If the air ventilation seat is positioned
at HIGH, the airflow speed will
increase according to vehicle speed.
• Use the air ventilation seat with the
air conditioning on for more effective
ventilation.
• It may take 3~5 minutes after switch
operation to feel the temperature
change.
• When touching the icon for more than
1.5 seconds with the air ventilation
seat operating, the operation will turn
OFF.
• The air ventilation seats defaults to
the OFF position whenever the Engine
Start/Stop button is pressed to the ON
position.
Second row air ventilation seats (if
equipped)
OJX1039081OJX1039081
• While the engine is running, press
either of the air ventilation switches to
cool the seat.
• Each time you press the switch, the air
flow changes as follows:
OFF → HIGH ( ) → MIDDLE ( ) → LOW ( )
• If the air ventilation seat is positioned
at HIGH, the airflow speed will
increase according to vehicle speed.
• Use the air ventilation seat with the
air conditioning on for more effective
ventilation.
• It may take 3~5 minutes after switch
operation to feel the temperature
change.
• When pressing the switch for
more than 1.5 seconds with the air
ventilation seat operating, the air
ventilation seat will turn OFF.
• The air ventilation seat defaults to the
OFF position whenever the Engine
Start/Stop button is pressed to the ON
position.
Page 128 of 632
04
4-23
Press brake pedal to start engine
This message is displayed if the Engine
Start/Stop button changes to the ACC
position twice by pressing the button
repeatedly without depressing the brake
pedal.
You can start the vehicle by depressing
the brake pedal and then pressing the
Engine Start/Stop button.
Key not in vehicle
This message is displayed if the smart
key is not in the vehicle when you leave
the vehicle with the Engine Start/Stop
button in the ON or Start position.
Always turn off the engine before leaving
your vehicle.
Key not detected
This message is displayed if the smart
key is not detected when you press the
Engine Start/Stop button.
Press START button again
This message is displayed if you were
unable to start the vehicle when the
Engine Start/Stop button was pressed.
If this occurs, attempt to start the engine
by pressing the Engine Start/ Stop button
again.
If the warning message appears each
time you press the Engine Start/Stop
button, have the vehicle inspected by an
authorized retailer of Genesis Branded
products.
Press START button with key
This message is displayed if you press
the Engine Start/Stop button while the
warning message “Key not detected” is
displayed.
At this time, the immobilizer indicator
light blinks.
Check BRAKE SWITCH fuse
This message is displayed if the brake
switch fuse is disconnected.
You need to replace the fuse with a new
one before starting the engine.
If that is not possible, you can start the
engine by pressing the Engine Start/
Stop button for 10 seconds in the ACC
position.
Shift to P or N to start engine
This message is displayed if you try to
start the engine in any other position
except P (Park) or N (Neutral).
Information
You can start the engine with the gear
in N (Neutral). But, for your safety, we
recommend that you start the engine with
the gear shifted to P (Park).
Page 133 of 632
Instrument Cluster
4-28
OJX1040075NOJX1040075N
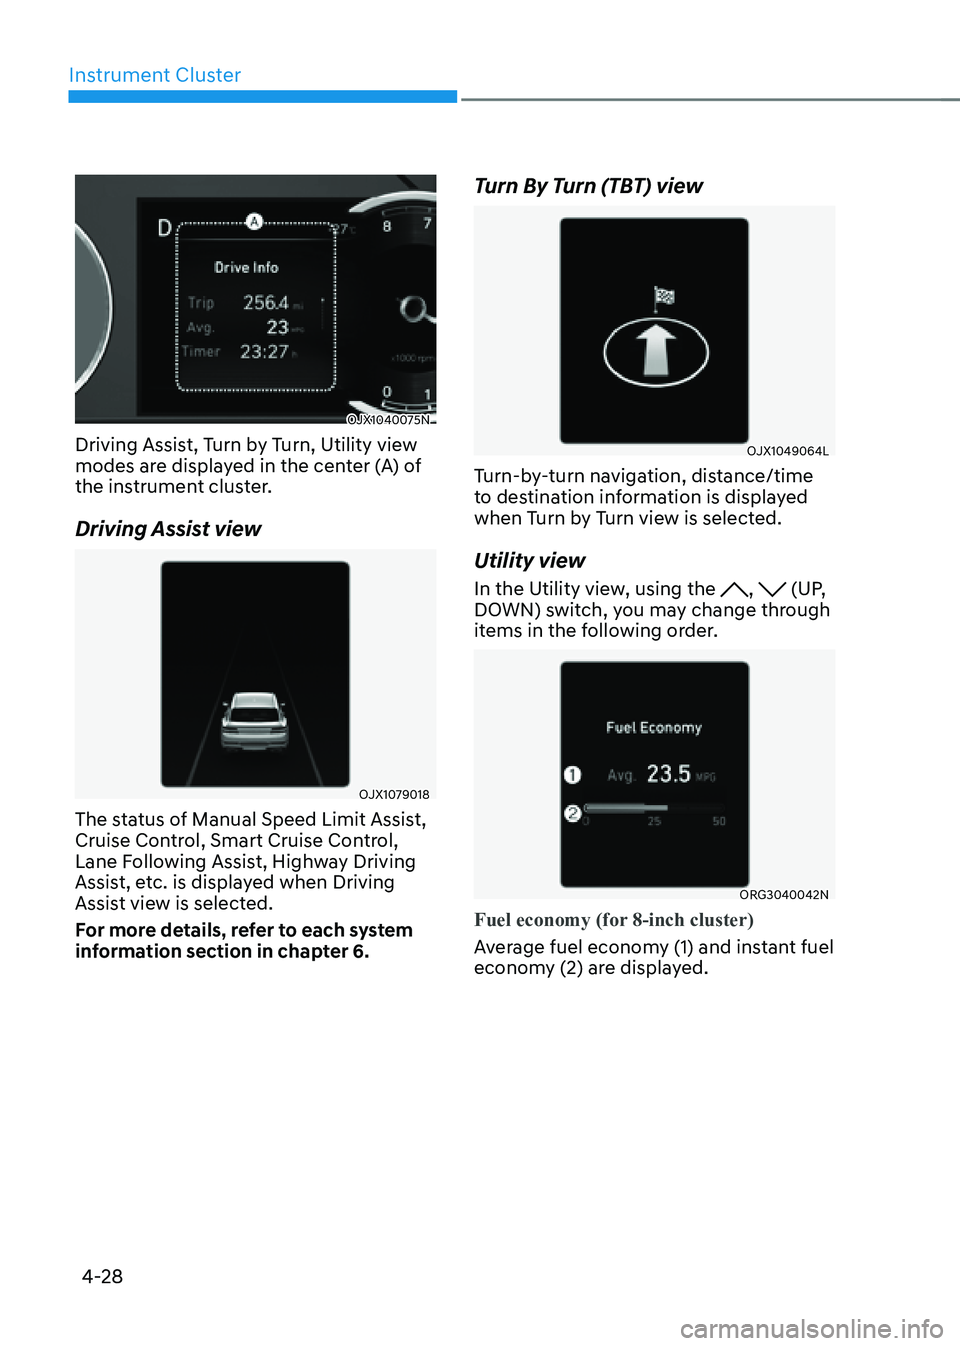
Driving Assist, Turn by Turn, Utility view
modes are displayed in the center (A) of
the instrument cluster.
Driving Assist view
OJX1079018OJX1079018
The status of Manual Speed Limit Assist,
Cruise Control, Smart Cruise Control,
Lane Following Assist, Highway Driving
Assist, etc. is displayed when Driving
Assist view is selected.
For more details, refer to each system
information section in chapter 6.
Turn By Turn (TBT) view
OJX1049064LOJX1049064L
Turn-by-turn navigation, distance/time
to destination information is displayed
when Turn by Turn view is selected.
Utility view
In the Utility view, using the , (UP,
DOWN) switch, you may change through
items in the following order.
ORG3040042NORG3040042N
Fuel economy (for 8-inch cluster)
Average fuel economy (1) and instant fuel
economy (2) are displayed.
Page 140 of 632
04
4-35
Information
• When your face gets too close or far to
the instrument cluster, or the camera
on the instrument cluster is blocked by
the steering wheel or other objects, the
3D cluster changes to 2D automatically.
However if the object blocking the
camera is removed, the cluster changes
back to 3D automatically.
• If outside temperature is below 39°F
(4°C), it may change to 2D about 1 to
10 minutes.
• Two red lights may appear on the
camera in the following conditions
when:
-The outside brightness is dim or
driving at night
-The vehicle drives inside a building,
such as a basement parking lot
-The camera case of the instrument
cluster is partially damaged
CAUTION
• It may sometimes be difficult to
read information on the 3D cluster
in the following situations. You must
change the cluster to 2D for safe
driving.
-The driver is wearing sunglasses,
special glasses, infrared cutoff
glasses, refracting glasses or thick
glasses
-The driver has heavy eye makeup
(eyeliner, mascara, color makeup,
false eyelash) or eye piercing
-The driver’s view is blocked by his/
her hair, etc.
-The driver is winking or wearing an
eye patch on one eye
-The driver’s face is covered
partially by a mask, muffler, hood,
etc.
-The driver’s view is blocked by
incoming light from outside of the
vehicle
-Light from outside, sunlight or
infrared LED light of the camera
is reflected on the glasses or
sunglasses
-The driver turns or lowers his/her
head so that the face or an eye is
hidden from the camera
-The driver shakes his/her head
up and down, or adverse road
conditions cause excessive vehicle
vibrations while driving
-The driver is too tall or short
-More than two people are
looking at the instrument cluster
simultaneously from the driver’s
seat
-The driver’s eyesight of both eyes
are severely different
-The driver has a severe headache
• Do not look toward the camera
within 8 in (20 cm) for longer than a
minute.
• If you use the 3D cluster while your
vehicle is stopped, it can cause eye
strains or dizziness.
• We recommend people who are
pregnant, elderly or has motion
sickness, avoid using the cluster in
3D.