display GMC CANYON 2008 User Guide
[x] Cancel search | Manufacturer: GMC, Model Year: 2008, Model line: CANYON, Model: GMC CANYON 2008Pages: 428, PDF Size: 5.82 MB
Page 125 of 428
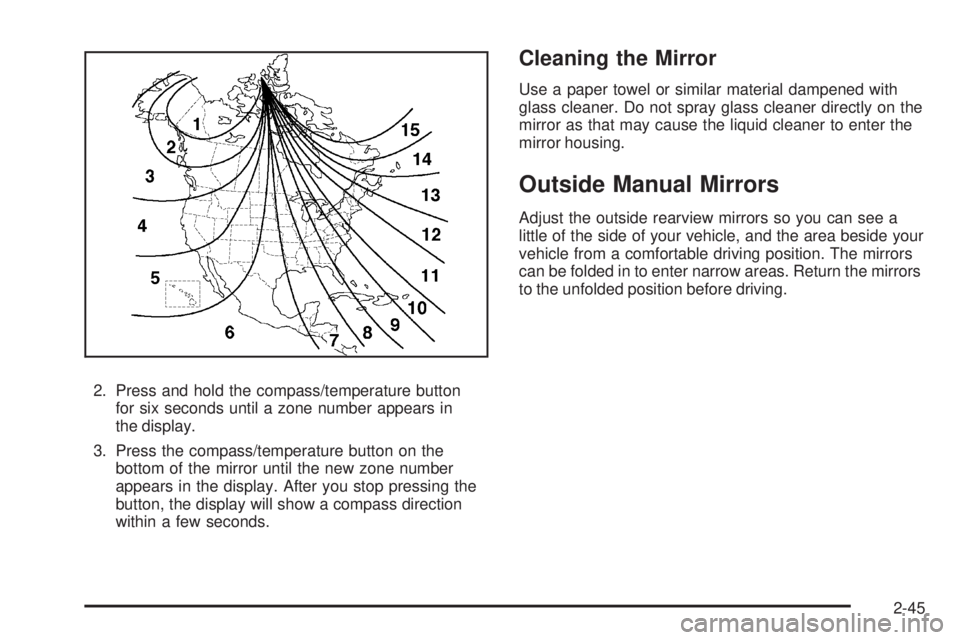
2. Press and hold the compass/temperature button
for six seconds until a zone number appears in
the display.
3. Press the compass/temperature button on the
bottom of the mirror until the new zone number
appears in the display. After you stop pressing the
button, the display will show a compass direction
within a few seconds.
Cleaning the Mirror
Use a paper towel or similar material dampened with
glass cleaner. Do not spray glass cleaner directly on the
mirror as that may cause the liquid cleaner to enter the
mirror housing.
Outside Manual Mirrors
Adjust the outside rearview mirrors so you can see a
little of the side of your vehicle, and the area beside your
vehicle from a comfortable driving position. The mirrors
can be folded in to enter narrow areas. Return the mirrors
to the unfolded position before driving.
2-45
Page 134 of 428
Up-Shift Light...............................................3-30
Brake System Warning Light..........................3-31
Antilock Brake System Warning Light...............3-32
Traction Control System (TCS)
Warning Light...........................................3-32
Engine Coolant Temperature Gage..................3-33
Tire Pressure Light.......................................3-33
Malfunction Indicator Lamp.............................3-34
Oil Pressure Light.........................................3-36
Security Light...............................................3-37
Cruise Control Light......................................3-37
Highbeam On Light.......................................3-37
Fuel Gage...................................................3-38Driver Information Center (DIC).......................3-38
DIC Operation and Displays...........................3-38
DIC Warnings and Messages.........................3-42
Audio System(s).............................................3-46
Setting the Time...........................................3-47
Radio(s)......................................................3-48
Using an MP3..............................................3-64
XM Radio Messages.....................................3-68
Theft-Deterrent Feature..................................3-69
Radio Reception...........................................3-69
Fixed Mast Antenna......................................3-70
XM™ Satellite Radio Antenna System..............3-70
Chime Level Adjustment................................3-70
Section 3 Instrument Panel
3-2
Page 149 of 428
Instrument Panel Brightness
D(Instrument Panel Lights):Turn the thumbwheel
up or down to brighten or dim the instrument panel lights
and the radio display. The instrument panel lights, cluster,
and radio display do not dim to complete darkness. The
instrument panel light brightness control will only work if
the headlamps or parking lamps are on. SeeExterior
Lamps on page 3-13.
Dome Lamp
The dome and footwell lamps come on when any door
is opened. The dome lamps are located in the cargo
and front area of the vehicle.
The dome and footwell lamps can be turned on by
turning the thumbwheel, located next to the exterior
lamps control, all the way up. In this position, the
lamps remain on whether a door is opened or closed.
Dome Lamp Override
E(Dome Lamp Override):You can use the
dome override button, located below the exterior lamps
control, to set the dome and footwell lamps to come on
automatically when a door is opened, or to remain off.
To turn the lamps off, press the button into the in position.
With the button in this position, the dome lamps will
remain off when the doors are open. To return the lamps
to automatic operation, press the button again and return
it to the out position. With the button in this position, the
dome lamps will come on when you open a door.
Exit Lighting
With exit lighting, the interior lamps will come on when
you remove the key from the ignition. The lamps will not
come on if the dome override button is pressed in.
3-17
Page 150 of 428
Electric Power Management
The vehicle has Electric Power Management (EPM)
that estimates the battery’s temperature and state
of charge. It then adjusts the voltage for best
performance and extended life of the battery.
When the battery’s state of charge is low, the voltage is
raised slightly to quickly put the charge back in. When
the state of charge is high, the voltage is lowered slightly
to prevent overcharging. If the vehicle has a voltmeter
gage, you may see the voltage move up or down. This is
normal. If there is a problem, an alert will be displayed.
The battery can be discharged at idle if the electrical
loads are very high. This is true for all vehicles.
This is because the generator (alternator) may not
be spinning fast enough at idle to produce all the
power that is needed for very high electrical loads.
A high electrical load occurs when several of the
following loads are on: headlamps, high beams, fog
lamps, rear window defogger, climate control fan at
high speed, heated seats, engine cooling fans, trailer
loads, and loads plugged into accessory power outlets.
Battery Run-Down Protection
This feature shuts off the dome lamp if it is left on for
more than 20 minutes when the ignition is in LOCK.
This will help prevent your battery from running down.
Accessory Power Outlet(s)
The accessory power outlets can be used to connect
electrical equipment such as a cellular phone or
CB radio.
Your vehicle may have two accessory power outlets
located on the lower part of the instrument panel below
the climate control system and there may be one located
on the rear of the center console. A small cap must be
pulled down to access an accessory power outlet.
When not using an outlet be sure to cover it with the
protective cap.
Notice:Leaving electrical equipment on for
extended periods will drain the battery. Always
unplug electrical equipment when not in use and do
not plug in equipment that exceeds the maximum
amperage rating of 20 amperes.
3-18
Page 157 of 428
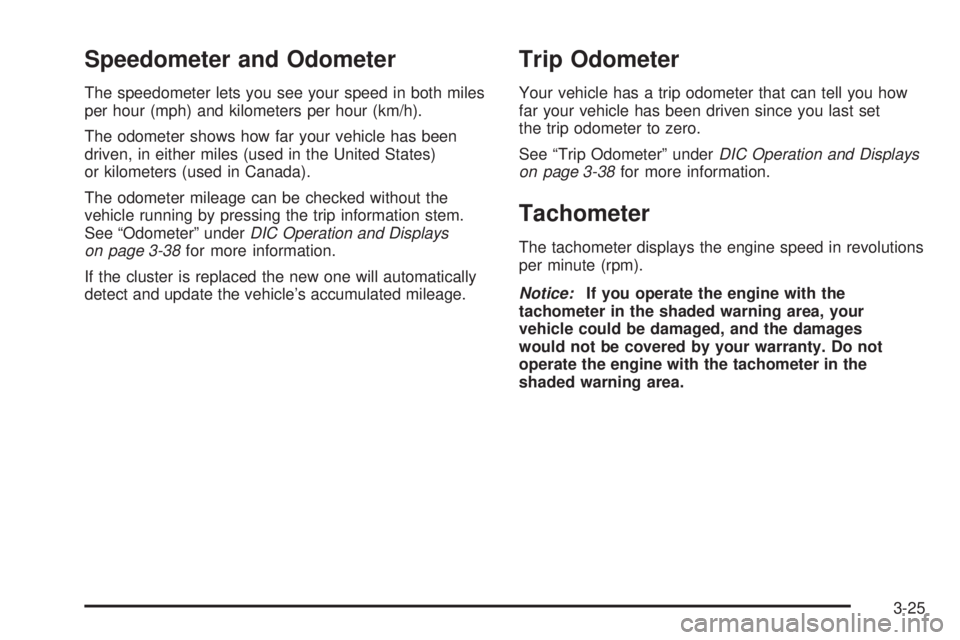
Speedometer and Odometer
The speedometer lets you see your speed in both miles
per hour (mph) and kilometers per hour (km/h).
The odometer shows how far your vehicle has been
driven, in either miles (used in the United States)
or kilometers (used in Canada).
The odometer mileage can be checked without the
vehicle running by pressing the trip information stem.
See “Odometer” underDIC Operation and Displays
on page 3-38for more information.
If the cluster is replaced the new one will automatically
detect and update the vehicle’s accumulated mileage.
Trip Odometer
Your vehicle has a trip odometer that can tell you how
far your vehicle has been driven since you last set
the trip odometer to zero.
See “Trip Odometer” underDIC Operation and Displays
on page 3-38for more information.
Tachometer
The tachometer displays the engine speed in revolutions
per minute (rpm).
Notice:If you operate the engine with the
tachometer in the shaded warning area, your
vehicle could be damaged, and the damages
would not be covered by your warranty. Do not
operate the engine with the tachometer in the
shaded warning area.
3-25
Page 170 of 428
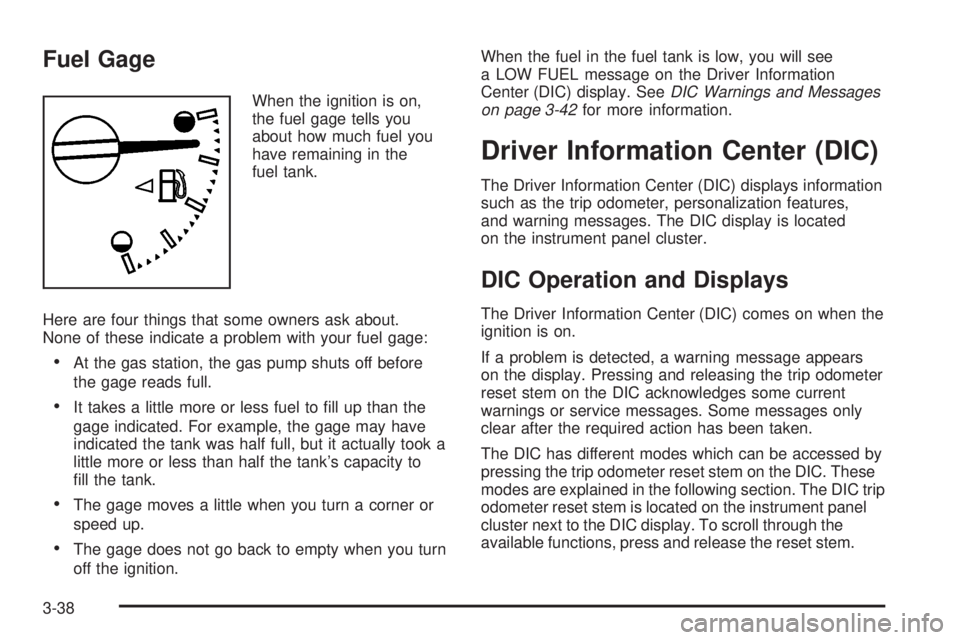
Fuel Gage
When the ignition is on,
the fuel gage tells you
about how much fuel you
have remaining in the
fuel tank.
Here are four things that some owners ask about.
None of these indicate a problem with your fuel gage:
At the gas station, the gas pump shuts off before
the gage reads full.
It takes a little more or less fuel to �ll up than the
gage indicated. For example, the gage may have
indicated the tank was half full, but it actually took a
little more or less than half the tank’s capacity to
�ll the tank.
The gage moves a little when you turn a corner or
speed up.
The gage does not go back to empty when you turn
off the ignition.When the fuel in the fuel tank is low, you will see
a LOW FUEL message on the Driver Information
Center (DIC) display. SeeDIC Warnings and Messages
on page 3-42for more information.
Driver Information Center (DIC)
The Driver Information Center (DIC) displays information
such as the trip odometer, personalization features,
and warning messages. The DIC display is located
on the instrument panel cluster.
DIC Operation and Displays
The Driver Information Center (DIC) comes on when the
ignition is on.
If a problem is detected, a warning message appears
on the display. Pressing and releasing the trip odometer
reset stem on the DIC acknowledges some current
warnings or service messages. Some messages only
clear after the required action has been taken.
The DIC has different modes which can be accessed by
pressing the trip odometer reset stem on the DIC. These
modes are explained in the following section. The DIC trip
odometer reset stem is located on the instrument panel
cluster next to the DIC display. To scroll through the
available functions, press and release the reset stem.
3-38
Page 171 of 428
Trip Information
Odometer
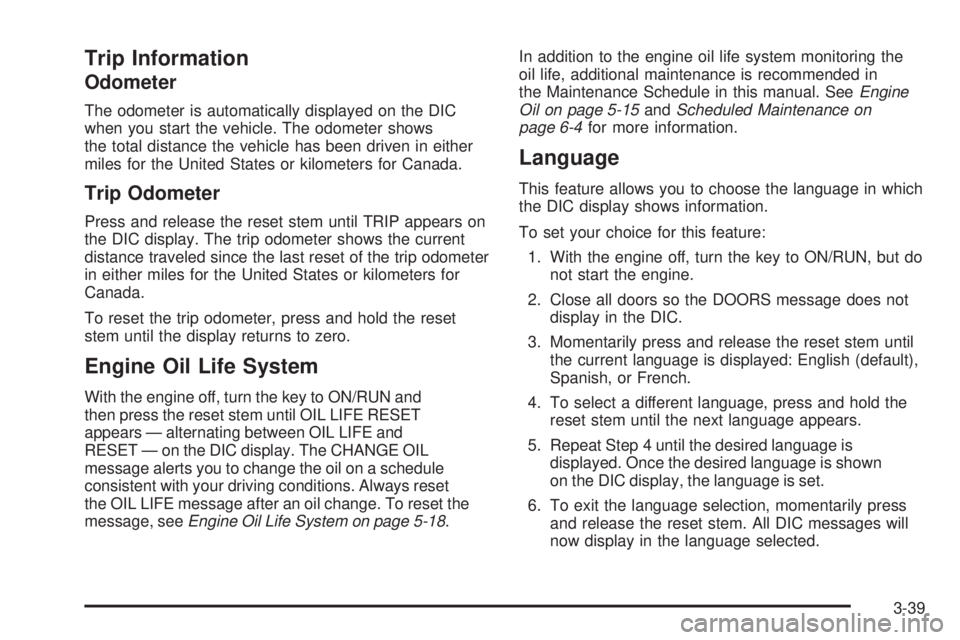
The odometer is automatically displayed on the DIC
when you start the vehicle. The odometer shows
the total distance the vehicle has been driven in either
miles for the United States or kilometers for Canada.
Trip Odometer
Press and release the reset stem until TRIP appears on
the DIC display. The trip odometer shows the current
distance traveled since the last reset of the trip odometer
in either miles for the United States or kilometers for
Canada.
To reset the trip odometer, press and hold the reset
stem until the display returns to zero.
Engine Oil Life System
With the engine off, turn the key to ON/RUN and
then press the reset stem until OIL LIFE RESET
appears — alternating between OIL LIFE and
RESET — on the DIC display. The CHANGE OIL
message alerts you to change the oil on a schedule
consistent with your driving conditions. Always reset
the OIL LIFE message after an oil change. To reset the
message, seeEngine Oil Life System on page 5-18.In addition to the engine oil life system monitoring the
oil life, additional maintenance is recommended in
the Maintenance Schedule in this manual. SeeEngine
Oil on page 5-15andScheduled Maintenance on
page 6-4for more information.
Language
This feature allows you to choose the language in which
the DIC display shows information.
To set your choice for this feature:
1. With the engine off, turn the key to ON/RUN, but do
not start the engine.
2. Close all doors so the DOORS message does not
display in the DIC.
3. Momentarily press and release the reset stem until
the current language is displayed: English (default),
Spanish, or French.
4. To select a different language, press and hold the
reset stem until the next language appears.
5. Repeat Step 4 until the desired language is
displayed. Once the desired language is shown
on the DIC display, the language is set.
6. To exit the language selection, momentarily press
and release the reset stem. All DIC messages will
now display in the language selected.
3-39
Page 172 of 428
Automatic Door Locks
This feature allows you to program the door locks to a
preferred setting.
To set your choice for this feature:
1. With the engine off, turn the key to LOCK/OFF.
Do not remove the key from the ignition.
2. Press and hold the power door lock button until the
DIC display shows the current door lock mode.
3. To view the next available mode, press and hold
the reset stem until the mode appears. Release
the reset stem and press and hold again to view
the next mode.
4. Once the desired mode is shown on the
DIC display, brie�y press the reset stem to
set your choice. The DIC display then clears.
The following are the available modes:
Lock 1 (default):On vehicles with an automatic
transmission, this mode locks all of the doors when the
vehicle is shifted out of PARK (P) and unlocks all of
the doors when the vehicle is shifted into PARK (P).On vehicles with a manual transmission, this mode
locks all of the doors when the vehicle speed is greater
than 15 mph (24 km/h) and unlocks all of the doors
when the key is removed from the ignition.
Lock 2:On vehicles with an automatic transmission,
this mode locks all of the doors when the vehicle
is shifted out of PARK (P) and unlocks the driver’s
door when the vehicle is shifted into PARK (P).
On vehicles with a manual transmission, this mode
locks all of the doors when the vehicle speed is greater
than 15 mph (24 km/h) and unlocks the driver’s door
when the key is removed from the ignition.
Lock 3:On vehicles with an automatic transmission,
this mode locks all of the doors when the vehicle
is shifted out of PARK (P). The doors will not
automatically unlock.
On vehicles with a manual transmission, this mode
locks all of the doors when the vehicle speed is greater
than 15 mph (24 km/h). The doors will not automatically
unlock.
3-40
Page 173 of 428
Remote Keyless Entry (RKE) Feedback
This feature allows you to program the Remote
Keyless Entry (RKE) feedback to a preferred setting.
To set your choice for this feature:
1. With the engine off, turn the key to LOCK/OFF.
Do not remove the key from the ignition.
2. Press and hold the lock and unlock buttons on
the RKE transmitter at the same time. Hold both
buttons until the DIC display shows the current RKE
feedback mode.
3. To view the next available mode, press and hold
the reset stem until the mode appears. Release
the reset stem and press and hold again to view
the next mode.
4. Once the desired mode is shown on the DIC
display, brie�y press the reset stem to set your
choice. The DIC display then clears.The following are the available modes:
RFA 1 (default):This mode �ashes the parking lamps
when you press the lock or unlock buttons on the
RKE transmitter.
RFA 2:This mode �ashes the parking lamps and
sounds the horn when you press the lock button on the
RKE transmitter. This mode also �ashes the parking
lamps when you press the unlock button on the
RKE transmitter.
RFA 3:This mode �ashes the parking lamps and
sounds the horn when you press the lock or unlock
buttons on the RKE transmitter.
RFA 4:This mode disables RKE feedback. There will
be no feedback when you press the lock or unlock
buttons on the RKE transmitter.
3-41
Page 174 of 428
DIC Warnings and Messages
Messages are displayed on the DIC to notify the
driver that the status of the vehicle has changed
and that some action may be needed by the driver
to correct the condition. Multiple messages may appear
one after another. The messages are displayed for
several seconds each.
Some messages may not require immediate action, but
you should press and release the trip odometer reset
stem to acknowledge that you received the messages
and to clear them from the display. Each message must
be acknowledged individually.
Some messages cannot be cleared from the DIC
display because they are more urgent. These messages
require action before they can be cleared. You should
take any messages that appear on the display seriously
and remember that clearing the messages only makes
the messages disappear, not correct the problem.
The following are the possible messages that can be
displayed and some information about them.
AC (Air Conditioning) OFF
This message displays when the engine coolant
temperature is too high and the air conditioning in your
vehicle needs to be turned off. SeeEngine Overheating
on page 5-29andClimate Control System on page 3-20
for more information. This message displays along with
the ENG HOT message.
ABS (Antilock Brake System) FAULT
This message displays if there is a problem with the
Antilock Brake System (ABS). Check the ABS as soon as
possible and have your vehicle serviced by your dealer/
retailer. SeeBrakes on page 5-38andAntilock Brake
System Warning Light on page 3-32for more information.
Press and release the reset stem to acknowledge the
message and clear it from the display.
BRAKES
This message displays if there is a problem with the
brakes. Check the brakes as soon as possible and have
your vehicle serviced by your dealer/retailer. SeeBrakes
on page 5-38andBrake System Warning Light on
page 3-31for more information. Press and release the
reset stem to acknowledge the message and clear it from
the display.
CHANGE OIL
This message displays when the oil needs to be
changed. Check the oil in your vehicle as soon as
possible and have your vehicle serviced by your dealer/
retailer. SeeEngine Oil on page 5-15andScheduled
Maintenance on page 6-4for more information. Press
and release the reset stem to acknowledge the message
and clear it from the display.
3-42