ECU GMC ENVOY 2004 Owner's Guide
[x] Cancel search | Manufacturer: GMC, Model Year: 2004, Model line: ENVOY, Model: GMC ENVOY 2004Pages: 474, PDF Size: 4.83 MB
Page 119 of 474

3. Grasp the handle and unroll the cover. Latch the
posts into the sockets on the inside of the vehicle
to secure it.
To remove the cargo cover, do the following:
1. Release the cover from the latch posts and carefully
roll it back up.
2. Compress one endcap and remove it from the
pocket in the trim panel.
3. Remove the cargo cover from the other endcap so
that you can remove the shade from the vehicle.
{CAUTION:
An improperly stored cargo cover could be
thrown about the vehicle during a collision or
sudden maneuver. You or others could be
injured. If you remove the cover, always store
it in the proper storage location. When you put
it back, always be sure that it is securely
reattached.
Cargo Tie Downs
There may be cargo tie
downs in the rear of your
vehicle that allow you
to strap cargo in and keep
it from moving.
2-51
Page 123 of 474
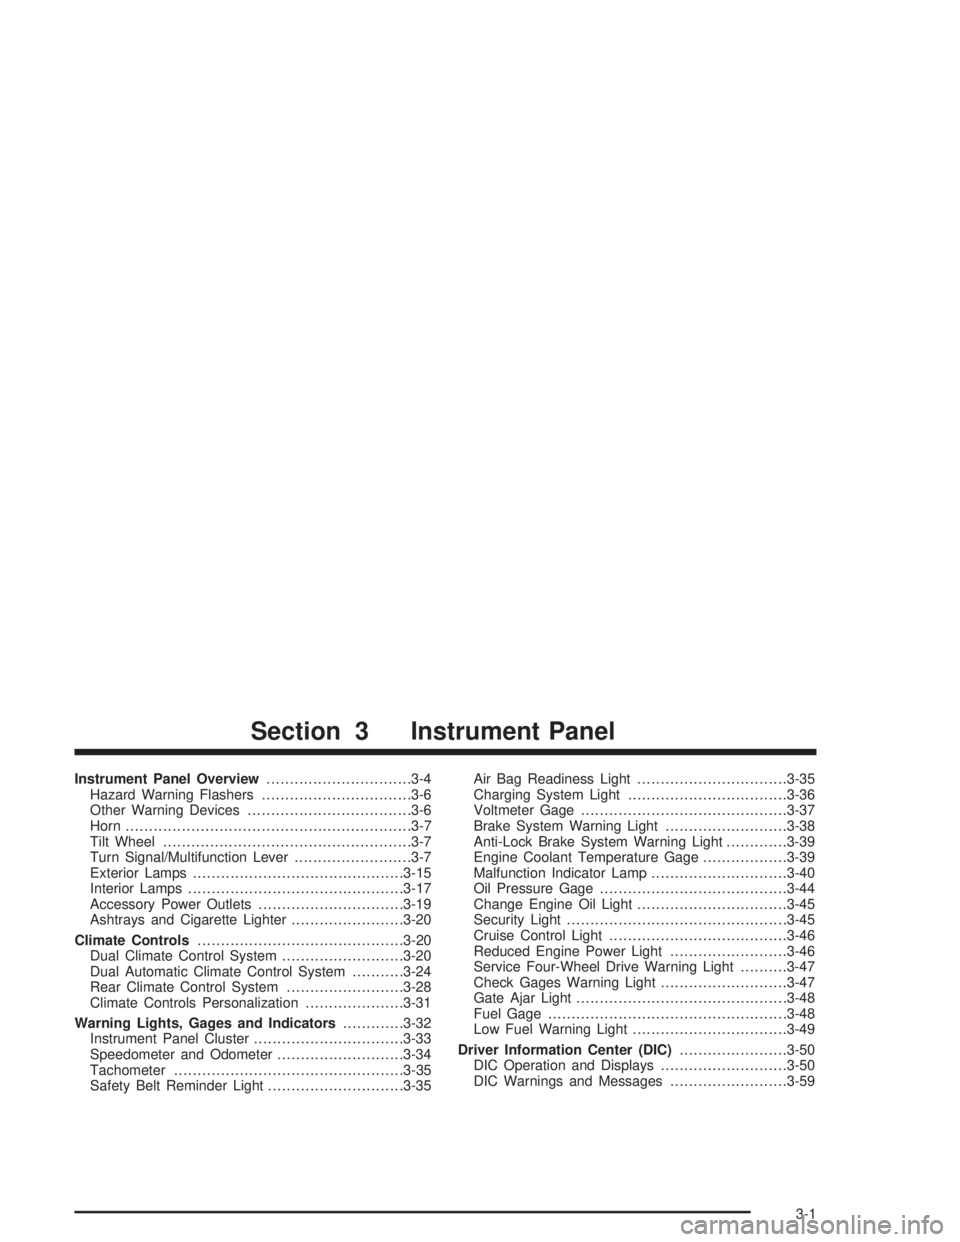
Instrument Panel Overview...............................3-4
Hazard Warning Flashers................................3-6
Other Warning Devices...................................3-6
Horn.............................................................3-7
Tilt Wheel.....................................................3-7
Turn Signal/Multifunction Lever.........................3-7
Exterior Lamps.............................................3-15
Interior Lamps..............................................3-17
Accessory Power Outlets...............................3-19
Ashtrays and Cigarette Lighter........................3-20
Climate Controls............................................3-20
Dual Climate Control System..........................3-20
Dual Automatic Climate Control System...........3-24
Rear Climate Control System.........................3-28
Climate Controls Personalization.....................3-31
Warning Lights, Gages and Indicators.............3-32
Instrument Panel Cluster................................3-33
Speedometer and Odometer...........................3-34
Tachometer.................................................3-35
Safety Belt Reminder Light.............................3-35Air Bag Readiness Light................................3-35
Charging System Light..................................3-36
Voltmeter Gage............................................3-37
Brake System Warning Light..........................3-38
Anti-Lock Brake System Warning Light.............3-39
Engine Coolant Temperature Gage..................3-39
Malfunction Indicator Lamp.............................3-40
Oil Pressure Gage........................................3-44
Change Engine Oil Light................................3-45
Security Light...............................................3-45
Cruise Control Light......................................3-46
Reduced Engine Power Light.........................3-46
Service Four-Wheel Drive Warning Light..........3-47
Check Gages Warning Light...........................3-47
Gate Ajar Light.............................................3-48
Fuel Gage...................................................3-48
Low Fuel Warning Light.................................3-49
Driver Information Center (DIC).......................3-50
DIC Operation and Displays...........................3-50
DIC Warnings and Messages.........................3-59
Section 3 Instrument Panel
3-1
Page 167 of 474
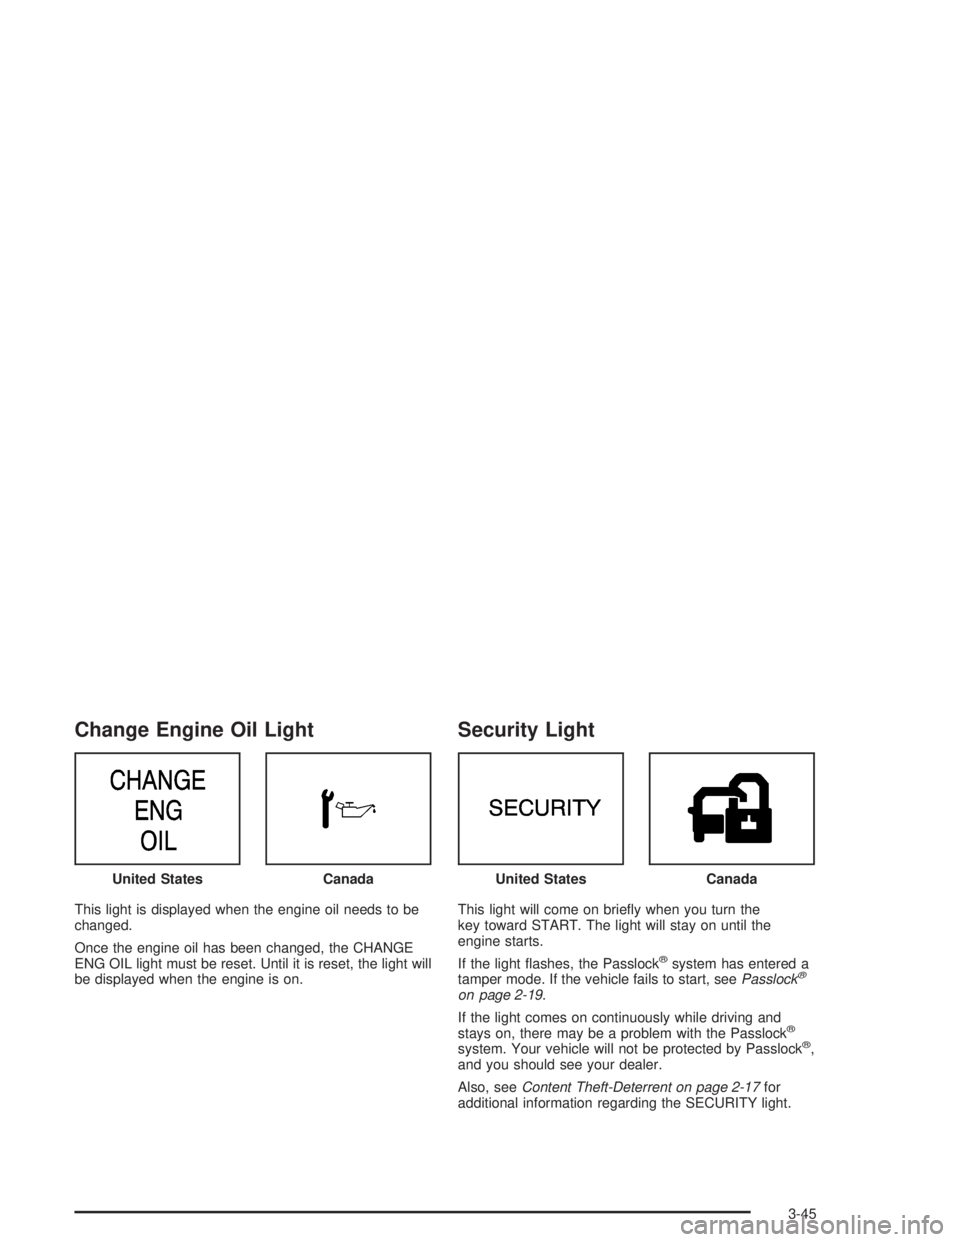
Change Engine Oil Light
This light is displayed when the engine oil needs to be
changed.
Once the engine oil has been changed, the CHANGE
ENG OIL light must be reset. Until it is reset, the light will
be displayed when the engine is on.
Security Light
This light will come on brie�y when you turn the
key toward START. The light will stay on until the
engine starts.
If the light �ashes, the Passlock
®system has entered a
tamper mode. If the vehicle fails to start, seePasslock®
on page 2-19.
If the light comes on continuously while driving and
stays on, there may be a problem with the Passlock
®
system. Your vehicle will not be protected by Passlock®,
and you should see your dealer.
Also, seeContent Theft-Deterrent on page 2-17for
additional information regarding the SECURITY light. United States
CanadaUnited StatesCanada
3-45
Page 194 of 474
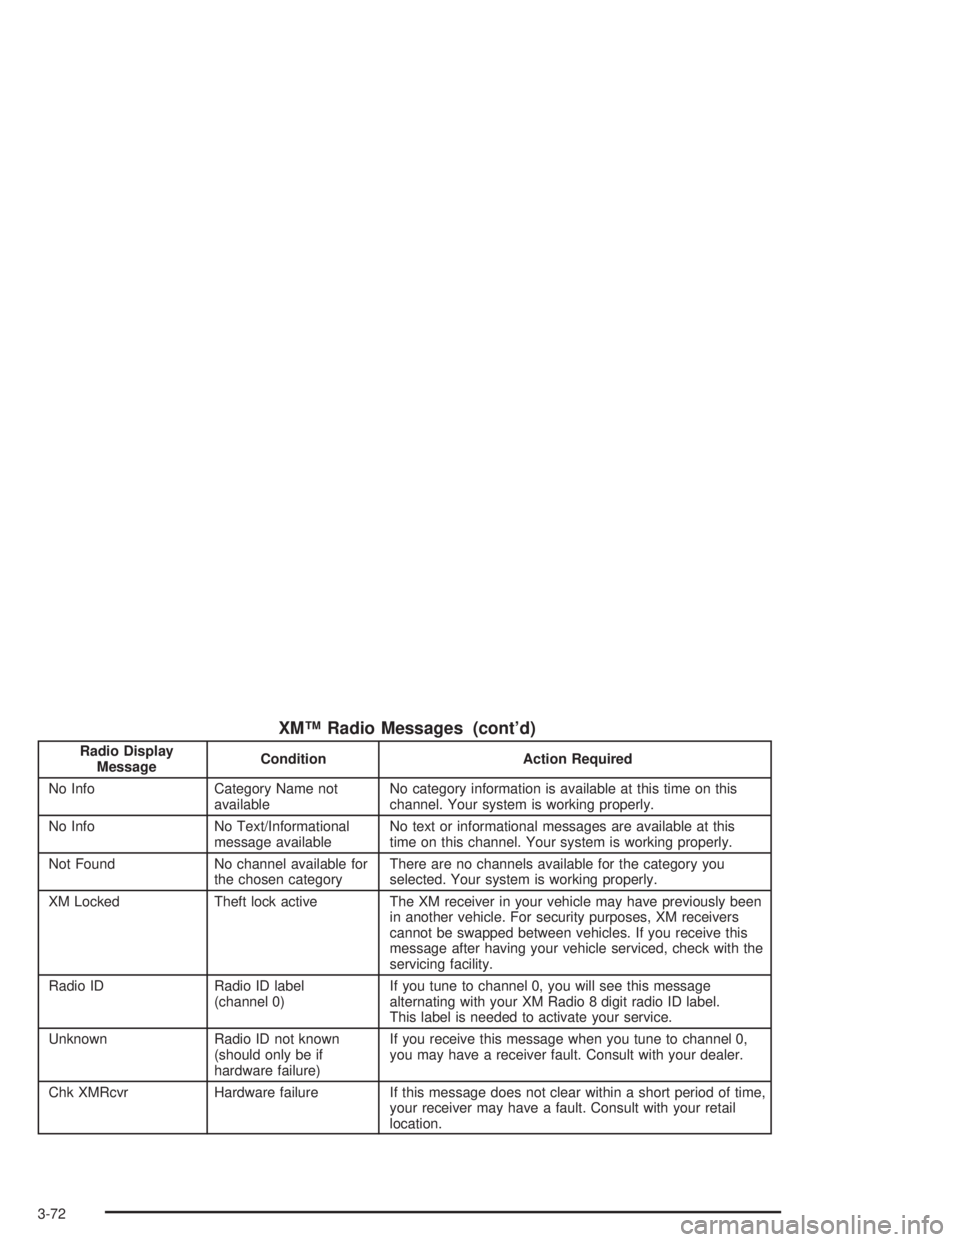
XM™ Radio Messages (cont’d)
Radio Display
MessageCondition Action Required
No Info Category Name not
availableNo category information is available at this time on this
channel. Your system is working properly.
No Info No Text/Informational
message availableNo text or informational messages are available at this
time on this channel. Your system is working properly.
Not Found No channel available for
the chosen categoryThere are no channels available for the category you
selected. Your system is working properly.
XM Locked Theft lock active The XM receiver in your vehicle may have previously been
in another vehicle. For security purposes, XM receivers
cannot be swapped between vehicles. If you receive this
message after having your vehicle serviced, check with the
servicing facility.
Radio ID Radio ID label
(channel 0)If you tune to channel 0, you will see this message
alternating with your XM Radio 8 digit radio ID label.
This label is needed to activate your service.
Unknown Radio ID not known
(should only be if
hardware failure)If you receive this message when you tune to channel 0,
you may have a receiver fault. Consult with your dealer.
Chk XMRcvr Hardware failure If this message does not clear within a short period of time,
your receiver may have a fault. Consult with your retail
location.
3-72
Page 205 of 474
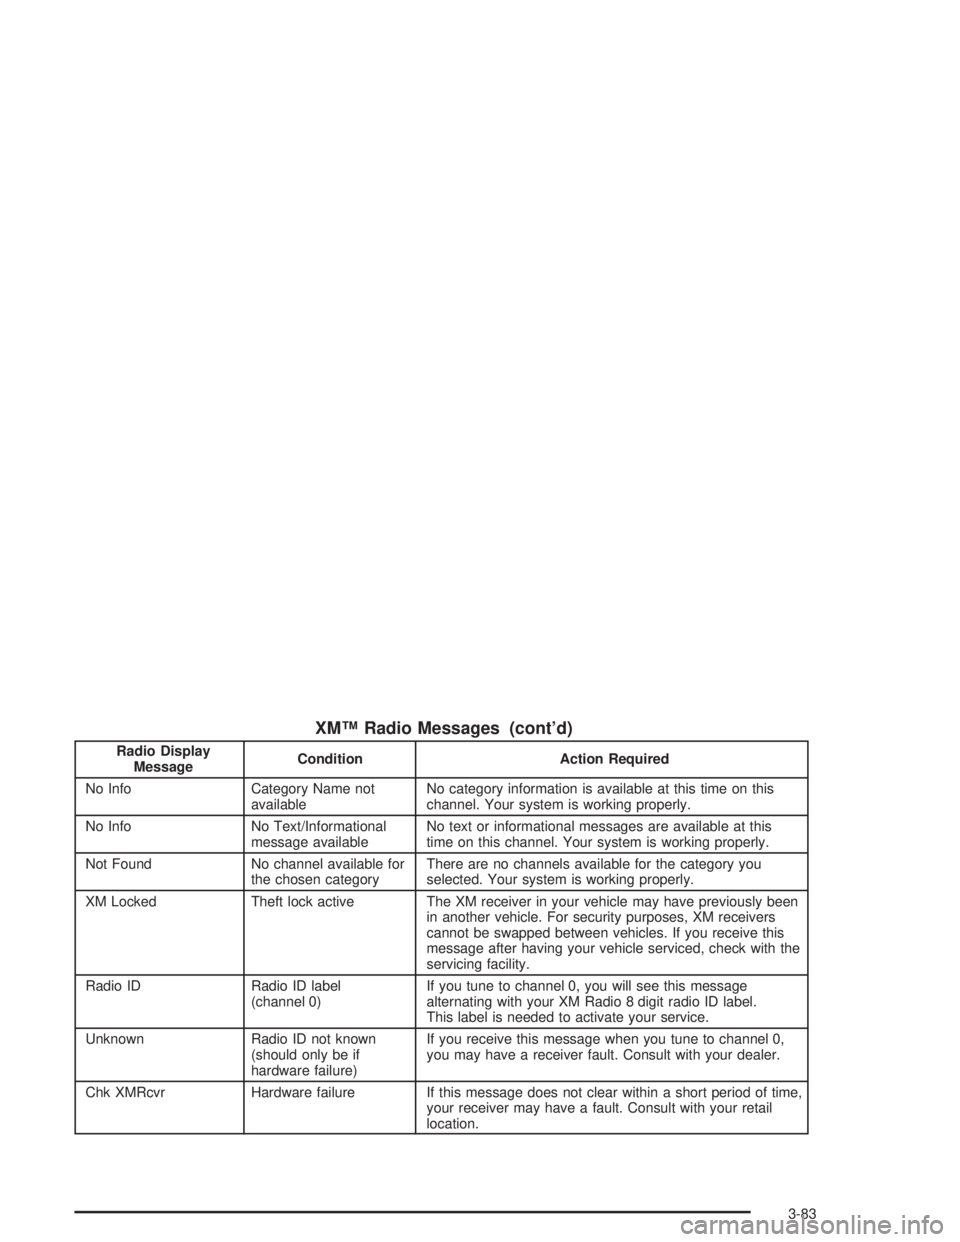
XM™ Radio Messages (cont’d)
Radio Display
MessageCondition Action Required
No Info Category Name not
availableNo category information is available at this time on this
channel. Your system is working properly.
No Info No Text/Informational
message availableNo text or informational messages are available at this
time on this channel. Your system is working properly.
Not Found No channel available for
the chosen categoryThere are no channels available for the category you
selected. Your system is working properly.
XM Locked Theft lock active The XM receiver in your vehicle may have previously been
in another vehicle. For security purposes, XM receivers
cannot be swapped between vehicles. If you receive this
message after having your vehicle serviced, check with the
servicing facility.
Radio ID Radio ID label
(channel 0)If you tune to channel 0, you will see this message
alternating with your XM Radio 8 digit radio ID label.
This label is needed to activate your service.
Unknown Radio ID not known
(should only be if
hardware failure)If you receive this message when you tune to channel 0,
you may have a receiver fault. Consult with your dealer.
Chk XMRcvr Hardware failure If this message does not clear within a short period of time,
your receiver may have a fault. Consult with your retail
location.
3-83
Page 219 of 474

XM™ Radio Messages (cont’d)
Radio Display
MessageCondition Action Required
No Info Category Name not
availableNo category information is available at this time on this
channel. Your system is working properly.
No Info No Text/Informational
message availableNo text or informational messages are available at this
time on this channel. Your system is working properly.
Not Found No channel available for
the chosen categoryThere are no channels available for the category you
selected. Your system is working properly.
XM Locked Theft lock active The XM receiver in your vehicle may have previously been
in another vehicle. For security purposes, XM receivers
cannot be swapped between vehicles. If you receive this
message after having your vehicle serviced, check with the
servicing facility.
Radio ID Radio ID label
(channel 0)If you tune to channel 0, you will see this message
alternating with your XM Radio 8 digit radio ID label.
This label is needed to activate your service.
Unknown Radio ID not known
(should only be if
hardware failure)If you receive this message when you tune to channel 0,
you may have a receiver fault. Consult with your dealer.
Chk XMRcvr Hardware failure If this message does not clear within a short period of time,
your receiver may have a fault. Consult with your retail
location.
3-97
Page 232 of 474
Battery Replacement
To change the batteries, do the following:
1. Remove the battery compartment door located on
the bottom of the remote control.
2. Replace the two AA batteries in the compartment.
Make sure that they are installed correctly, using
the diagram on the inside of the battery
compartment.
3. Close the battery door securely.
Notice:Do not store the remote control in heat or
direct sunlight. This could damage the remote
control and it would not be covered by your vehicles
warranty. Keep the remote control stored in a
cool, dry place.
If the remote control is to be stored for a long period of
time, remove the batteries and keep them in a cool,
dry place.
Headphones
The RSE system includes two sets of wireless
headphones.
Each set of headphones has an ON/OFF control.
An indicator light will illuminate on the headphones when
they are on. If the light does not illuminate, the
batteries may need to be replaced. See “Battery
Replacement” following for more information.
Each set of headphones has a volume knob. To adjust
the volume, adjust this knob.
The headphones will automatically turn off if they lose
the infrared signal from the system after approximately
four minutes in order to preserve their battery power.
The signal may be lost if the system is turned off or if the
headphones are out of range of the infrared signal
transmitters that are located below the video display
screen.
When using the wired headphones, if the front seat
passengers play a CD in the Radio with Six-Disc CD
(if equipped) or use XM™ Satellite Radio Service
(48 contiguous US states, if equipped), you will hear the
audio for these sources, instead of the DVD or CD
that is currently playing through the RSE.
3-110
Page 258 of 474
Loading Your Vehicle for Off-Road
Driving
There are some important things to remember about
how to load your vehicle.
The heaviest things should be on the load �oor and
forward of your rear axle. Put heavier items as far
forward as you can.
Be sure the load is secured properly, so driving on
the off-road terrain does not toss things around.
{CAUTION:
Cargo on the load �oor piled higher than
the seatbacks can be thrown forward
during a sudden stop. You or your
passengers could be injured. Keep cargo
below the top of the seatbacks.
Unsecured cargo on the load �oor can be
tossed about when driving over rough
terrain. You or your passengers can be
struck by �ying objects. Secure the cargo
properly.
Heavy loads on the roof raise the vehicle’s
center of gravity, making it more likely to
roll over. You can be seriously or fatally
injured if the vehicle rolls over. Put heavy
loads inside the cargo area, not on the
roof. Keep cargo in the cargo area as far
forward and low as possible.
You will �nd other important information in this manual.
SeeLoading Your Vehicle on page 4-48,Luggage
Carrier on page 2-47andTires on page 5-57.
4-16
Page 280 of 474

Winter Driving
Here are some tips for winter driving:
Have your vehicle in good shape for winter.
You may want to put winter emergency supplies in
your vehicle.Include an ice scraper, a small brush or broom, a
supply of windshield washer �uid, a rag, some winter
outer clothing, a small shovel, a �ashlight, a red
cloth and re�ective warning triangles. And, if you will be
driving under severe conditions, include a small bag
of sand, a piece of old carpet or a couple of burlap bags
to help provide traction. Be sure you properly secure
these items in your vehicle.
4-38
Page 288 of 474
Four-Wheel-Drive Vehicles
Four-wheel-drive vehicles can be dinghy towed if you
follow the proper procedures. The transmission has
no provisions for internal lubrication while being towed,
so it is important that you follow all the steps listed
in this manual to dinghy tow your four-wheel-drive
vehicle.
Use the following procedure to tow your vehicle:
1. Shift the transmission to PARK (P).
2. Turn the engine off, but leave the ignition on.
3. Firmly set the parking brake.
4. Securely attach the vehicle being towed to the tow
vehicle.
{CAUTION:
Shifting a four-wheel-drive vehicle’s transfer
case into NEUTRAL can cause your vehicle to
roll even if the transmission is in Park (P). You
or others could be injured. Make sure the
parking brake is �rmly set before you shift the
transfer case to NEUTRAL.5. Shift the transfer case to NEUTRAL (N). See
Four-Wheel Drive on page 2-26for the proper
procedure to select the NEUTRAL position for your
vehicle.
6. Release the parking brake only after the vehicle
being towed is �rmly attached to the towing
vehicle.
7. Turn the ignition off and leave the steering column
unlocked.
4-46