GMC ENVOY 2009 Owner's Manual
Manufacturer: GMC, Model Year: 2009, Model line: ENVOY, Model: GMC ENVOY 2009Pages: 474, PDF Size: 2.56 MB
Page 391 of 474
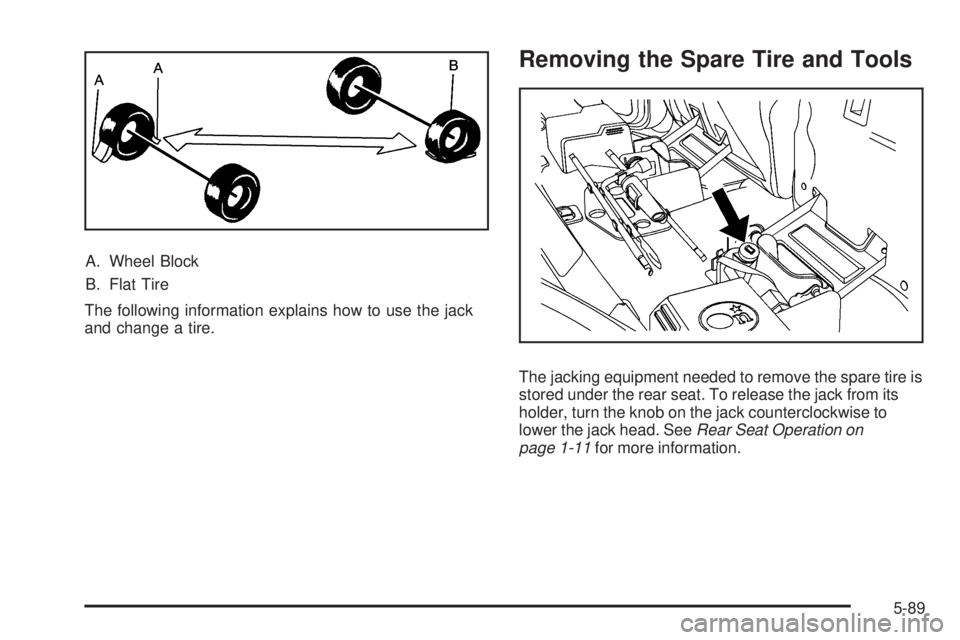
A. Wheel Block
B. Flat Tire
The following information explains how to use the jack
and change a tire.
Removing the Spare Tire and Tools
The jacking equipment needed to remove the spare tire is
stored under the rear seat. To release the jack from its
holder, turn the knob on the jack counterclockwise to
lower the jack head. SeeRear Seat Operation on
page 1-11for more information.
5-89
Page 392 of 474
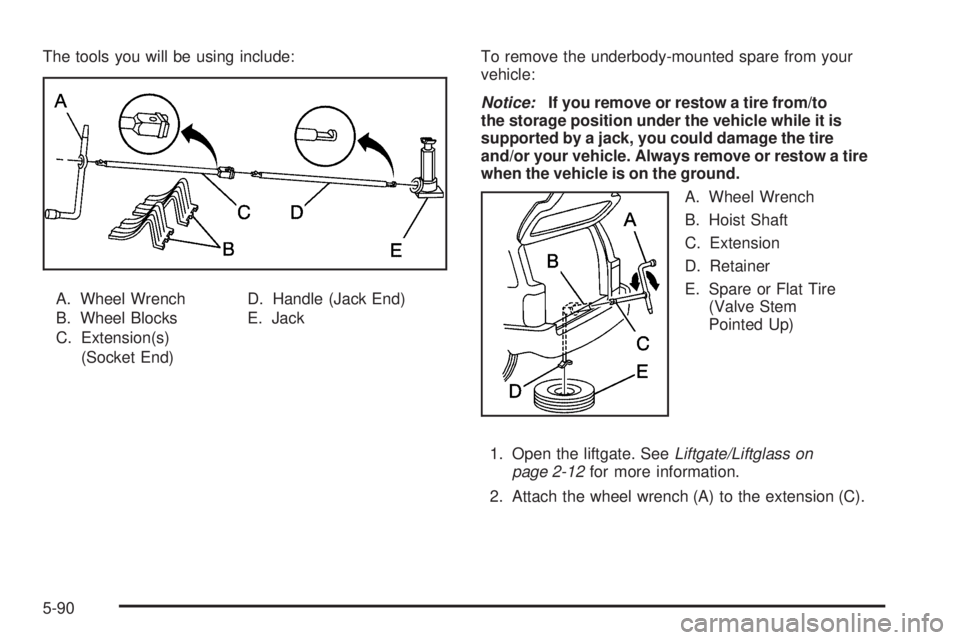
The tools you will be using include:
A. Wheel Wrench
B. Wheel Blocks
C. Extension(s)
(Socket End)D. Handle (Jack End)
E. JackTo remove the underbody-mounted spare from your
vehicle:
Notice:If you remove or restow a tire from/to
the storage position under the vehicle while it is
supported by a jack, you could damage the tire
and/or your vehicle. Always remove or restow a tire
when the vehicle is on the ground.
A. Wheel Wrench
B. Hoist Shaft
C. Extension
D. Retainer
E. Spare or Flat Tire
(Valve Stem
Pointed Up)
1. Open the liftgate. SeeLiftgate/Liftglass on
page 2-12for more information.
2. Attach the wheel wrench (A) to the extension (C).
5-90
Page 393 of 474
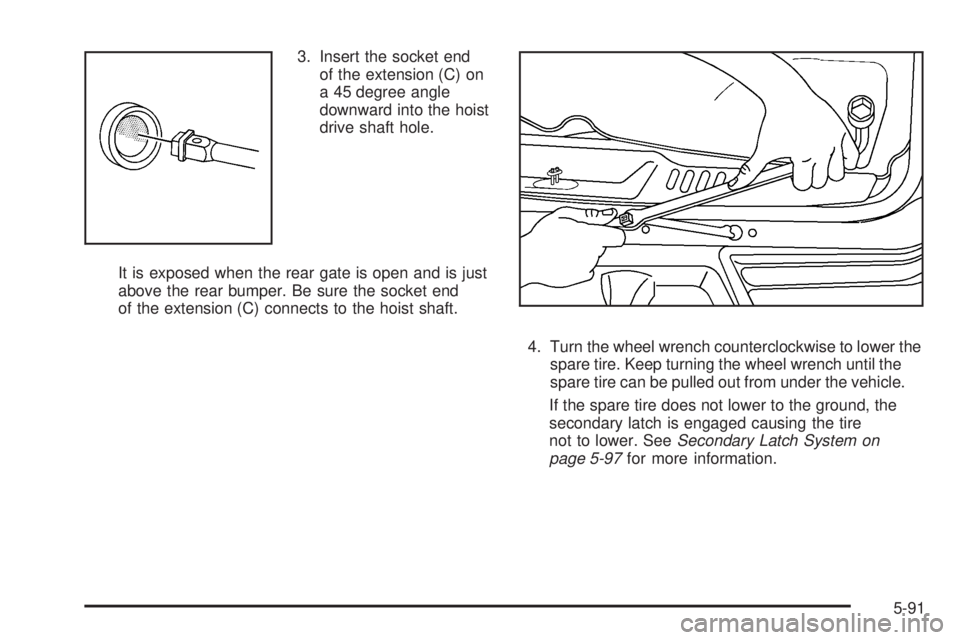
3. Insert the socket end
of the extension (C) on
a 45 degree angle
downward into the hoist
drive shaft hole.
It is exposed when the rear gate is open and is just
above the rear bumper. Be sure the socket end
of the extension (C) connects to the hoist shaft.
4. Turn the wheel wrench counterclockwise to lower the
spare tire. Keep turning the wheel wrench until the
spare tire can be pulled out from under the vehicle.
If the spare tire does not lower to the ground, the
secondary latch is engaged causing the tire
not to lower. SeeSecondary Latch System on
page 5-97for more information.
5-91
Page 394 of 474
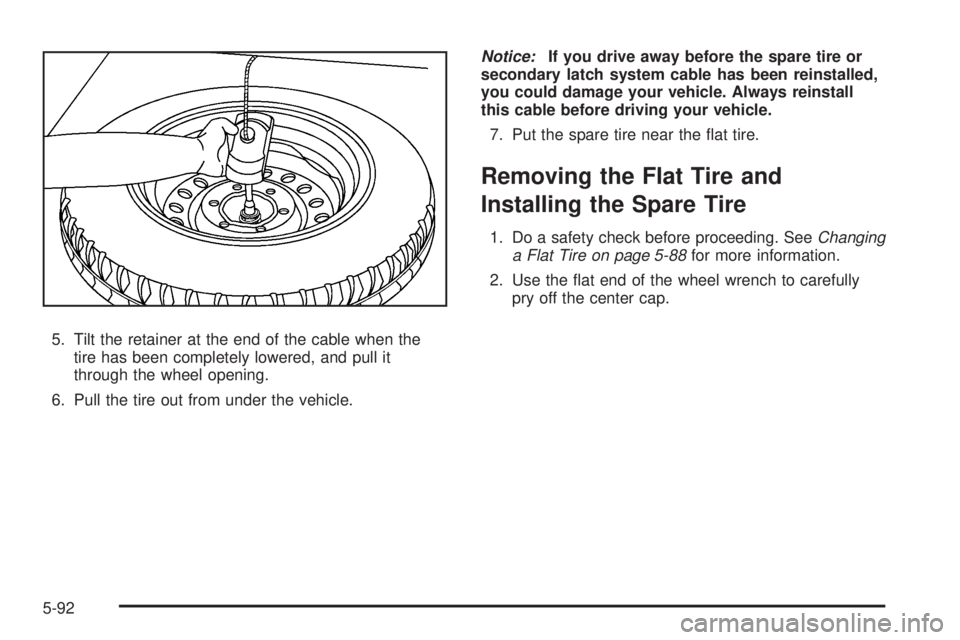
5. Tilt the retainer at the end of the cable when the
tire has been completely lowered, and pull it
through the wheel opening.
6. Pull the tire out from under the vehicle.Notice:If you drive away before the spare tire or
secondary latch system cable has been reinstalled,
you could damage your vehicle. Always reinstall
this cable before driving your vehicle.
7. Put the spare tire near the �at tire.
Removing the Flat Tire and
Installing the Spare Tire
1. Do a safety check before proceeding. SeeChanging
a Flat Tire on page 5-88for more information.
2. Use the �at end of the wheel wrench to carefully
pry off the center cap.
5-92
Page 395 of 474
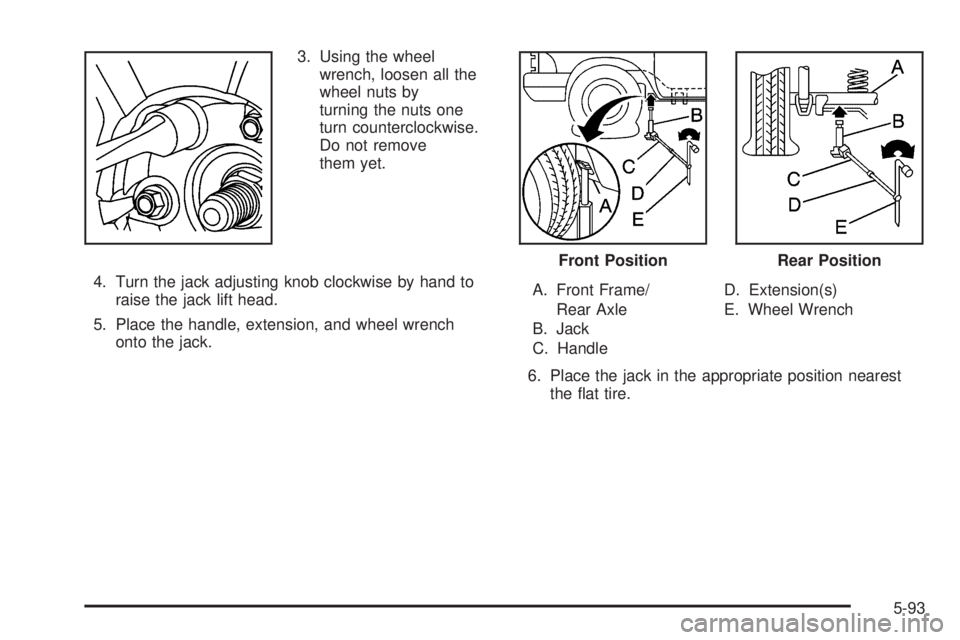
3. Using the wheel
wrench, loosen all the
wheel nuts by
turning the nuts one
turn counterclockwise.
Do not remove
them yet.
4. Turn the jack adjusting knob clockwise by hand to
raise the jack lift head.
5. Place the handle, extension, and wheel wrench
onto the jack.A. Front Frame/
Rear Axle
B. Jack
C. HandleD. Extension(s)
E. Wheel Wrench
6. Place the jack in the appropriate position nearest
the �at tire.
Front PositionRear Position
5-93
Page 396 of 474
{CAUTION:
Getting under a vehicle when it is jacked up is
dangerous. If the vehicle slips off the jack, you
could be badly injured or killed. Never get under a
vehicle when it is supported only by a jack.
{CAUTION:
Raising your vehicle with the jack improperly
positioned can damage the vehicle and even make
the vehicle fall. To help avoid personal injury and
vehicle damage, be sure to �t the jack lift head into
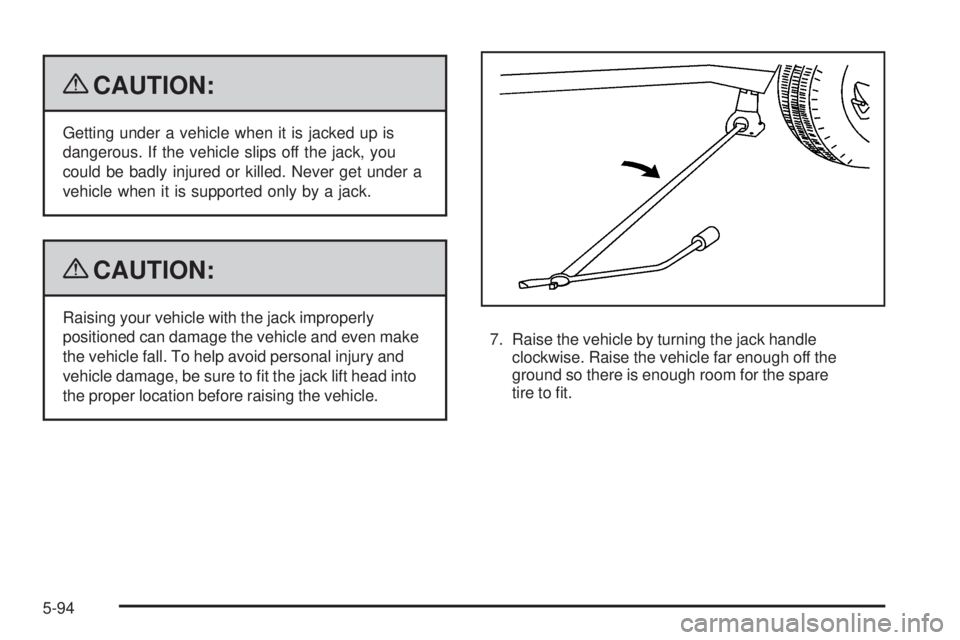
the proper location before raising the vehicle.7. Raise the vehicle by turning the jack handle
clockwise. Raise the vehicle far enough off the
ground so there is enough room for the spare
tire to �t.
5-94
Page 397 of 474
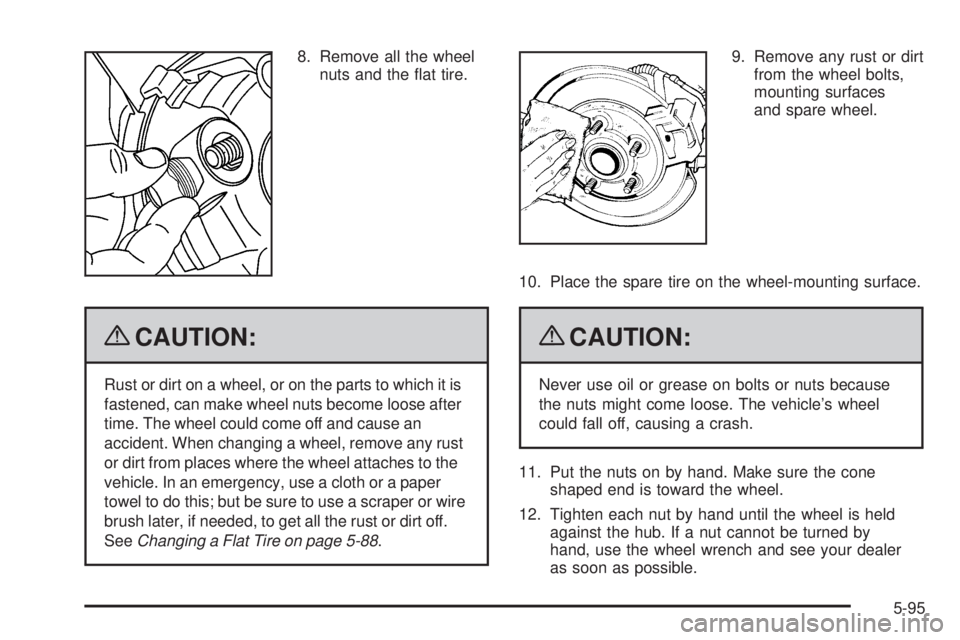
8. Remove all the wheel
nuts and the �at tire.
{CAUTION:
Rust or dirt on a wheel, or on the parts to which it is
fastened, can make wheel nuts become loose after
time. The wheel could come off and cause an
accident. When changing a wheel, remove any rust
or dirt from places where the wheel attaches to the
vehicle. In an emergency, use a cloth or a paper
towel to do this; but be sure to use a scraper or wire
brush later, if needed, to get all the rust or dirt off.
SeeChanging a Flat Tire on page 5-88.9. Remove any rust or dirt
from the wheel bolts,
mounting surfaces
and spare wheel.
10. Place the spare tire on the wheel-mounting surface.
{CAUTION:
Never use oil or grease on bolts or nuts because
the nuts might come loose. The vehicle’s wheel
could fall off, causing a crash.
11. Put the nuts on by hand. Make sure the cone
shaped end is toward the wheel.
12. Tighten each nut by hand until the wheel is held
against the hub. If a nut cannot be turned by
hand, use the wheel wrench and see your dealer
as soon as possible.
5-95
Page 398 of 474
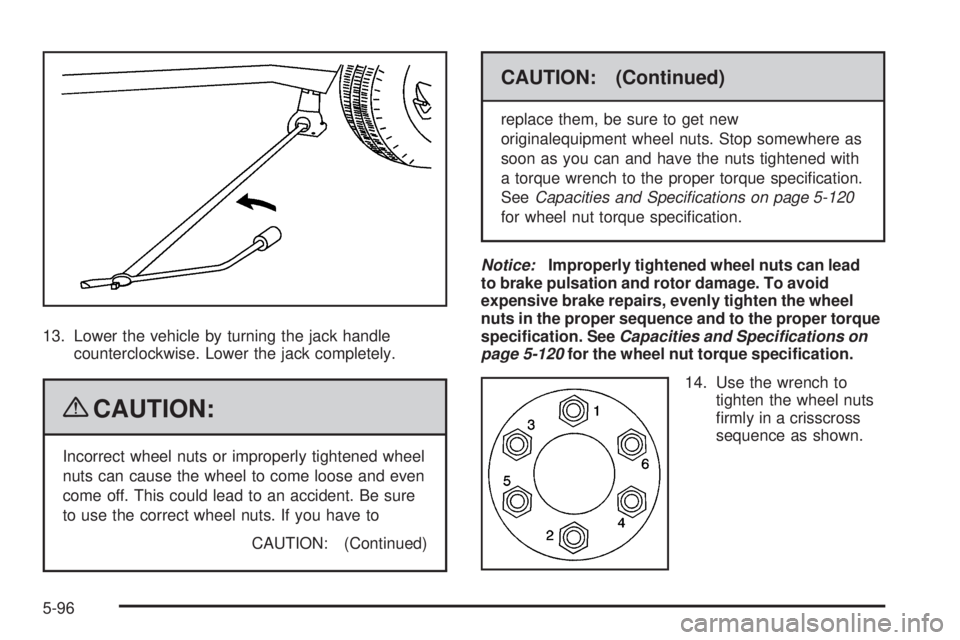
13. Lower the vehicle by turning the jack handle
counterclockwise. Lower the jack completely.
{CAUTION:
Incorrect wheel nuts or improperly tightened wheel
nuts can cause the wheel to come loose and even
come off. This could lead to an accident. Be sure
to use the correct wheel nuts. If you have to
CAUTION: (Continued)
CAUTION: (Continued)
replace them, be sure to get new
originalequipment wheel nuts. Stop somewhere as
soon as you can and have the nuts tightened with
a torque wrench to the proper torque speci�cation.
SeeCapacities and Specifications on page 5-120
for wheel nut torque speci�cation.
Notice:Improperly tightened wheel nuts can lead
to brake pulsation and rotor damage. To avoid
expensive brake repairs, evenly tighten the wheel
nuts in the proper sequence and to the proper torque
speci�cation. SeeCapacities and Specifications on
page 5-120for the wheel nut torque speci�cation.
14. Use the wrench to
tighten the wheel nuts
�rmly in a crisscross
sequence as shown.
5-96
Page 399 of 474
Secondary Latch System
This vehicle may have an underbody-mounted tire hoist
assembly equipped with a secondary latch system. It is
designed to stop the spare tire, if the vehicle has one,
from suddenly falling off the vehicle if the cable holding
the spare tire is damaged. For the secondary latch to
work, the tire must be stored with the valve stem pointing
up. SeeStoring a Flat or Spare Tire and Tools on
page 5-100for instructions on storing the spare or
�at tire correctly.
{CAUTION:
Before beginning this procedure read all the
instructions. Failure to read and follow the
instructions could damage the hoist assembly and
you and others could get hurt. Read and follow the
instructions listed next.
{CAUTION:
Someone standing too close during the procedure
could be injured by the jack. If the spare tire does
not slide off the jack completely, make sure no
one is behind you or on either side of you as you
pull the jack out from the under spare.
To release the spare tire from the secondary latch:
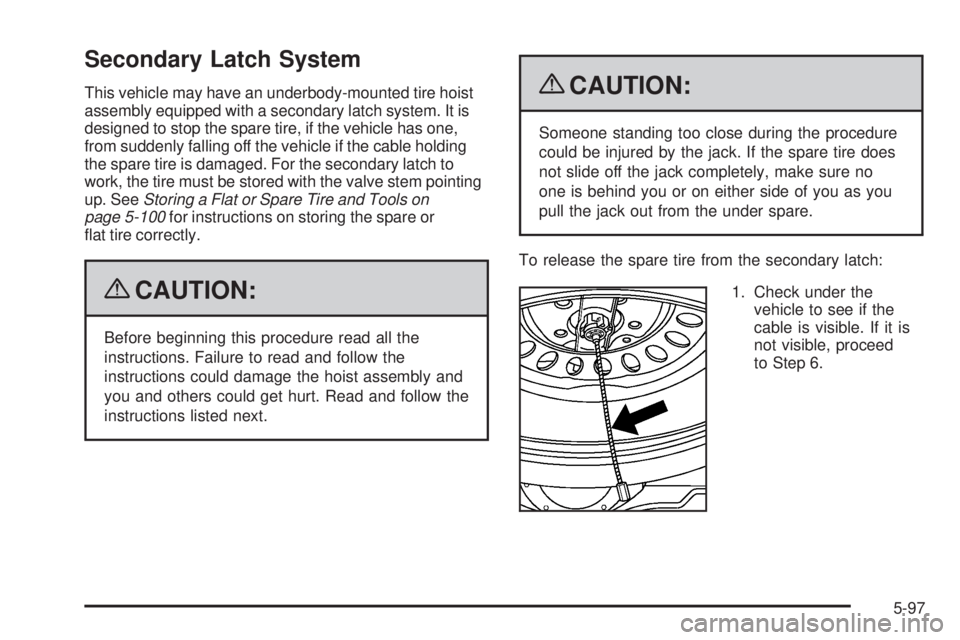
1. Check under the
vehicle to see if the
cable is visible. If it is
not visible, proceed
to Step 6.
5-97
Page 400 of 474
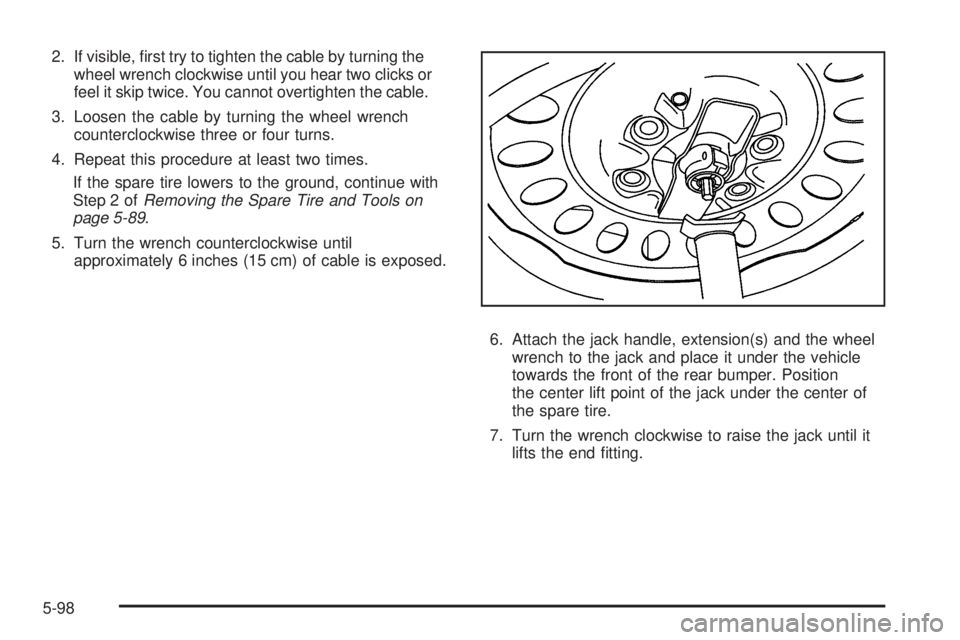
2. If visible, �rst try to tighten the cable by turning the
wheel wrench clockwise until you hear two clicks or
feel it skip twice. You cannot overtighten the cable.
3. Loosen the cable by turning the wheel wrench
counterclockwise three or four turns.
4. Repeat this procedure at least two times.
If the spare tire lowers to the ground, continue with
Step 2 ofRemoving the Spare Tire and Tools on
page 5-89.
5. Turn the wrench counterclockwise until
approximately 6 inches (15 cm) of cable is exposed.
6. Attach the jack handle, extension(s) and the wheel
wrench to the jack and place it under the vehicle
towards the front of the rear bumper. Position
the center lift point of the jack under the center of
the spare tire.
7. Turn the wrench clockwise to raise the jack until it
lifts the end �tting.
5-98