turn signal GMC JIMMY 1997 Owner's Manual
[x] Cancel search | Manufacturer: GMC, Model Year: 1997, Model line: JIMMY, Model: GMC JIMMY 1997Pages: 410, PDF Size: 20.03 MB
Page 10 of 410

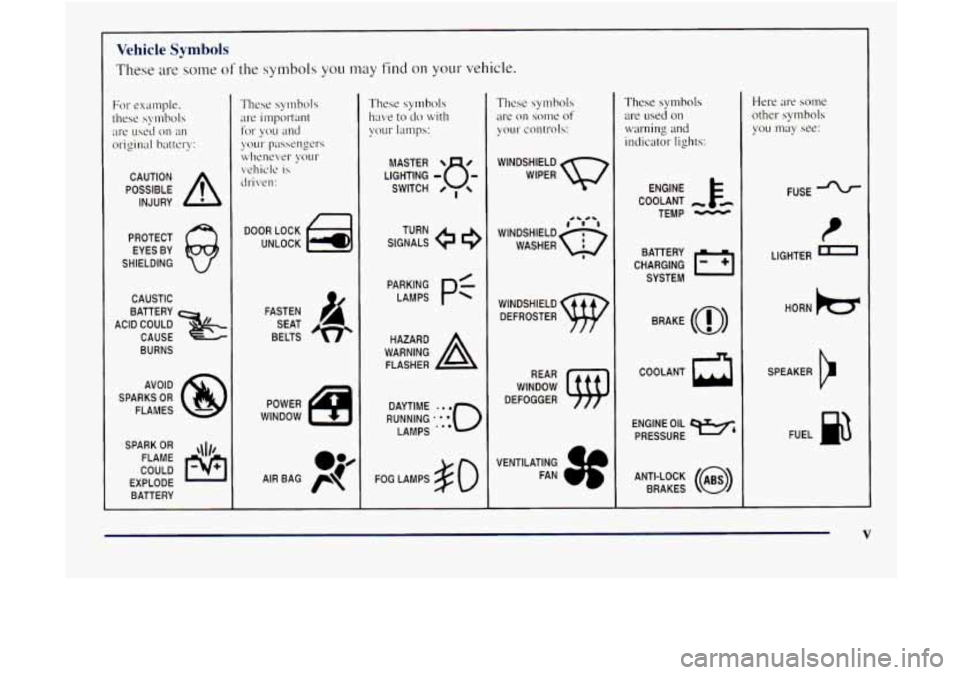
~~~~ Vehicle Symbols
These are some of the symbols you may find on your vehicle.
POSSIBLE A
CAUTION
INJURY
PROTECT EYES BY
SHIELDING
CAUSTIC
ACID COULD
&
BATTERY
CAUSE
BURNS
AVOID
SPARKS
OR
FLAMES
SPARK
OR ,\I/,
COULD FLAME
EXPLODE BATTERY
DOOR LOCK
UNLOCK
FASTEN SEAT
BELTS
POWER
WINDOW SIGNALS
e
TURN
RUNNING
.':o'o
DAYTIME LAMPS
..e
FOG LAMPS $0
These symbols
are on some of
your controls:
WINDSHIELD
WIPER
WINDSHIELD DEFROSTER
VENTILATING FAN
These symbols
are
used 011
warning and
indicator lights:
COOLANT
TEMP
CHARGING I-1
BAllERY
SYSTEM
BRAKE
(@)
COOLANT a
ENGINE OIL e,
PRESSURE
ANTI-LOCK
(@)
BRAKES
Here are some
other symbols
YOLI may see:
FUSE
t
LIGHTER m
HORN k3
SPEAKER
b
FUEL I&
V
Page 99 of 410

Tilt Wheel (If Equipped)
If you have the tilt steering
wheel,
you should adjust
the steering wheel before
you drive.
You can raise it to the highest level to give your legs
more
room when you enter and exit the vehicle.
To tilt the wheel, hold the steerins wheel and pull the
lever toward you. Move the steering wheel
to a
comfortable level. then release the lever to lock the
wheel in place.
Do not ad-just the steering wheel while driving.
Turn Signal/Multifunction Lever
The lever on the left. side of the steering column
includes your:
Turn Signal and Lane Change Indicator
Headlamp HighLow Beam Changer
0 Windshield Wipers
0 Windshield Washer
2-38 -
Page 100 of 410

Turn and Lane Change Signals
The turn signal has twio upward (for right) and two
downward (for left) positions. These positions allow
you
to signal a turn or LI lane change.
To signal a tum, move the lever all the way up or down.
When the turn is finished. the lever will return automatically.\
An arrow on the instrument
panel will flash
in the
direction
of the turn
or lane change.
To signal a lane change, just raise or lower the lever
unt.il the arrow starts to flash. Hold it there until you
complete
your lane change. The lever will return by
itself when
you release it.
As you signal a turn or a lane change, if the arrows don't
flash but just stay
on, a signal bulb may be burned out
and other drivers won't see your turn signal.
If a bulb is burned out, replace it to help ac.oid an
accident.
If the arrows don't go on at all when you
signal
a turn, check the fuse (see "Fuses and Circuit
Breakers"
in the Index) and for burned-out bulbs.
If you have a trailer towing option with added wiring for
the trailer lamps.
a different turn signal flasher is used.
With this flasher installed, the signal indicator will flash
even
if ;I turn signal bulb is burned out. Check the front
and rear turn signal
lamps regularly to make sure they
are working.
Headlamp HighLow Beam Changer
To change the headlamps from low-beam to high or
high
to low. pull the multifunction lever all the way
toward you. Then release
it.
2-39
Page 127 of 410

Operating the Transmitter
Press and hold the appropriate button on the universal
transmitter. The red light comes on while the signal is
being transmitted.
Note that the effective transmission range of the
universal transmitter may differ from the hand-held
transmitter and from one channel to another.
Erasing Channels
To erase all three programmed channels, hold down
the two outside buttons until the red light begins to
flash. Individual channels cannot be erased.
but can be
reprogrammed using
the procedure for programming the
transmitter explained earlier.
Training a Garage Opener with a "Rolling
Code" Feature
If you programmed the universal transmitter. but the
garage door will not open. and
if your garage door opener
was manufactured after
1995, your garage door may have
a security feature that changes the "code"
of your garage
door opener every time
it is opened or closed.
To determine if your garage door opener has this
"rolling code" feature. press the appropriate button on
the universal transmitter that was programmed. If the
red light tlashes rapidly for one to two seconds, then
turns solid, your garage door opener
has this feature.
To program a garage door opener with the rolling code
feature, do the following:
1.
-. 3
3.
4.
5.
6.
Program your hand-held transmitter to the universal
transmitter by following the steps provided under
"Programming the Transmitter" earlier in this section.
Remove the cover panel from the garage door opener
receiver.
It is located near the garage door opener motor.
Locate the training button
on the garage door opener
receiver. The exact location and color
will vary
among brands.
Press the training button on the garage door opener
receiver for one to two seconds.
Return
to your vehicle and press the programmed
button on the universal transmitter
until the red light
flashes rapidly (about two seconds).
Release the button. then repress
it to confirm it was
programmed to the garage door opener receiver.
You may now use either the universal transmitter or
the hand-held transmitter to open your garage door.
If you still have difficulty in programming and I
assistance. please call 1-800-355-35 15.
Accessories
Accessories for the universal transmitter are ava .I
:quire
lable
from the manufitcturer of the unit. If you would like
additional information. please call
1-800-355-35 15.
2-66
Page 133 of 410

Warning Lights, Gages and Indicators
This part describes the warning lights and gages that
may be on your vehicle. The pictures
will help you
locate them.
Warning lights and gages can signal that something
is
wrong before it becomes serious enough to cause an
expensive repair or replacement. Paying attention
to
your warning lights and gages could also save you or
others from
injury.
Warning lights come on wl1e.n there may be or is a
problem with one of your vehicle’s functions. As you
will see in the details on the next few pages, some
warning lights come on briefly when you start the
engine just to
let you know they’re working. If you are
familiar with
this section, you should not be alarmed
when this happens.
Gages can indicate when there may
be or is a problem
with one of your vehicle’s functions. Often gages and
warning lights work together to
let you know when
there’s
a problem with your vehicle. When one
of the warning lights comes on and stays
on
when you are driving, or when one of the gages shows
there may be a problem, check the section that tells you
what to do about
it. Please follow this manual’s advice.
Waiting to do repairs can be costly
-- and even
dangerous.
So please get to know your warning lights
and gages. They’re
a big help.
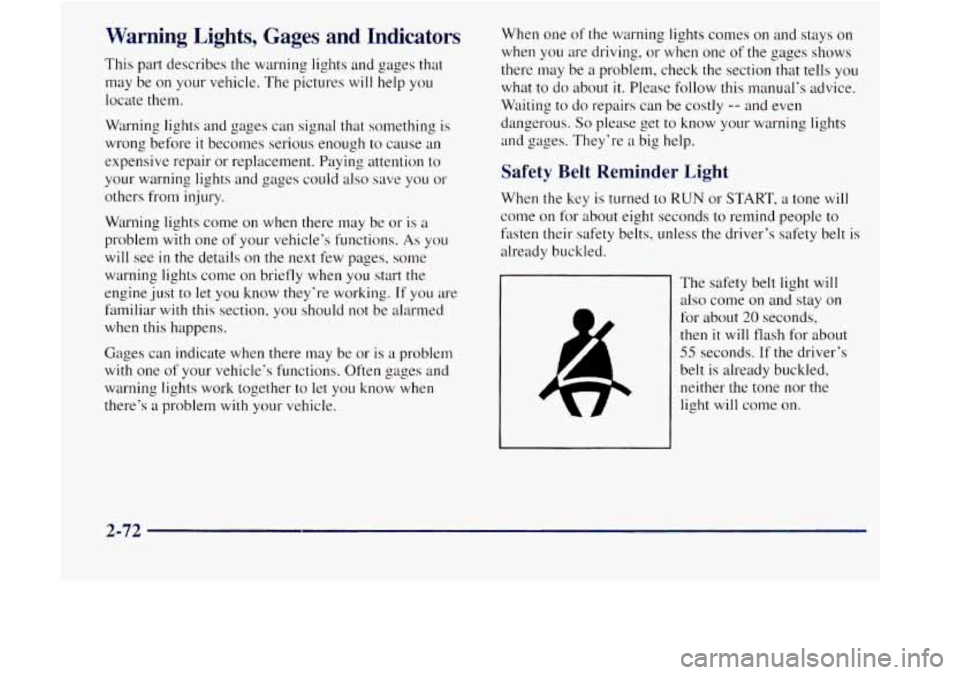
Safety Belt Reminder Light
When the key is turned to RUN or START, a tone will
come on for about eight seconds to remind people to
fisten their safety belts, unless the driver’s safety belt is
already buckled.
The safety belt light
will
also come on and stay on
for about
20 seconds,
then
it will flash for about
55 seconds. If the driver’s
belt is already buckled,
neither the tone nor the
light
will come on.
2-72
Page 198 of 410

Freeway Driving
Mile for mile, freeways (also called thruways, parkways,
expressways, turnpikes or superhighways) are the safest of all roads. But they have their own special rules. The
most important advice on freeway driving is: Keep
up with traffic and keep to the right. Drive at the same
speed most of the other drivers are driving. Too-fast or
too-slow driving breaks a smooth traffic flow. Treat the
left lane
on a freeway as a passing lane.
At the entrance, there is usually a ramp that leads to the
freeway. If you have a clear view
of the freeway as you
drive along the entrance ramp, you should begin to
check traffic. Try to determine where you expect to
blend with the flow. Try to merge into the gap at close to
the prevailing speed. Switch on your
turn signal, check
your mirrors and glance over your shoulder as often as
necessary. Try to blend smoothly with the traffic flow.
Once you are on the freeway, adjust your speed to the
posted limit or to the prevailing rate if it’s slower. Stay
in the right lane unless you want to pass.
Before changing lanes, check your mirrors. Then use
your turn signal.
Just before you leave the lane, glance quickly over your
shoulder to make sure there isn’t another vehicle in your
“blind” spot.
4-33
Page 216 of 410

Following Distance
Backing
Up
Making Turns
NOTICE:
Making very sharp turns while trailering could
cause the trailer to come
in contact with the
vehicle.
Your vehicle could be damaged. Avoid
making very sharp turns while trailering.
Turn Signals When Towing a Trailer
4-51
Page 217 of 410

When towing a trailer, the ~~rrows on your instrument
panel
will flash for turns even if the bulbs on the trailer
itre burned out. Thus. you may think drivers behind you
are seeing your signal when they are not. It's important
to check occasionally to be sure the trailer bulbs arc
still working.
Driving On Grades
On a long uphill grade, shift down and reducc your
speed
to around 45 mph (70 km/h) to reduce the
possibility
of engine and transmission ovc.rheating.
If you have an automatic transmission. you should use
DRIVE
(D) when towing a trailer. Operating your
vehicle
in DRIVE (D) when towing a trailer will
minimize heat buildup and extend the life
of your
trrmsmission. Or:
if you have ;1 manual transmission. it's
better not to use FIFTH (5) gear. just drive in
FOURTH (4) gear (or, as you need to, a I~MW gear). Whcn
towins at high altitude
on steep uphill grades,
consider the following: Engine coolant will boil at a
lower temperature than at normal altitudes. If yo^^ turn
your engine off immediately after towing
at high altitude
on steep uphill grades, your \:ellicle may show signs
similar to engine overheating.
To avoid this. let the
engine
r~~n while parked (preferably on level grout1d)
with the automatic transmission in PARK (Pj (or the
1manuaI transmission out of
gear and the parking brake
applied) 1'01-
;I few minutes before turning the engine off.
If you do get the overheat warning. see "Engine
Overheating"
in the Index.
Parking on Hills
You really should not park your vehicle. with a trailer
attached.
on a hill. If something goes wrong, your rig
could start
to move. People can be injured, and both
yo~~r vehicle and the trailer can
be damaged.
4-52
Page 295 of 410

Front Turn Signal Lamps
If you have fog lamps, the fog lamp bracket must be
removed before
you can replace the front turn
signal lamps.
3 -.
3.
Turn the socket counterclockwise and pull it out.
Holding the base
of the bulb, pull the bulb straight
out of the socket.
Push the new bulb
into the socket until it clicks.
Put the socket back into
the turn signal lamp
usembly and turn ii clockwise until it locks
into place.
Front Sidemarker Lamps
1.
3 -.
3.
4.
5.
6.
7.
9. 8.
Remove the lens retaining screws.
Remove the sidernarker
lens from the radiator grille.
Turn hc bulb and socket one-quarter turn
counterclockwise.
Remove the
bulb and socket from the lens.
Install the
new bulb and socket to the
sidemarker lens.
Rotate the bulb and socket one-quarter
of a
turn clockwise.
Install the sidemarker lens to the radiator grille.
Insert the tabs into the locators.
Install and tighten the screws.
6-36
Page 320 of 410

Fuse/Circuit Breaker Usage
5
6
7
8
9
10
11
12
13
14
1s
Oxygen Sensor Heater, Exhaust Gas
Recirculation, Cam Sensor, CANN.
Purge. Canister Vent Solenoid. Mass
Airflow Sensor,
Cam Shaft Sensor
Blower Motor, Temperature Door Motor.
HI Blower Relay Coil
Power Auxiliary Outlets, Assembly
Line Diagnostic
Link
Rear Window Defogger
PCM/VCM Battery. Fuel Pump
PCM/VCM Ignition, Injectors. Crank
Sensor. Coil Driver Module
Radio, Inside Rearview Mirror Map
Lamp, Overhead Console Reading
Lamps. Rear Wiper, Rear Washer.
Overhead Console Display
Anti-Lock Braking System. VCM
IGN-3
Clock. Radio Battery, CD Player
A/C Compressor Battery Feed
Daytime Running Lamps, Fog
Lamps,
Fog Lamp Relay
17
18
19
20
21
22
23
Fuse/Circuit
Breaker Usage
16 Turn Signals and Back-up Lamps,
Brake-Transmission Shift Interlock
Solenoid
Windshield Washer, Windshield Wiper Motor
Not Used
Electric Shift Transfer Case
Crank Relay,
Air Bag Module
Not Used
Air Bag Module
Cluster Hlumination, Radio
Illu~nination. He.ater Lamp.
4WD
Illumination, Chime Module, Fog
Lam13 Illumination, Rear Wiper
Switch Illumination, Rear Defogger
Switch Illumination, Liftglass
Release Switch Illumination,
Overhead Console Illutnination
PRNDL Power. 4L60E Automatic
Transmission
24
6-61