GMC SIERRA 1994 Owners Manual
Manufacturer: GMC, Model Year: 1994, Model line: SIERRA, Model: GMC SIERRA 1994Pages: 404, PDF Size: 20.91 MB
Page 151 of 404
I NOTICE:
Scraping the inside of your rear window could cut and damage
the defogger. Your warranty would not cover this damage. And,
don’t put decals there, you might have to scrape them
off.
For best results, clear the window of as much snow or ice as possible first.
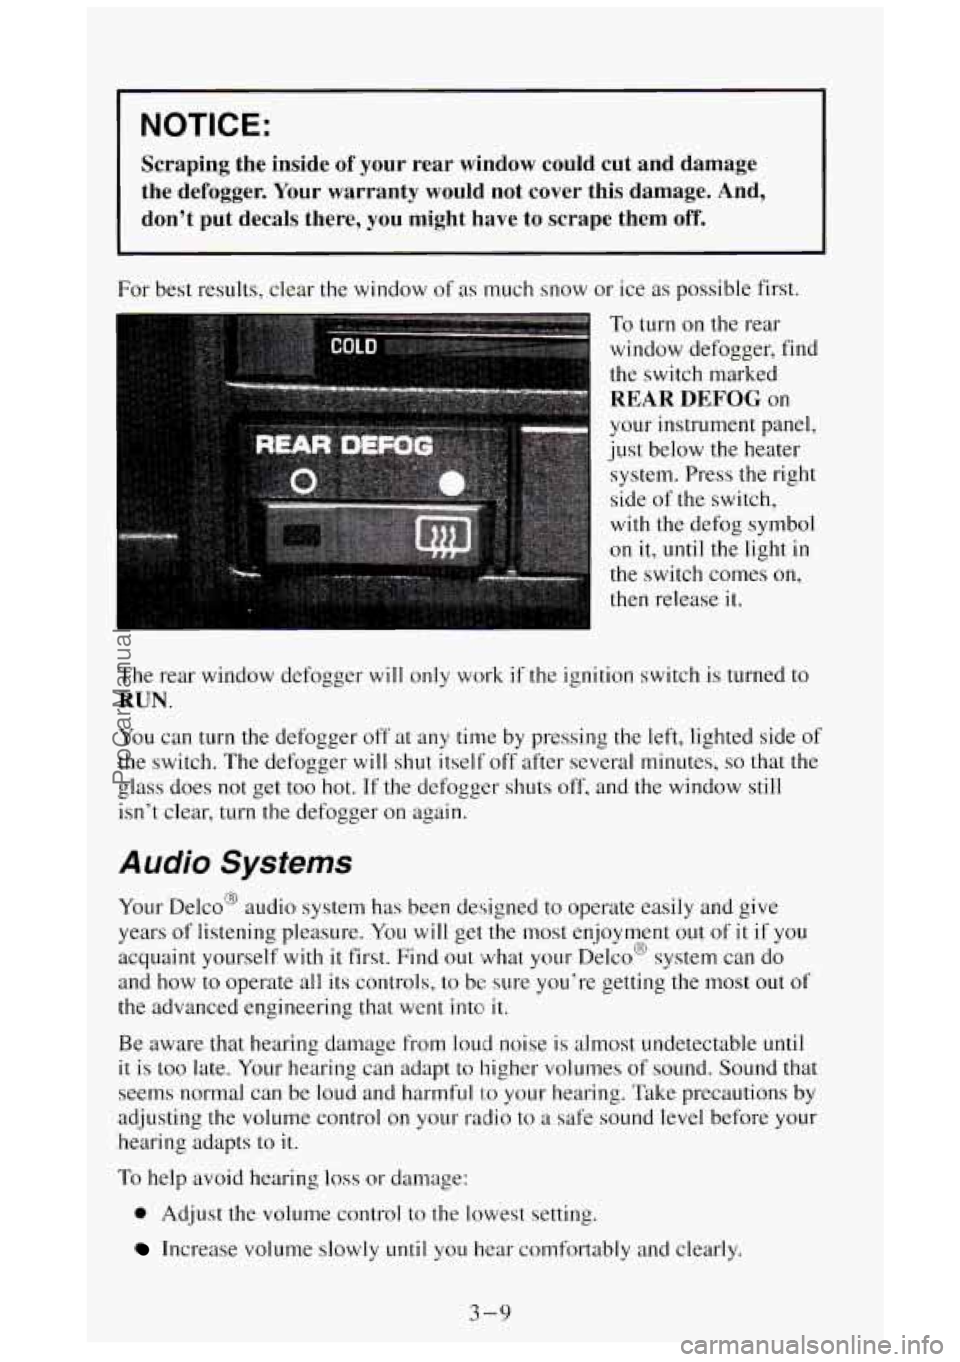
To turn on the rear
window defogger, find
the switch marked
REAR DEFOG on
your instrument panel,
just below the heater
system. Press the right
side
of the switch,
with the defog symbol
on it,
until the light in
the switch comes on,
then release
it.
The rear window defogger will only work if the ignition switch is turned to
RUN.
You can turn the defogger off at any time by pressing the left, lighted side of
the switch. The defogger will shut itself off after several minutes, so that the
isn’t clear, turn
the defogger on again.
a olass does not get too hot. If the defogger shuts off, and the window still
Audio Systems
Your Delco@ audio system has been designed to operate easily and give
years of listening pleasure.
You will get the. most enjoyment out of it if you
acquaint yourself with
it first. Find out what your Delco@ system can do
and
how to operate all its controls, to be sure you’re getting the most out of
the advanced engineering that went into
it.
Be aware that hearing damage from loud noise is almost undetectable until
it is too late. Your hearing can adapt to higher volumes of sound. Sound that
seems normal can be loud and harmful
I:O your hearing. Take precautions by
adjusting the volume control
on your radio to a safe sound level before your
hearing adapts to it.
To help avoid hearing loss or damage:
0 Adjust the volume control to the lowest setting.
Increase volume slowly until you hear comfortably and clearly.
3-9
ProCarManuals.com
Page 152 of 404
FM Stereo
FM stereo will give you the best sound. But FM signals can only reach
about
10 to 40 miles (16 to 65 km). And, tall buildings or hills can interfere
with
FM signals, causing the sound to come and go.
AM
The range for most AM stations is greater than for FM, especially at night.
The longer range, however, can cause stations to interfere
with each other.
AM
can pick up noise from things like electrical storms and power lines. If
the noise interferes with your listening, try reducing the treble to lessen the
noise.
AM Stereo
This means the Delco@ system can receive C-QUAM@ stereo broadcasts.
Many AM stations around
the country use C-QUAM@ to produce stereo,
though some
do not. If your Delco@ system can get C-QUAM@, your
“STEREO” light will come on when you’re receiving it. (C-QUAM’ is a
registered trademark of Motorola, Inc.).
NOTICE:
Before you add any sound equipment to your vehicle - like a
tape player, CB radio, mobile telephone or two-way radio - be
sure you can add what you want. If you can,
it’s very important
to do it properly. Added sound equipment may interfere with the
operation
of your vehicle’s engine, Delco@ radio or other
systems, and even damage them. And, your vehicle’s systems
may interfere with the operation of sound equipment that has
been added improperly.
So, before adding sound equipment, check with your dealer and
be sure to check Federal rules covering mobile radio and
telephone units.
3-10
ProCarManuals.com
Page 153 of 404
Yow to Operate Your AM ETR':"' Radio
To Play the Radio
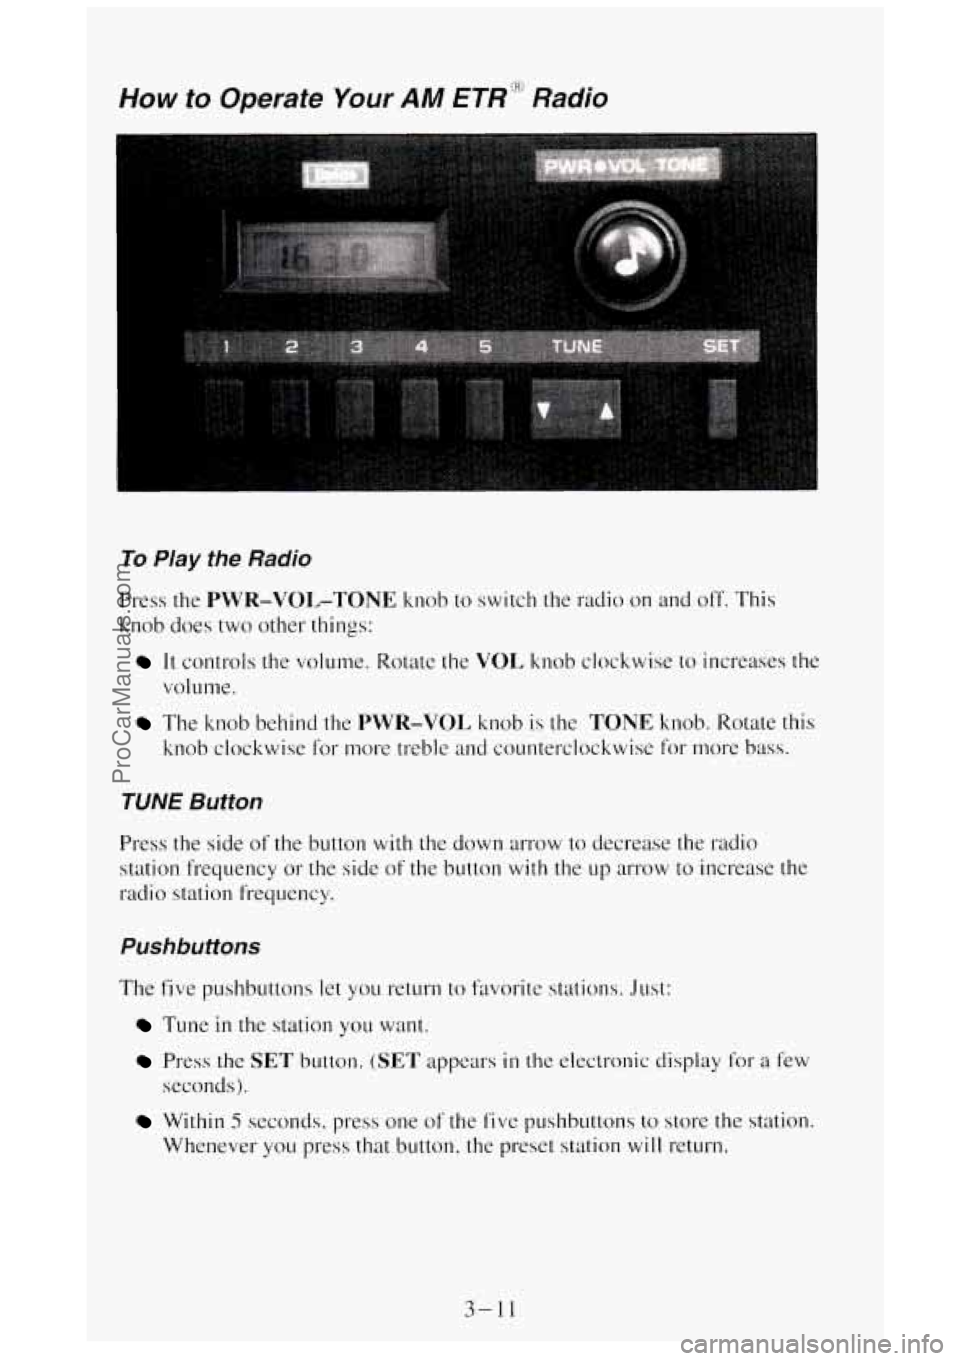
Press the PWR-VOL-TONE knob to switch the radio on and off. This
knob does two other things:
It controls the volume. Rotate the VOI, knob clockwise to increases the
volume.
The knob behind the PWR-VOL knob is the TONE knob. Rotate this
knob clockwise
for more treble and counterclockwise for more bass.
TUNE Button
Press the side of the button with the down arrow to decrease the radio
station frequency
or the side of the button with the up arrow to increase the
radio station frequency.
Pushbuttons
The five pushbuttons let you return to favorite stations. Just:
Tune in the station you want.
Press the SET button. (SET appears in the electronic display for a f'ew
seconds).
Within 5 seconds, press one of the fivc pushbuttons to store the station.
Whenever you press that button, the preset station
will return.
3-11
ProCarManuals.com
Page 154 of 404
How to Operate Your AM-FM Stereo Audio System
and Cassette Deck
To Play The Radio
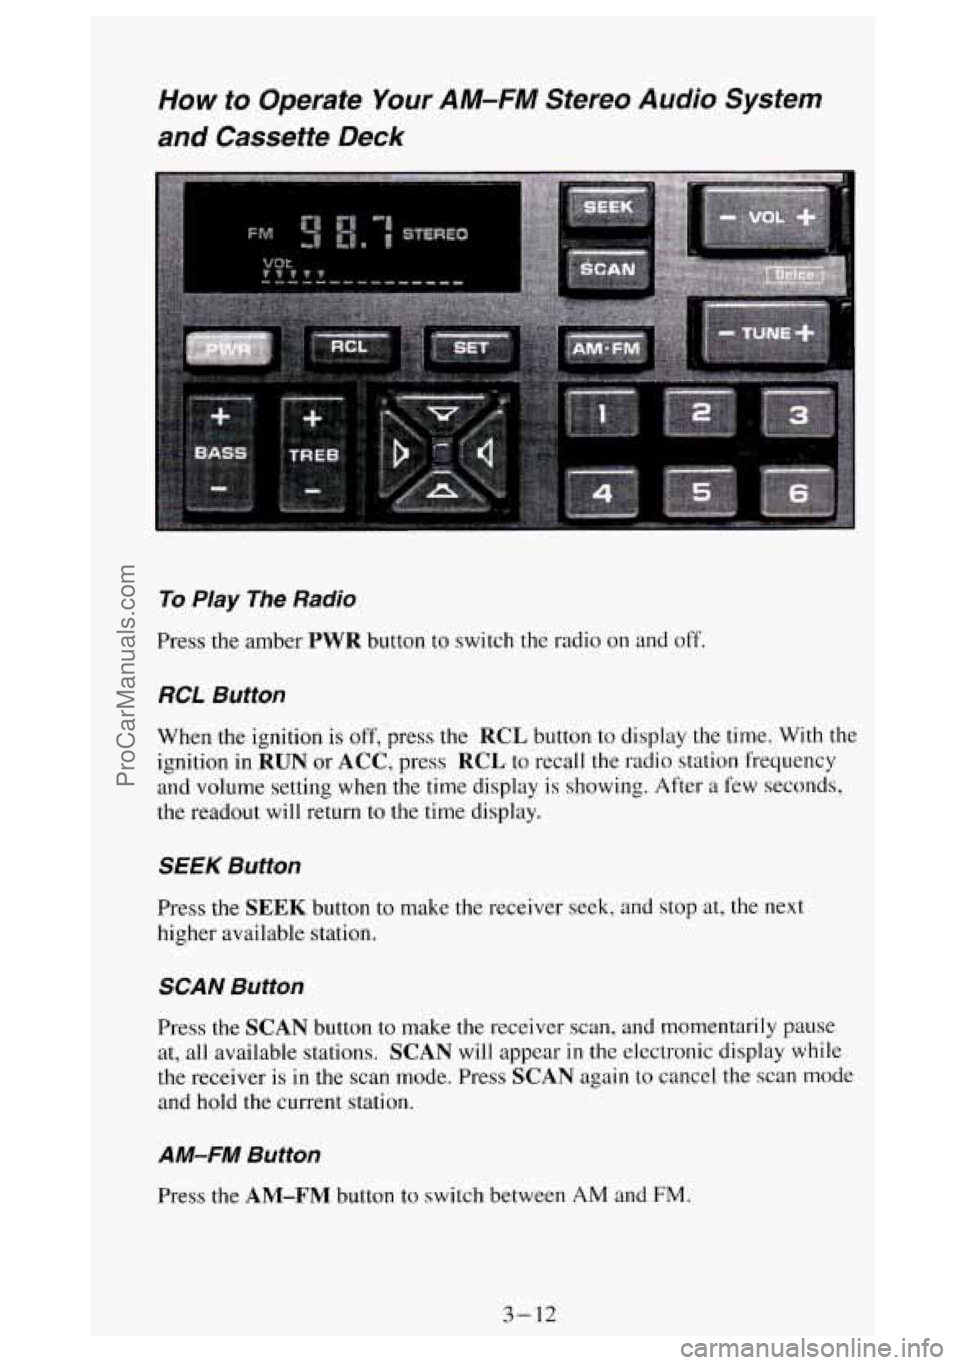
Press the amber PWR button to switch the radio on and off.
RCL Button
When the ignition is off, press the RCL button to display the time. With the
ignition in
RUN or ACC, press RCL to recall the radio station frequency
and volume setting when the time display is showing. After
a few seconds,
the readout will return
to the time display.
SEEK Button
Press the SEEK button to make the receiver seek, and stop at, the next
higher available station.
SCAN Button
Press the SCAN button to make the receiver scan, and momentarily pause
at, all available stations.
SCAN will appear in the electronic display while
the receiver is
in the scan mode. Press SCAN again to cancel the scan mode
and hold the current station.
AM-FM Button
Press the AM-FM button to switch between AM and FM.
3-12
ProCarManuals.com
Page 155 of 404
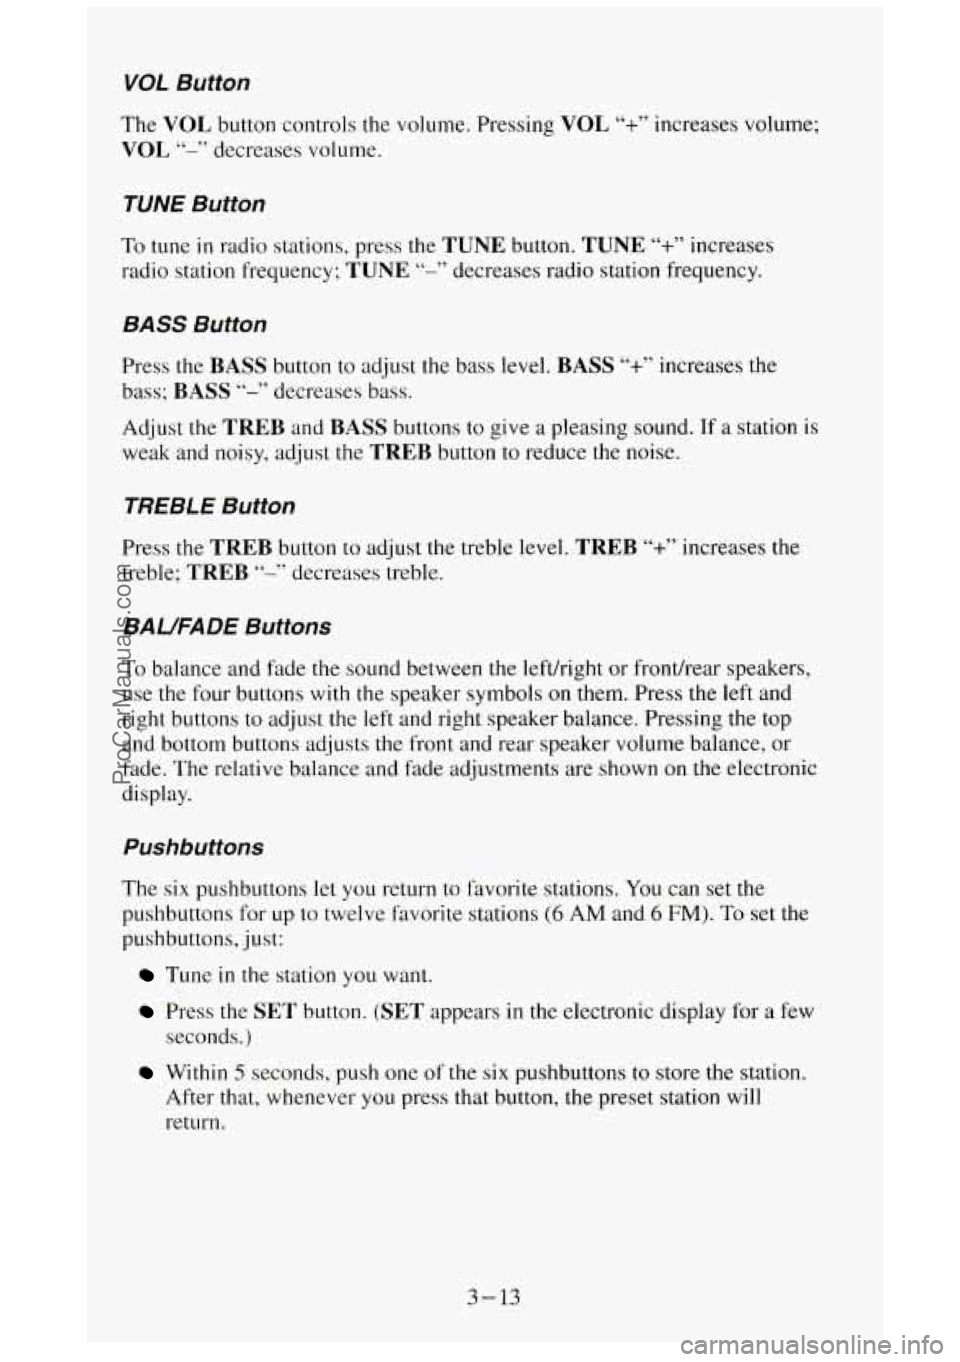
VOL Button
The VOL button controls the volume. Pressing VOL "+" increases volume;
VOL "-" decreases volume.
TUNE Button
To tune in radio stations, press the TUNE button. TUNE "+" increases
radio station frequency;
TUNE "-" decreases radio station frequency.
BASS Button
Press the BASS button to adjust the bass level. BASS "+" increases the
bass; BASS "-" decreases bass.
Adjust the
TREB and BASS buttons to give a pleasing sound. If a station is
weak and noisy, adjust the
TREB button to reduce the noise.
TREBLE Button
Press the TREB button to adjust the treble level. TREB "+" increases the
treble; TREB "-" decreases treble.
BAUFADE Buttons
To balance and hde the sound between the leftkight or fronthear speakers,
use
the four buttons with the speaker symbols on them. Press the left and
right buttons to adjust the left and right speaker balance. Pressing the top
and bottom buttons adjusts the front and rear speaker volume balance,
or
fade. The relative. balance. and fade adjustments are shown on the electronic
display.
Pushbuttons
The six pushbuttons let you return to favorite stations. You can set the
pushbuttons for up to twelve favorite stations
(6 AM and 6 FM). To set the
pushbuttons, just:
Tune in the station you want.
Press the SET button. (SET appears in the electronic display for a few
seconds.)
Within 5 seconds, push one of the six pushbuttons to store the station.
After that, whenever you press that button, the preset station
will
return.
3-13
ProCarManuals.com
Page 156 of 404
Clock
To set the clock, just:
0
0
0
0
Press the SET button. The word SET will light up in the electronic
display.
Within
5 seconds, press and hold the SEEK button until the correct
hour appears on the display.
Then, press and hold the
SCAN button until the correct minute appears
on the display.
After you set the time, the word
SET will remain in the electronic
display for a few seconds.
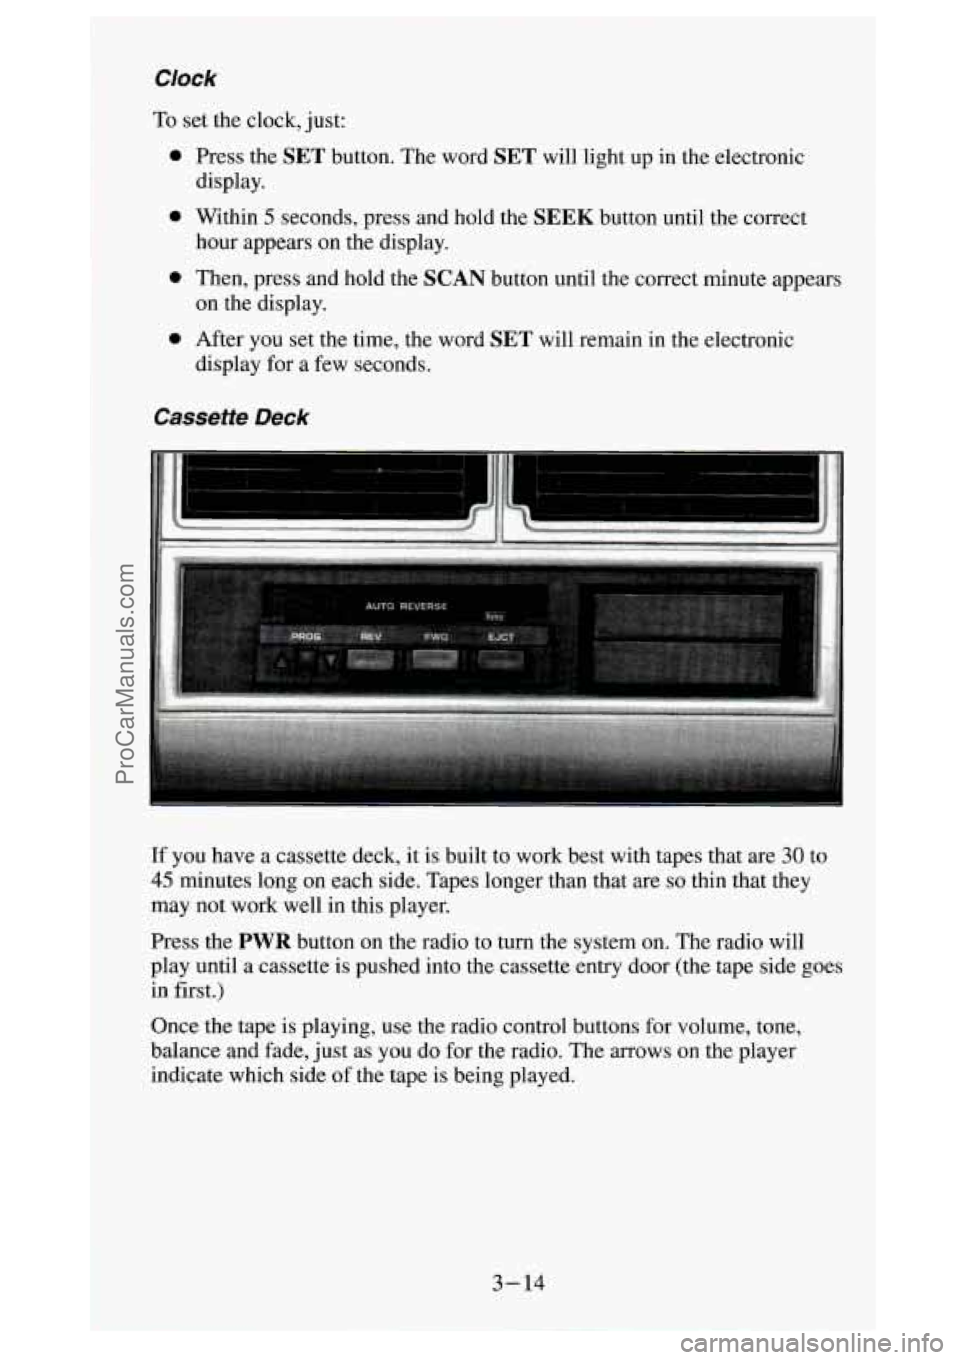
Cassette Deck
p... .... ..... ......................... ..... i' f. ................... ./.. .._..-... ..............
ii .... ........ "_ ......... ........ -. ........ ... .....
If you have a cassette deck, it is built to work best with tapes that are 30 to
45 minutes long on each side. Tapes longer than that are so thin that they
may not work well in this player.
Press the
PWR button on the radio to turn the system on. The radio will
play until a cassette is Dushed into the cassette entry door (the tape side goes
in first.)
Once the tape is playing, use the radio control buttons for volume, tone,
balance and fade, just as you do for the radio. The arrows
on the player
indicate which side of the tape
is being played.
3-14
ProCarManuals.com
Page 157 of 404
PROG
To go from one side of the tape to the other, press the PROG button.
Observe the lighted arrows to determine which side of the tape is being
played.
If a tape is inserted with side “1” (or “A”) up, then the up arrow means that
that side is being played. Likewise, a down arrow would indicate that side
“2” (or “B”) had been selected. The player will automatically switch to the \
other side
of the tape when the first side ends.
REV
To rapidly rewind the tape, press the REV button. The tape will rapidly
rewind until you press either the
PROG or E JCT button. If the beginning
of the tape is reached while in the
REV mode, play will resume on the same
side of the tape.
FWD
To rapidly advance the tape, press the FWD button. The tape will rapidly
advance until you press either the
PROG or E JCT button. If the end of the
tape is reached while in the
FWD mode, the tape will change direction, and
play will resume on the opposite side
of the tape.
EJCT
Press the
EJCT button to eject the cassette tape from the player (the radio \
will then play).
3-15
ProCarManuals.com
Page 158 of 404
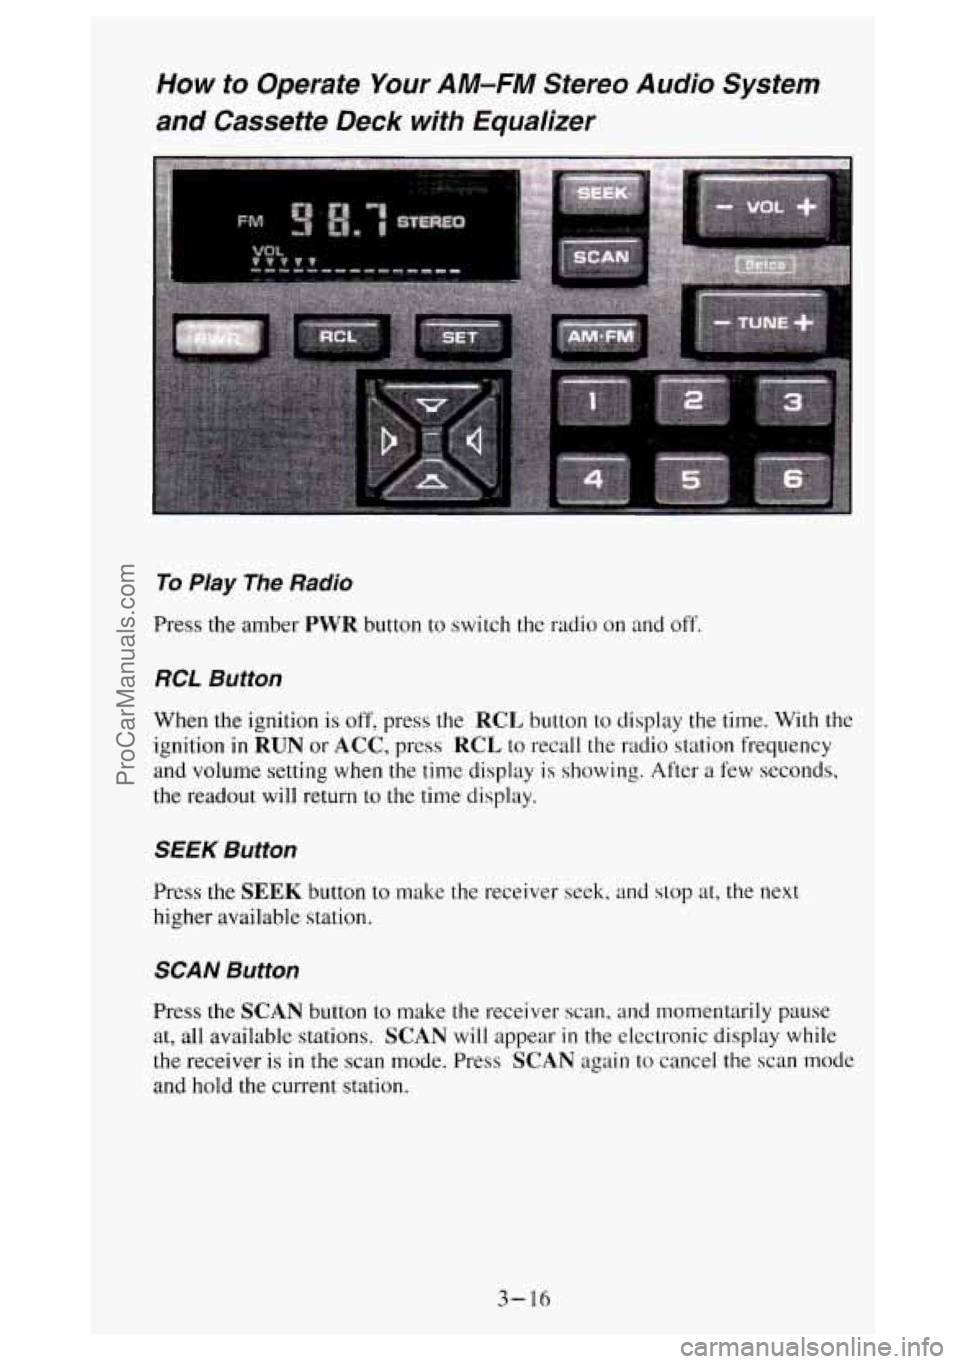
How to Operate Your AM-FM Stereo Audio System
and Cassette Deck with Equalizer
To Play The Radio
Press the amber PWR button to switch the radio on and off.
RCL Button
When the ignition is off, press the RCL button to display the time. With the
ignition
in RUN or ACC, press RCL to recall the radio station frequency
and volume setting when the time display is showing. After a few seconds,
the readout will return to
the time display.
SEEK Button
Press the SEEK button to make the receiver seek, and stop at, the next
higher available station.
SCAN Button
Press the SCAN button to make the receiver scan, and momentarily pause
at, all available stations.
SCAN will appear in the electronic display while
the receiver is
in the scan mode. Press SCAN again to cancel the scan mode
and hold the current station.
3-16
ProCarManuals.com
Page 159 of 404
AM-FM Button
Press the AM-FM button to switch between AM and FM.
Stereo (AM)
Your Delco@ radio can receive C-QUAM@ stereo broadcasts. Many AM
stations around the country use C-QUAM@ to produce stereo, though some
do not. If your Delco@ system can get C-QUAM@ signals, your STEREO
light
will come on when you are receiving stereo. (C-QUAM@ is a
registered trademark of Motorola Inc.).
VOL Button
The VOL button controls the volume. Pressing VOL "+" increases volume;
VOL "-" decreases volume.
TUNE Button
To tune in radio stations, press the TUNE button. TUNE "+" increases
radio station frequency;
TUNE "-" decreases radio station frequency.
BAUFADE Buttons
To
balance and fade the sound between the lefthight or frondrear speakers,
use the four buttons with the speaker symbols on them. Press the left and
right buttons
to adjust the left and right speaker balance. Pressing the top
and bottom buttons adjusts the front and rear speaker volume balance, or
fade. The relative balance and fade adjustments are shown
on the electronic
display.
Pushbuttons
The six pushbuttons let you return to favorite stations. You can set the
pushbuttons for up to twelve favorite stations
(6 AM and 6 FM). To set the
pushbuttons, just:
Tune in the station you want.
Press the SET button. (SET appears in the electronic display for a few
Within 5 seconds, push one of the six pushbuttons to store the station.
seconds.)
After that, whenever you press that button, the preset station will
return.
3- 17
ProCarManuals.com
Page 160 of 404
Clock
To set the clock, just:
0 Press the SET button. The word SET will light up in the electronic
display.
hour appears on the display.
0 Within 5 seconds, press and hold the SEEK button until the correct
0 Then, press and hold the SCAN button until the correct minute appears
0 After you set the time, the word SET will remain in the electronic
on the display.
display for a few seconds.
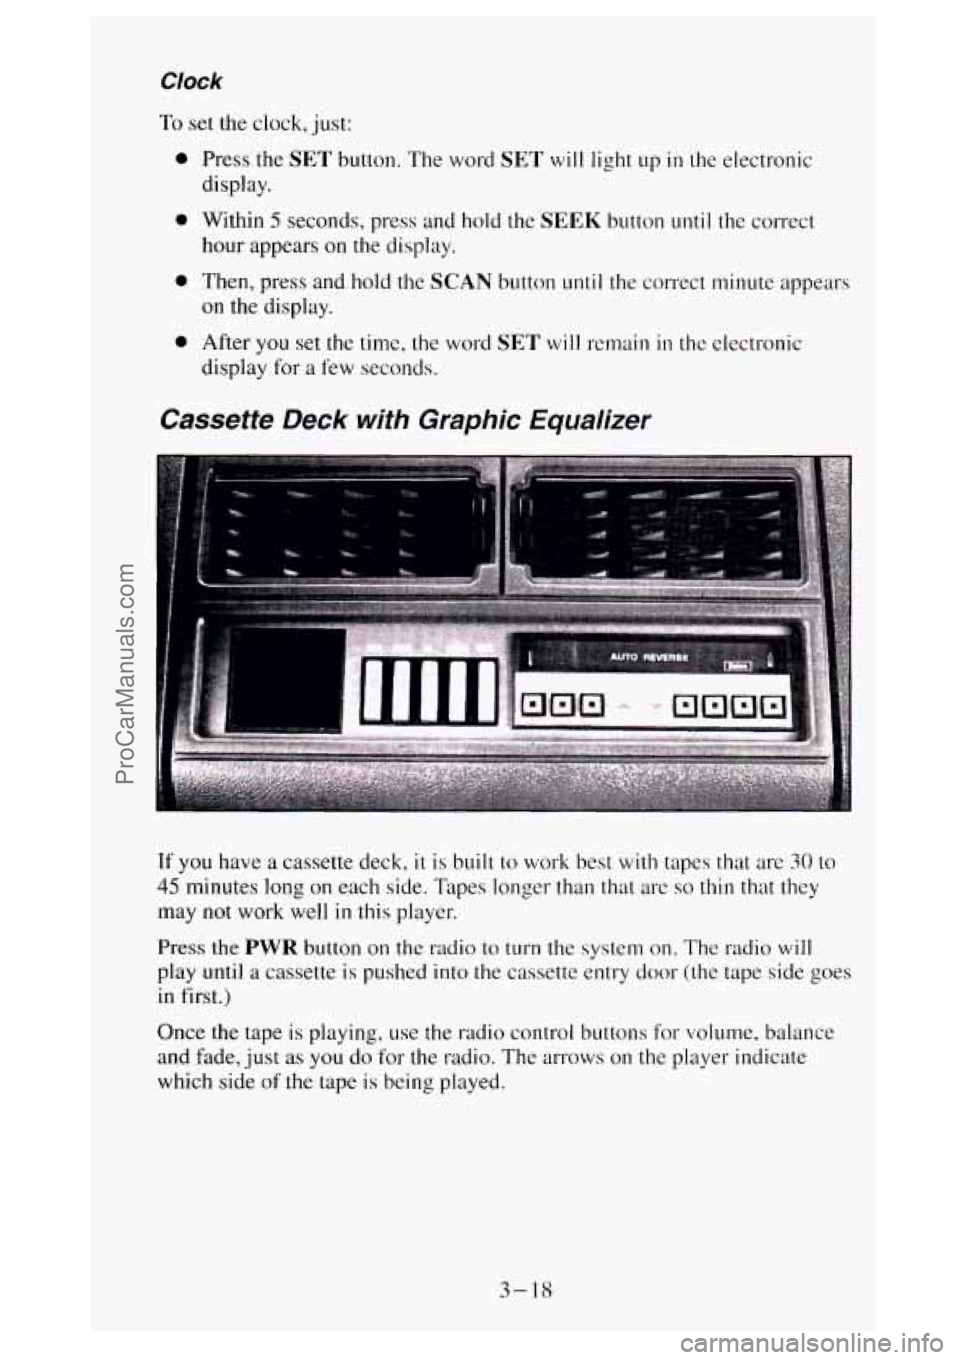
Cassette Deck with Graphic Equalizer
If you have a cassette deck, it is built to work best with tapes that are 30 to
45 minutes long on each side. Tapes longer than that are so thin that they
may not work well
in this player.
Press the PWR button on the radio to turn the system on. The radio will
play until a cassette is pushed into the cassette entry door (the tape side goes
in first.)
Once the tape
is playing, use the radio control buttons for volume, balance
and fade, just
as you do for the radio. The arrows on the player indicate
which side
of the tape is being played.
3- 18
ProCarManuals.com