GMC SIERRA 1994 Owners Manual
Manufacturer: GMC, Model Year: 1994, Model line: SIERRA, Model: GMC SIERRA 1994Pages: 404, PDF Size: 20.91 MB
Page 141 of 404
If equipment such as a cap or camper is installed, a wire labele\
d “Center
High Mount Stop lamp
(CHMSL) feed” is provided along the left rear frame
rail. This wire should be used to connect a
CHMSL on the cap or camper.
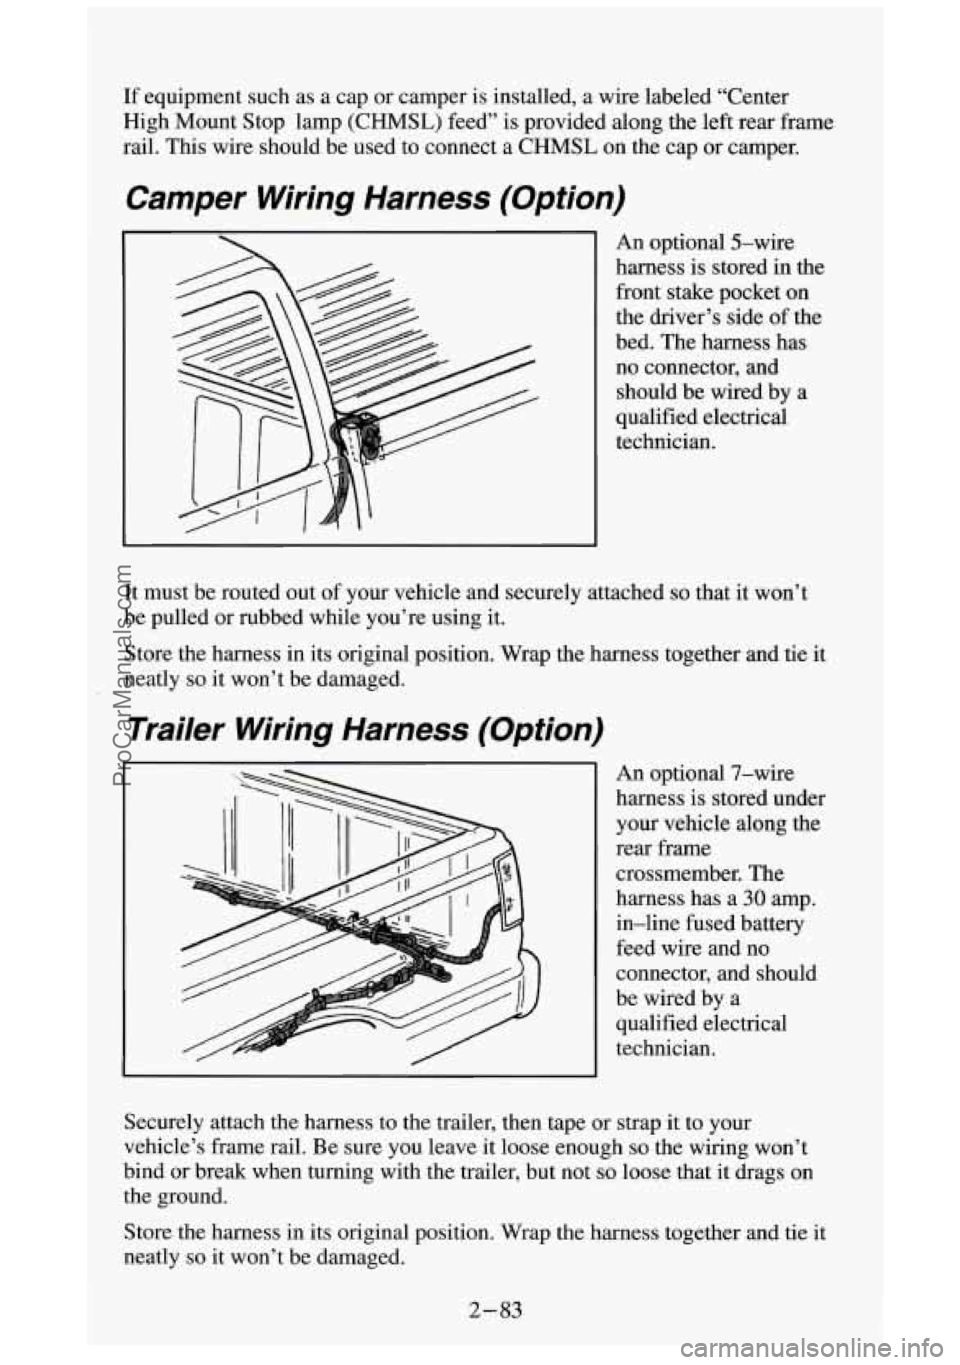
Camper Wiring Harness (Option)
An optional 5-wire
harness is stored in the
front stake pocket on
the driver’s side of the
bed. The harness has no connector, and should be wired by a
qualified electrical
technician.
It must be routed out of your vehicle and securely attached
so that it won’t
be pulled or rubbed while you’re using it.
Store the harness in its original position. Wrap the harness together and tie it
neatly so it won’t be damaged.
Trailer Wiring Harness (Option)
An optional 7-wire
harness is stored under
your vehicle along the
rear frame
crossmember. The
harness has a
30 amp.
in-line fused battery
feed wire and
no
connector, and should
be wired by a
qualified electrical
technician.
Securely attach the harness to the trailer, then tape or strap\
it to your
vehicle’s frame rail. Be sure you leave it loose enough
so the wiring won’t
bind or break when turning with
the trailer, but not so loose that it drags on
the ground.
Store the harness in its original position. Wrap the harness together and tie it
neatly
so it won’t be damaged.
2-83
ProCarManuals.com
Page 142 of 404
Step-Bumper Pad
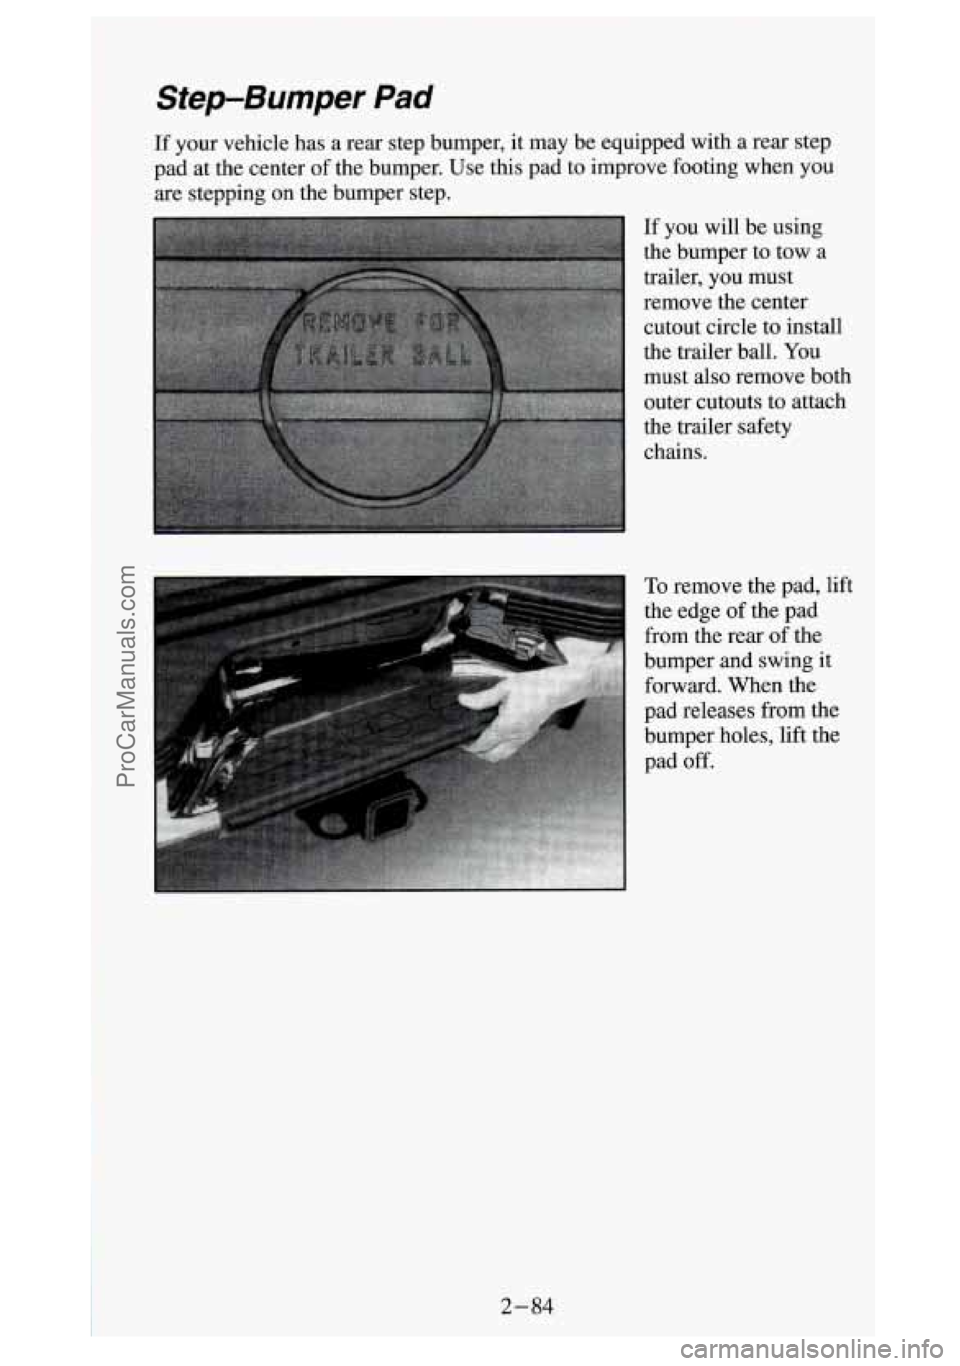
If your vehicle has a rear step bumper, it may be equipped with a rear step
pad at the center
of the bumper. Use this pad to improve footing when you
are stepping on the bumper step.
If you will be using
the bumper to tow a
trailer, you must
remove the center cutout circle to install
the trailer
ball. You
must also remove both outer cutouts to attach
the trailer safety
chains.
I
ProCarManuals.com
Page 143 of 404
Comfort Controls and Audio Systems
Section
In this section you’ll find out how to operate the comfort control and audio
systems offered with your vehicle
. Be sure to read about the particular
system supplied with your vehicle
.
For explanation of vehicle symbols in this section. refer to “Vehicle
Symbols” in the Introduction
.
Comfort Control System
Flow-Through Ventilation System
........................... 3-2
Heating System (Without Air Conditioning)
................... 3-5
Electronic Heating/Air Conditioning System ................... 3-6
Rear Window Defogger
................................... 3-8
Audiosystems
............................................. 3-9
FMStereo ............................................. 3-10
AM
.................................................. 3-10
AMStereo
............................................. 3-10
How to Operate Your AM ETR@ Radio
...................... 3-11
How to Operate
Your AM-FM Stereo Audio System and Cassette
Deck
............................................... 3-12
How to Operate Your AM-FM Stereo Audio System and Cassette
Deck with Equalizer
.................................. 3-16
Care of Your Cassette Tape Player
.......................... 3-20
Fixed Mast Antenna
........................ ..r . . 3-21
3-1
ProCarManuals.com
Page 144 of 404
Comfort Controls
Flow-Through Ventilation System
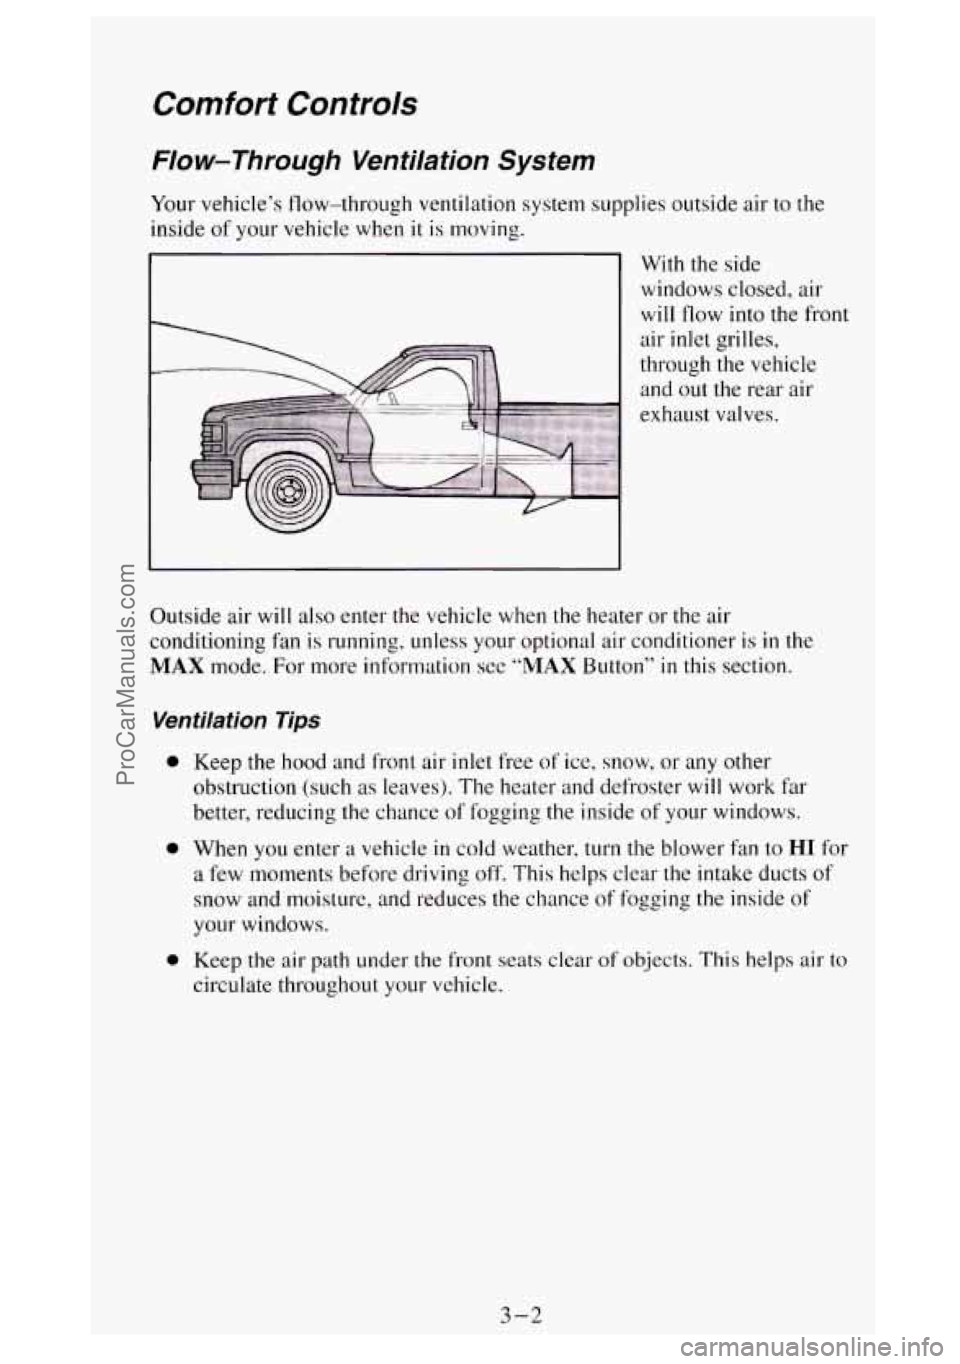
Your vehicle’s flow-through ventilation system supplies outside air to the
inside of your vehicle when
it is moving.
With the side
windows closed, air
will flow into the fro Int
Outside air will also enter the vehicle when the heater or the air
conditioning fan
is running, unless your optional air conditioner is in the
MAX mode. For more information see “MAX Button” in this section.
Ventilation Tips
0 Keep the hood and front air inlet free of ice, snow, or any other
obstruction (such
as leaves). The heater and defroster will work far
better, reducing the chance
of fogging the inside of your windows.
0 When you enter a vehicle in cold weather, turn the blower fan to HI for
a few moments before driving off. This helps clear the intake ducts of
snow and moisture, and reduces the chance of fogging the inside of
your windows.
0 Keep the air path under the front seats clear of objects. This helps air to
circulate throughout your vehicle.
3-2
ProCarManuals.com
Page 145 of 404
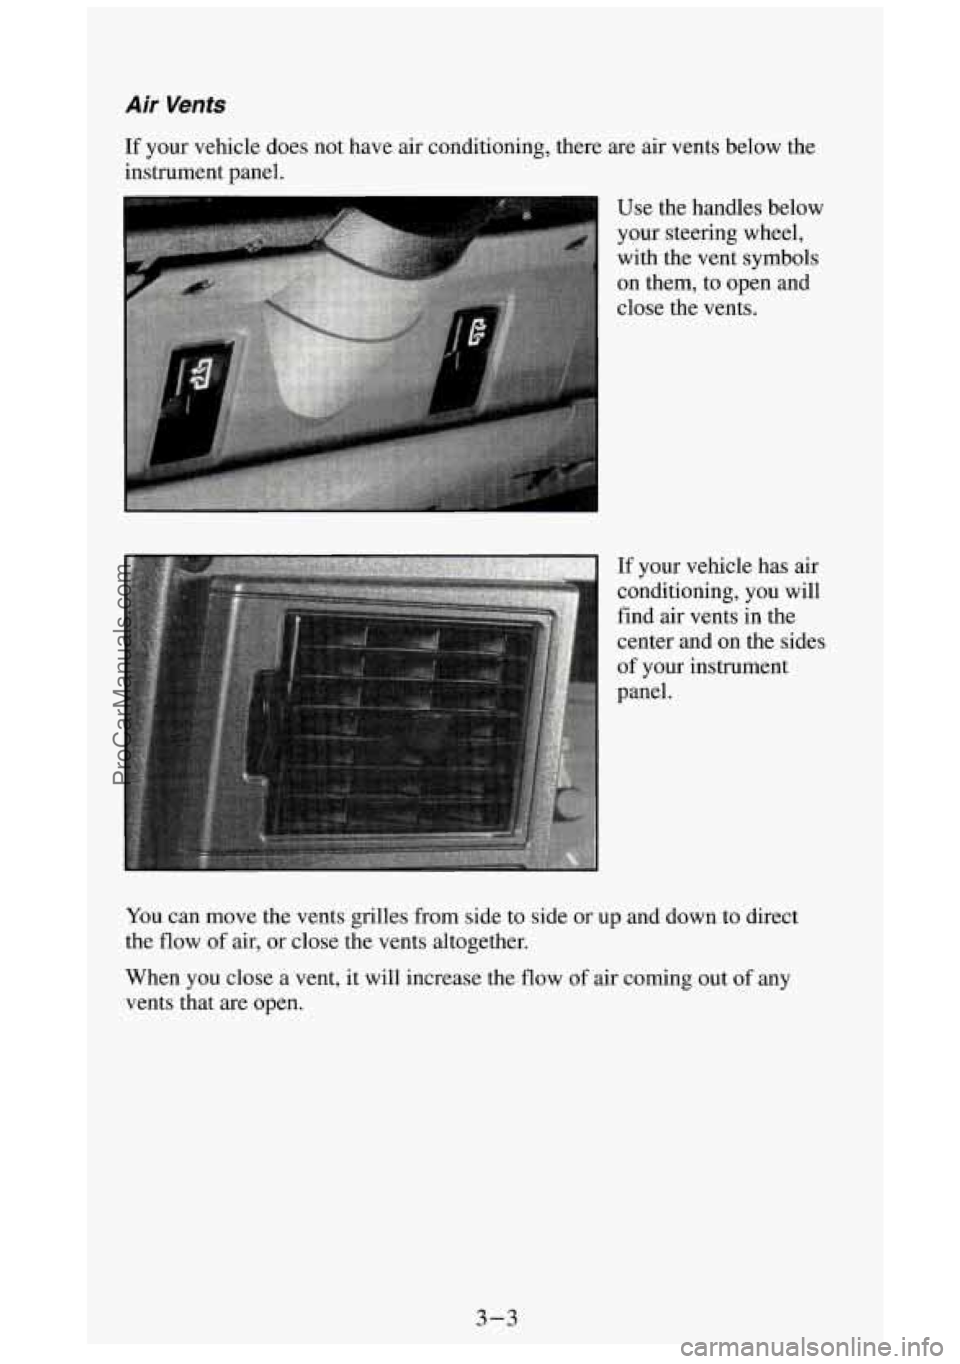
Air Vents
If your vehicle does not have air conditioning, there are air vents be\
low the
instrument panel.
- Use the handles below
your steering wheel,
with the vent symbols
on them, to open and
close the vents.
If your vehicle has air
conditioning, you will
find air vents in the center and on the sides
of your instrument
panel.
You can move the vents grilles from side to side or up and down to direct
the flow of air,
or close the vents altogether.
When you close a vent, it will increase the flow of air coming out of any
vents that are open.
3-3
ProCarManuals.com
Page 146 of 404
Heater Output
Engine Coolant Heater (Engine Block Heater)
If your vehicle has a diesel engine, it is equipped with an engine coolant
heater. An engine coolant heater
is optional on gas engine vehicles. You can
use an engine coolant heater during initial start-up
in cold weather (20” F,
-8” C, or lower) to help heat the passenger compartment faster. Because an
engine coolant heater warms the engine coolant, your vehicle’s heating
system can provide some heat
as soon as you start the engine.
The
use of an engine coolant heater also reduces the time it takes for the
engine to reach normal operating temperature, and shortens the time it takes
the heater to reach full output. For more information, See “Engine Coolant
Heater”
in the Index.
Diesel Engine
If you idle your diesel engine for a long time when it’s cold outside, your
heater may blow out cool air. This
is normal. When you increase the engine
speed, your heater should blow
out warmer air. If it doesn’t, your coolant
level may be low. See “Engine Coolant”
in the Index to find out how to
check your coolant level.
3-4
ProCarManuals.com
Page 147 of 404
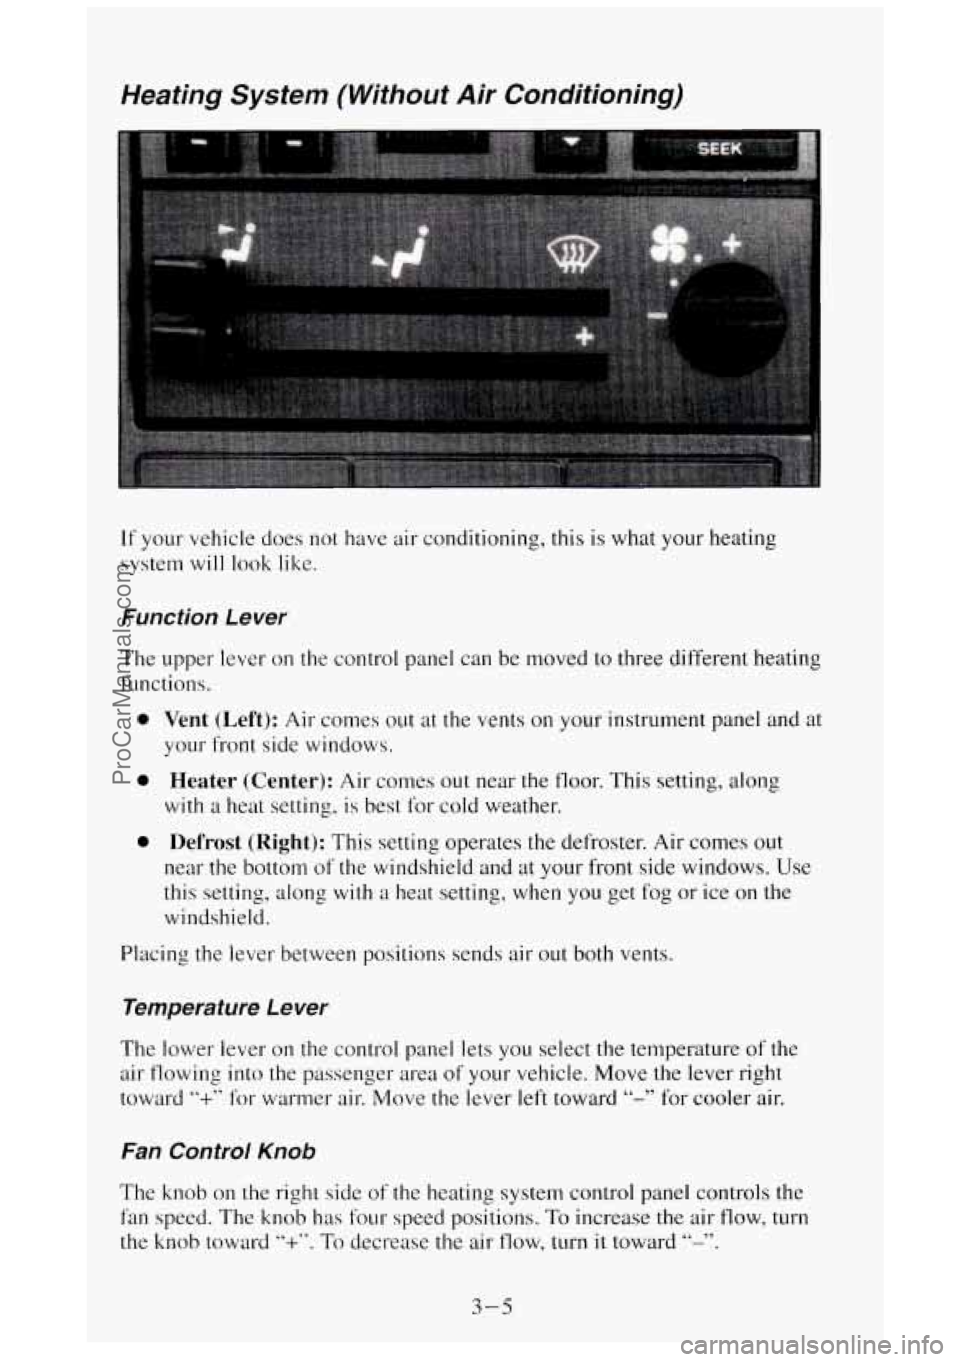
Weating System (Without Air Conditioning)
If your vehicle does not have air conditioning, this is what your heating
system
will look like.
Function Le wer
The upper lever on the control panel can be moved to three different heating
functions.
0
0
0
Vent (Left): Air comes out at the vents on your instrument panel and at
your front side windows.
Heater (Center): Air comes out near the floor. This setting, along
with a heat setting, is best for cold weather.
Defrost (Right): This setting operates the defroster. Air comes out
near the bottom of the windshield and at your front side windows. Use
this setting, along
with a heat setting, when you get fog or ice on the
windshield.
Placing the lever between positions sends air out both vents.
Temperature Le wer
The lower lever on the control panel lets you select the temperature of the
air flowing into the passenger area
of your vehicle. Move the lever right
toward
“+” for warmer air. Move the lever left toward “-” for cooler air.
Fan Control Knob
The knob on the right side of the heating system control panel controls the
fan speed. The knob has four speed positions. To increase the air flow, turn
the knob toward
“+”. To decrease the air flow, turn it toward “-”.
3-5
ProCarManuals.com
Page 148 of 404
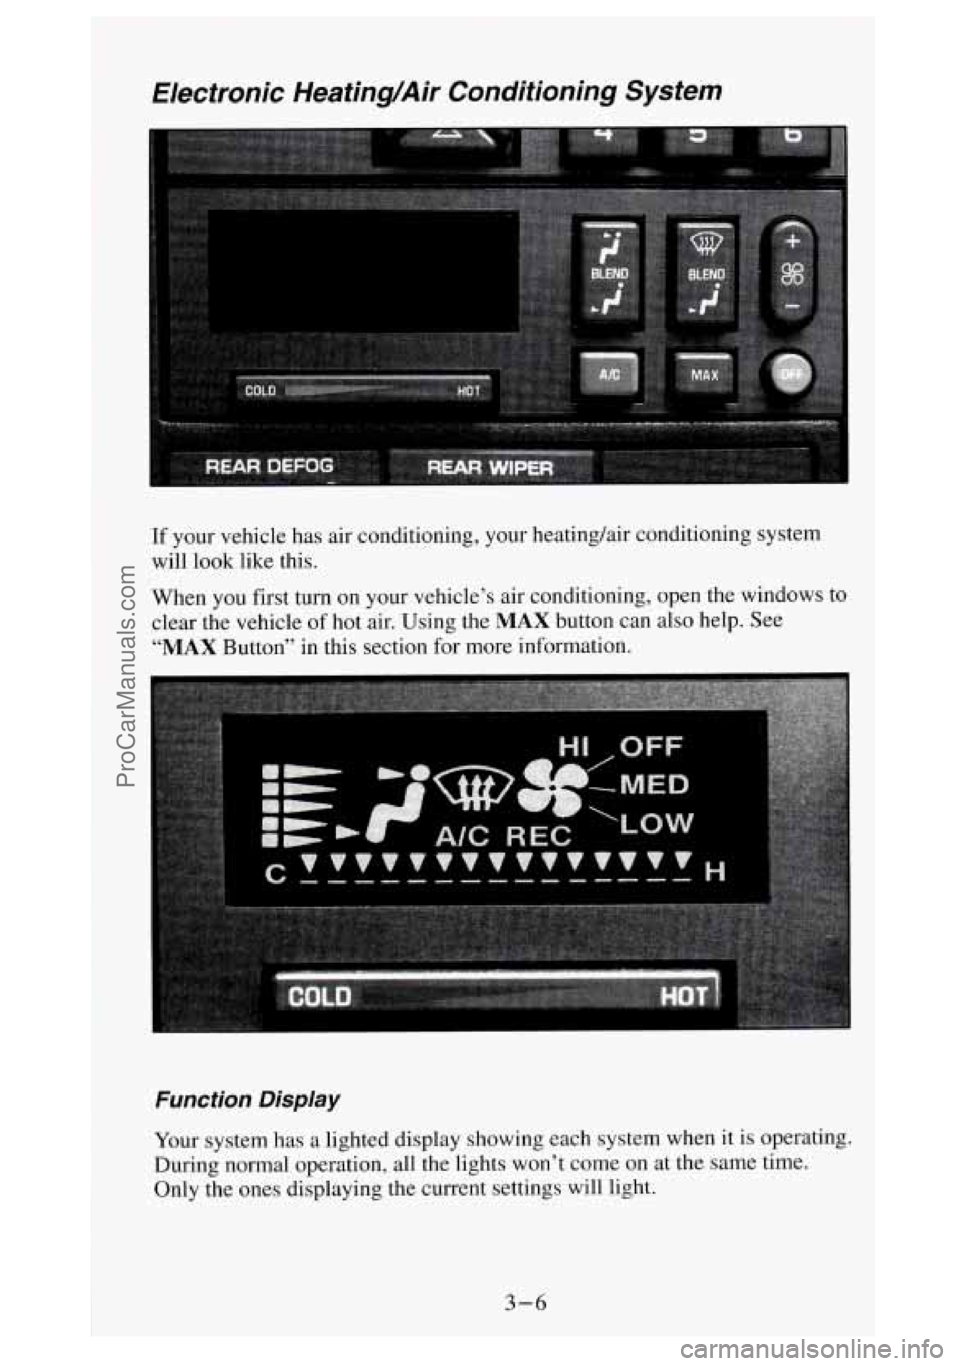
Electronic Heating/Air Conditioning System
If your vehicle has air conditioning, your heating/air conditioning system
will look like this.
When
you first turn on your vehicle’s air conditioning, open the windows to
clear the vehicle of hot air. Using the
MAX button can also help. See
“MAX Button” in this section for more information.
Function Display
Your system has a lighted display showing each system when it is operating.
During normal operation, all the lights won’t come
on at the same time.
Only the ones displaying the current settings will
light.
3-6
ProCarManuals.com
Page 149 of 404
Temperature Selector Bar
The bar under your system display lets you select the temperature of the air
flowing into the passenger area
of your vehicle. Press COLD for cooler air
and press
HOT for warmer air. Release the bar when the system reaches the
temperature you want. The temperature is shown on
the display by the
arrow moving between
C and H.
Air Controls (BLEND)
The two buttons to the right of the system display control the air flow. You
can blend the air flow to suit your needs. The amount
of blending is shown
on the display by an arrow moving between the figure’s feet (floor air flow)
and head (vent air flow).
Left Button
Vent (Top): Press the top of this button and the air flow will come through
the instrument panel vents.
Heater (Bottom): Press the bottom of this button and the air flow will come
through the floor outlet.
The air flow can be blended between the two positions. To blend between
positions press the side of
the button showing the area where you would like
more air flow. The system will automatically begin to blend toward the
position chosen. To stop the system between positions, just press the
SAME
side of the button again.
Right Button
Defrost (Top): This setting operates the defroster. Air comes out near the
bottom
of the windshield and at your front side windows. Use this setting,
along
with a heat setting, when you get fog or ice on the windshield.
Heater (Bottom): Press the bottom of this button and air comes out near the
floor. This setting, along with
a heat setting, is best for passenger comfort in
cold weather.
The air flow can be blended between
the two positions. To blend between
positions, press the side
of the button showing the area where you would
like more air flow. The system
will automatically begin to blend toward the
position chosen. To stop the system between positions, just press the
SAME
side of the button again.
3-7
ProCarManuals.com
Page 150 of 404
A/C Button
Press the button marked A/C to turn your air conditioner on and off. The
A/C symbol will light on your display and air will come out of your
instrument panel vents. The fan
will automatically be set on LOW.
When you press the A/C button to turn the air conditioner off, the system
will operate in the
vent mode. When you turn the air conditioner back on,
the system will operate
in the mode that you last selectcd unless the OFF
button was pressed.
MAX Button
If you press the MAX button, the air in your vehicle will be recirculated.
With the air conditioner on,
MAX will give you maximum cooling. It can
also be used
in all modes to help keep dust out of your vchicle. When MAX
is selected, REC will light on your display.
If your air conditioner develops high system pressure, it will automatically
go into the
MAX mode and REC will light on your display. The A/C
system will remain in the MAX mode, even if you press the MAX button,
until system pressure returns
to a normal level.
Fan Control Button
This button is in the upper right corner of your system control panel. The
fan has four settings
- low, medium low, medium high and high. Press the
top of the button
“+” to increase the air flow. Press the bottom of the button
“-” to decrease the air flow. The setting you select is shown on your display
as LOW, MED LOW, MED HI or HI.
OFF Button
Press this button to turn the air conditioning/heating system off. Pressing
OFF will erase the present mode of operation from the system’s memory.
Outside air will still come out of
the heater outlet whenever the vehicle is
moving forward.
If the OFF button was pressed, you must press A/C, MAX, or one of the
BLEND buttons for the system to come back on.
Rear Window Defogger
You can tell if your vehicle has this option by looking at the rear window. If
you see lines running across the glass, you have it. These are the conductive
wire-like elements which heat your window.
3-8
ProCarManuals.com